Create a Docker Compose App
Creating an app involves four steps: Choose the app, Domain, Environment and Confirm and deploy. You can navigate back to earlier steps at any point before you deploy.
Before you begin
Section titled “Before you begin”Review the prerequisites in Before you begin on the overview page. Only team owners and team admins can create apps.
1. Open the create flow
Section titled “1. Open the create flow”Open your server's Sites page, click Create New Site, and select Docker Compose App in the dialog. The card displays a Beta badge.
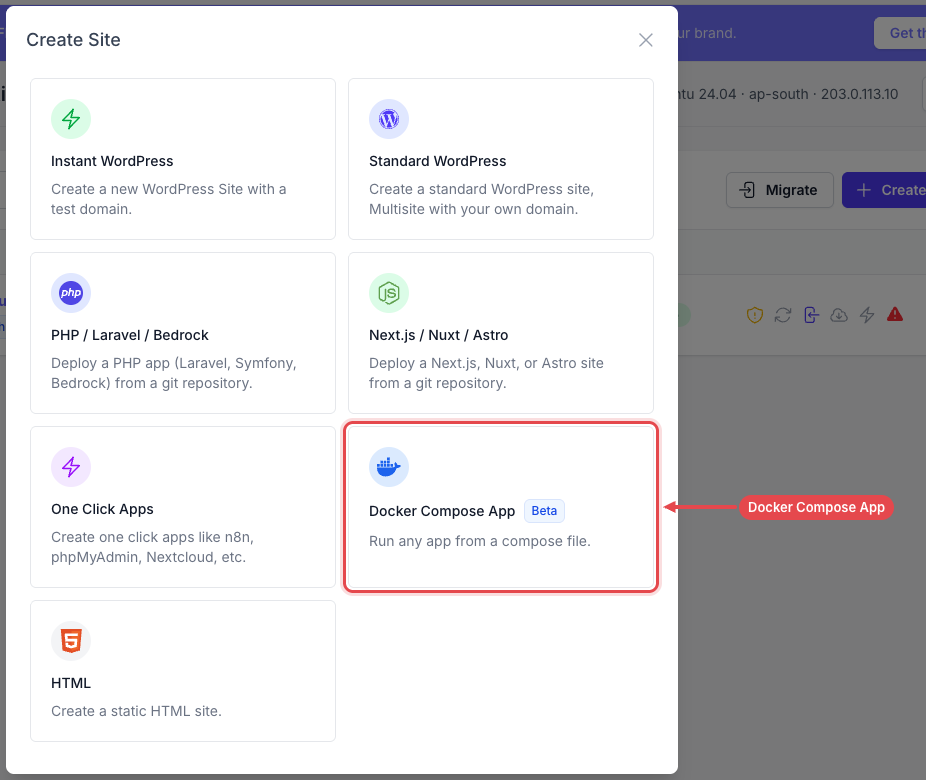
Choose your server first. If a server can't host an app, its card explains why, such as a trial server, a server that is still being set up, or a server with too little memory.
2. Choose the app
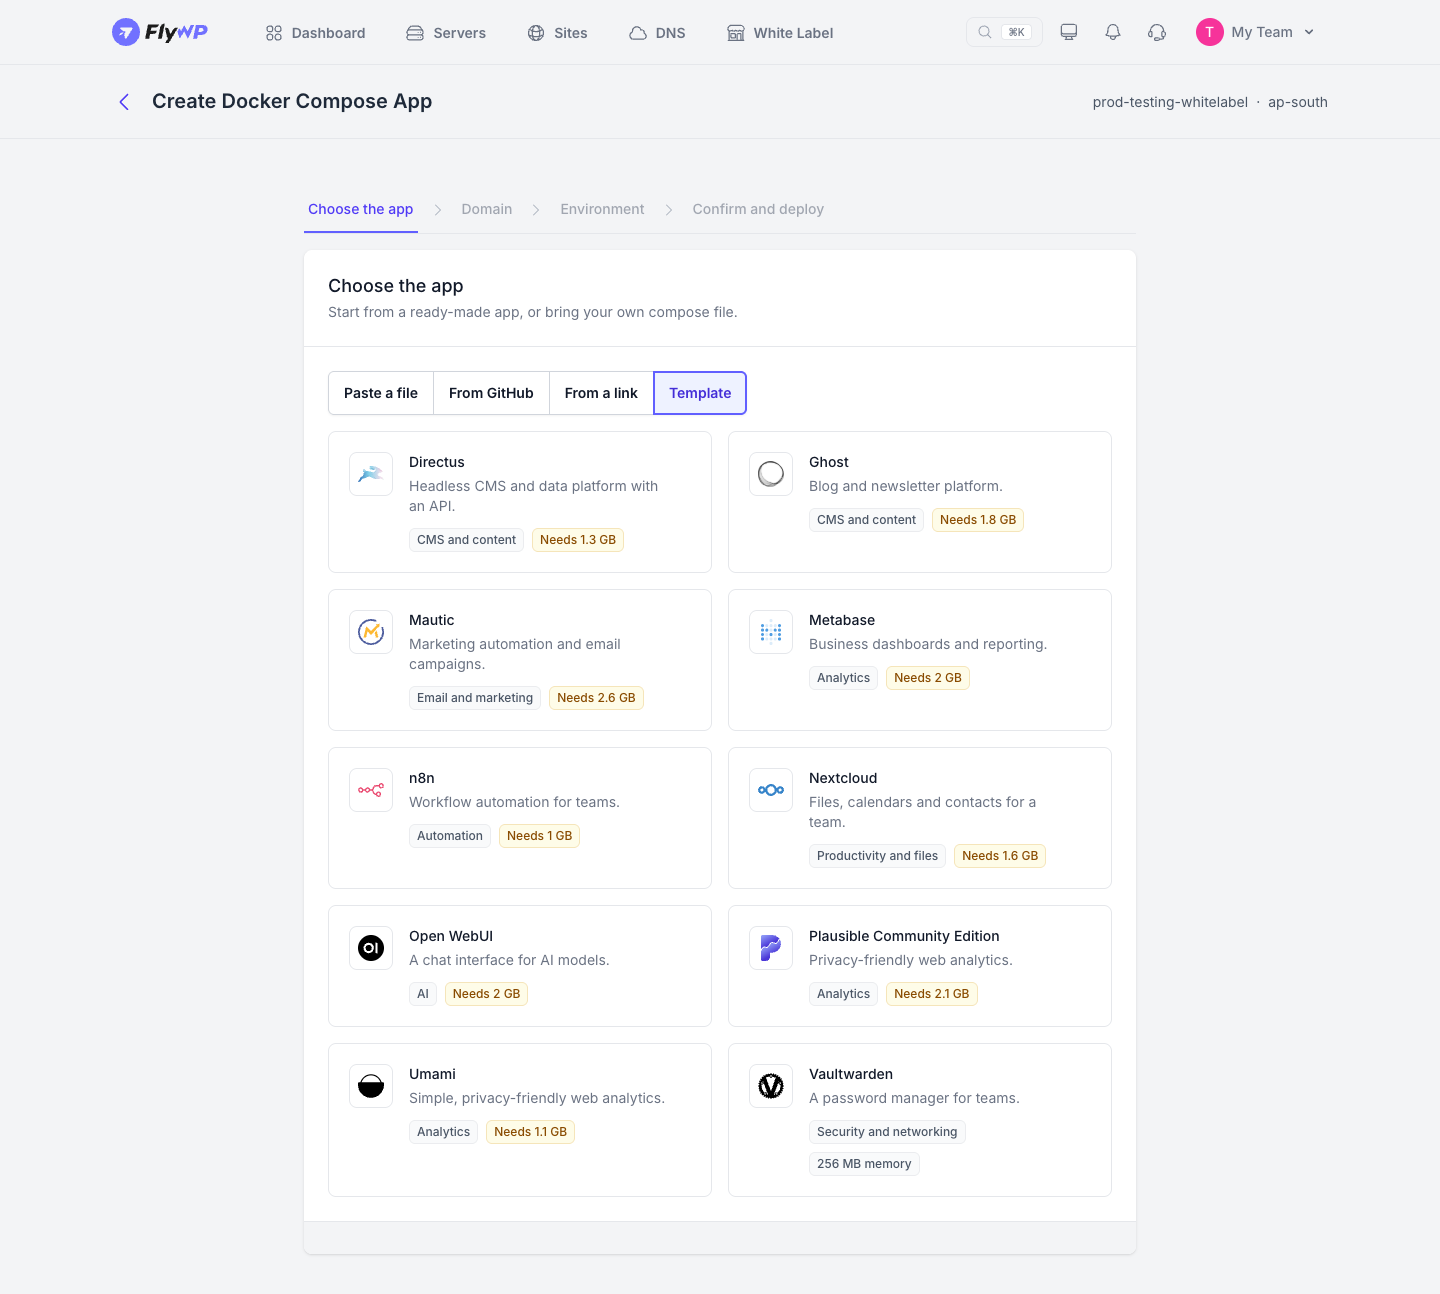
Section titled “2. Choose the app”On Choose the app, pick one of four ways to provide your app configuration:
- Paste a file lets you paste the text of a Compose file (up to 64 KB). Click Start with a sample to load a starter example.
- From GitHub imports a Compose file from a GitHub repository. Choose the repository, branch, and Compose file path, then click Read File. Connect your GitHub account first if your repository isn't listed.
- From a link fetches a Compose file from a URL. Paste the full URL to the file (starting with
https://), then click Fetch. FlyWP imports the file once, so subsequent updates at that link won't change your app. - Template starts from one of our built-in templates.
FlyWP validates your file as you work. If there is an issue, FlyWP flags it next to the offending line with a clear explanation. Resolve any issues before continuing. To learn what the validator accepts and blocks, see Compose file rules.
Templates
Section titled “Templates”The template catalogue includes these apps:
- Directus
- Ghost
- Mautic
- Metabase
- n8n
- Nextcloud
- Open WebUI
- Plausible Community Edition
- Umami
- Vaultwarden
Each card displays the memory the app requires. If a template fits in your server's free memory, it displays its size (such as 256 MB memory). If it needs more memory than the server has available, the card flags it with Needs and the required amount (such as Needs 1.3 GB). Select any template to see the services it runs, its requirements, and next steps. Some templates ask for configuration values under the card before you continue, such as Admin email for Directus.
3. Domain
Section titled “3. Domain”On Domain, configure how visitors reach your app:
- Turn on Use flywp.xyz test domain to have FlyWP generate a testing subdomain.
- Enter your own hostname in Domain Name for a custom domain.
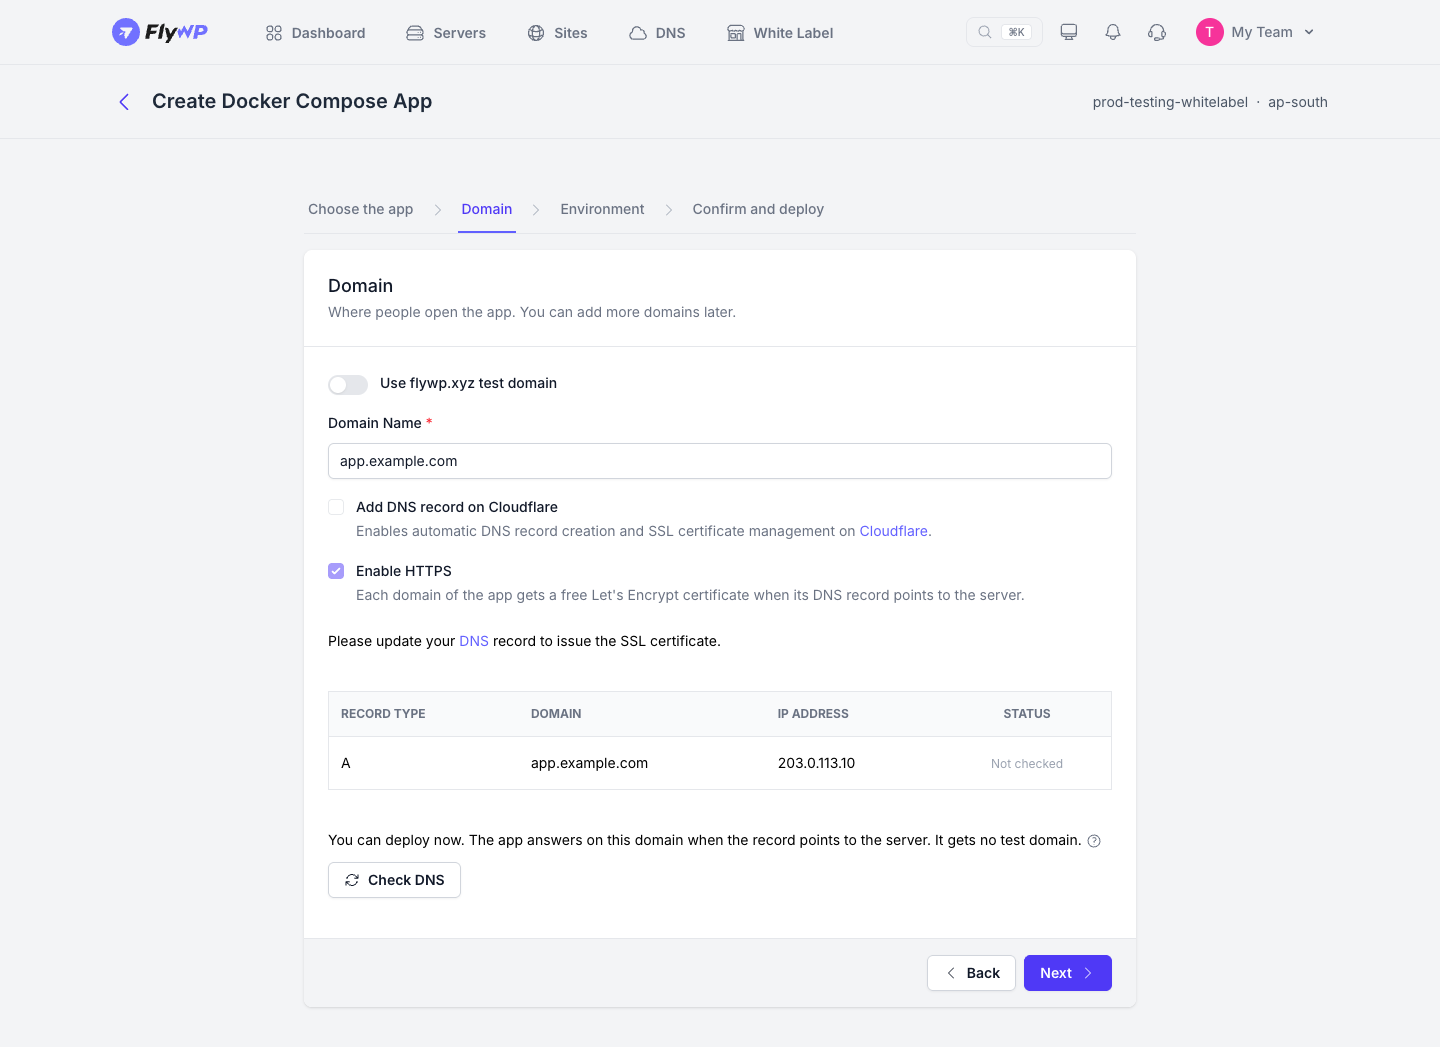
For a custom domain, you can tick Add DNS record on Cloudflare to let FlyWP create the DNS record for you automatically. Otherwise, point the hostname to your server yourself, then verify the domain on the app's Domains page after deployment. Enable HTTPS is always on for an app.
Test domains are intended for testing only. Use your own domain for a live site.
4. Environment
Section titled “4. Environment”On Environment, FlyWP lists the variables declared in your Compose file. Each variable includes a Value field. Turn on Secret to hide sensitive values on screen.
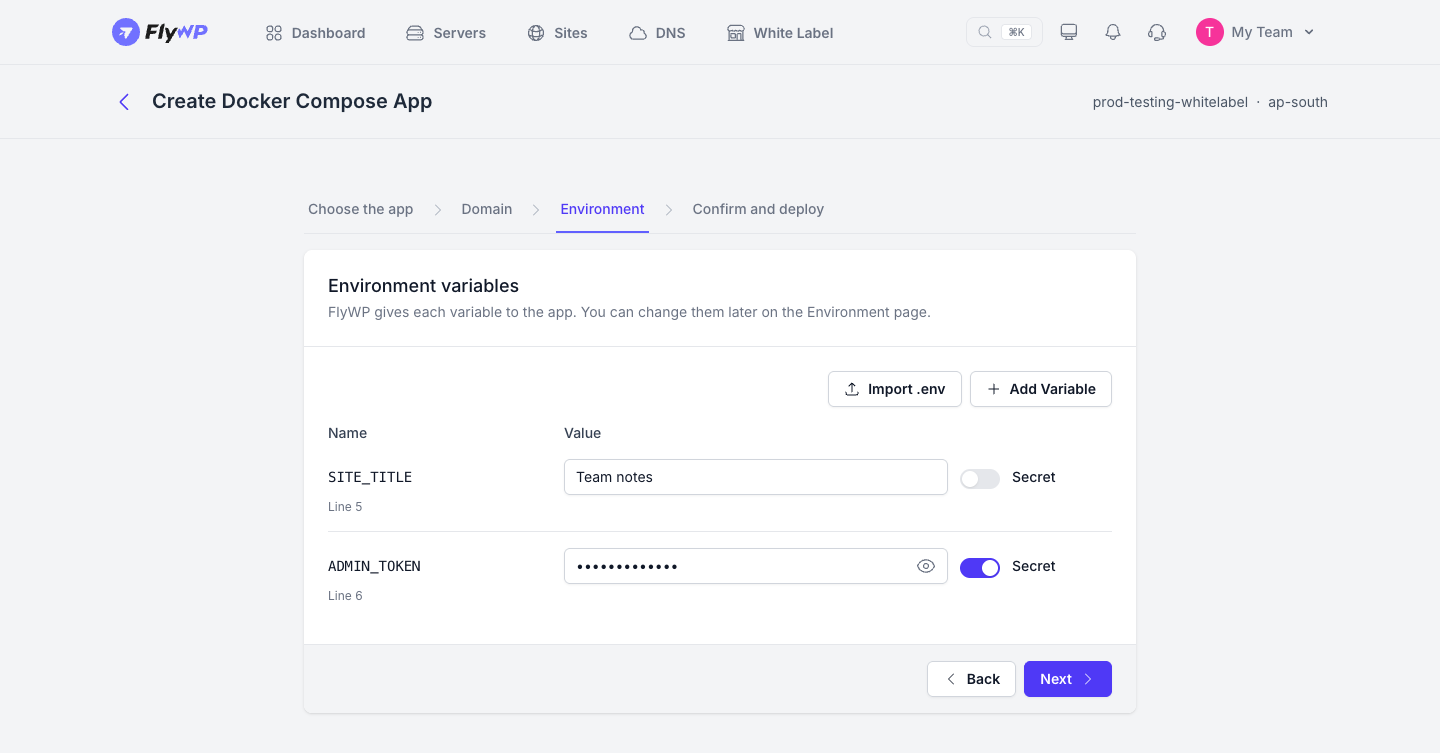
To fill multiple variables at once, paste the text of a .env file and click Import .env. FlyWP automatically ignores comment lines and empty lines, and strips surrounding quotes from values. Only variables used by your app will receive values from the pasted text.
5. Confirm and deploy
Section titled “5. Confirm and deploy”On Confirm and deploy, enter a Name for your app. Review the summary (source, server, domain, services and resources), then click Deploy.
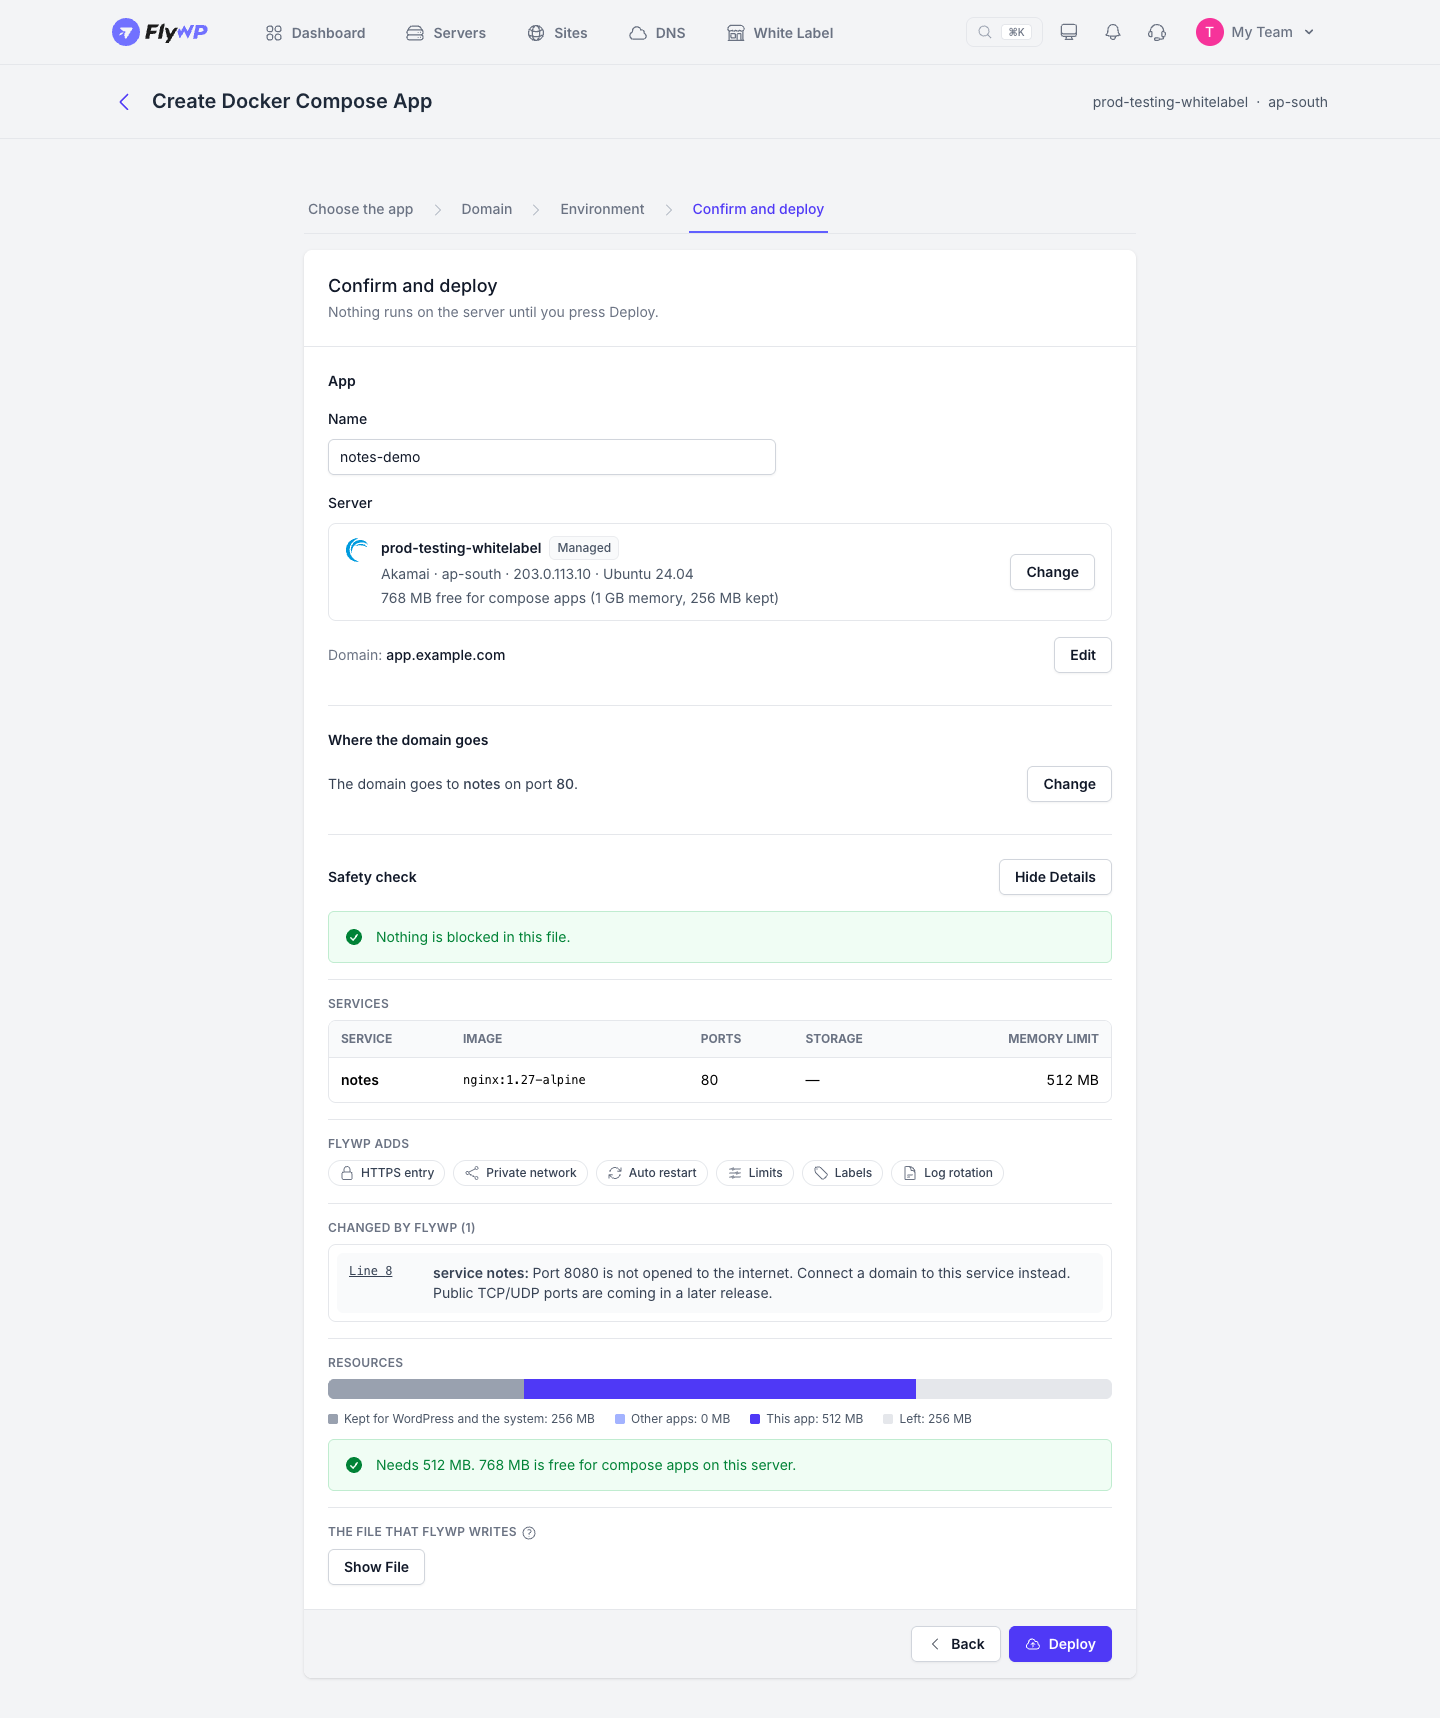
The deploy runs in the background, so you can safely leave the page while it finishes. Open the app from the server's site list to follow its progress. When deployment completes, the app status switches to running and the domain starts serving your app.
If a deploy fails
Section titled “If a deploy fails”If an initial deploy fails, your app stays in the dashboard alongside its deploy log. Check the last lines of the log to diagnose the problem, adjust your Compose file or environment variables, and deploy again from the Deploys page. See Deploys.
Still stuck? How can we help?
View as Markdown