Notification Channels
Notification Channels send your team's alerts to a shared place where people already talk: a Slack channel, a Telegram group such as your on-call group, or a webhook that starts a workflow in a tool such as n8n. Use them when alerts should reach the whole team, not only each person's email.
Each channel gets one alert level and the servers or sites it covers. A team can connect up to 5 Slack channels, 5 Telegram groups and 5 webhooks. Email and the in-app bell are set for each team member separately on Profile → Notifications, and channels do not change them.
On this page
Section titled “On this page”- Who can manage channels
- Open Notification Channels
- Connect a Slack workspace
- Add a Slack channel
- Connect a Telegram group
- Connect a webhook
- Send alerts to n8n
- Choose the alerts
- Choose the servers
- Manage a channel
- Attach a channel to a server
- Attach a channel to a site
Who can manage channels
Section titled “Who can manage channels”Only the team Owner and members with the Team Admin role can add, change, or remove channels.
Only the Owner can send Billing alerts to a channel. When a Team Admin sets the alert level, Billing alerts are not included.
Notification Channels are not shown on White Label hosts. White Label customers receive alerts by email and in the bell.
Open Notification Channels
Section titled “Open Notification Channels”-
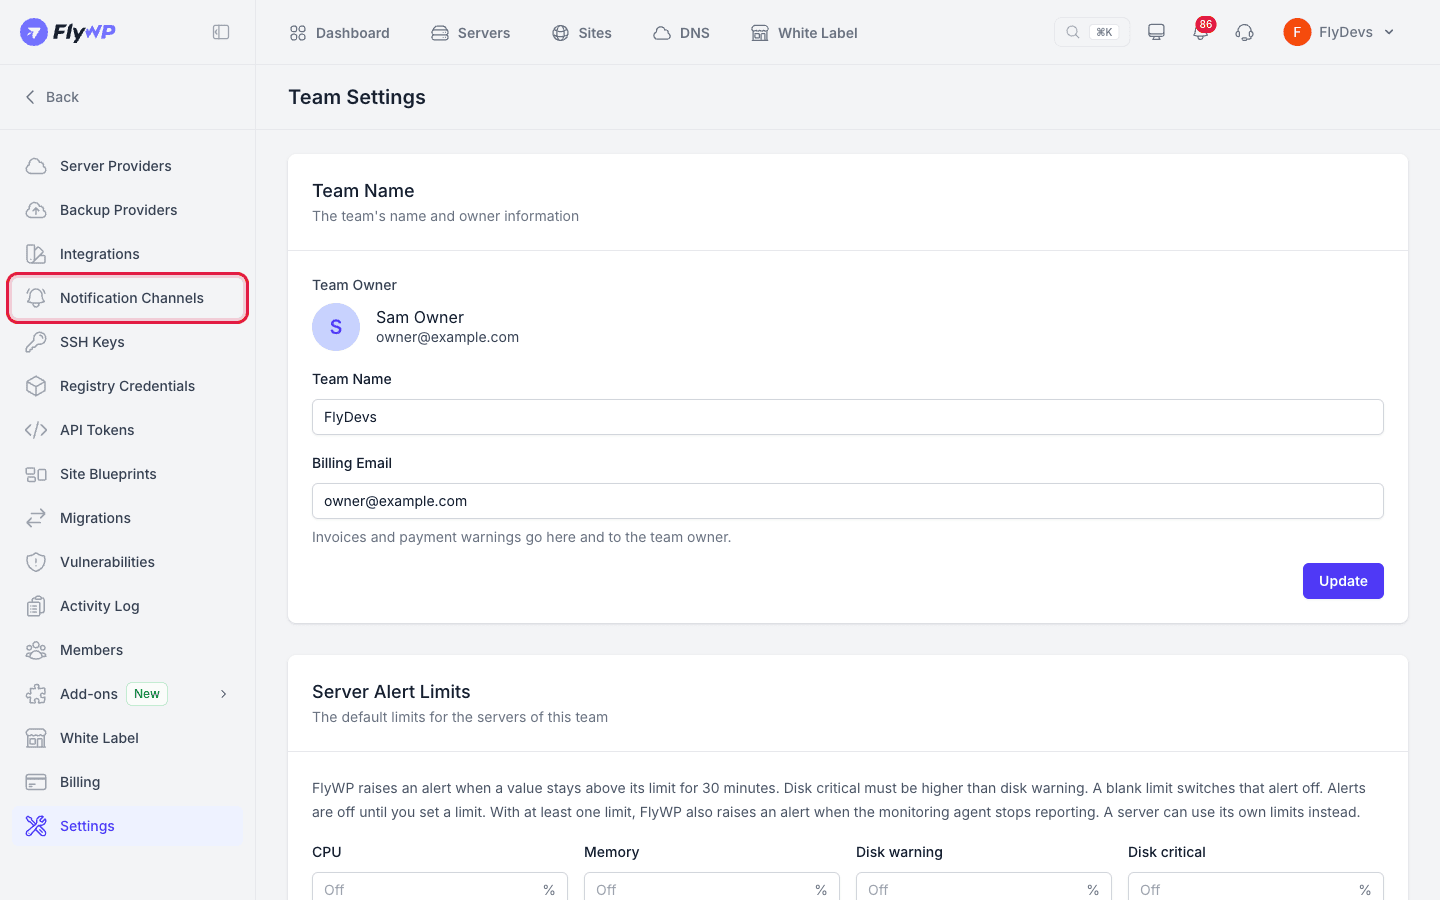
Open Team Settings, then click Notification Channels.
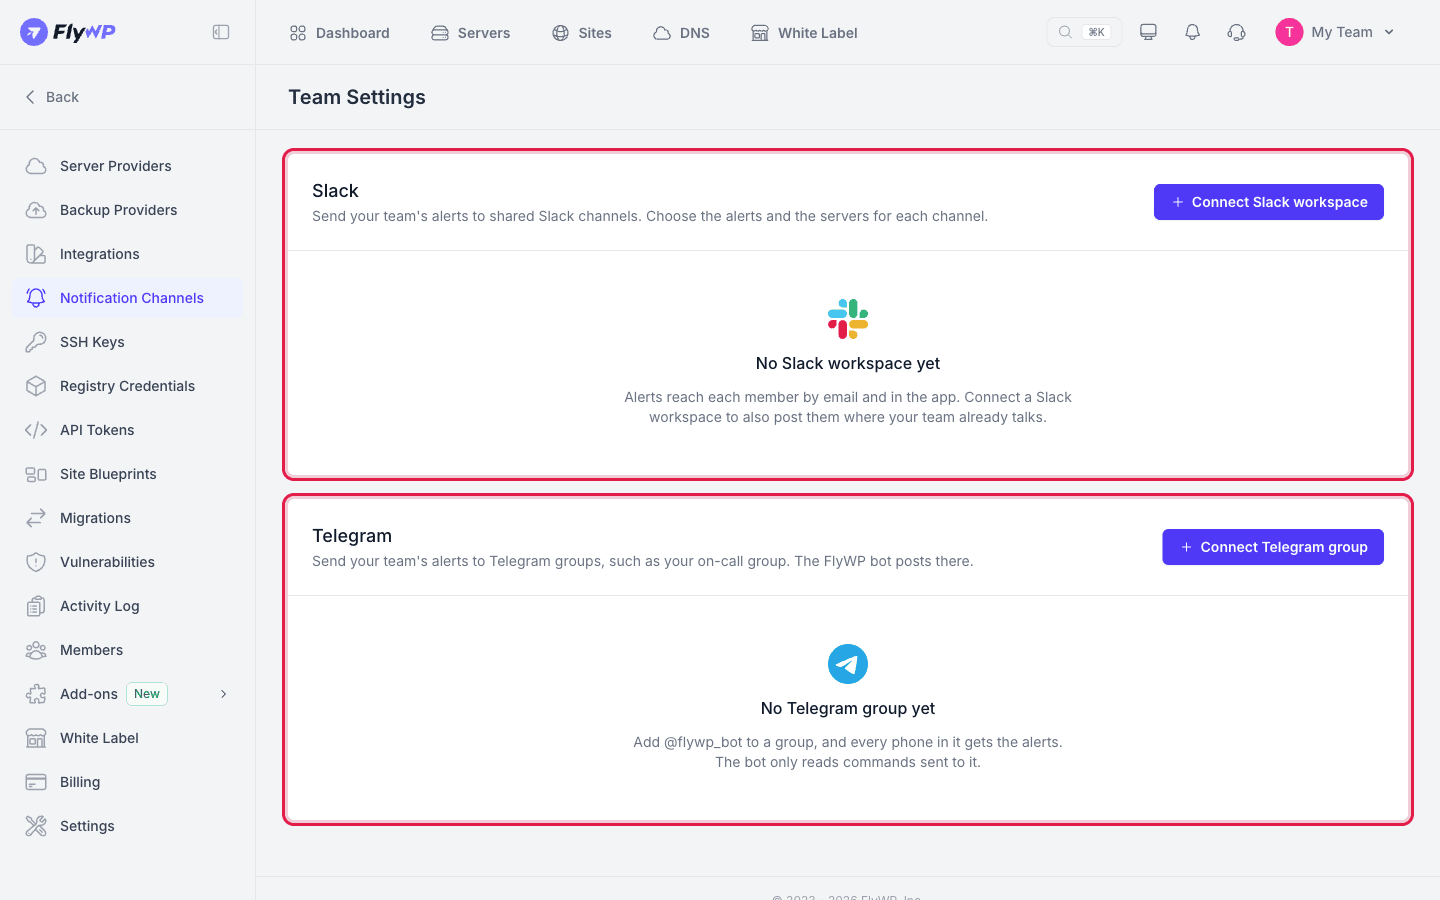
The page has one section for Slack, one for Telegram and one for Webhooks.
Connect a Slack workspace
Section titled “Connect a Slack workspace”-
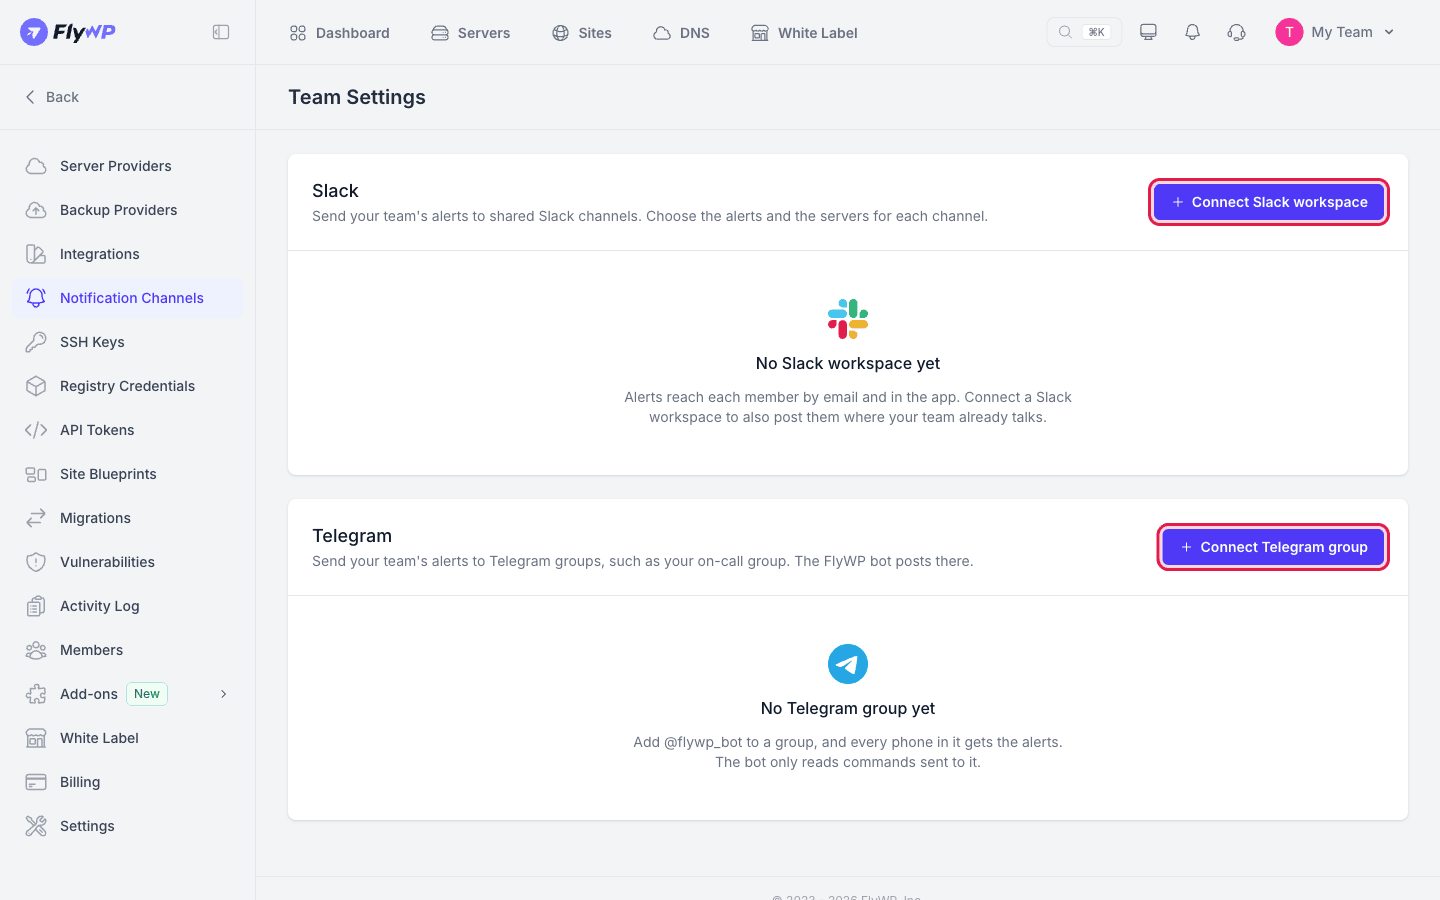
On the Notification Channels page, under Slack, click Connect Slack workspace.
-
Approve FlyWP in Slack. Slack returns you to FlyWP.
-
In the Slack workspace connected dialog, click Configure alerts to add a channel now, or Done to add one later. A workspace can stay connected with no channel.
To add a channel to a connected workspace, click Add channel on that workspace, then follow the steps below.
Add a Slack channel
Section titled “Add a Slack channel”- Click Add channel on your workspace.
- On the Channel step, choose the Slack channel. Click Next.
- On the Alerts step, choose an alert level and the servers the channel covers. Nothing is preselected, and Connect stays off until you choose both. Click Connect.
The Workspace step appears only when you have more than one workspace to choose from.
If a private channel is not in the list, open the channel in Slack and type /invite @FlyWP, then click the refresh button in FlyWP. If you pick a channel that is already connected, it keeps its alert level.
Connect a Telegram group
Section titled “Connect a Telegram group”- On the Notification Channels page, under Telegram, click Connect Telegram group.
- Click Open Telegram on this computer, or scan the QR code with your phone.
- In Telegram, pick the group for the alerts, then tap Add bot.
- FlyWP waits for the bot to join the group, then moves to the Alerts step. Choose an alert level and the servers the group covers, then click Connect.
The link expires after a short countdown. If it expires, click Get a new link.
If the bot is already in the group or the link does not open, copy the message shown on the Telegram step and send it in the group.
Send alerts to a topic
Section titled “Send alerts to a topic”If the group uses topics, alerts go to General unless you choose a topic. Copy the message shown on the Telegram step and send it in the topic you want. FlyWP then shows the topic under Topic.
Connect a webhook
Section titled “Connect a webhook”A webhook sends each alert as one HTTPS request with a JSON body to an address you give, so any tool that accepts a JSON POST can receive your alerts. A team can have up to 5 webhooks. For the setup, the auth header, testing, the delivery log and the JSON message, see Webhooks for Notification Channels.
Send alerts to n8n
Section titled “Send alerts to n8n”To start an n8n workflow from every alert, connect a webhook with n8n's Header Auth. Follow the step-by-step guide in Send alerts to n8n.
Choose the alerts
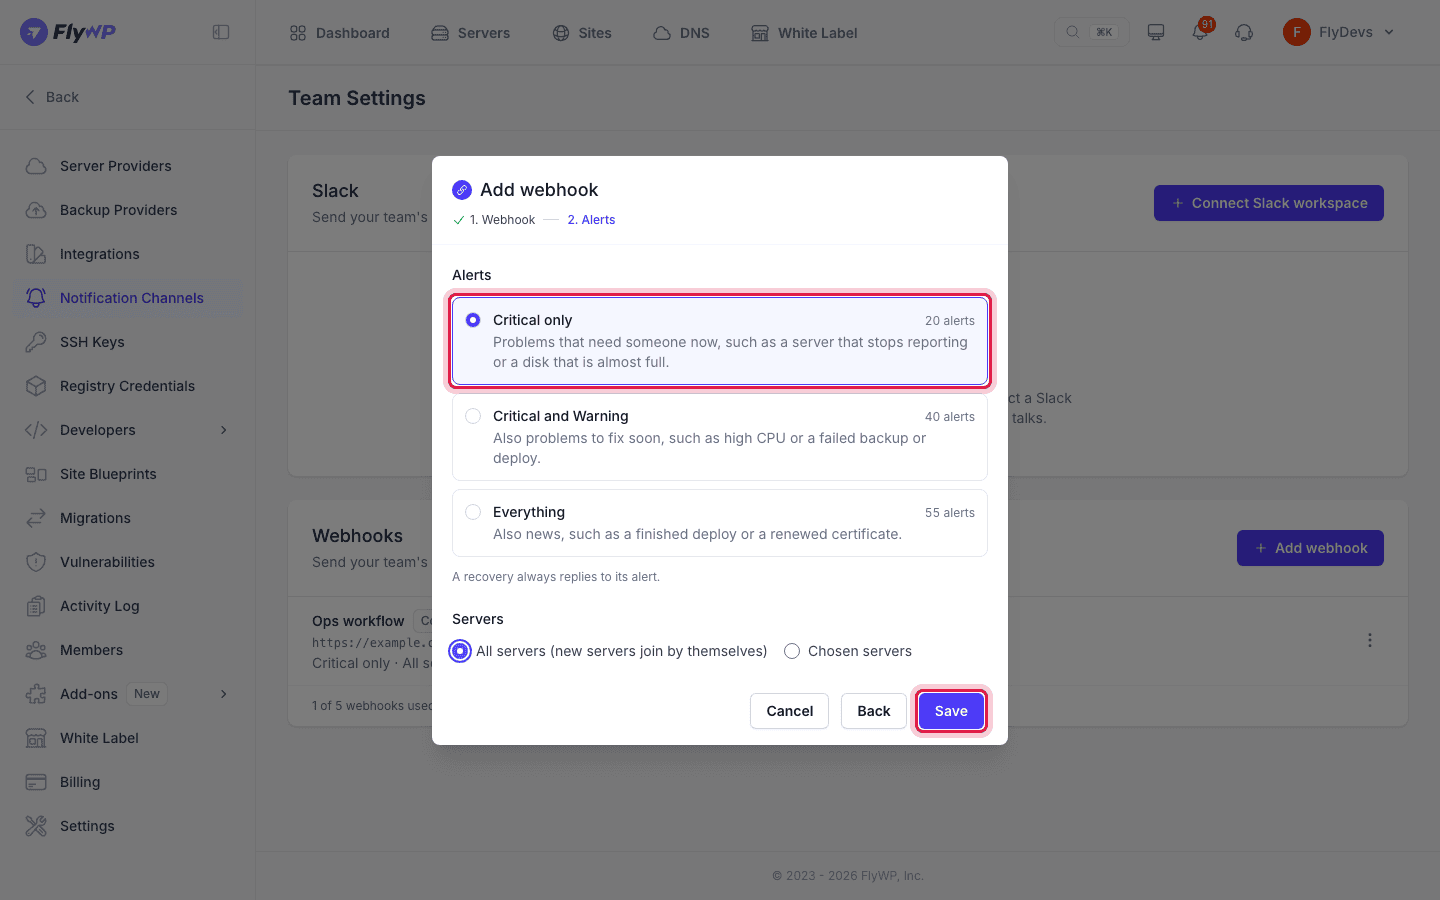
Section titled “Choose the alerts”Each channel gets one of three alert levels:
| Level | What it sends |
|---|---|
| Critical only | Problems that need someone now, such as a server that stops reporting or a disk that is almost full. |
| Critical and Warning | Everything in Critical only, plus problems to fix soon, such as high CPU, a failed backup, or a failed deploy. |
| Everything | Everything in Critical and Warning, plus news, such as a finished deploy or a renewed certificate. |
A recovery message always replies to its original alert in Slack and Telegram. A webhook gets a new request that names the alert it closes. Uptime alerts show only on teams that have the Uptime add-on.
Choose the servers
Section titled “Choose the servers”On the Servers step, choose one of two options:
- All servers (new servers are included automatically).
- Chosen servers, then tick the servers in the list. Use Find servers to search.
Choosing a server includes all of its sites. To send a single site's alerts to a channel, use the site's own page (see Attach a channel to a site). Billing and Team alerts are team-wide.
Manage a channel
Section titled “Manage a channel”Open the menu on a channel row to use these actions:
| Action | What it does |
|---|---|
| Send test | Sends a sample alert to the channel. You can send 3 tests per channel each day. Webhook tests have their own limit (see Test a webhook). |
| Pause | Stops alerts to the channel. Resume starts them again. |
| Edit and Delivery log | Webhooks only. See Edit a webhook and Delivery log and Resend. |
| Reconnect | Appears when the channel is disconnected. For Telegram, it opens a new link. For Slack, it opens Slack's approval page. |
| Alerts | Changes the channel's alert level. |
| Servers | Changes which servers the channel covers. |
| Remove | Stops alerts to the channel from every server and site. |
Send test and Pause show only while the channel is Connected. Resume shows only while it is Paused.
Each channel row shows its status: Connected, Paused, or Disconnected, with the reason when there is one. A webhook that is waiting to retry shows Failing.
After 5 failed deliveries in a row, FlyWP pauses the channel and raises the Notification channel stopped alert. One delivered alert resets the count. Fix the cause, then click Resume. A paused channel does not catch up on missed alerts. Each row also shows the alert level, the servers it covers, and the time of the last delivery. If the Slack channel was archived or deleted in Slack, the row offers Remove instead of Reconnect.
If Slack access is lost for a workspace, click Reconnect on the workspace row to approve FlyWP again. This fixes all of its channels.
To remove a Slack workspace and all its channels, open the workspace menu and click Remove workspace. Connect it again to add channels back.
Attach a channel to a server
Section titled “Attach a channel to a server”-
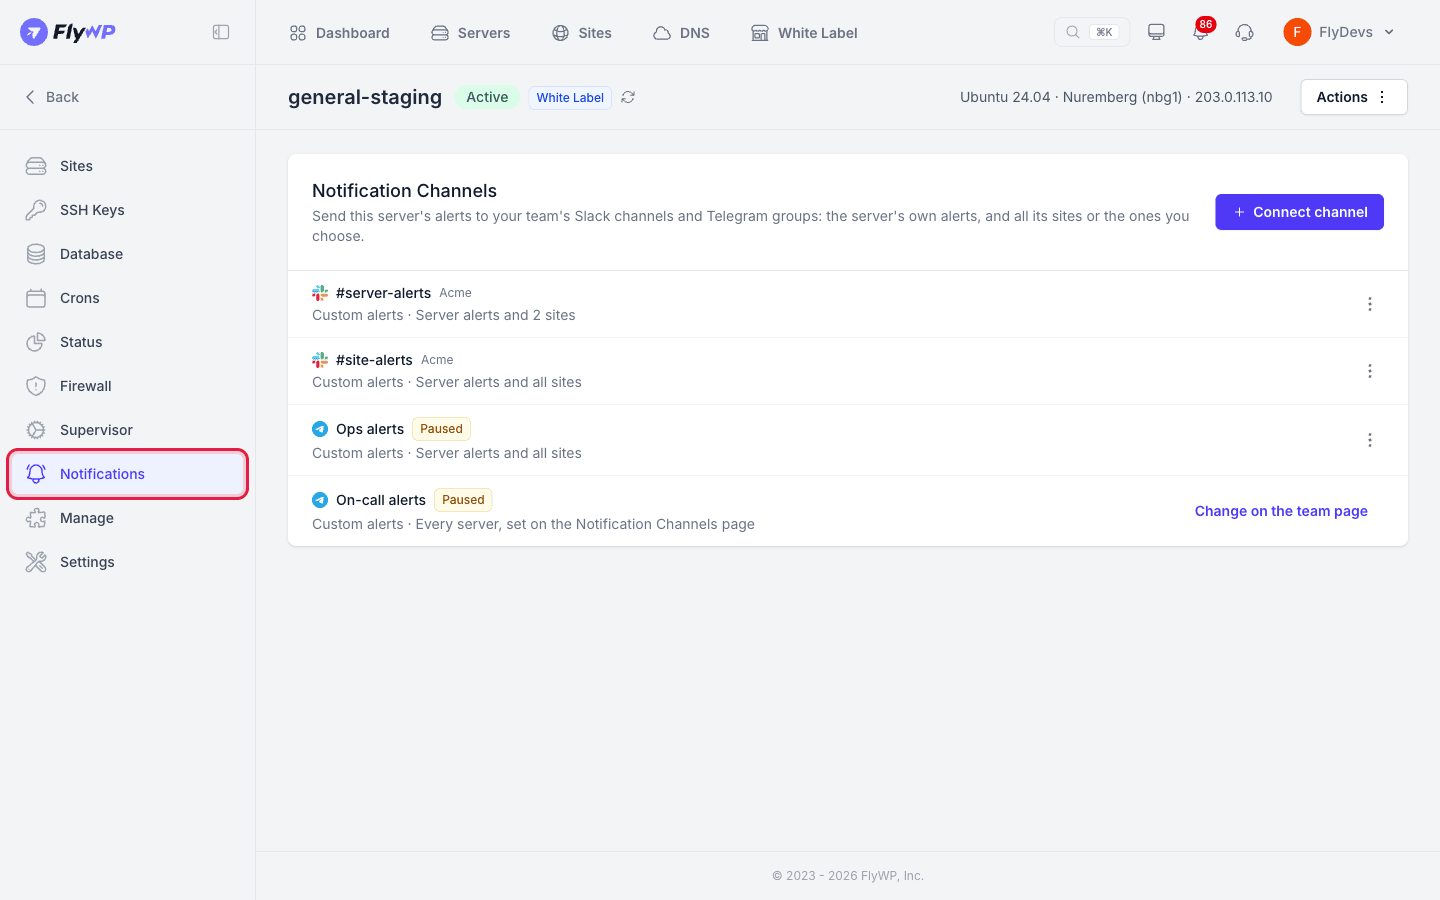
Open the server, then click Notifications in the server menu.
-
Click Connect channel to add a channel for this server. If the team has no channel yet, click Go to Notification Channels and connect one first.
-
To change a channel, open its menu:
- Sites chooses which of the server's sites the channel gets.
- Remove from this server stops this server's alerts to the channel. The channel stays for other servers.
A channel that covers all servers is changed on the team page: click Change on the team page.
The channel gets the server's own alerts, and all its sites or the sites you choose.
For the server's own limits, see Server Alerts and Monitoring Agent.
Attach a channel to a site
Section titled “Attach a channel to a site”-
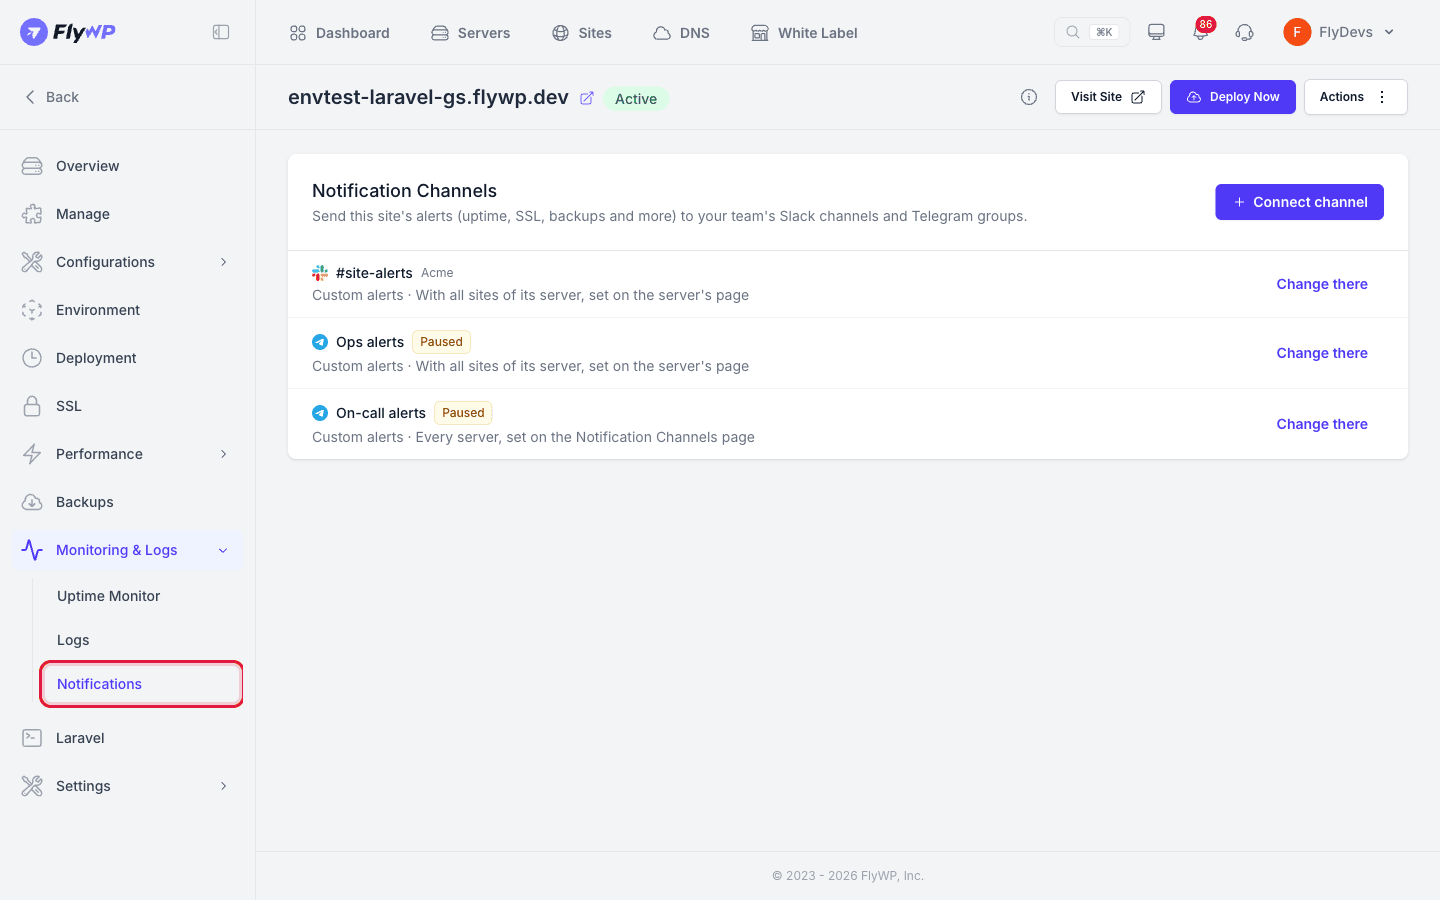
Open the site, then click Monitoring & Logs and Notifications.
-
Click Connect channel to add a channel for this site.
-
To remove a channel, open its menu and click Remove from this site. A channel that covers the site through its server shows Change there instead. Use that link to change it on the server's page.
The channel gets this site's alerts, such as uptime, SSL and backups. The server's own alerts are chosen on the server's page.
Related guides
Section titled “Related guides”- Webhooks for Notification Channels: the webhook reference and JSON message.
- Send alerts to n8n: step-by-step n8n workflow.
- Notifications: the notifications page and your own email preferences.
- Billing: the plans that include Notification Channels.
Still stuck? How can we help?
View as Markdown