Create a Laravel, Symfony or PHP Site
Create a Laravel, Symfony, or plain PHP site from a Git repository. FlyWP builds the site first. You then add your environment variables and deploy the code from the site page.
Before you begin
Section titled “Before you begin”- A regular (non-trial) FlyWP server. Trial servers only offer WordPress site types, so the PHP / Laravel / Bedrock card does not appear on them.
- A Git provider connected to your account. See Git Provider Connections.
- A repository with your application and the branch you want to deploy.
Create the site
Section titled “Create the site”-
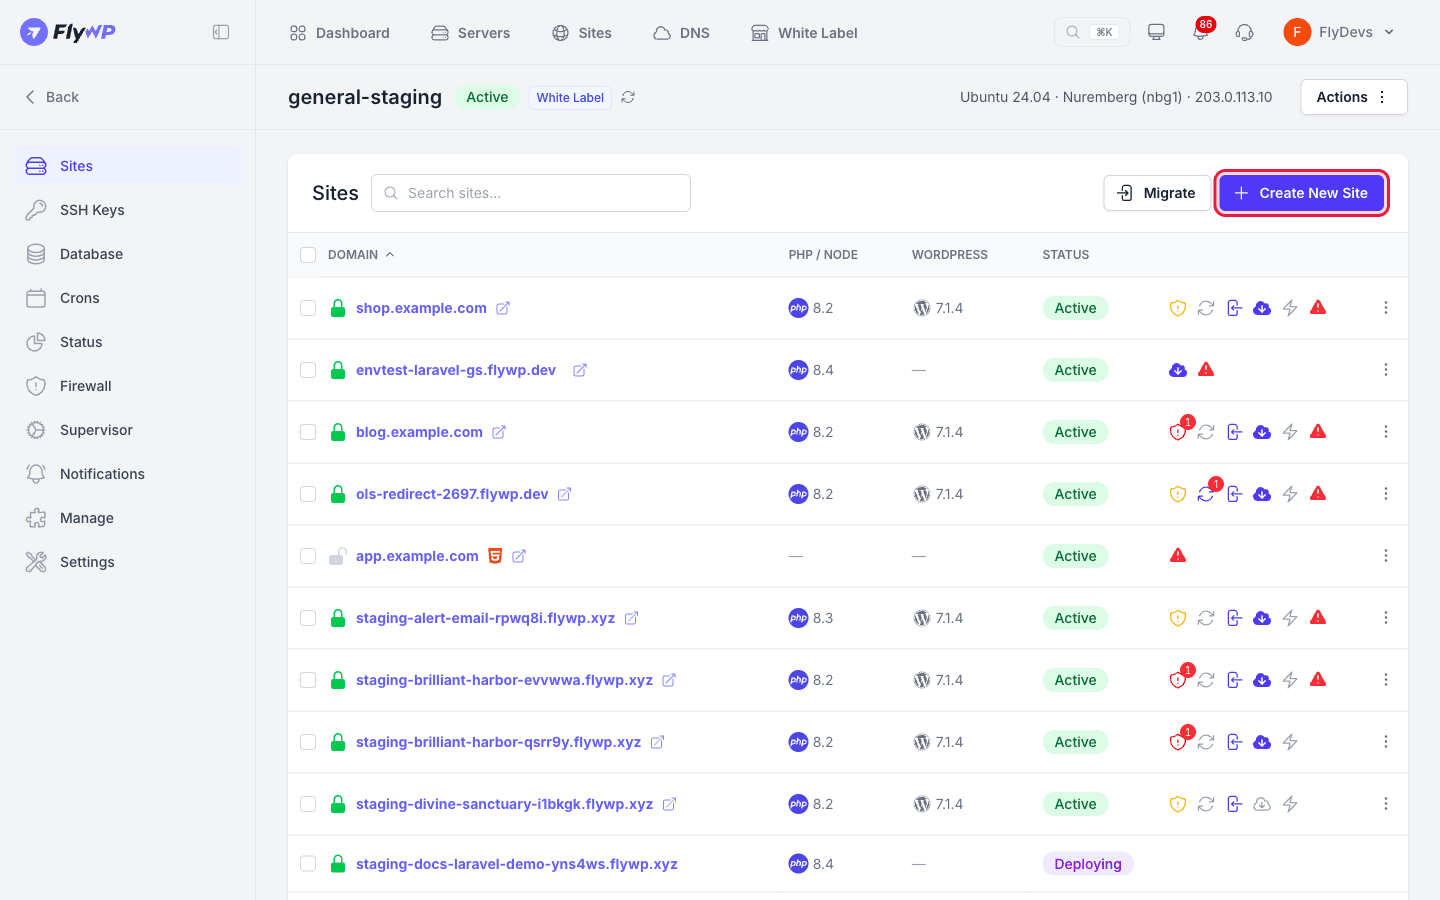
Open the server, go to its Sites tab, and click Create New Site. A Create Site window opens with the site type cards.
-
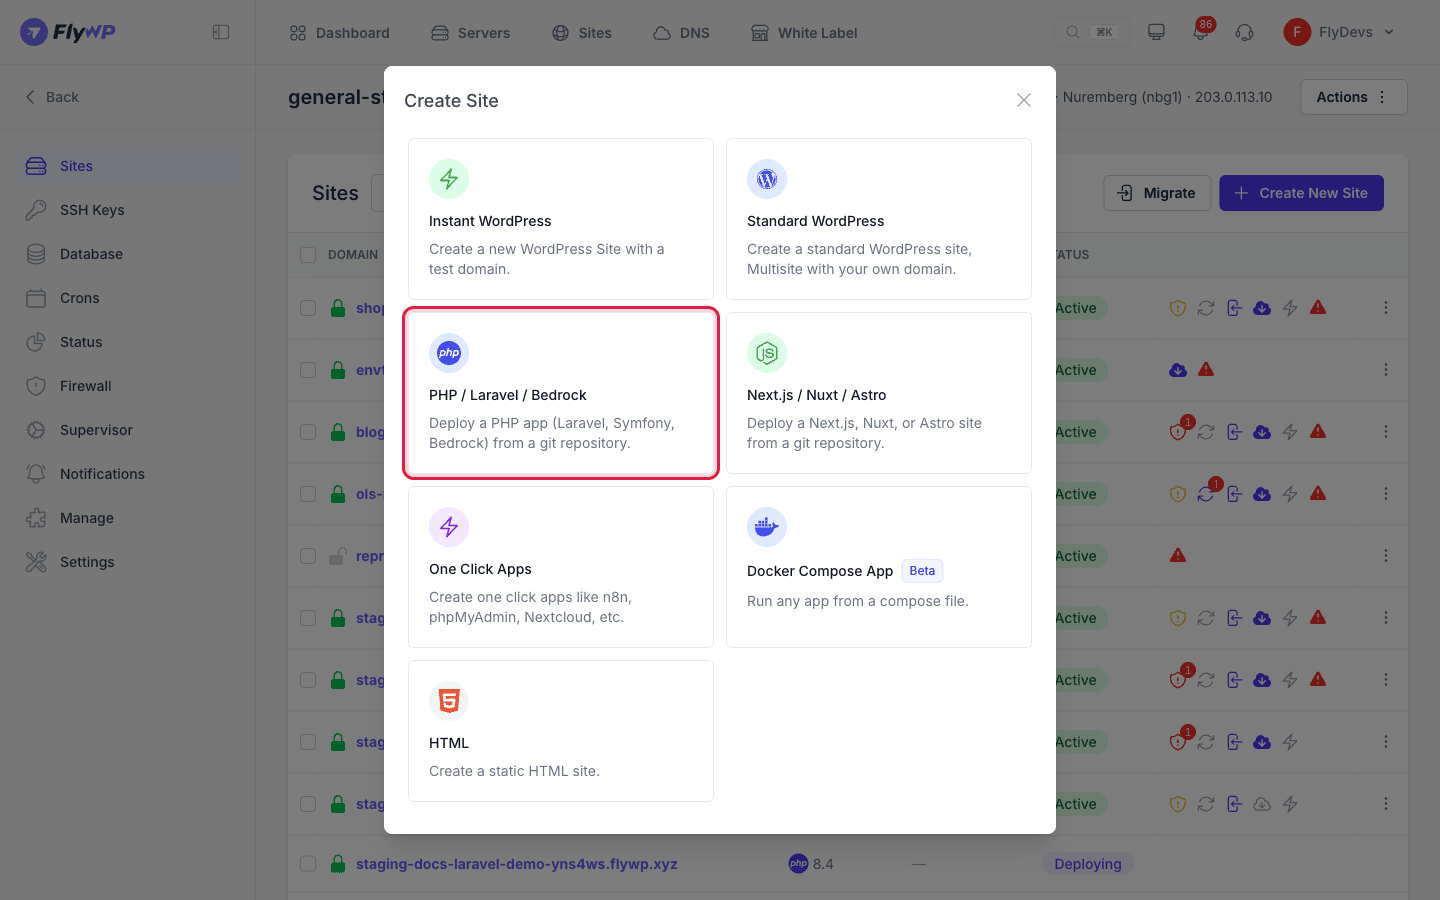
Choose PHP / Laravel / Bedrock. The wizard opens as Create New Site.
-
Domain: enter a Domain Name, or turn on Use flywp.xyz test domain to get a testing subdomain. Click Next. For DNS and SSL options, see Domain Management.
-
Configure Git: set up the application and repository, as described in The Configure Git step, then click Next.
-
Configuration: pick your PHP Version and click Next. The Server Stack is Nginx for these sites. PHP 7.4 to 8.5 are listed, and 8.4 is selected for you. Versions older than 8.2 are marked Outdated & Vulnerable - EOL. If the app should connect to a database outside the server, turn on Use an external database here. The wizard then adds a Database step after this one.
-
Installation: enter a Site Title and click Next. There are no WordPress admin fields.
-
Summary: check the settings, including the Application Type, and click Create Site.
The Configure Git step
Section titled “The Configure Git step”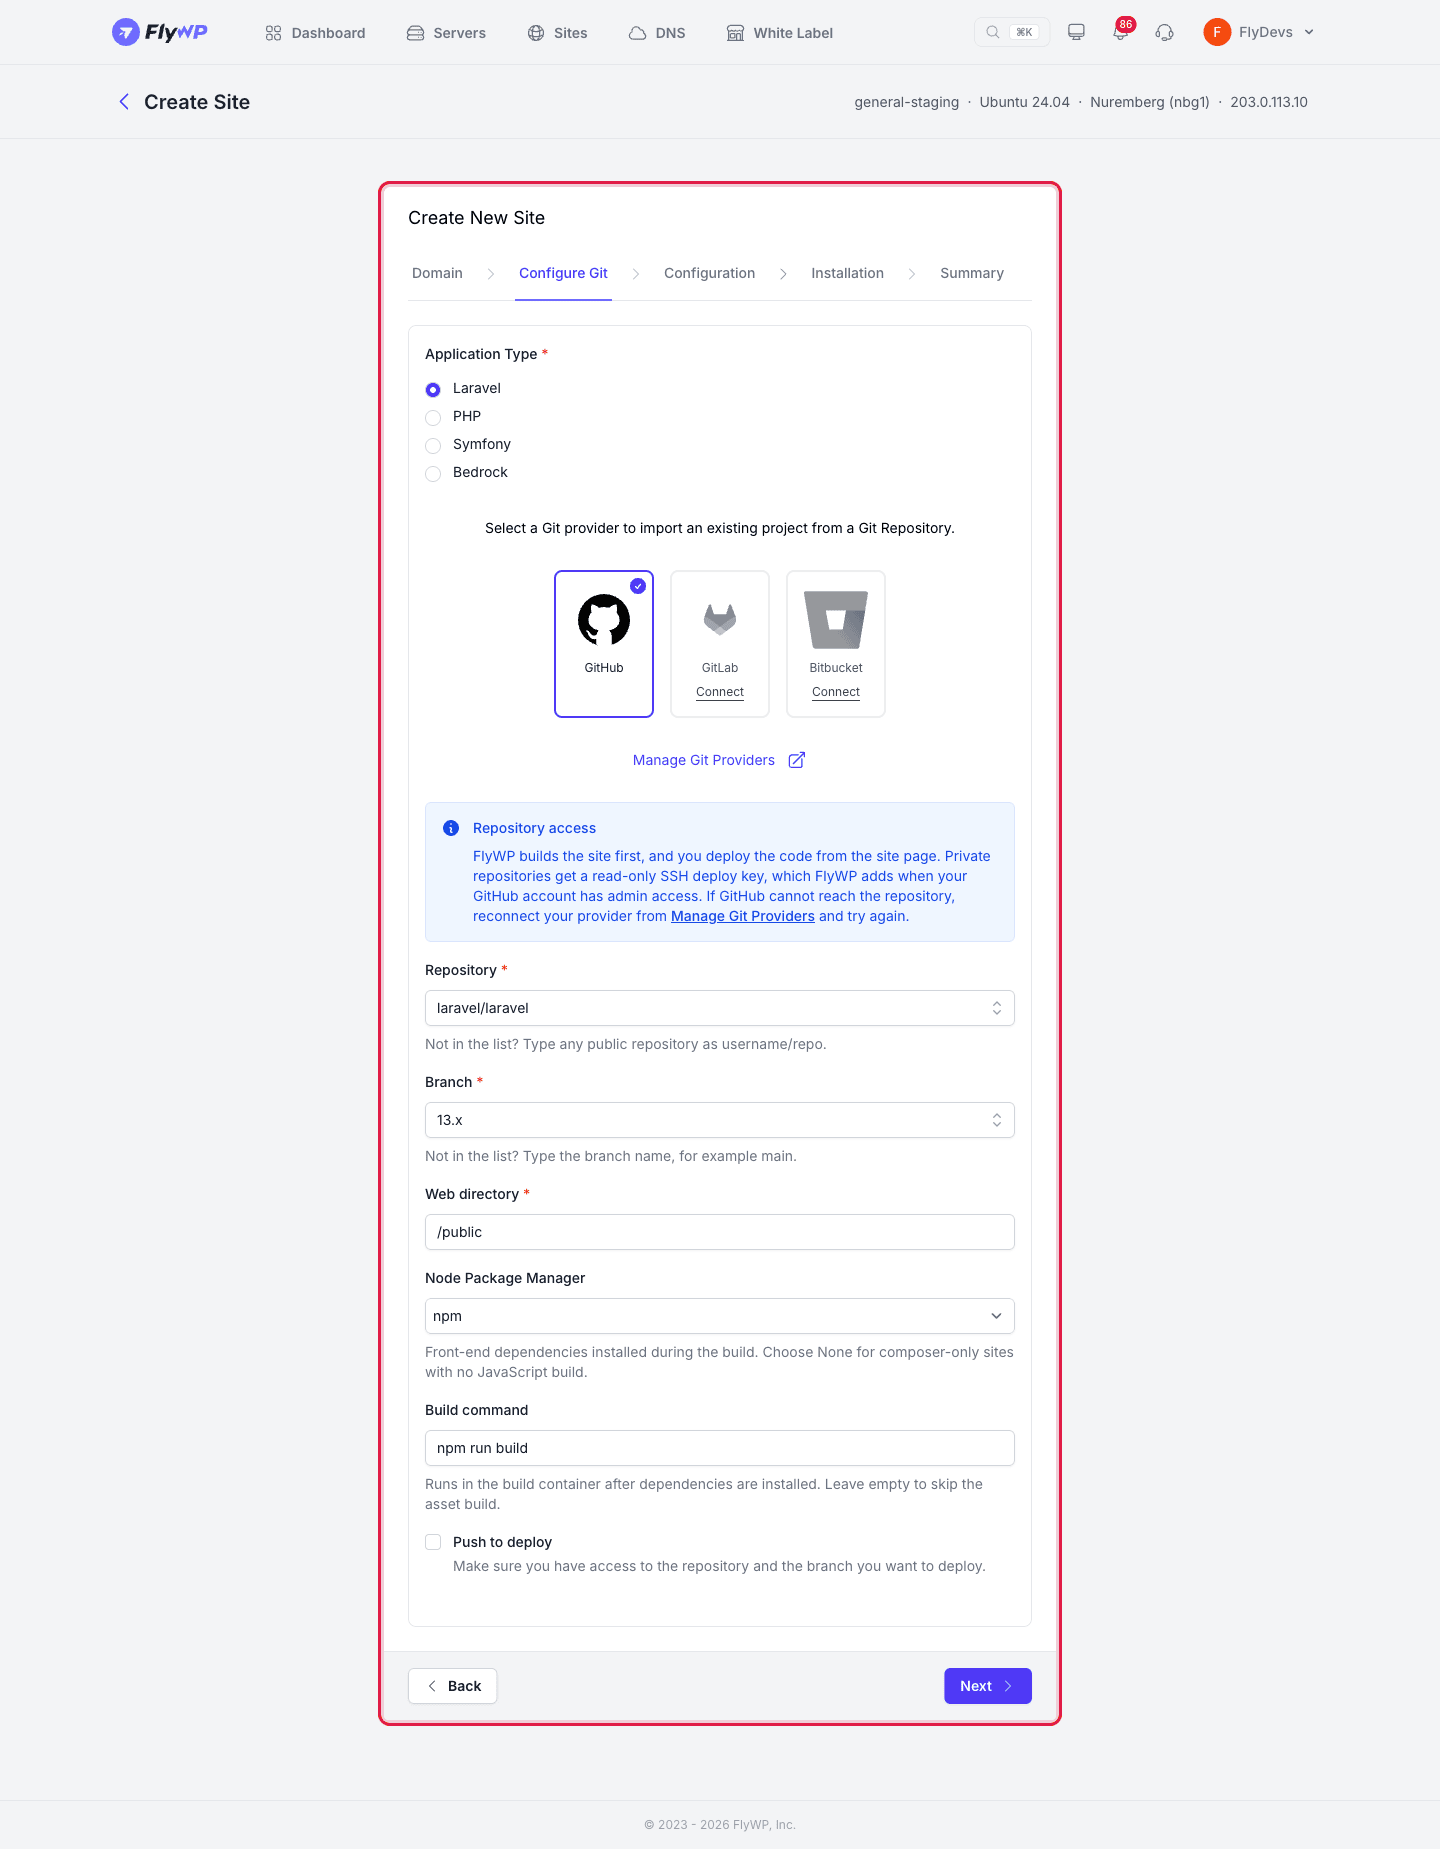
| Field | What to enter |
|---|---|
| Application Type | Laravel (selected by default), PHP, Symfony, or Bedrock. Bedrock is a WordPress project, so it is not covered here. |
| Git provider | Choose GitHub. GitLab and Bitbucket are listed but not available yet. If GitHub is greyed out, click Connect, finish the connection in the new tab, then click Check again. |
| Repository | Search your repositories, or type a public repository as username/repo. |
| Branch | Select a branch, or type its name, for example main. The default branch of the repository is selected for you. |
| Web directory | The folder served by Nginx. It is /public by default and you can change it. It must start with /. |
| Node Package Manager | npm (default), yarn, pnpm, or None (no JS build). Choose None for a Composer-only app with no JavaScript build. |
| Build command | Shown when you pick a package manager. It runs after the front-end dependencies are installed. The default is <package manager> run build, for example npm run build. Leave it empty to skip the asset build. |
| Push to deploy | Deploy automatically when you push to the selected branch. Off by default. You can change it later under Deployment → Settings. |
During the build, FlyWP installs Composer dependencies and, when a package manager and build command are set, builds your front-end assets.
If your account has no admin access to a private repository, a You will add a deploy key notice appears on this step. See Add the deploy key.
Add the deploy key
Section titled “Add the deploy key”FlyWP clones a private repository over SSH with a read-only deploy key that belongs to the site. When the connected GitHub account has admin access to the repository, FlyWP adds the key for you.
If your account only has collaborator access, or the repository belongs to an organization, GitHub refuses the key. The site page then shows Add the deploy key:
- Click Open Deploy keys, or click Copy instructions for an admin and send them to a repository admin.
- Add the key to the repository. Give it the title
FlyWPand leave write access off. - Wait for FlyWP to detect it. FlyWP checks every 15 seconds. You can also click Check now. When the key works, you see The deploy key works. You can deploy now.
Deploy Now stays off until the key is added. If FlyWP cannot reach the server to test the key, it tells you, and you can still deploy.
For a site that deploys from a private repository, you can see the key at any time under Deployment → Settings → Deploy Key. Click Generate deploy key if the site has none yet.
Deploy the code
Section titled “Deploy the code”After creation, the site shows a placeholder page and a Ready to deploy card with these steps:
- Add the deploy key, if GitHub refused it.
- Set the environment variables: click Edit .env. See Environment variables.
- Deploy the code: click Deploy Now. The Deploy Now button in the site header does the same.
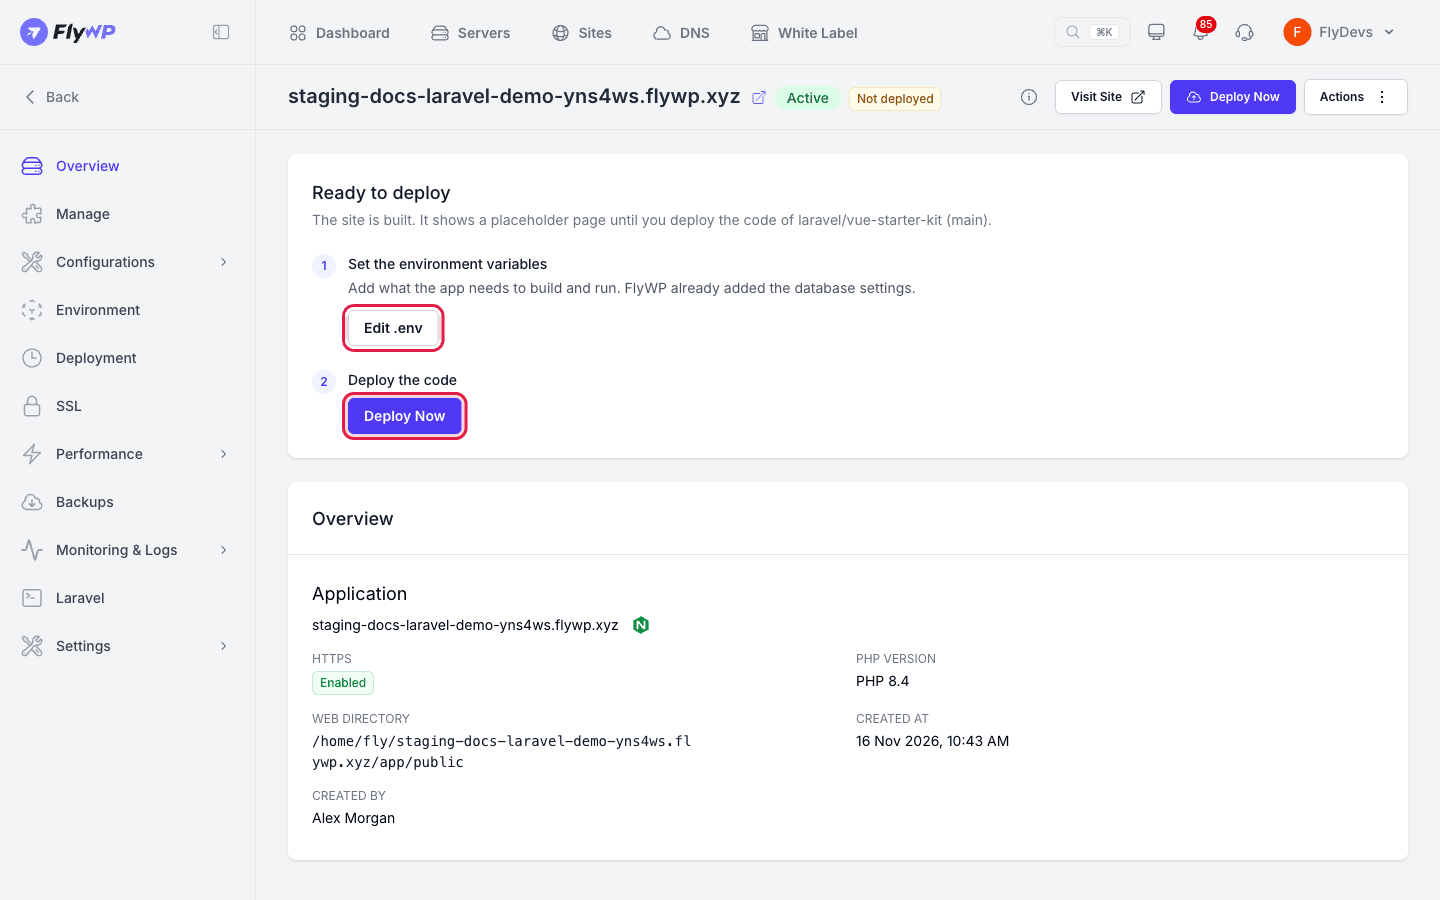
If a deployment fails, the card shows The last deploy failed. Open the deployment log link on the card, fix the problem, and deploy again.
On the first deployment, FlyWP fetches and builds your branch. It also adds any keys from your repository's .env.example that are missing from .env, without changing values that are already there. If your repository tracks a .env file, FlyWP keeps the site's .env file.
Later deployments
Section titled “Later deployments”Open Deployment in the site menu to see the deployment history: when, who deployed, the branch, the commit, the duration, and the status. Click Settings on that page to manage:
- Push to Deploy (click Enable Push to Deploy or Disable Push to Deploy).
- Deploy Key (private repositories only)
- Deployment Branch (click Update branch to save). Deployments are fast-forward only, so a branch that has diverged from the one on the server fails every deploy until it is reset.
- Deployment Script (click Update to save)
- Deployment Trigger URL, which starts a deployment from a GET or POST request. Click Refresh Token to get a new URL.
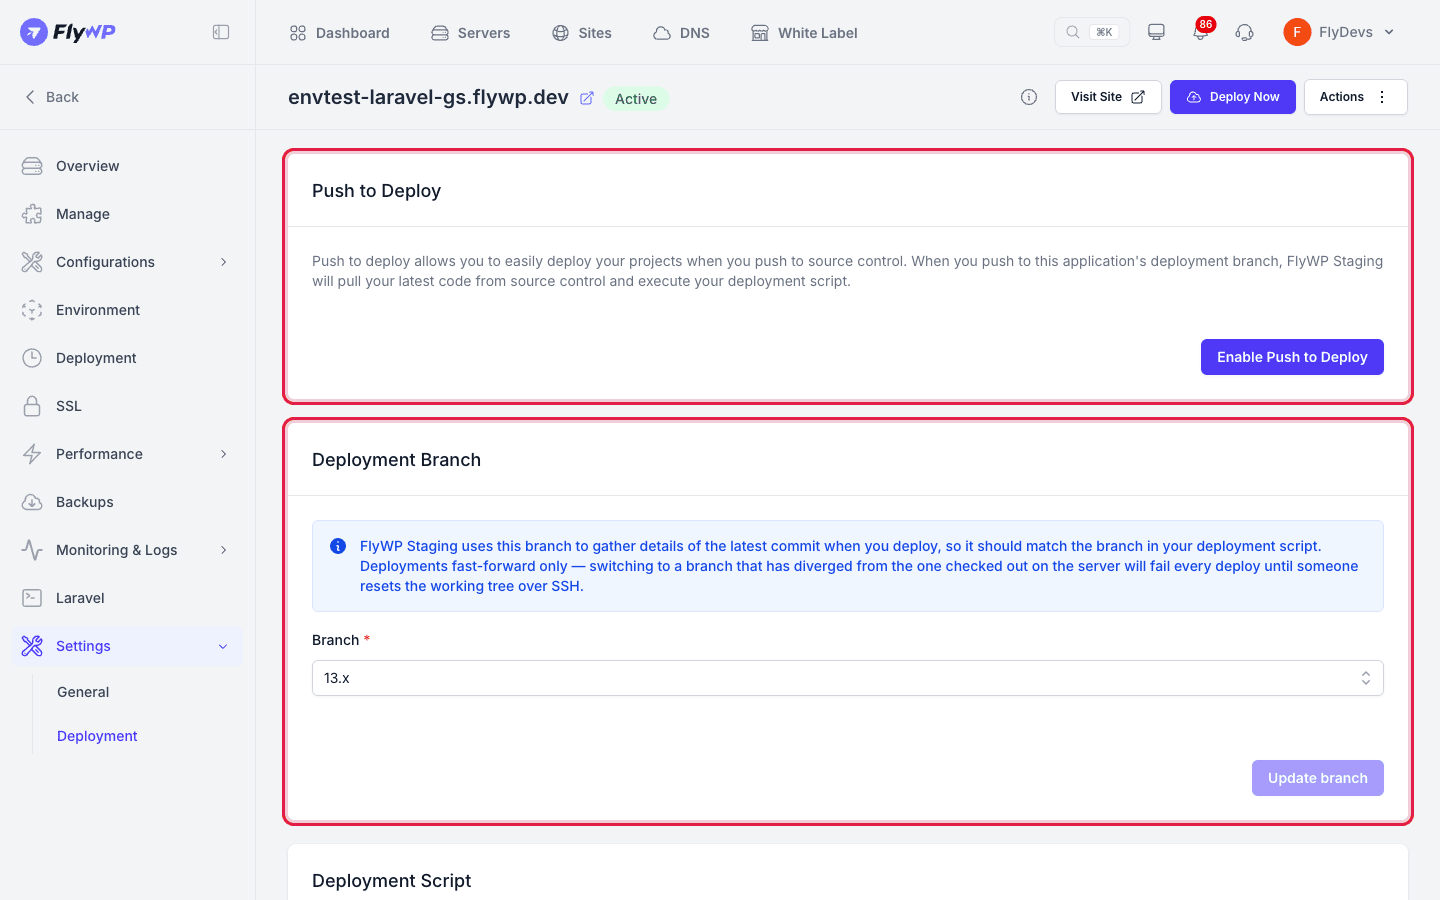
By default, each deployment pulls the branch, runs the build (Composer and your assets), and for Laravel sites also runs php artisan migrate --force, php artisan optimize and php artisan queue:restart.
Delete the site
Section titled “Delete the site”When you delete the site, FlyWP removes the deploy key it added to your repository.
Related guides
Section titled “Related guides”Still stuck? How can we help?
View as Markdown