Wasabi isn’t your typical backup provider. Instead of offering their backup software, they focus on providing secure and affordable cloud storage that can be used as a target for your existing backup solution. Now you can use Wasabi as your backup companion with FlyWP.
You can easily integrate Wasabi with FlyWP and start backing up your WordPress site.
Here’s a quick introduction to Wasabi as a cloud storage option for backups:
- Cost-effective: Known for competitive pricing compared to other cloud storage services.
- Focus on Hot Storage: Ideal for frequently accessed backups since it prioritizes fast retrieval.
- Scalable: Easily adjust your storage space as your backup needs grow.
- Security-focused: They emphasize data security with features like encryption.
Let’s get started with the process:
First, you must have the servers and sites created in FlyWP before proceeding with the steps.
Step one: getting started
First, enter one of the sites created here. Or you can create a new site with FlyWP.
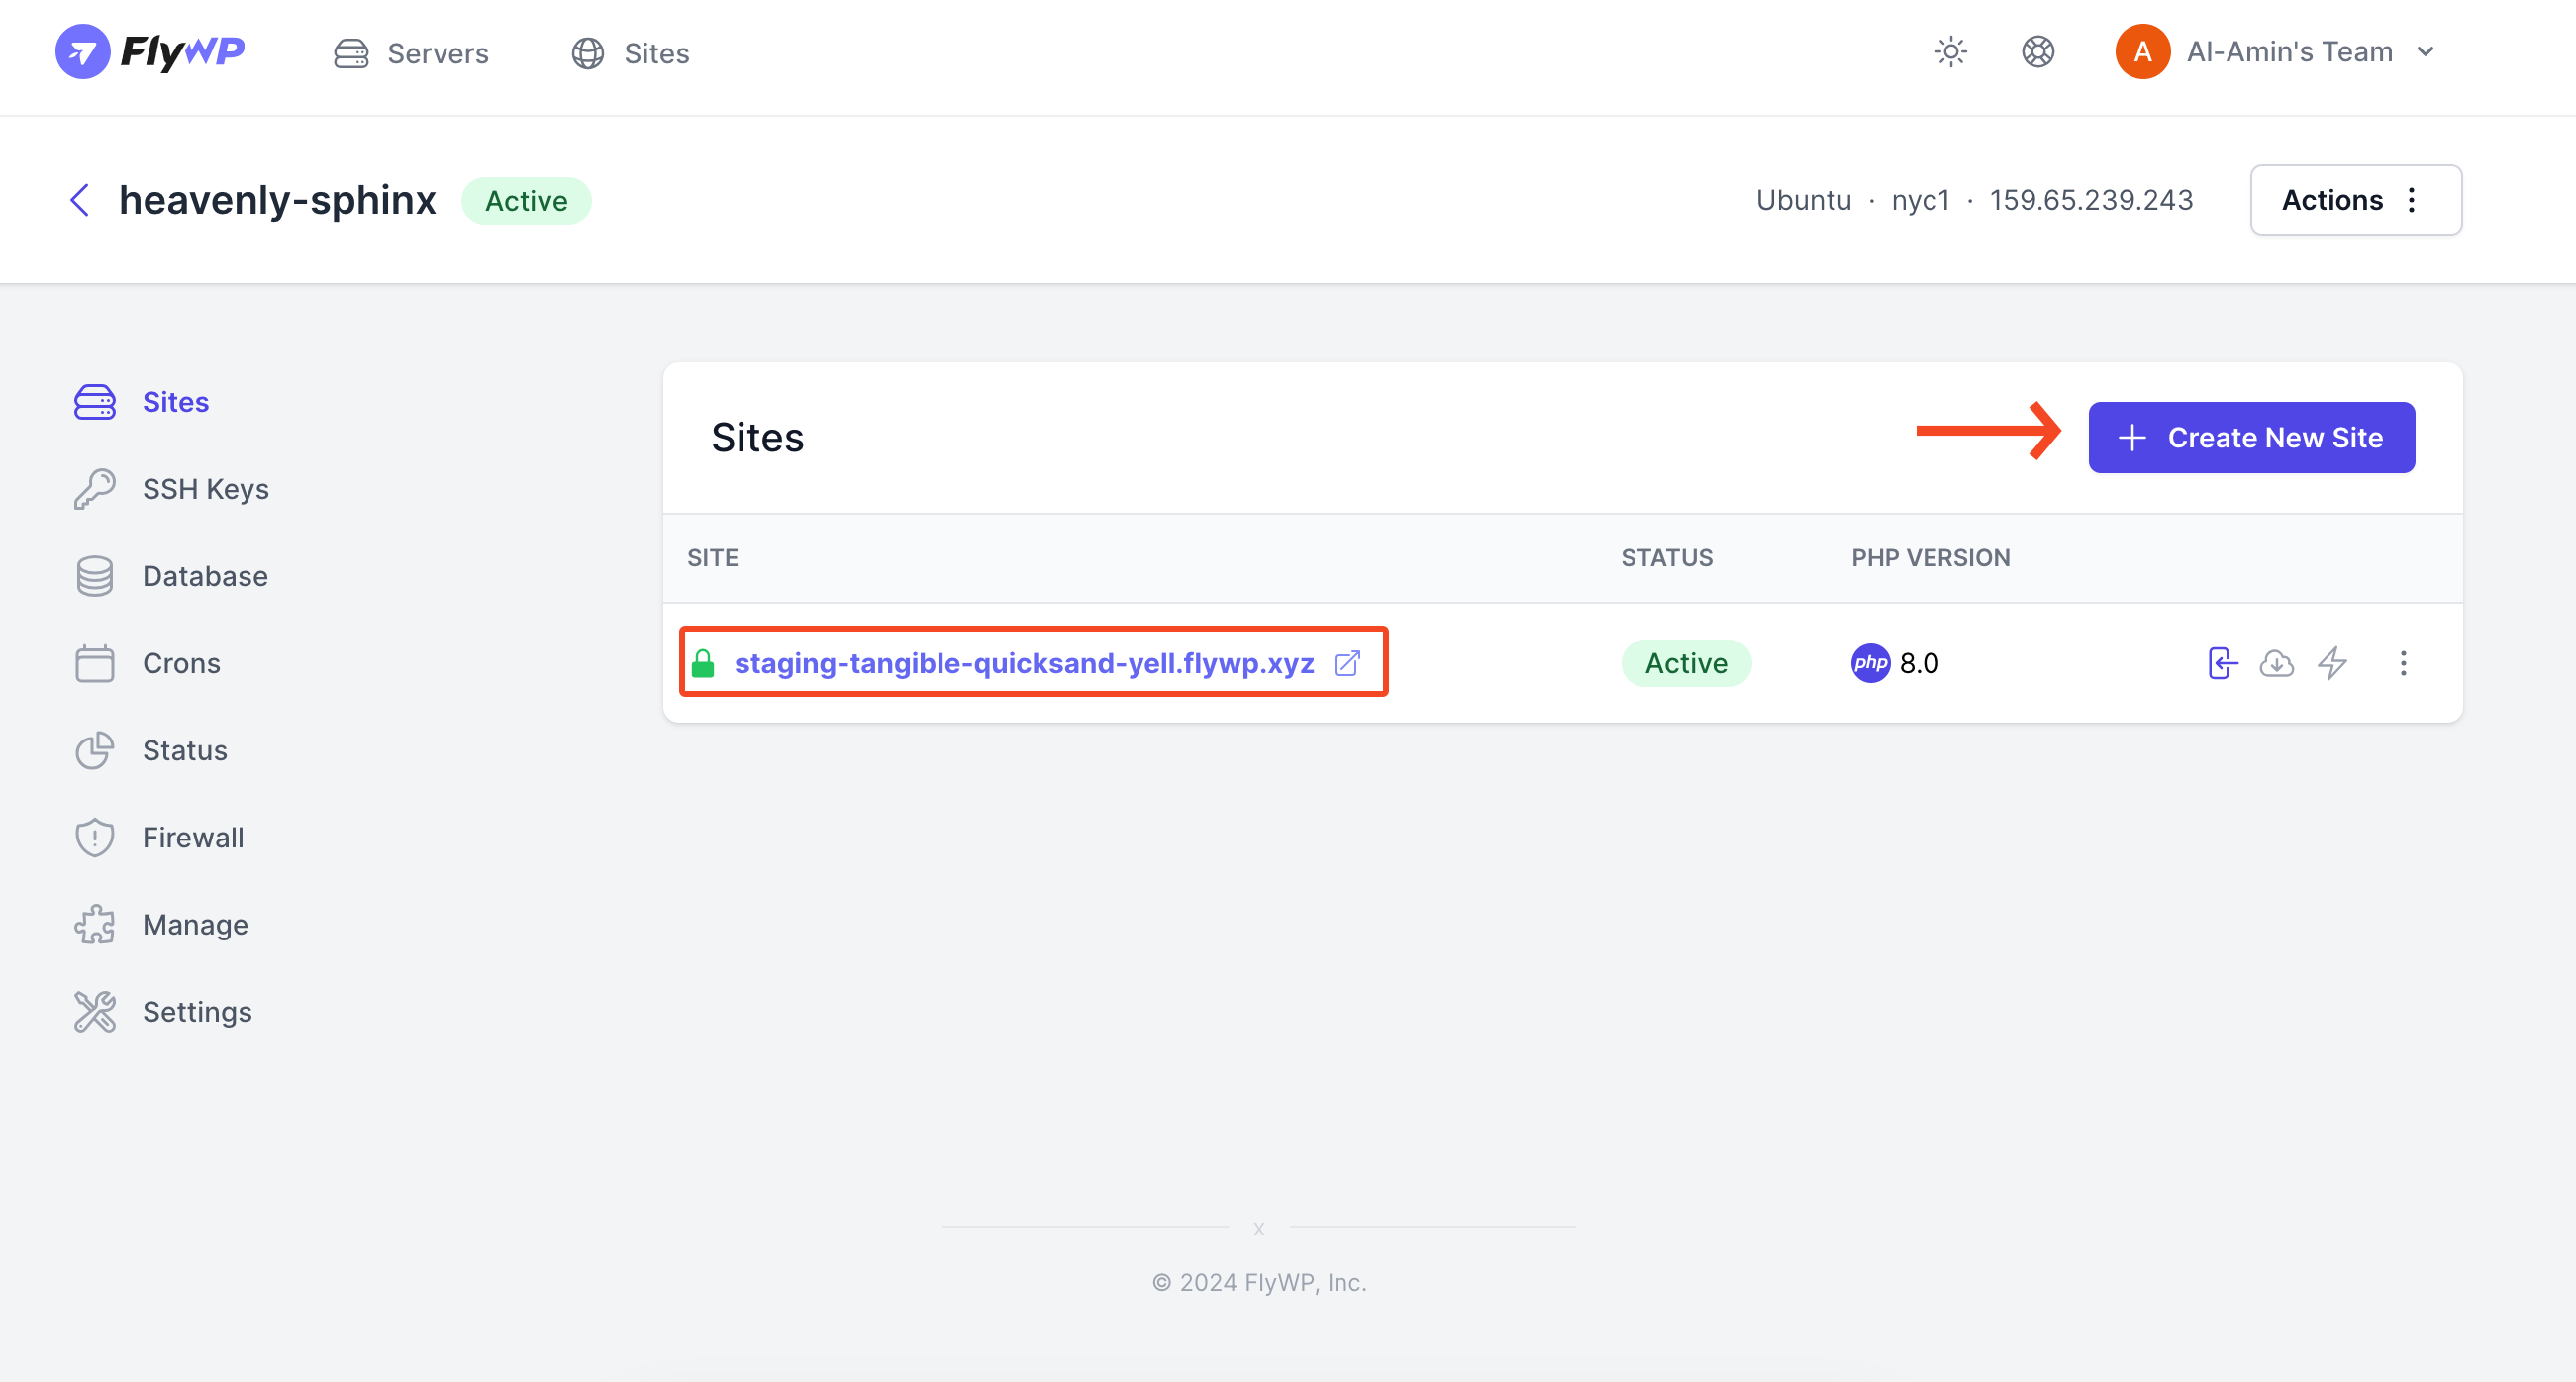
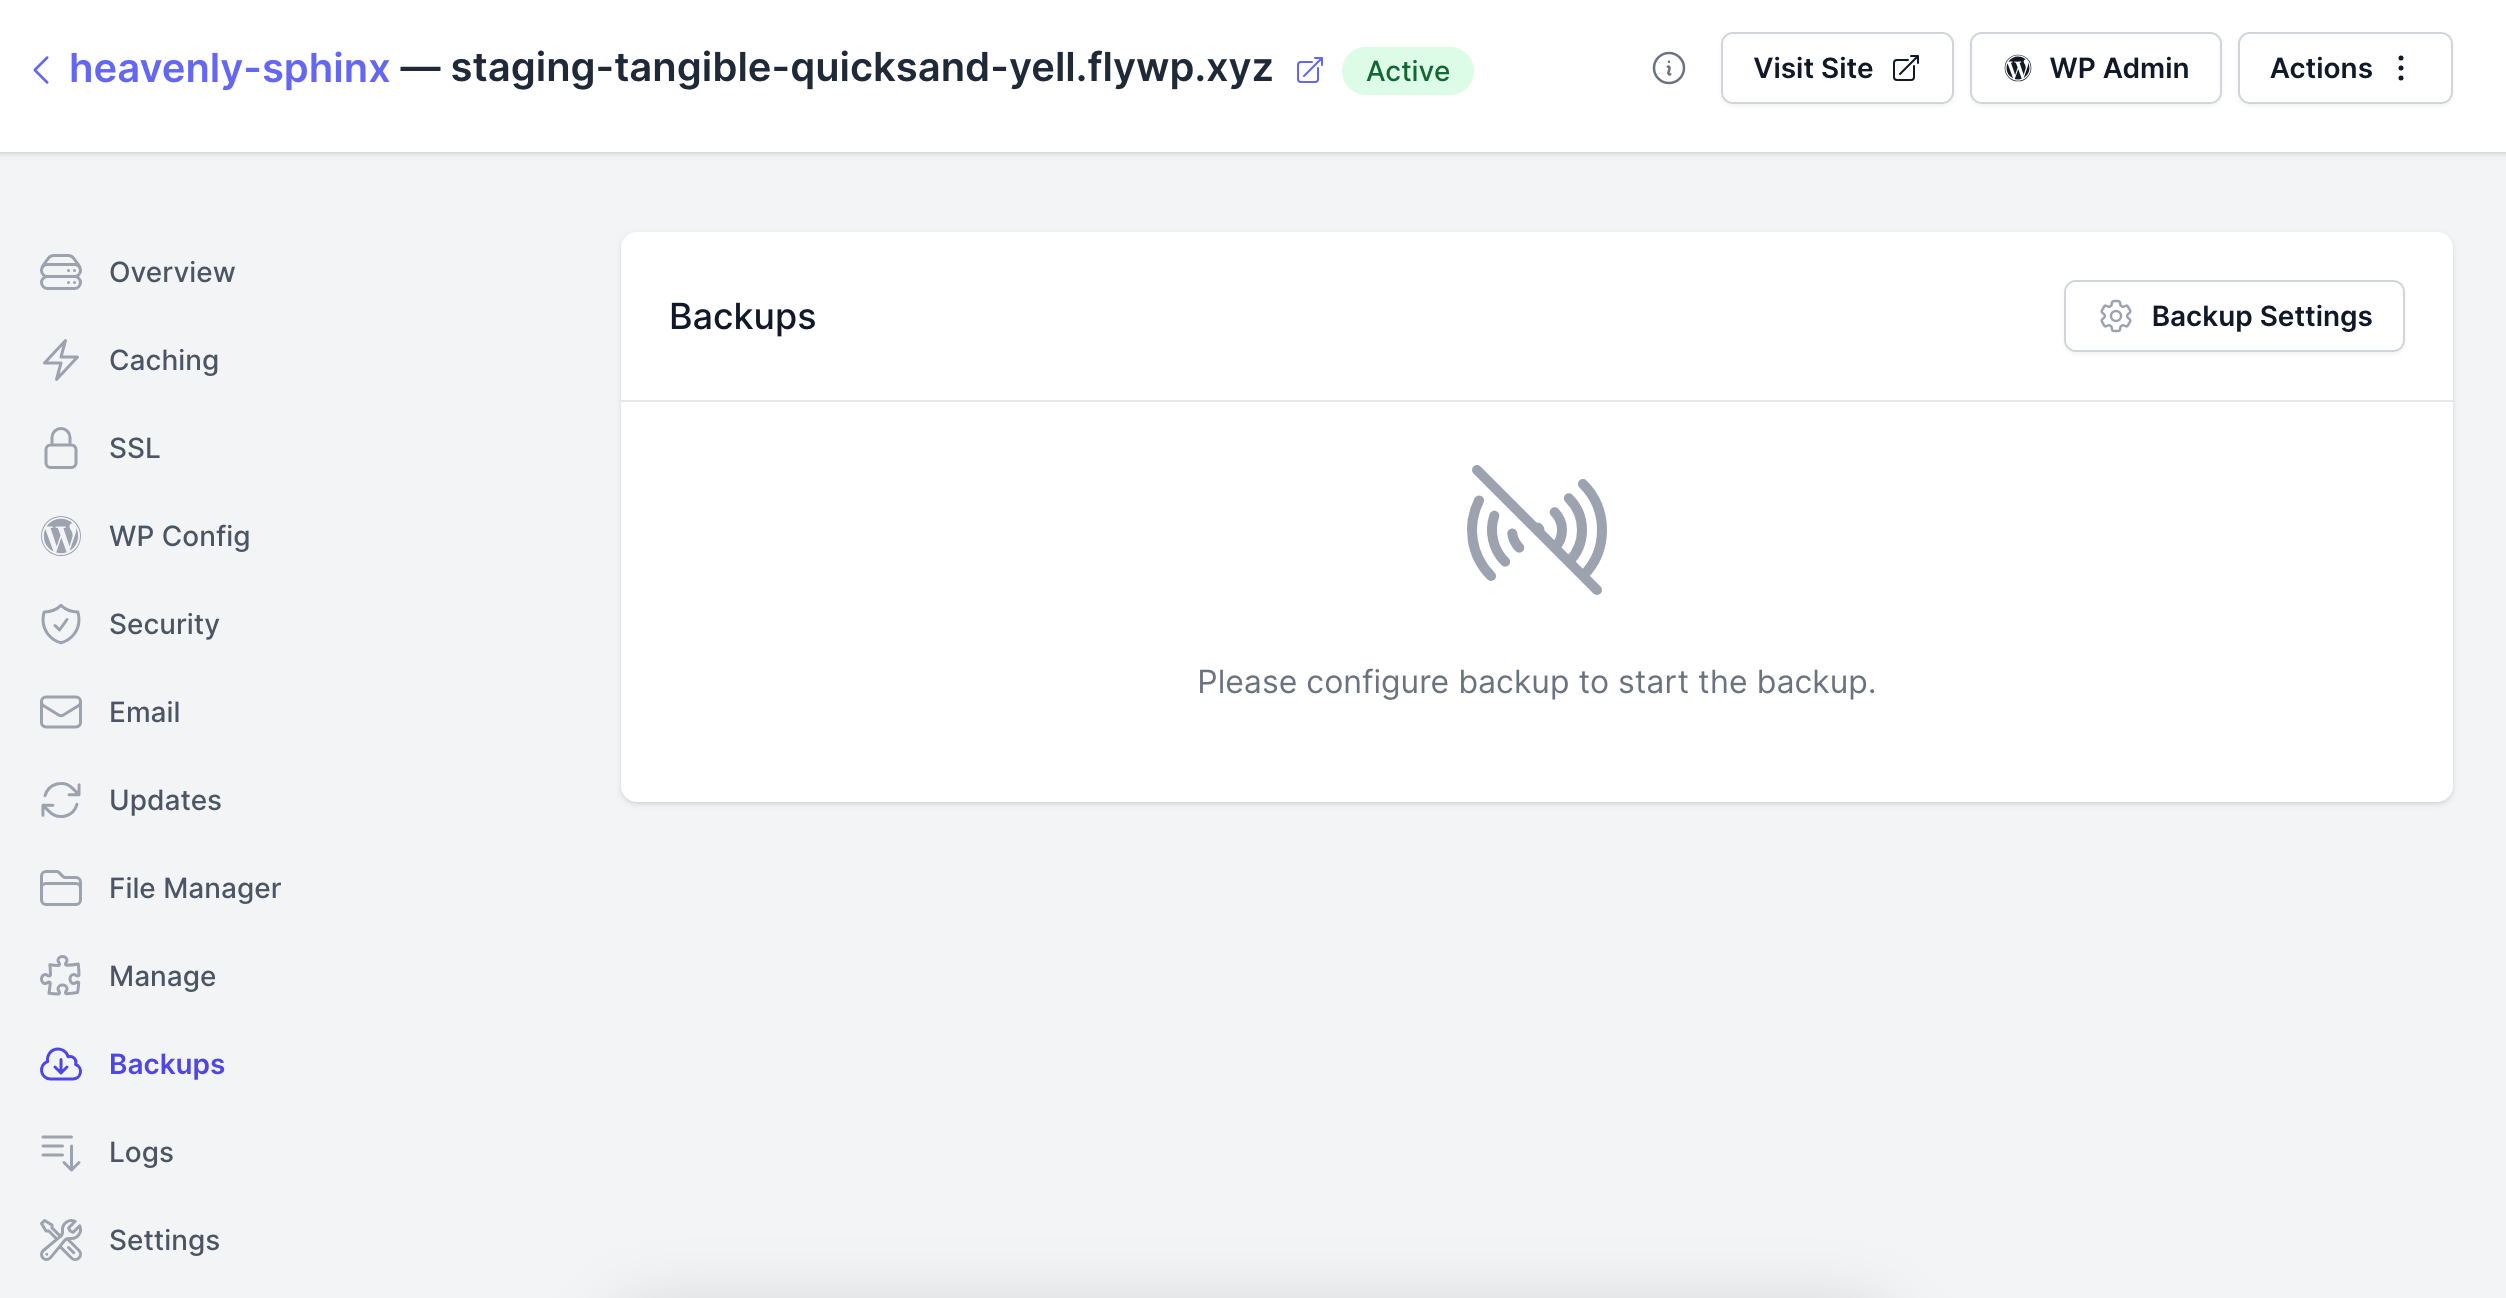
Then click on the backups.
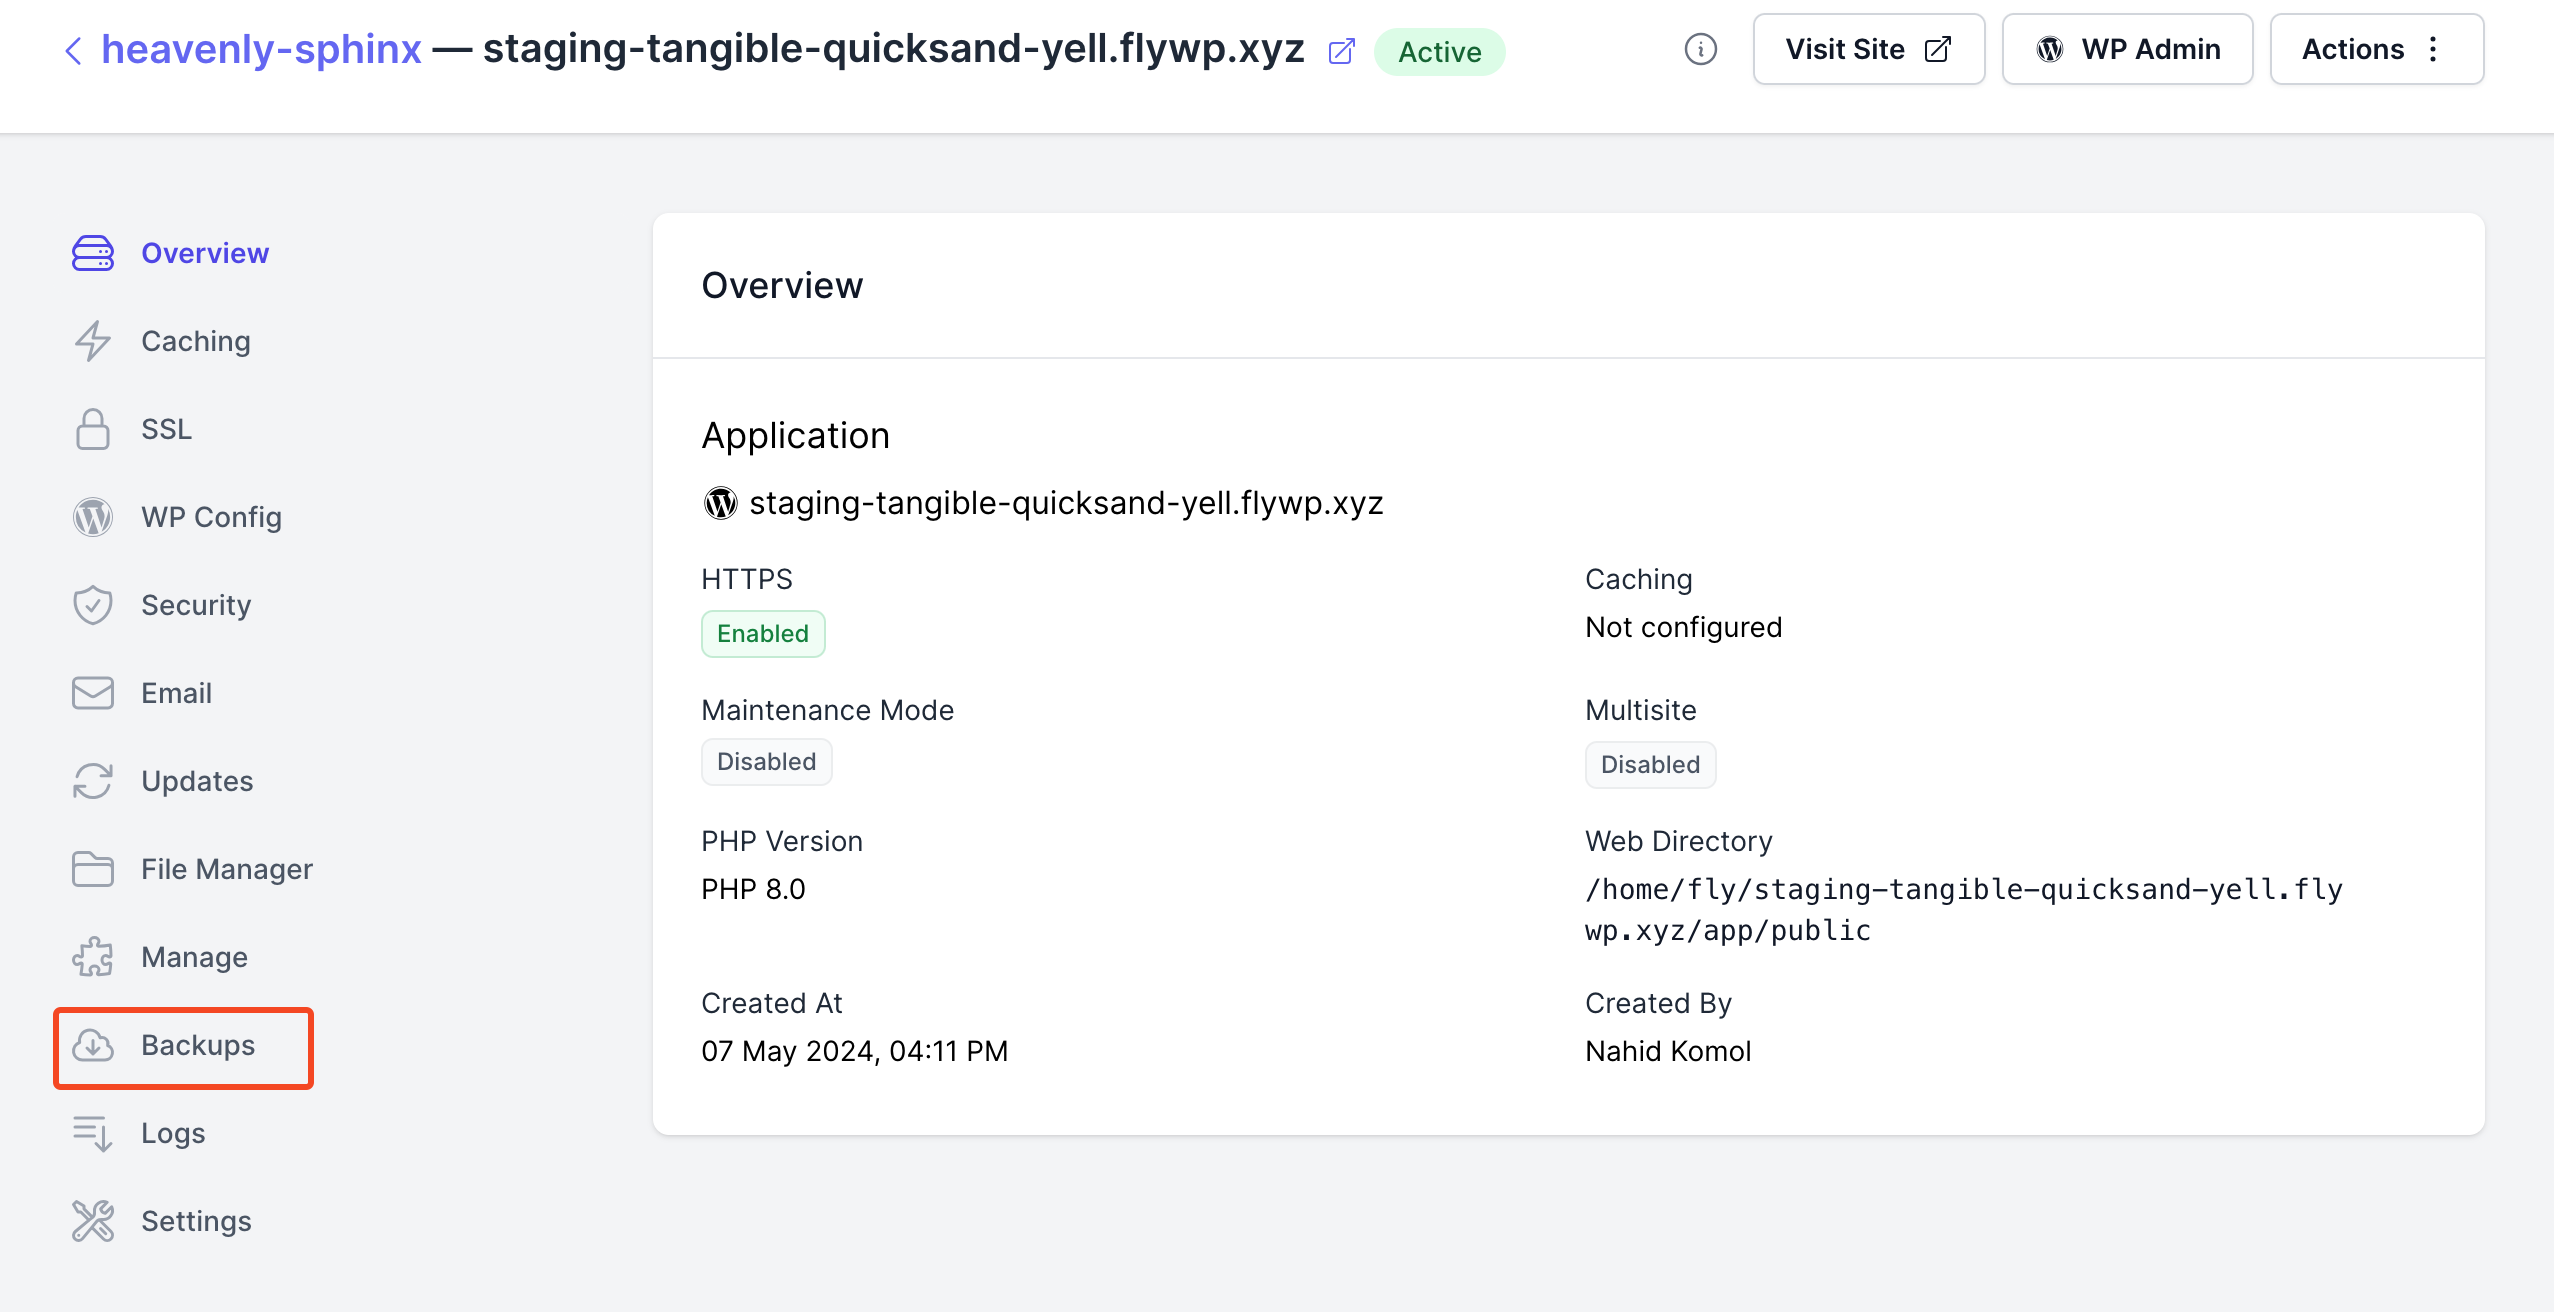
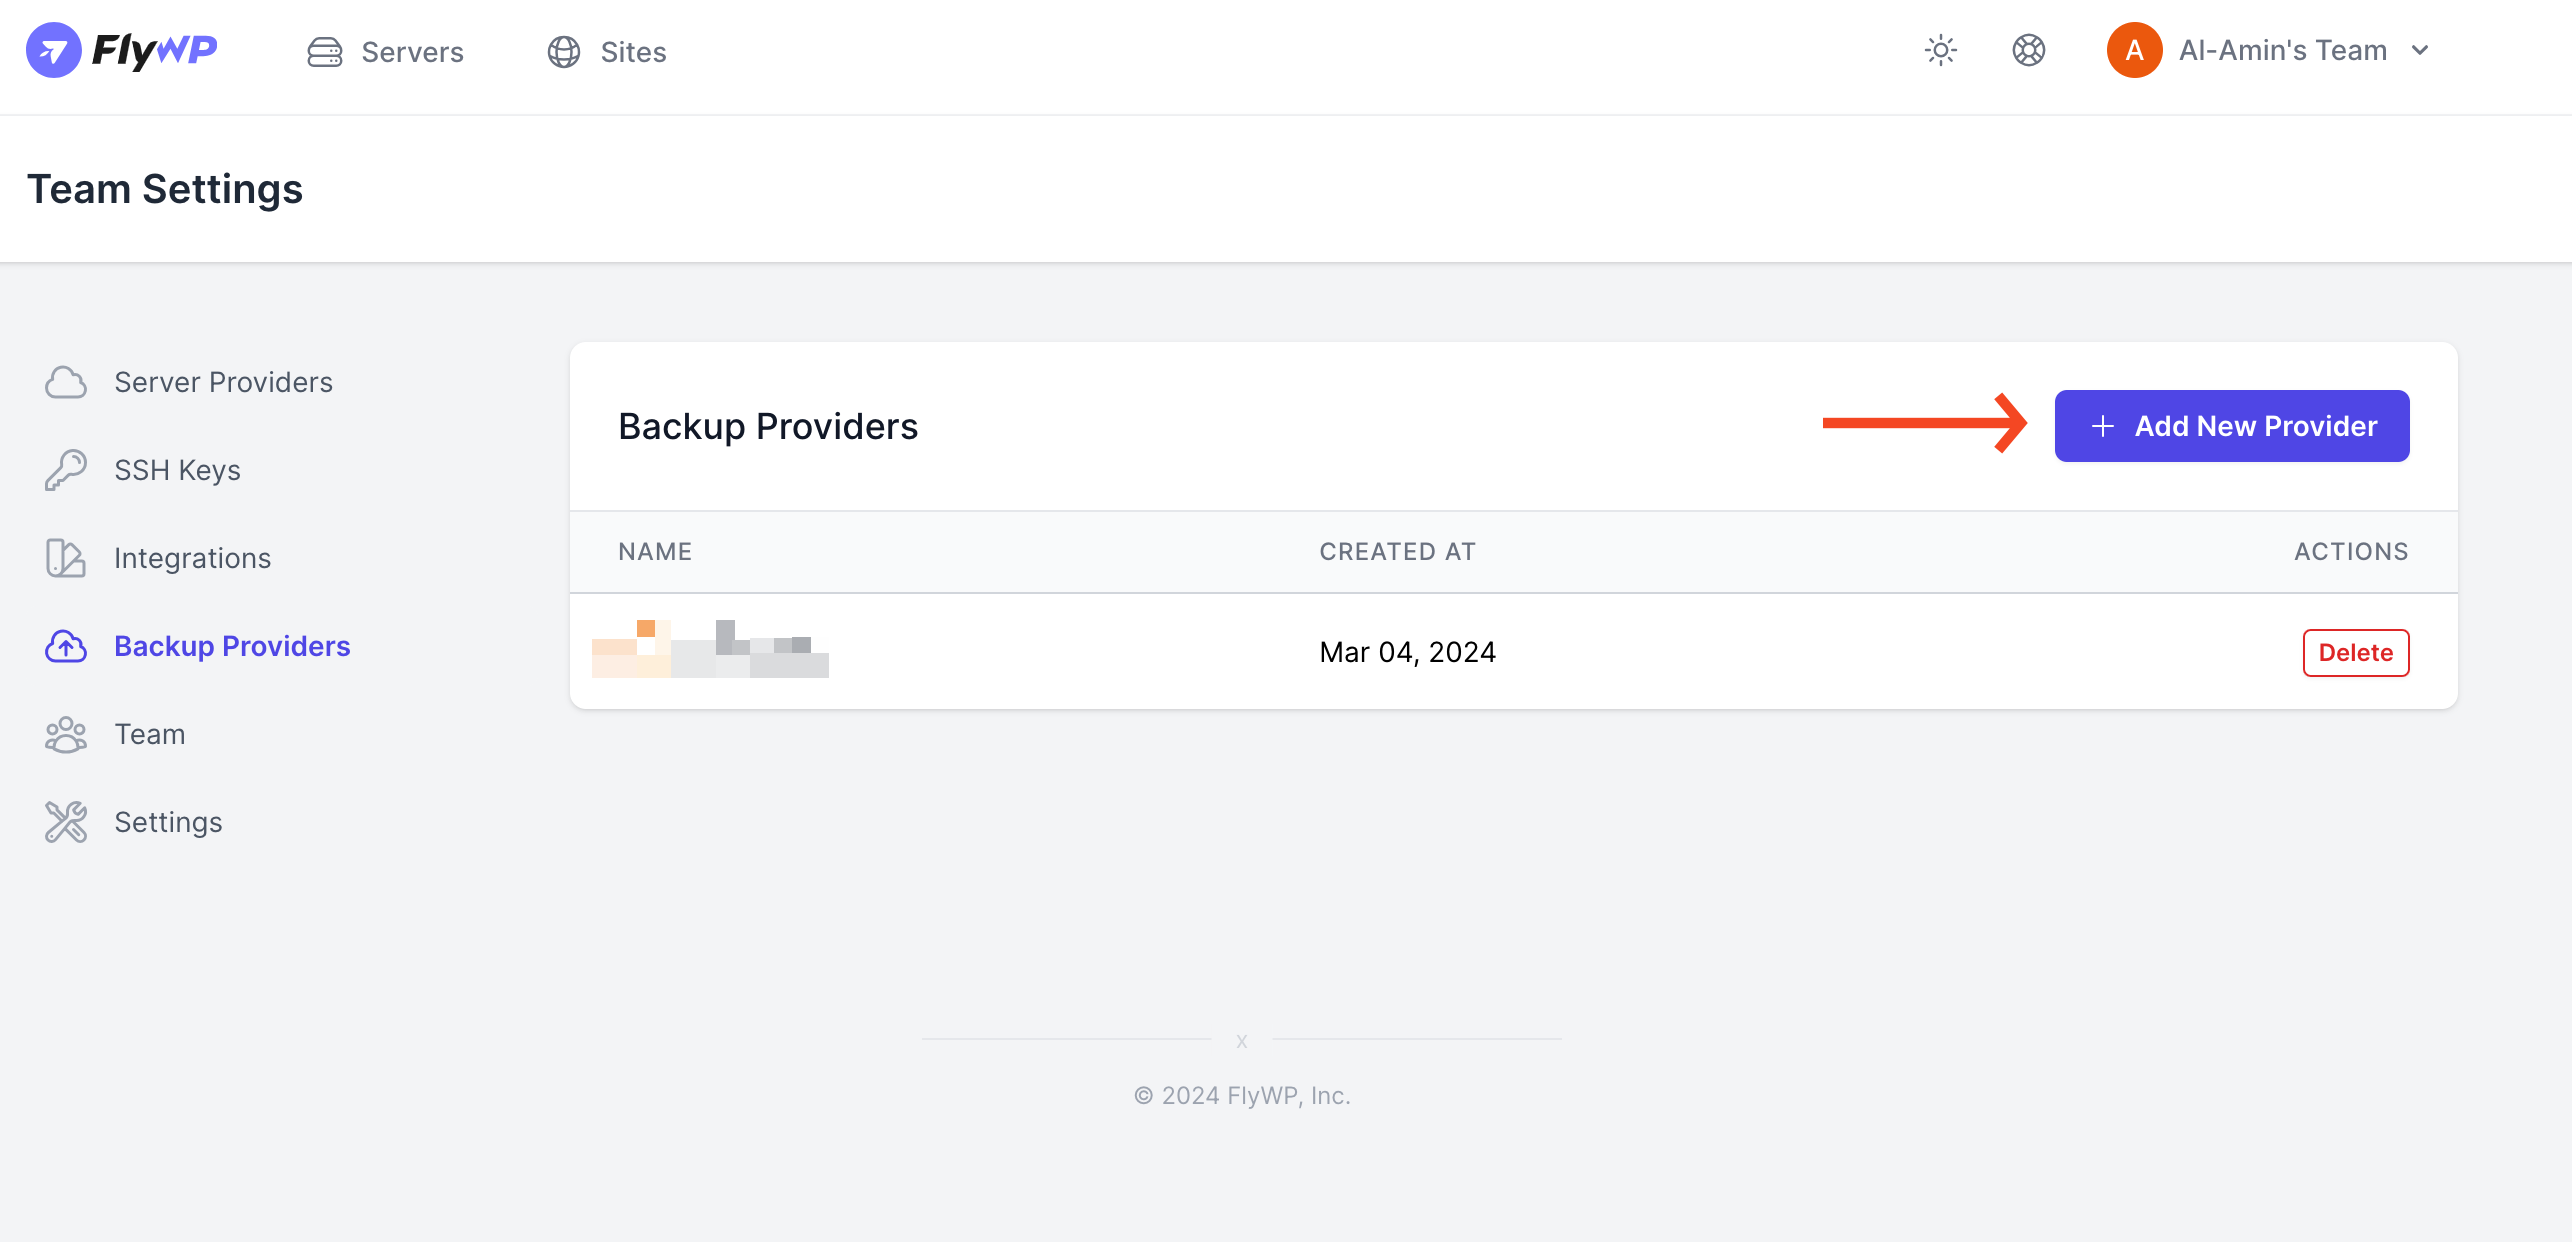
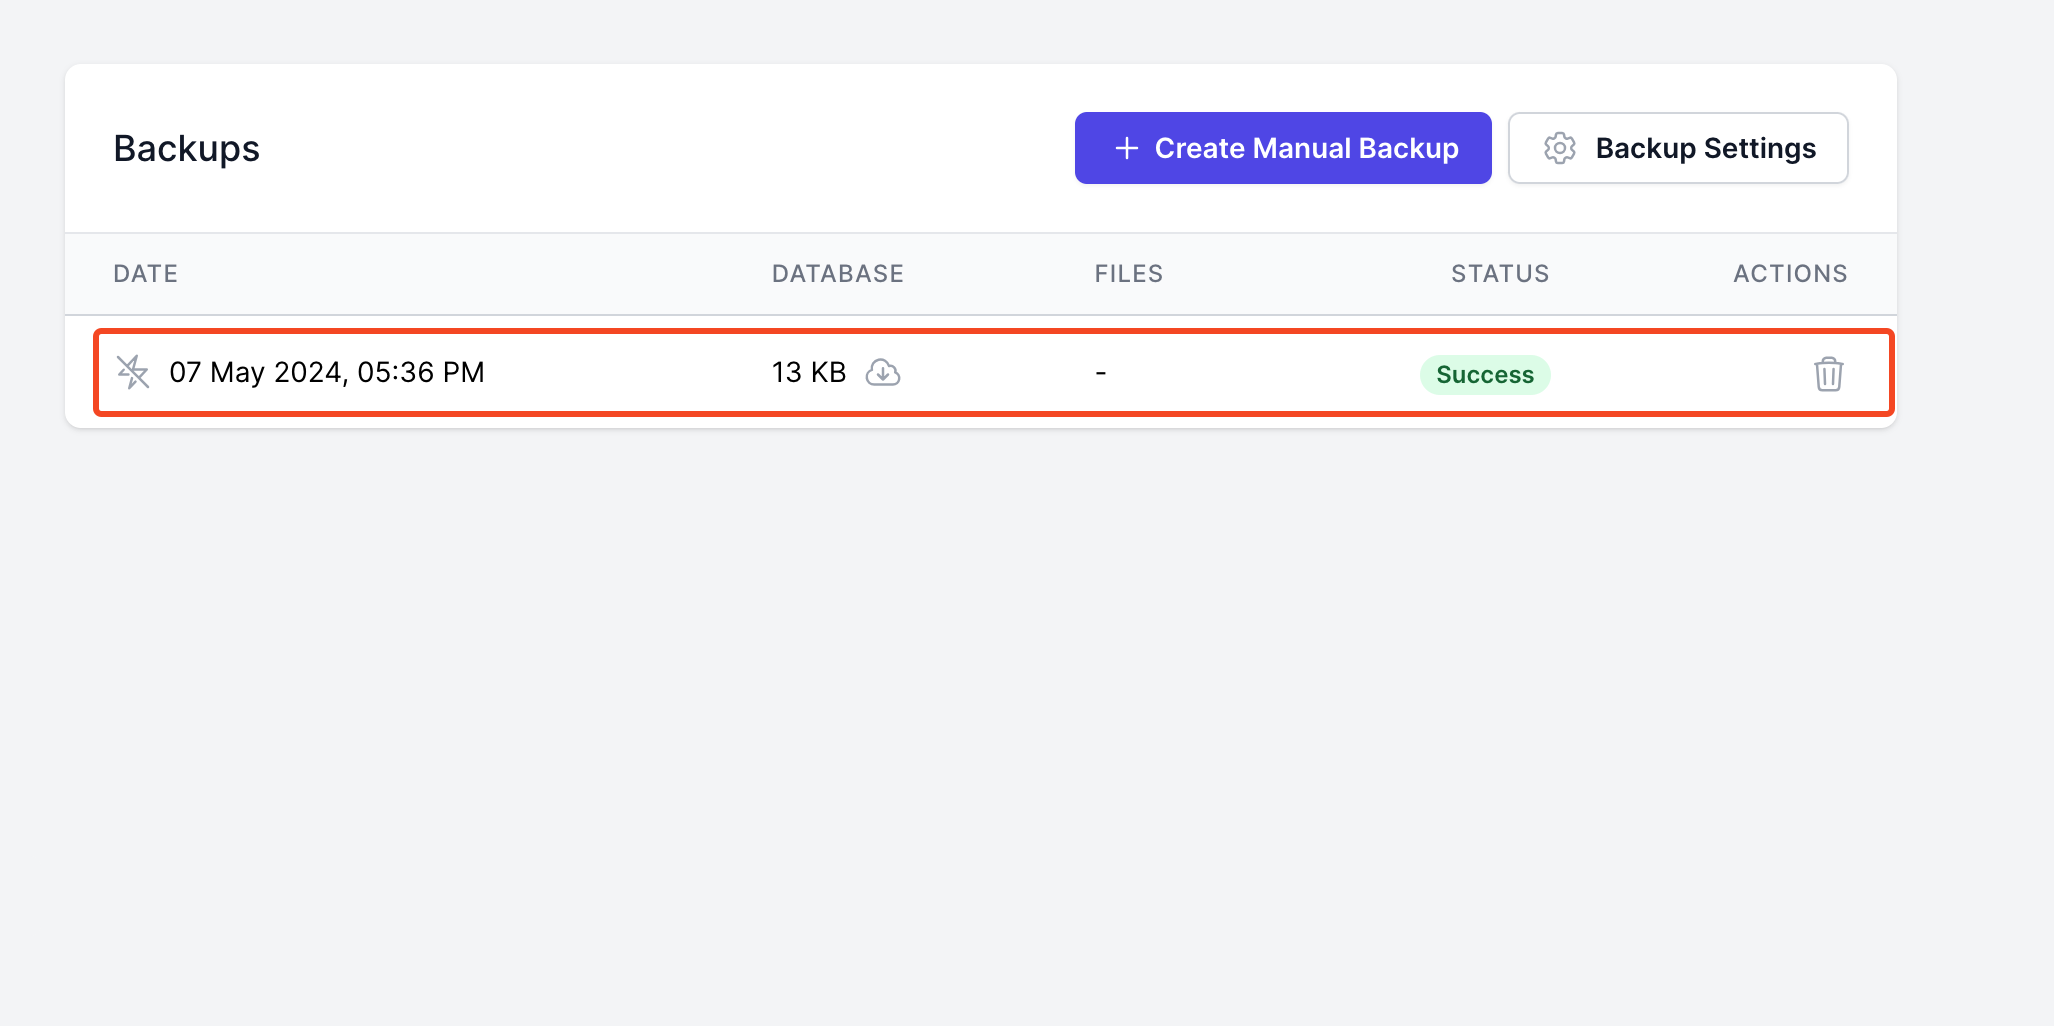
As you can see, nothing is here to configure. So you have to add the backup providers in the settings.
Step two: adding Wasabi as a backup provider
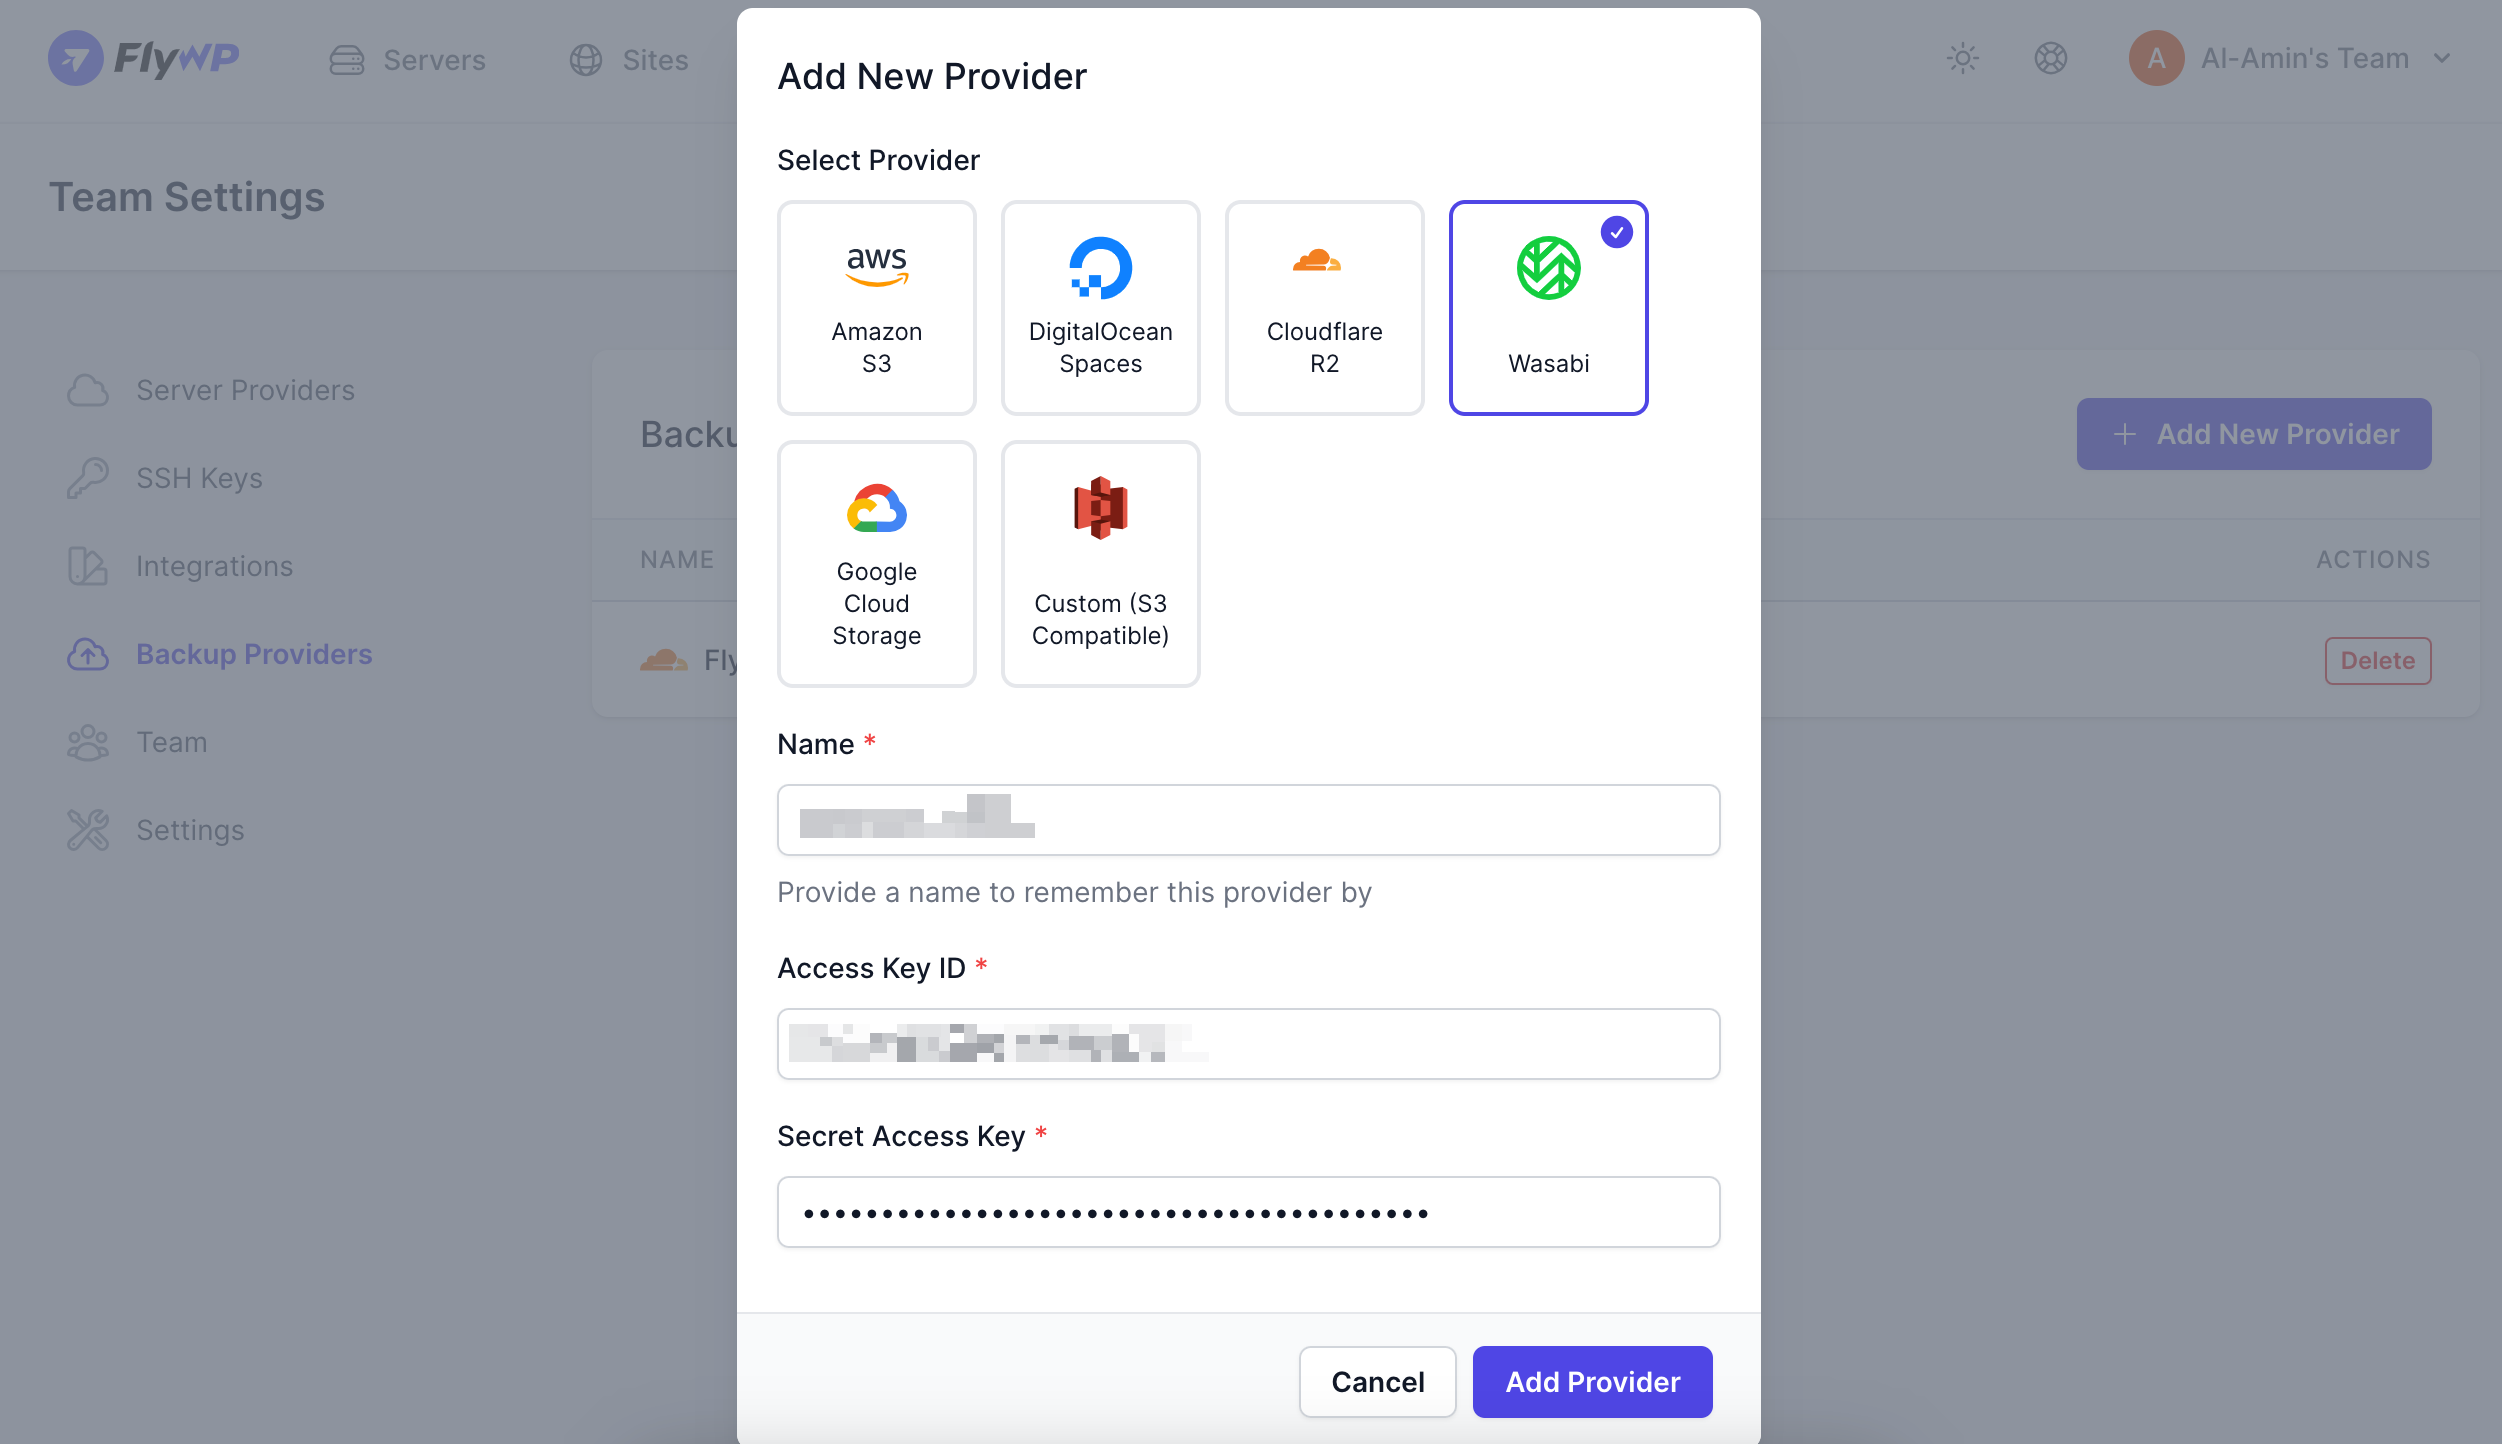
- Now go to the settings page and then backup providers. If you have already added the backup provider before, then they must be on the list.
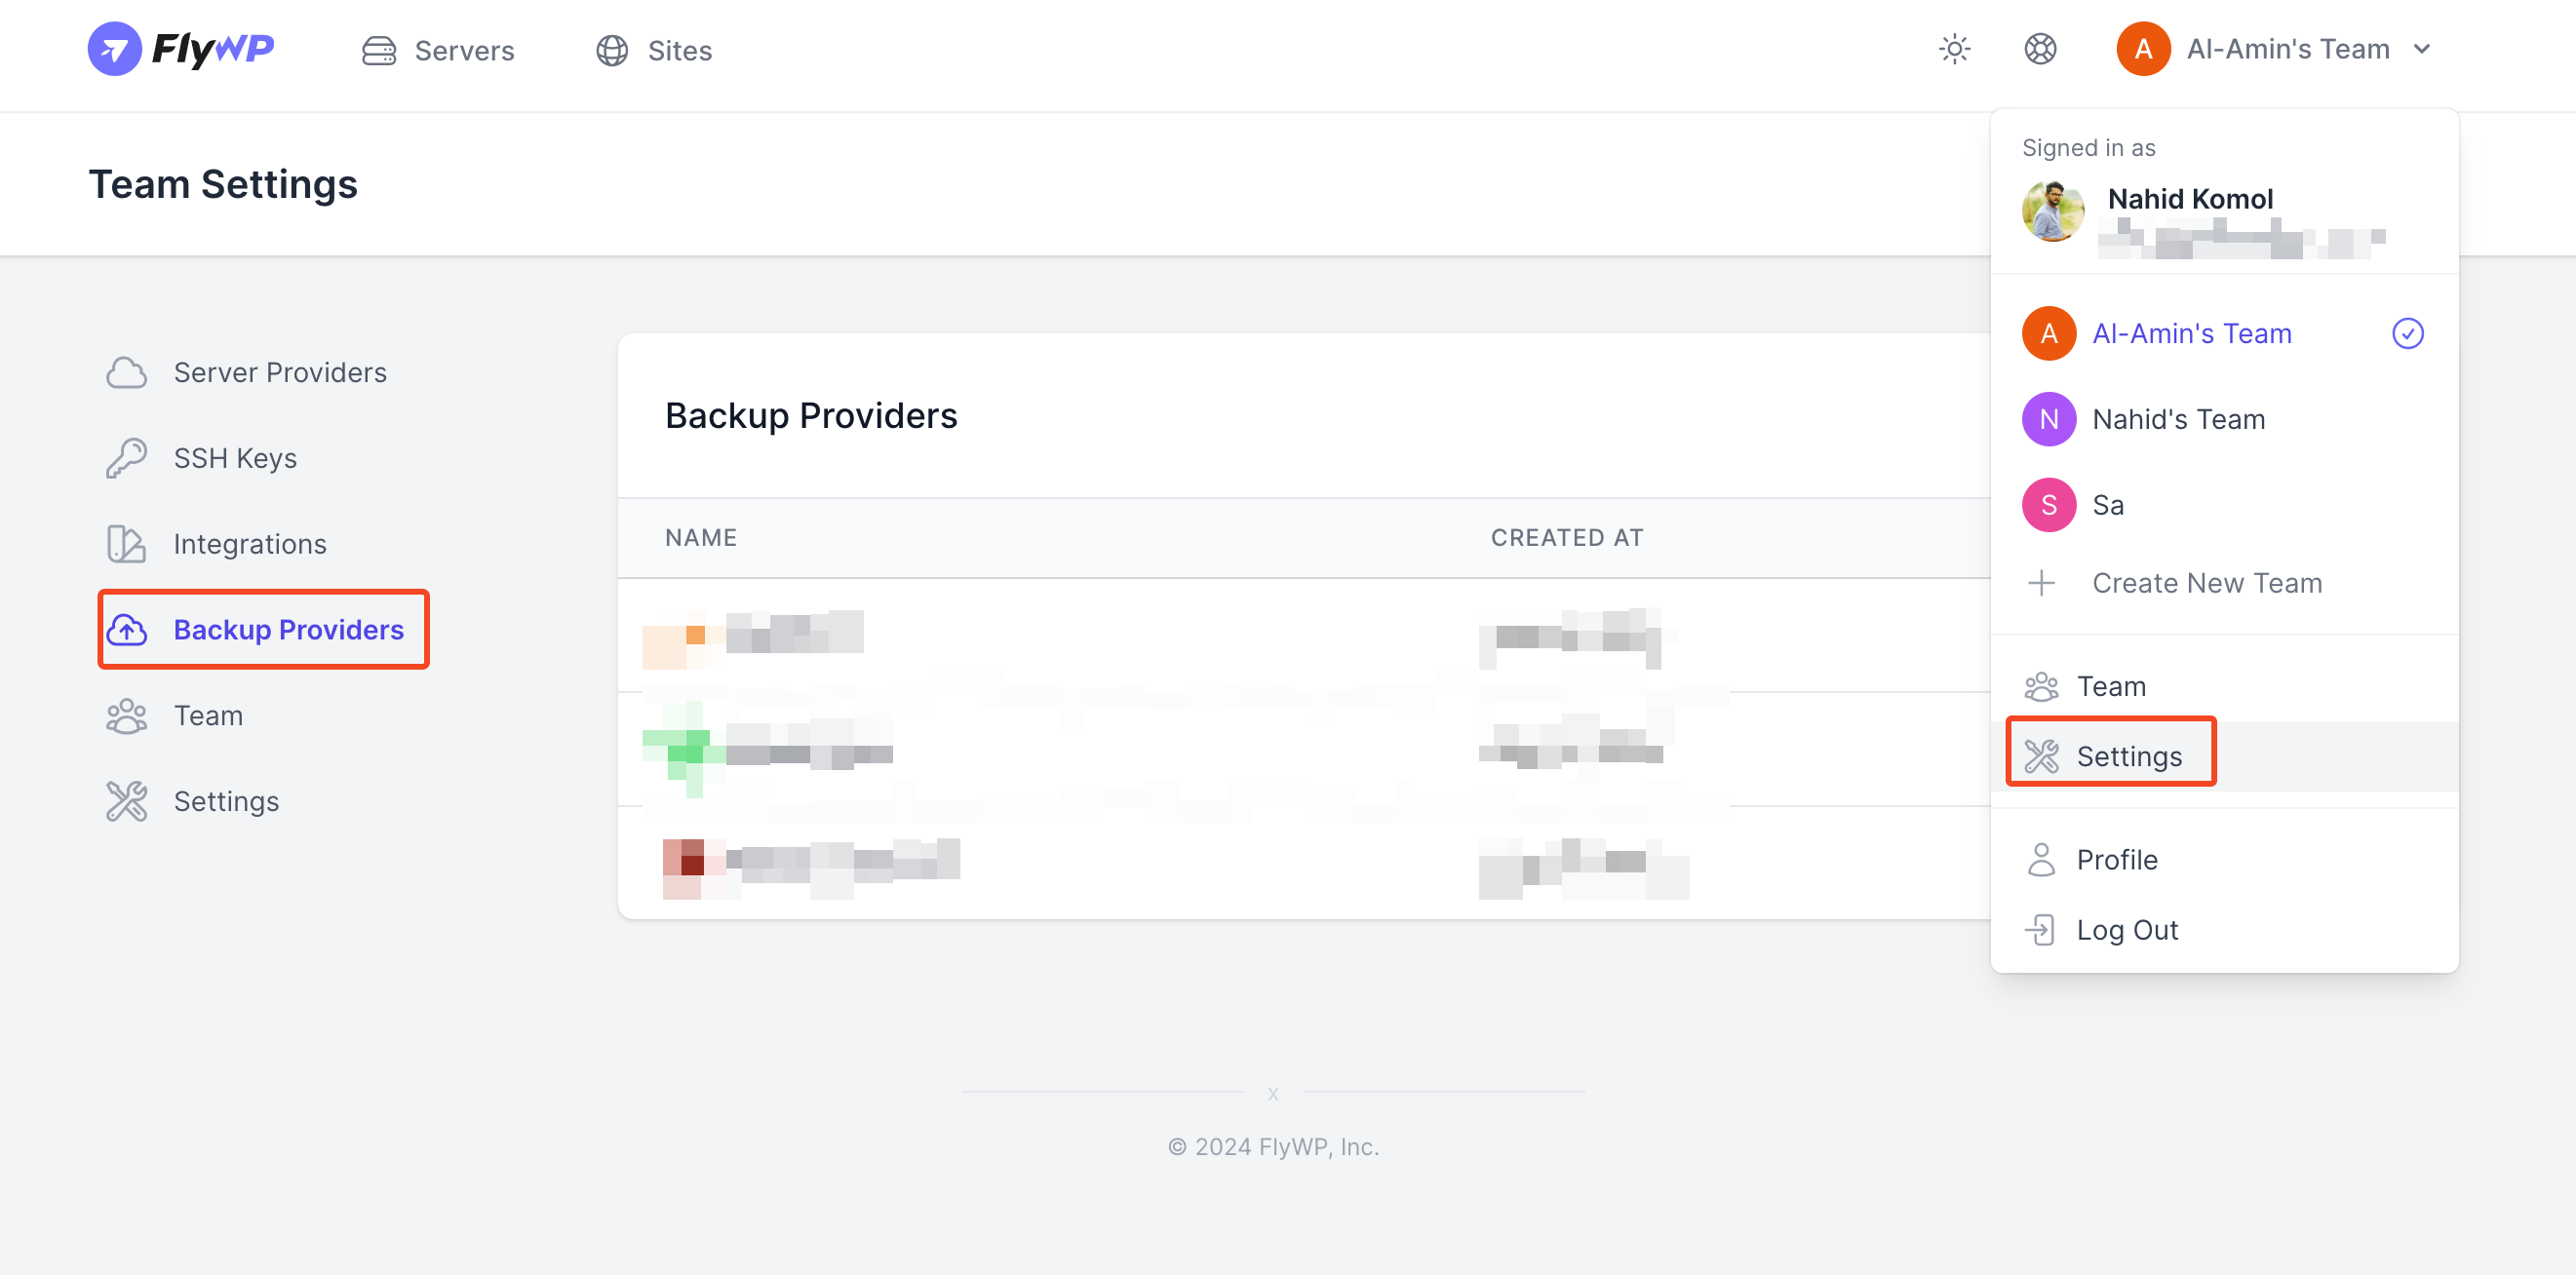
- Click on the “Add New Provider” button.
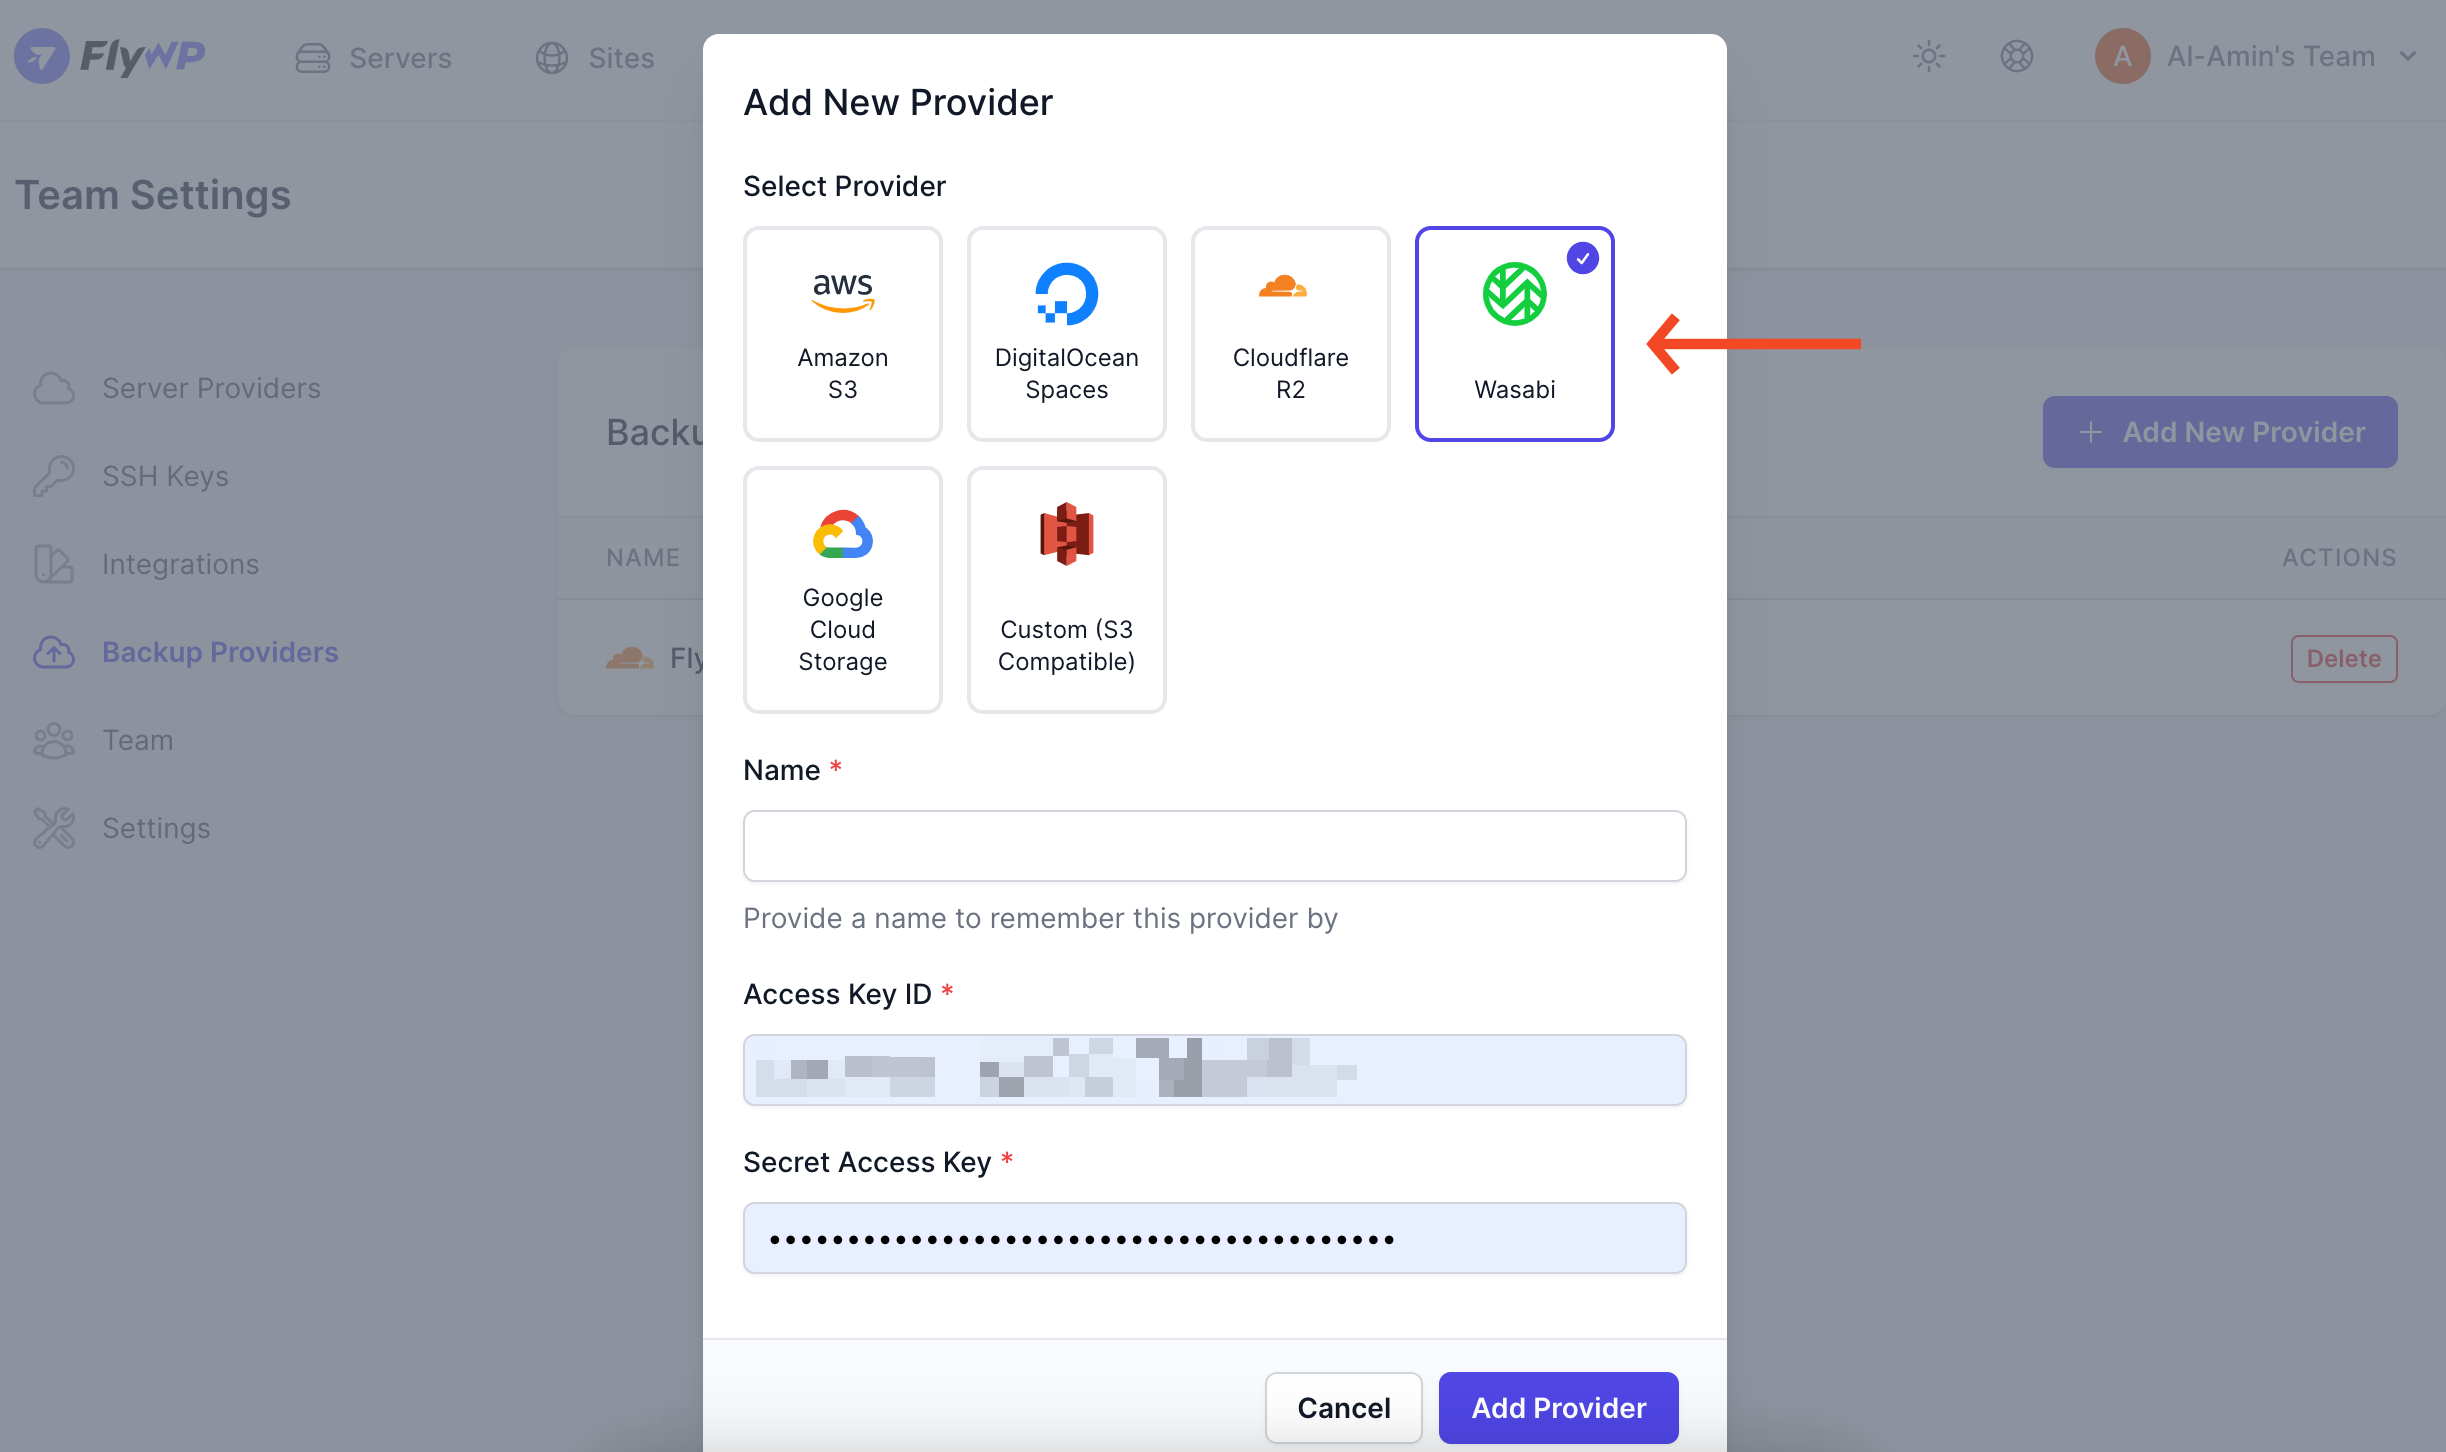
- Next, you’ll see the providers list here. Select “Wasabi” and you will need to provide information like you name, access key, and secret key. For that visit Wasabi’s console. After you create an account, you’ll get a 30-day trial period.
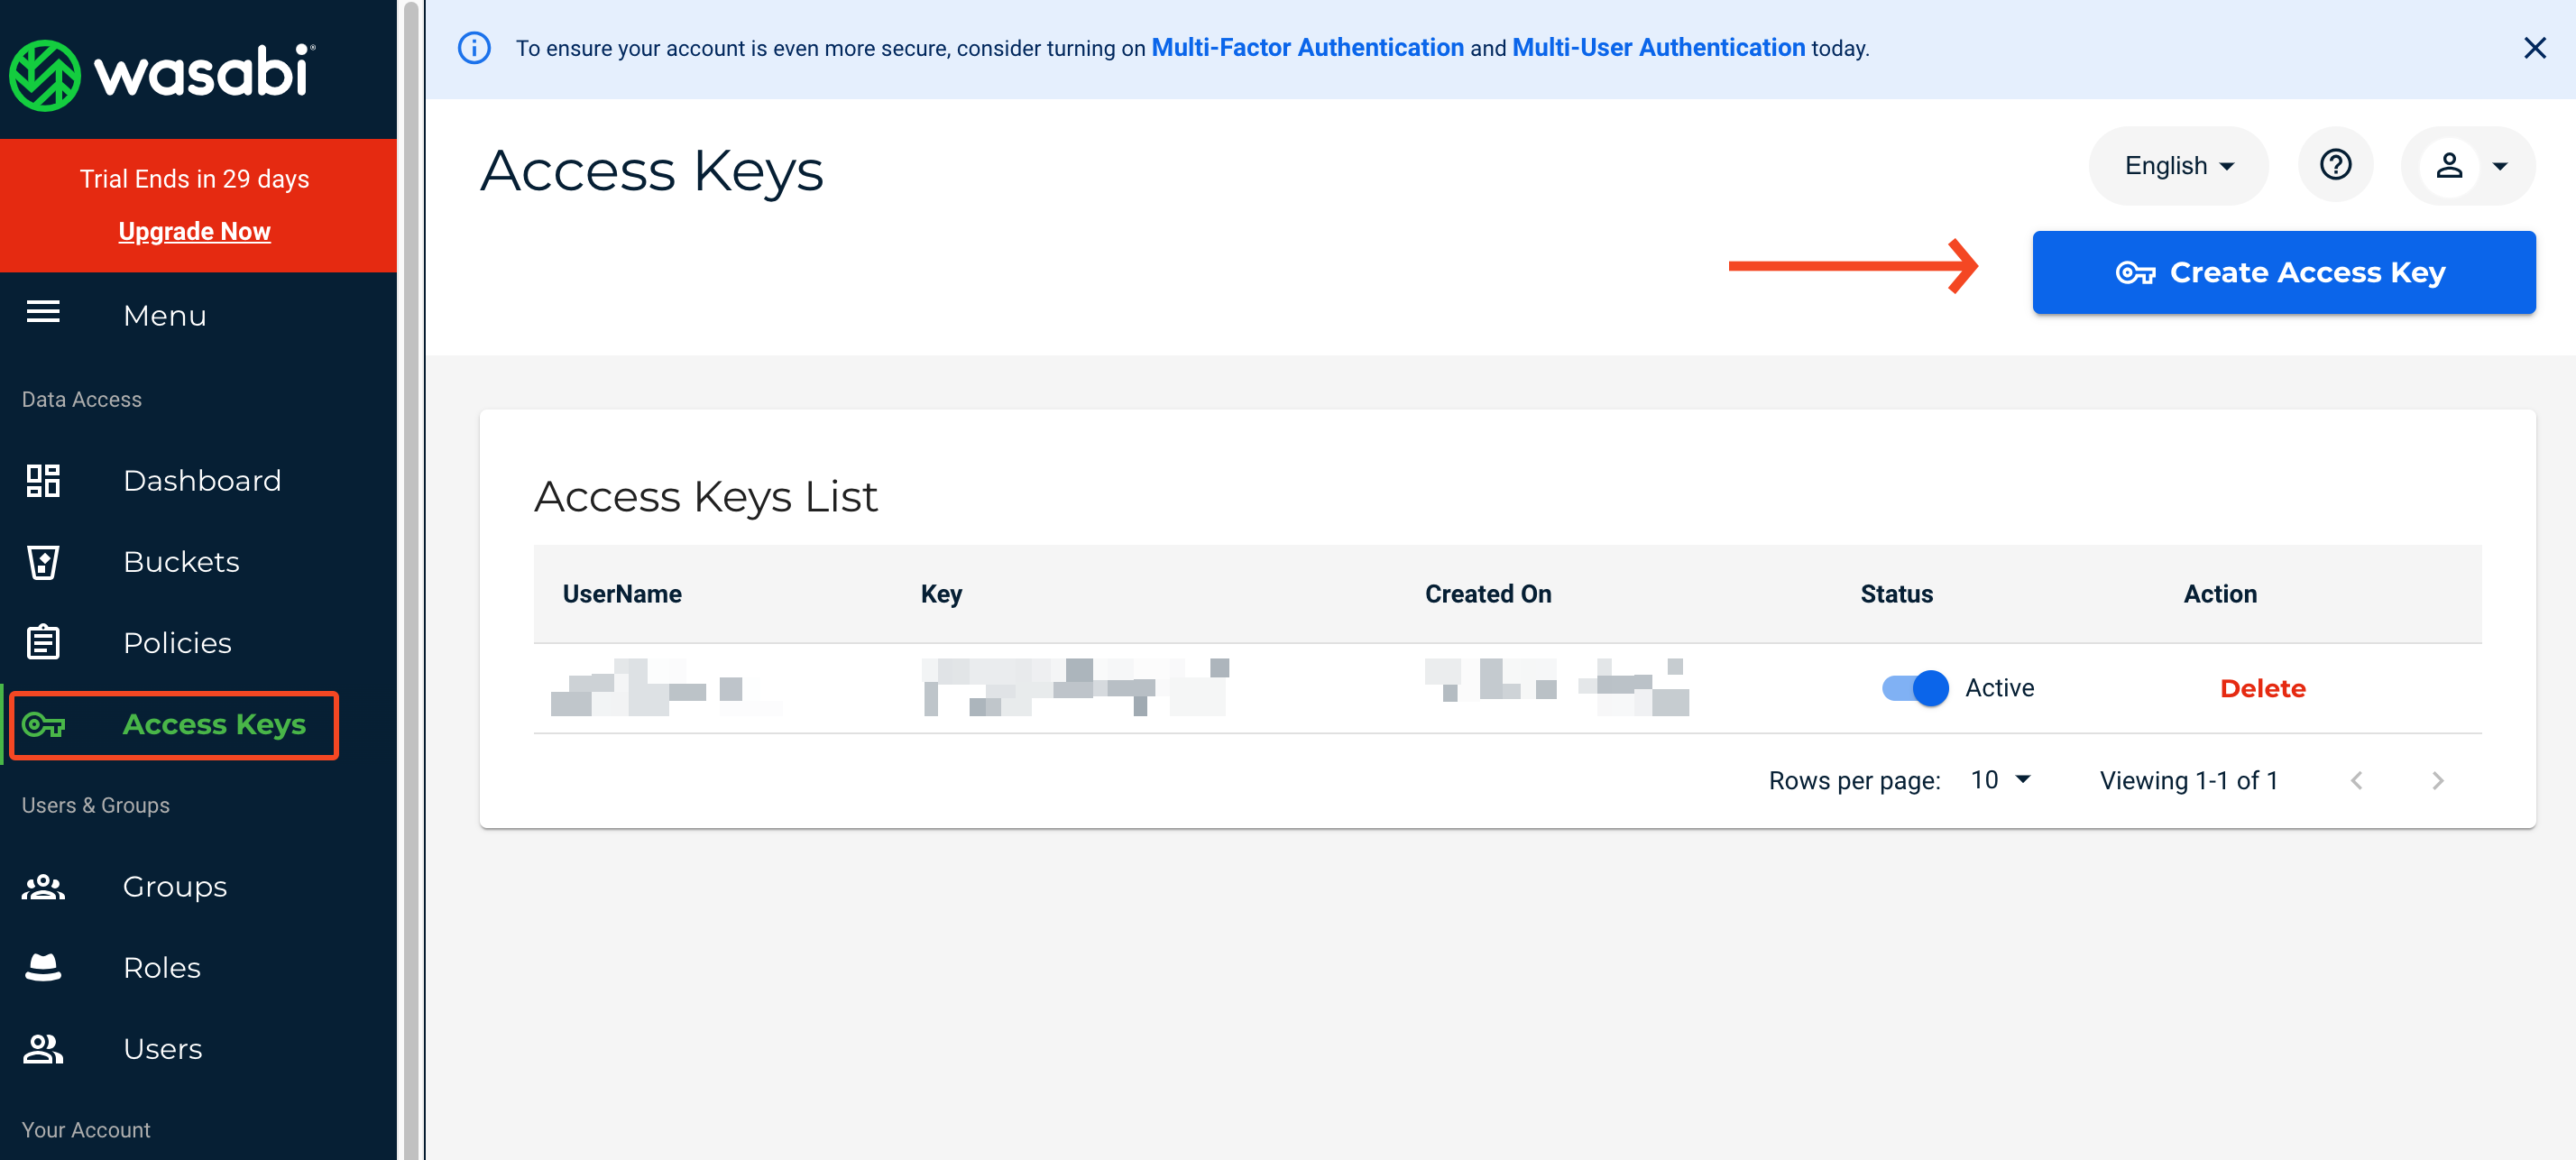
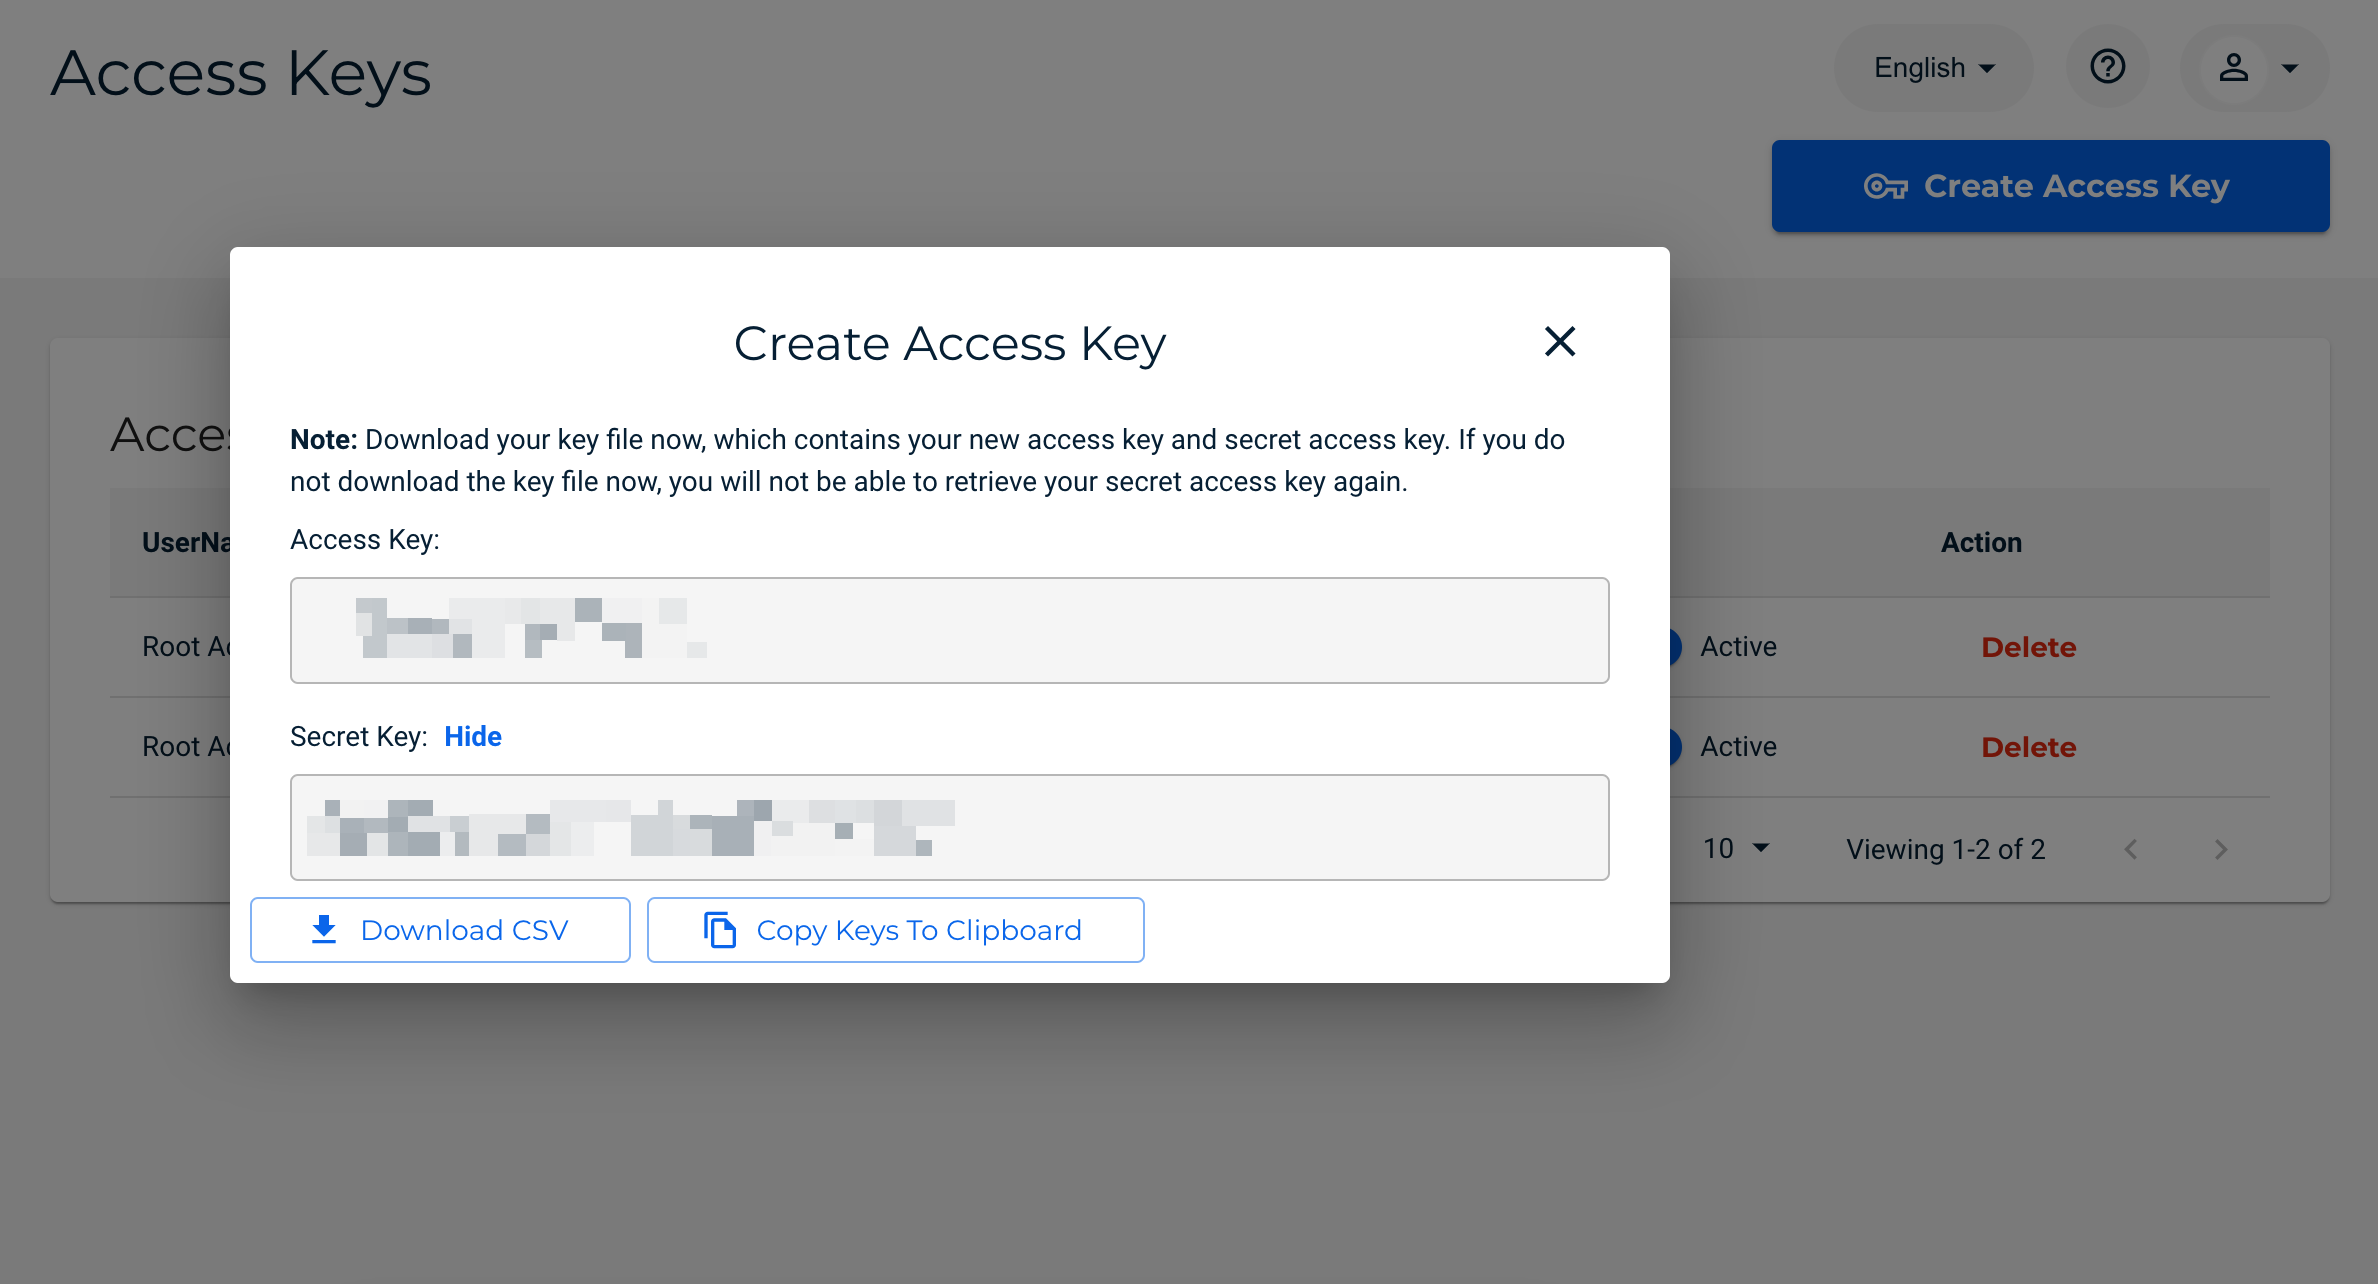
- On the dashboard, navigate to the “access keys” button and then click on the “create access key“.
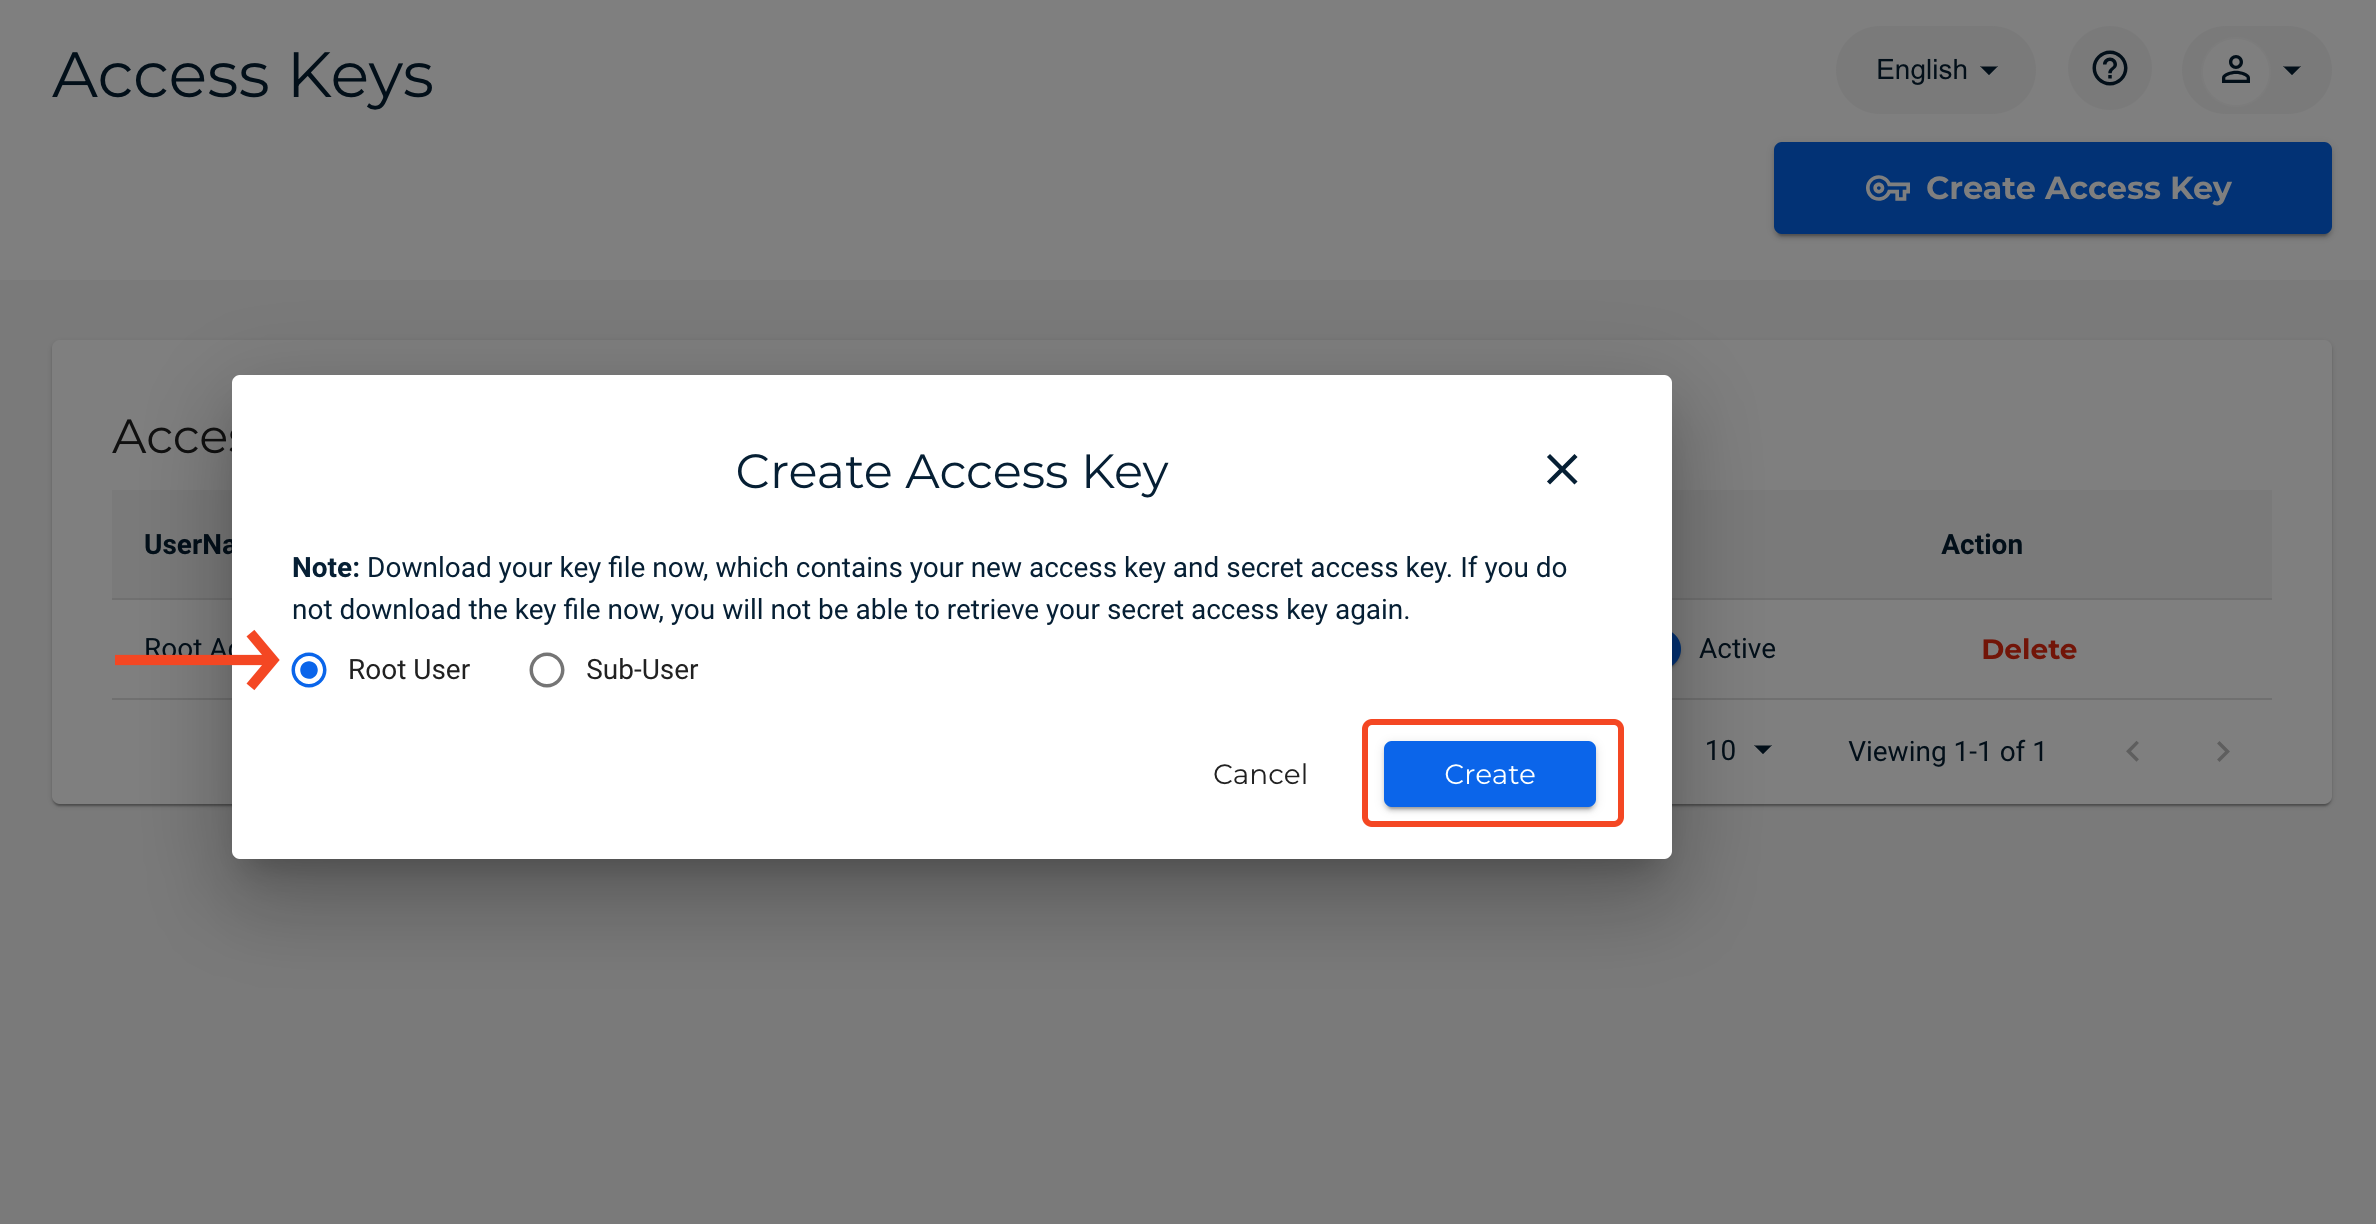
- Now select “Root User” and then click on the “Create” button.
- Here you go, you’ll find the access and secret keys. Just copy them and paste them into the FlyWP backup provider window.
- Now paste the credentials here. And then click on the “Add Provider” button.
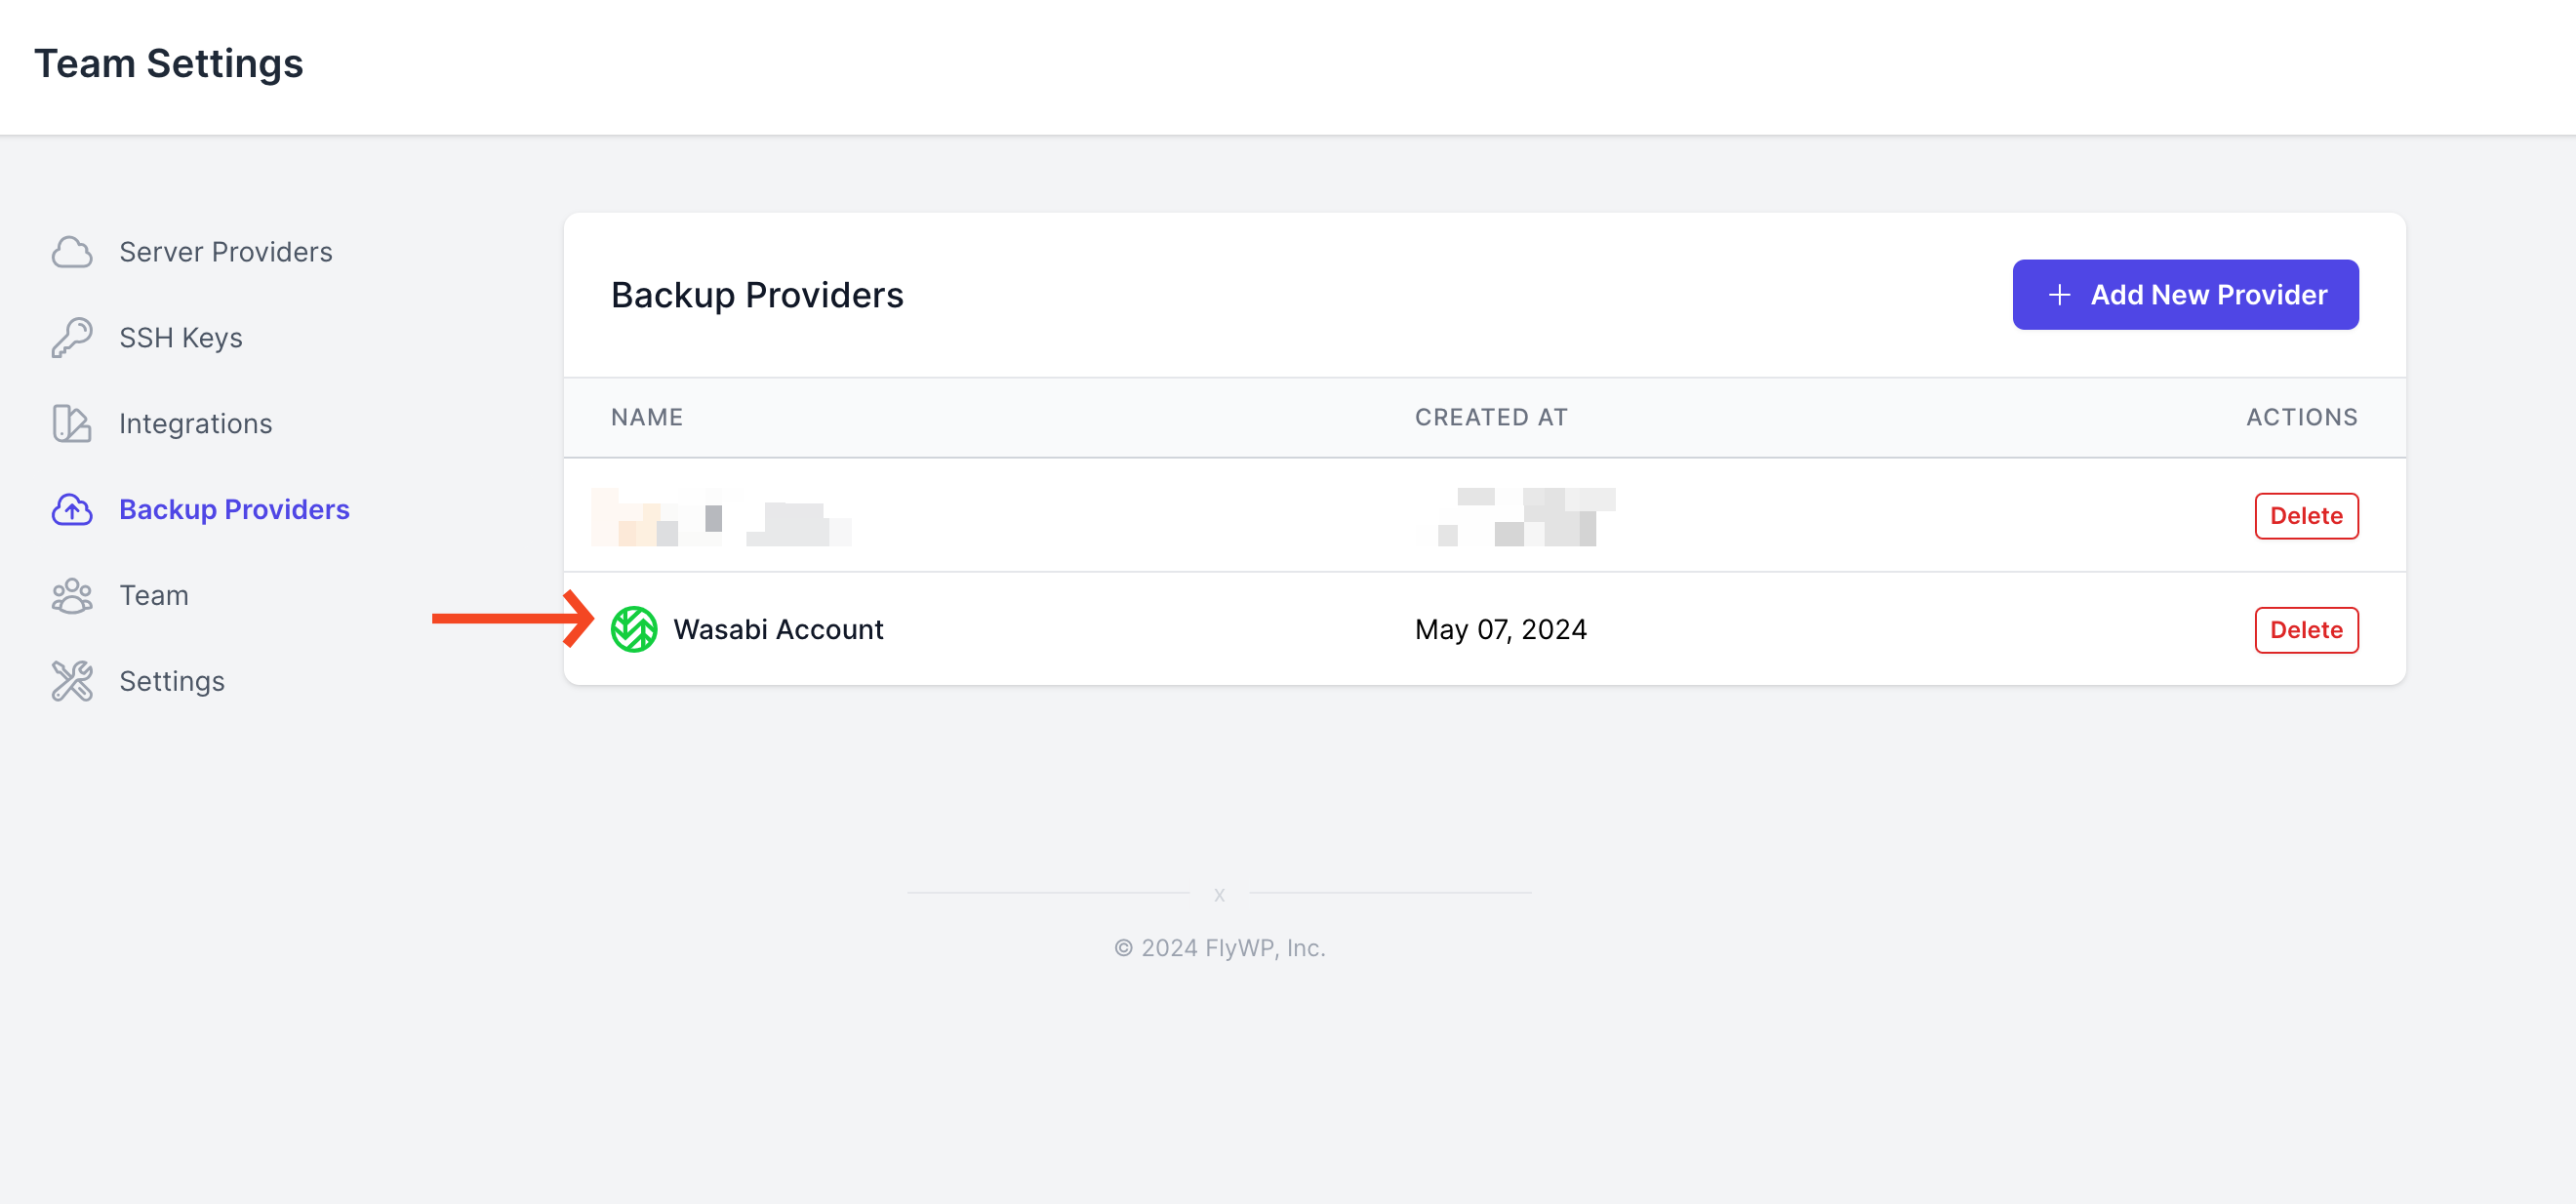
- Your backup provider will be added here
Step three: website backup configuration
Now before you create a backup, you need to enable an important option for a successful backup process. Yes, you need to create a bucket. For that, click on the “buckets” on the Wasabi’s dashboard and then fill in the blank pages.
- Bucket name
- Region
- And quick setup (optional)
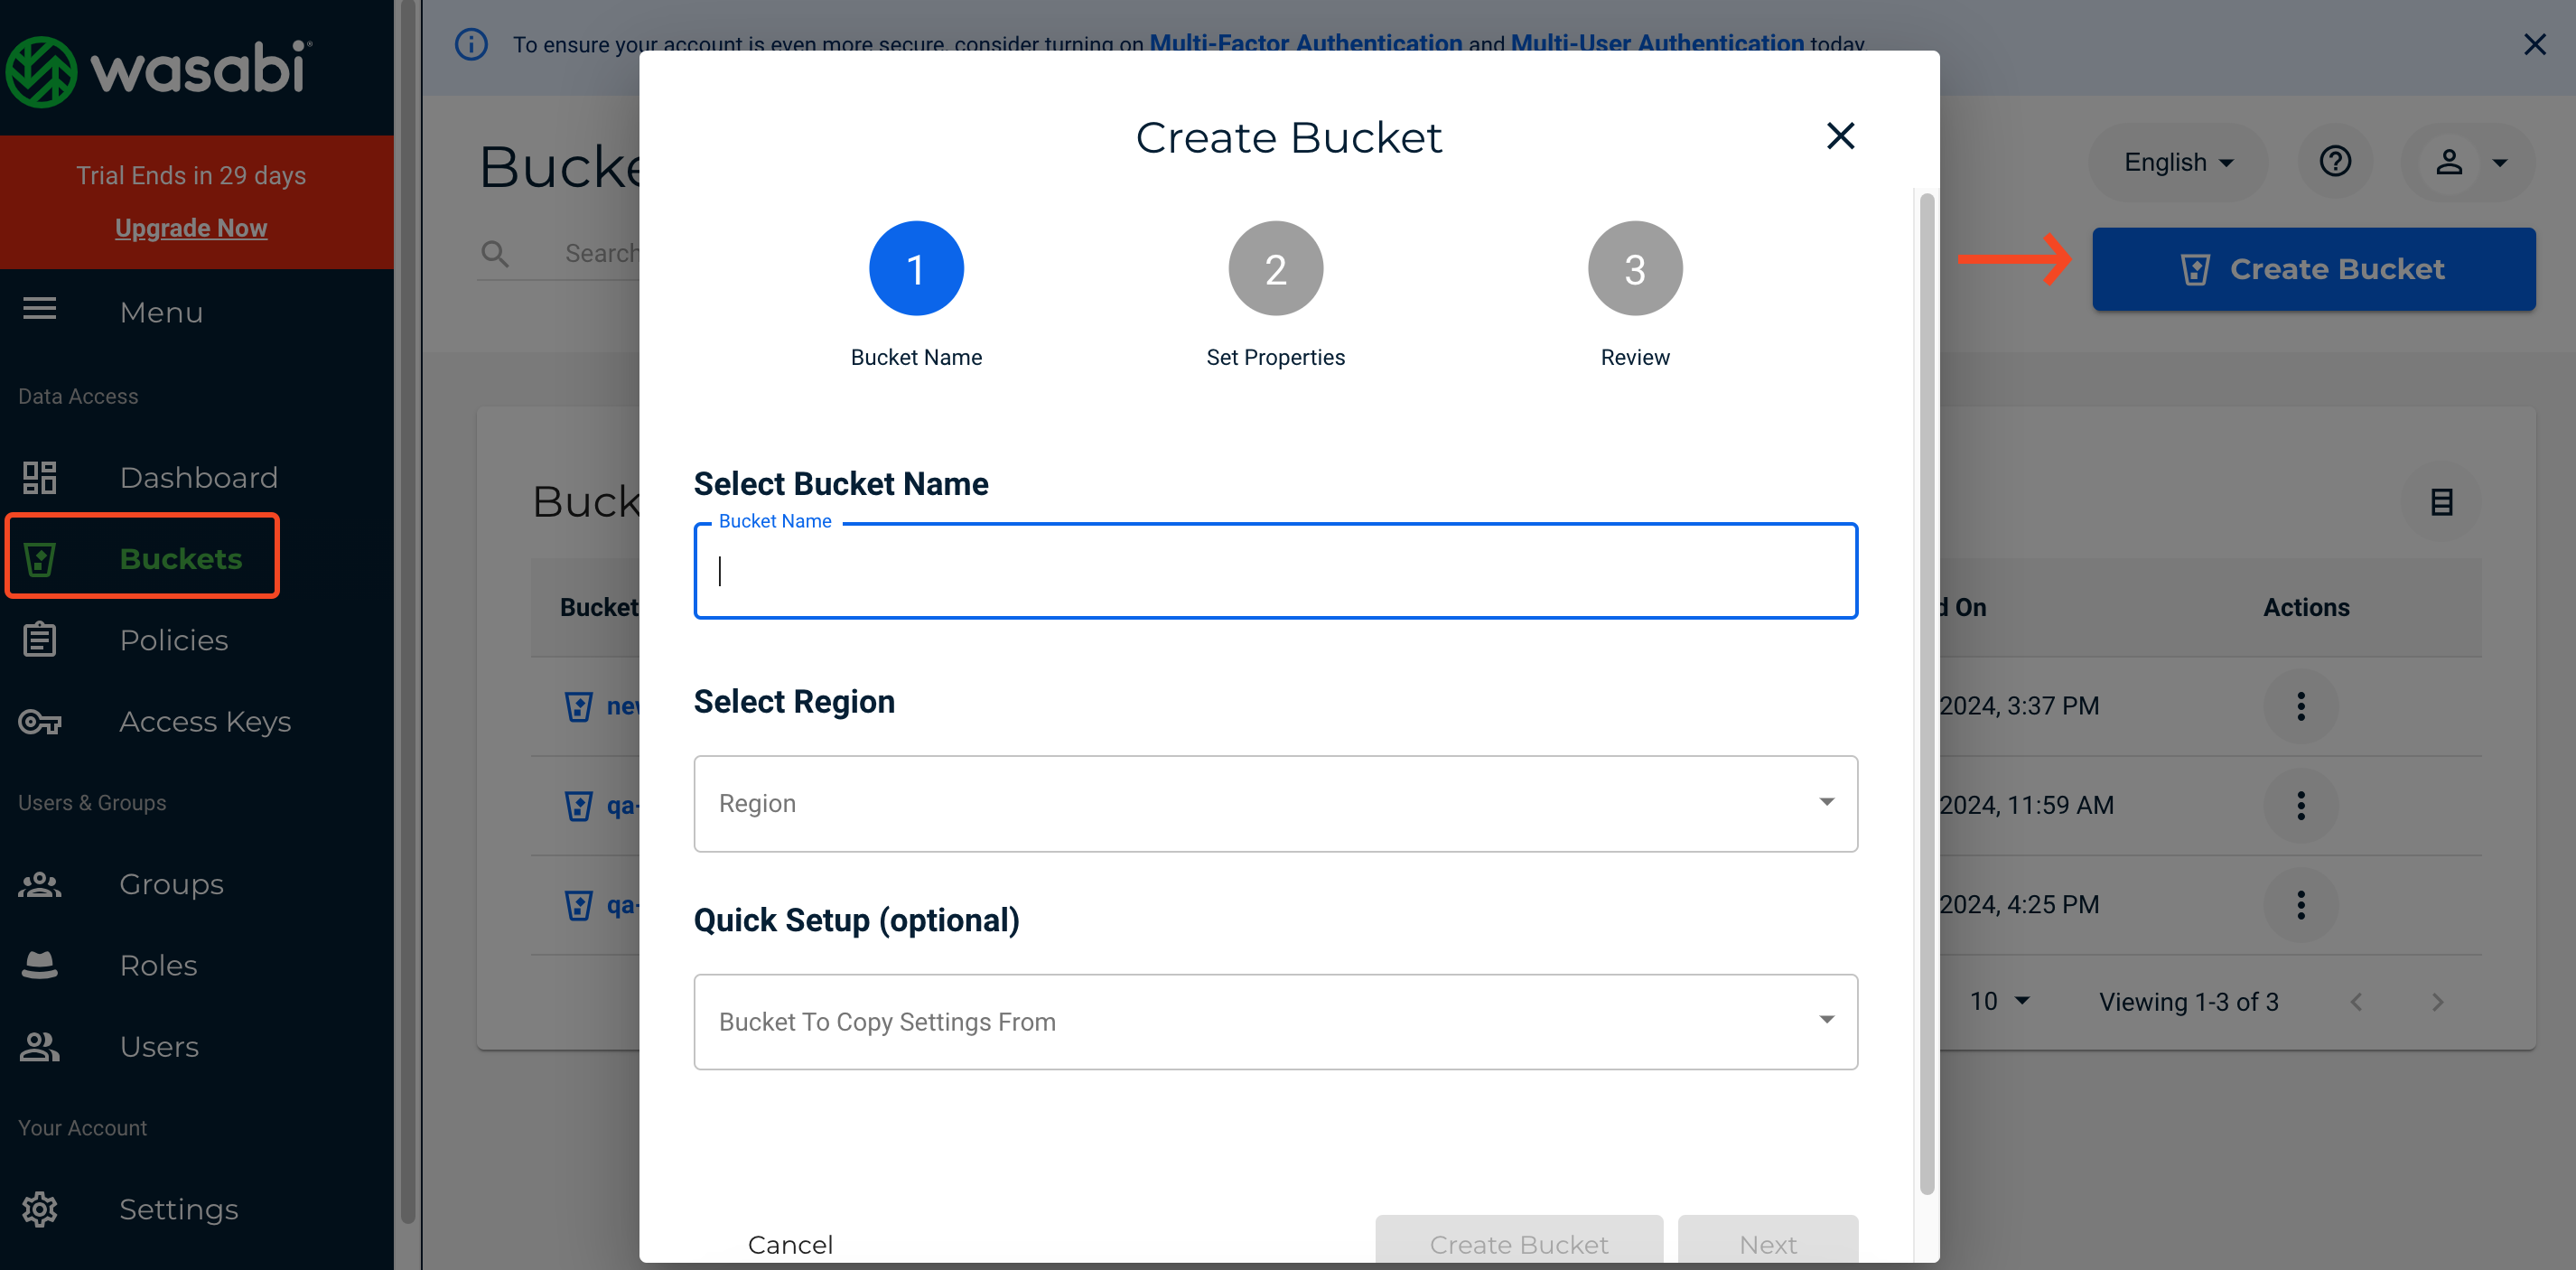
- Provide the information and remember the religion carefully. It will be needed.
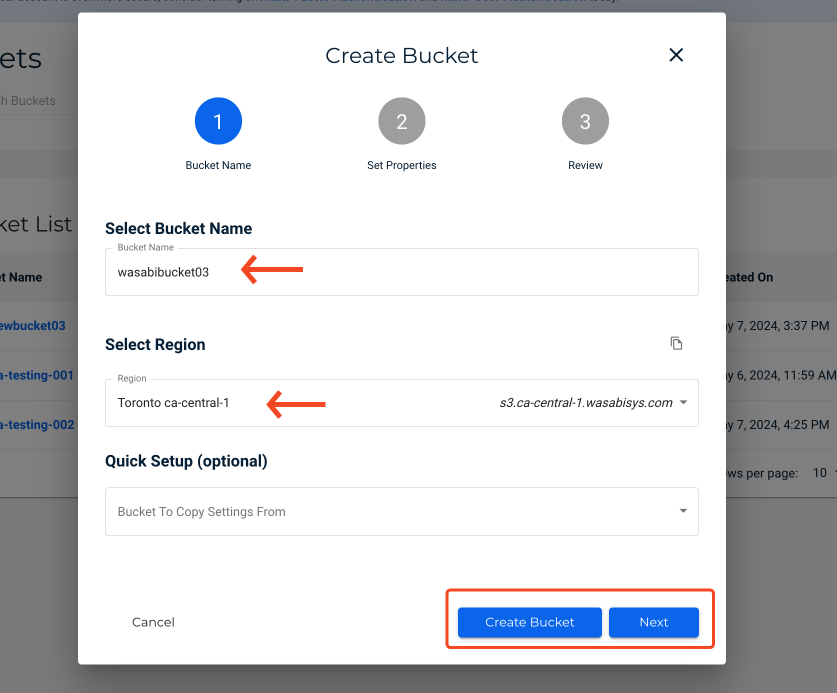
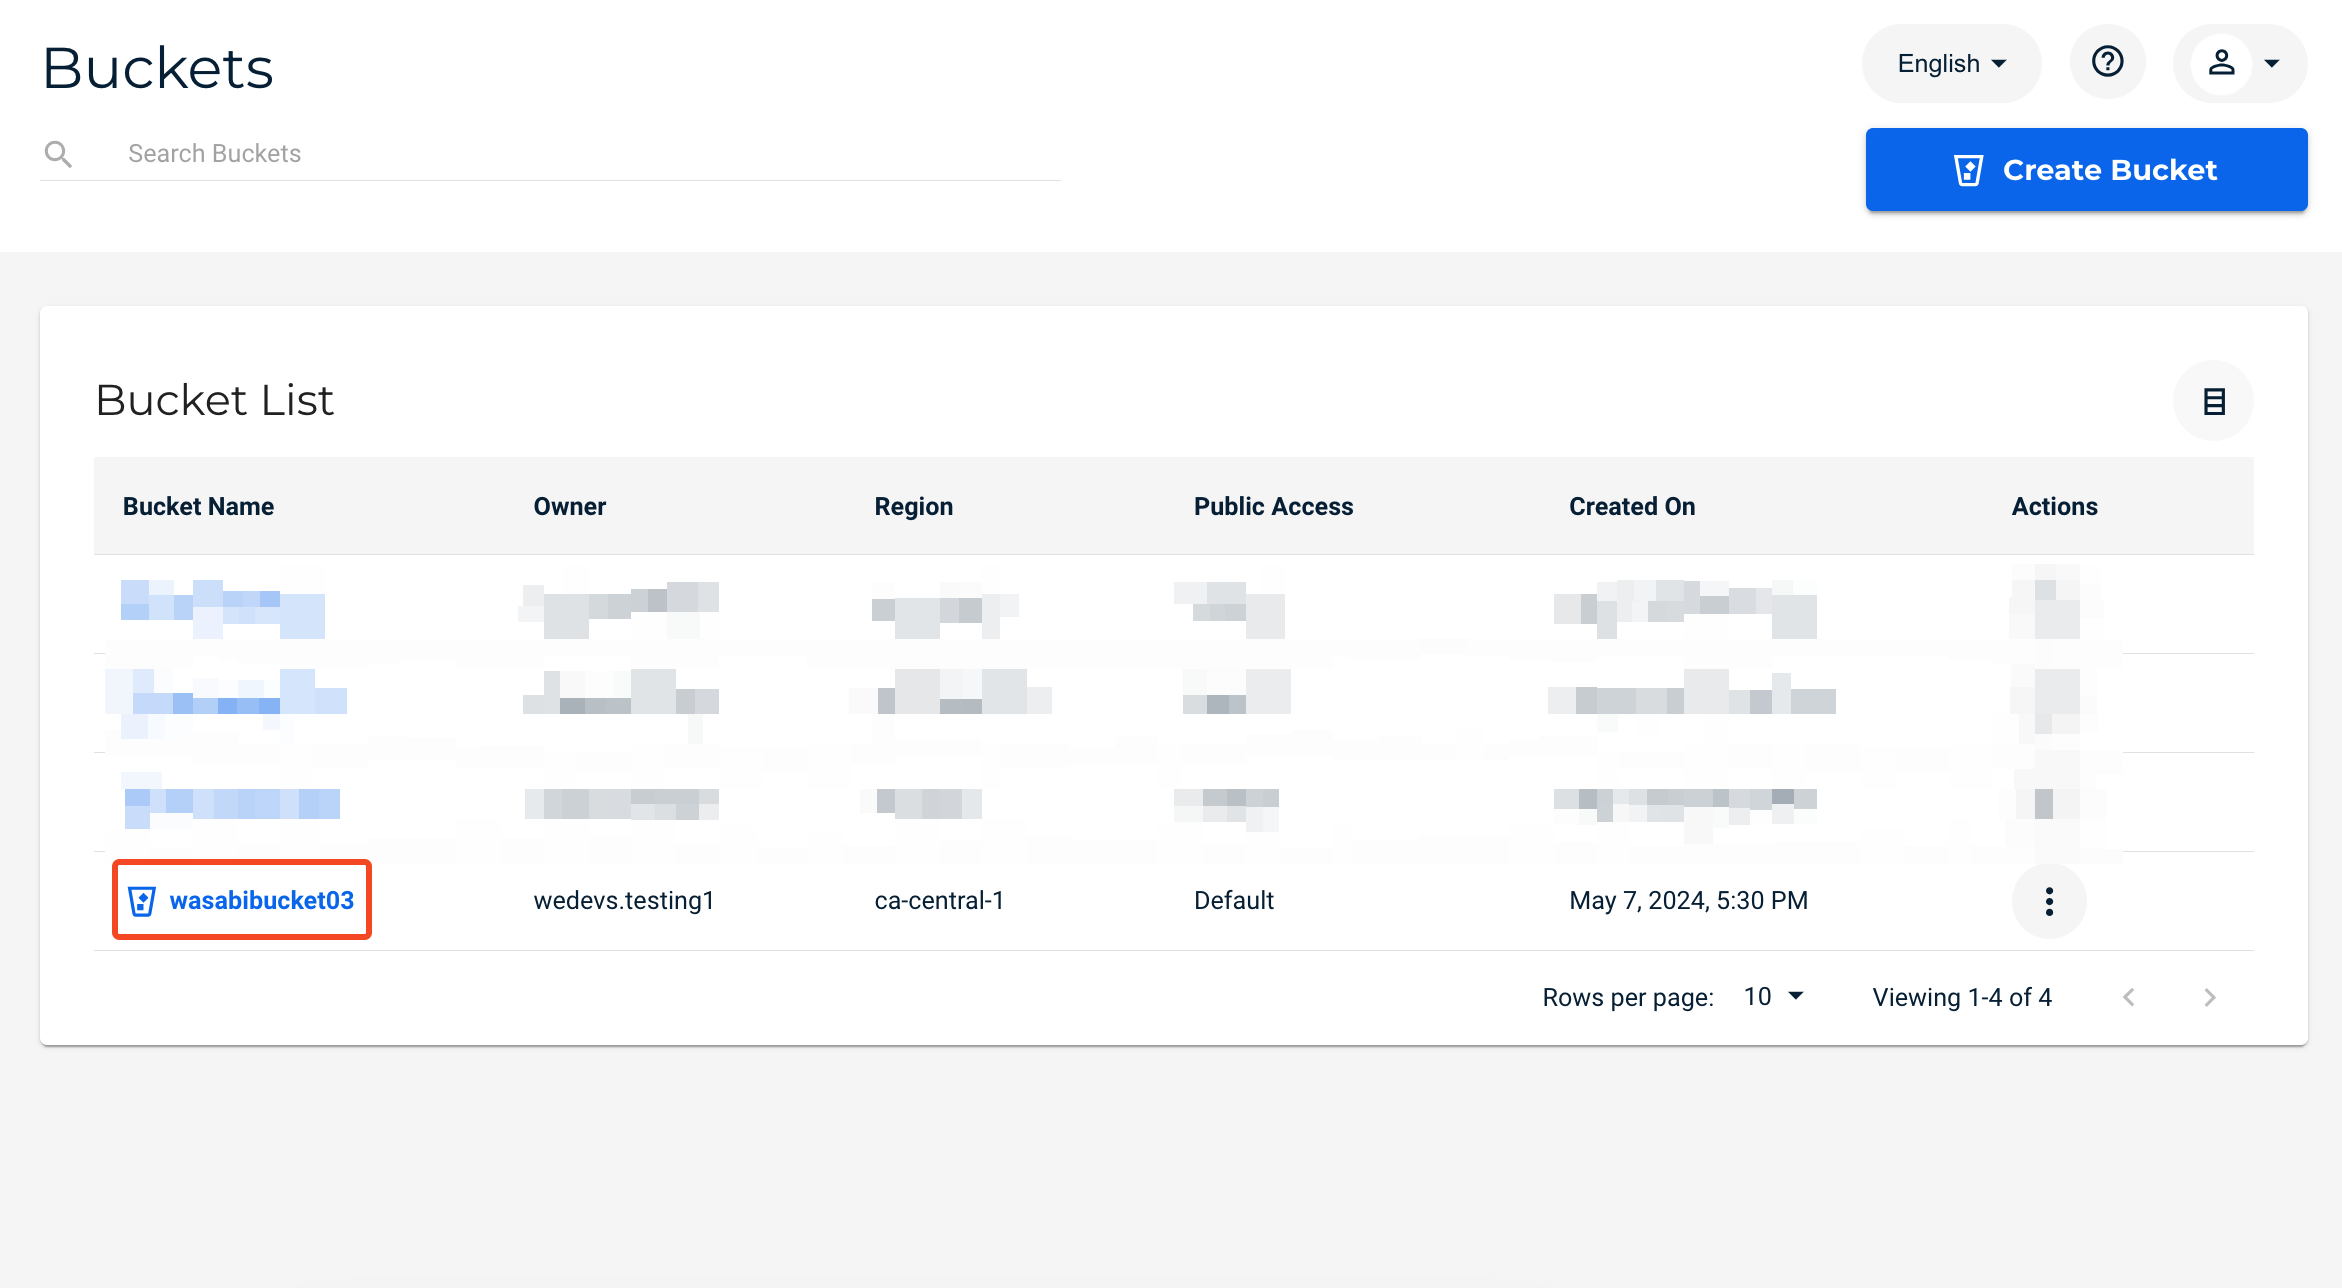
- Your bucket is being created.
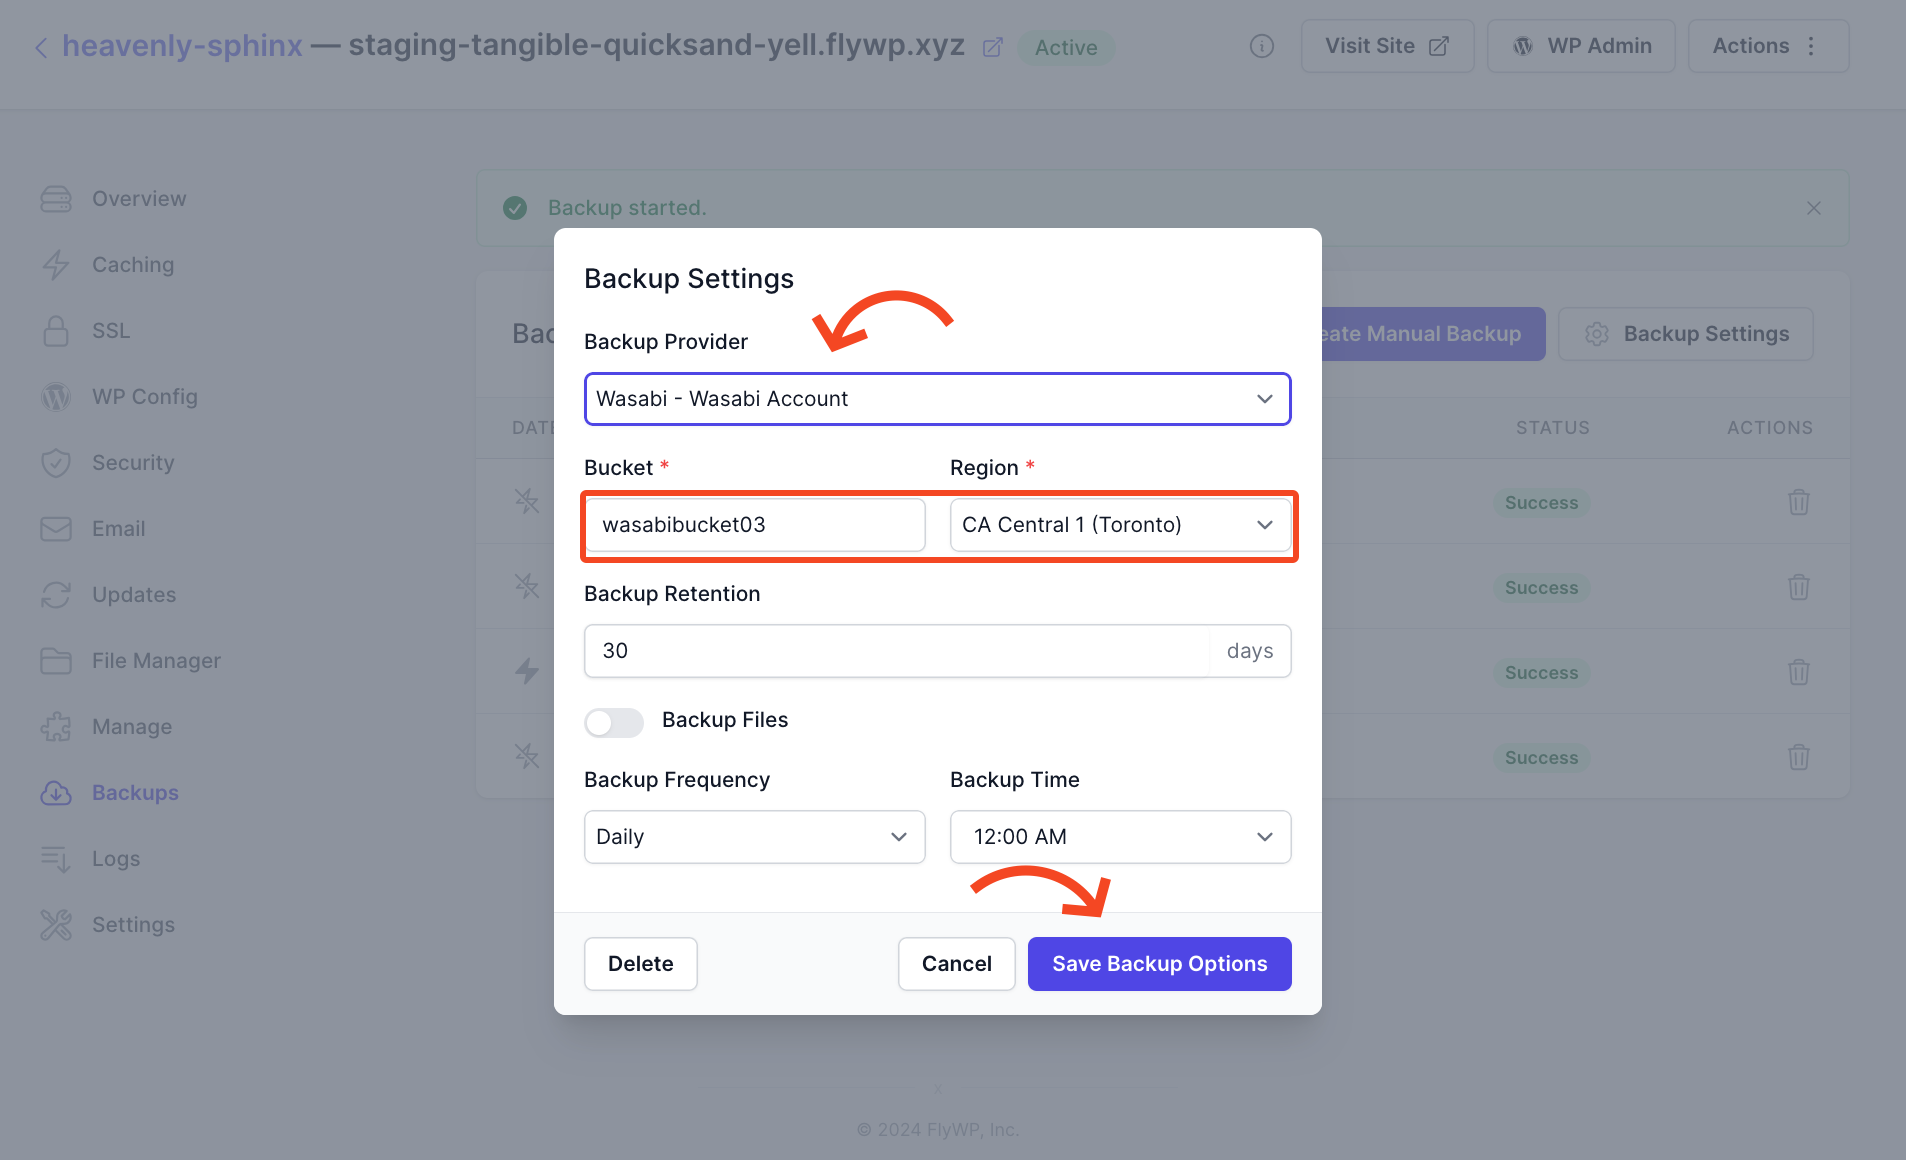
- Provide the information. Bucket name that we have created earlier and the region. So it will automatically create a backup daily at 12 am.
Please note: Make sure to match the bucket and region name where you created it on Wasabi. Otherwise, you’ll get an error
- Click on “create manual backup” if you want to see if everything is working fine or not.
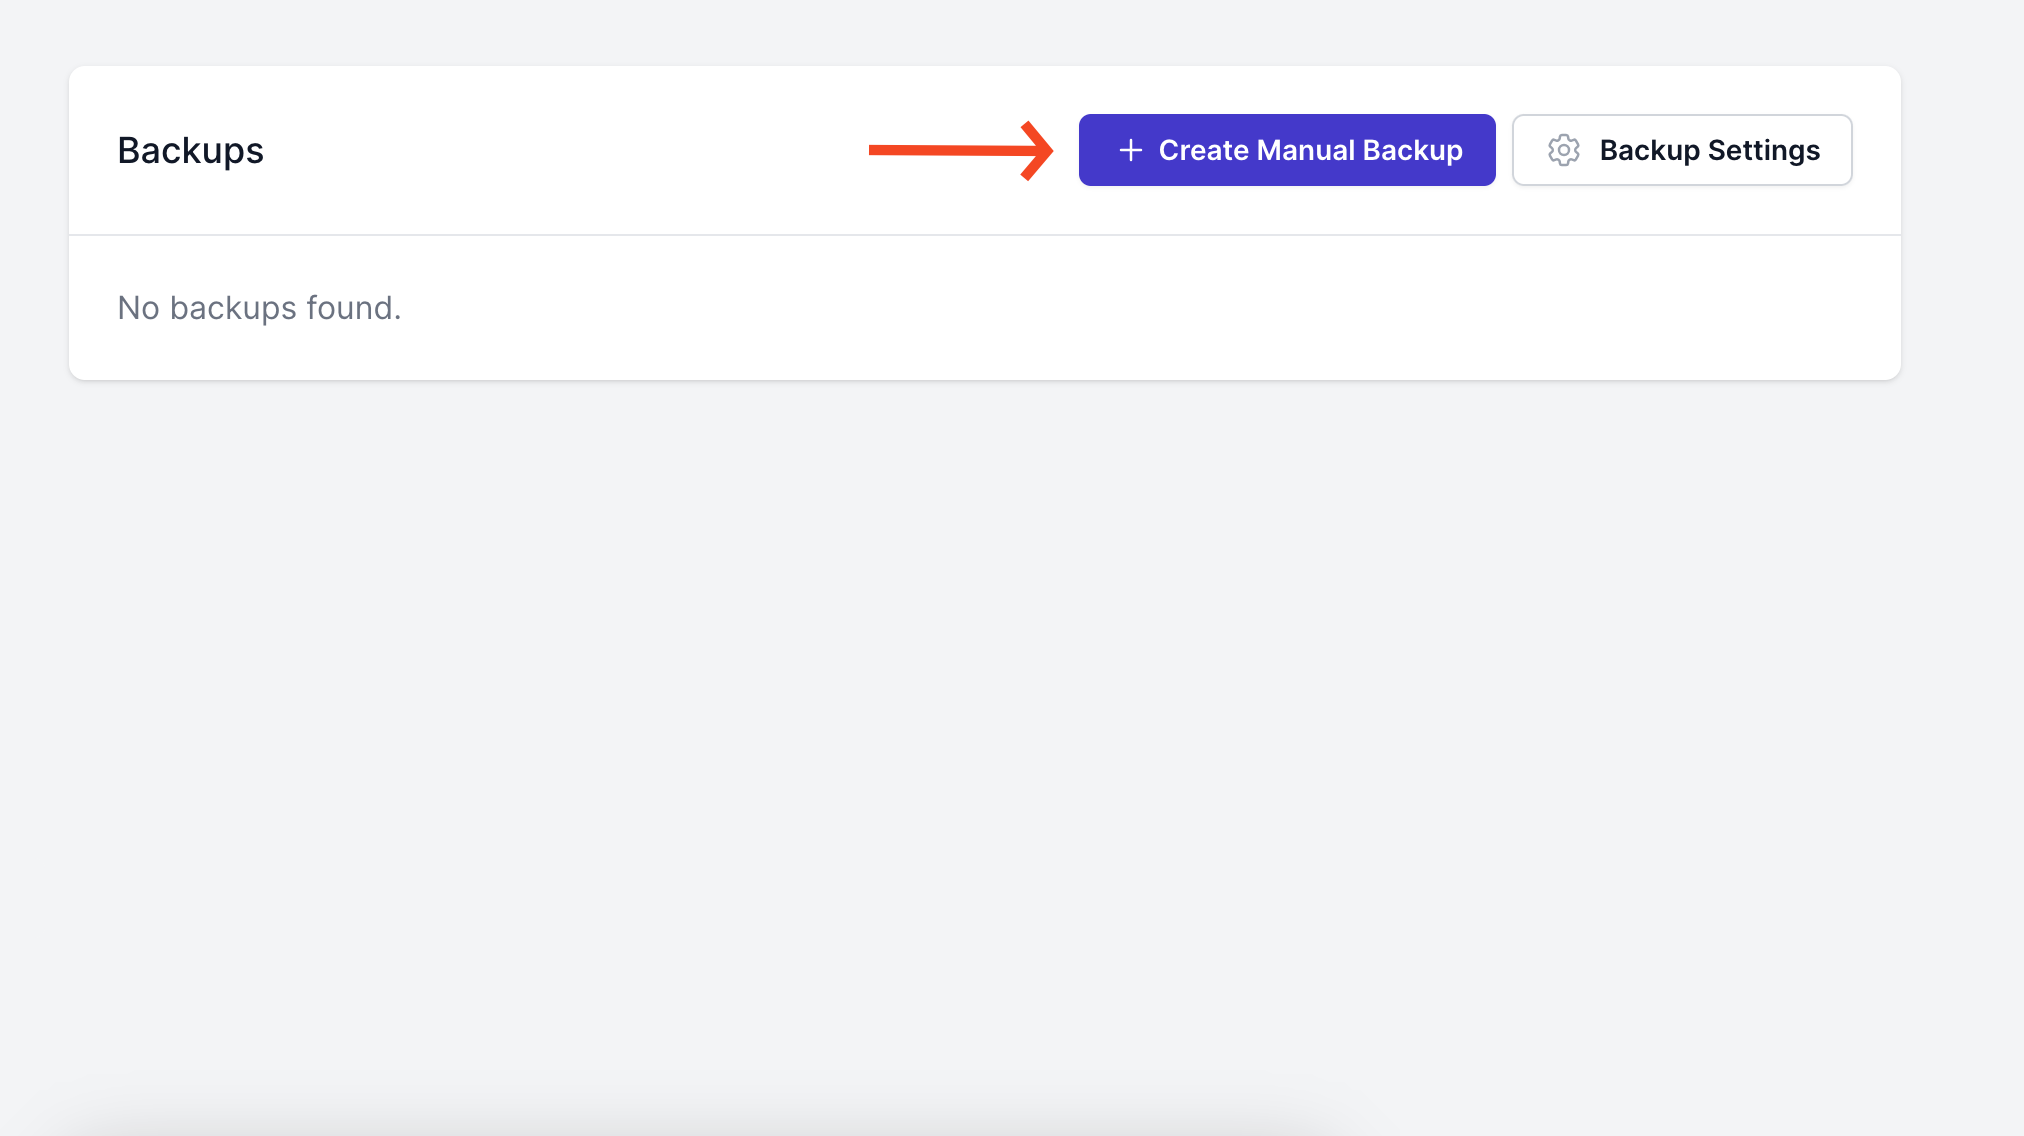
- Here, you can see the backup status. As you can see, it’s been created successfully.
- You can manually create a backup. For that, it won’t follow the regular backup frequency.
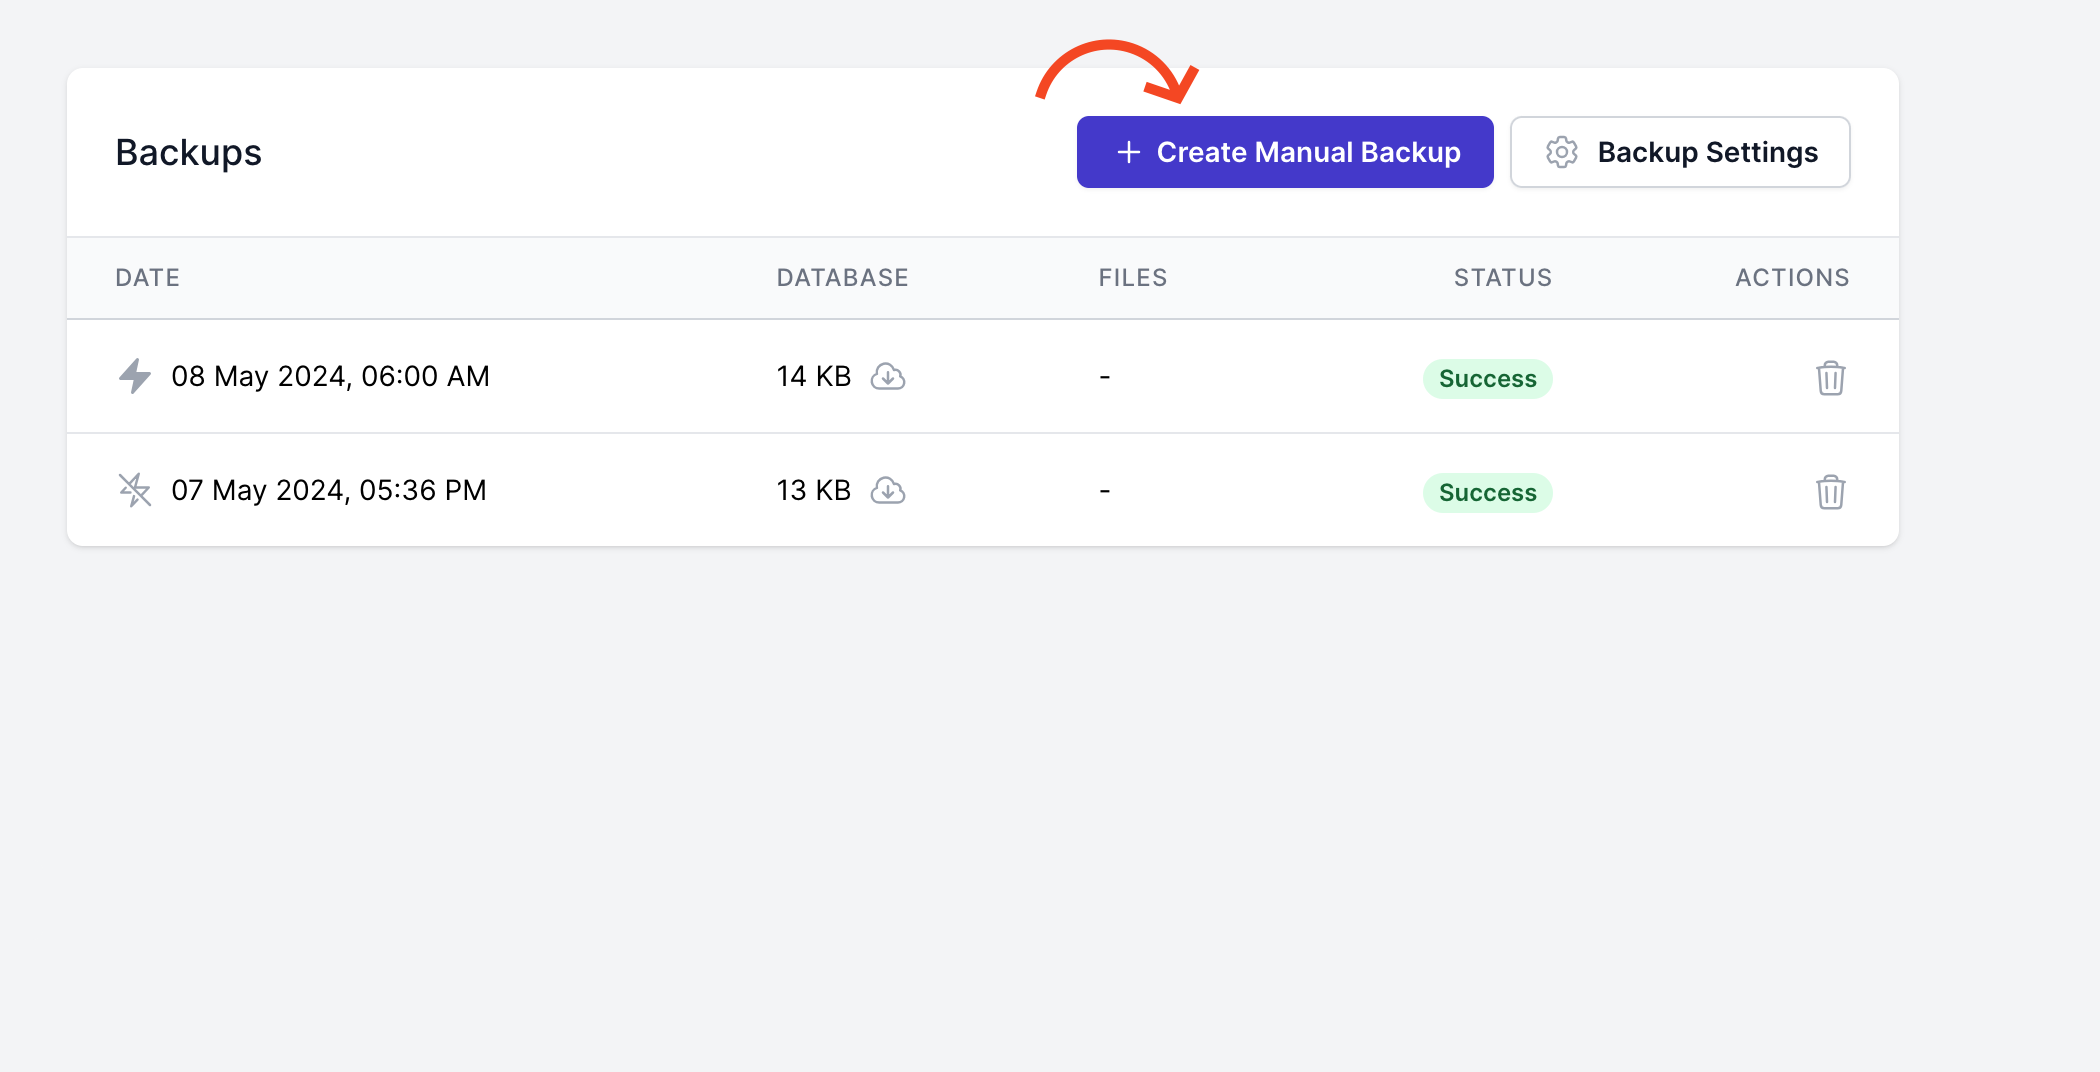
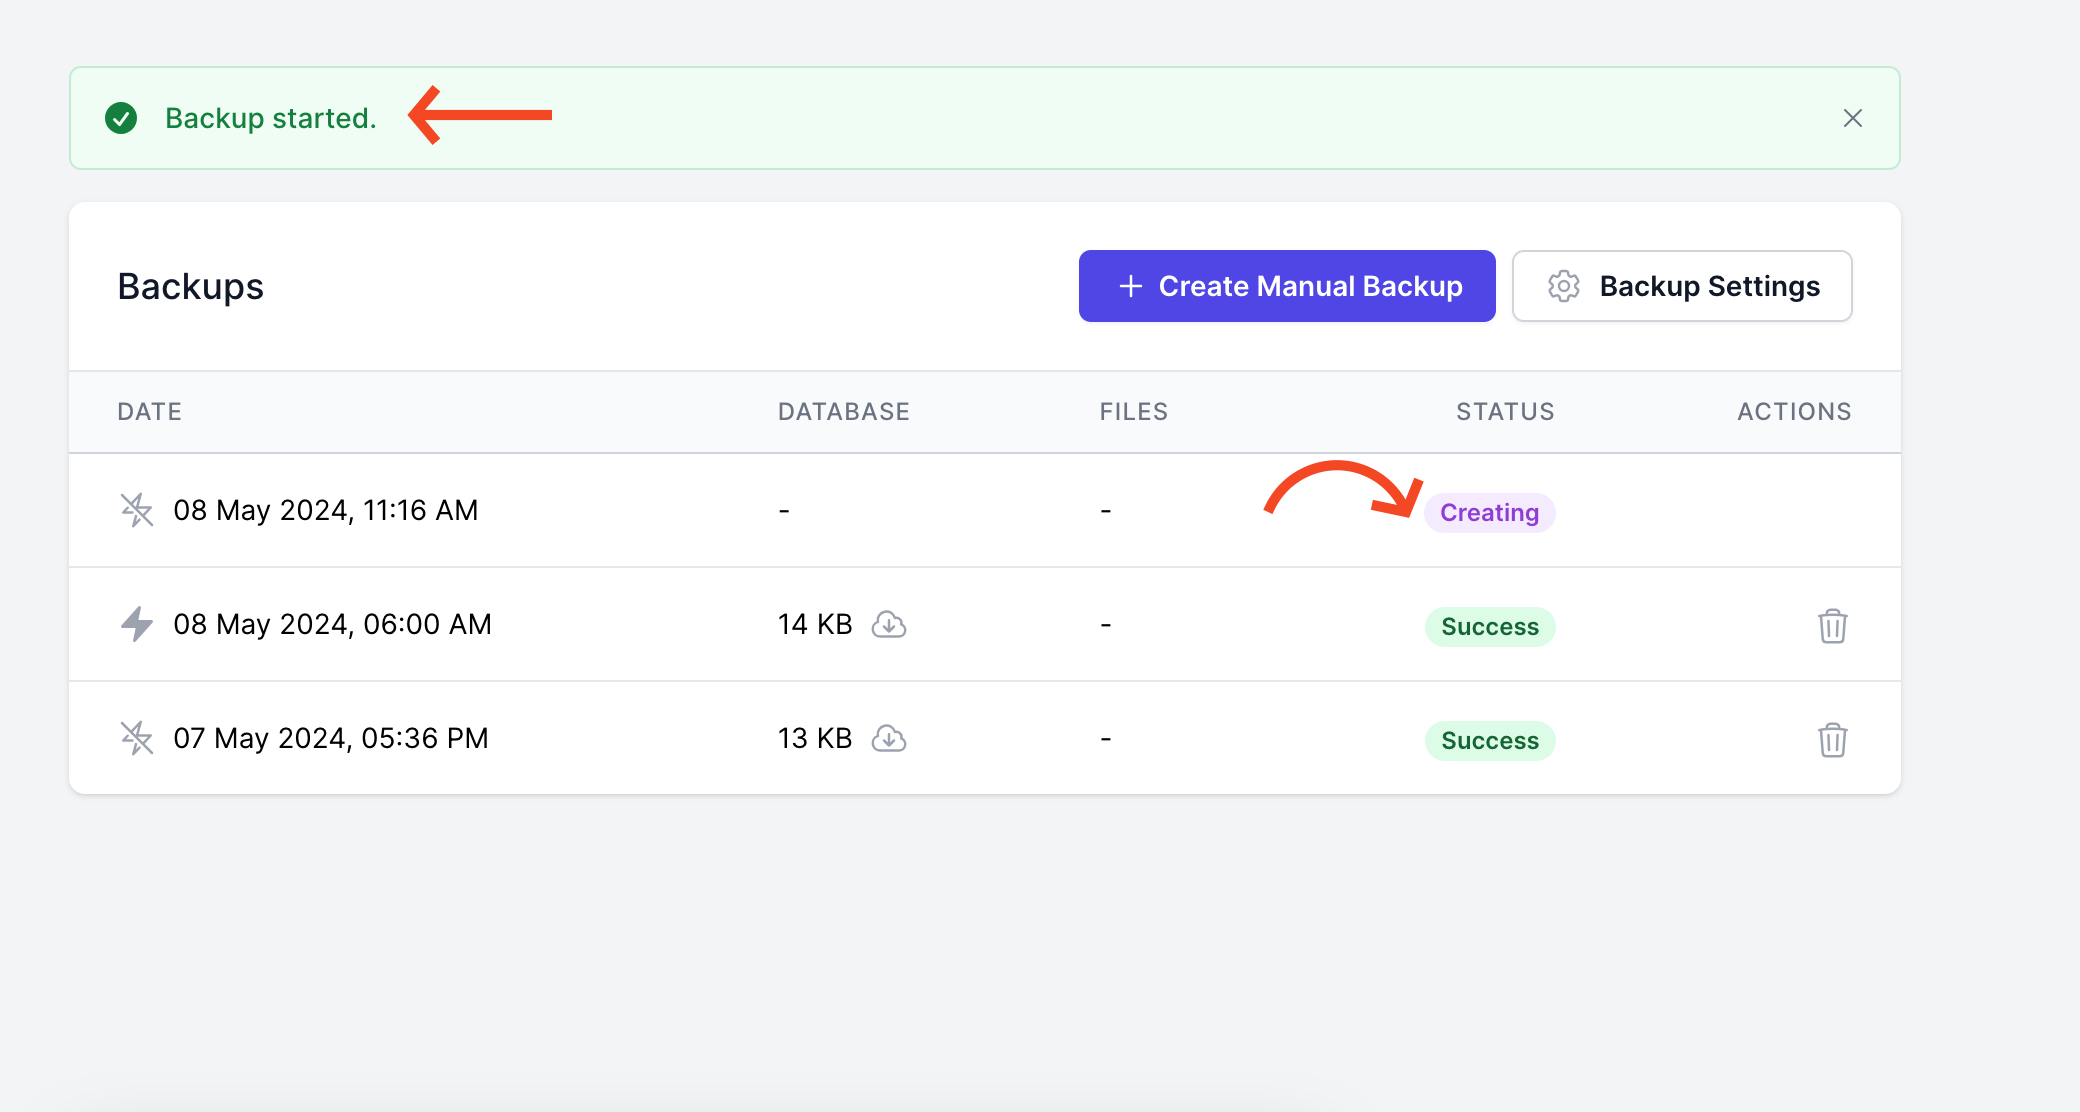
- Your backup is ready.
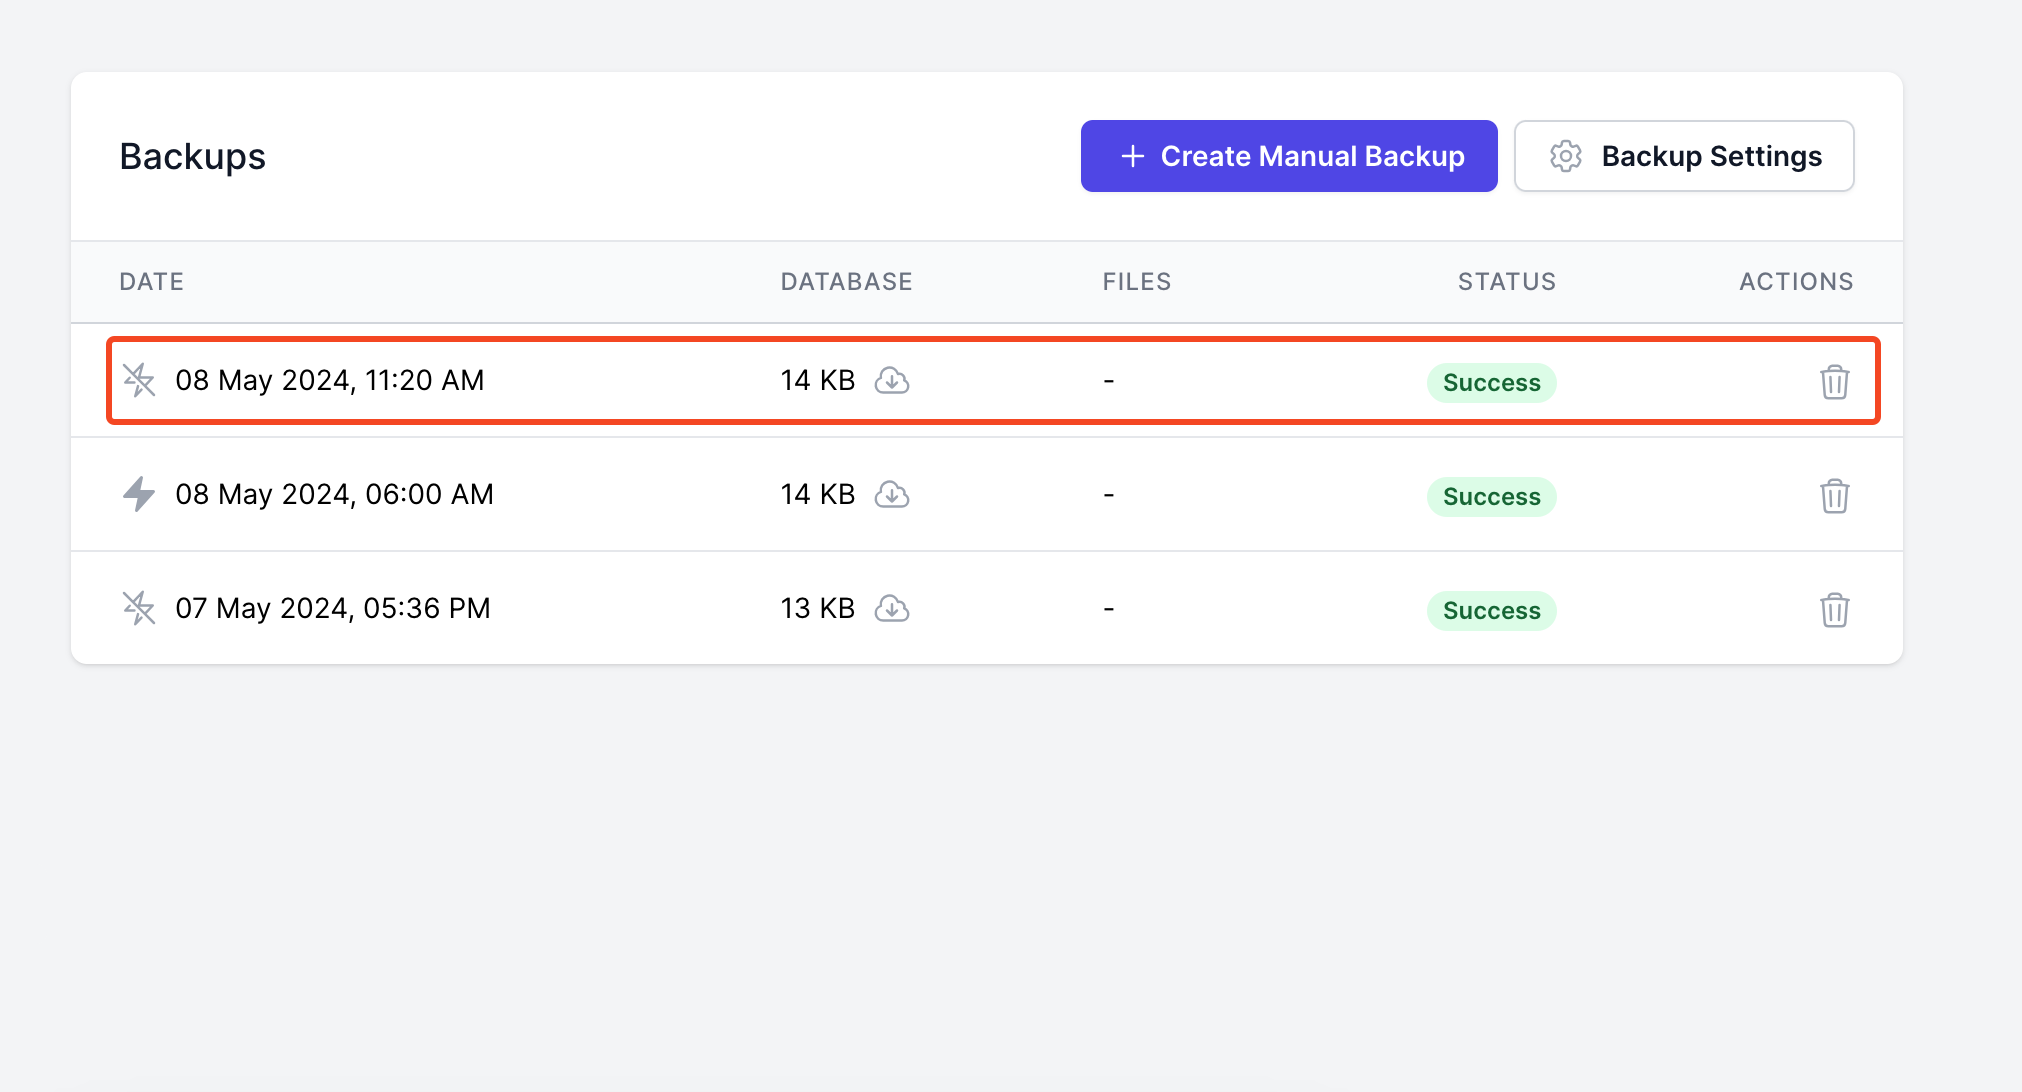
Now you can download the backup file and use it in the future. So this is how you can use Wasabi to create a backup of your WordPress site.
Get an overview of other backup providers. You can find them here.