FlyWP is a compact server management solution that lets you manage all your servers with a fingertip. Even if you want to migrate an existing site to a newer one, FlyWP will assist you in doing that swiftly.
In this documentation, we’re going to show you how to easily migrate from an existing site to a new site using FlyWP.
Step one: Add server providers (Optional)
- The first step that you need to take is adding server providers. Here’s a detailed guide that you can follow to learn how to add servers in FlyWP.
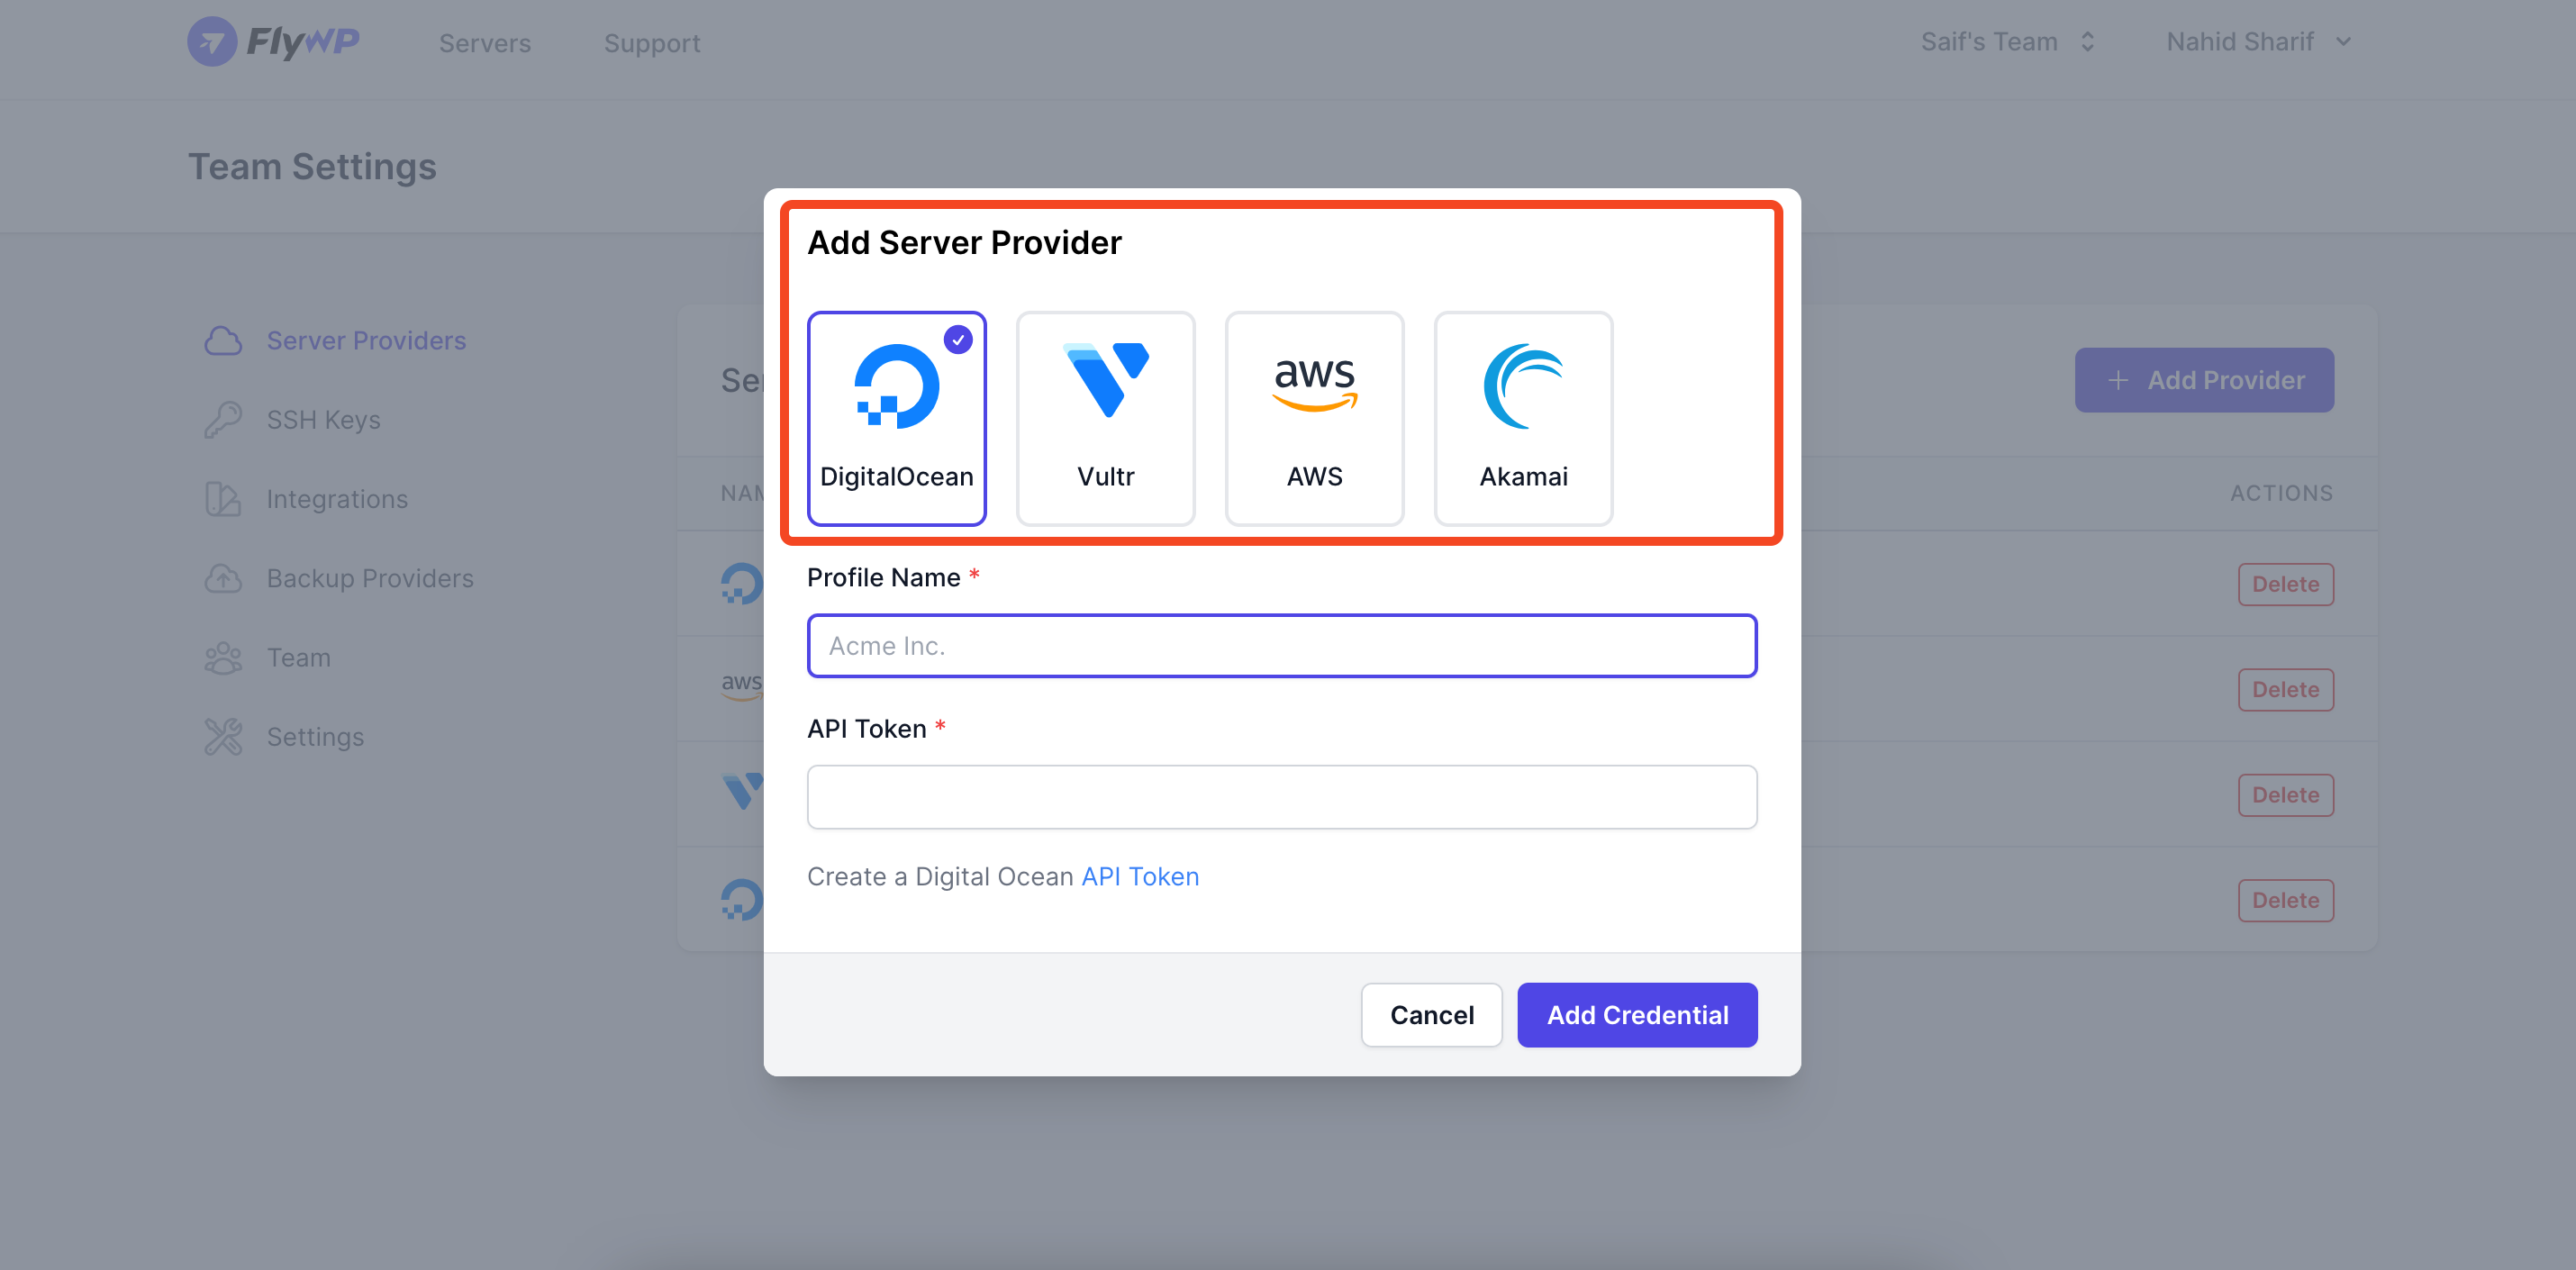
In FlyWP, you can add some of the popular server providers like DigitalOcean, Vultr, Akamai, and AWS EC2. Choose your preferred provider and complete the first step.
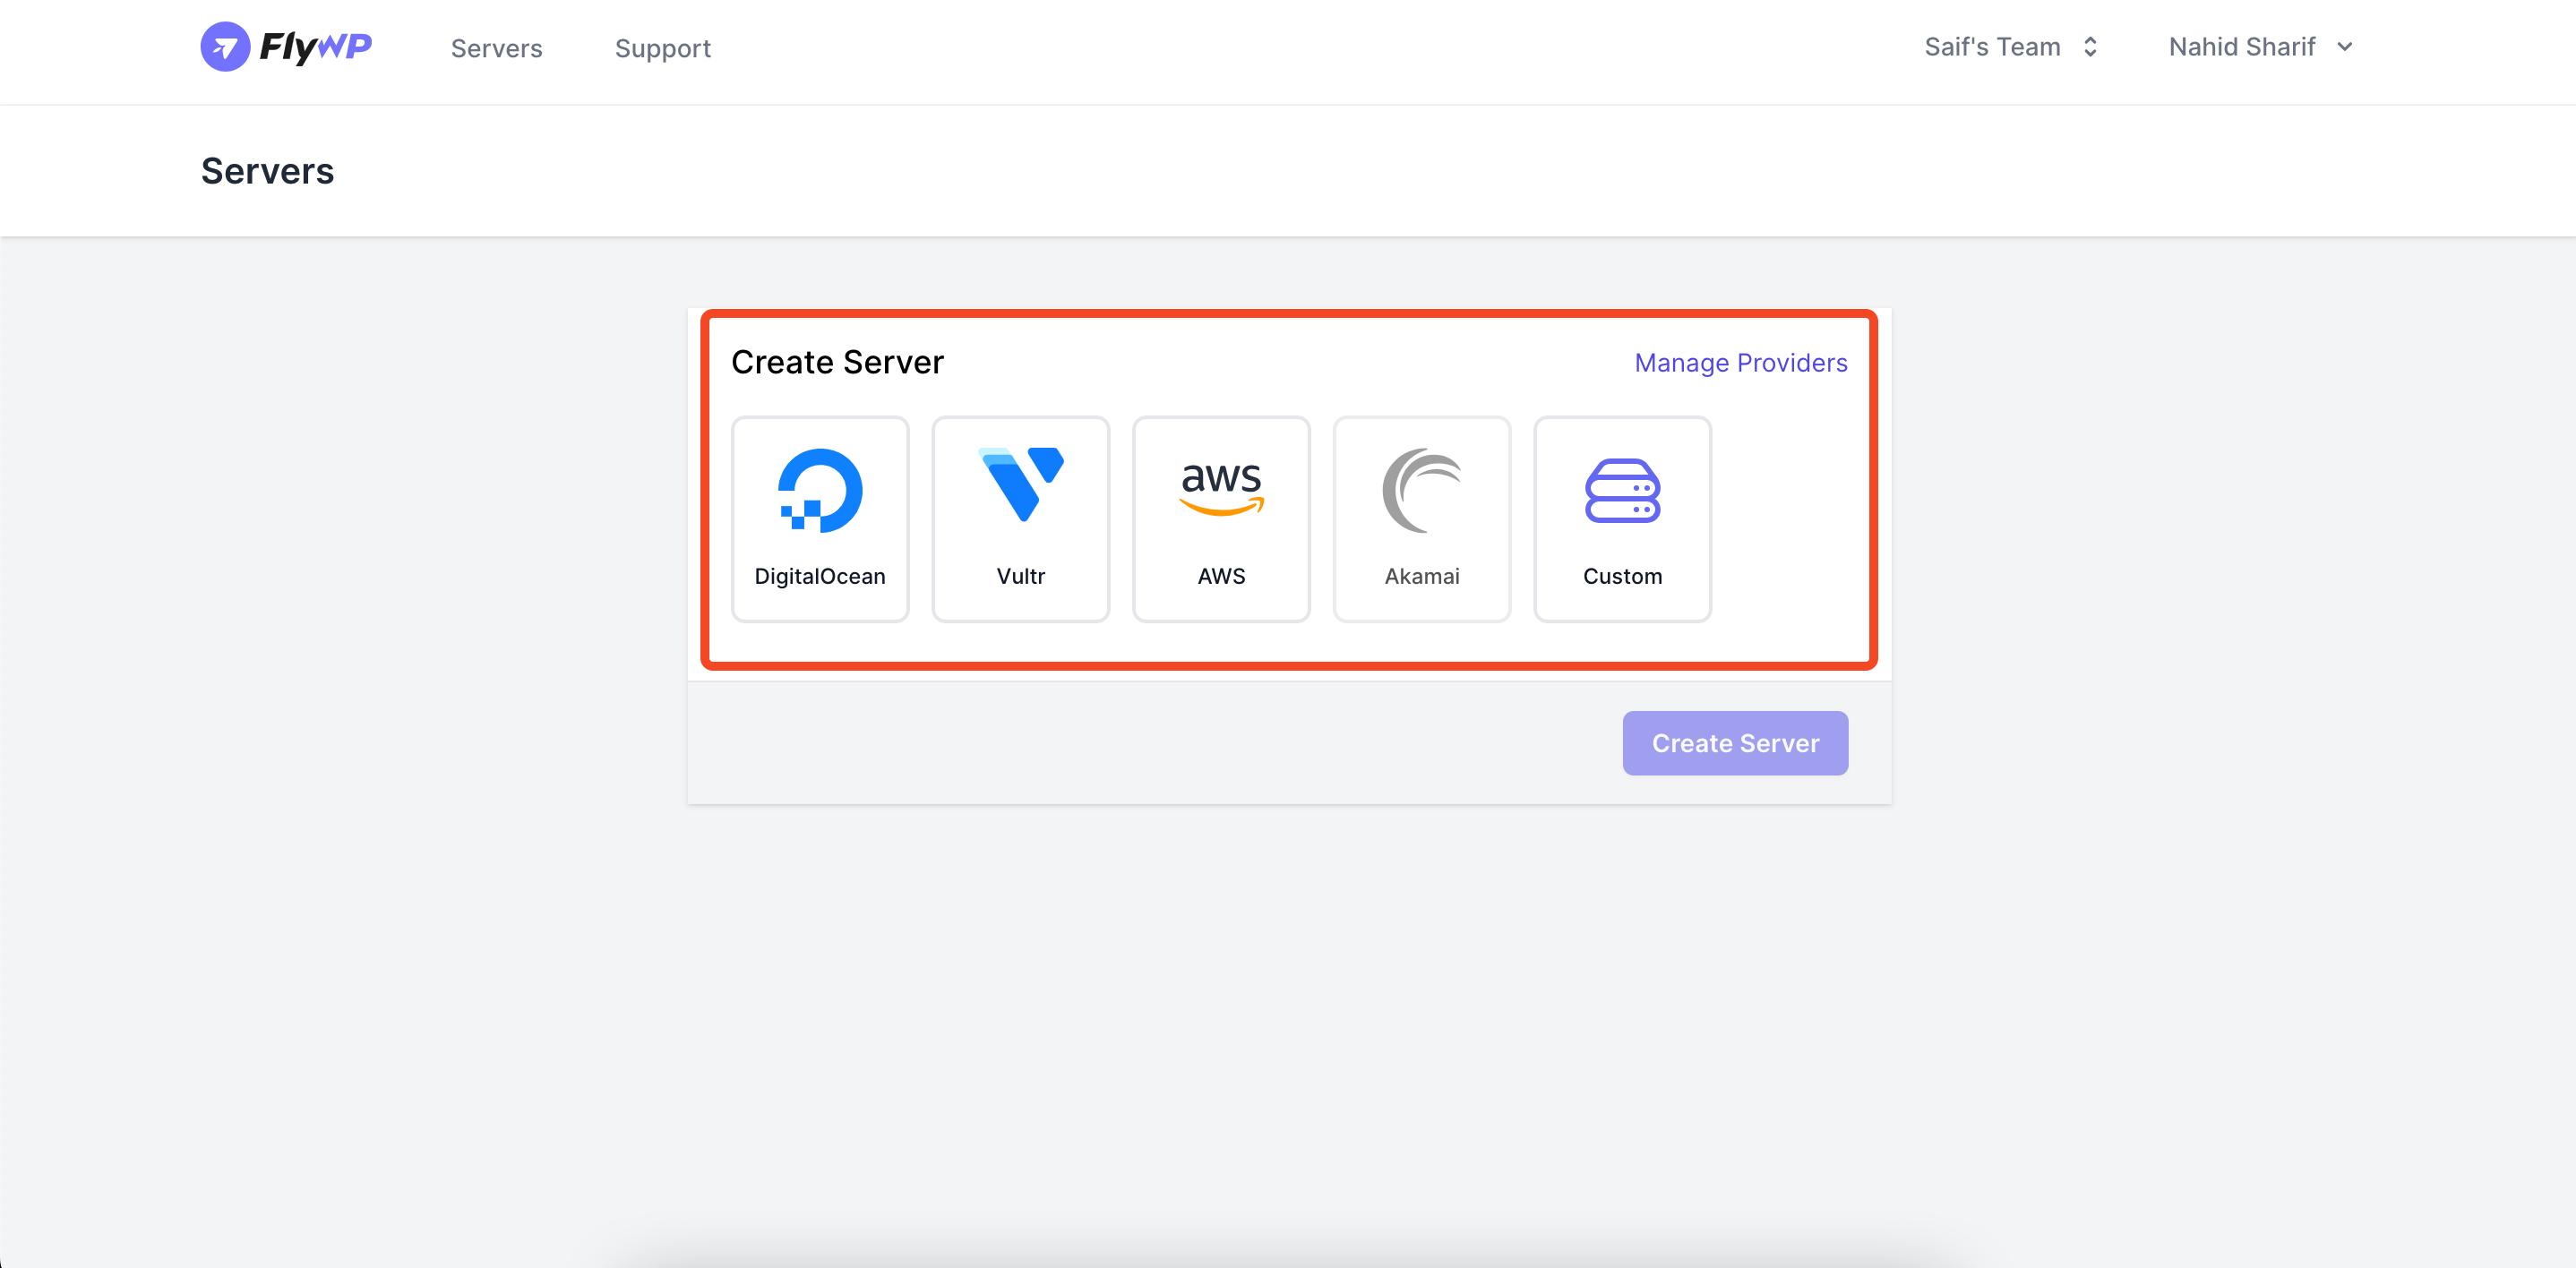
Step two: Create servers
- After adding the server providers, you need to create servers. On the server page, you can find the available server providers. Just choose the server provider here and add your credentials to move forward.
Also, you can find the details here on how to create servers in FlyWP.
Step three: Create site
- After creating servers, you now need to create a site on your preferred server. Once you have added the servers, you must see them on the server page.
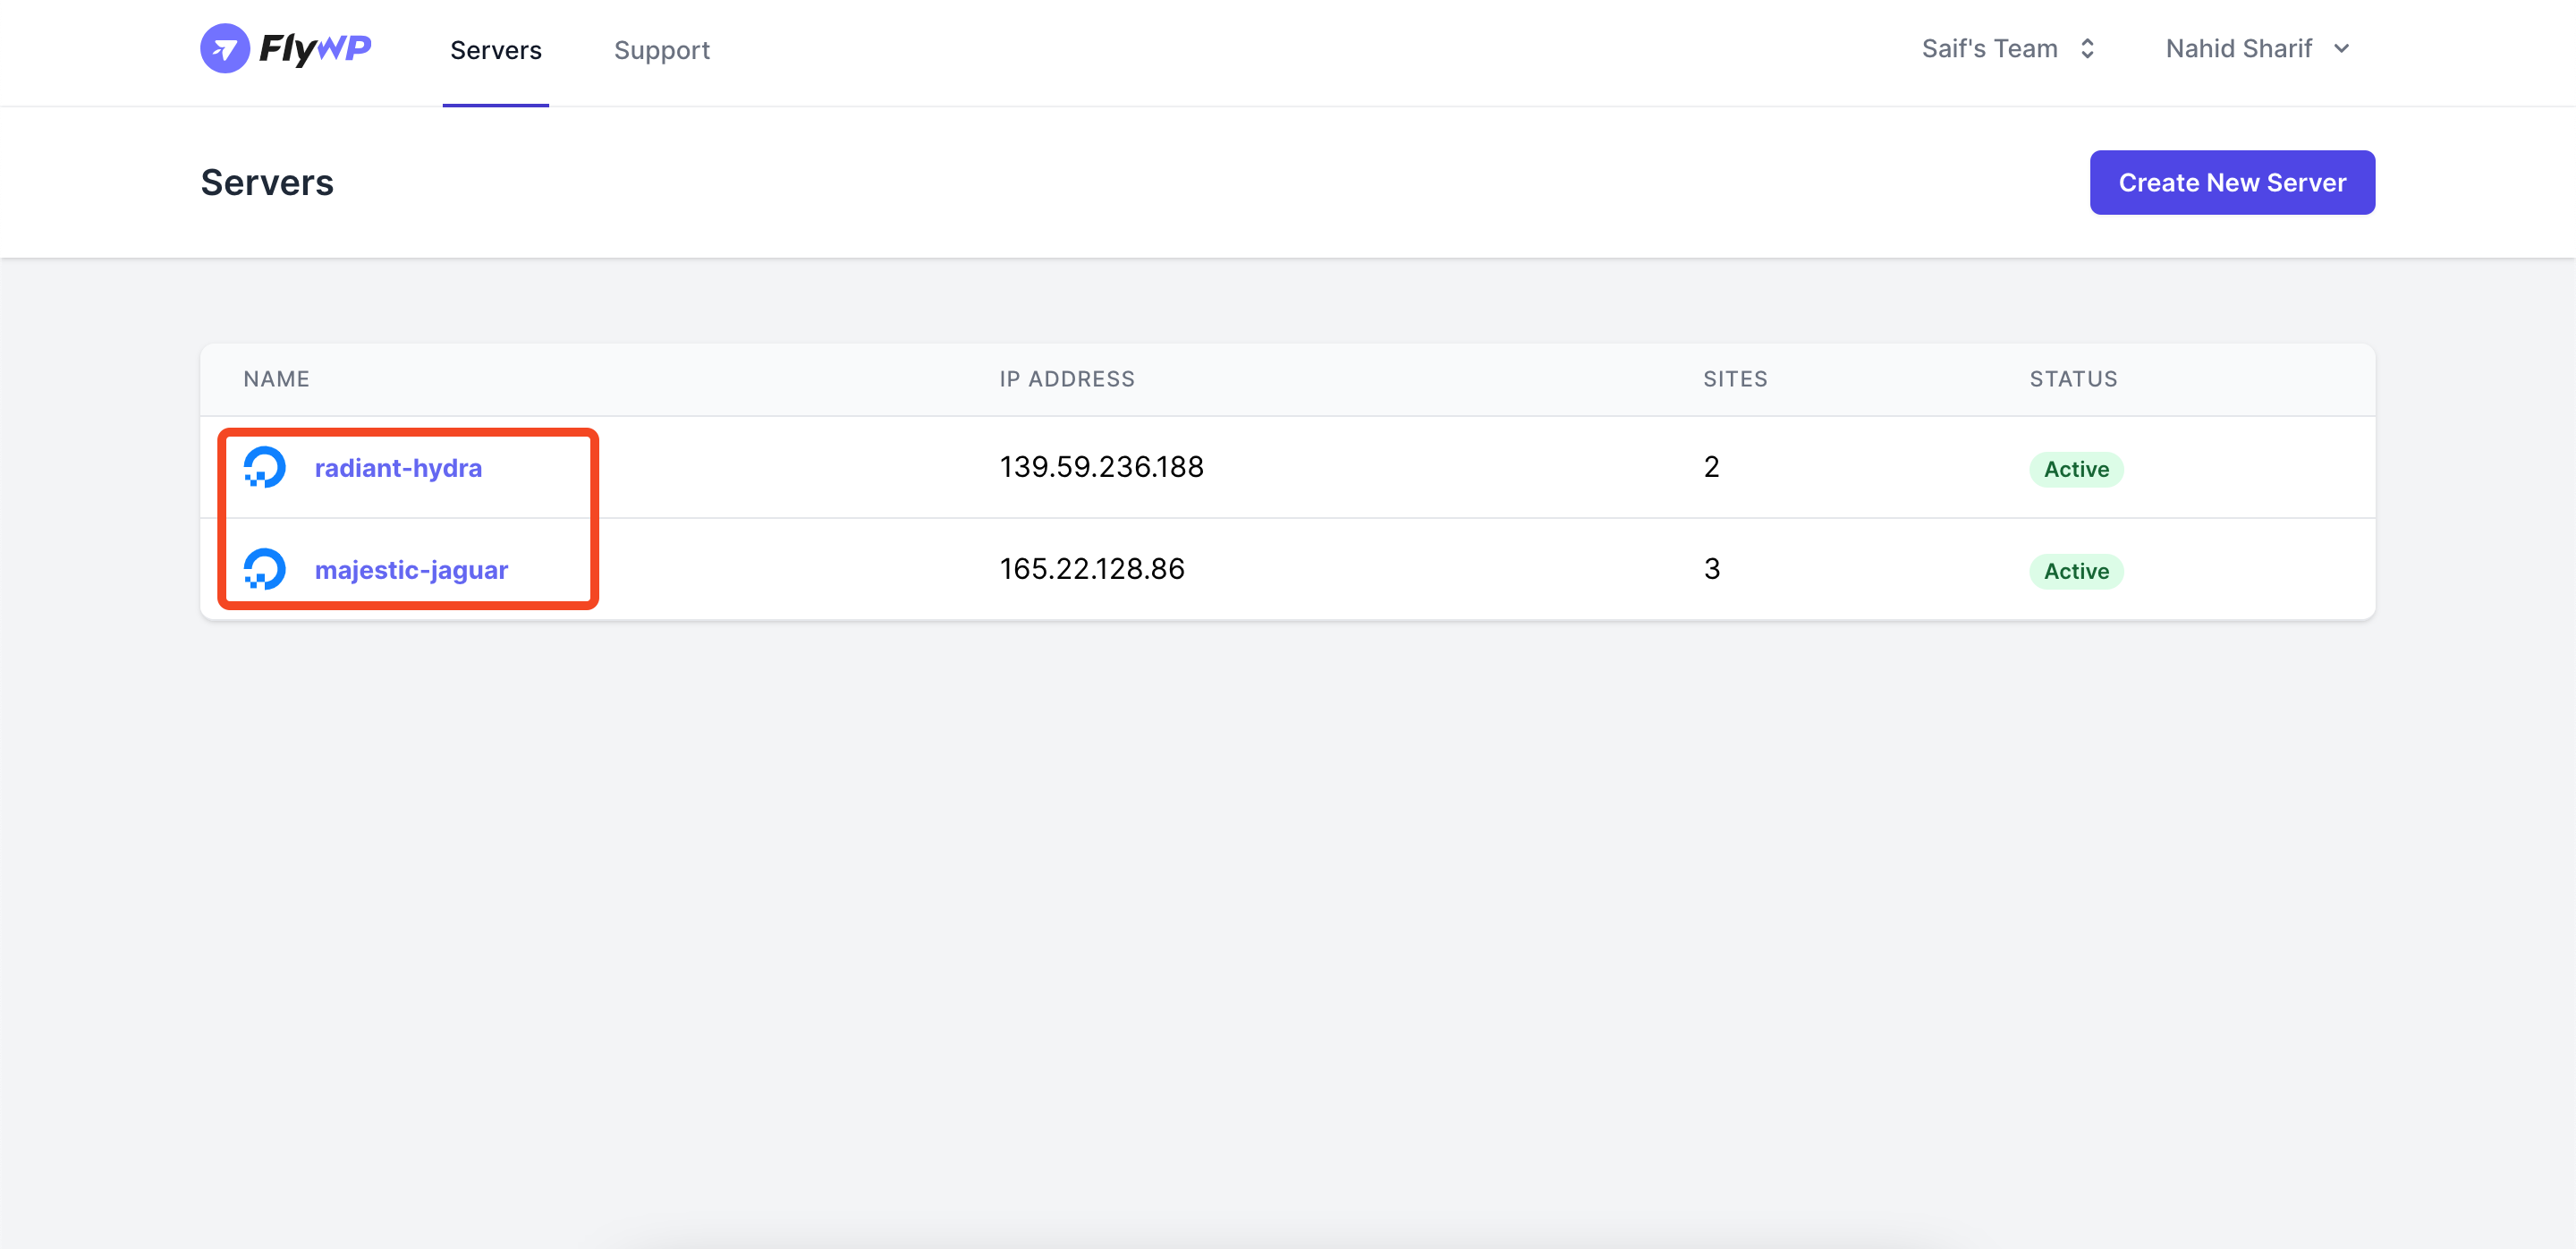
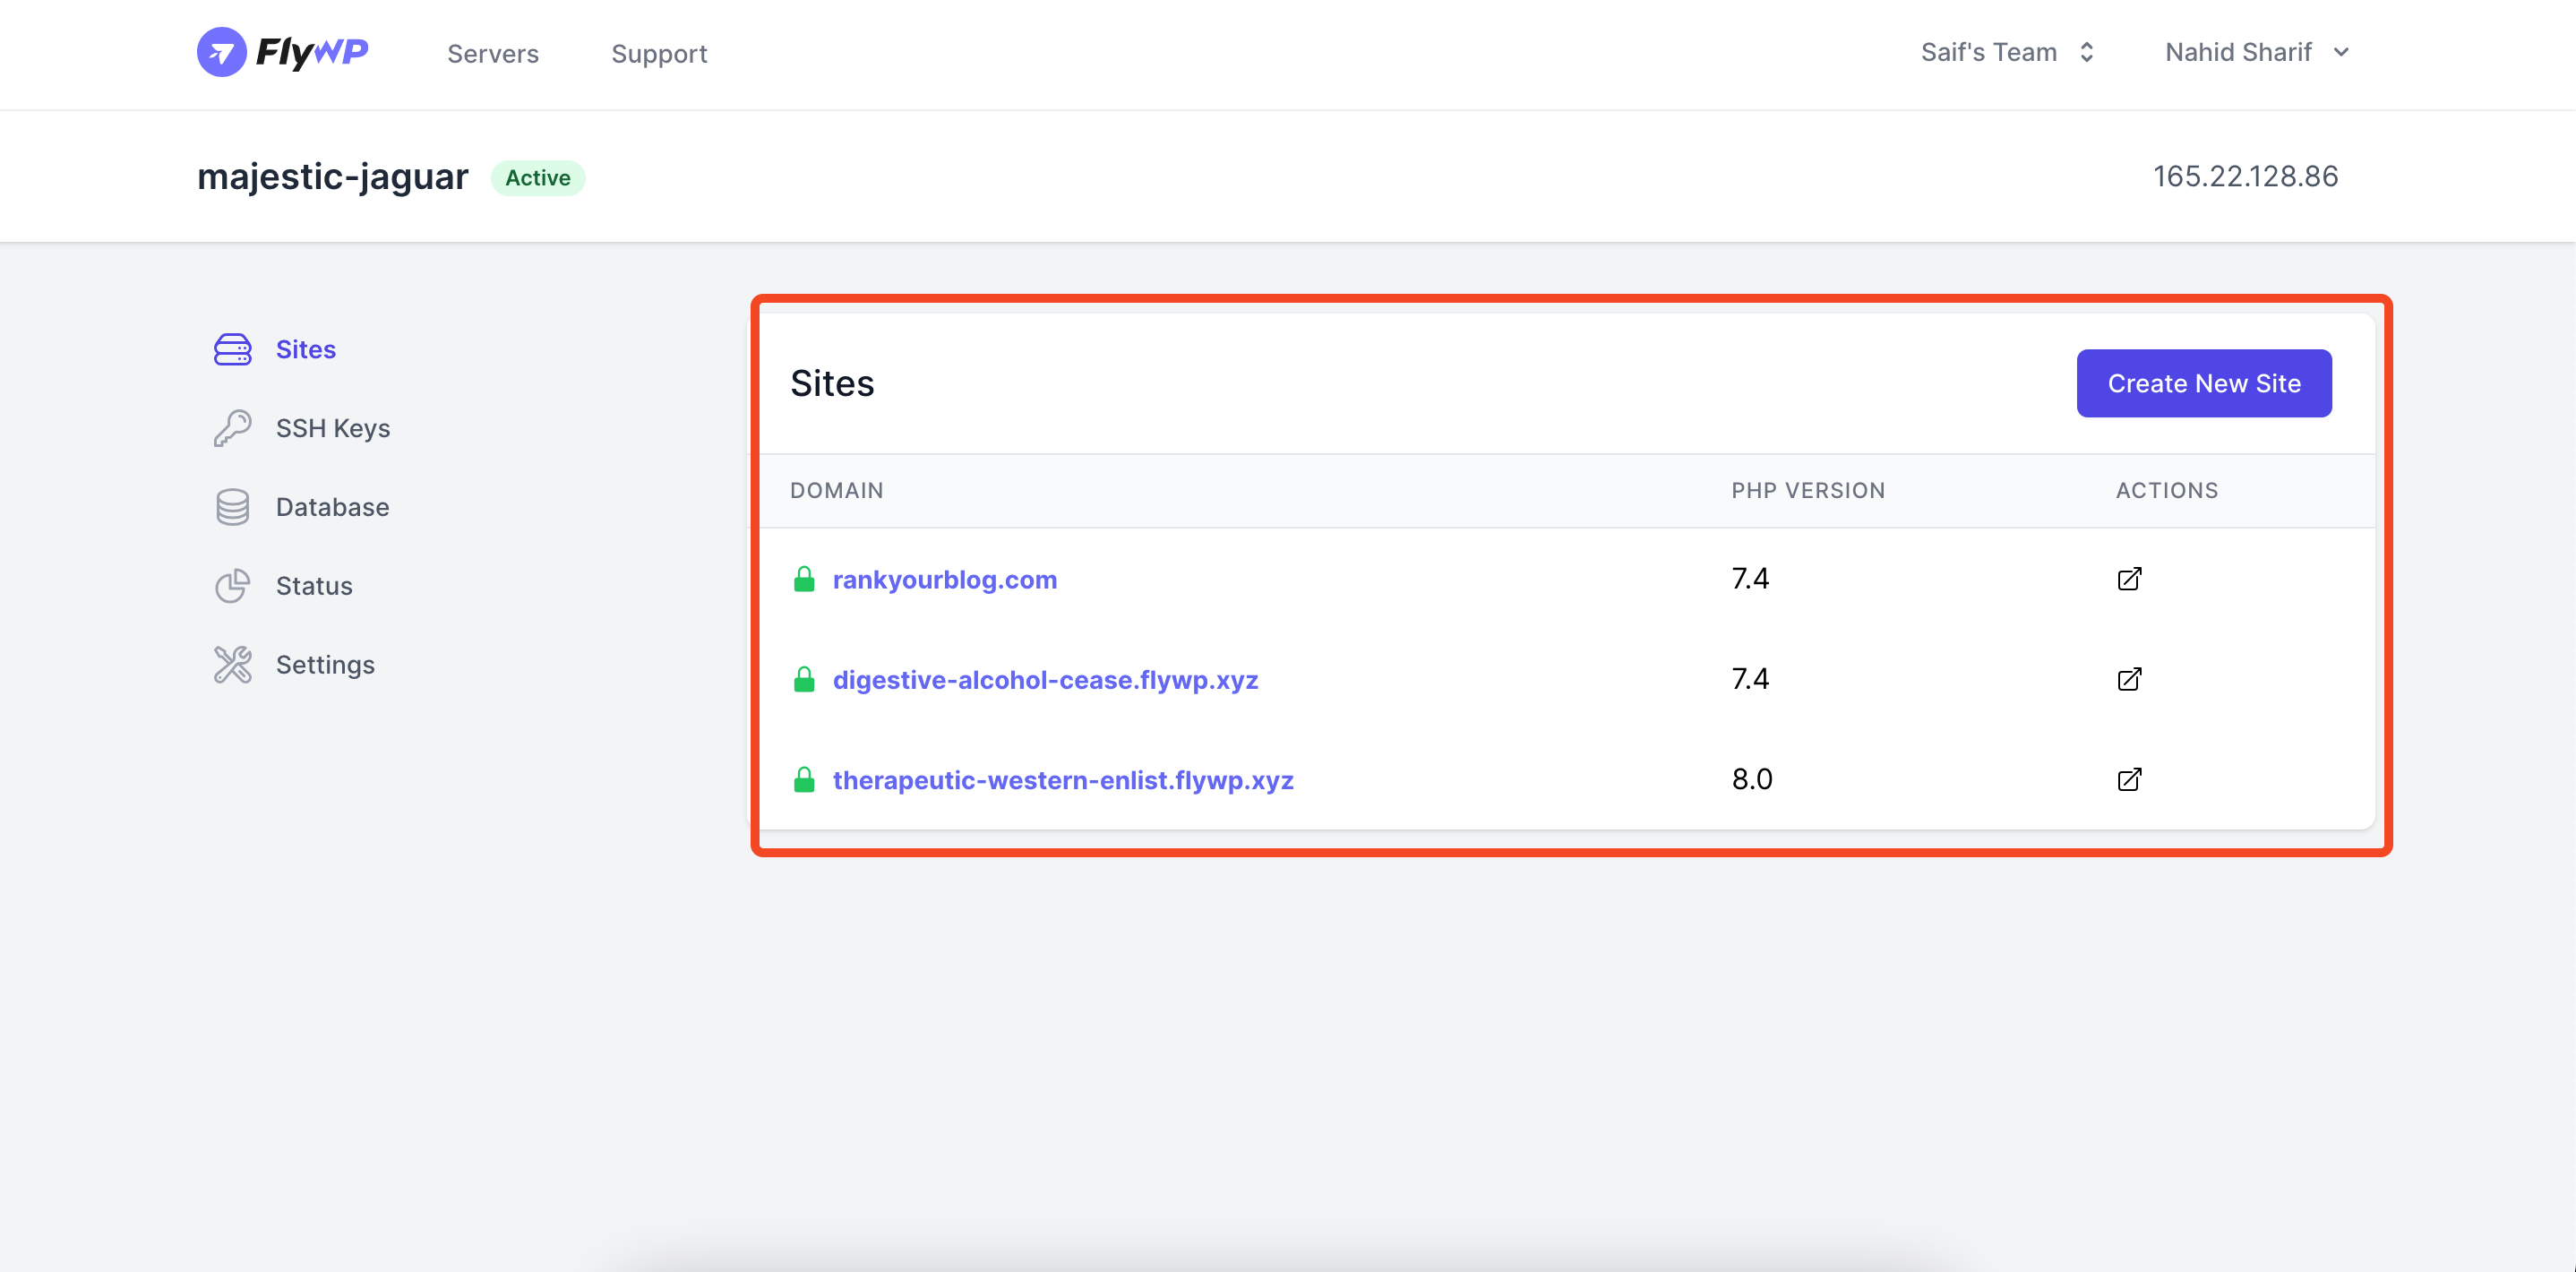
- After you enter the server, you can see the site lists that were created on the server. As you can see, there are three sites on the list.
Important note
We recommend you to create a test site with FlyWP and then transfer your data from your existing/live site. For that, you need to create a test site from here.’
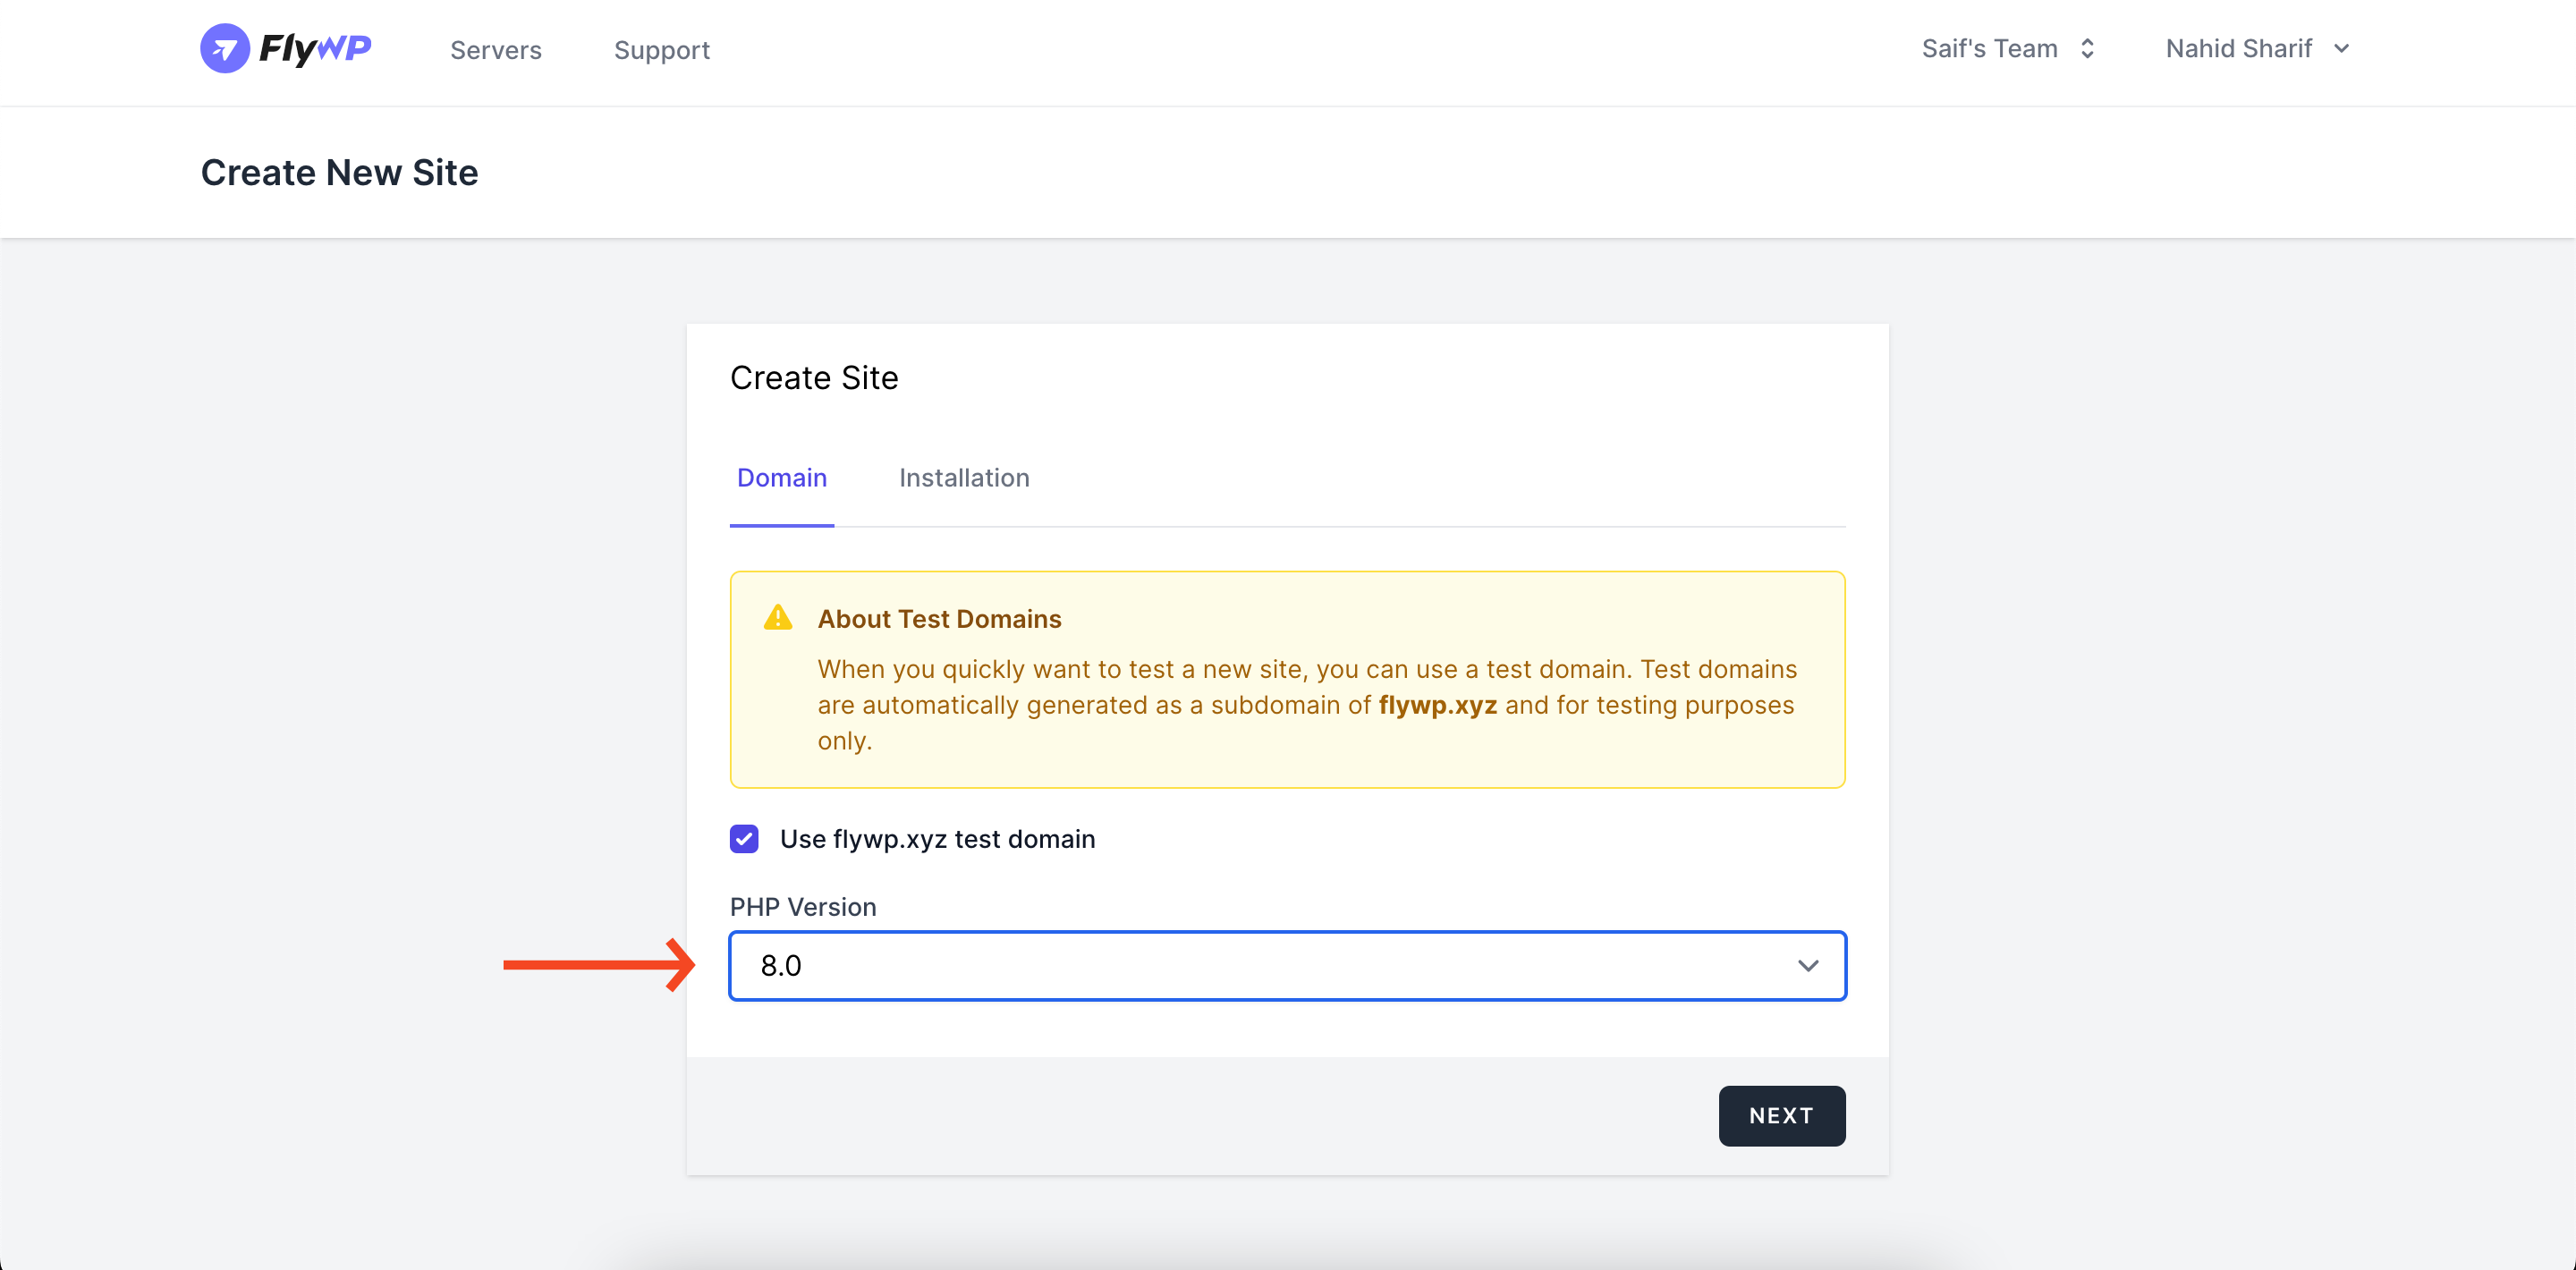
- You’ll get this after you click on the “create a new site” button. And then tick on the button “Use flywp.xyz test domain“
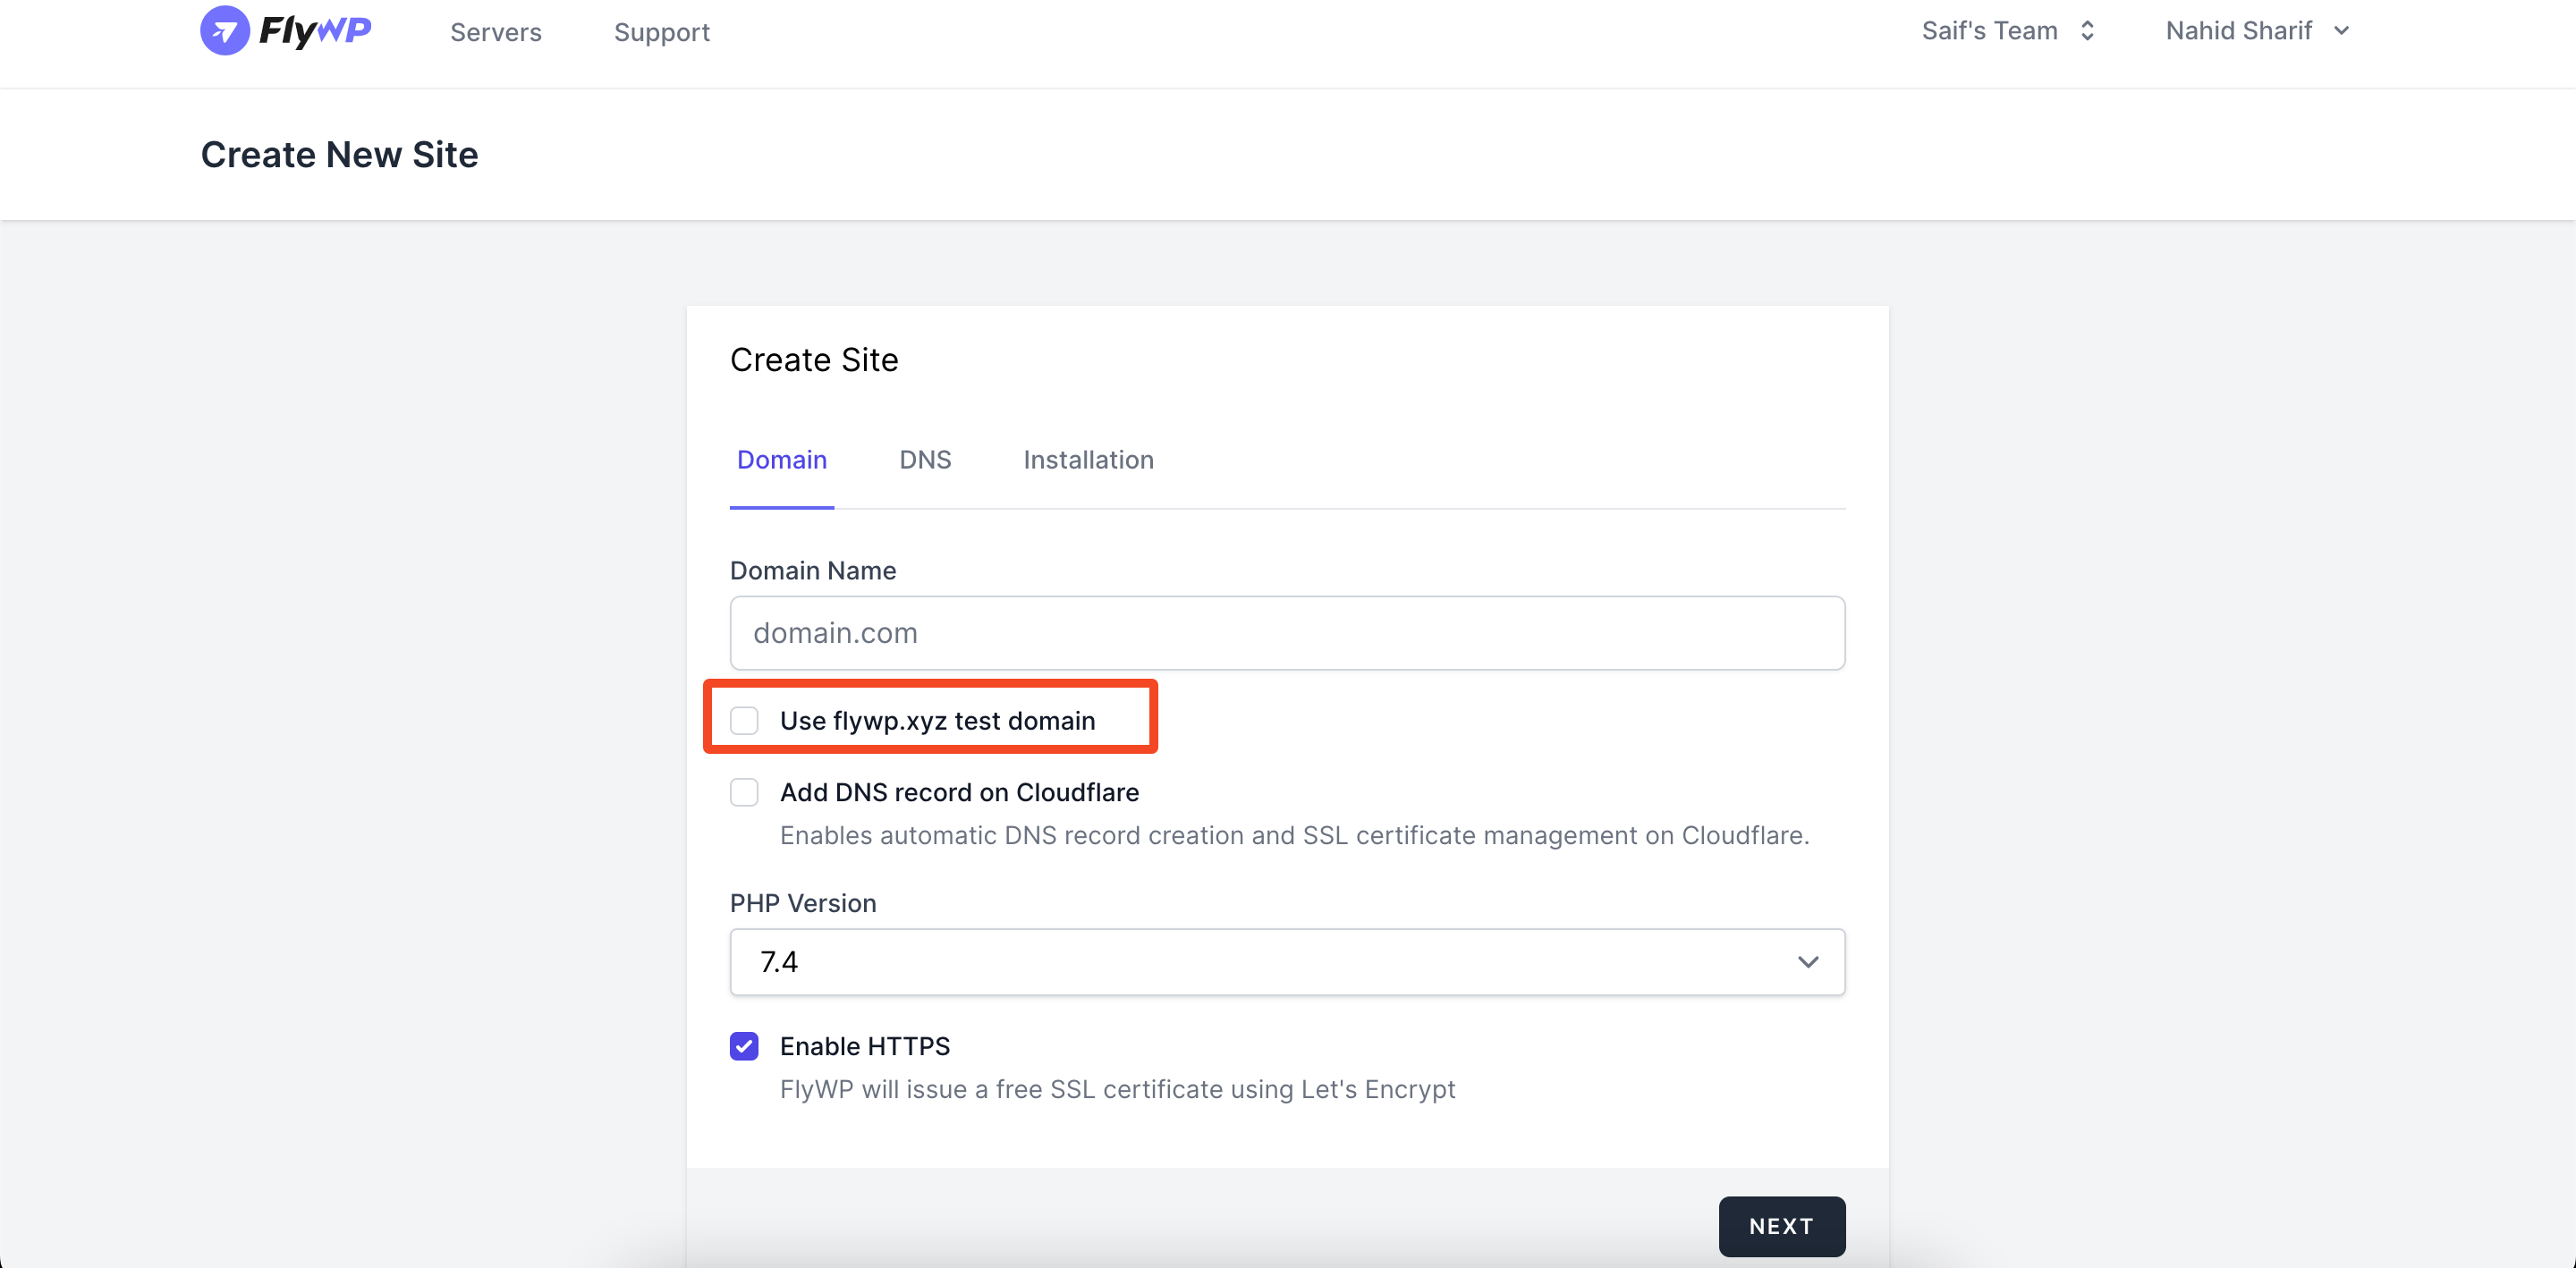
- Choose the PHP version of your test site.
- Now on the installation page, give a site title, admin email, username, and password, and enable Full Page Cache (it will speed up your site’s performance), and then hit the next button.

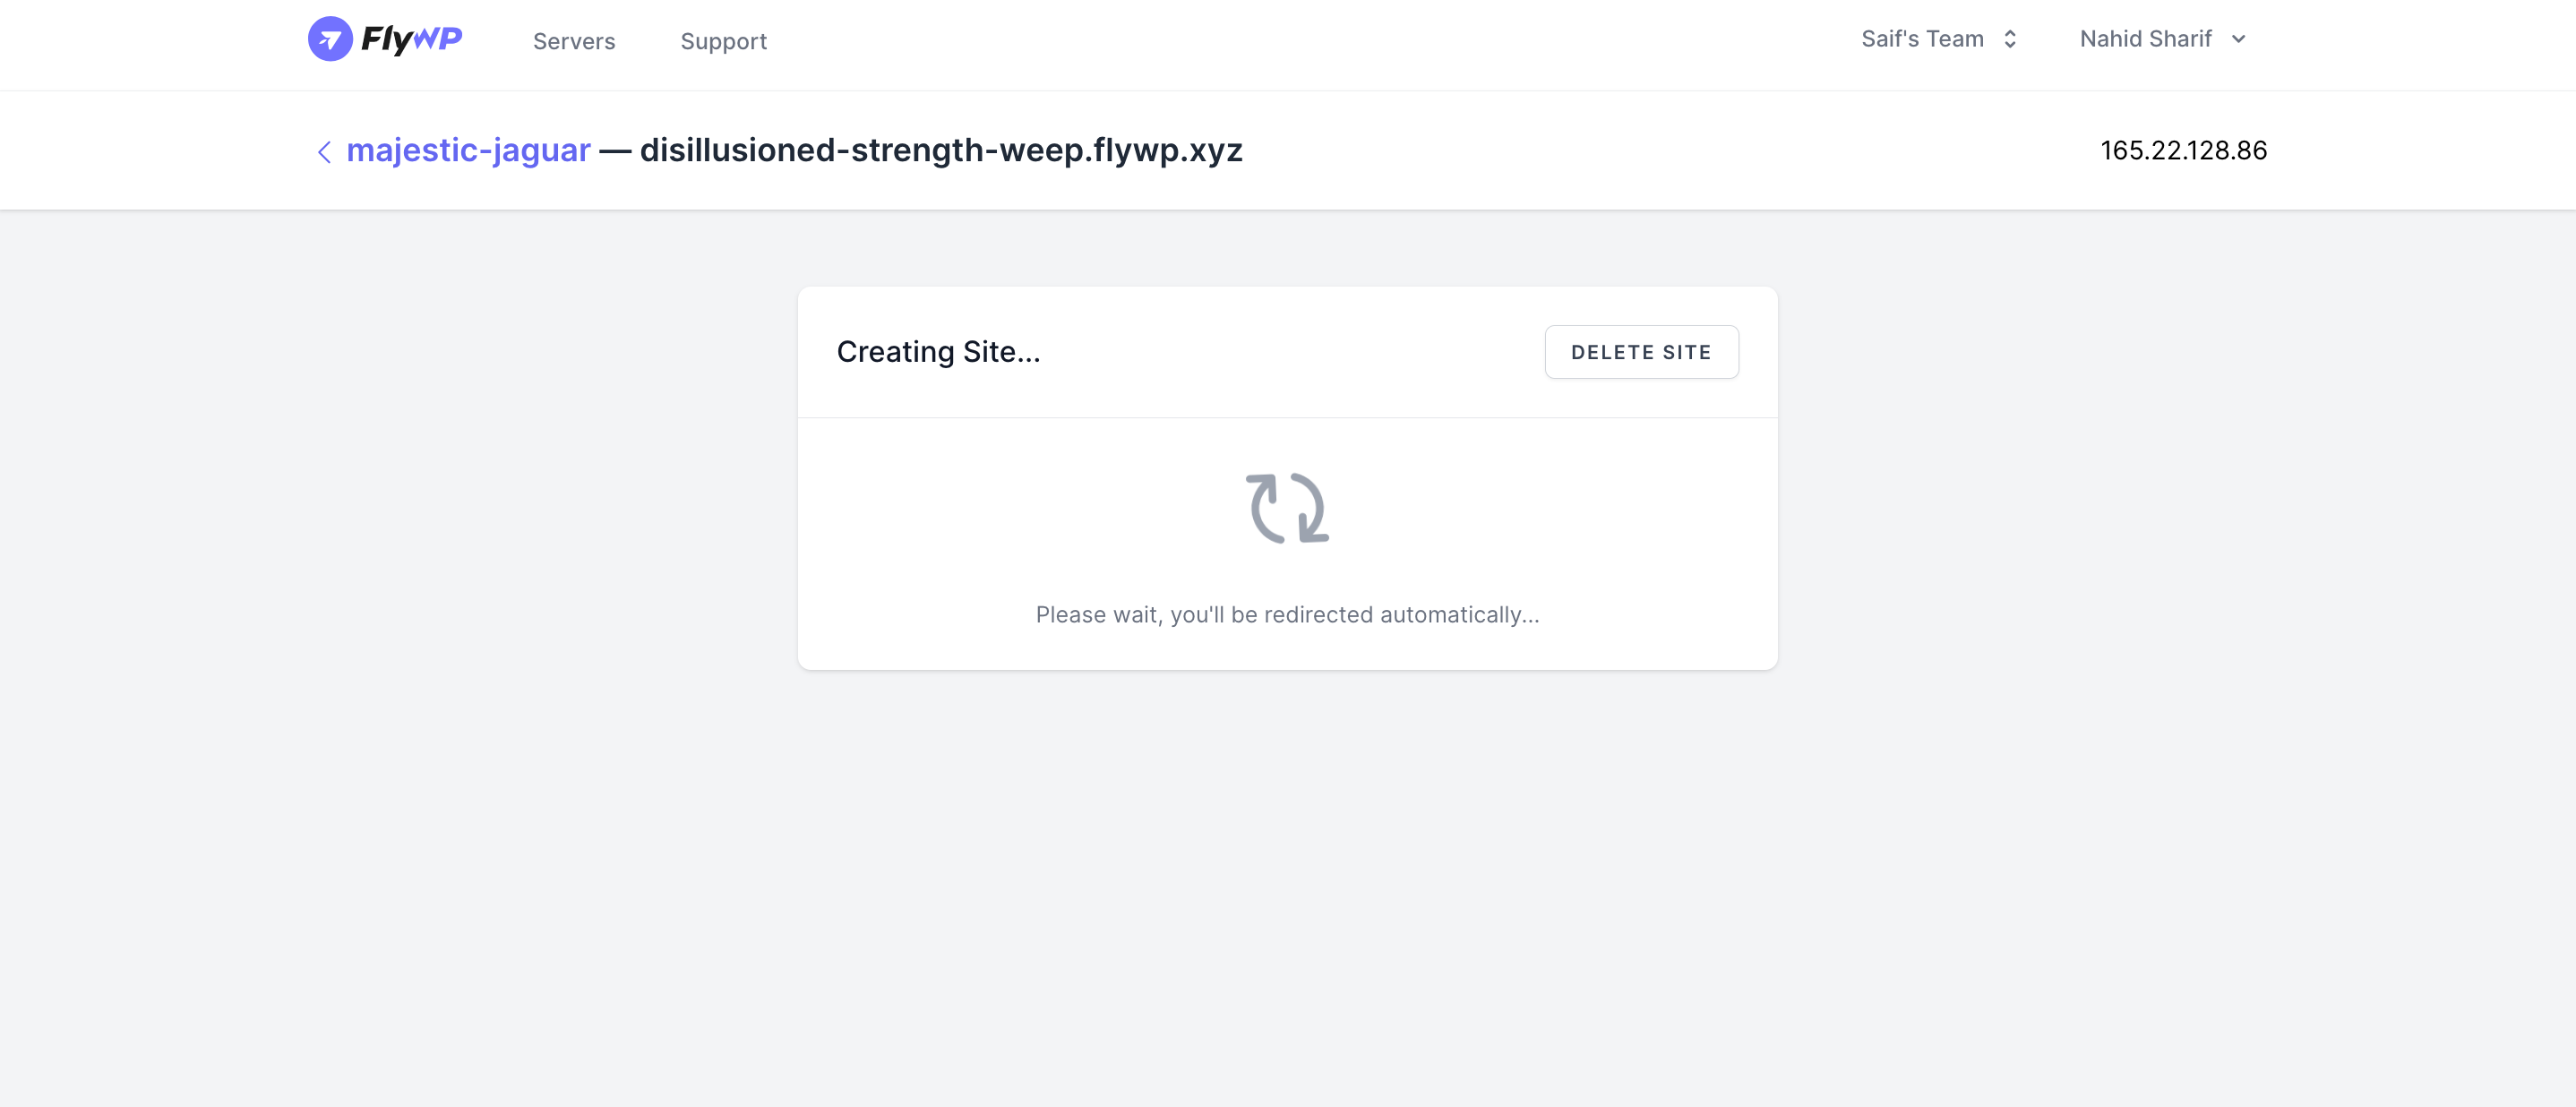
You must get this notice that your site is being created. You have to wait for a while.
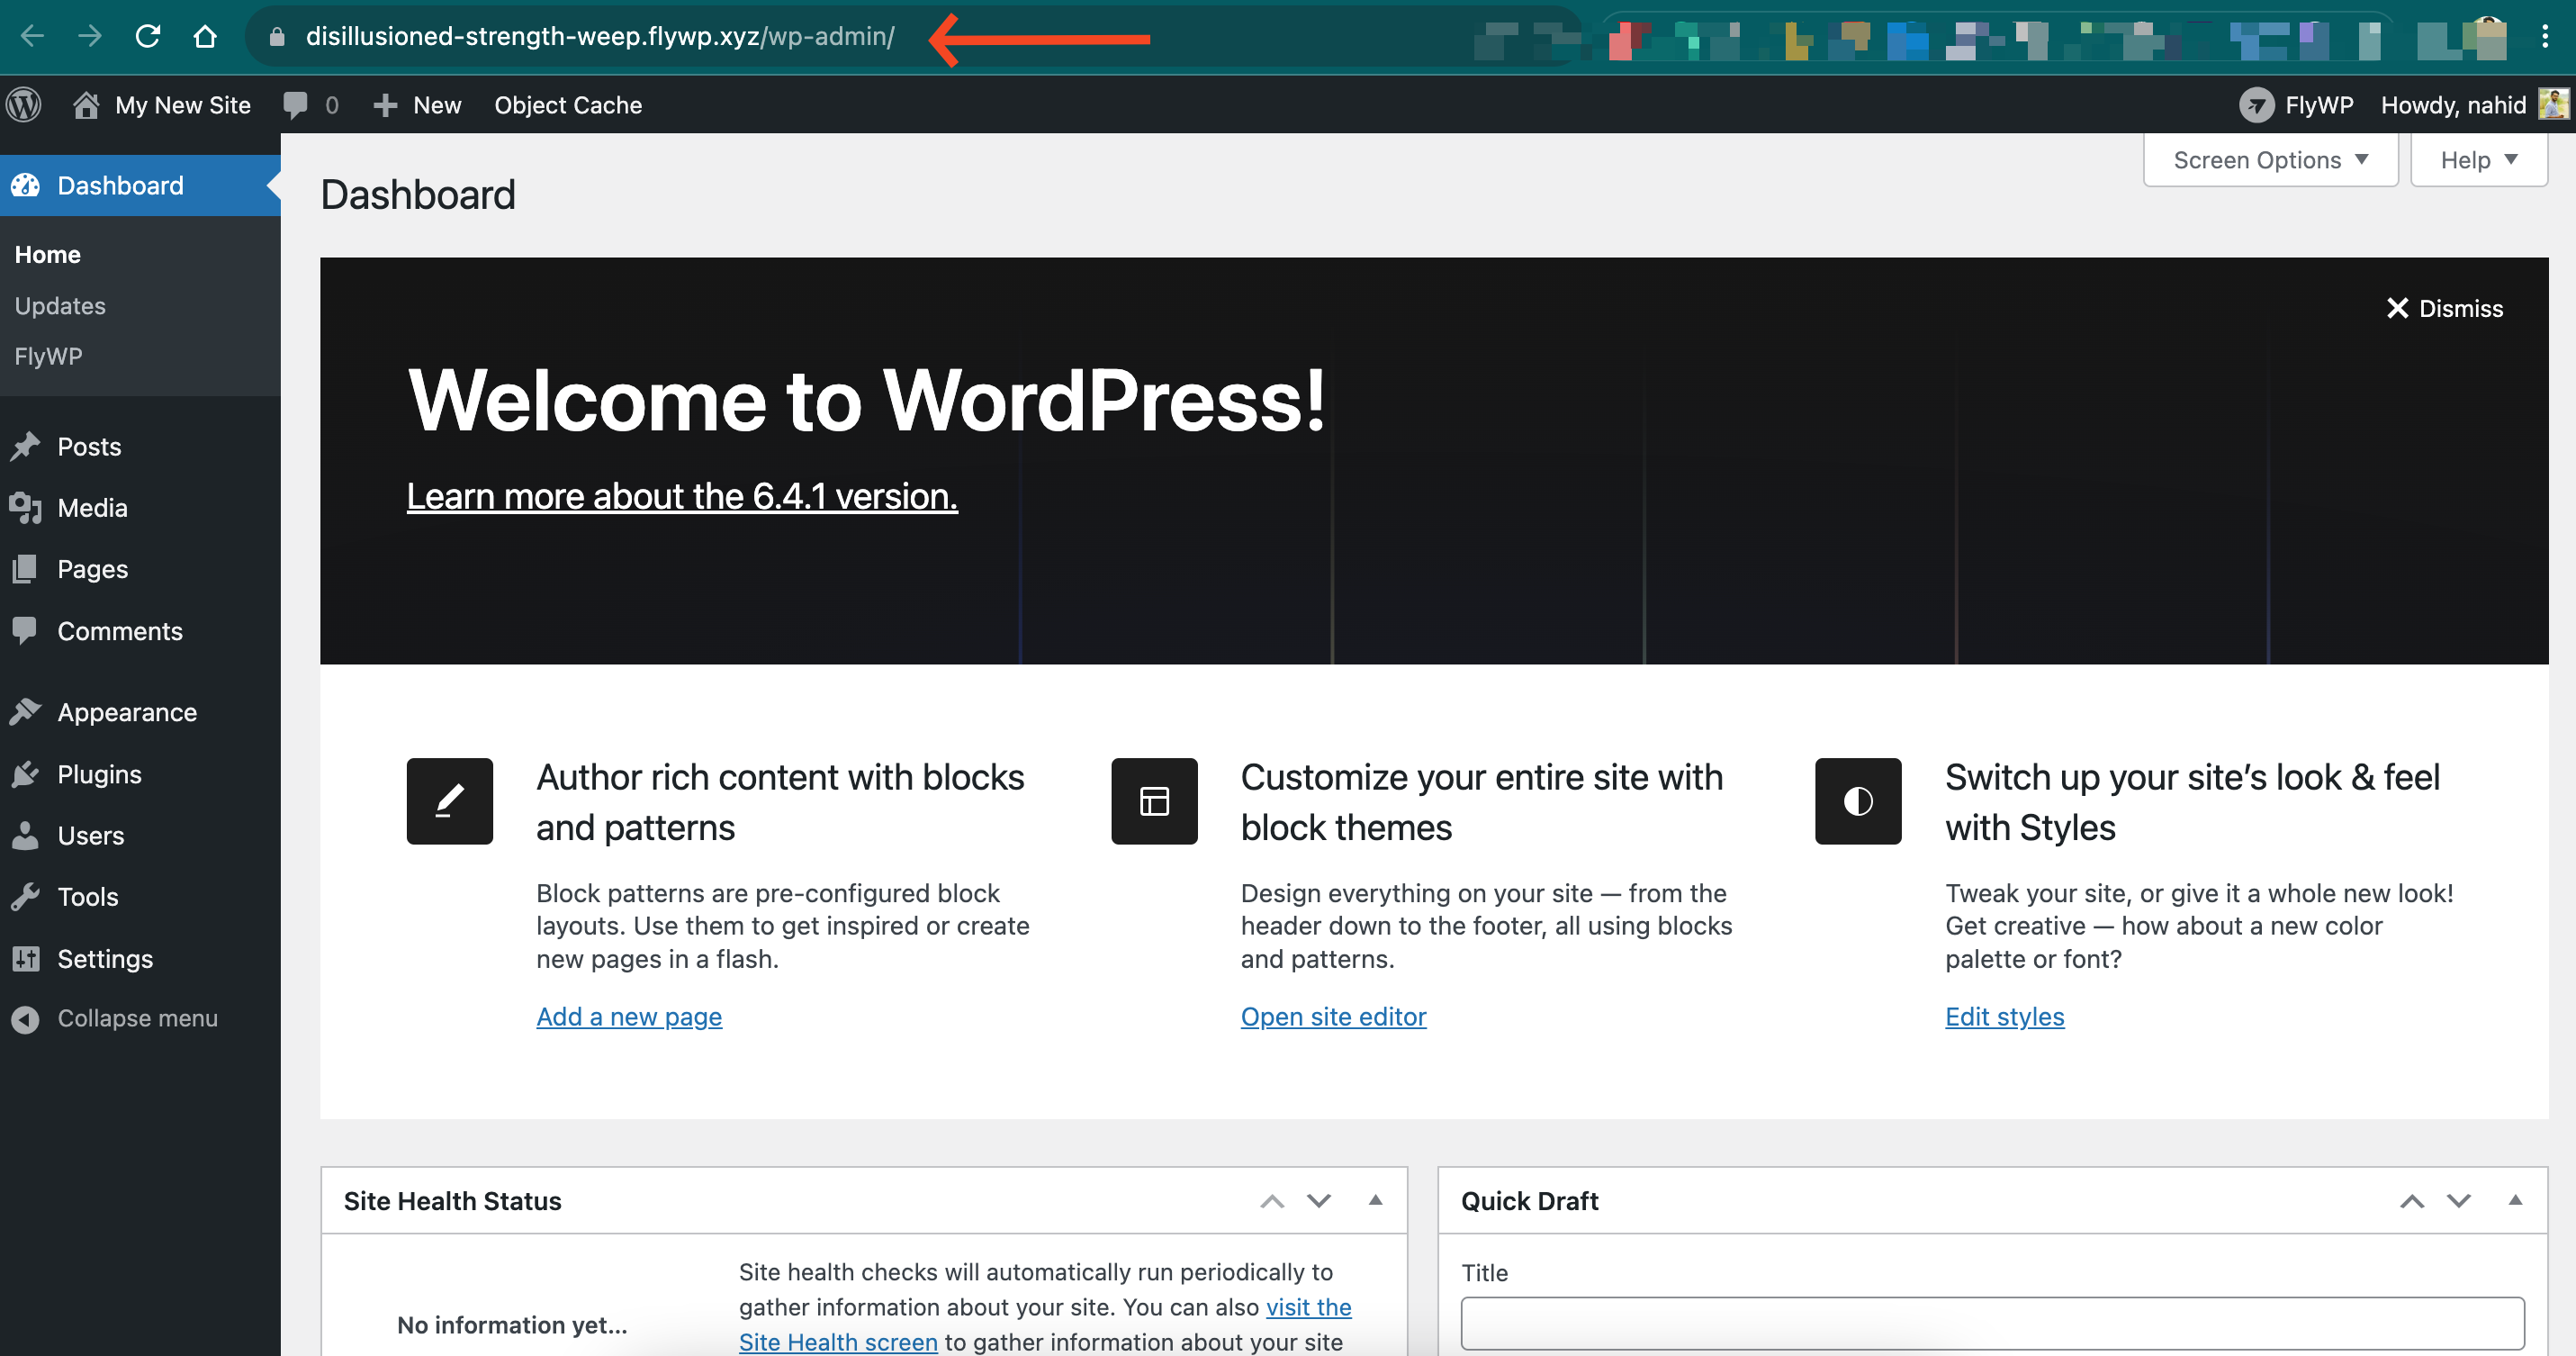
- Once the process is completed, you’ll get a dashboard for your new test site. Now click on the “WP Admin” button to directly login to your new site. It’s a magic login feature of FlyWP. You don’t have to access it from a different login page and enter your ID and password. Just click on it and you’ll be automatically logged in.
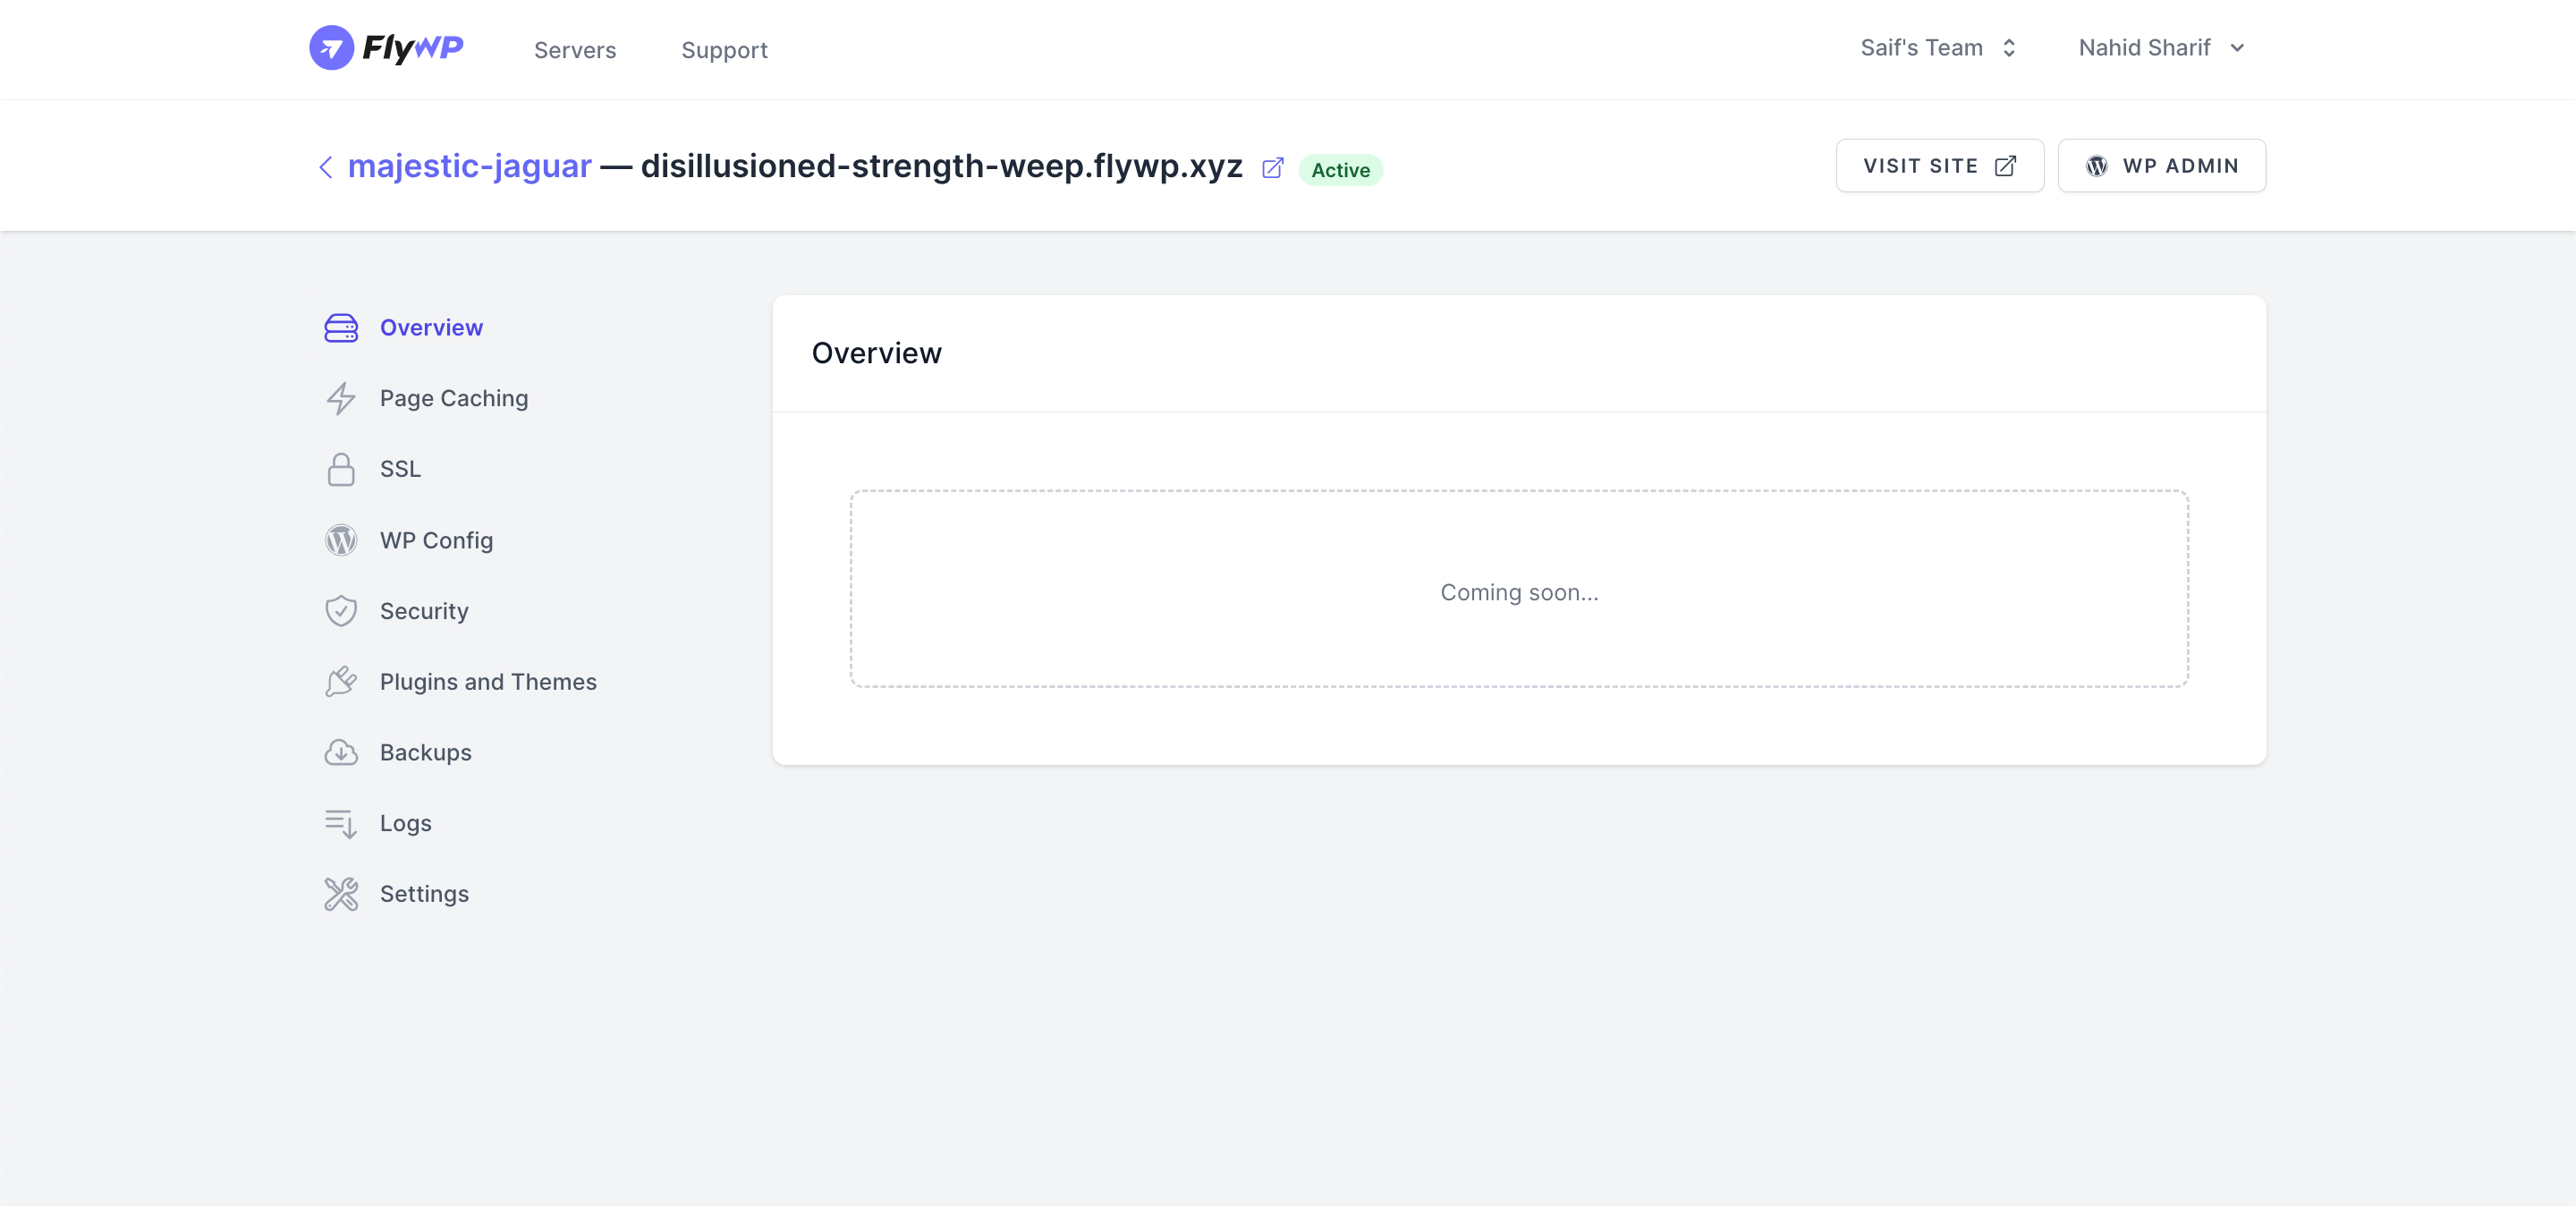
- Here you go. You can see the new site details on a WordPress dashboard.
Step four: Create a backup of your live site
We’ll migrate data from old site to the new site we created in FlyWP. Let’s see how to do it.
Make sure you install and activate the FlyWP Helper plugin on your website before taking the backup
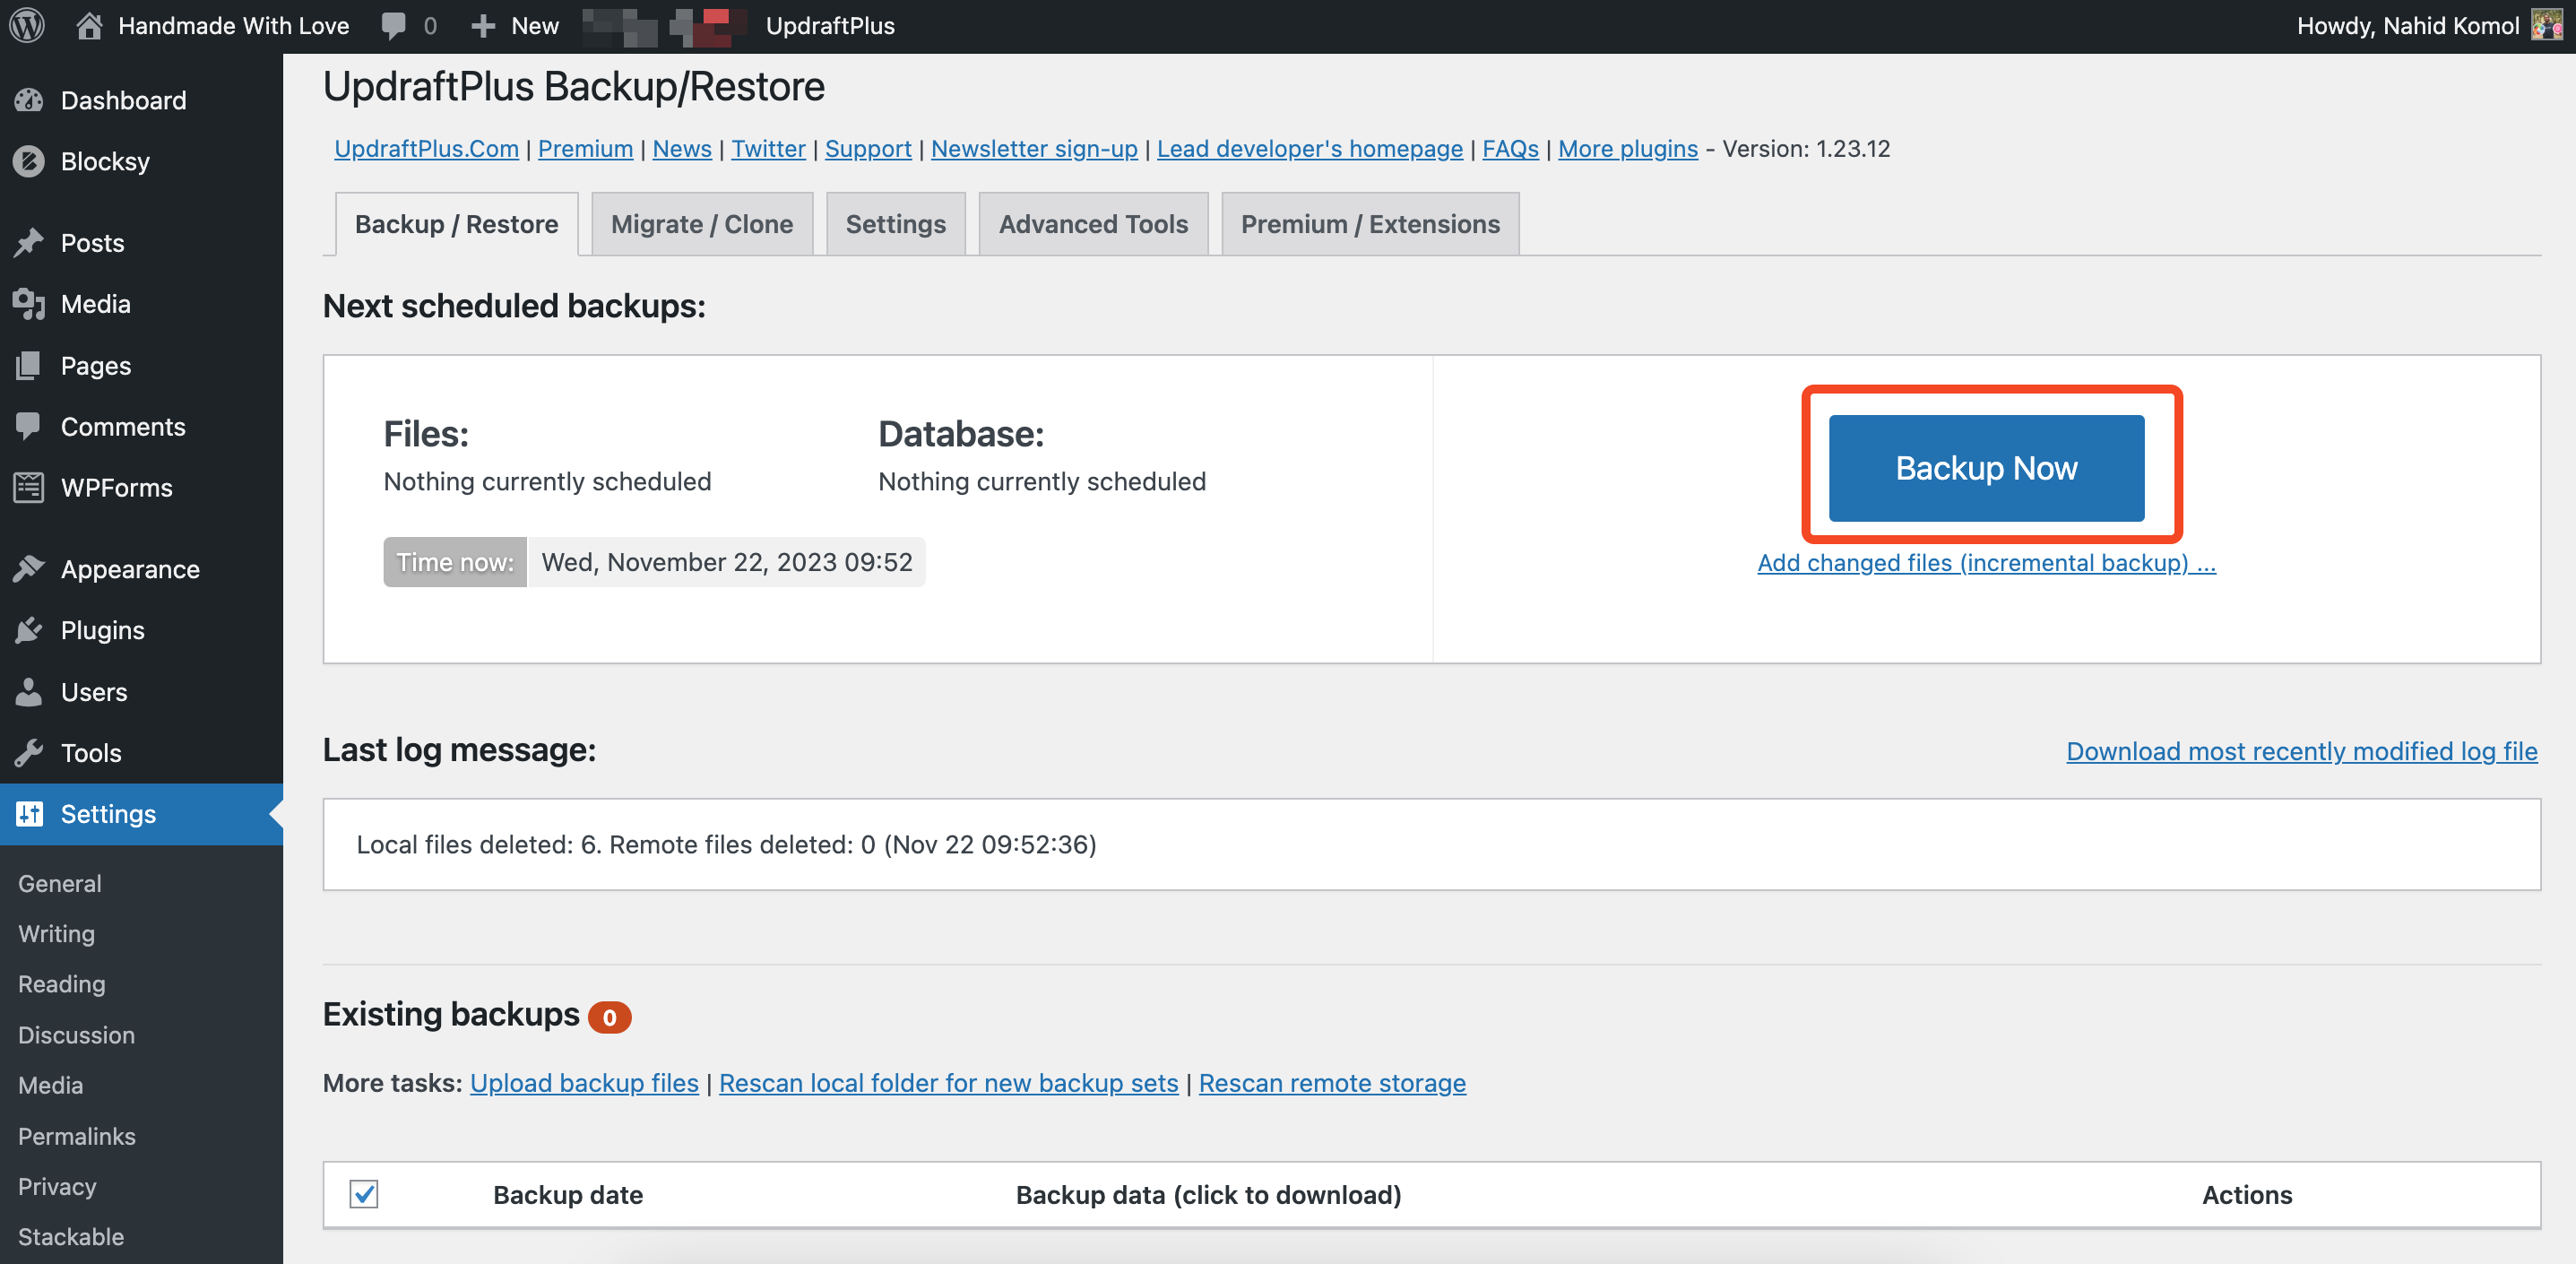
Open your existing site plugin area. And add any of your preferred backup plugins. In our case, we’ll go with the Updraft plugin. Search for it, install it, and activate it.

- Then navigate to Settings > Updrafts Plus Backup. Here you’ll find the “Backup Now” button.
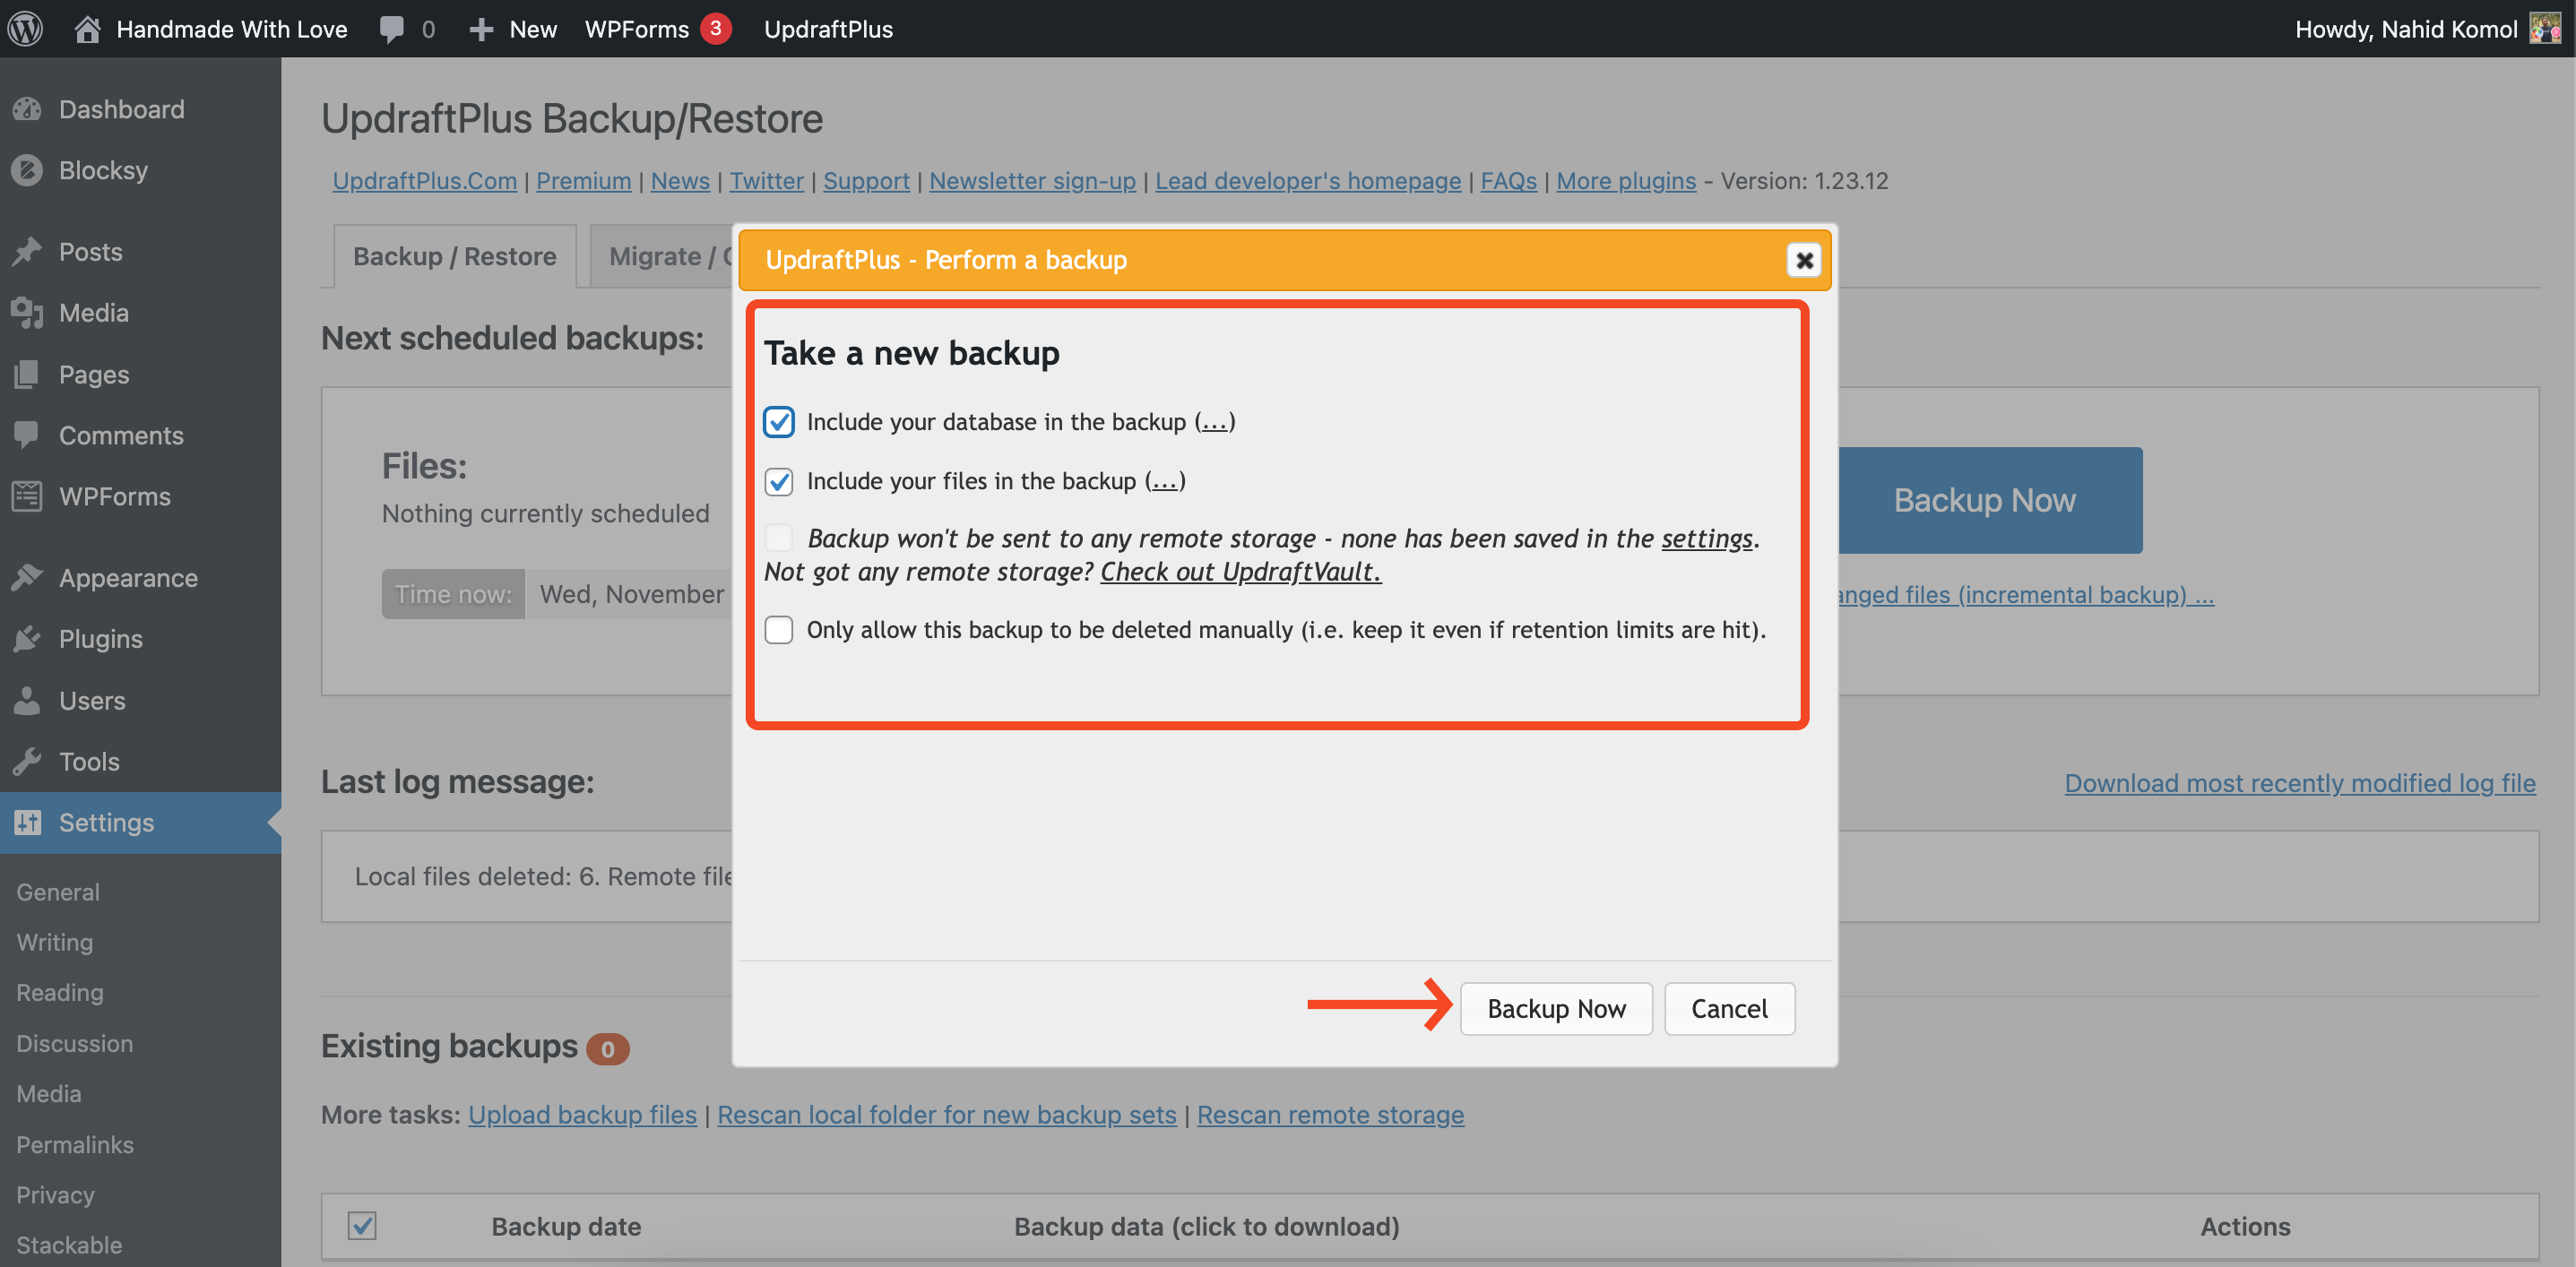
- After that, you’ll get a window. Here, check all the boxes. Also, you can check the last box if you want to manually delete the backup file later. Finally, click on the Backup Now button to proceed.
- You can see the backup files are ready to be saved on your device.
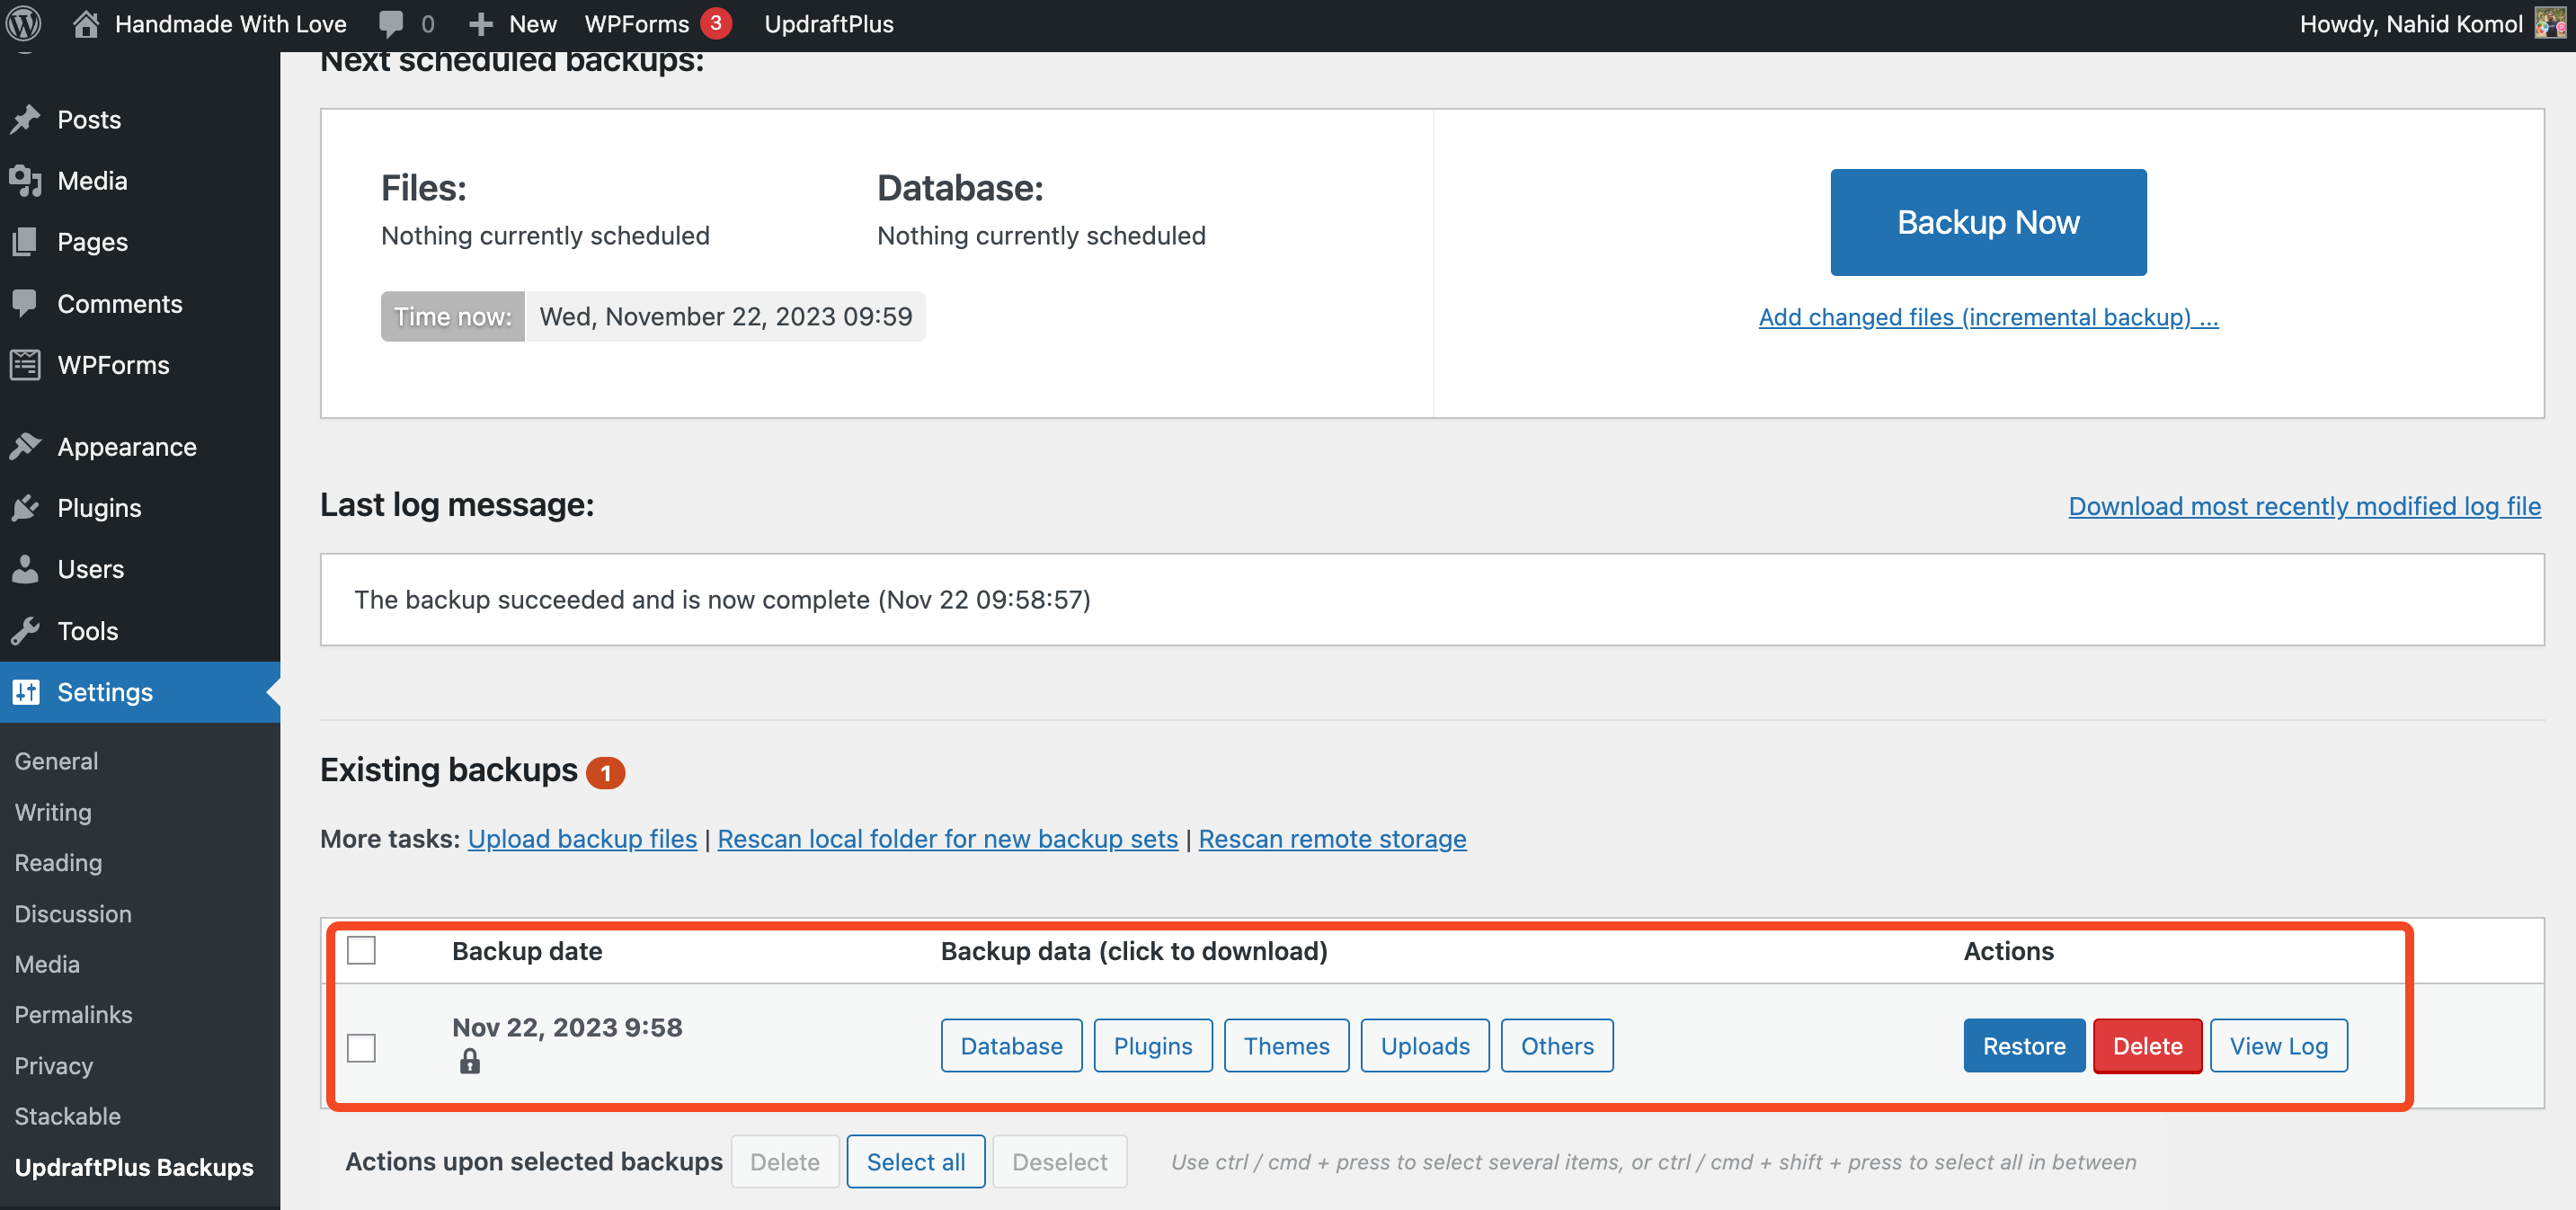
- Since we’re migrating the entire site, saving all these files to your device is better.
- Database, Plugins, Themes, Uploads, and Others.
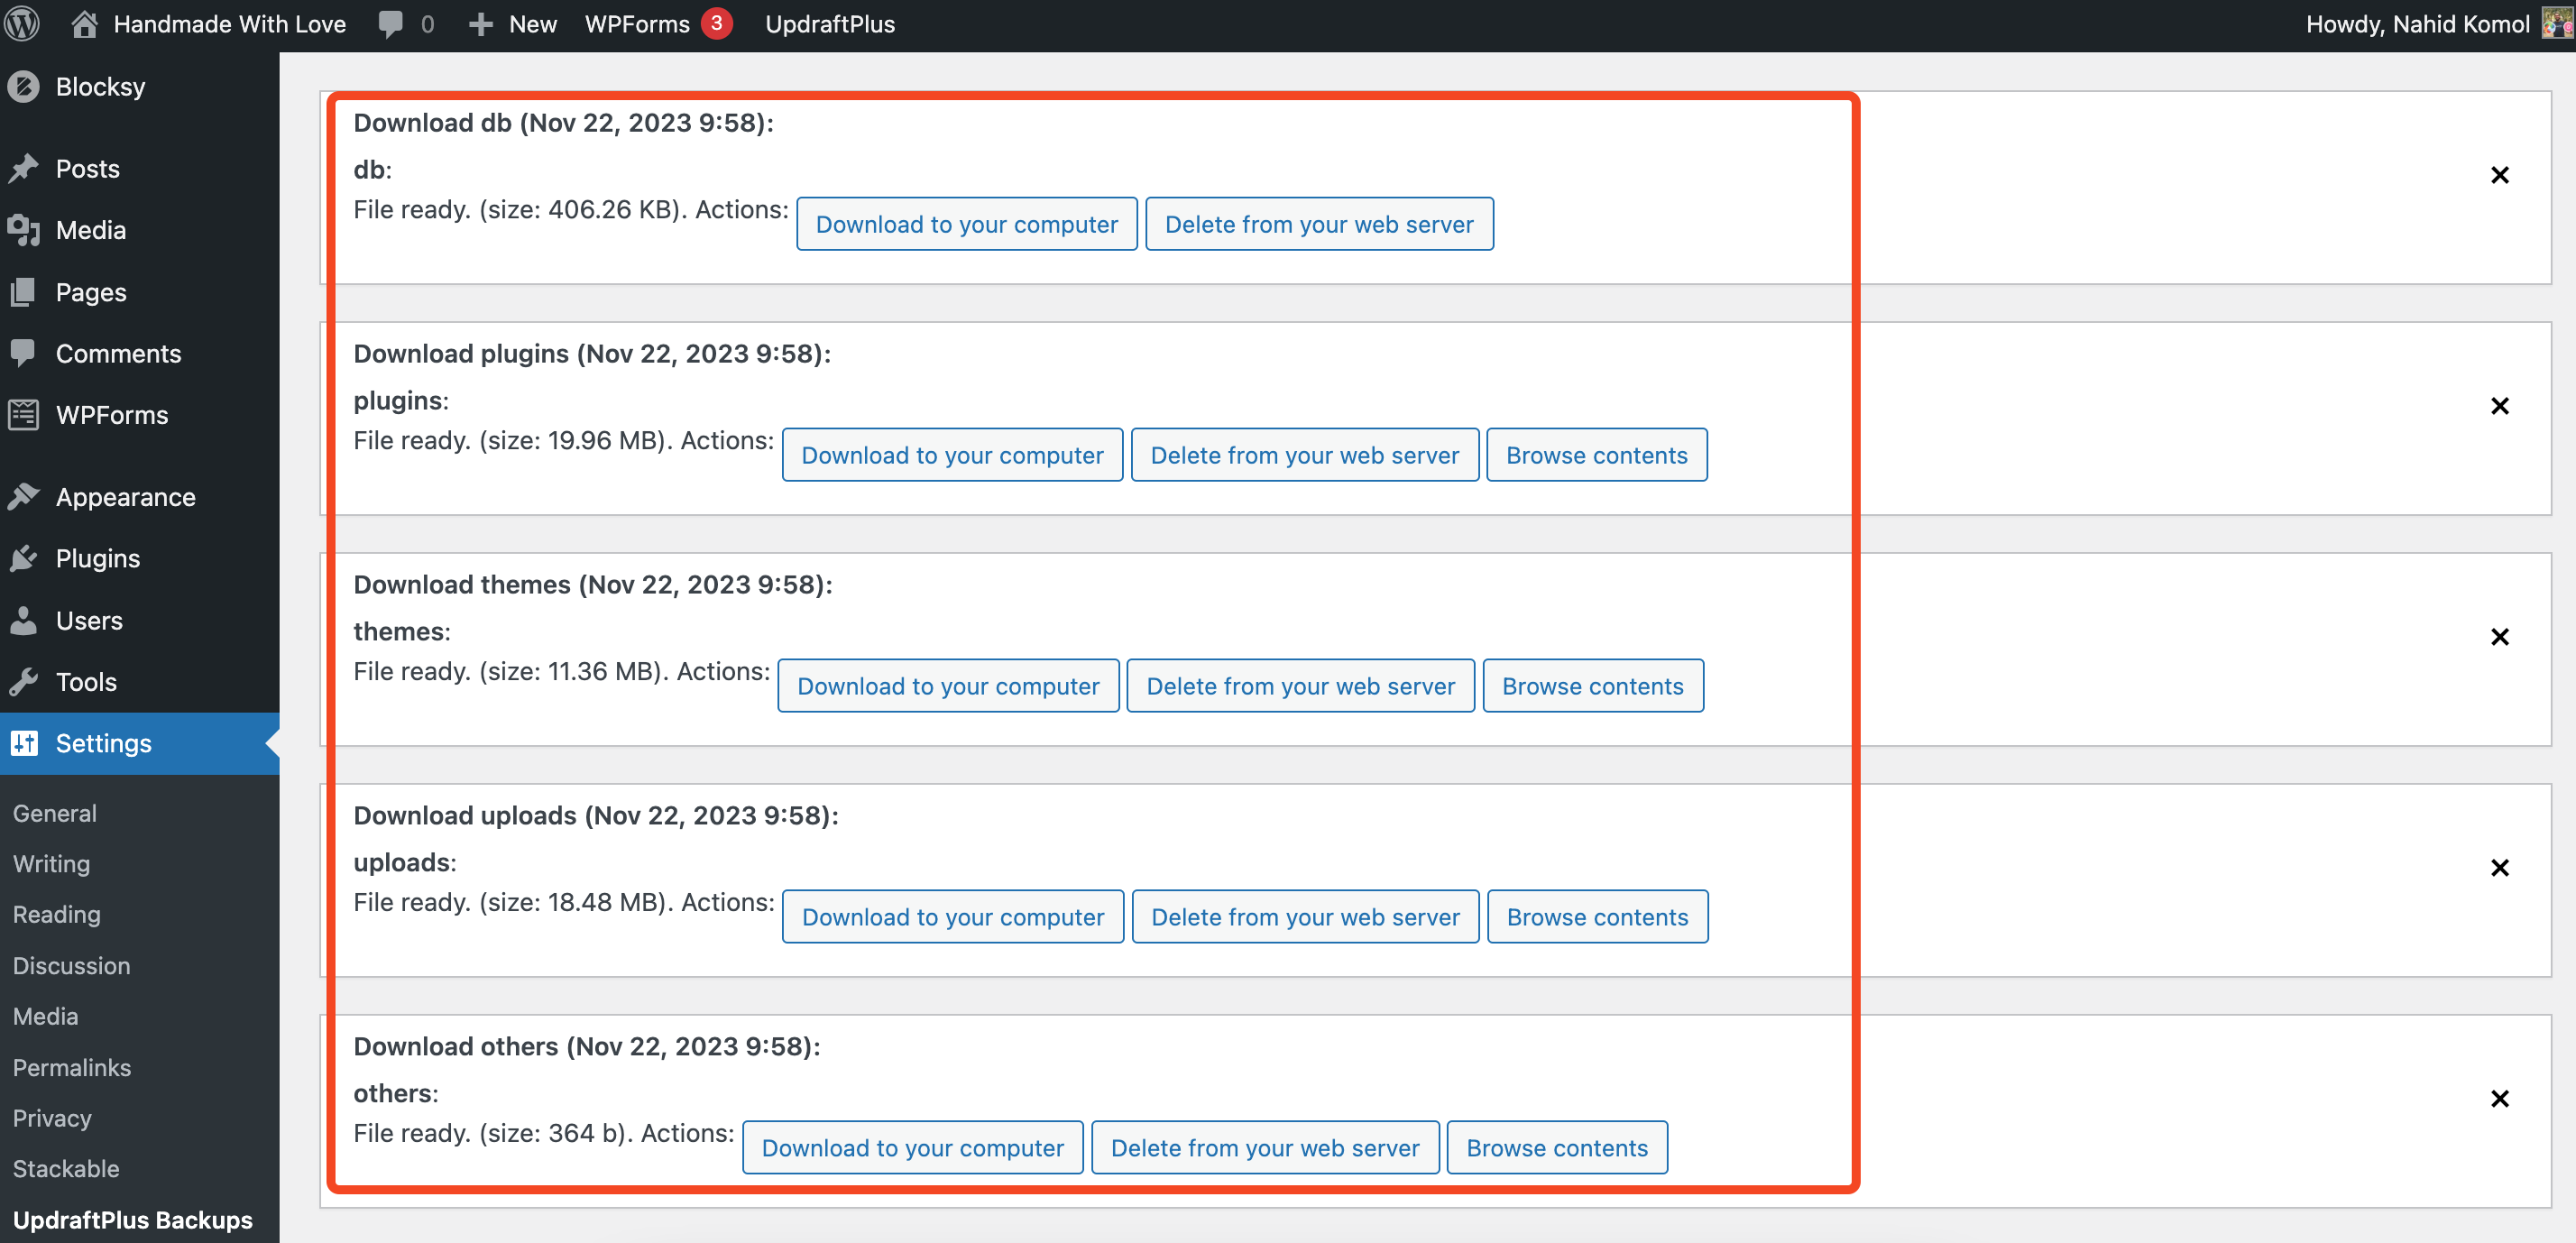
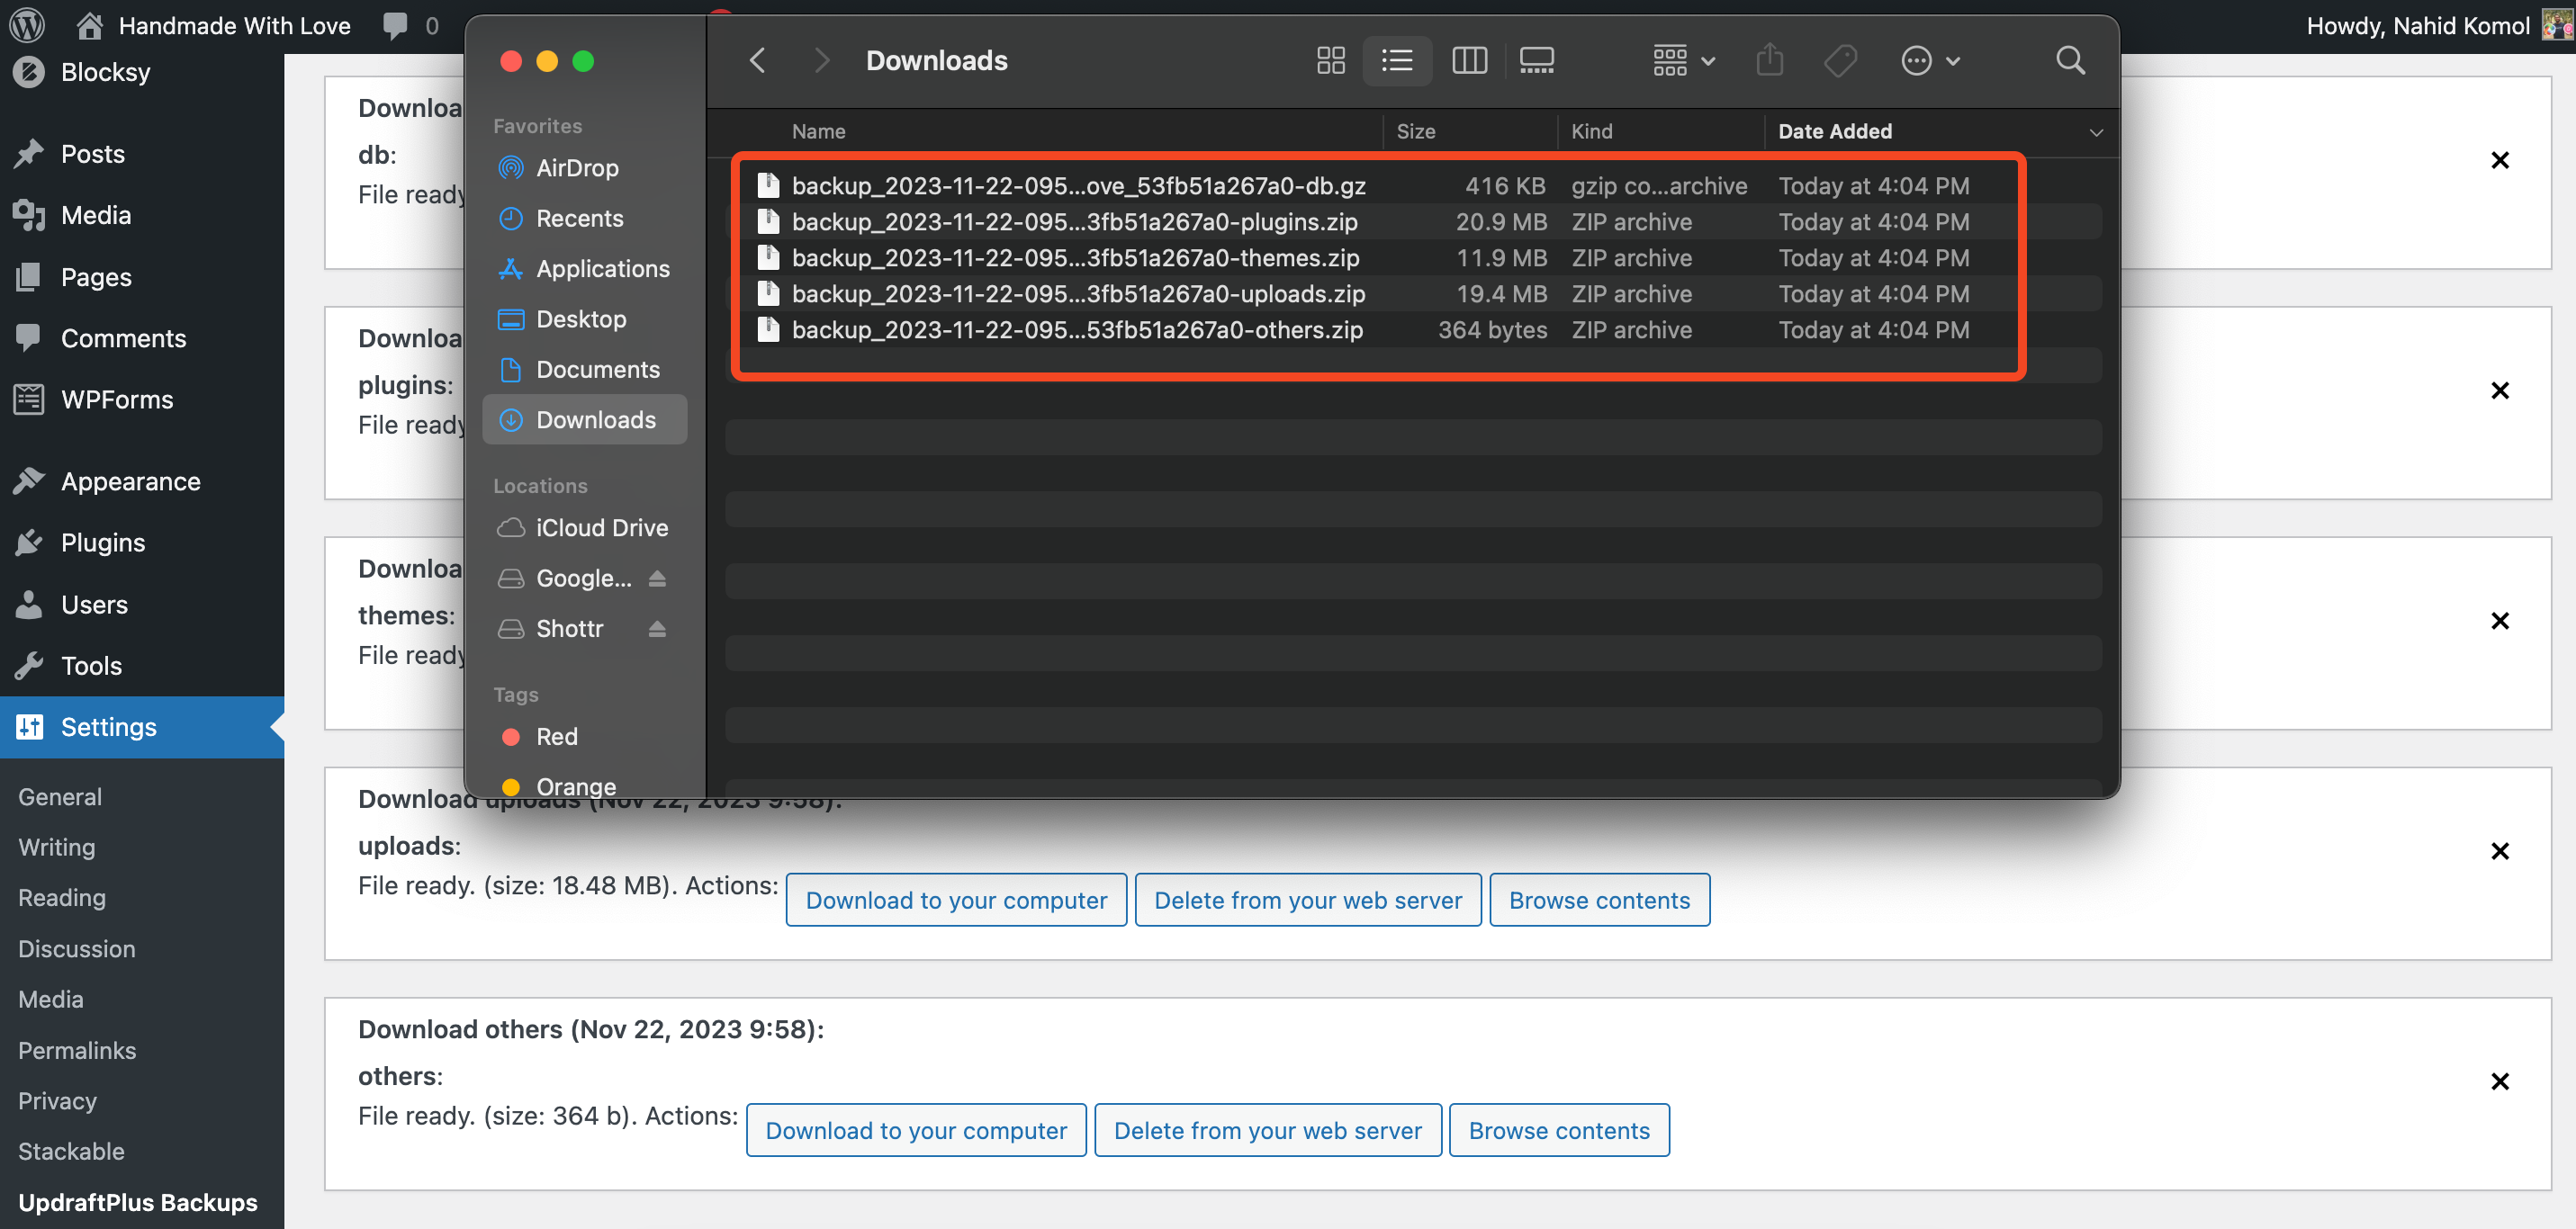
- Make sure you download all the backed up files to your local computer
Step five: Importing the old site’s data to the new site
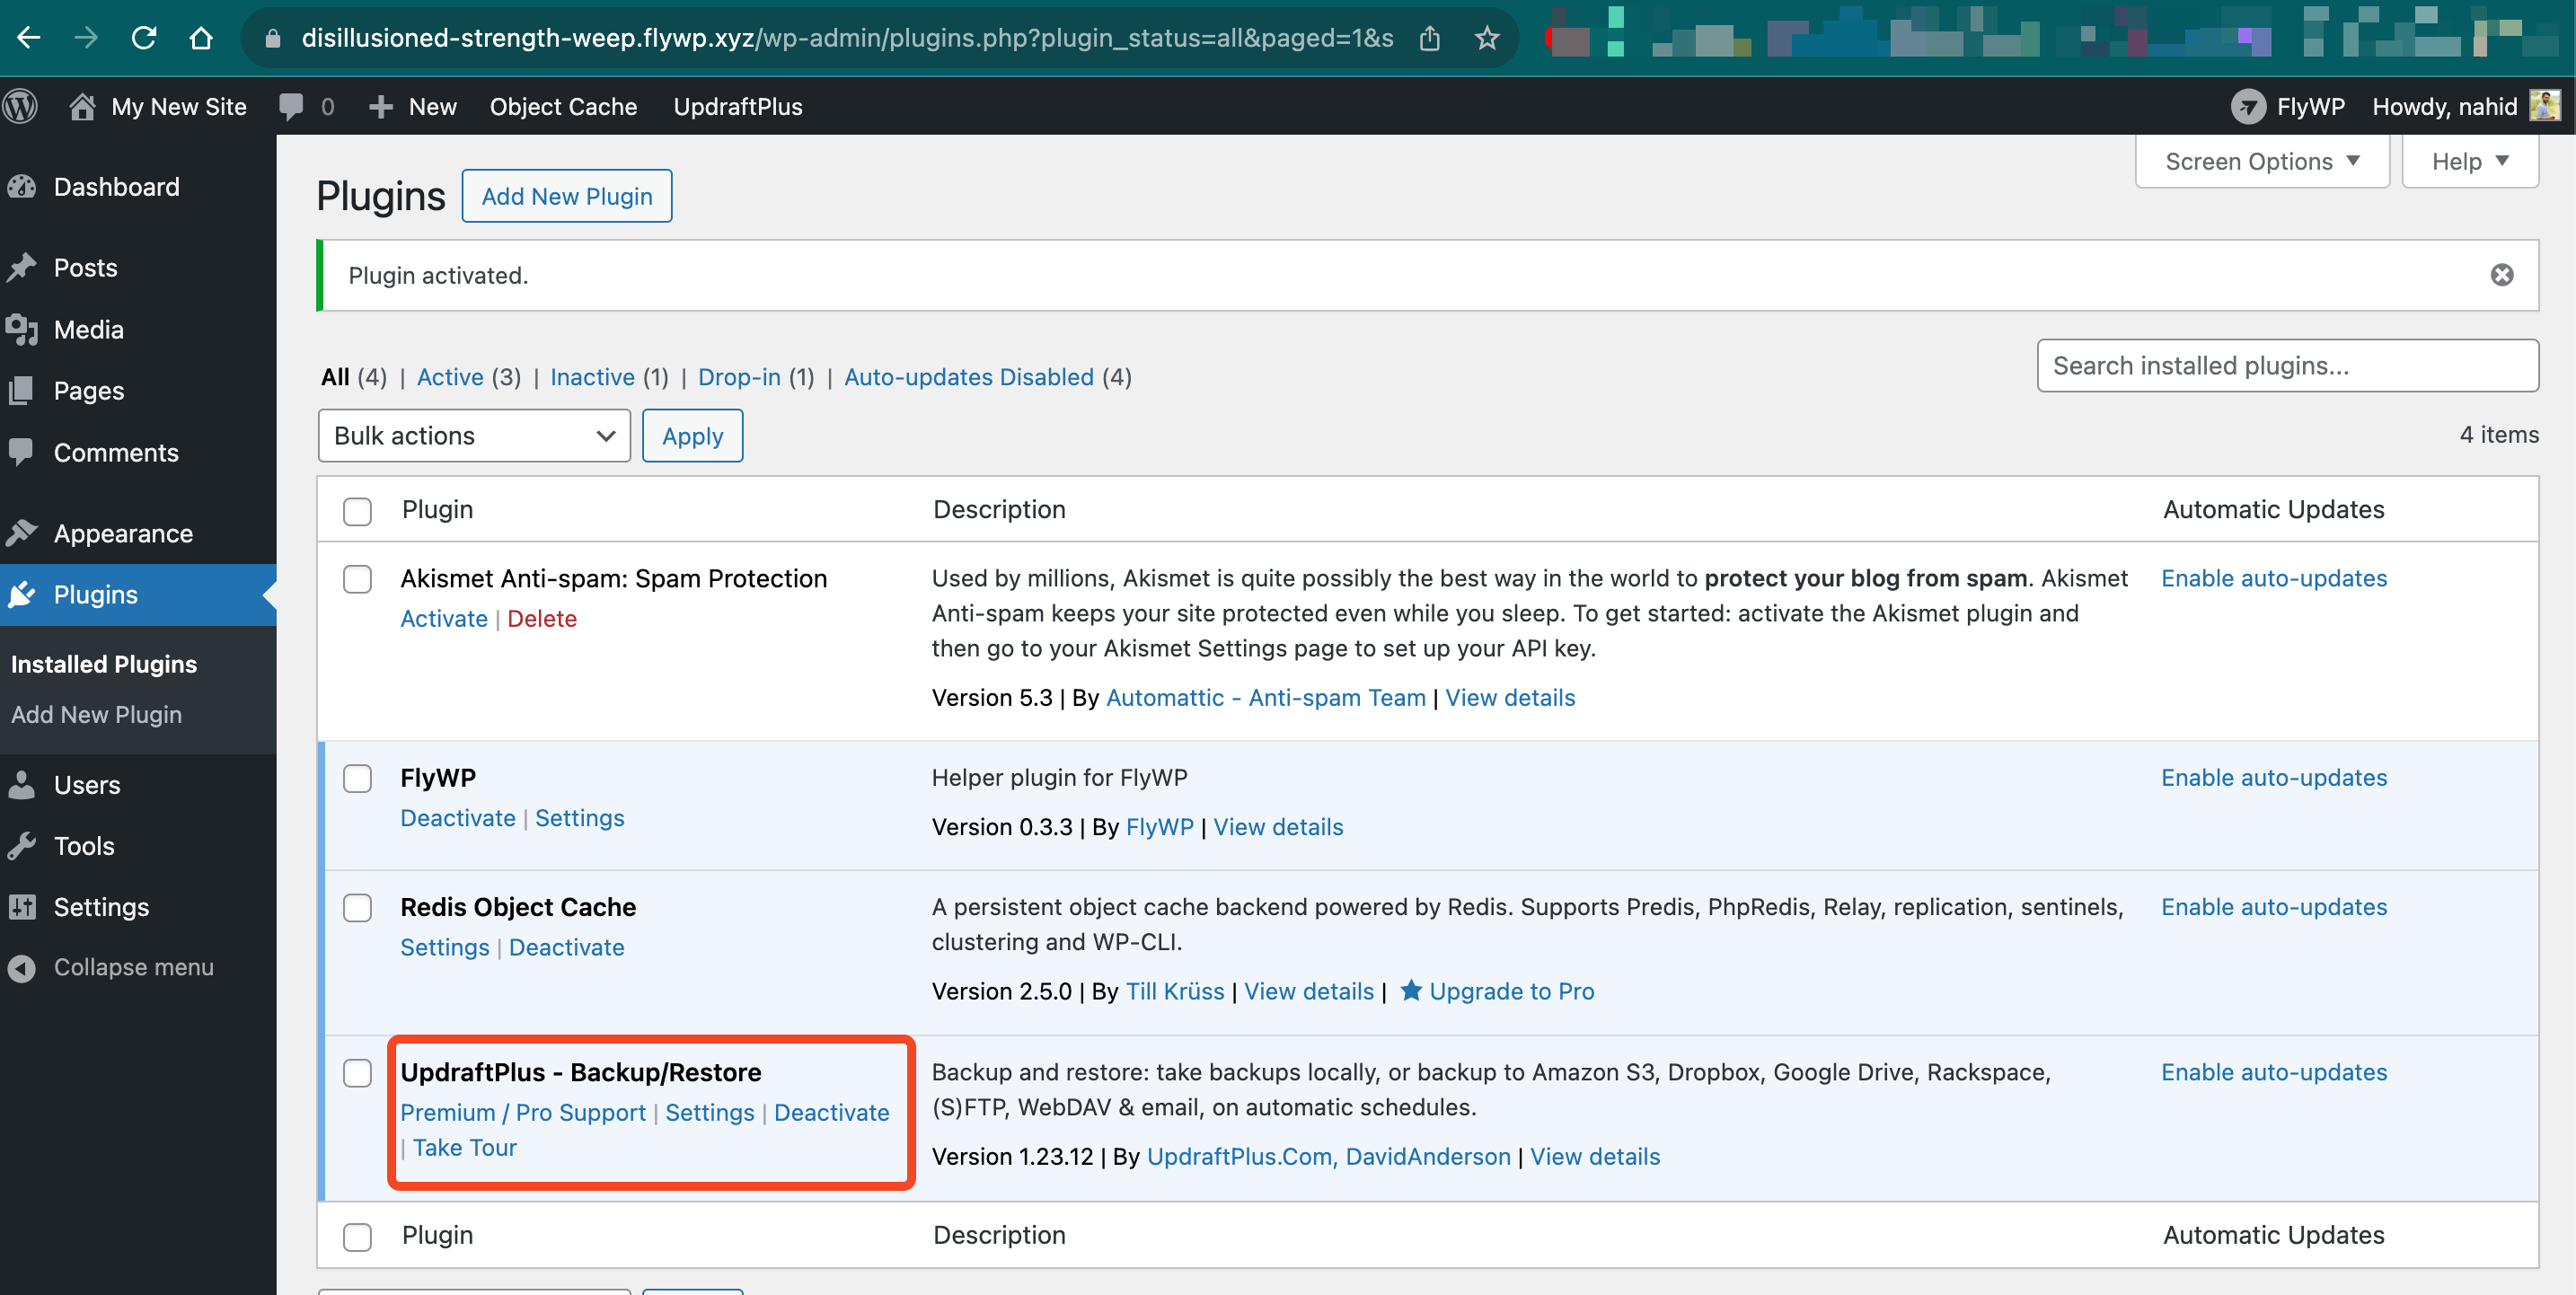
As we have used the Updraft Plus plugin for keeping the backup file, we’ll use it for our new site too. So install and activate the Updraft Plus Backup plugin on the new site.
- It will look like this after you install and activate the UpdraftPlus plugin on the new site.
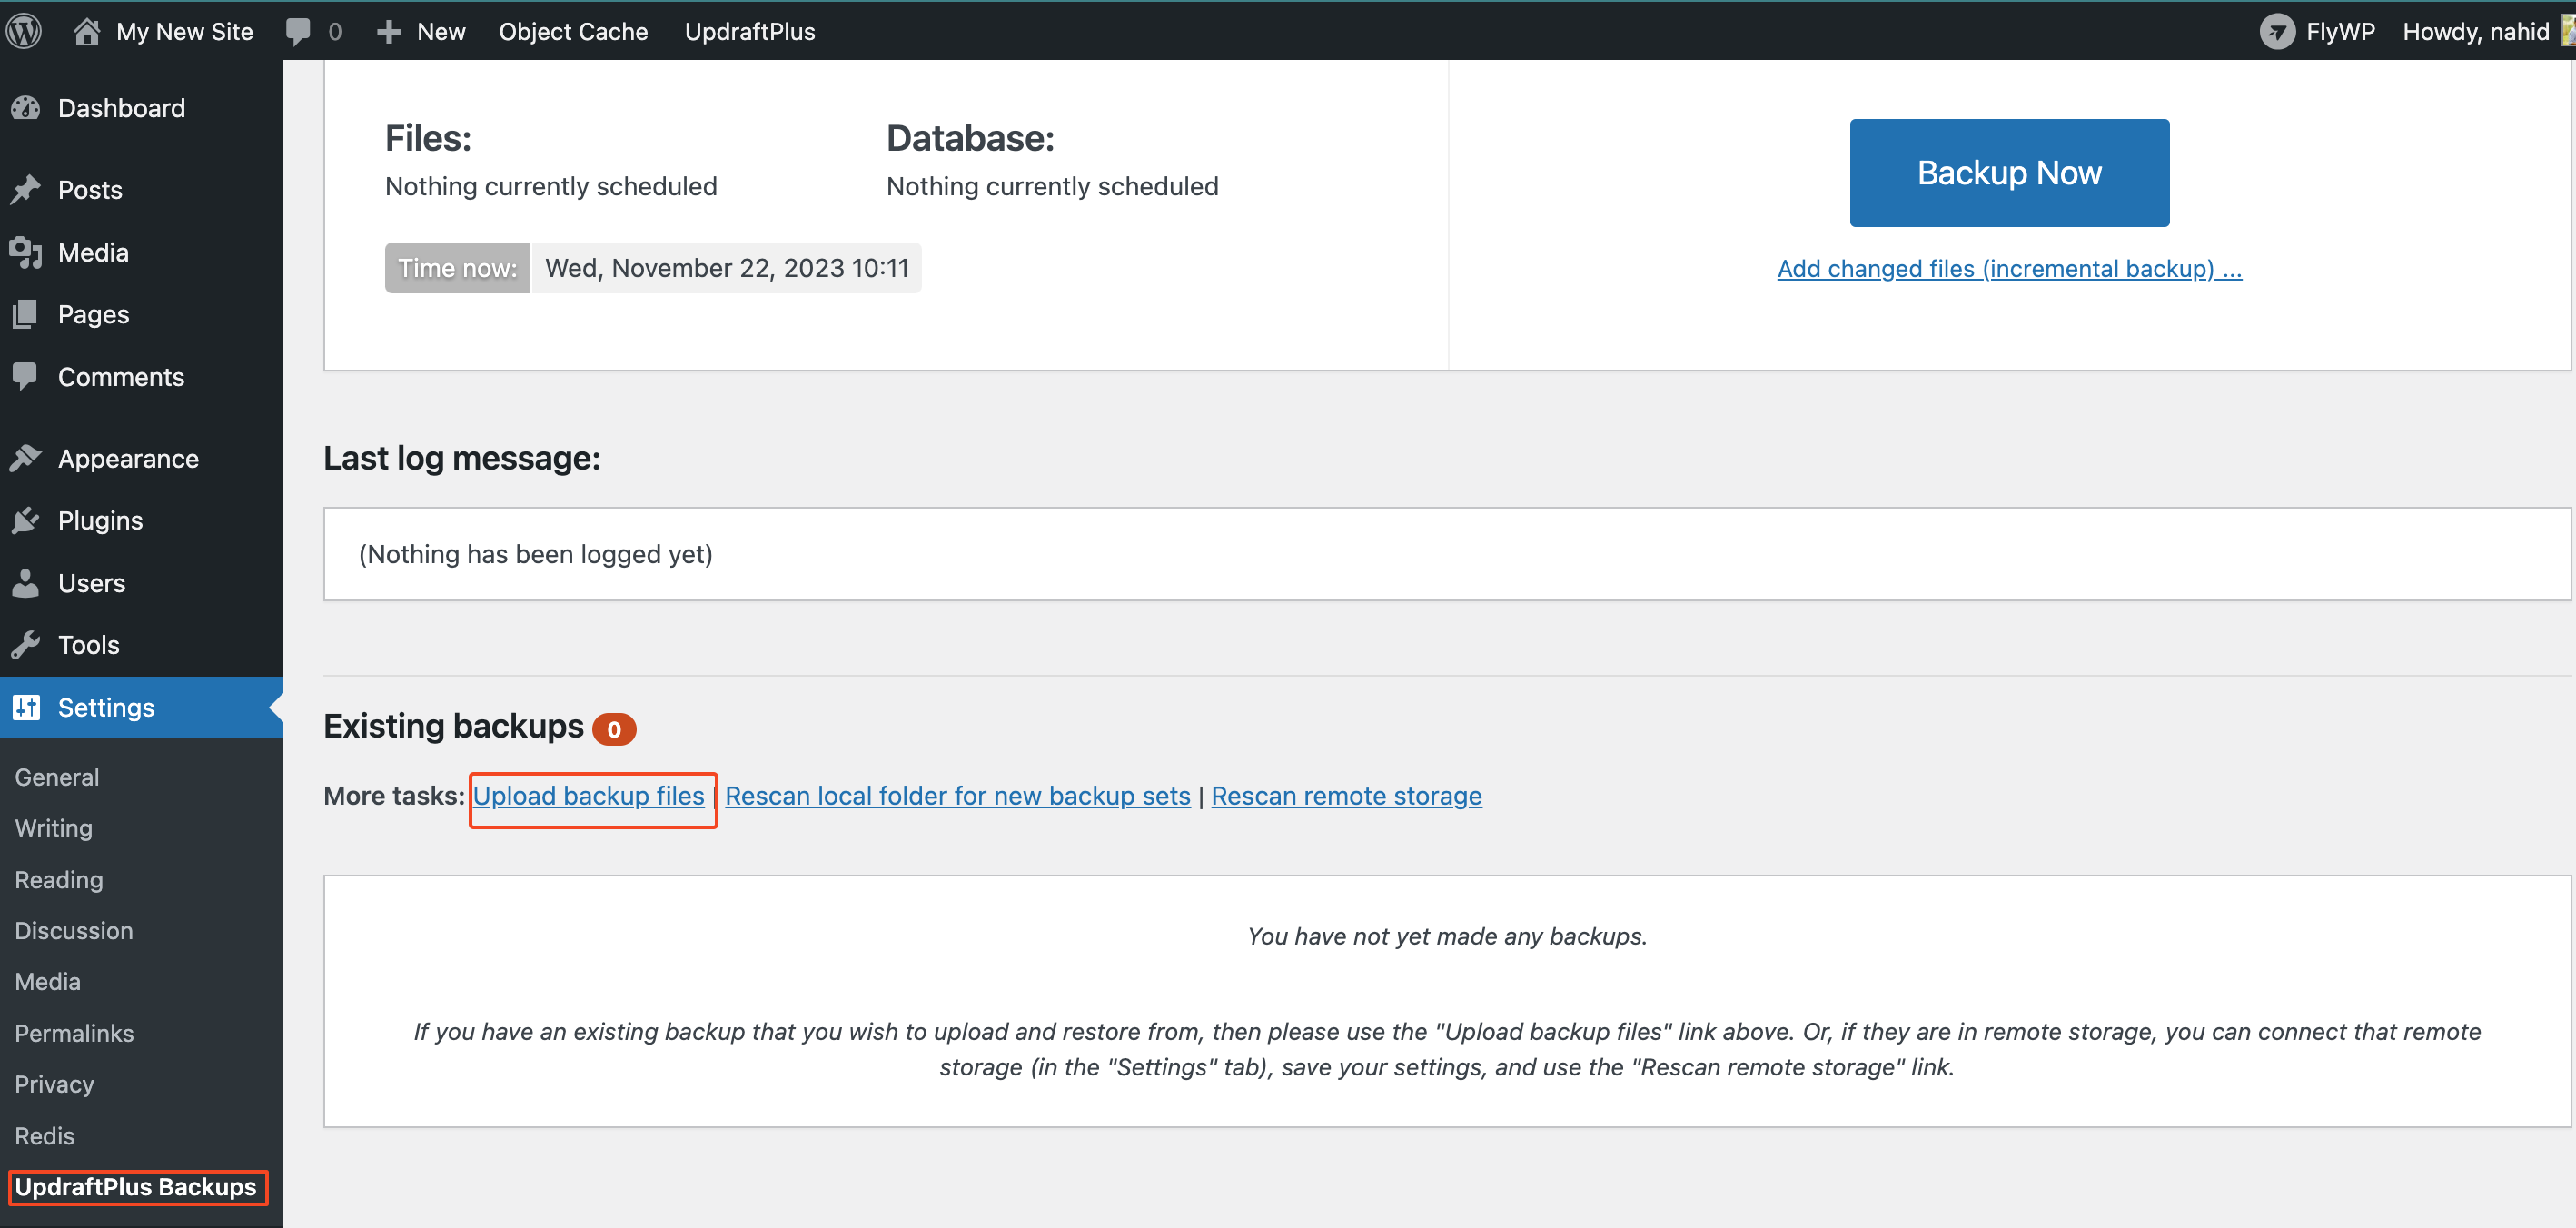
- Similarly, navigate to Settings → UpdraftPlus Backups. Here, you can find the “Upload backup files” option. Click on it.
- Now one by one upload the backup files that you saved earlier.
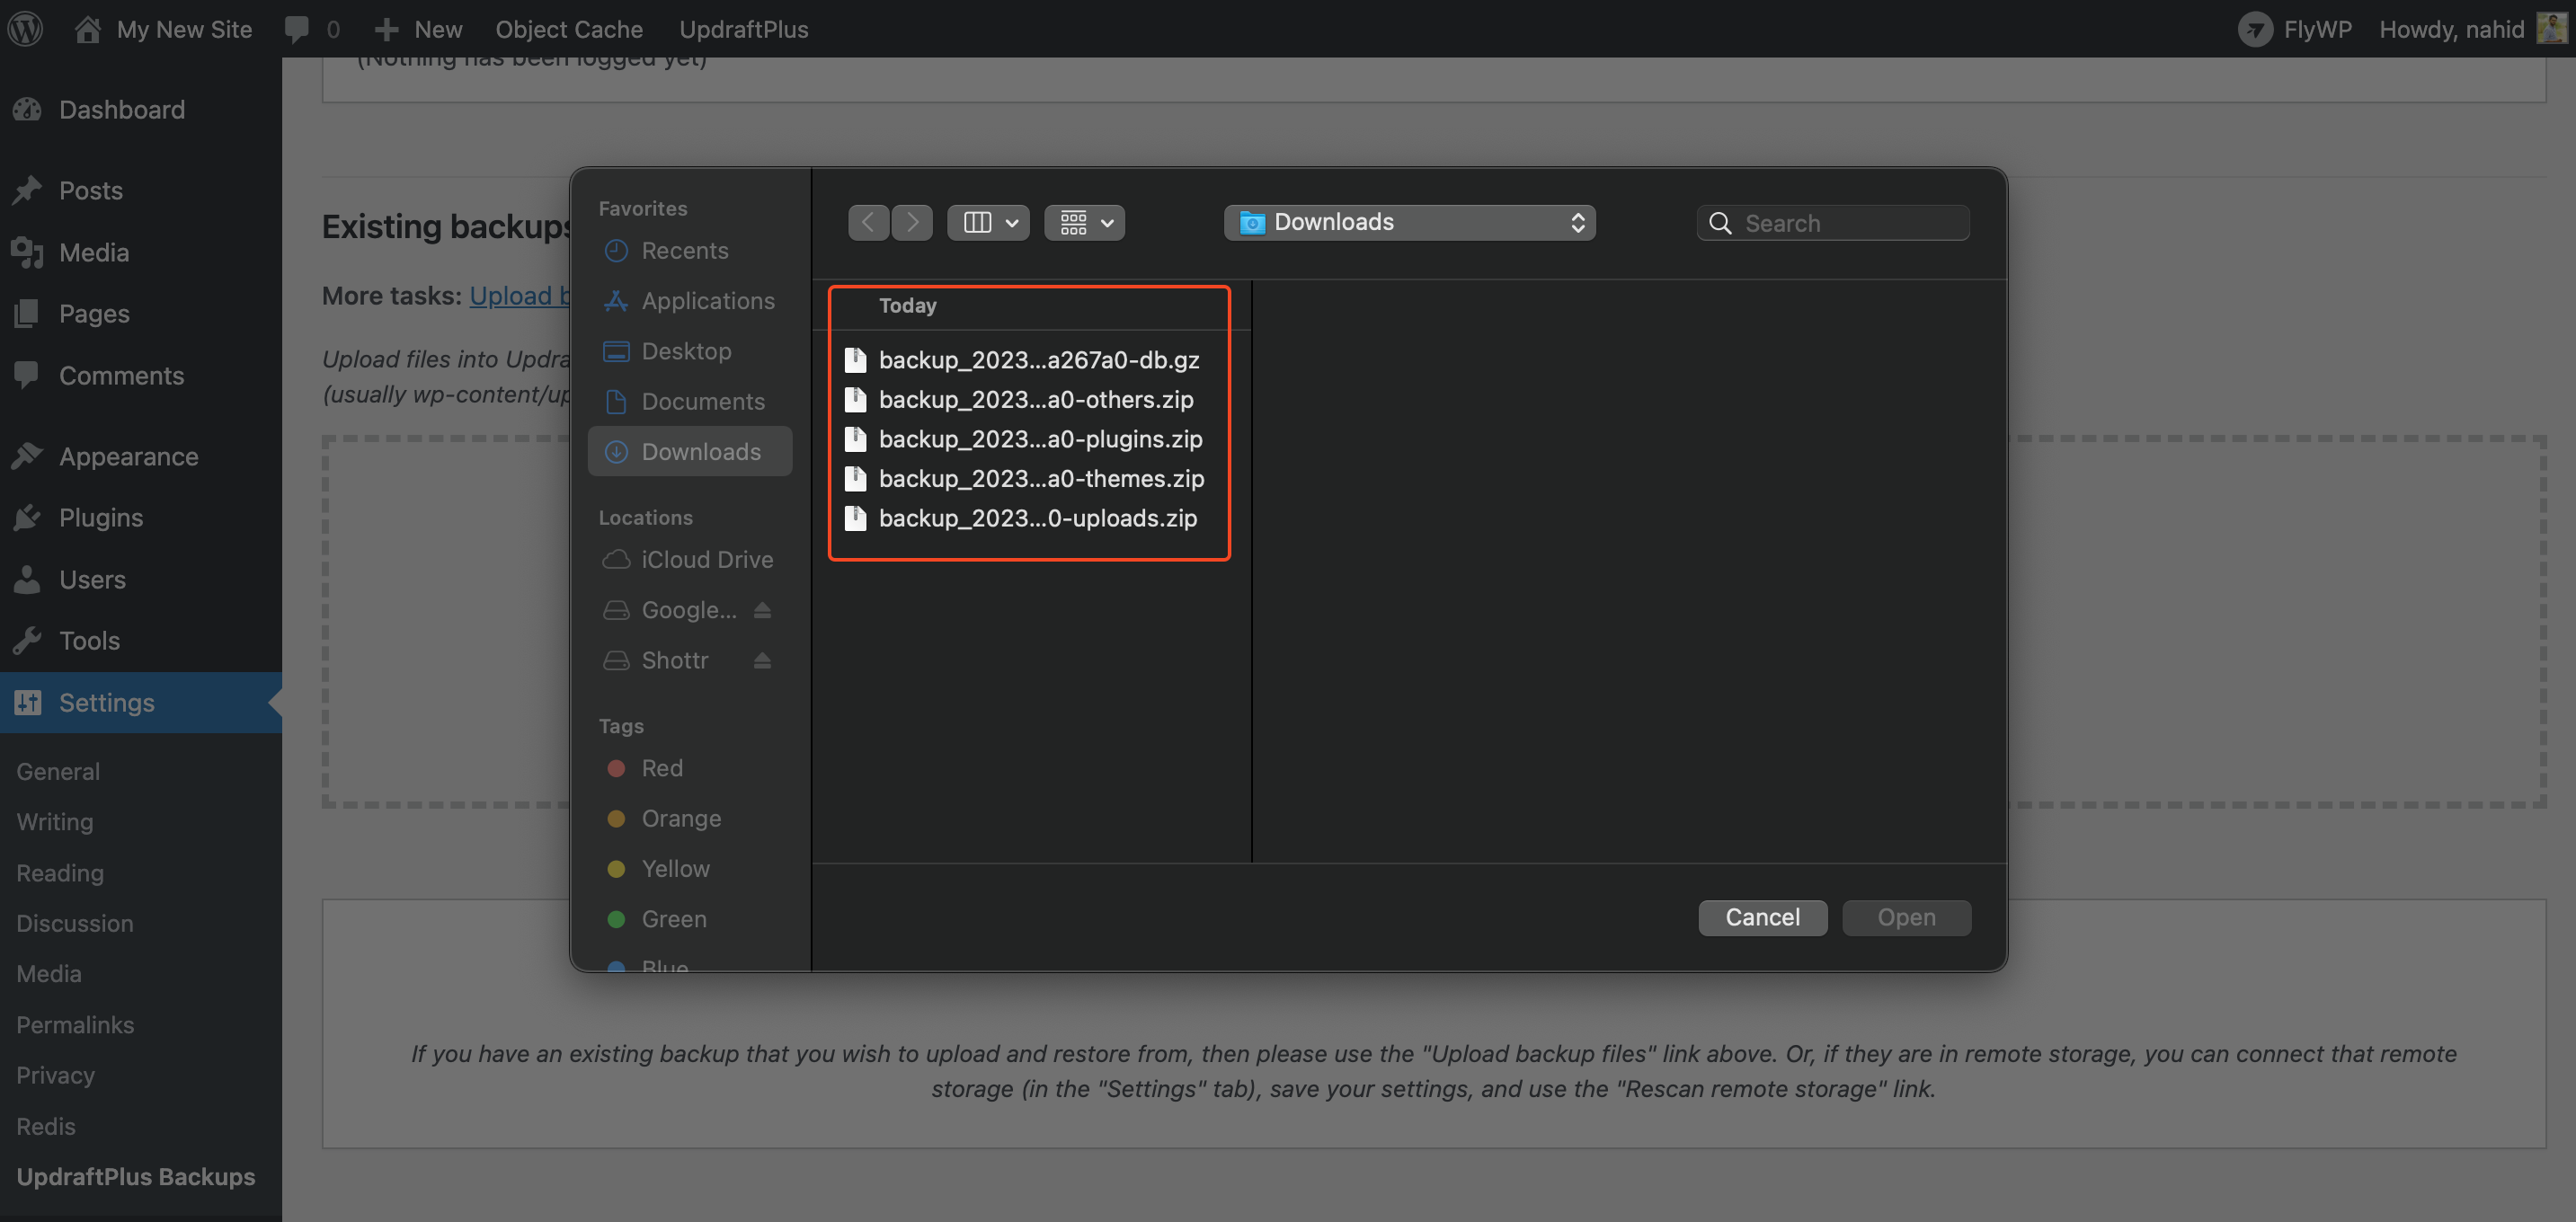
- You can see the backup files are successfully uploaded.
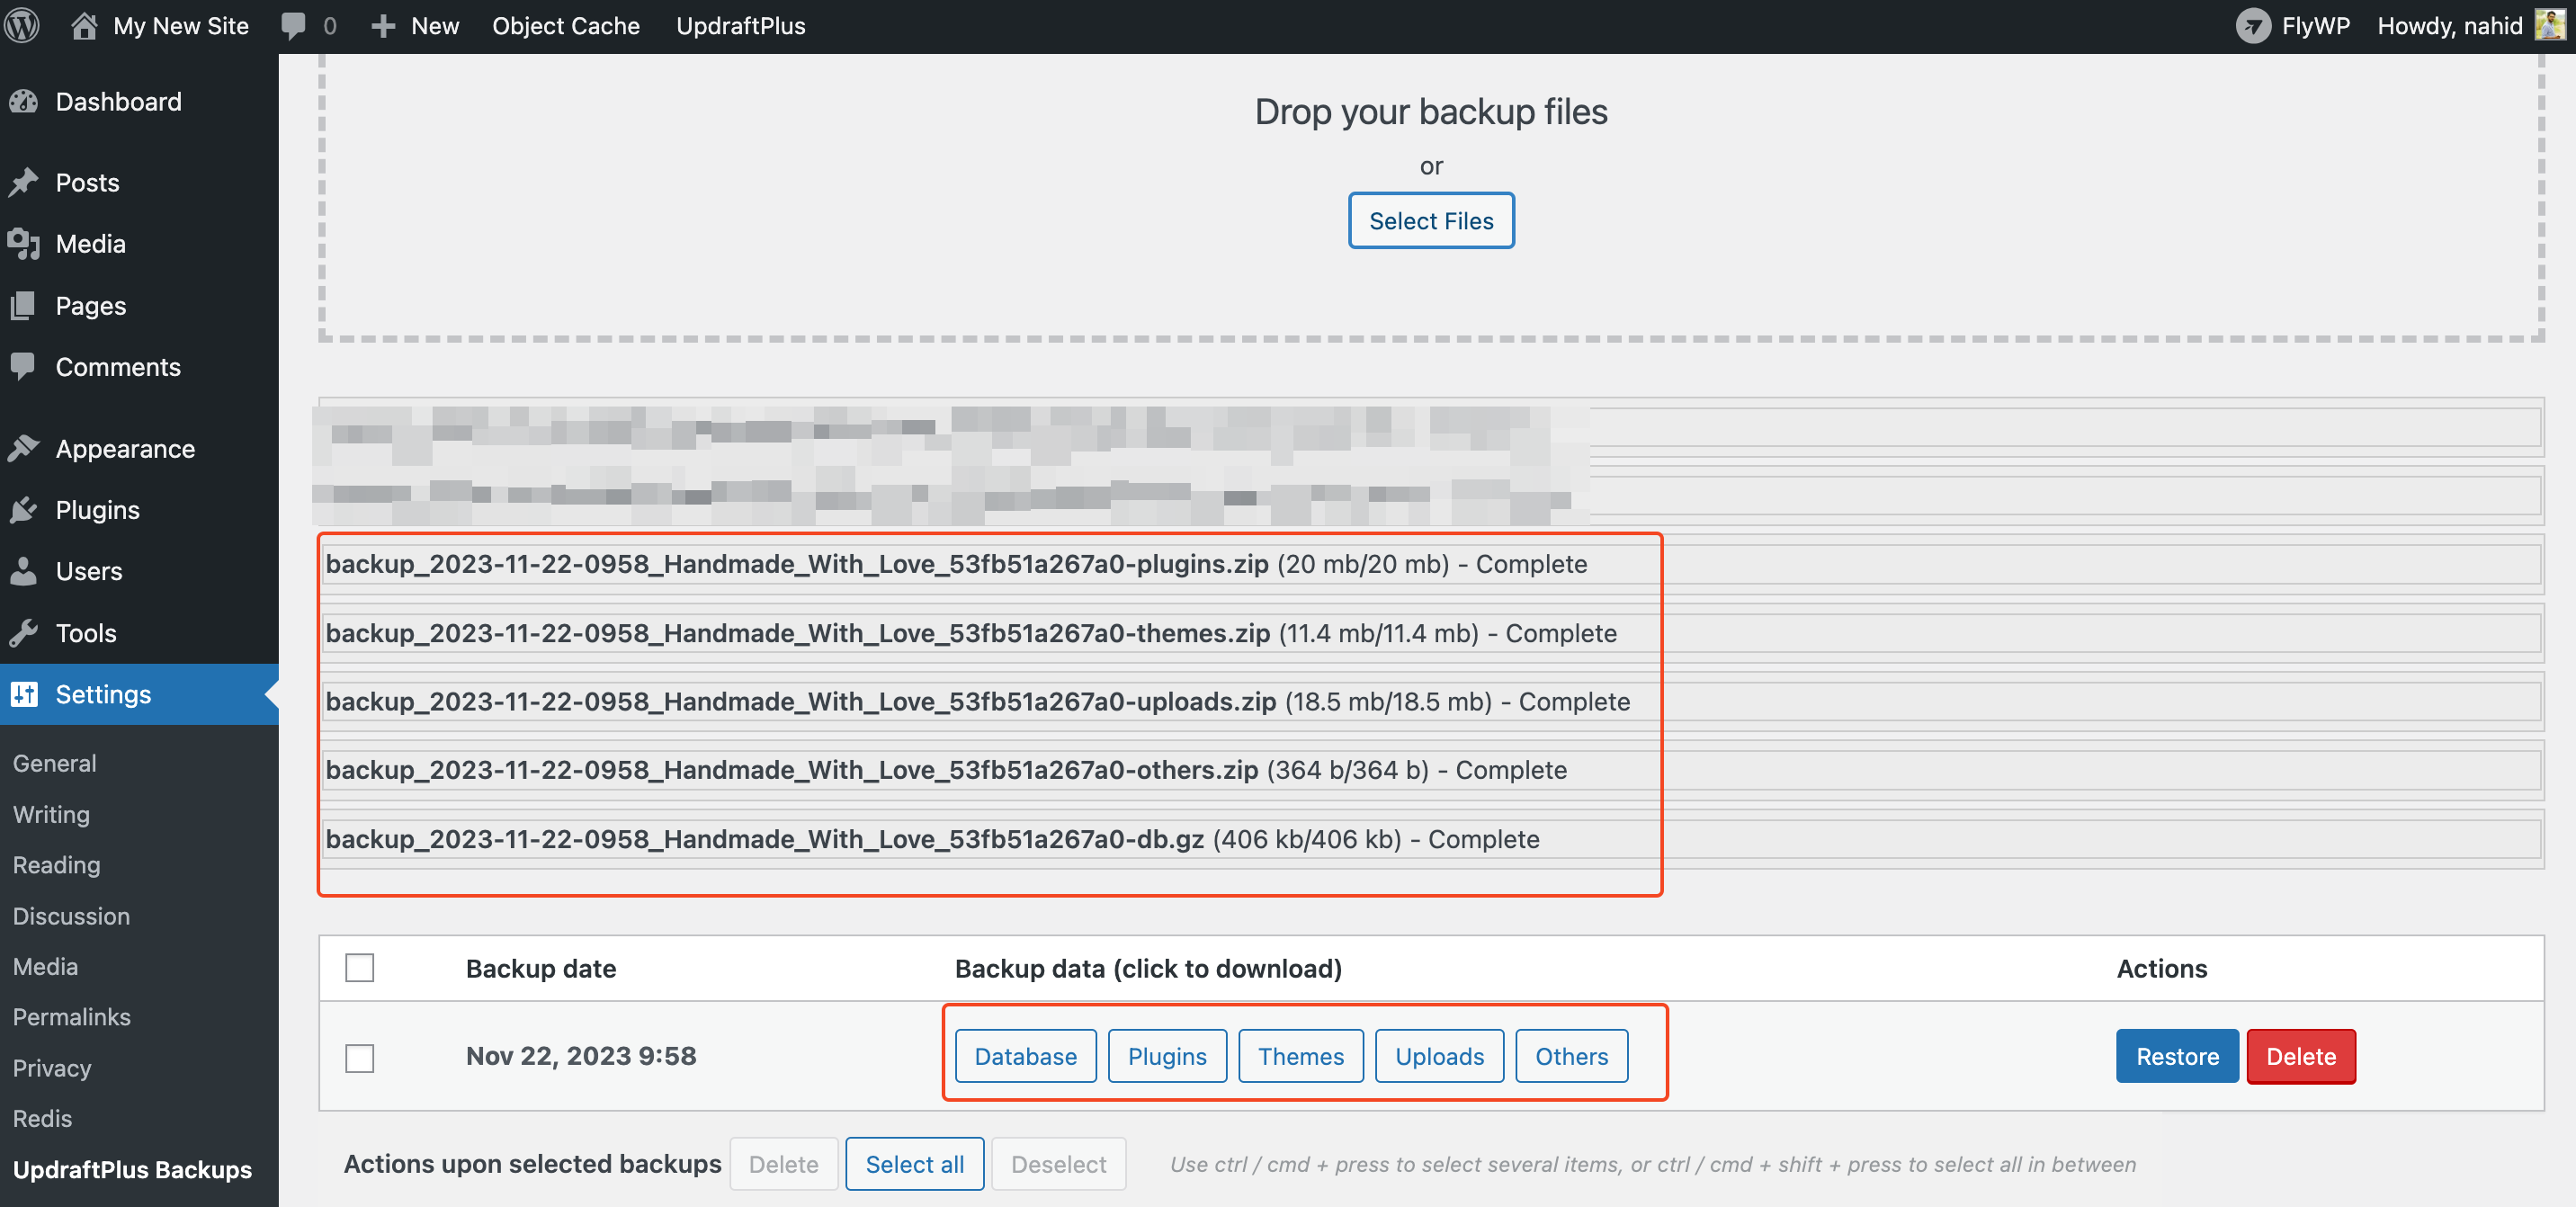
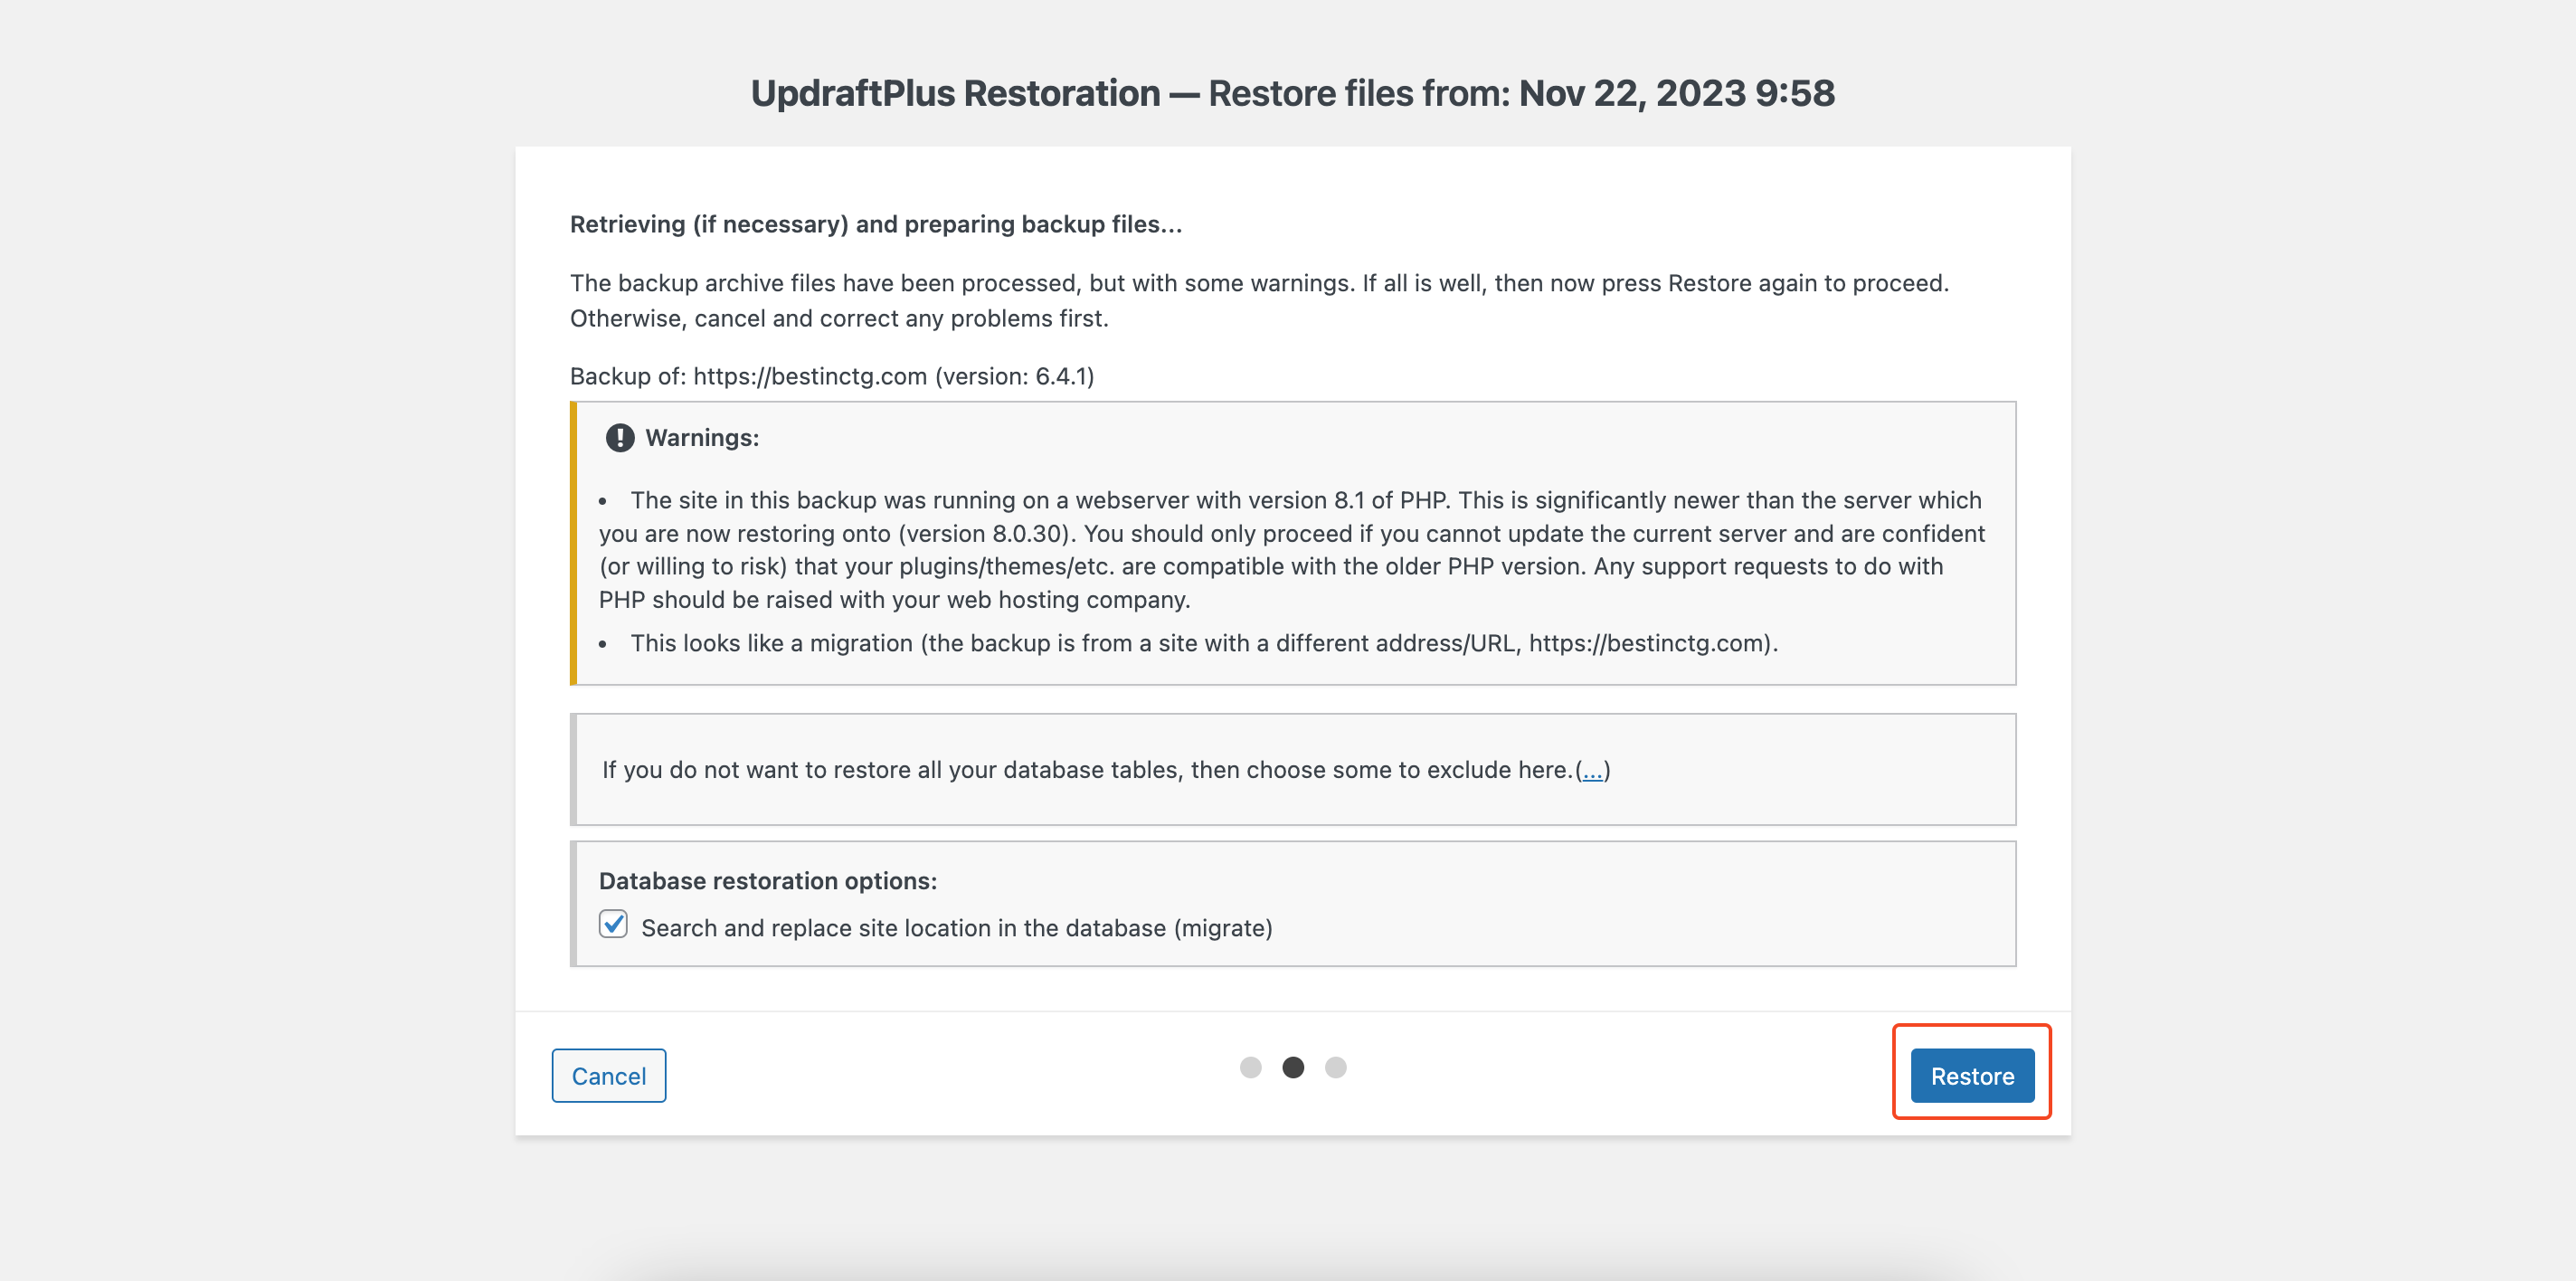
- You can see the files are uploaded here. Check with Select all and click the “Restore” button to continue the import task.
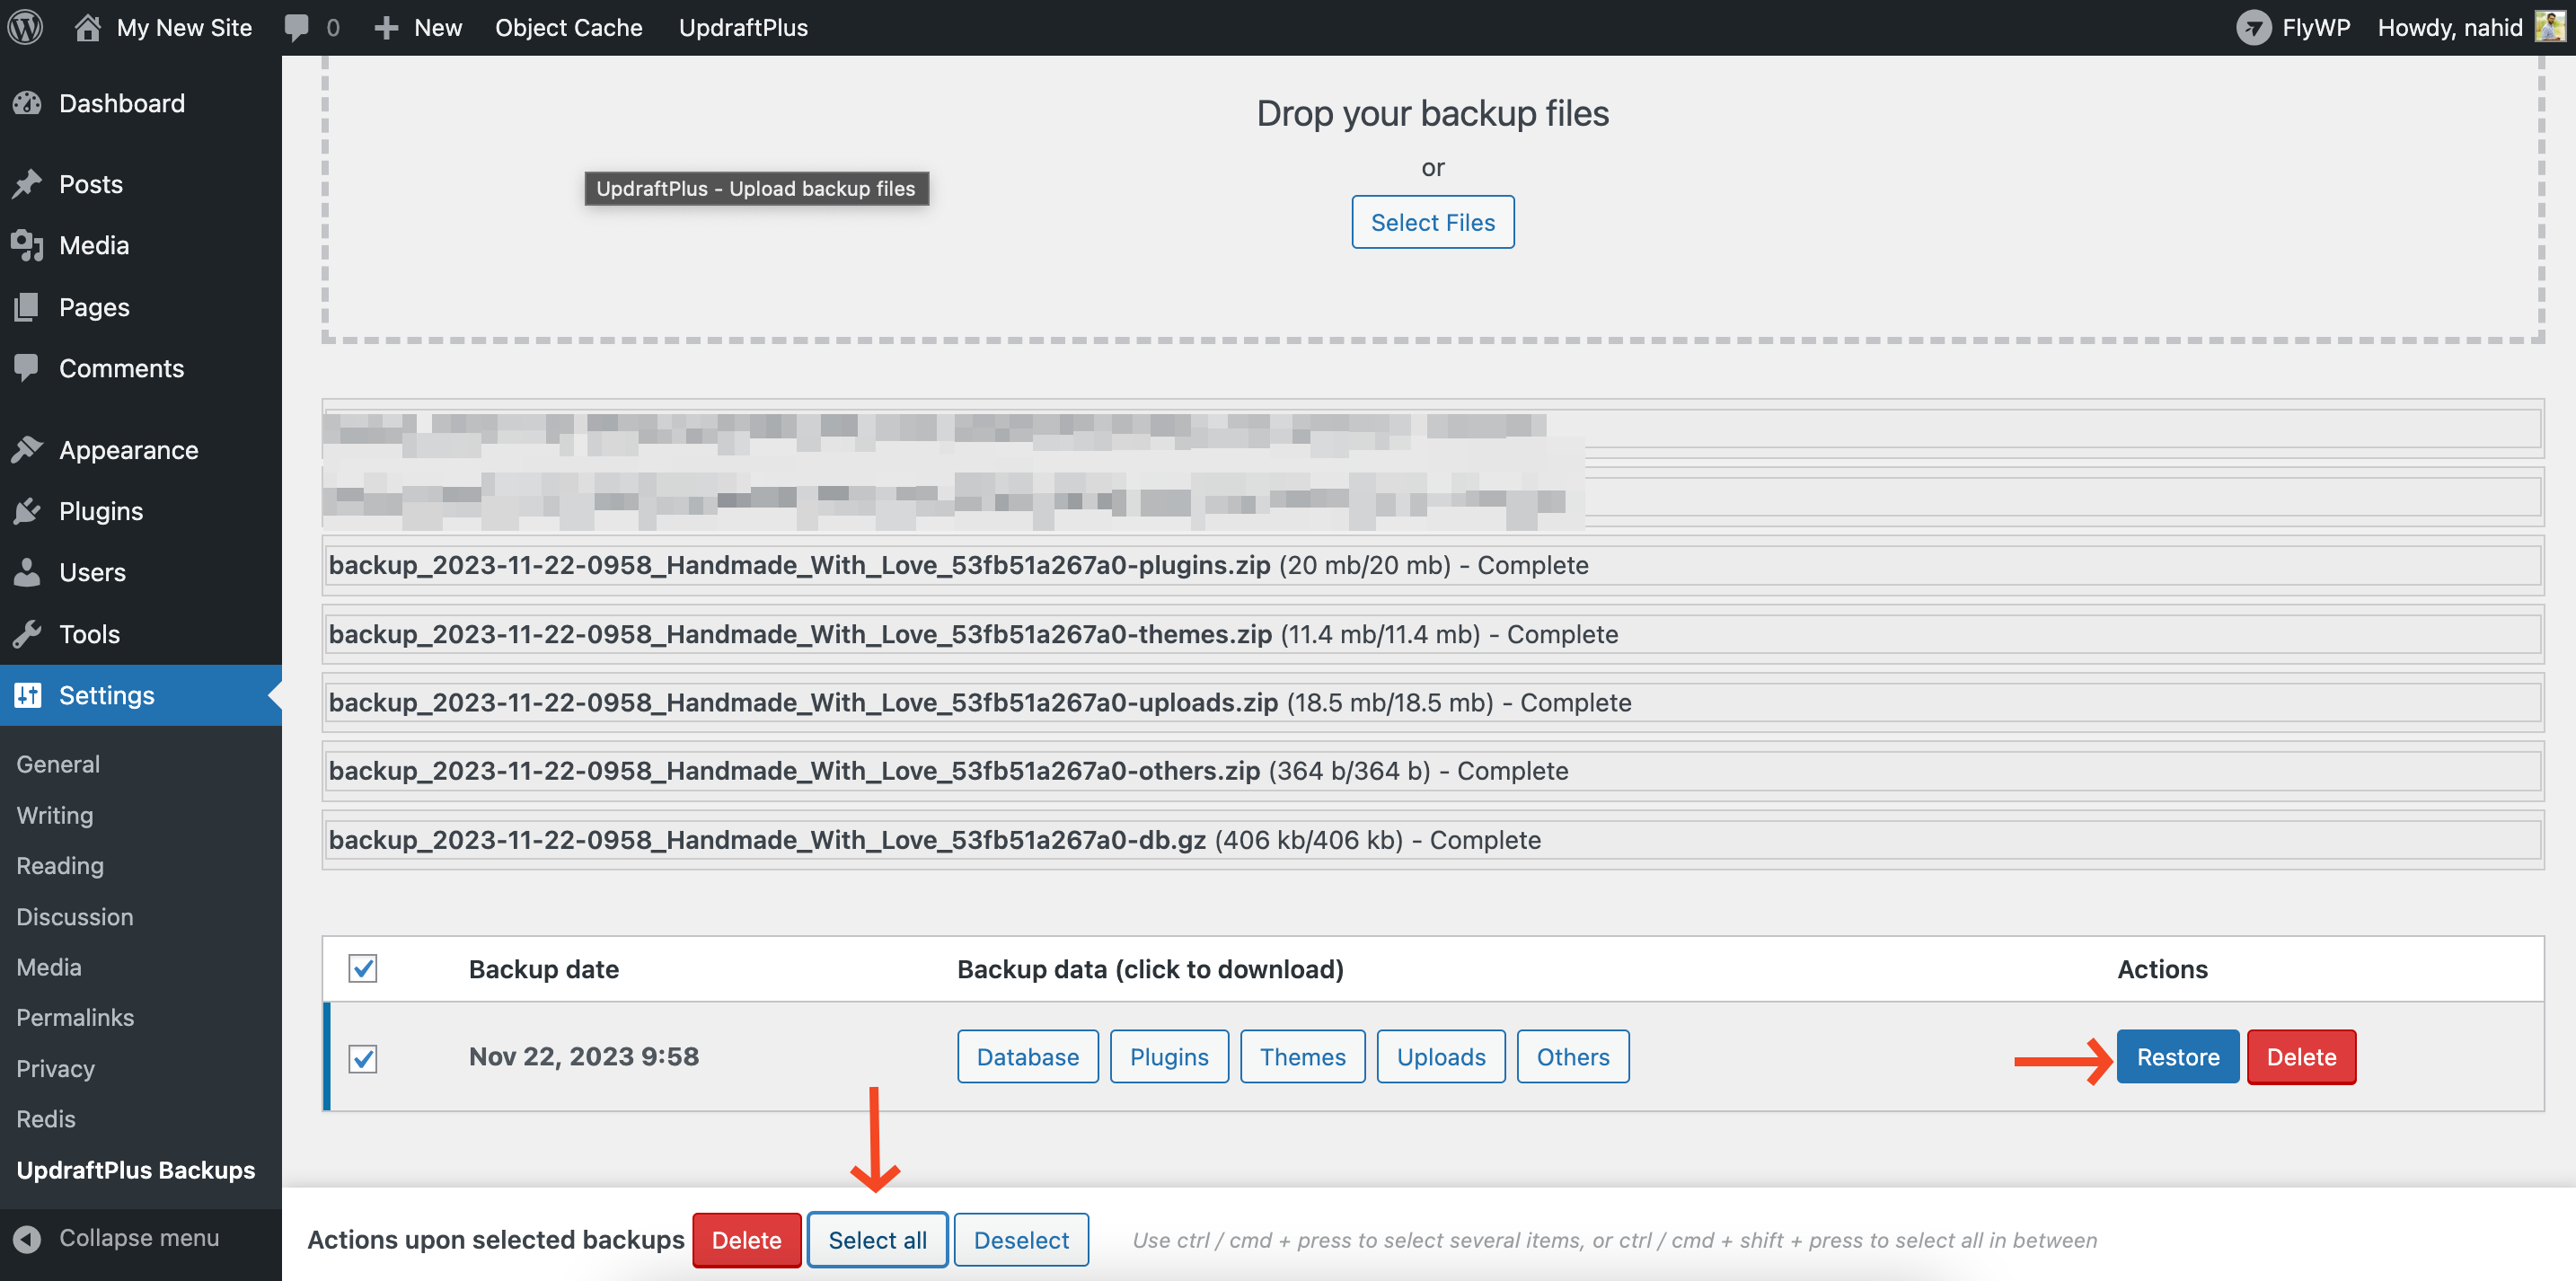
- Here, select all and hit on the next button.
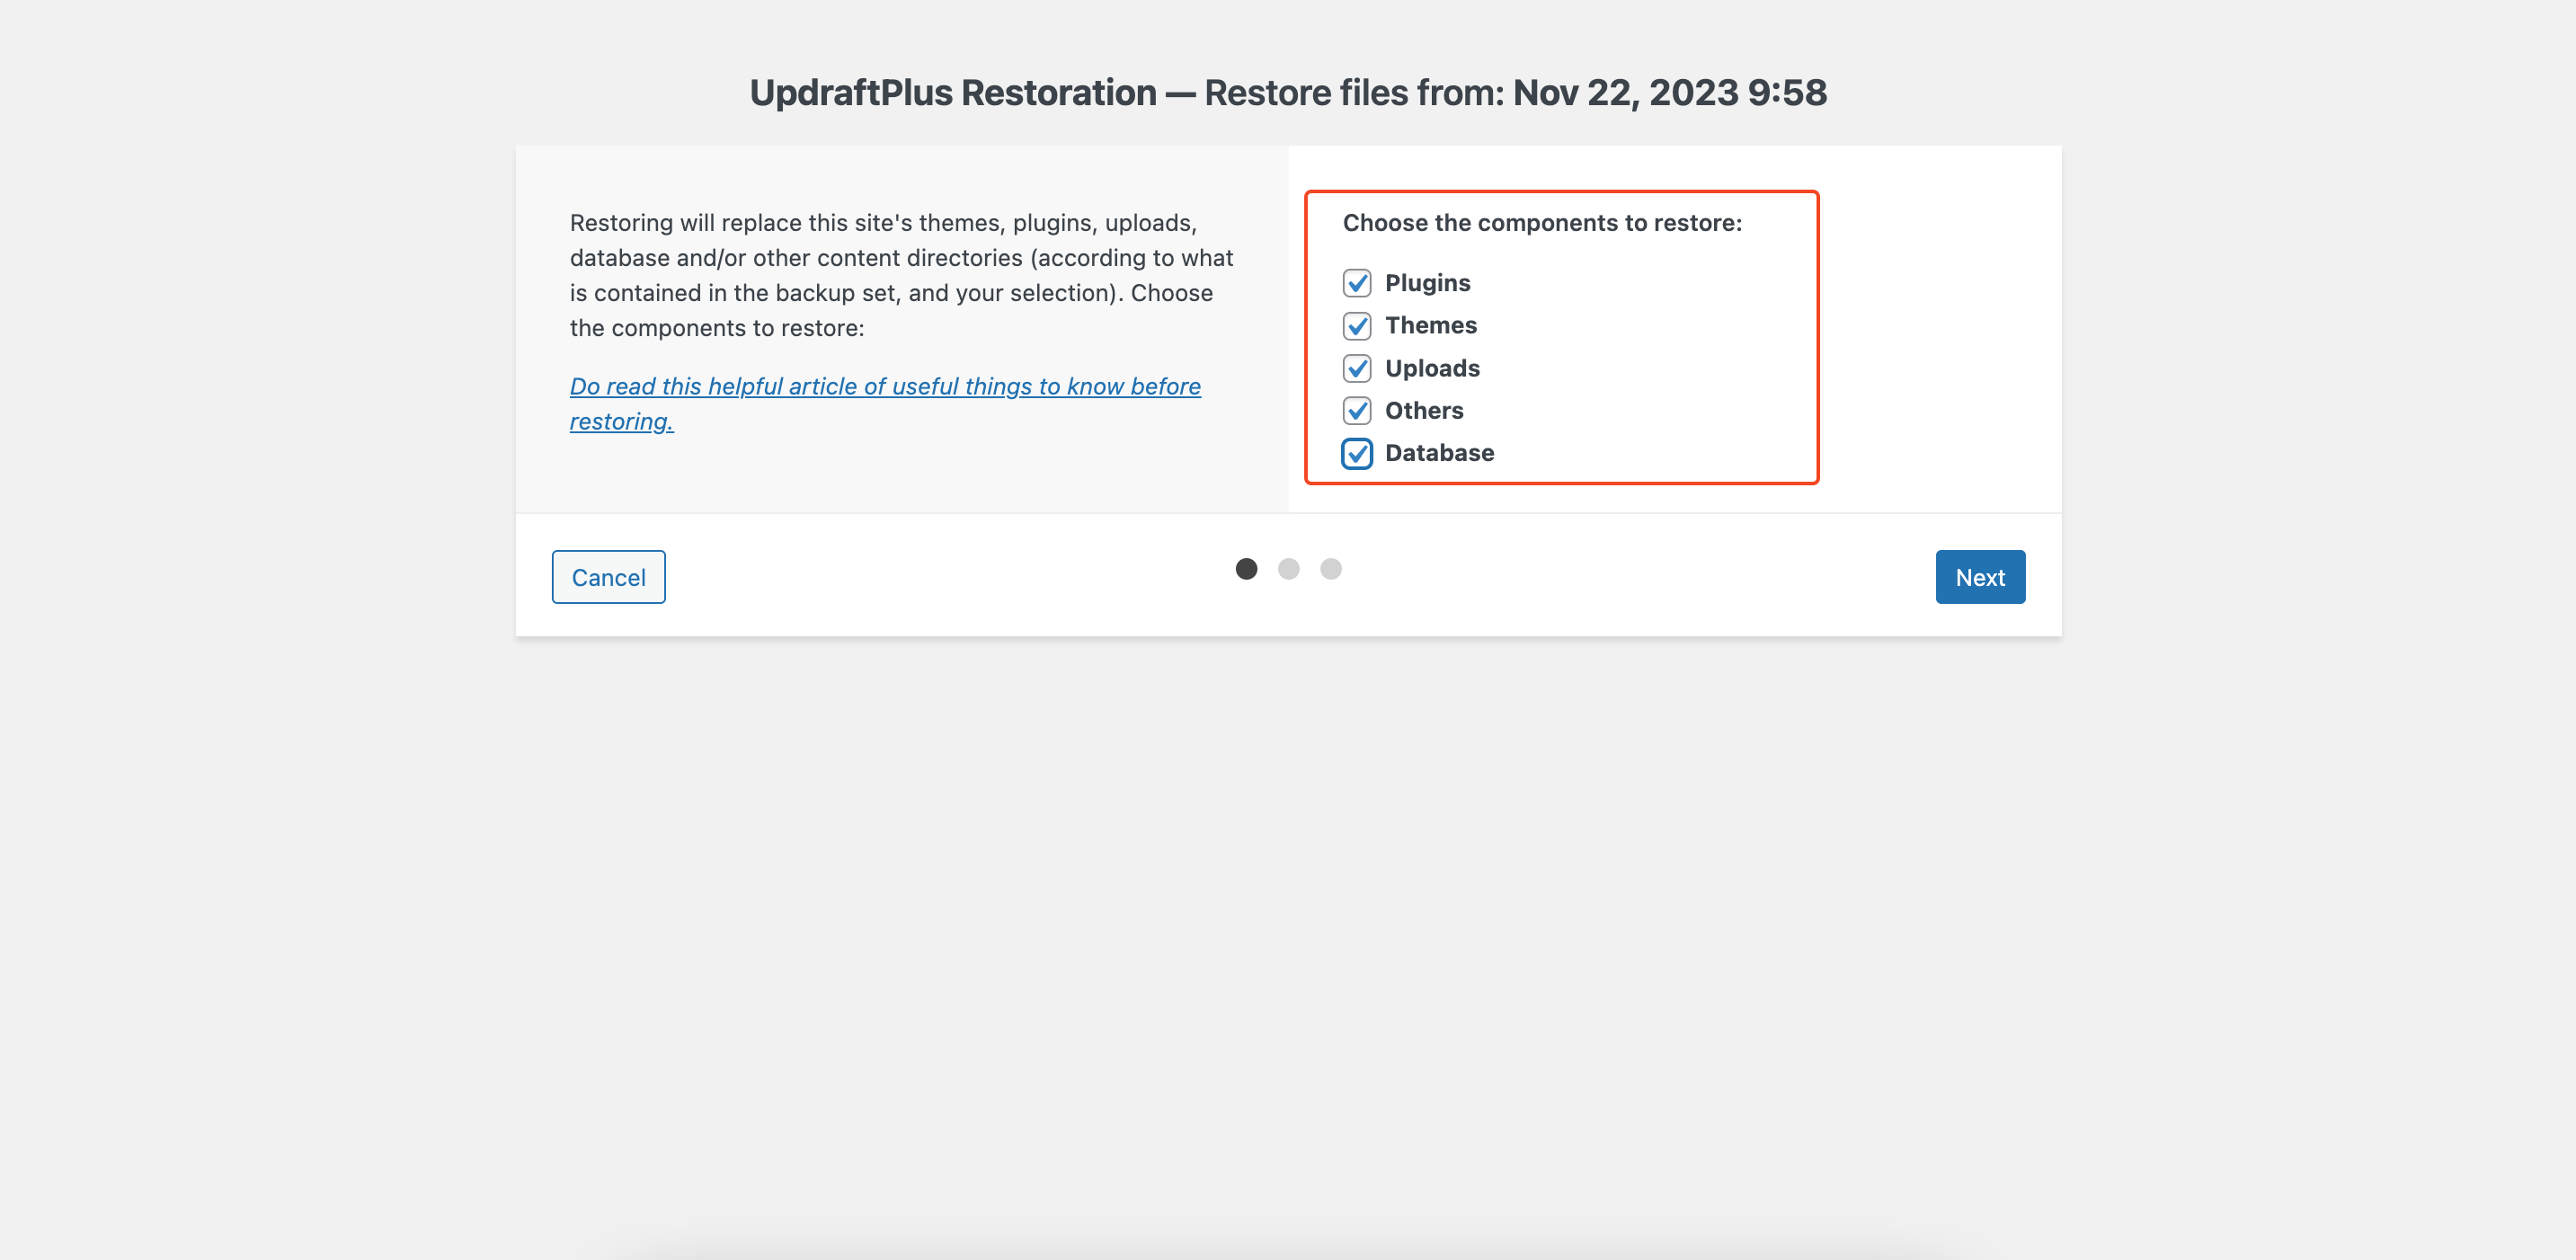
- Click on the restore button to continue.
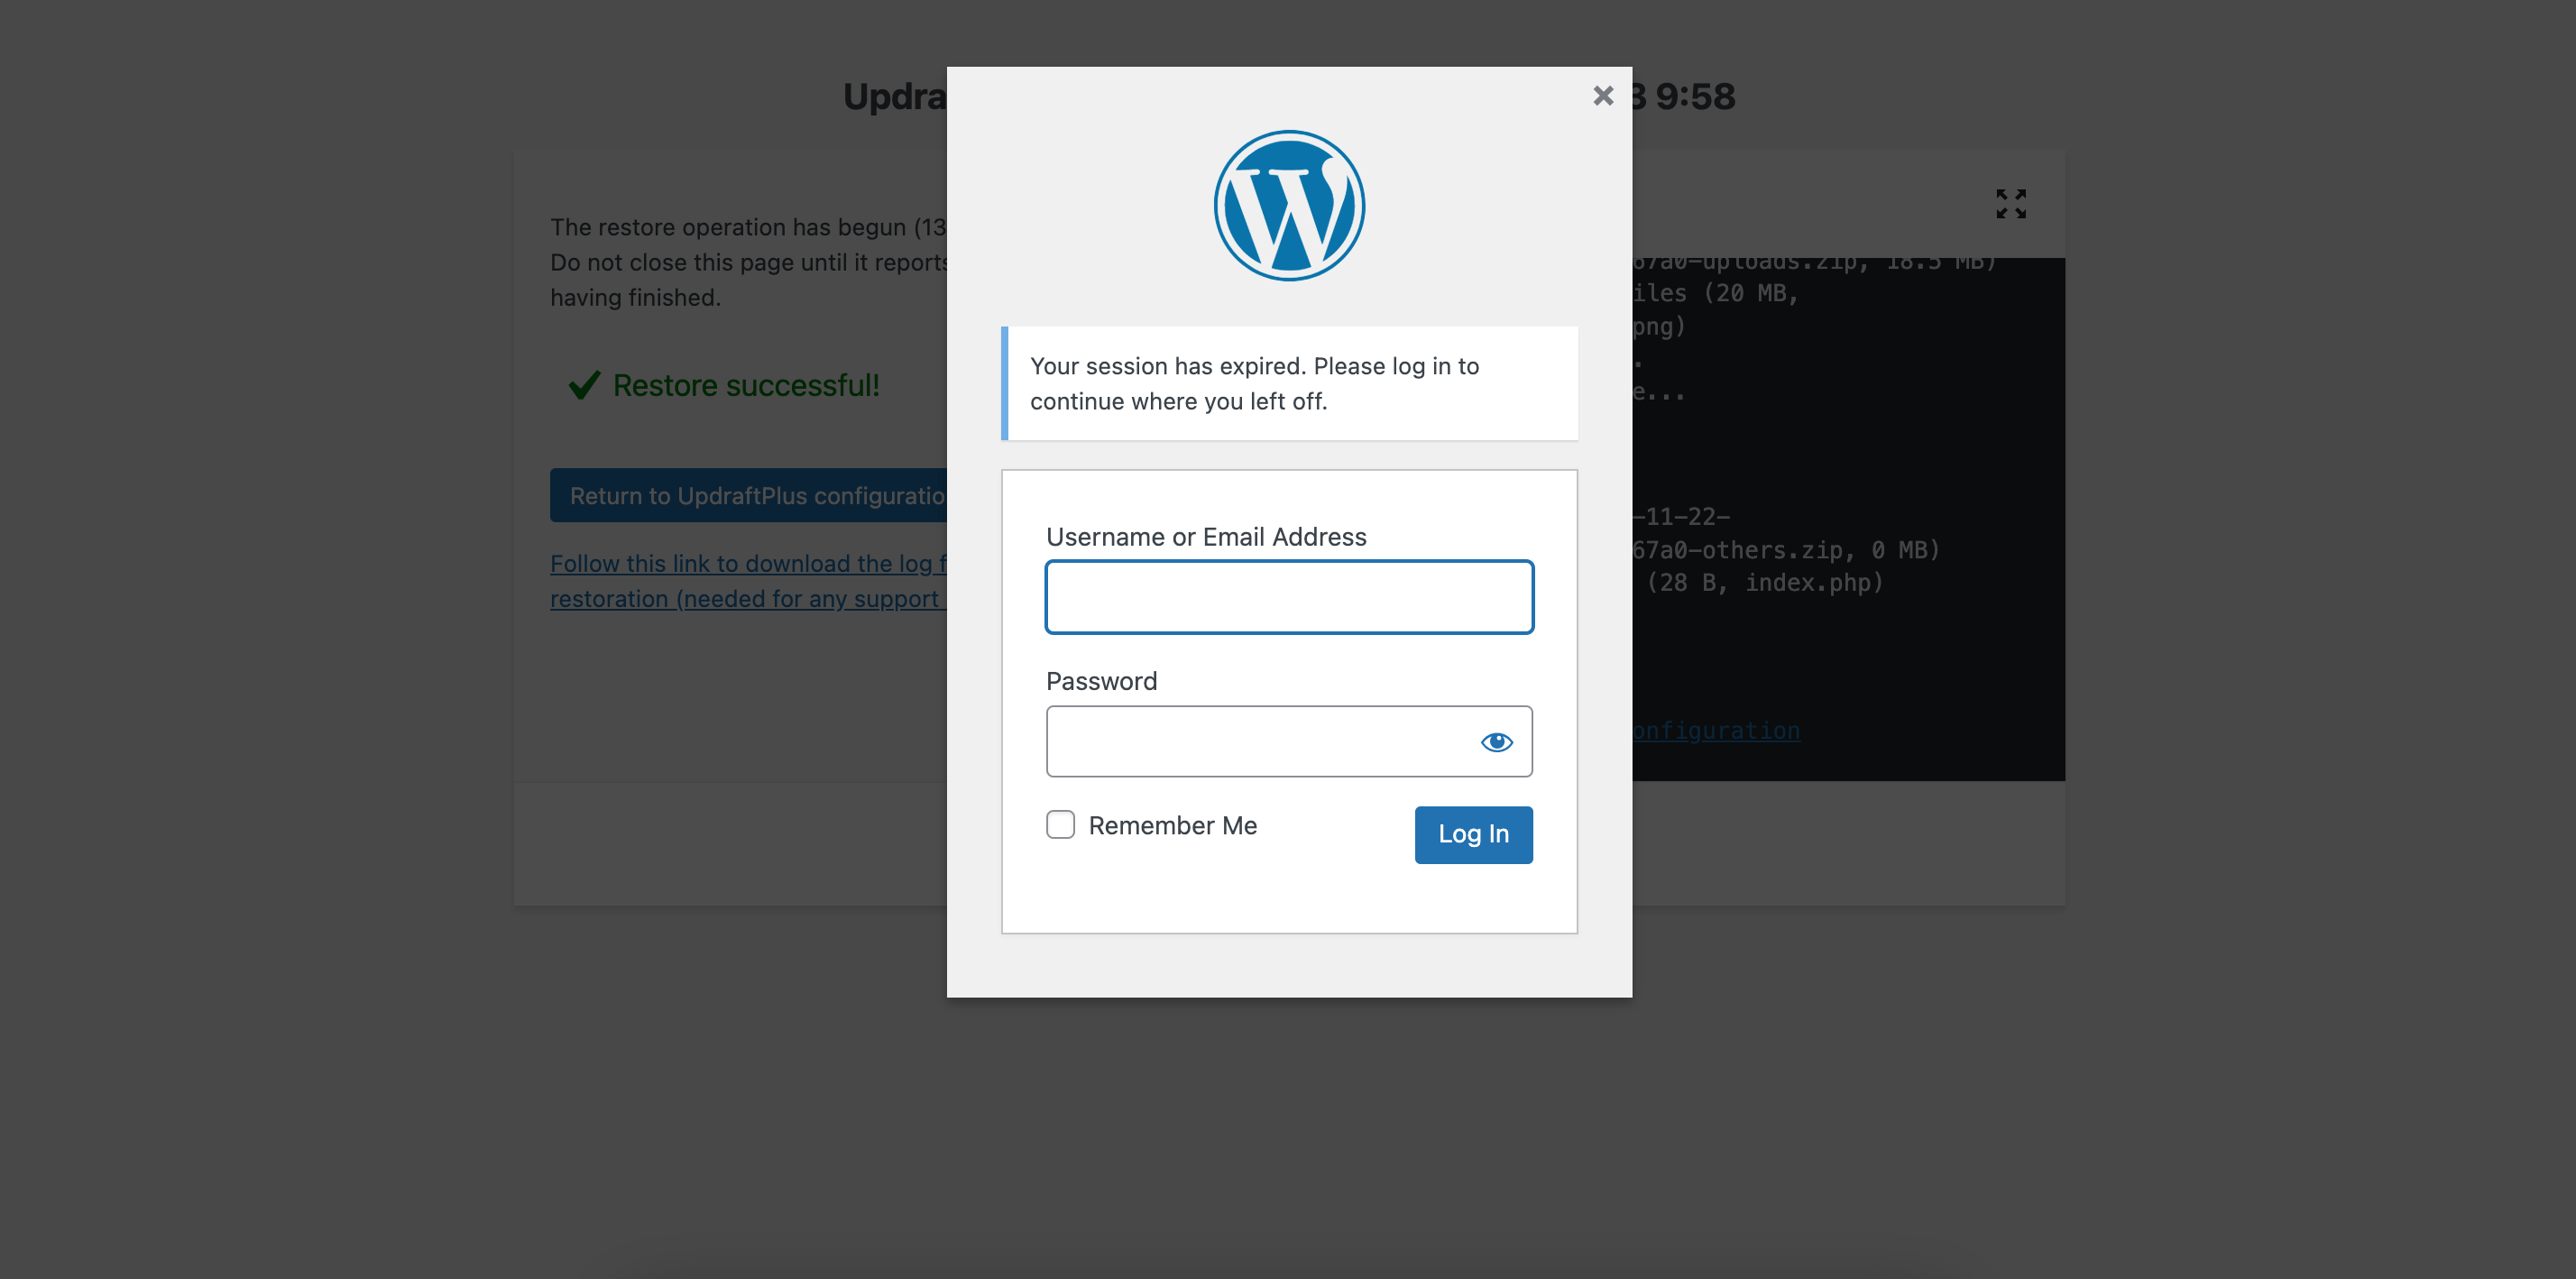
- Yes, your restoration process is complete.

Note: After this process, you’ll be logged out of your account, since you have restored the database and other files. Now, you need to use your old site’s credentials to log in.
- Please make sure to delete any caching plugin on your installation from the File Manager before accessing the site to ensure your site is accessible. Sometimes your old site may have a pre-configured caching mechanism, that’s not compatible with FlyWP.
- If object-cache, Redis cache or any caching plugin was installed, please remove/move those files from these directories
wp-contentwp-content/pluginswp-content/mu-plugins
- Now login to your new site with old credentials.

Finishing Up
Every provider may add some custom configurations. You need to ensure the default WordPress configuration is reflected in the restored site.
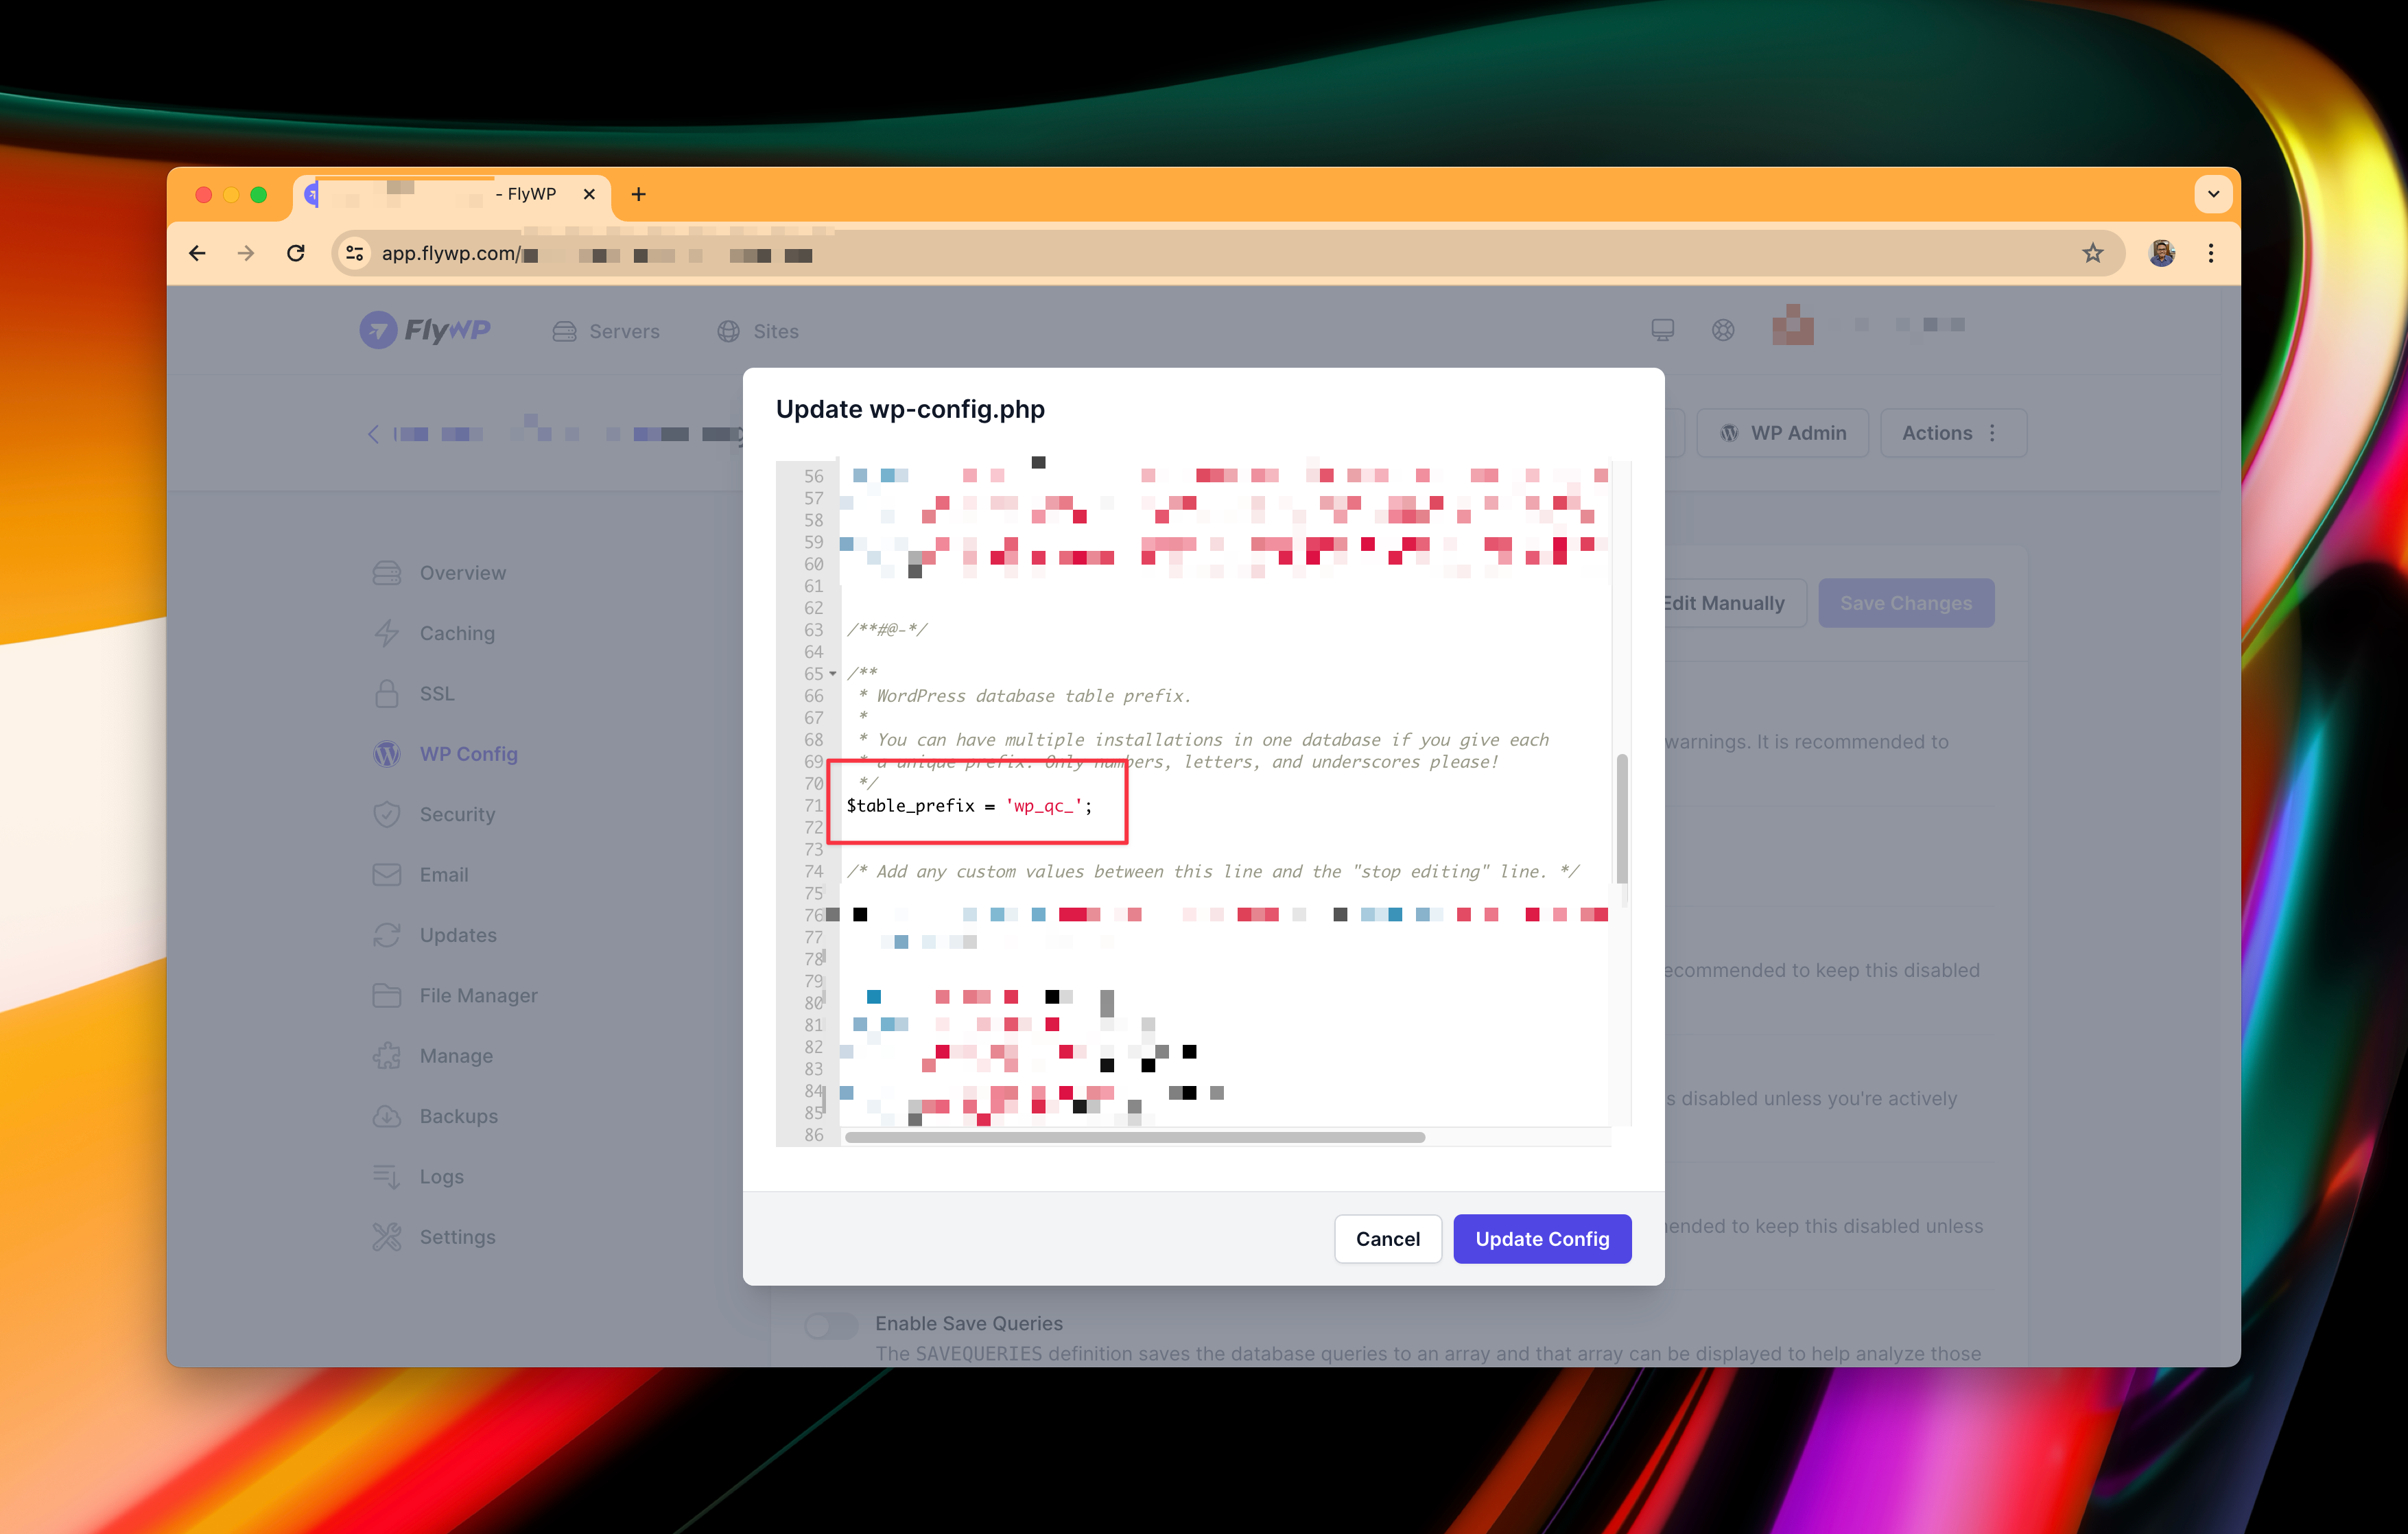
- Go to your website’s File Manager. Check if you have any custom variable/constants. If you find any file under a
publicfolder that contains a wp-config.php, move the file to the root directory (../wp-config.php) (Use the File Manager for this task) - Manually edit the wp-config.php file to update your database’s table prefix. You can do this by navigating to your site → WP Config and click “Edit Manually“
- Finally, update database prefix inside
wp-config.phpfile using the manual WP Config Editor
Voila! By this time, your new site should be successfully migrated
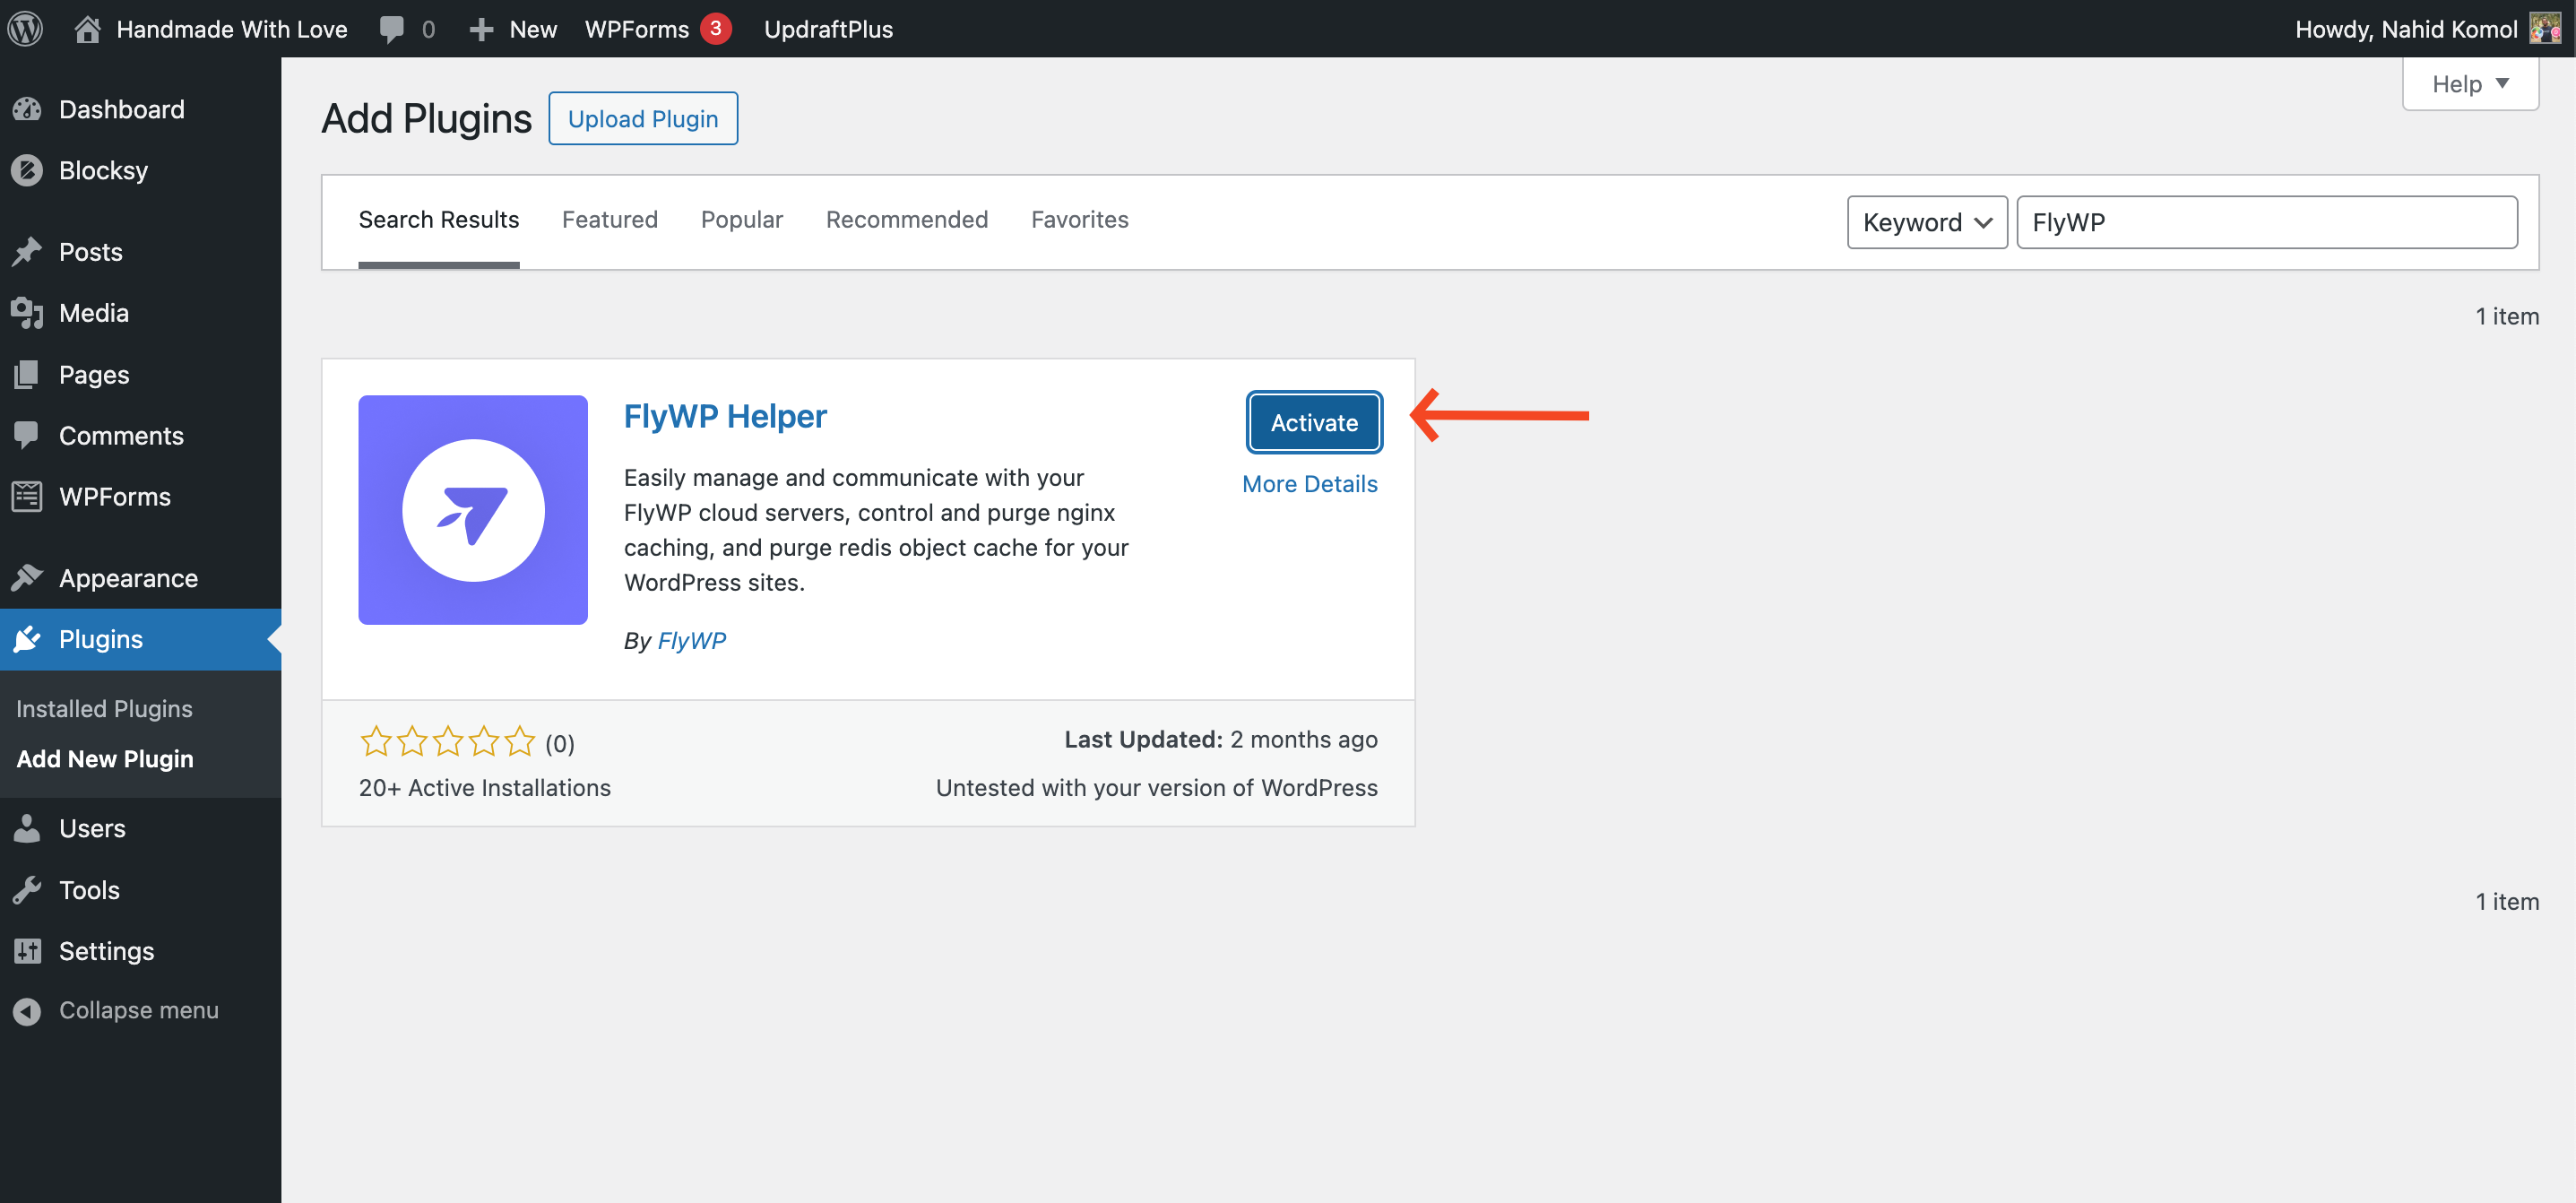
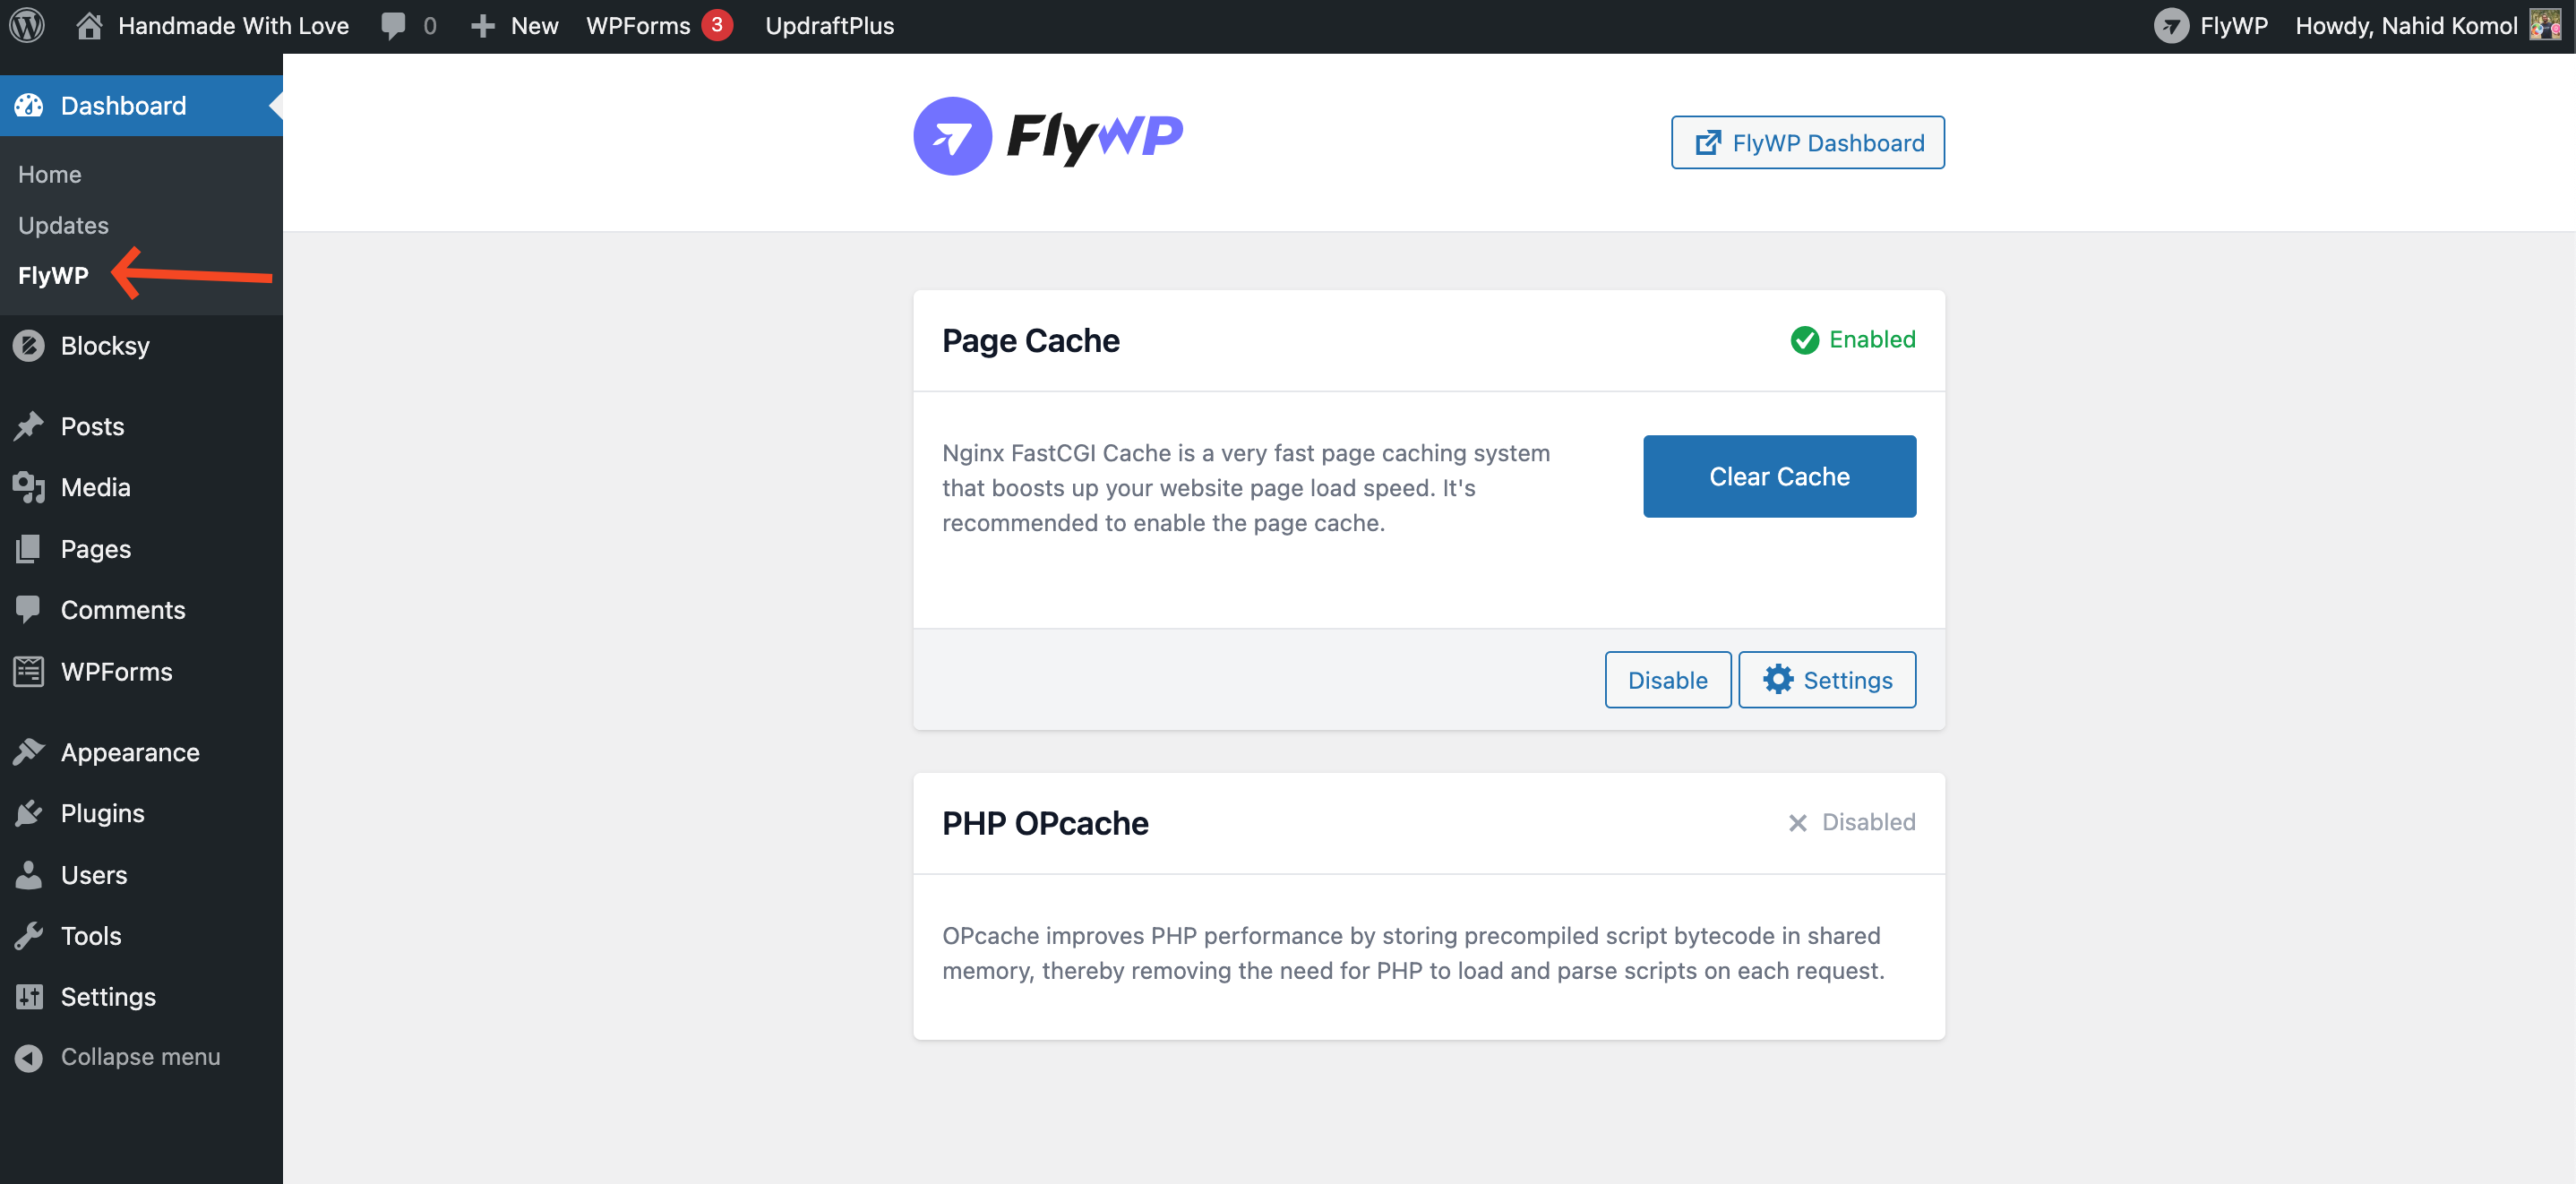
Step six (optional): Ensuring you have FlyWP FlyWP Helper plugin installed
- Go to the plugin area, install the FlyWP Helper plugin, and activate it (if it’s not already activated). It’d make sure all FlyWP-specific features (including caching, emails, magic login works as expected)
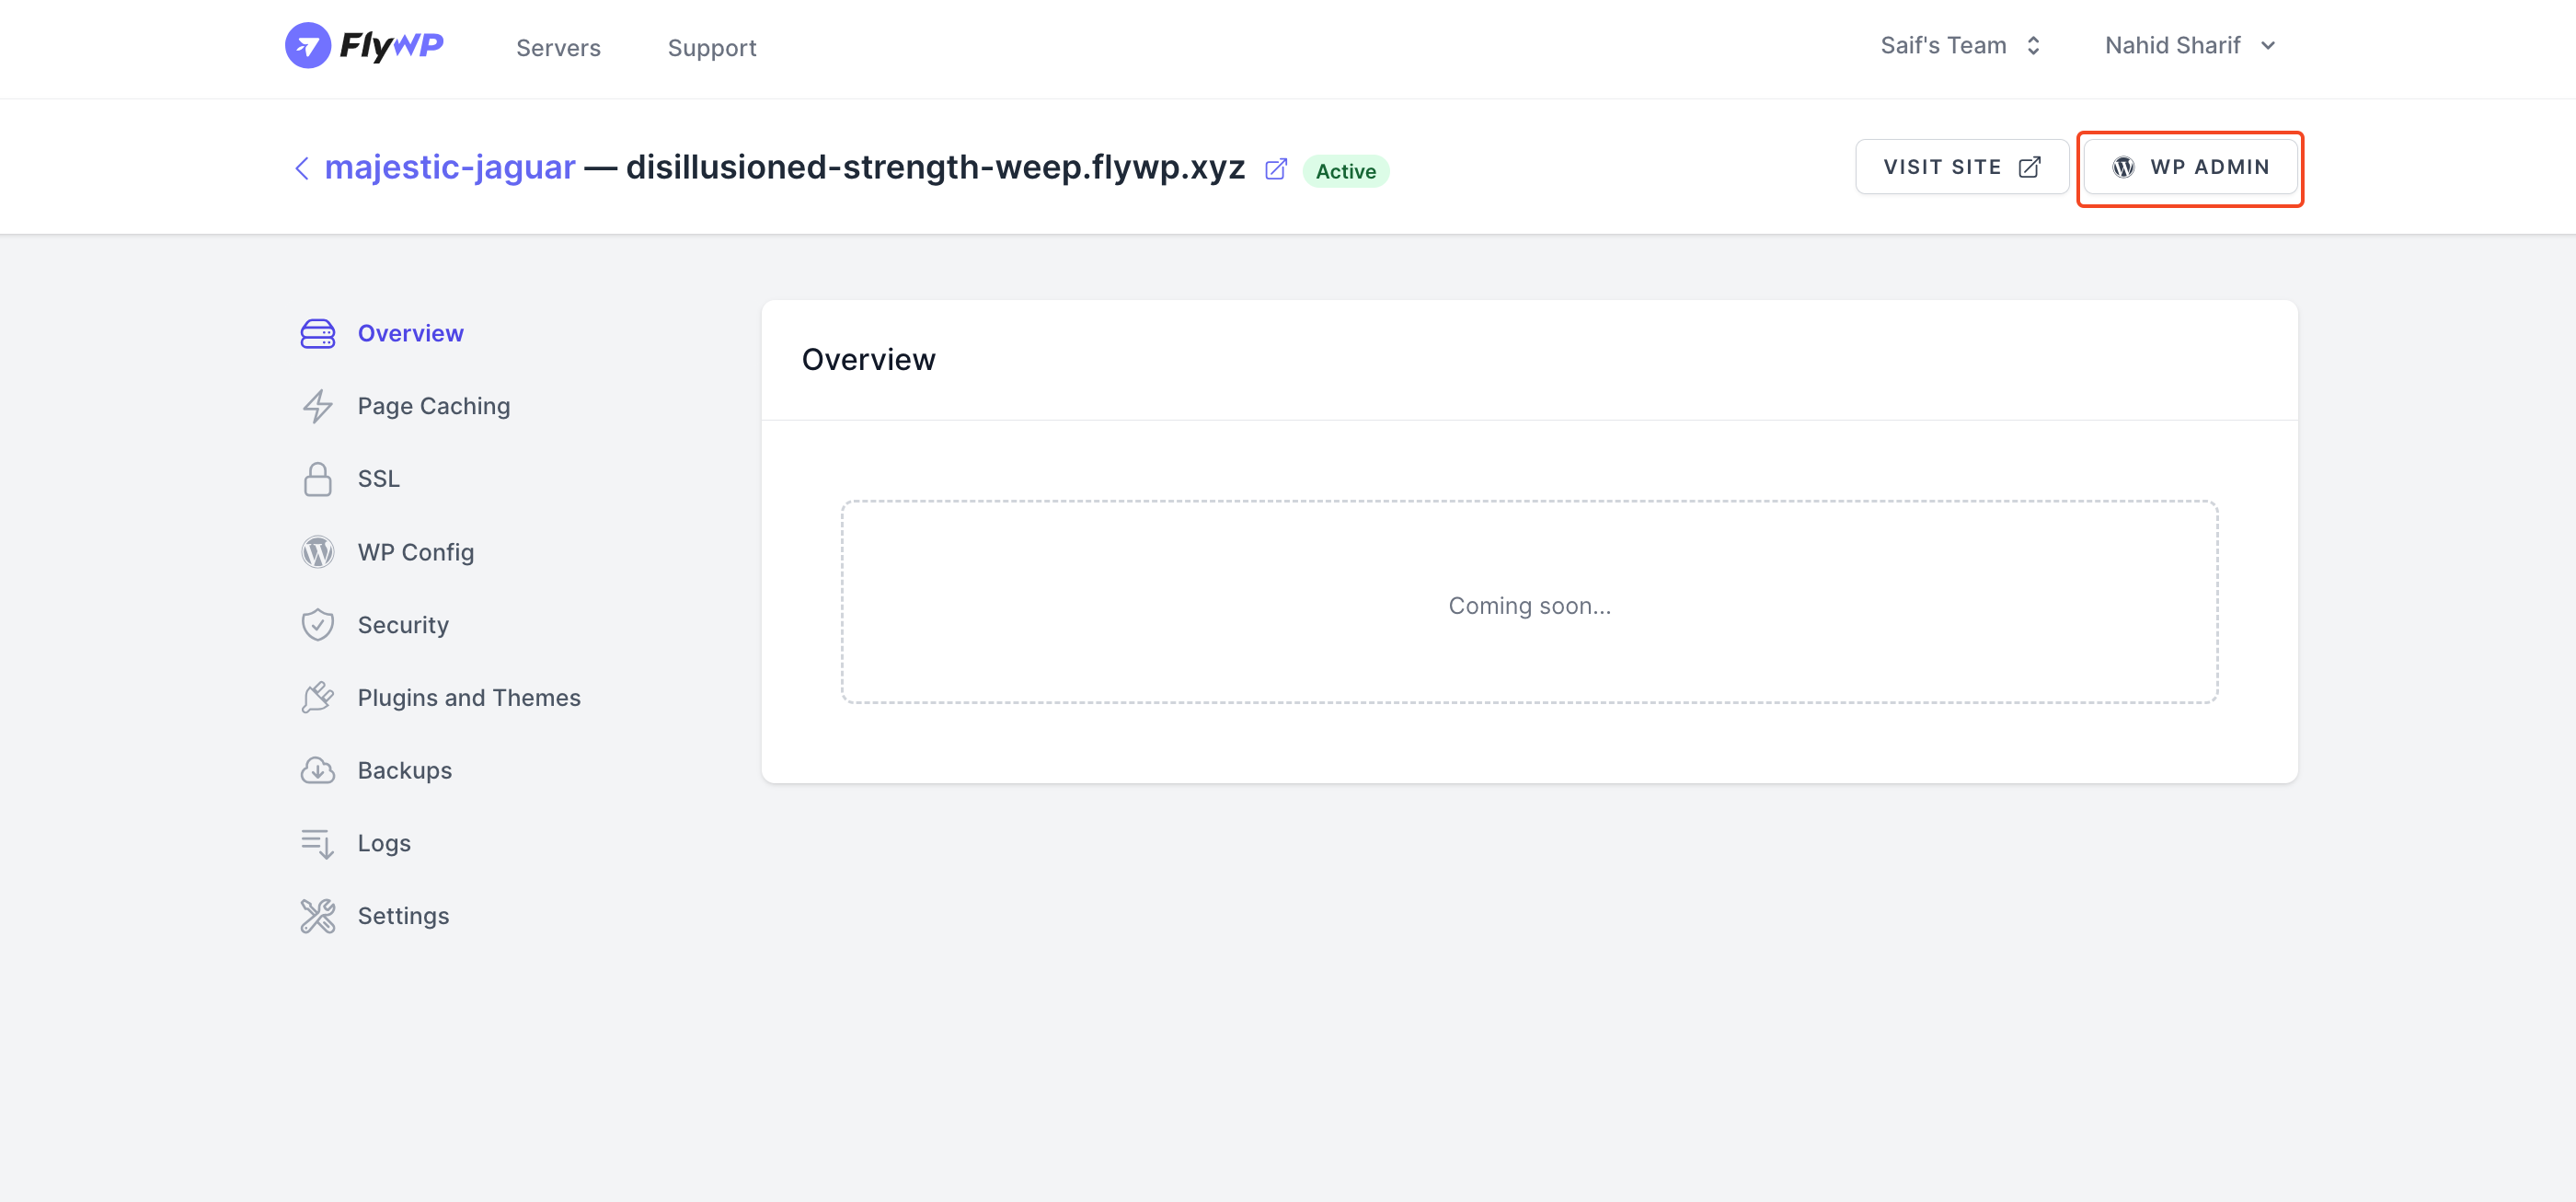
- After you activate FlyWP, you can get it here. And you can see it’s connected.
- To ensure it’s working: You can go back to the FlyWP site page and click on “WP Admin” for instant login. If it works fine, then the FlyWP Helper plugin is working as expected.
Step 7: Change the domain name to a new URL
You need to change the domain name in the final step.
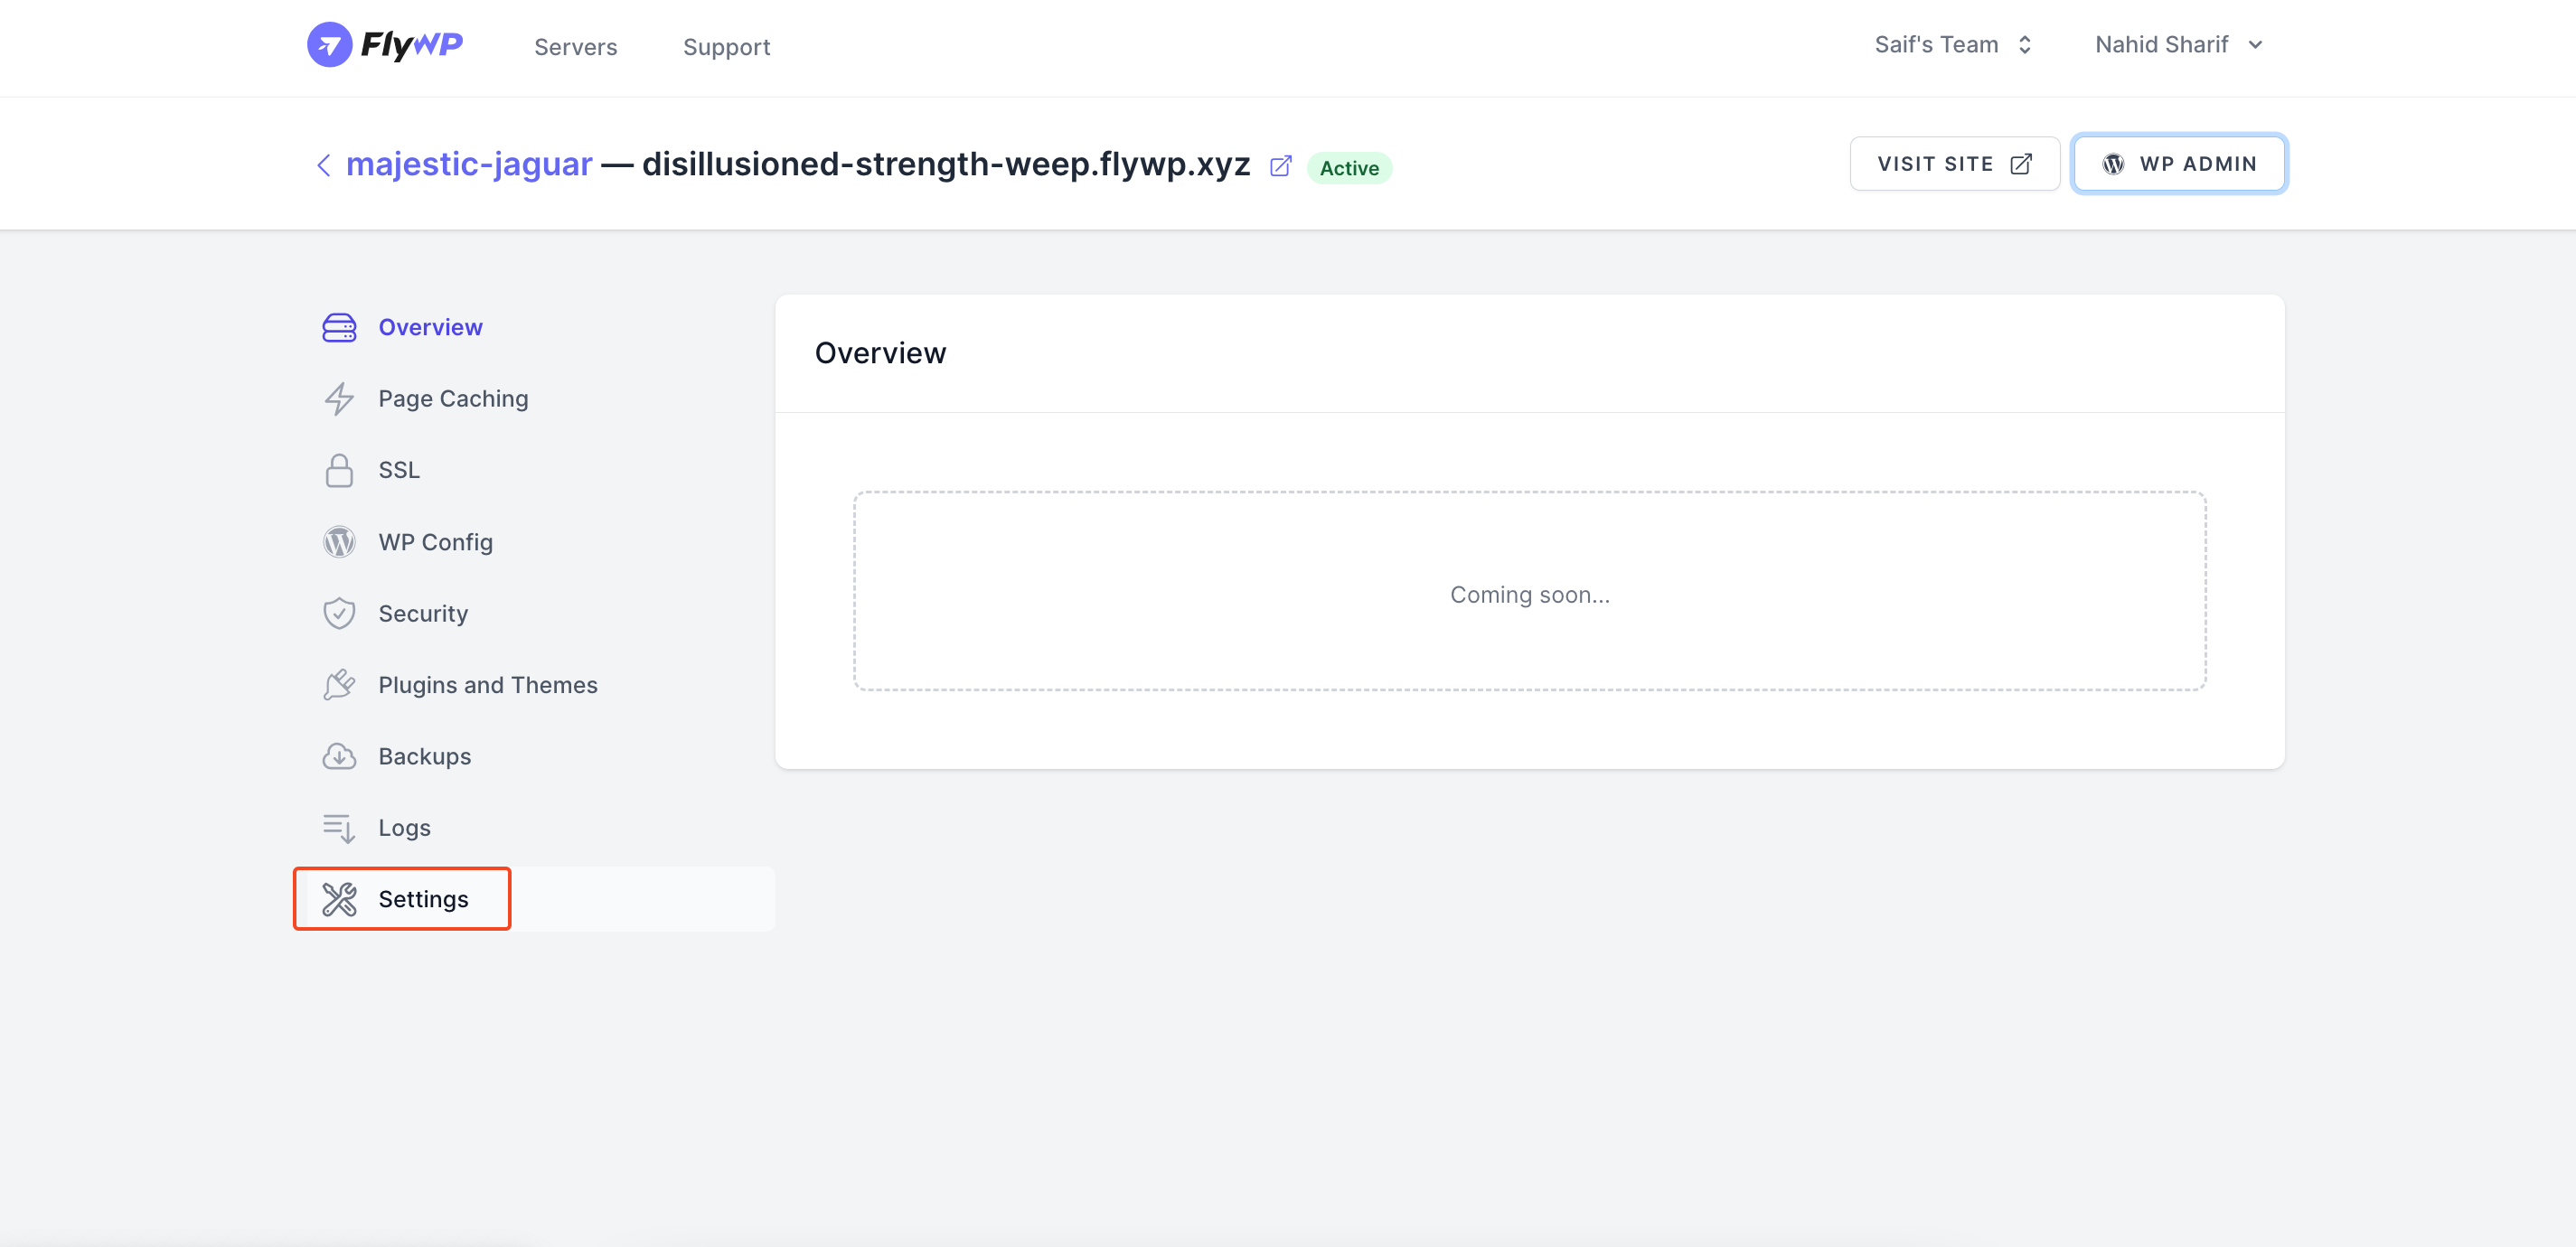
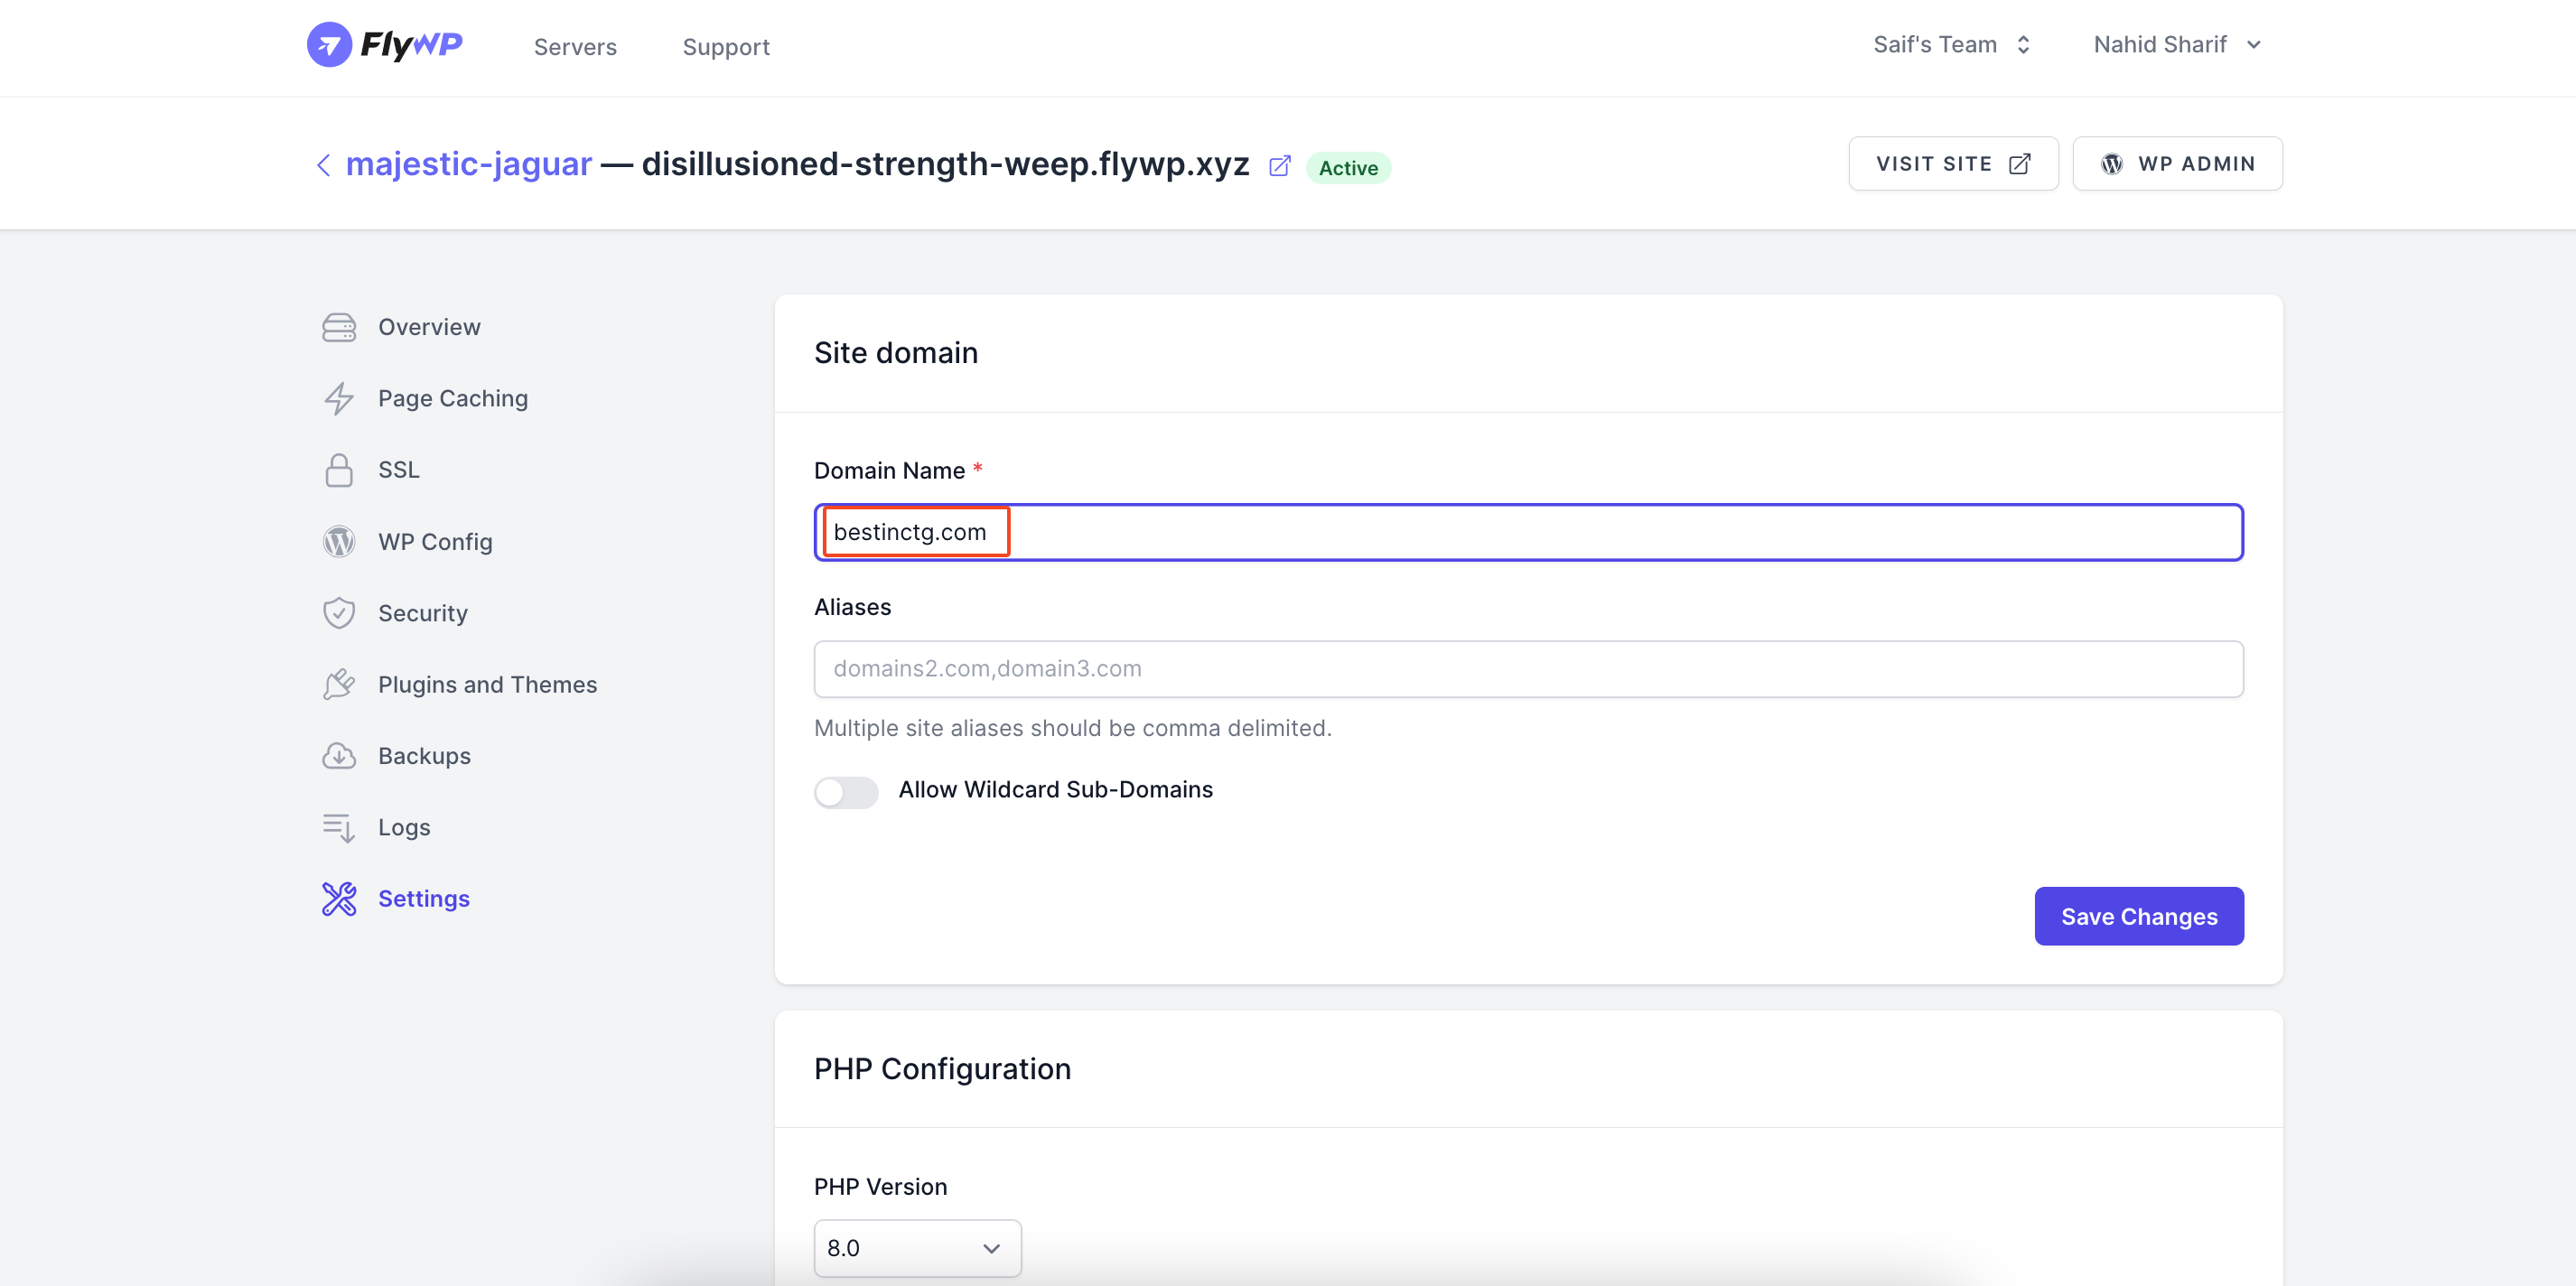
- On the dashboard, enter the Settings page.
- Here, replace this name with your original website name
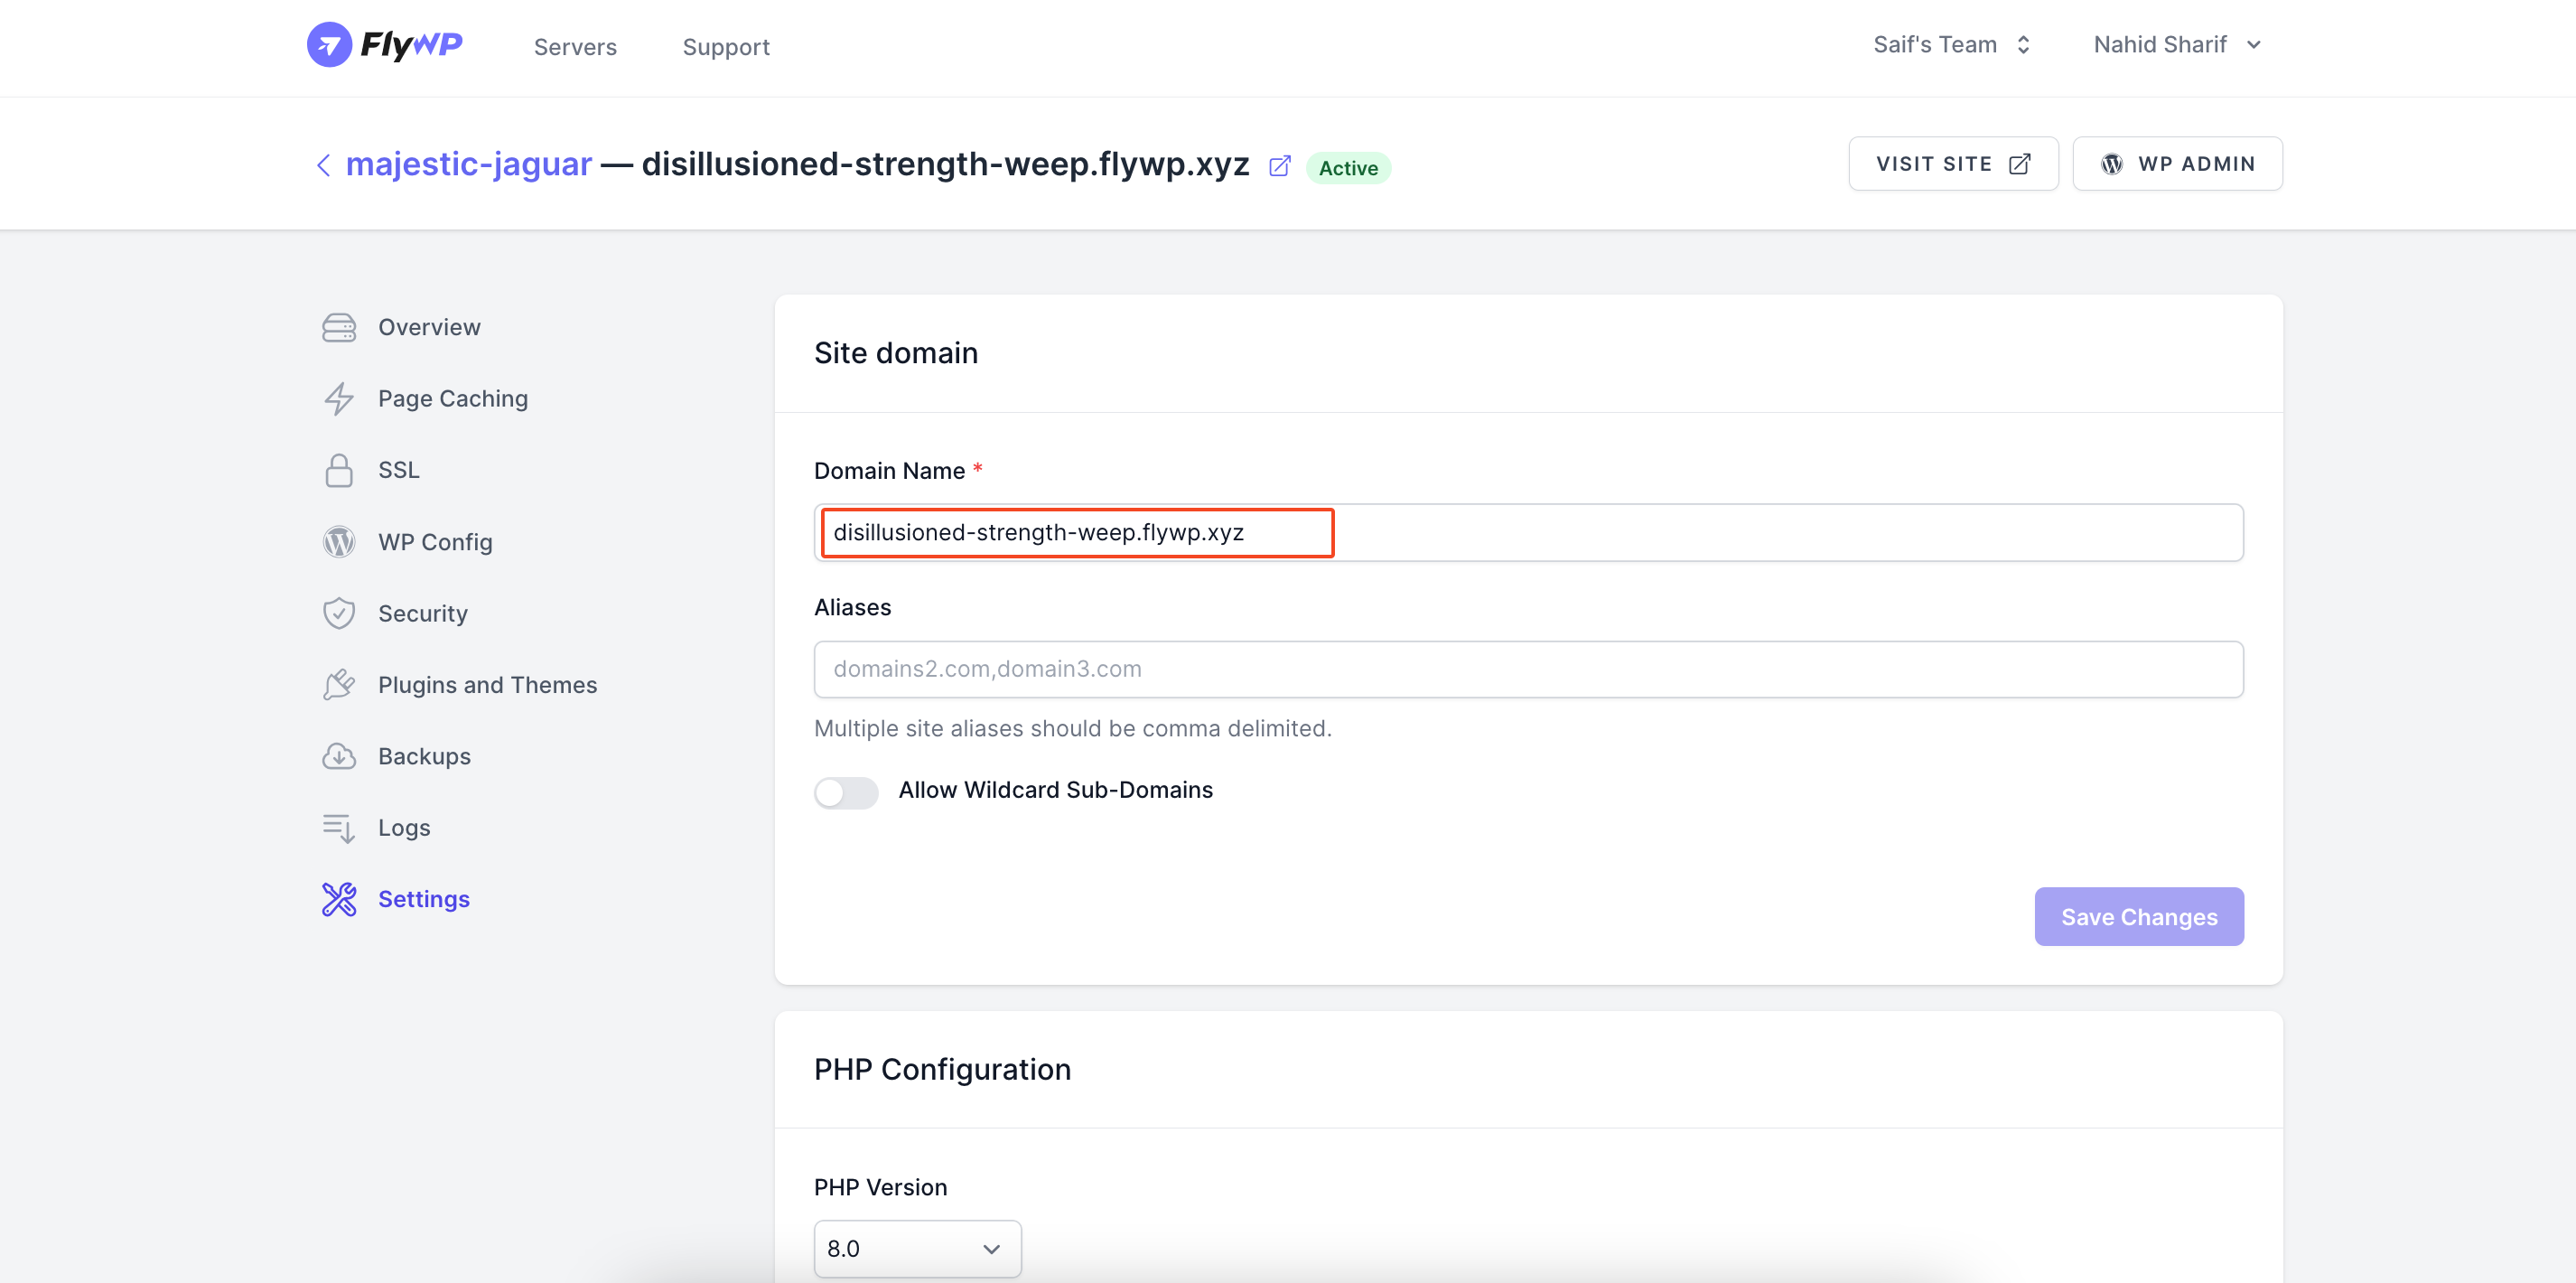
Avoid using HTTP:// and HTTPS:// here. Also, don’t include (/) at the end of the URL. When done everything, click on “Save Changes.“
- You can see the status of the task. Wait for a few seconds to complete the task
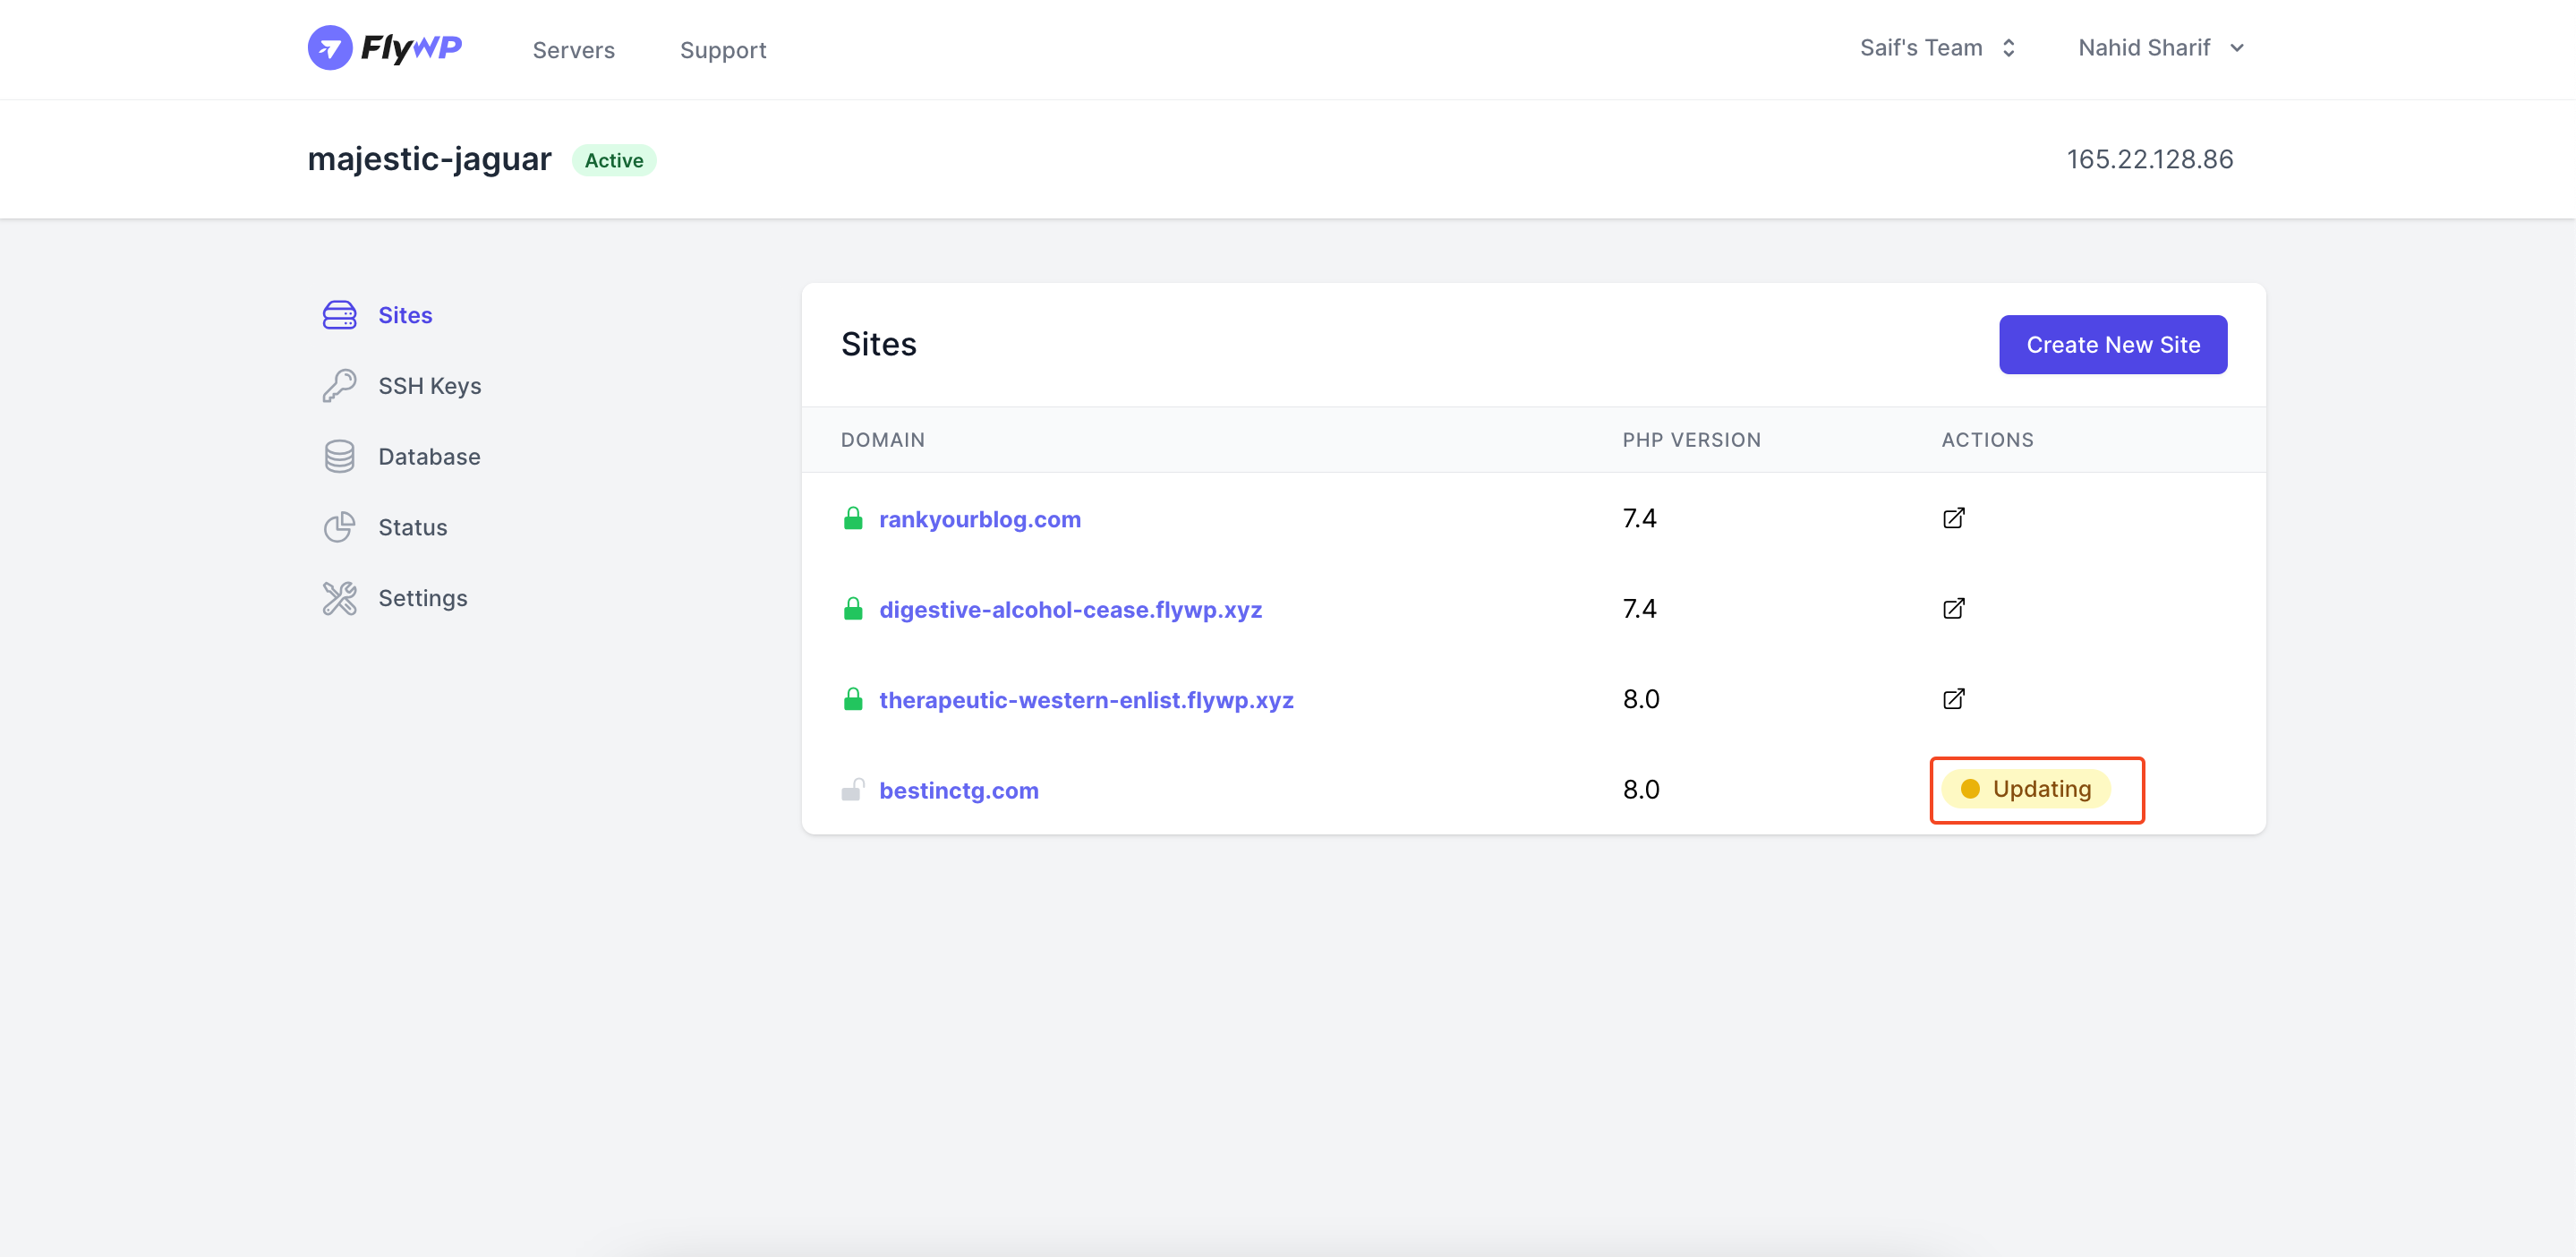
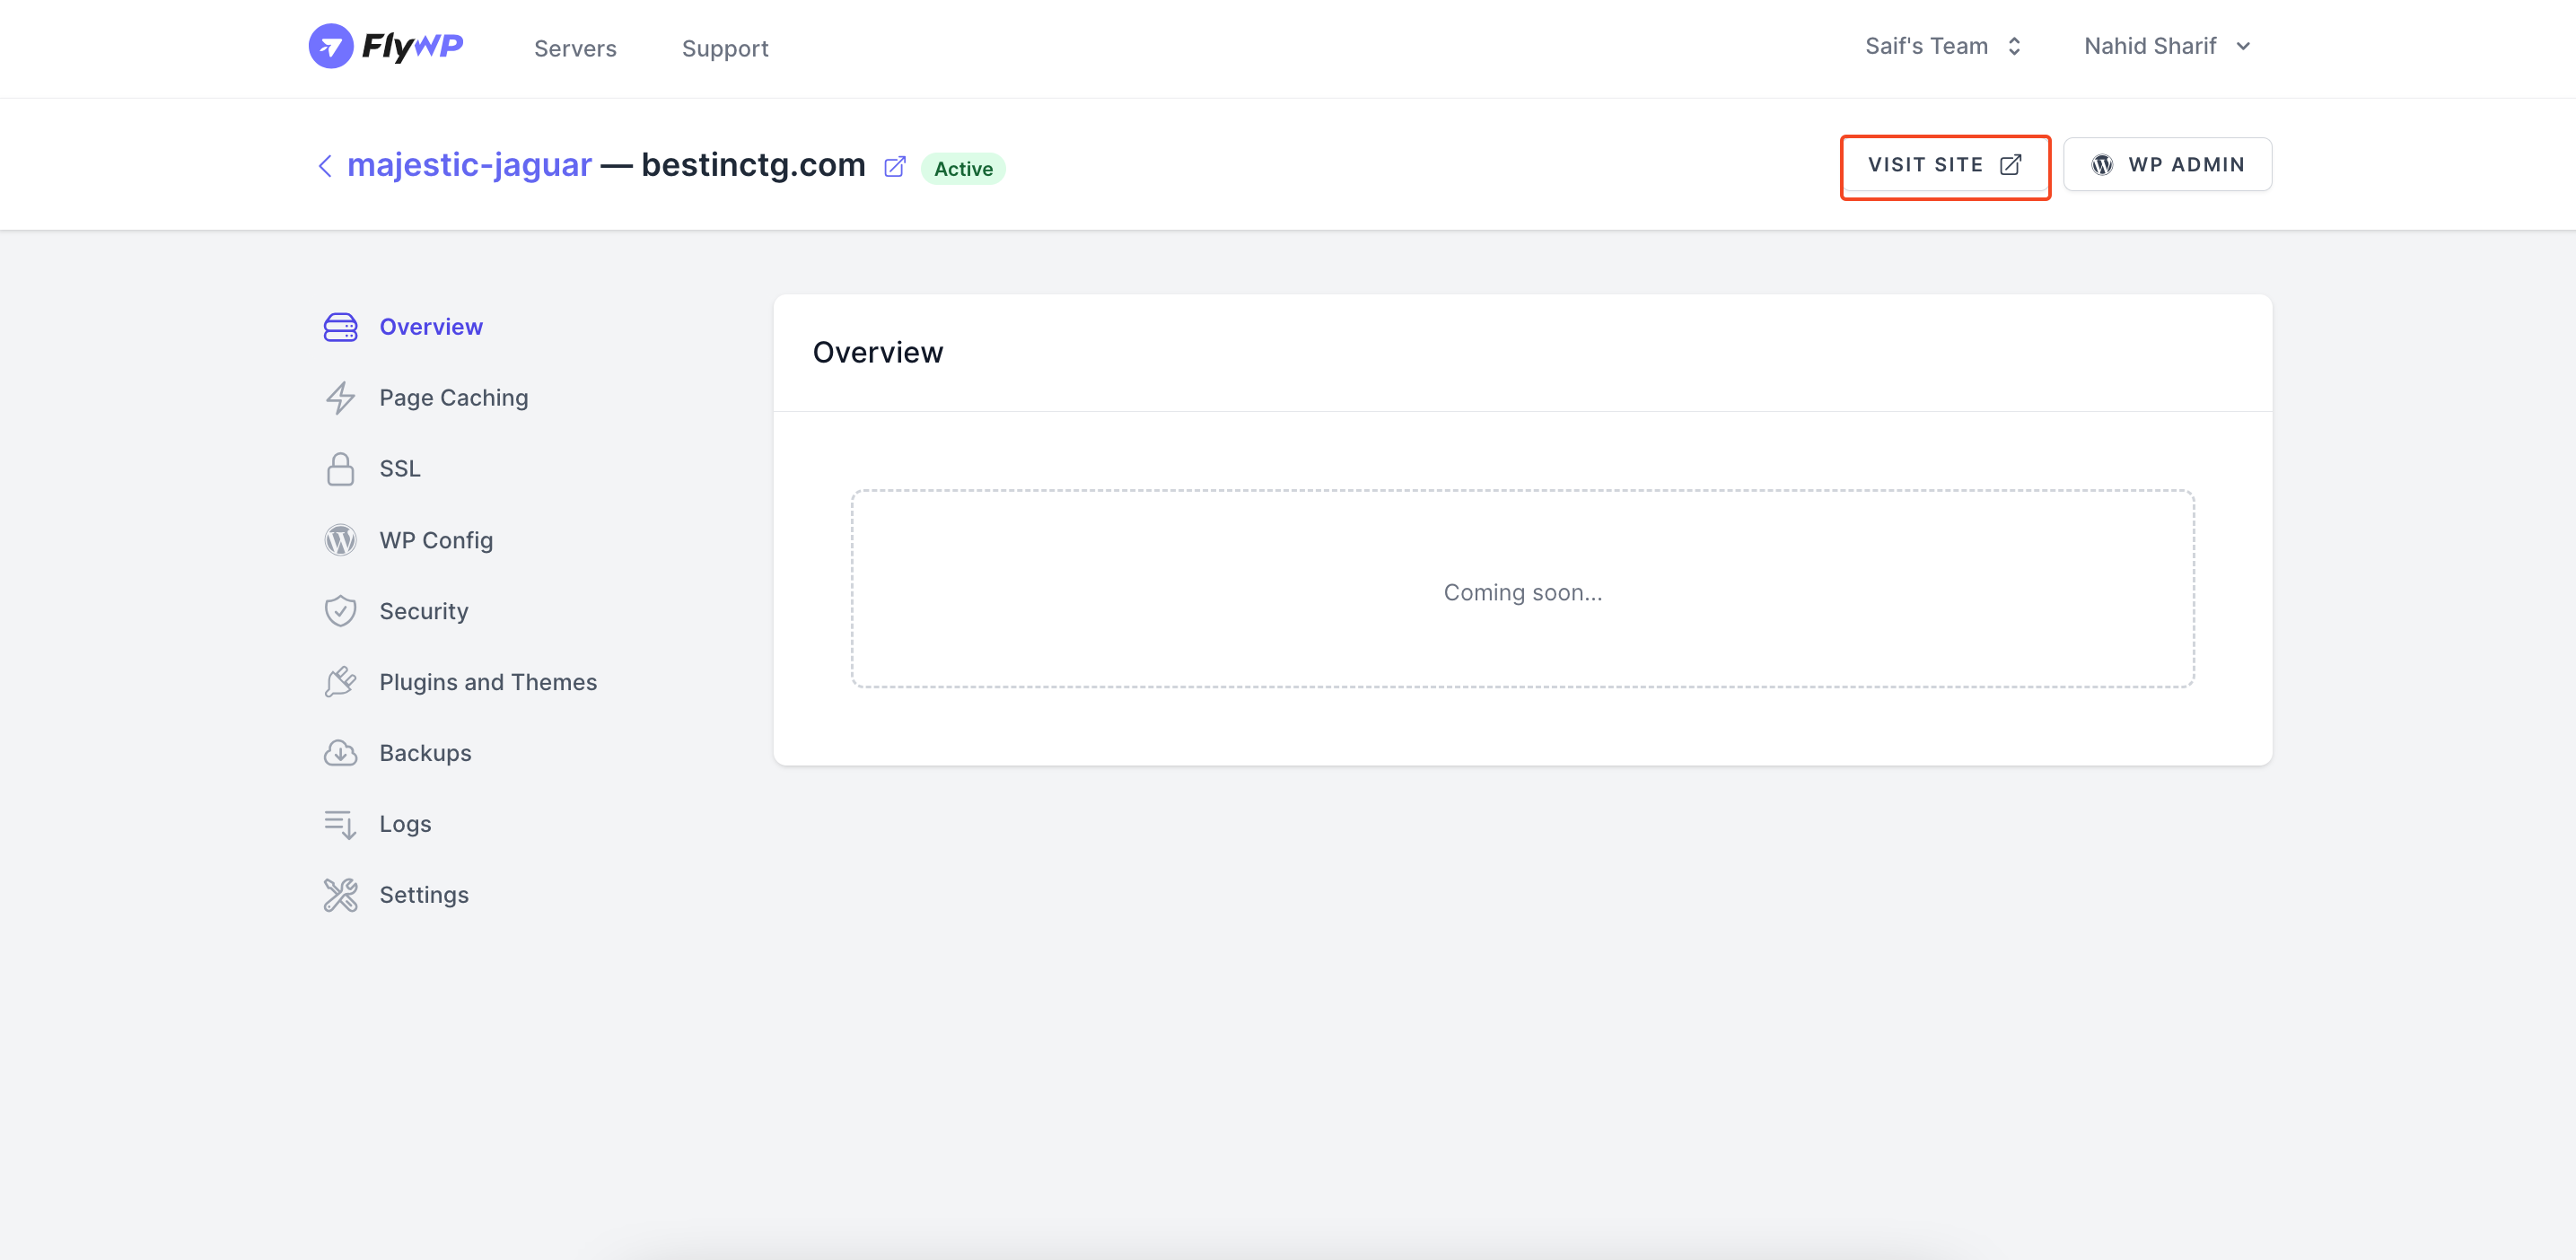
- The site is now live, and you can access it from here.
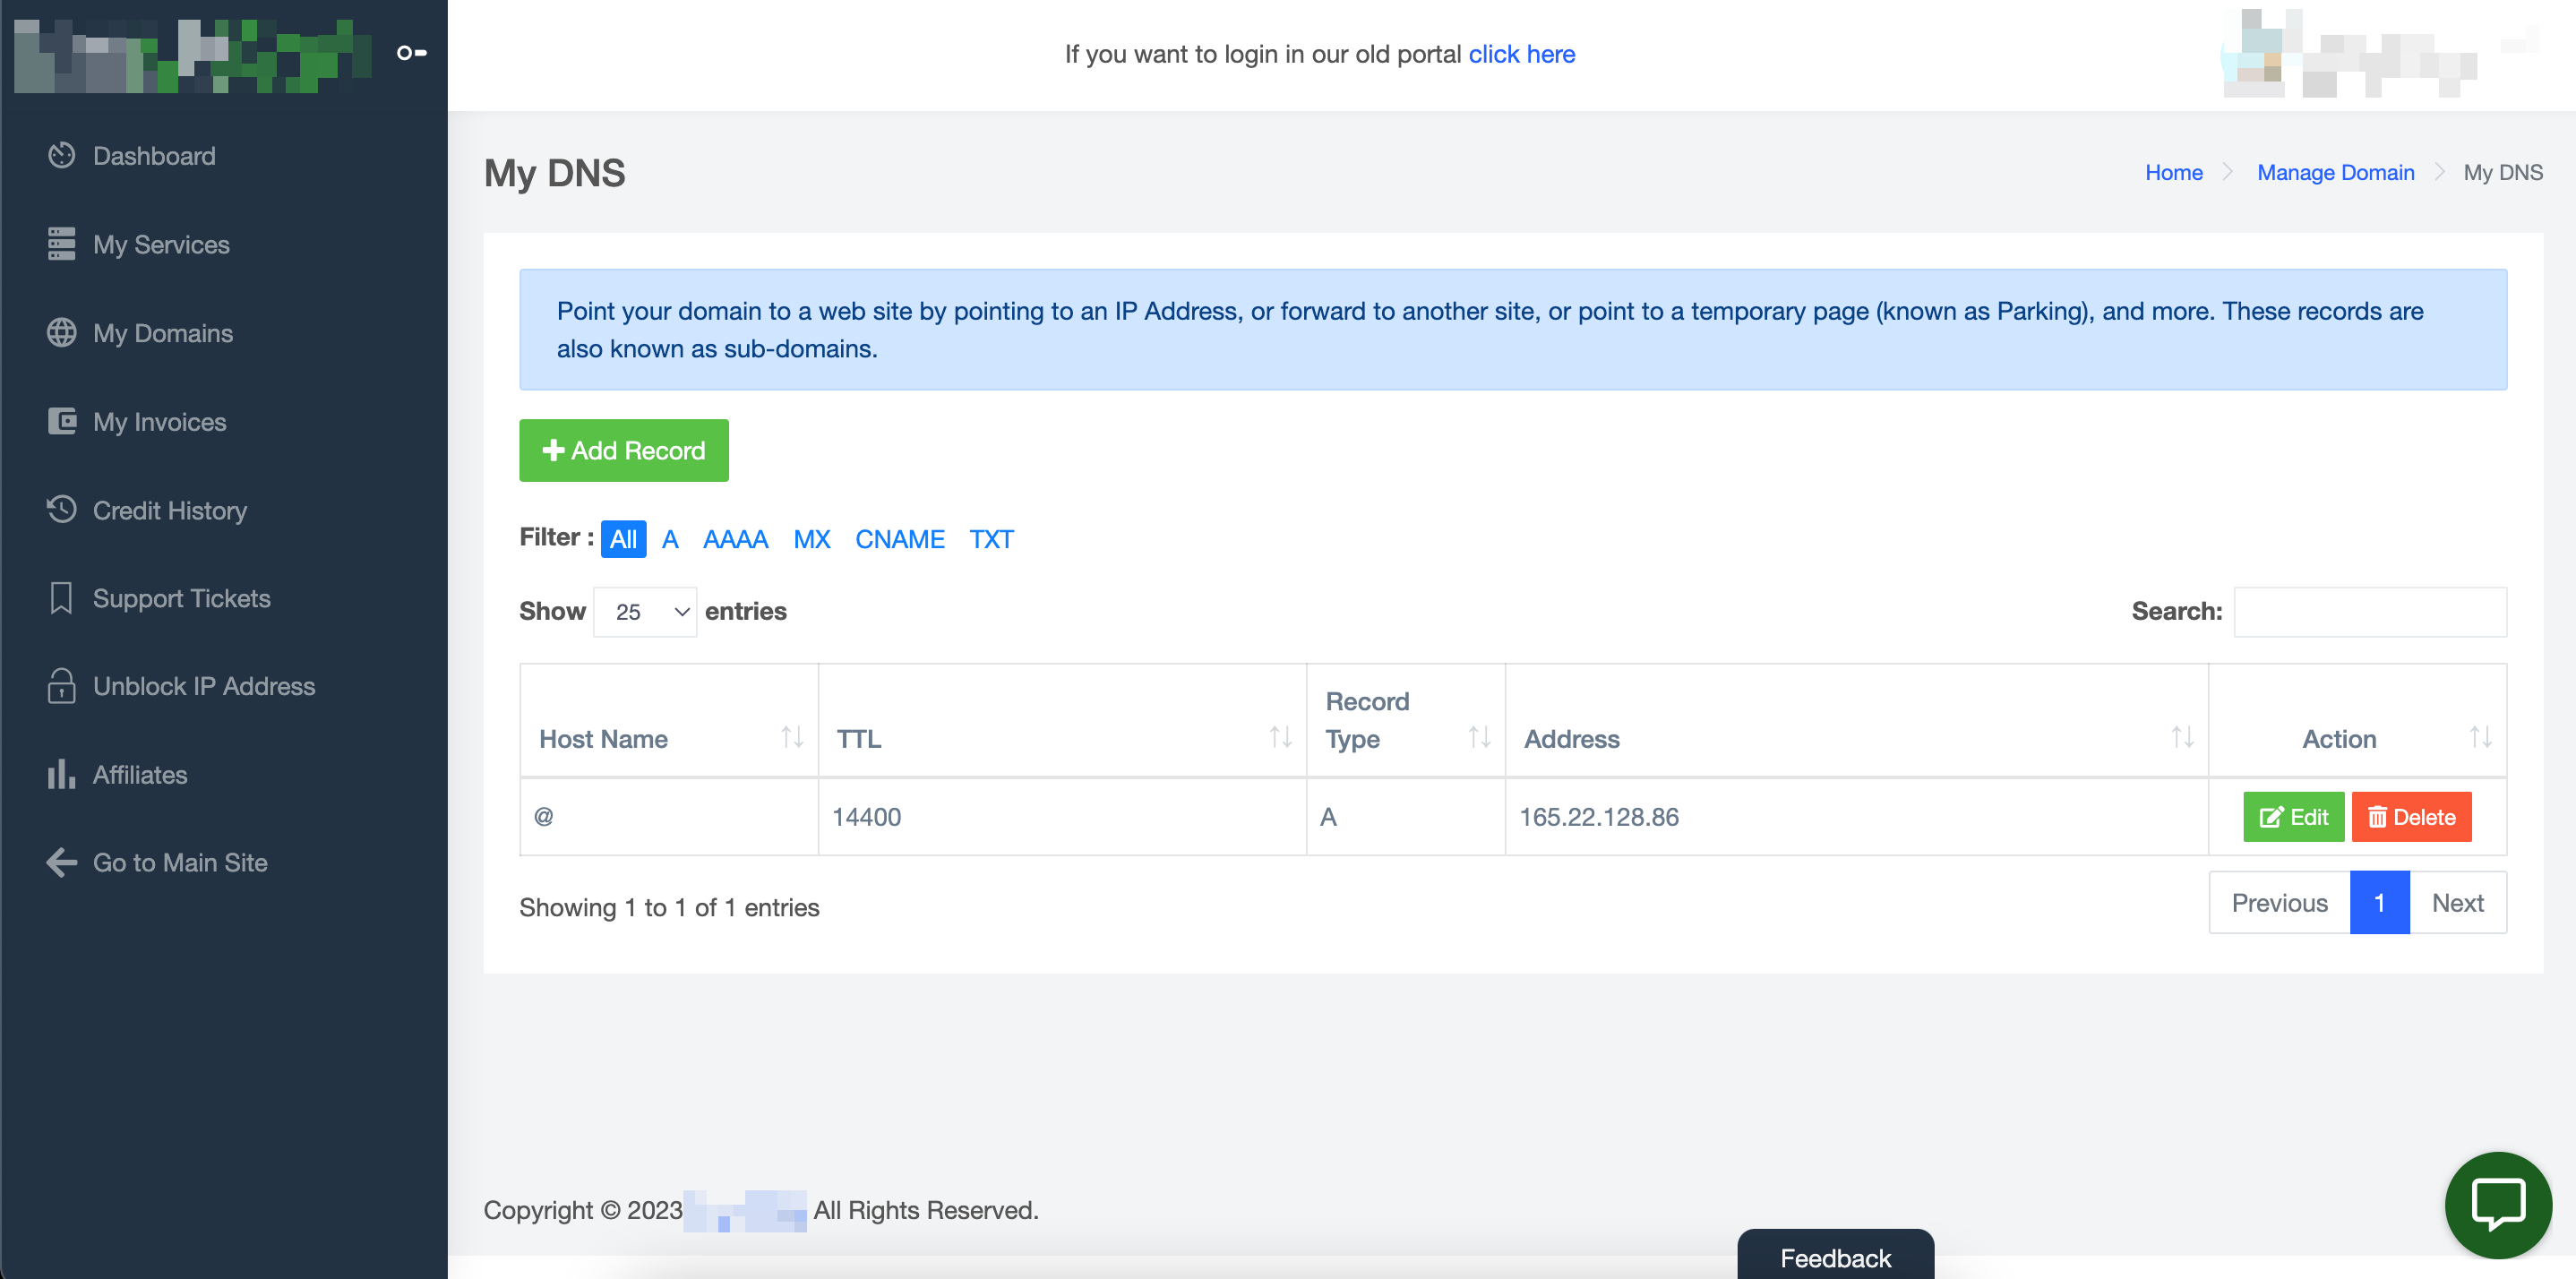
Step Eight: Add a DNS record
Now you need to verify and add the DNS record to your hosting provider’s account. Login to your hosting account and add the server’s IP as a DNS record.
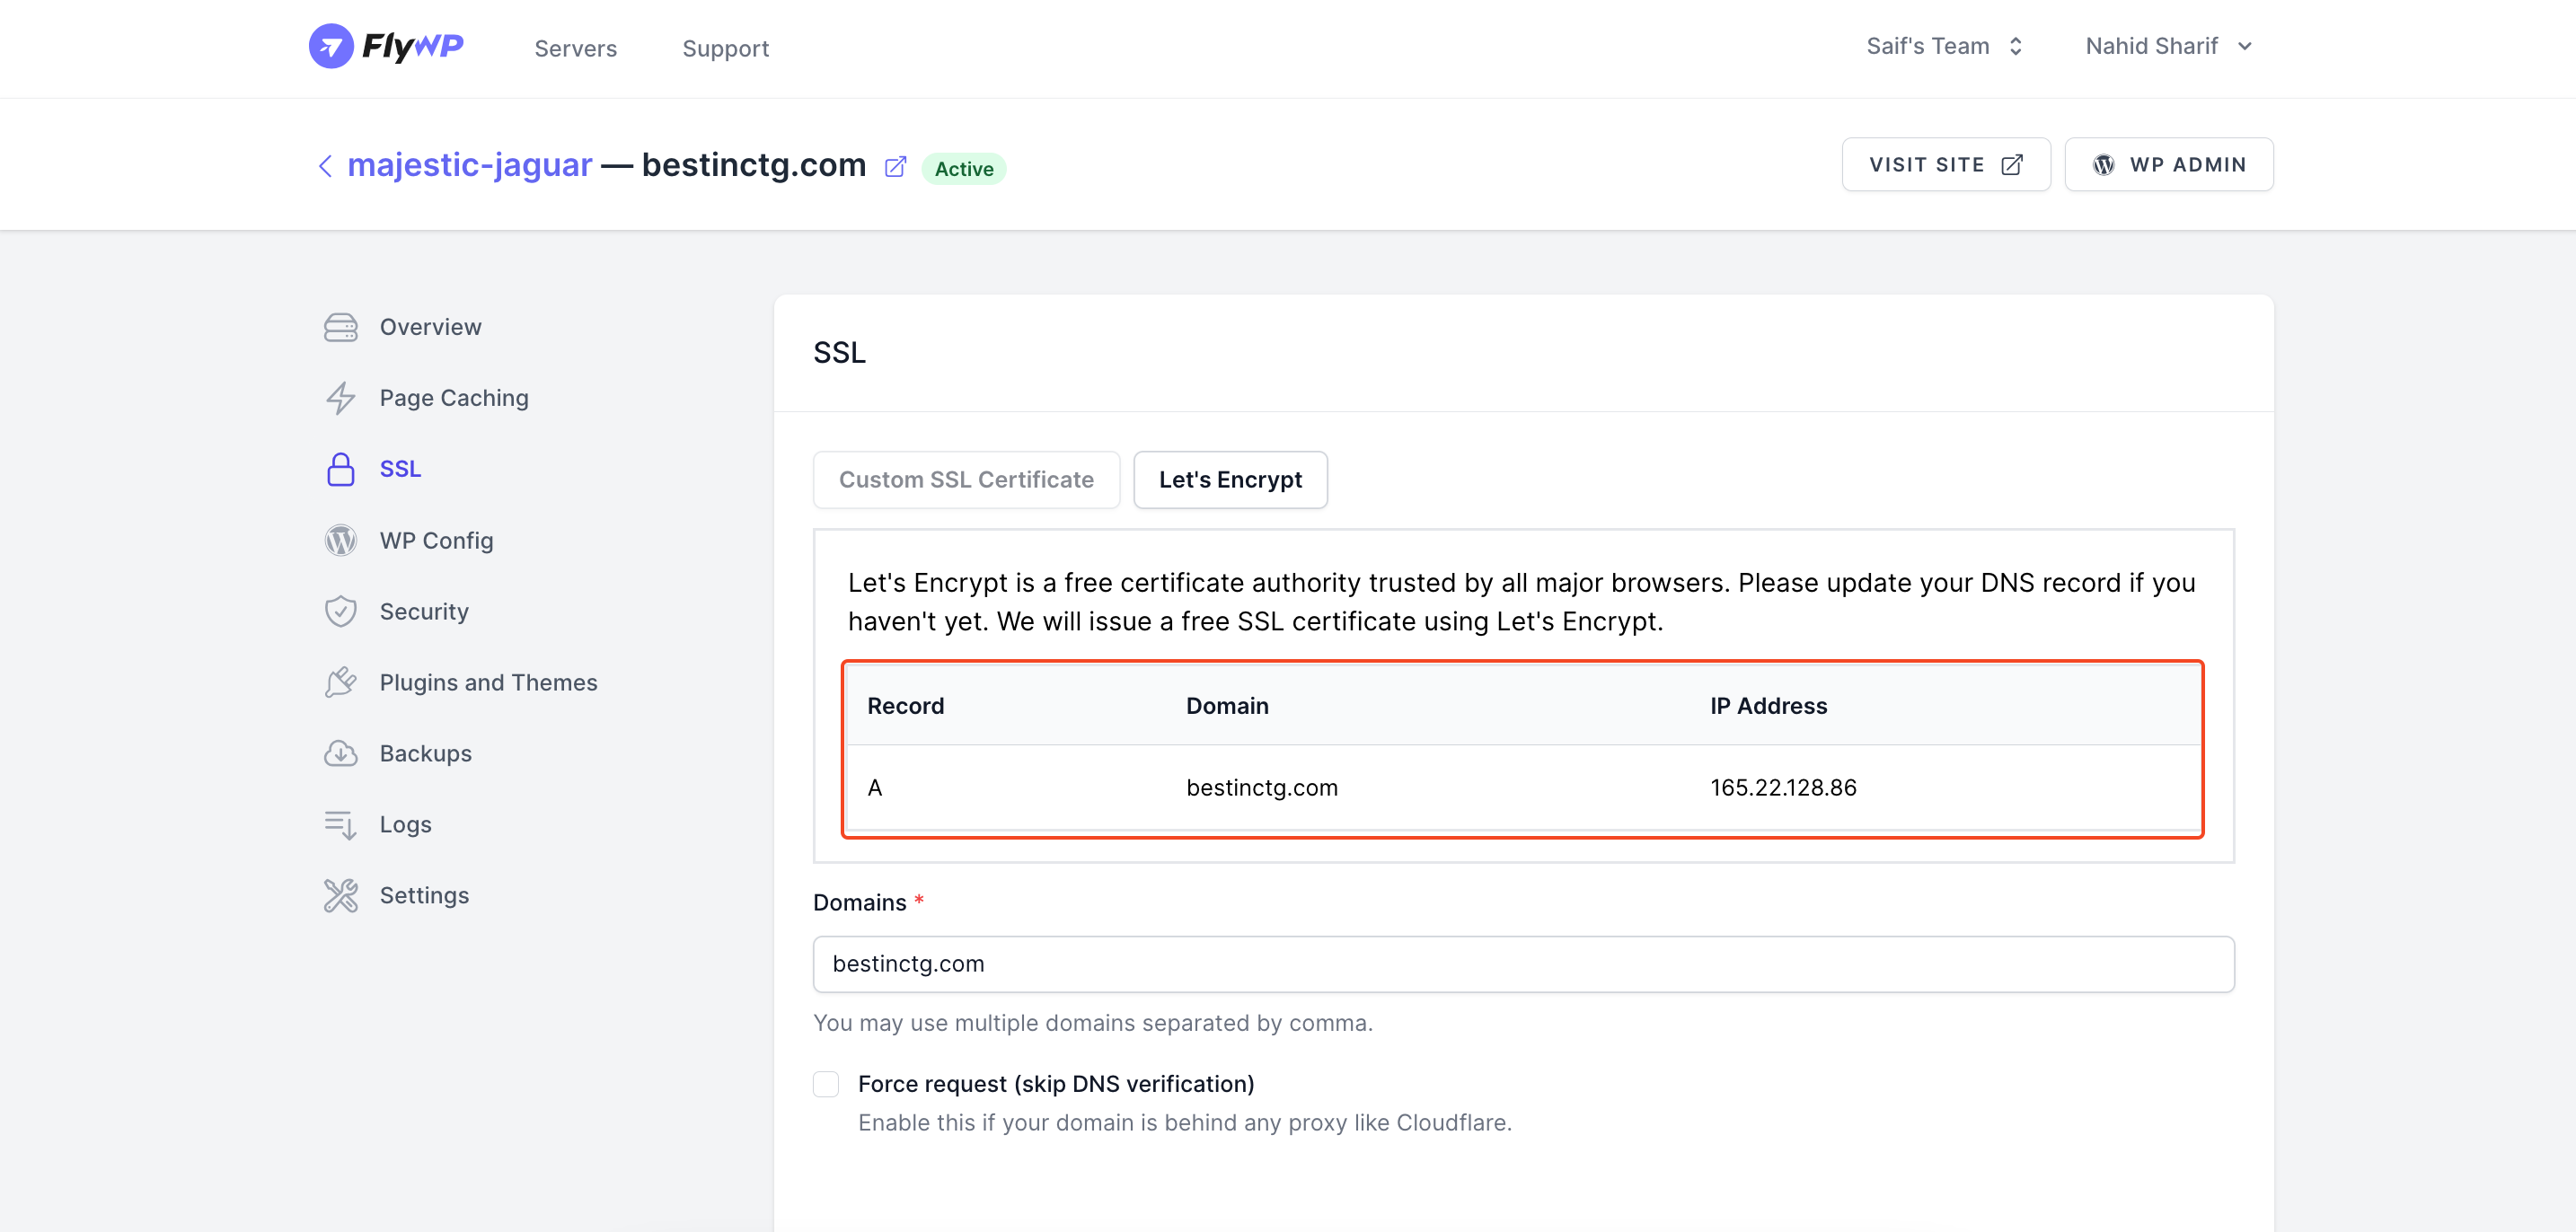
- Here, you can add your website’s IP address as a DNS record on your hosting provider’s account.
So that’s how you can migrate an old site to a new site using FlyWP. We hope you find this tutorial helpful.