Cloudflare is a popular application security and performance booster tool. It’s also known as the content delivery network (CDN). You can do DDoS mitigation, get quality internet security services, and distribute domain name server (DNS) services. It acts as a reverse proxy for websites, helping to improve performance, increase security, and ensure the availability of websites and web applications.
The good news is that you can now integrate this popular web and application security tool into FlyWP to protect your servers from getting hacked or compromised.
Here in this documentation, we’ll give you the basic steps to integrate this tool into FlyWP.
Let’s get started.
Integrating Cloudflare with FlyWP
FlyWP’s Cloudflare Integrations feature enhances your workflow by automating key tasks and providing a centralized place to manage external services, all from a unified dashboard.
From DNS management to caching and firewall automation, integrating third-party tools with FlyWP saves time and reduces the need for manual configuration.
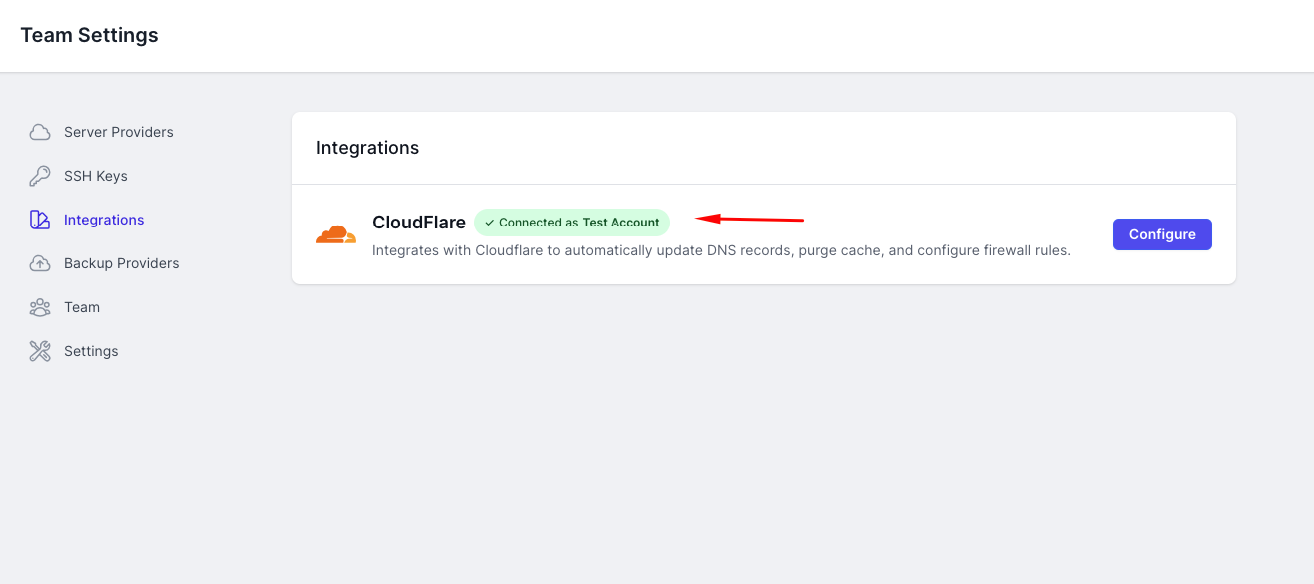
Accessing the Integrations Panel
To view or manage integrations:
- Go to the FlyWP Dashboard
- Click the Team Dropdown (top-right) and select your desired team
- In the left sidebar, click on Integrations under Team Settings
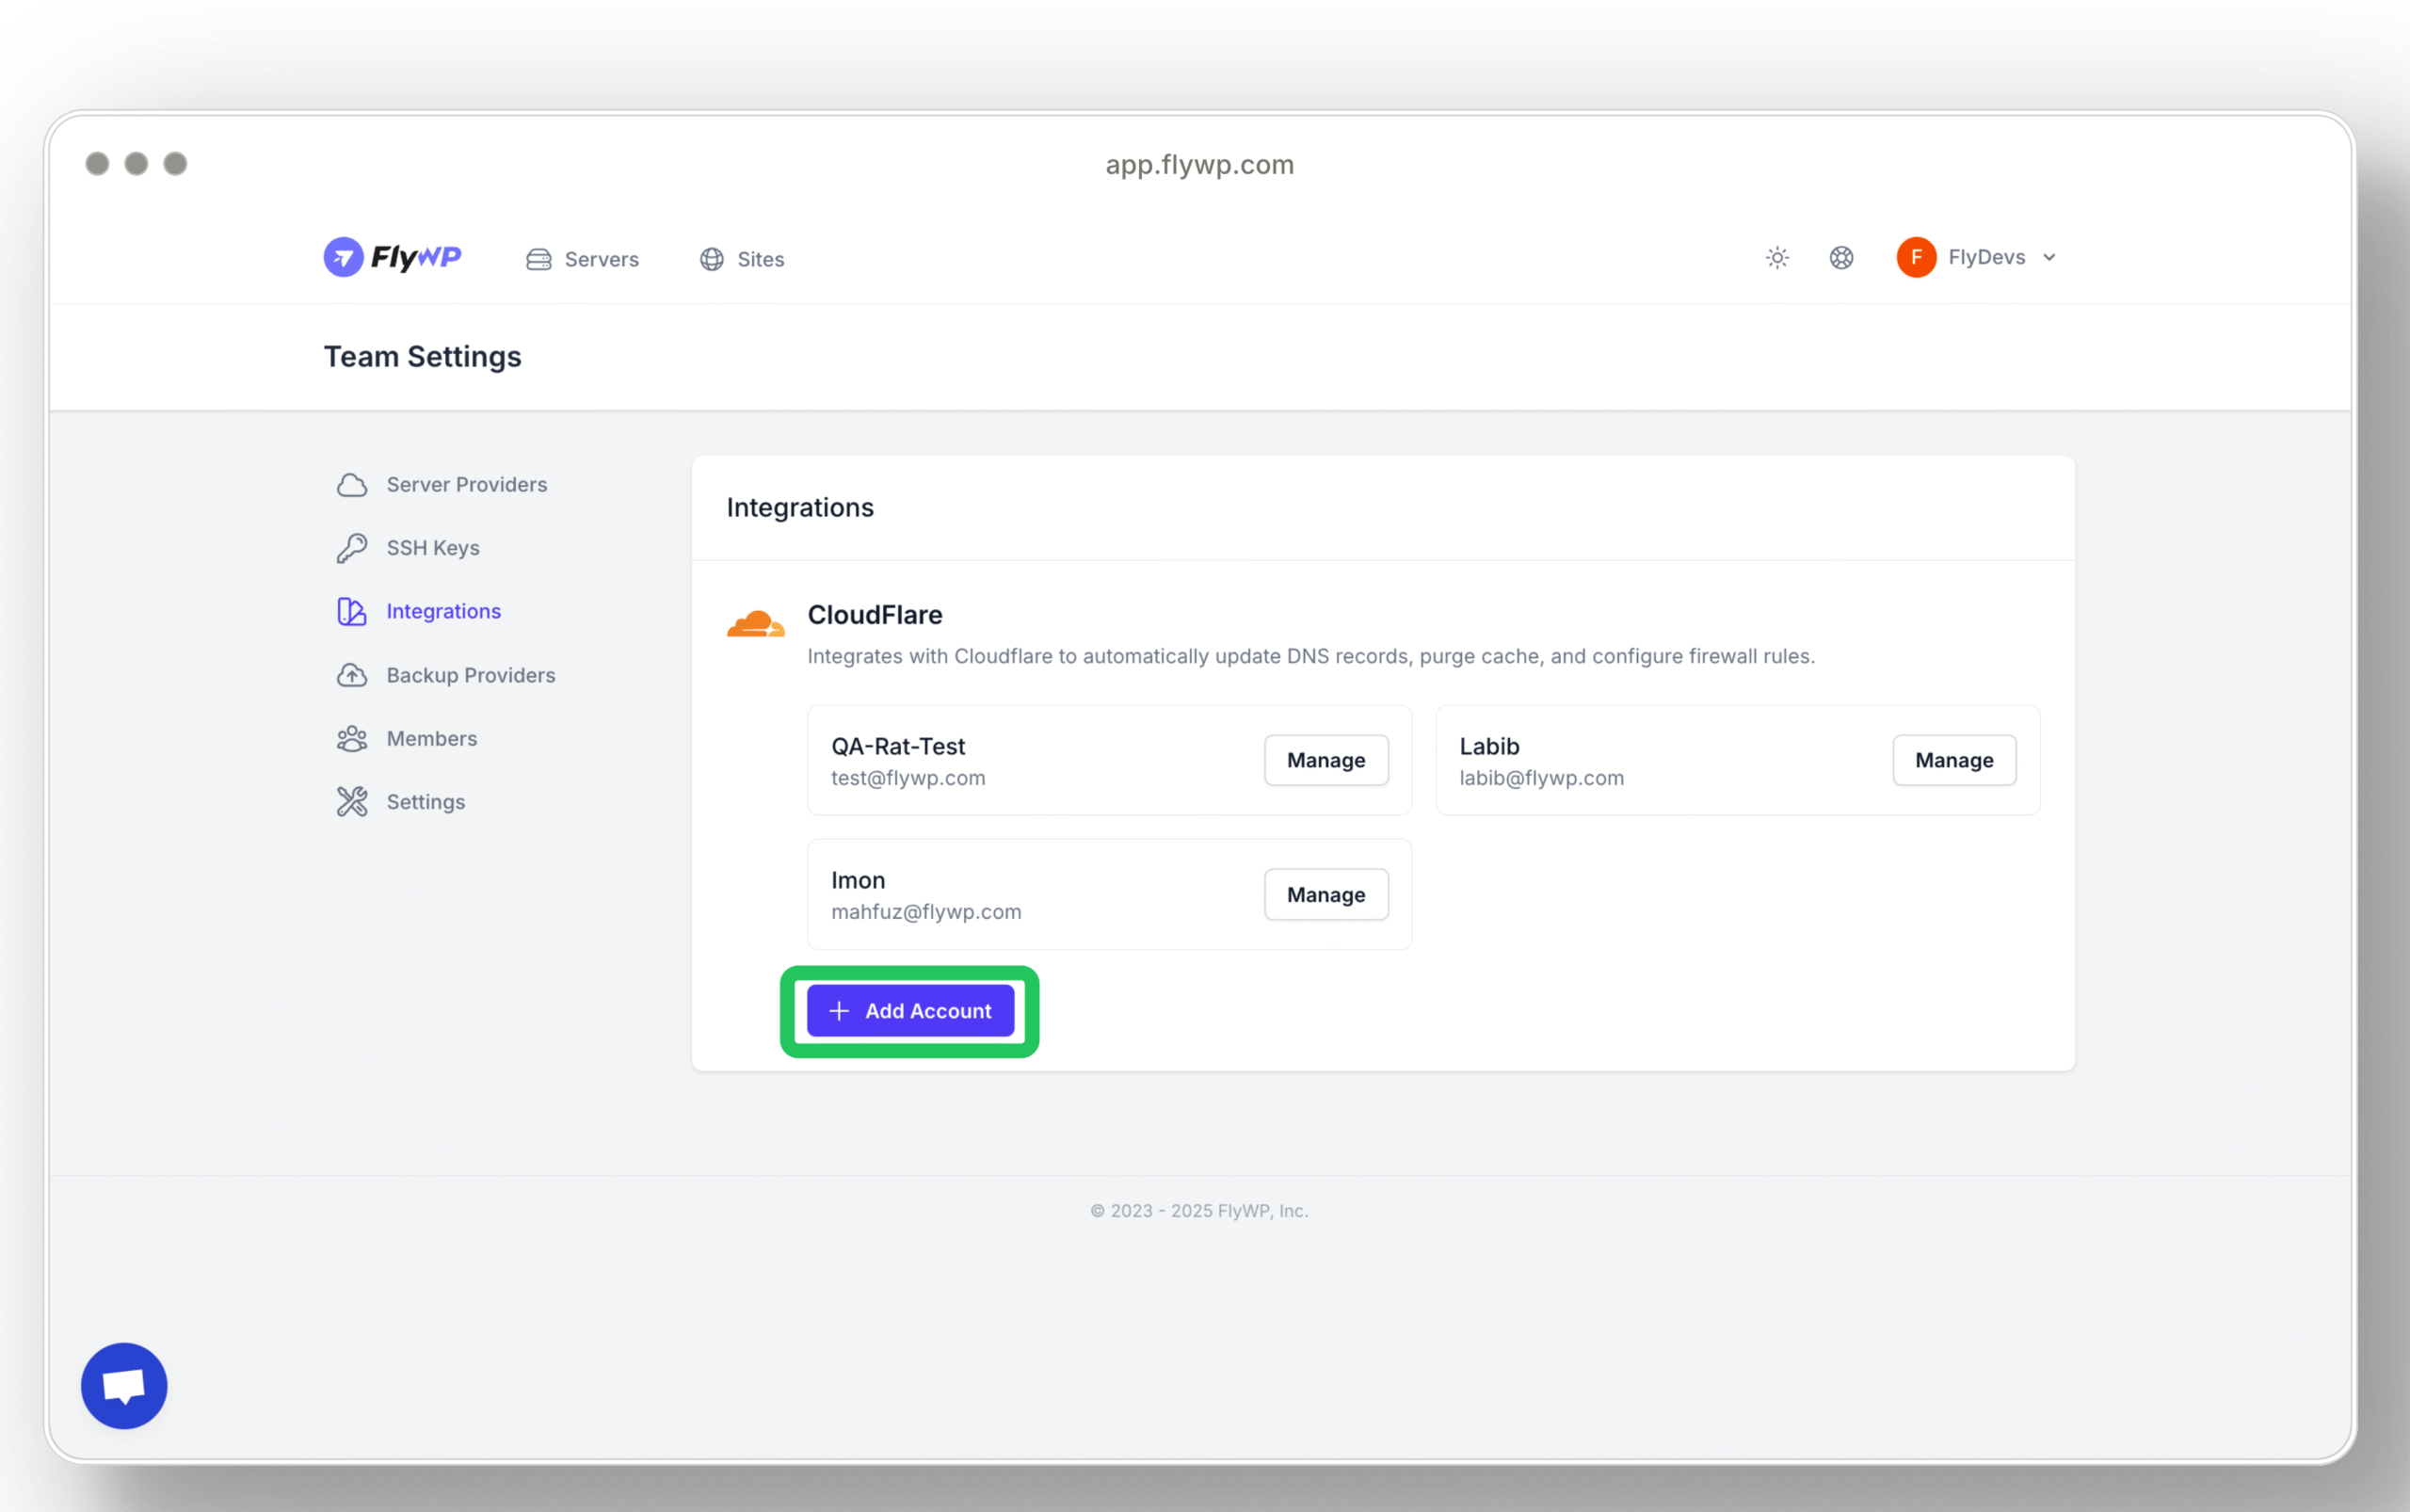
Cloudflare Integration (Now with Multi-Account Support)
FlyWP now supports multiple Cloudflare accounts, making it easier for agencies, freelancers, and multi-brand teams to manage DNS across various domains and projects.
Key Benefits:
- Auto-create DNS records when deploying a site
- Auto-update records during site migration
- Auto-remove DNS entries when a site is deleted
- Manage multiple Cloudflare accounts from one dashboard
- Assign specific Cloudflare accounts to specific sites
Adding a Cloudflare Account
To connect a new Cloudflare account:
- Navigate to Team Settings > Integrations
- Under Cloudflare, click the + Add Account button
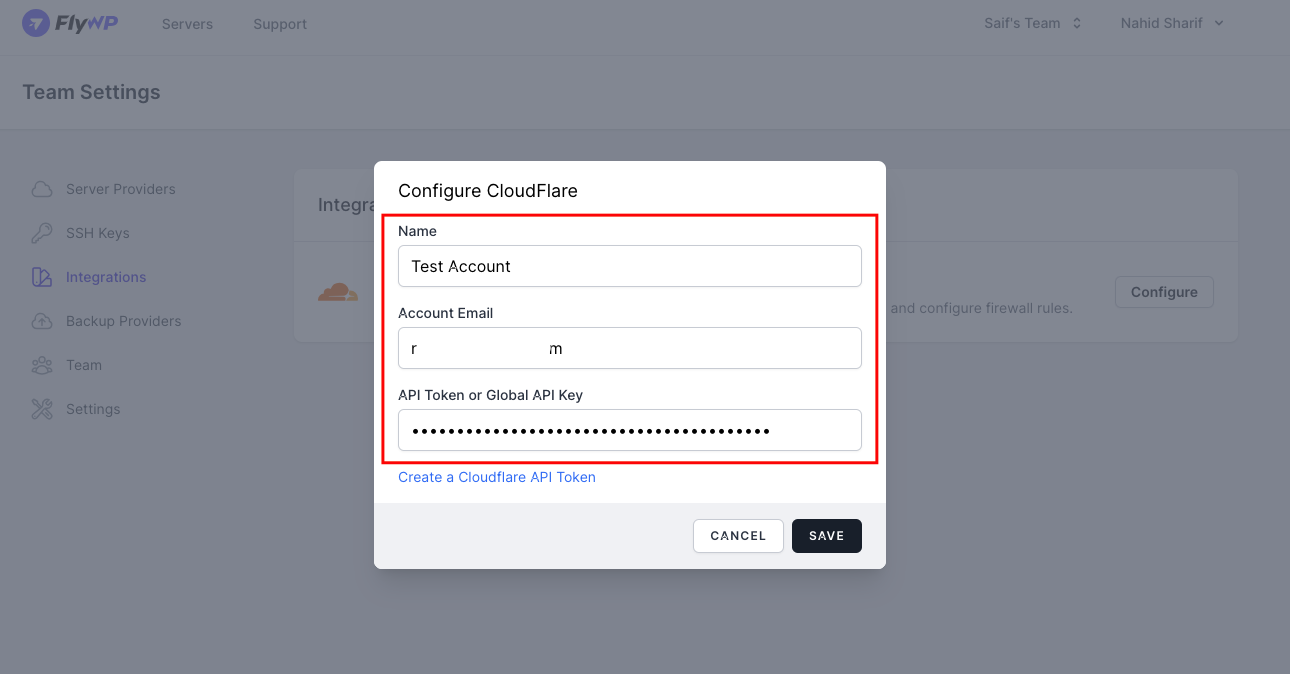
- Enter the following:
- Name: A custom label for the account (e.g., “Client A”, “Staging DNS”)
- Account Email: Email address tied to the Cloudflare account
- API Token or Global API Key: Generate one from Cloudflare’s API Token page
- Name: A custom label for the account (e.g., “Client A”, “Staging DNS”)
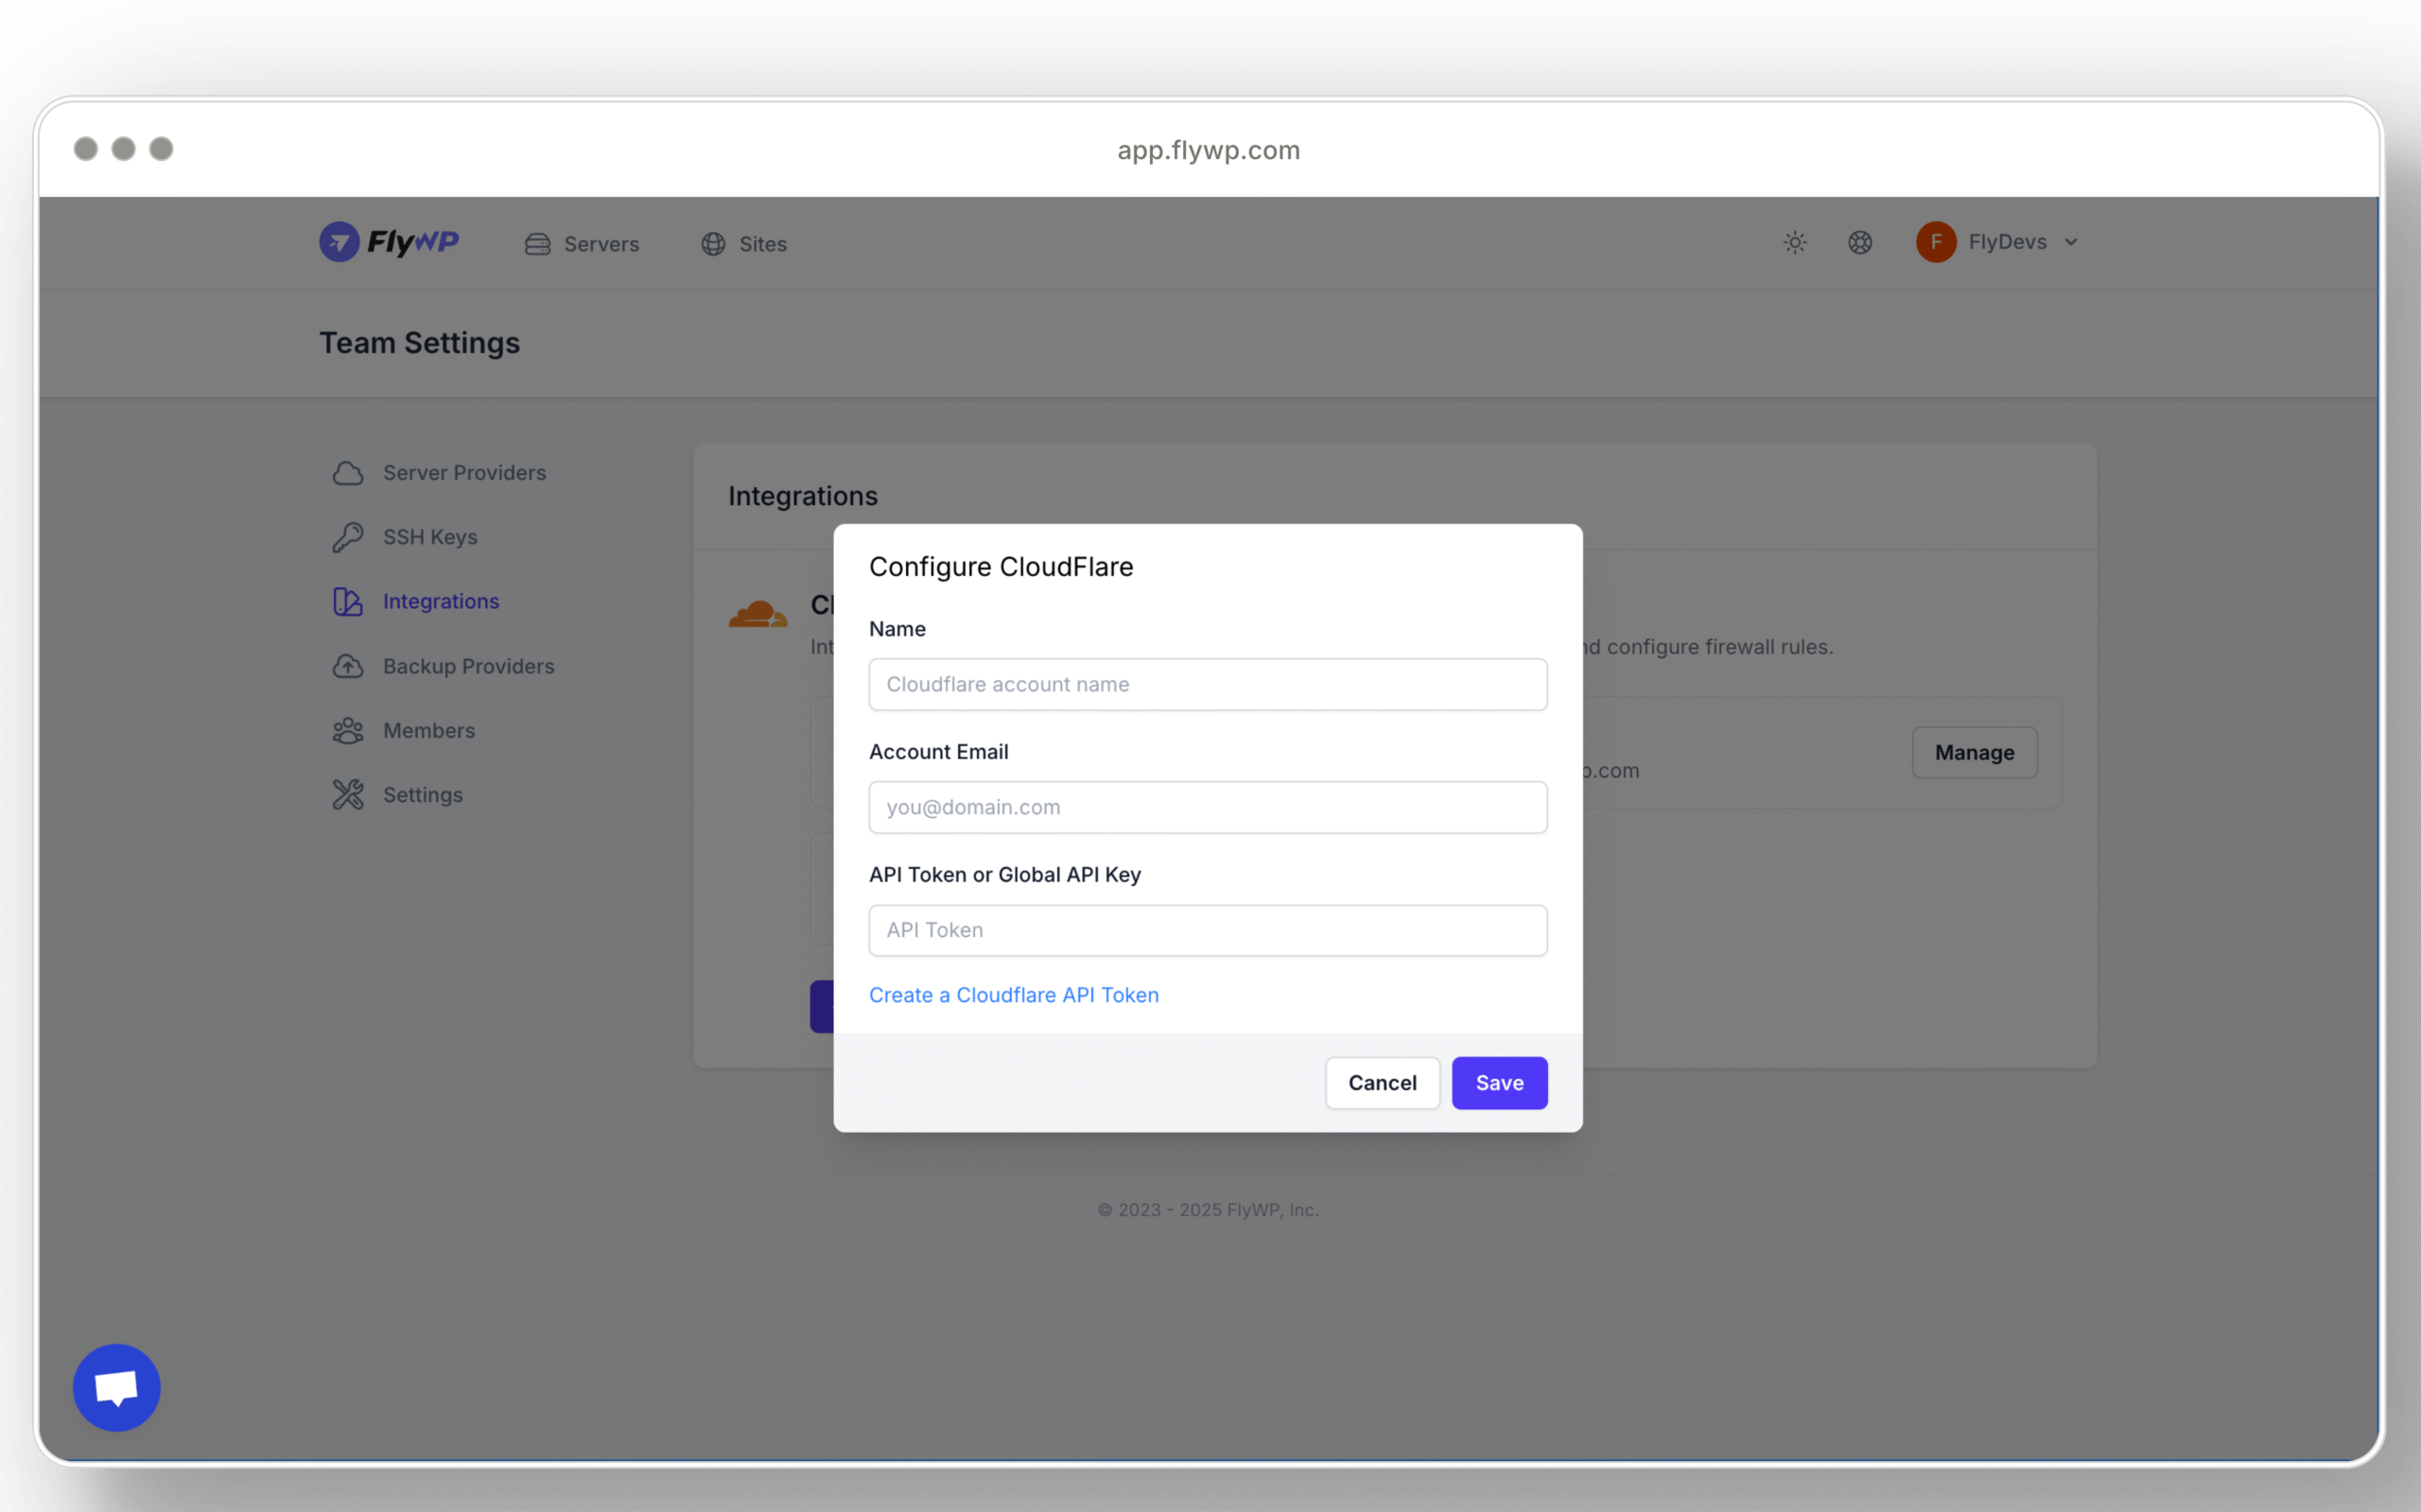
Each account can be managed individually via the Manage button beside its entry.
When deploying or migrating a site, you’ll have the option to select which Cloudflare account to use, ensuring DNS updates happen in the correct zone every time.
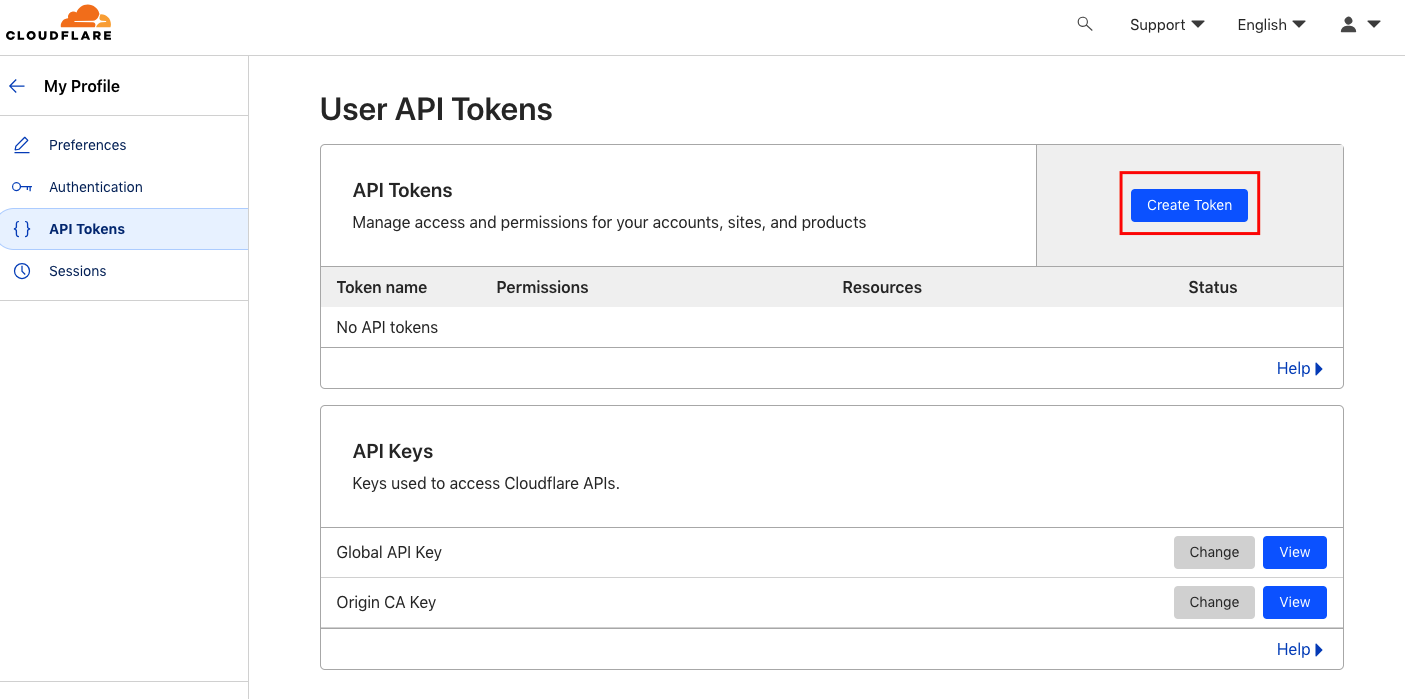
- To create a Cloudflare API token, you can check out this link.
- You need to log in here
- After you log in, you’ll be directly redirected to the API token page. Click on “Create Token“.
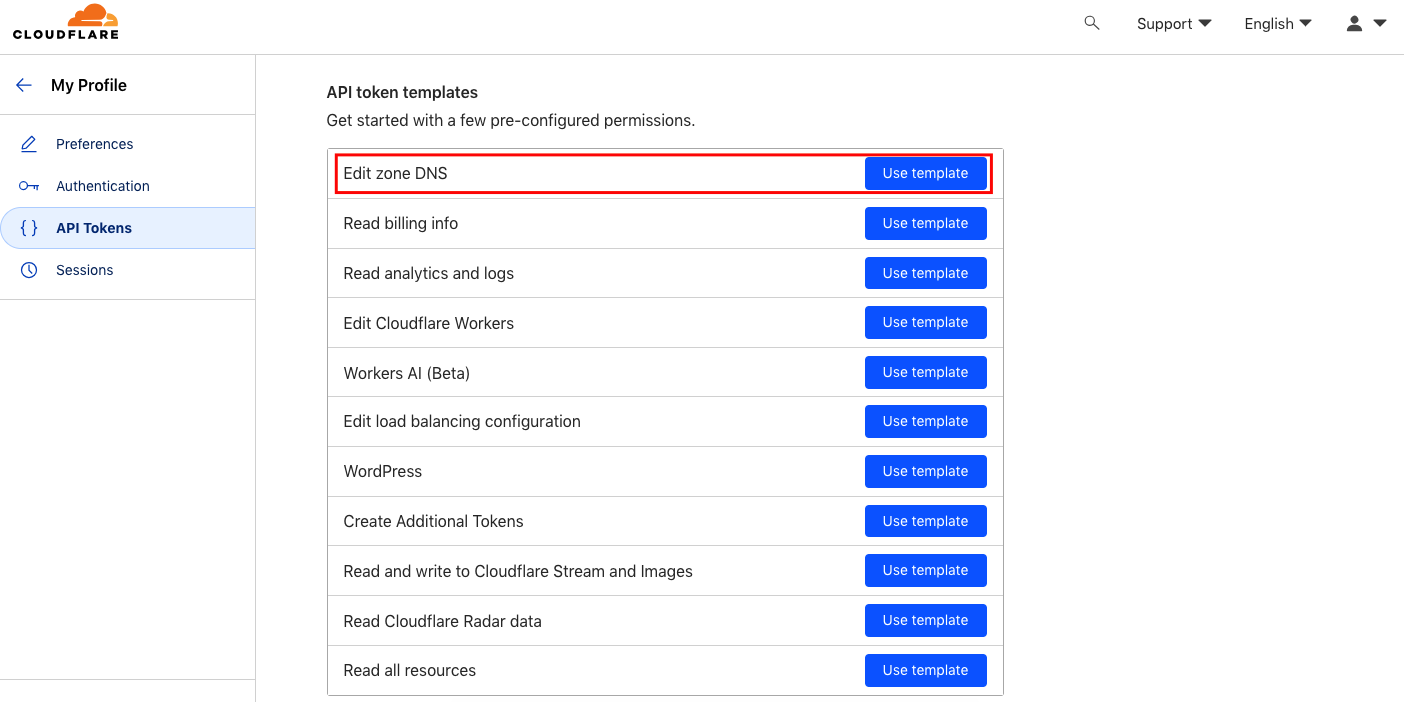
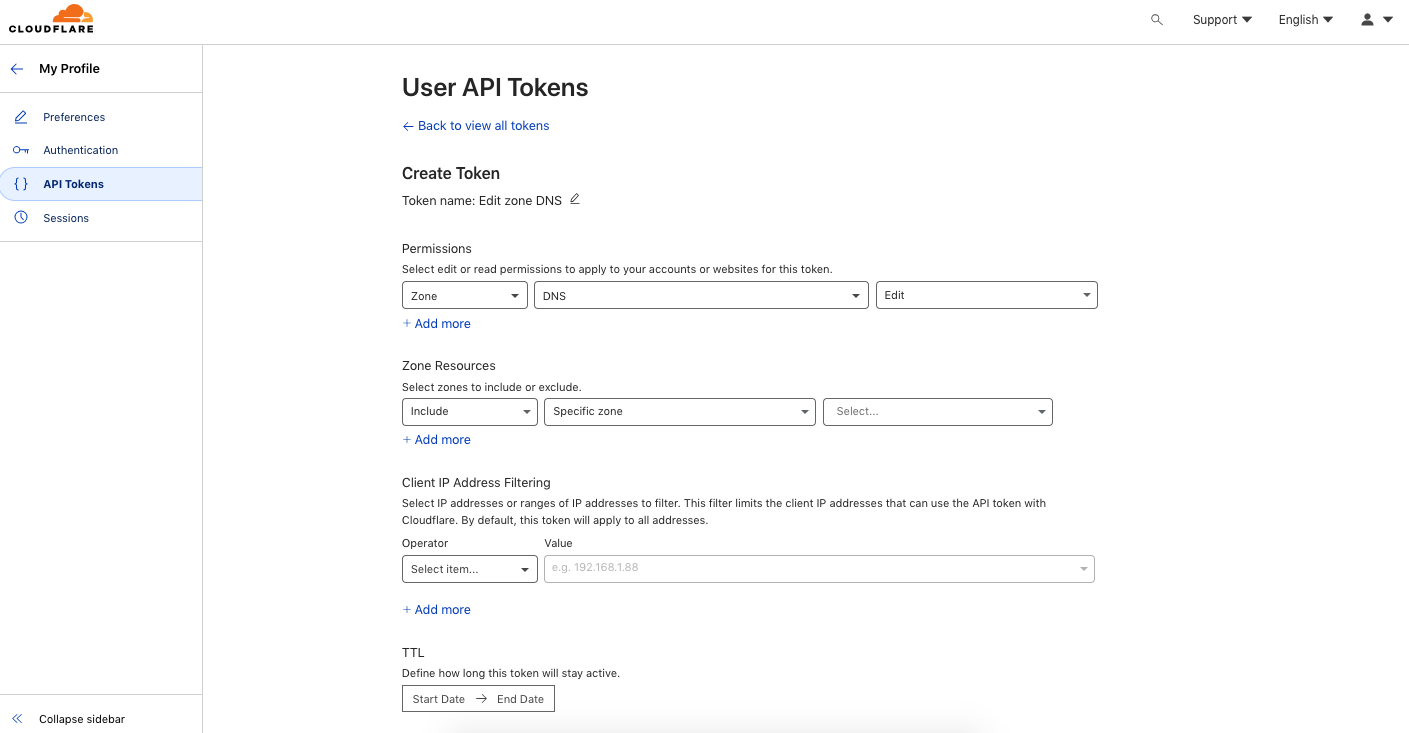
- Here you’ll find the pre-built API token templates. So go with the DNS API token to proceed with the step.
- Fill out the information with some valid data. For example, permissions, zone resources, client IP address filtering, and TTL And then move on to the next step.
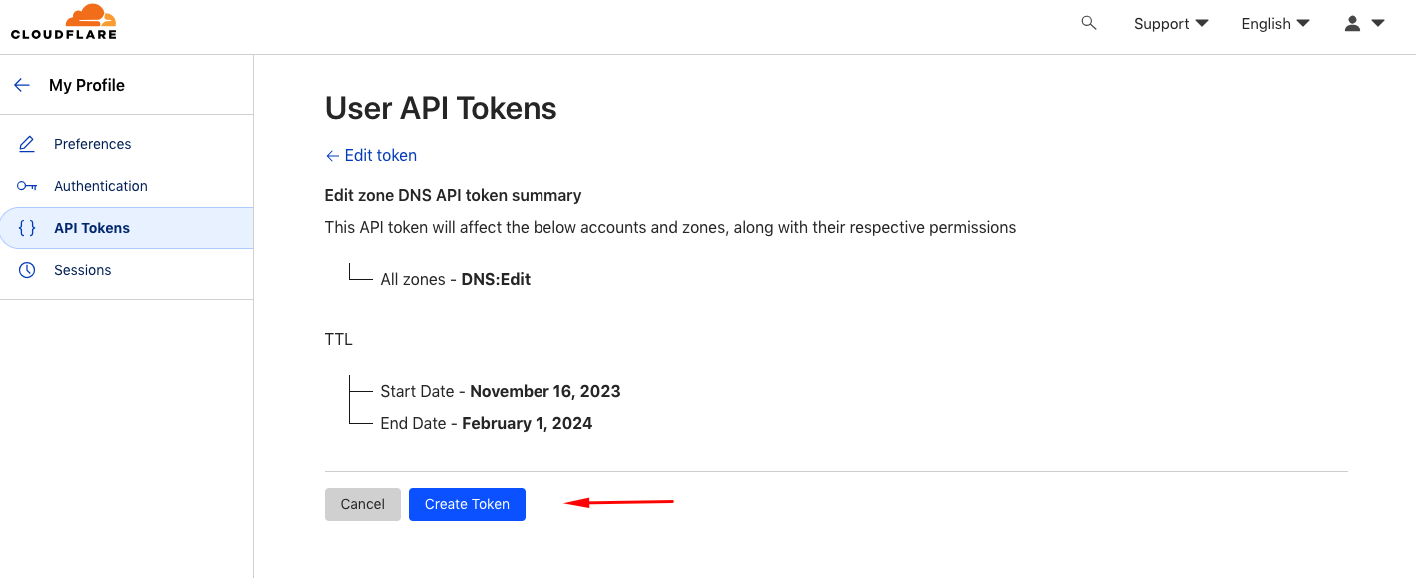
- You’re all set; now just check the information before creating the API token.
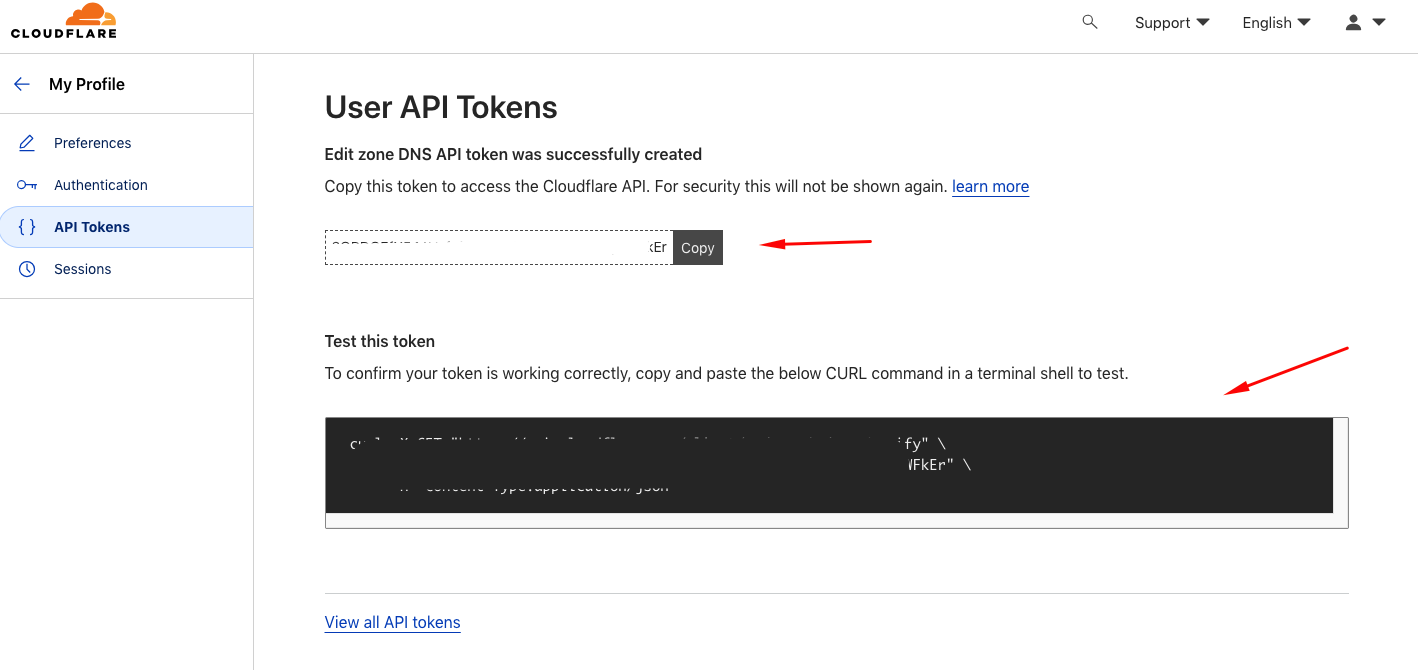
- Here you go. You can find the API tokens here. Also, you can use the given CURL in a terminal shell to test whether your token is working or not.
- Now go back to the FlyWP Cloudflare configuration page and paste the API token here with the ID credentials. Once you’re done, hit the “Save” button.
- That’s all. You have successfully integrated Cloudflare with FlyWP to secure your WordPress server management process.
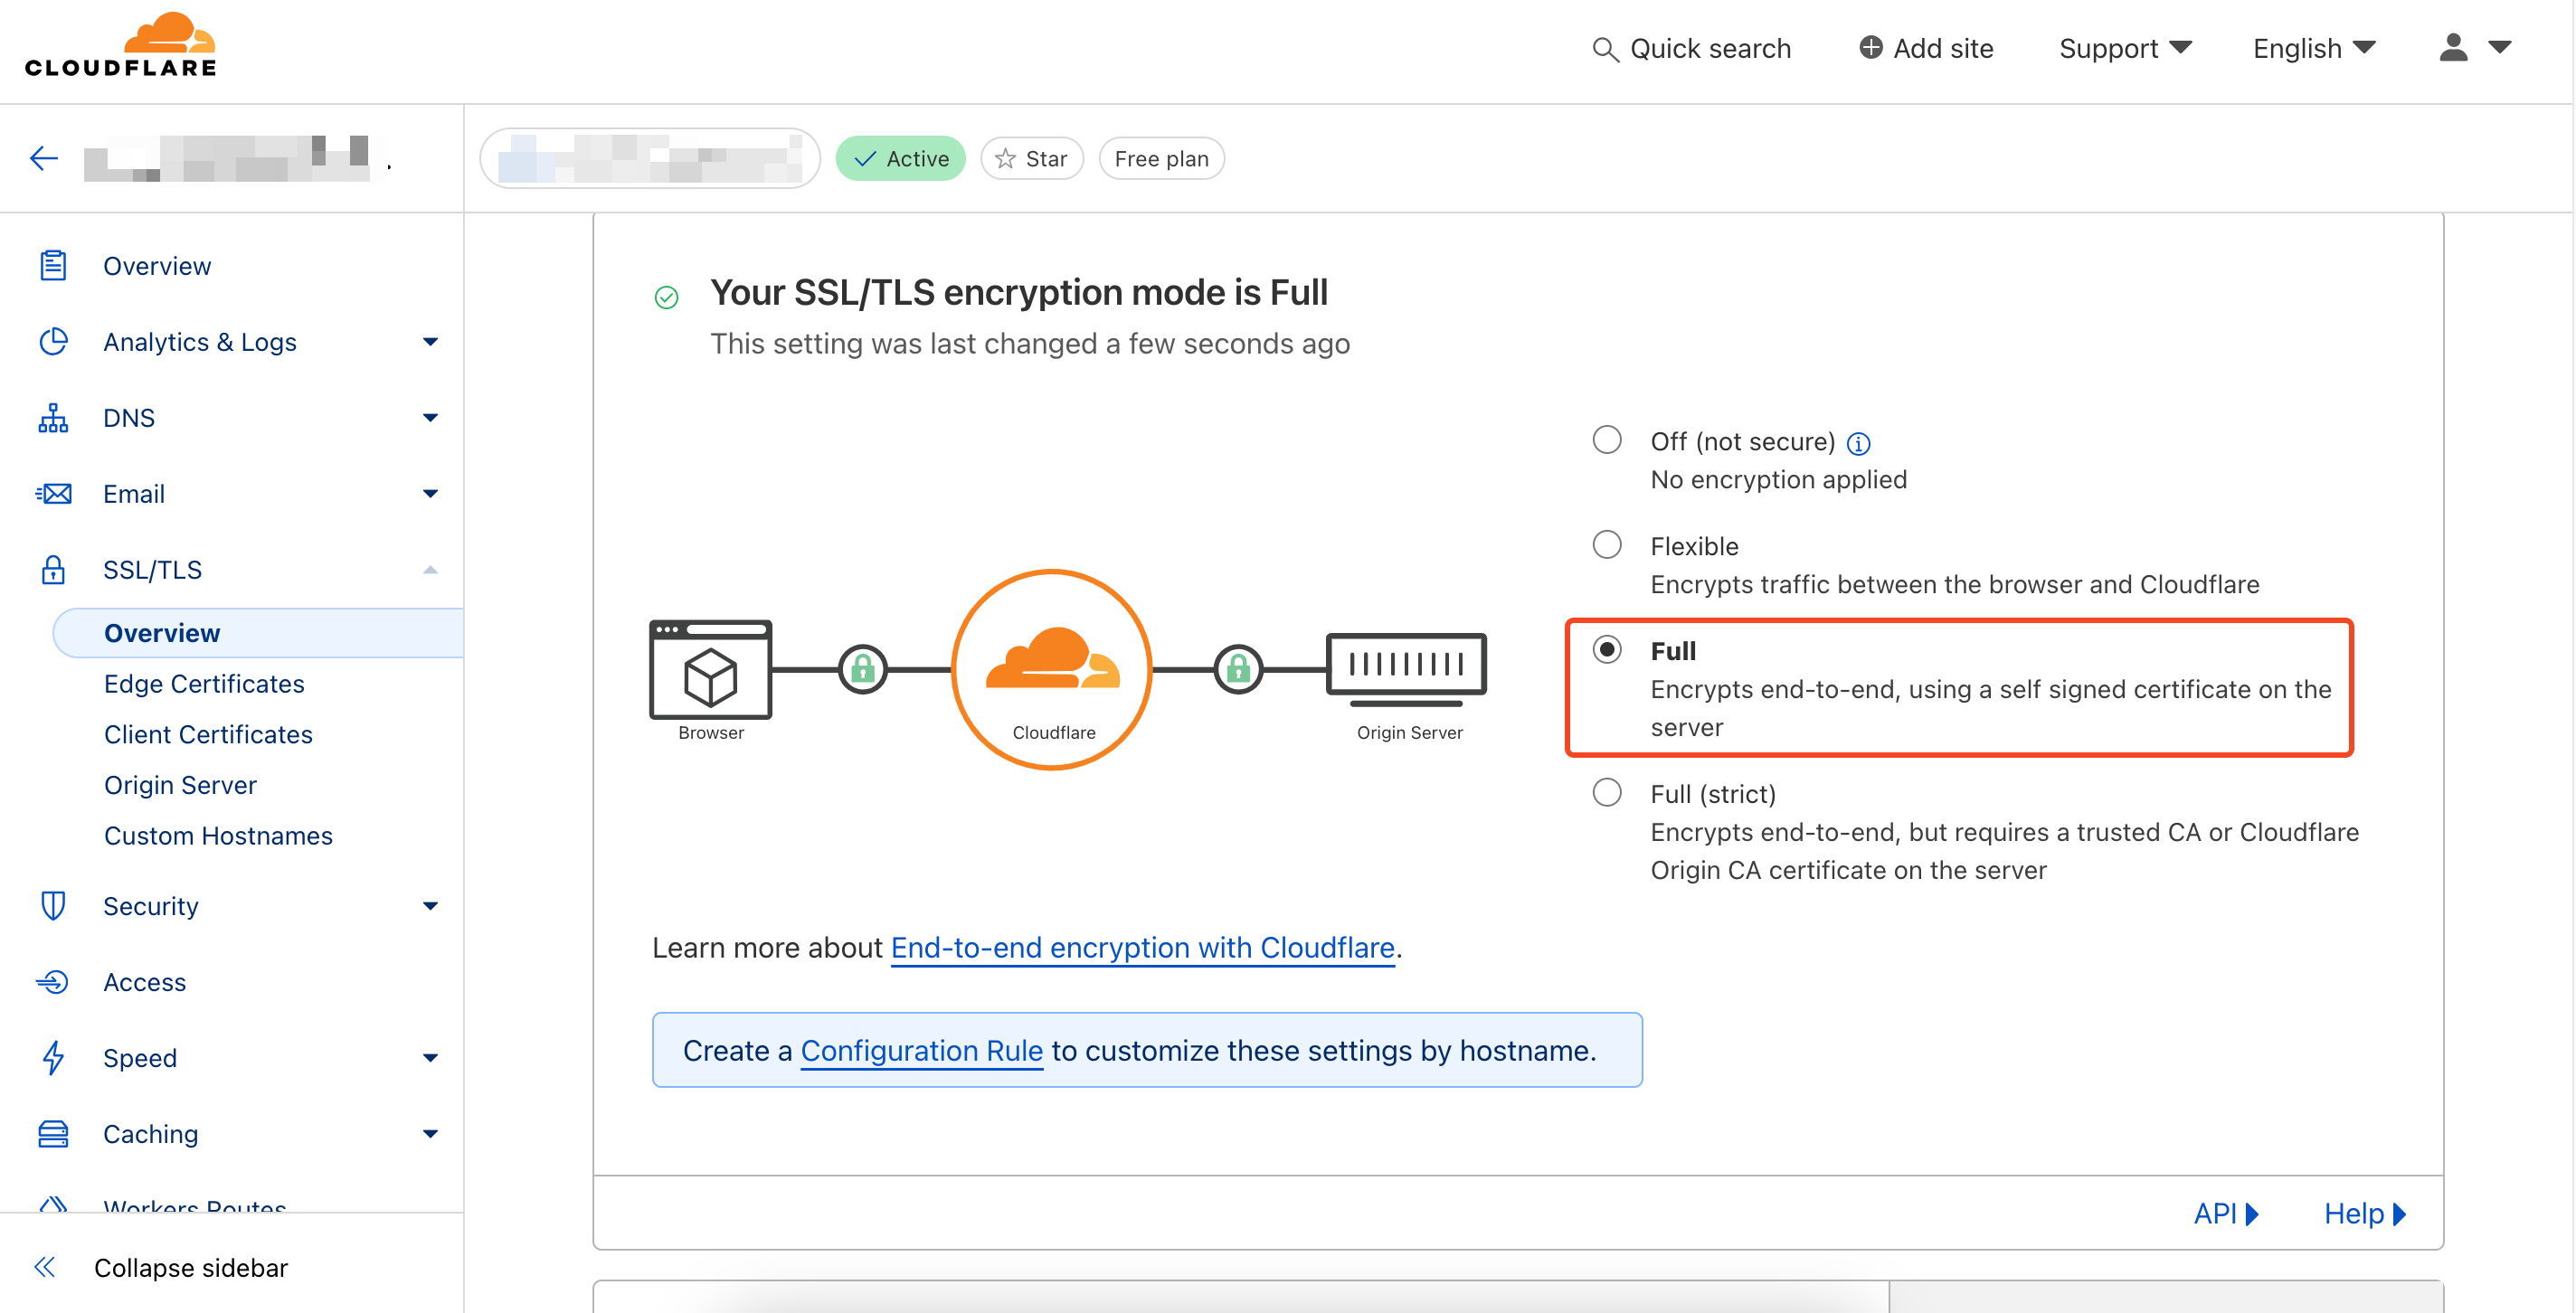
Most important:
To avoid frequent redirects or error like “ERR_TOO_MANY_REDIRECTS“, you need to enable SSL/TLS encryption mode to Full. For that, navigate to SSL/TLS in your Cloudflare account. Then go to the overview page. After that, select Full.
That’s all!
So this is how you can integrate and configure a Cloudflare account in FlyWP.