Amazon Web Services (AWS) is a comprehensive, evolving cloud computing platform that offers a wide range of on-demand computing, storage, databases, networking, application development, analytics, machine learning, and Internet of Things (IoT) services.
The good news is that you can use this sophisticated platform in FlyWP to take your server management experience to the next level.
Here, we have discussed the process below to help you successfully integrate this server provider. Check it out now!
Step-by-step guide to adding Amazon EC2 in FlyWP
Step one:
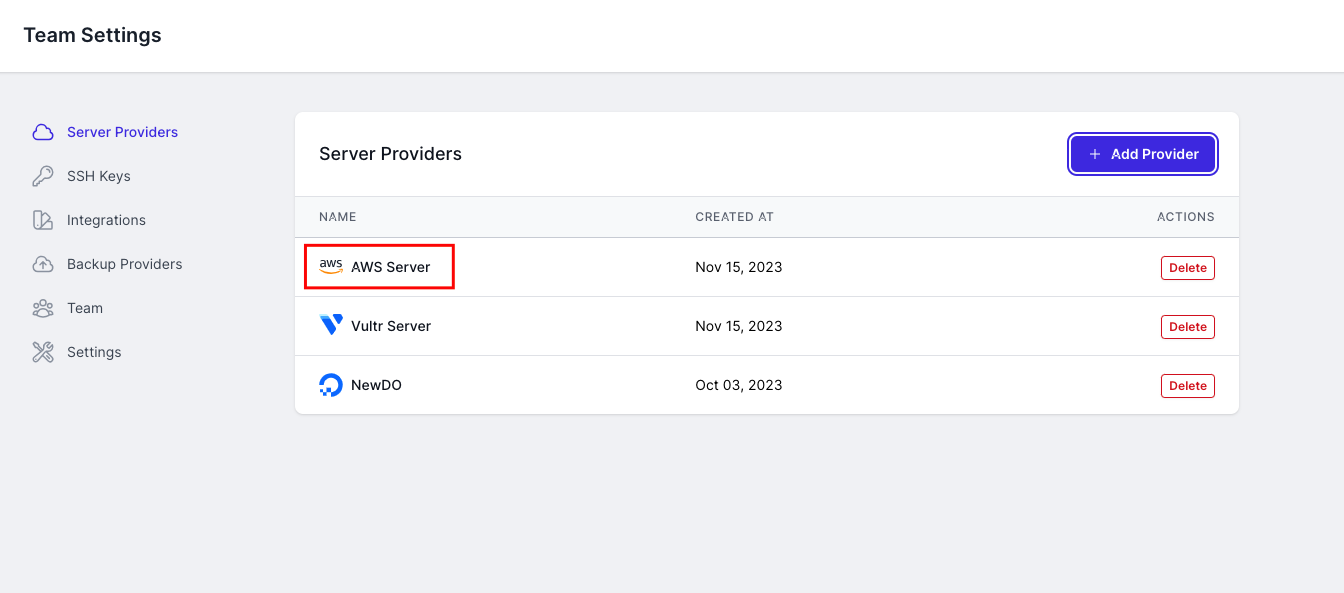
- First, proceed to the server providers page from the team tab
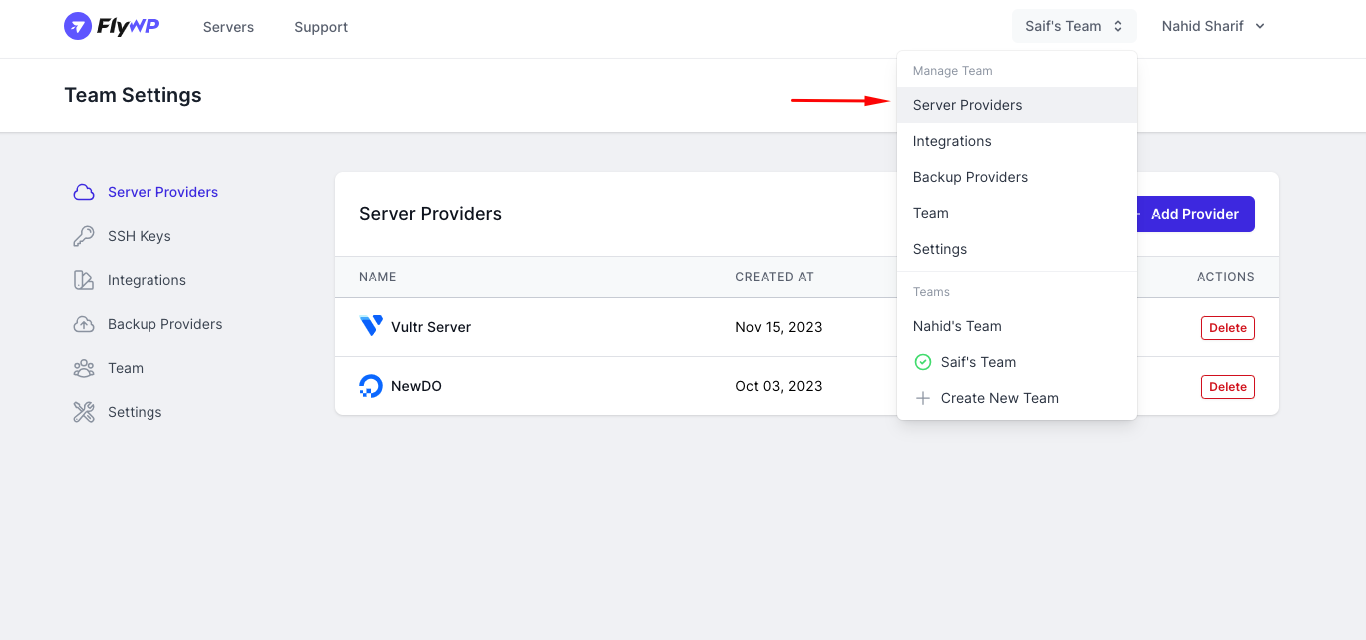
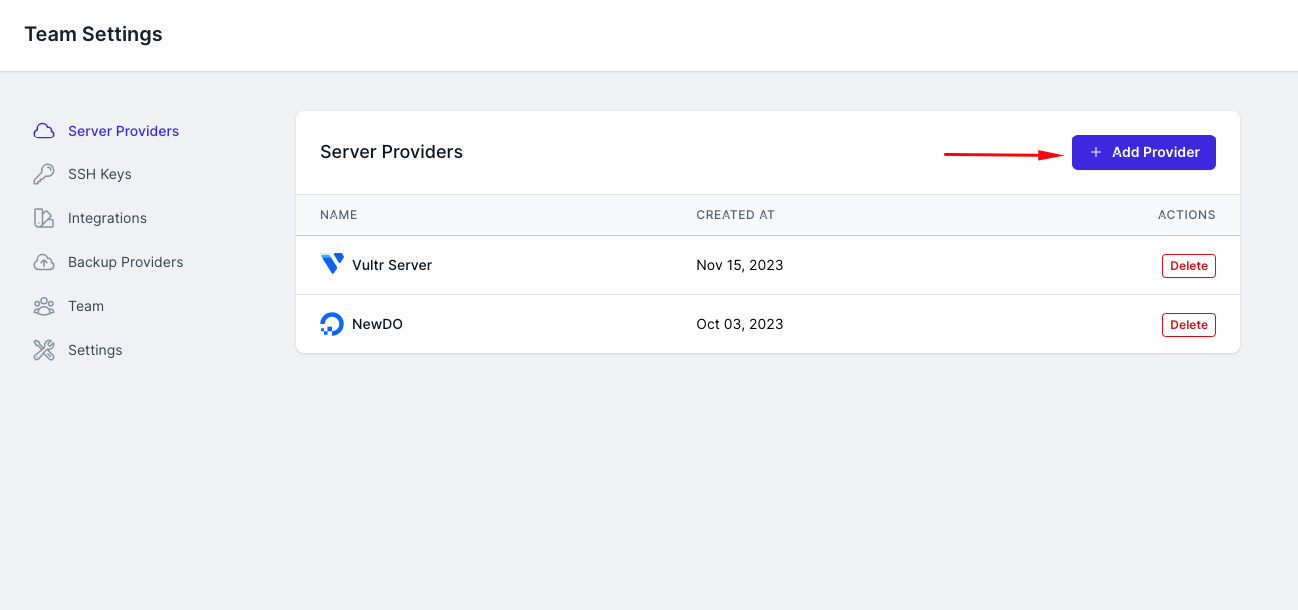
Step two:
- Click on the “Add Provider” button and you’ll find a list of server providers.
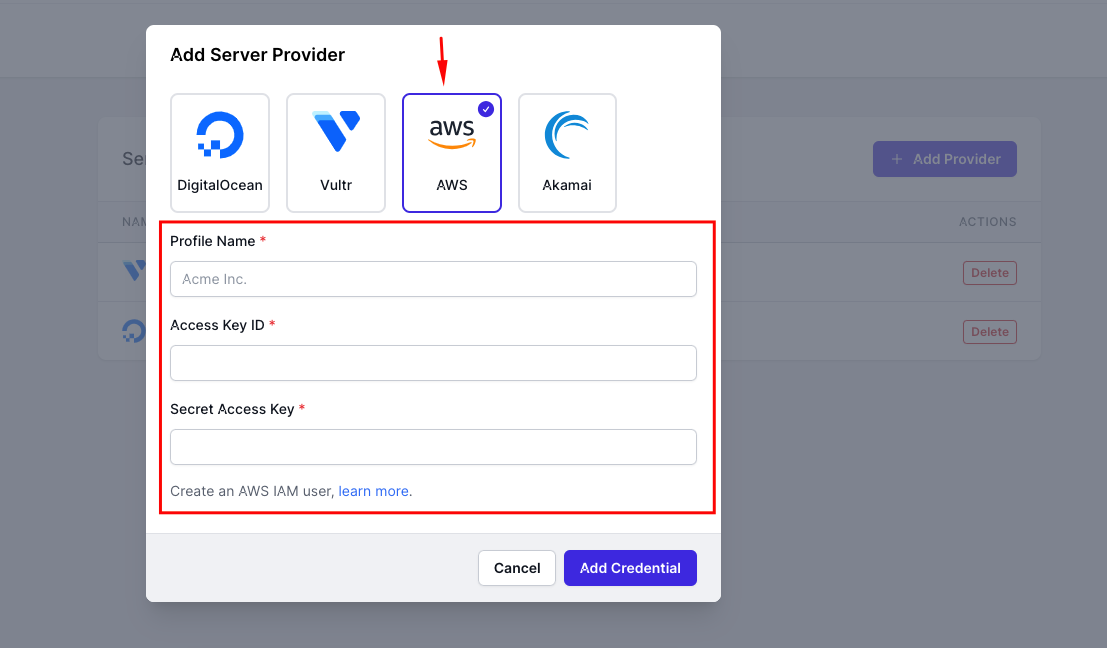
Step three:
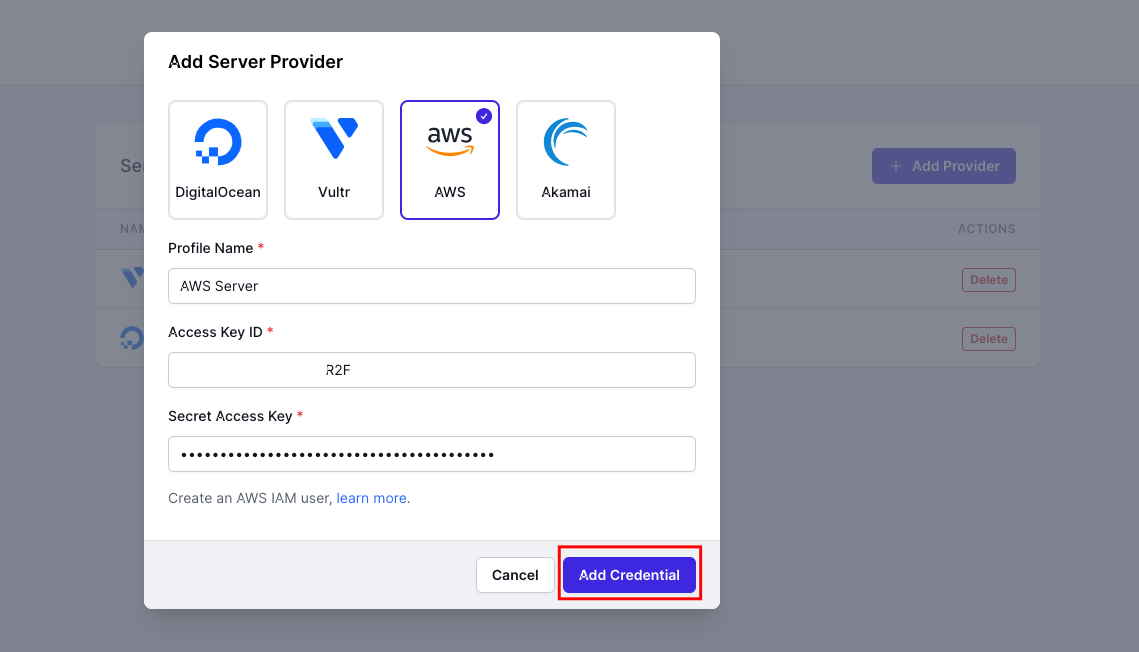
- Select AWS, and you can see the server information below.
Step four:
To obtain your AWS Access Key and Secret Access Key, follow these detailed steps. This process assumes you already have an AWS account. If you don’t, you’ll need to create one before proceeding.
Sign in to Your AWS Management Console
- Go to the AWS Management Console (https://aws.amazon.com/console/).
- Sign in with your AWS account credentials.
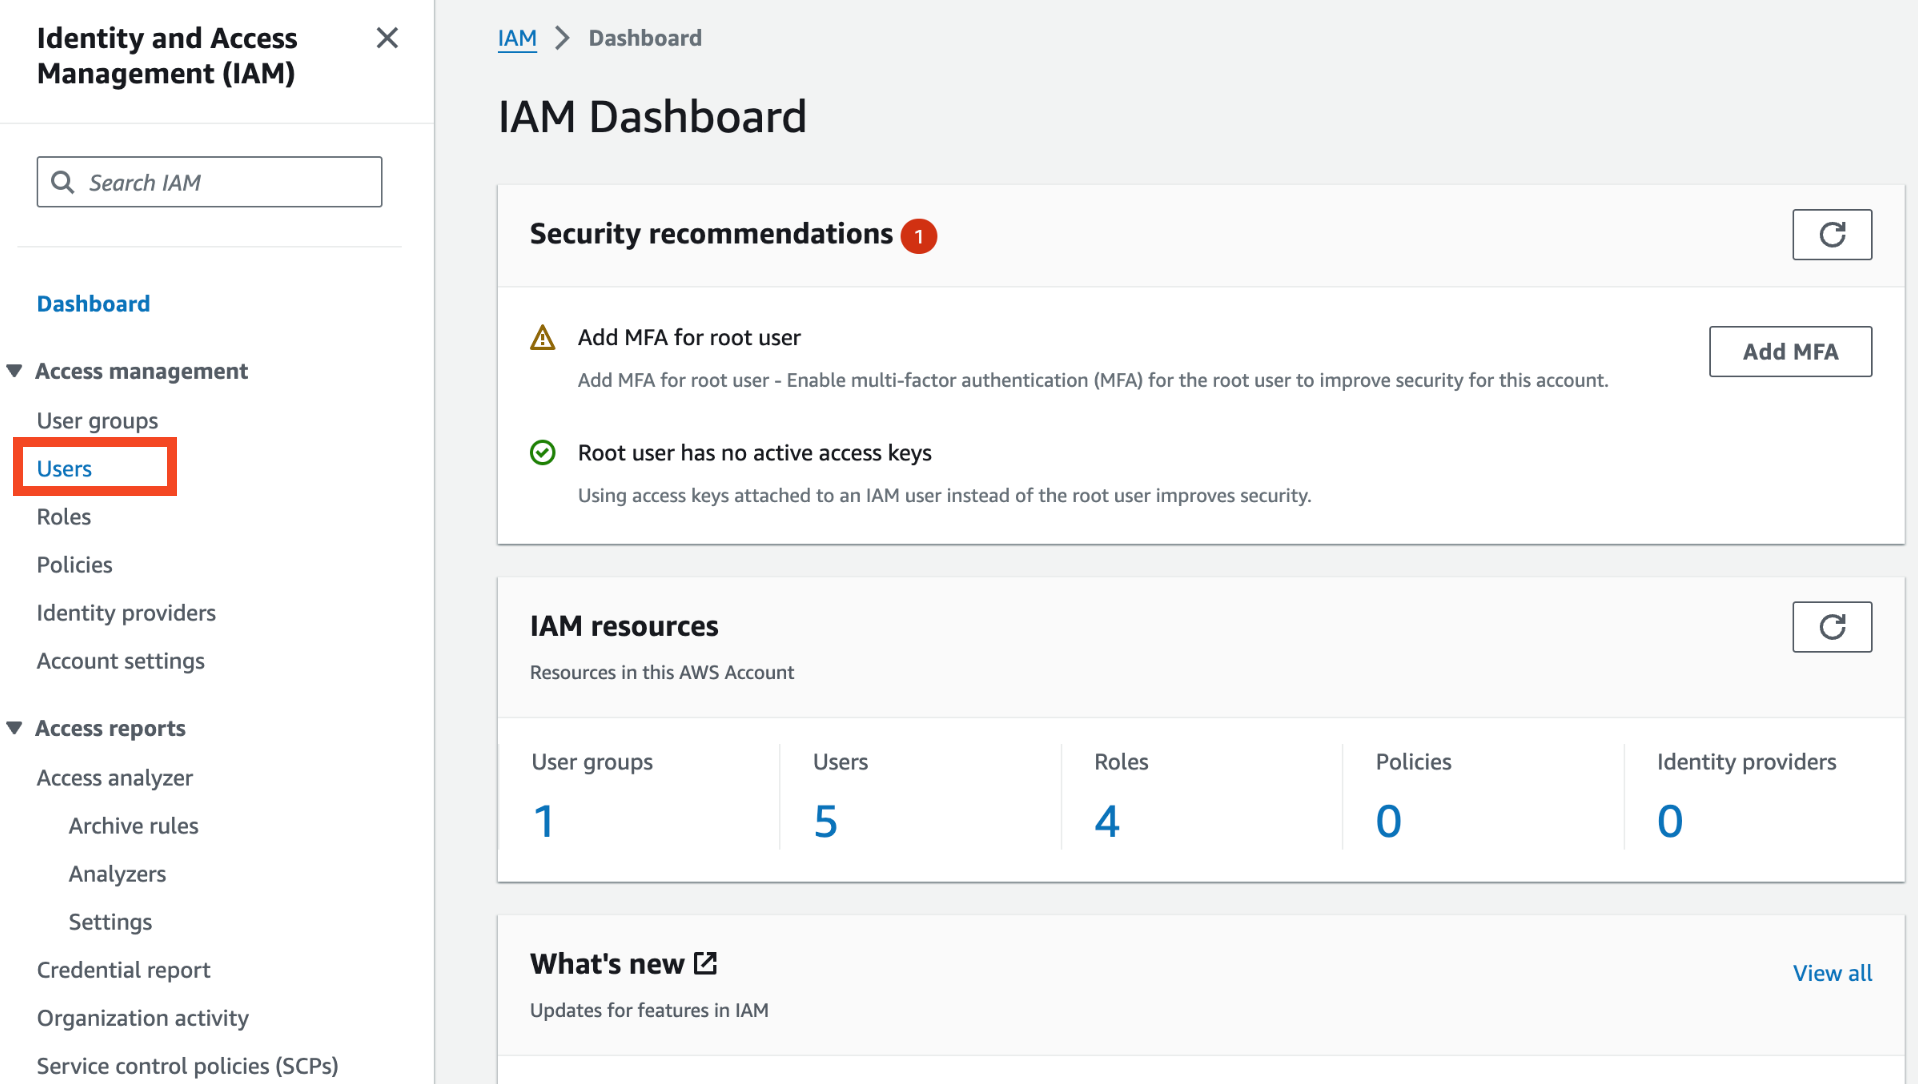
Navigate to the IAM (Identity and Access Management) Dashboard
- Once logged in, find the “Services” menu at the top of the console.
- Click on “IAM” under the “Security, Identity, and Compliance” section.

Create a New IAM User
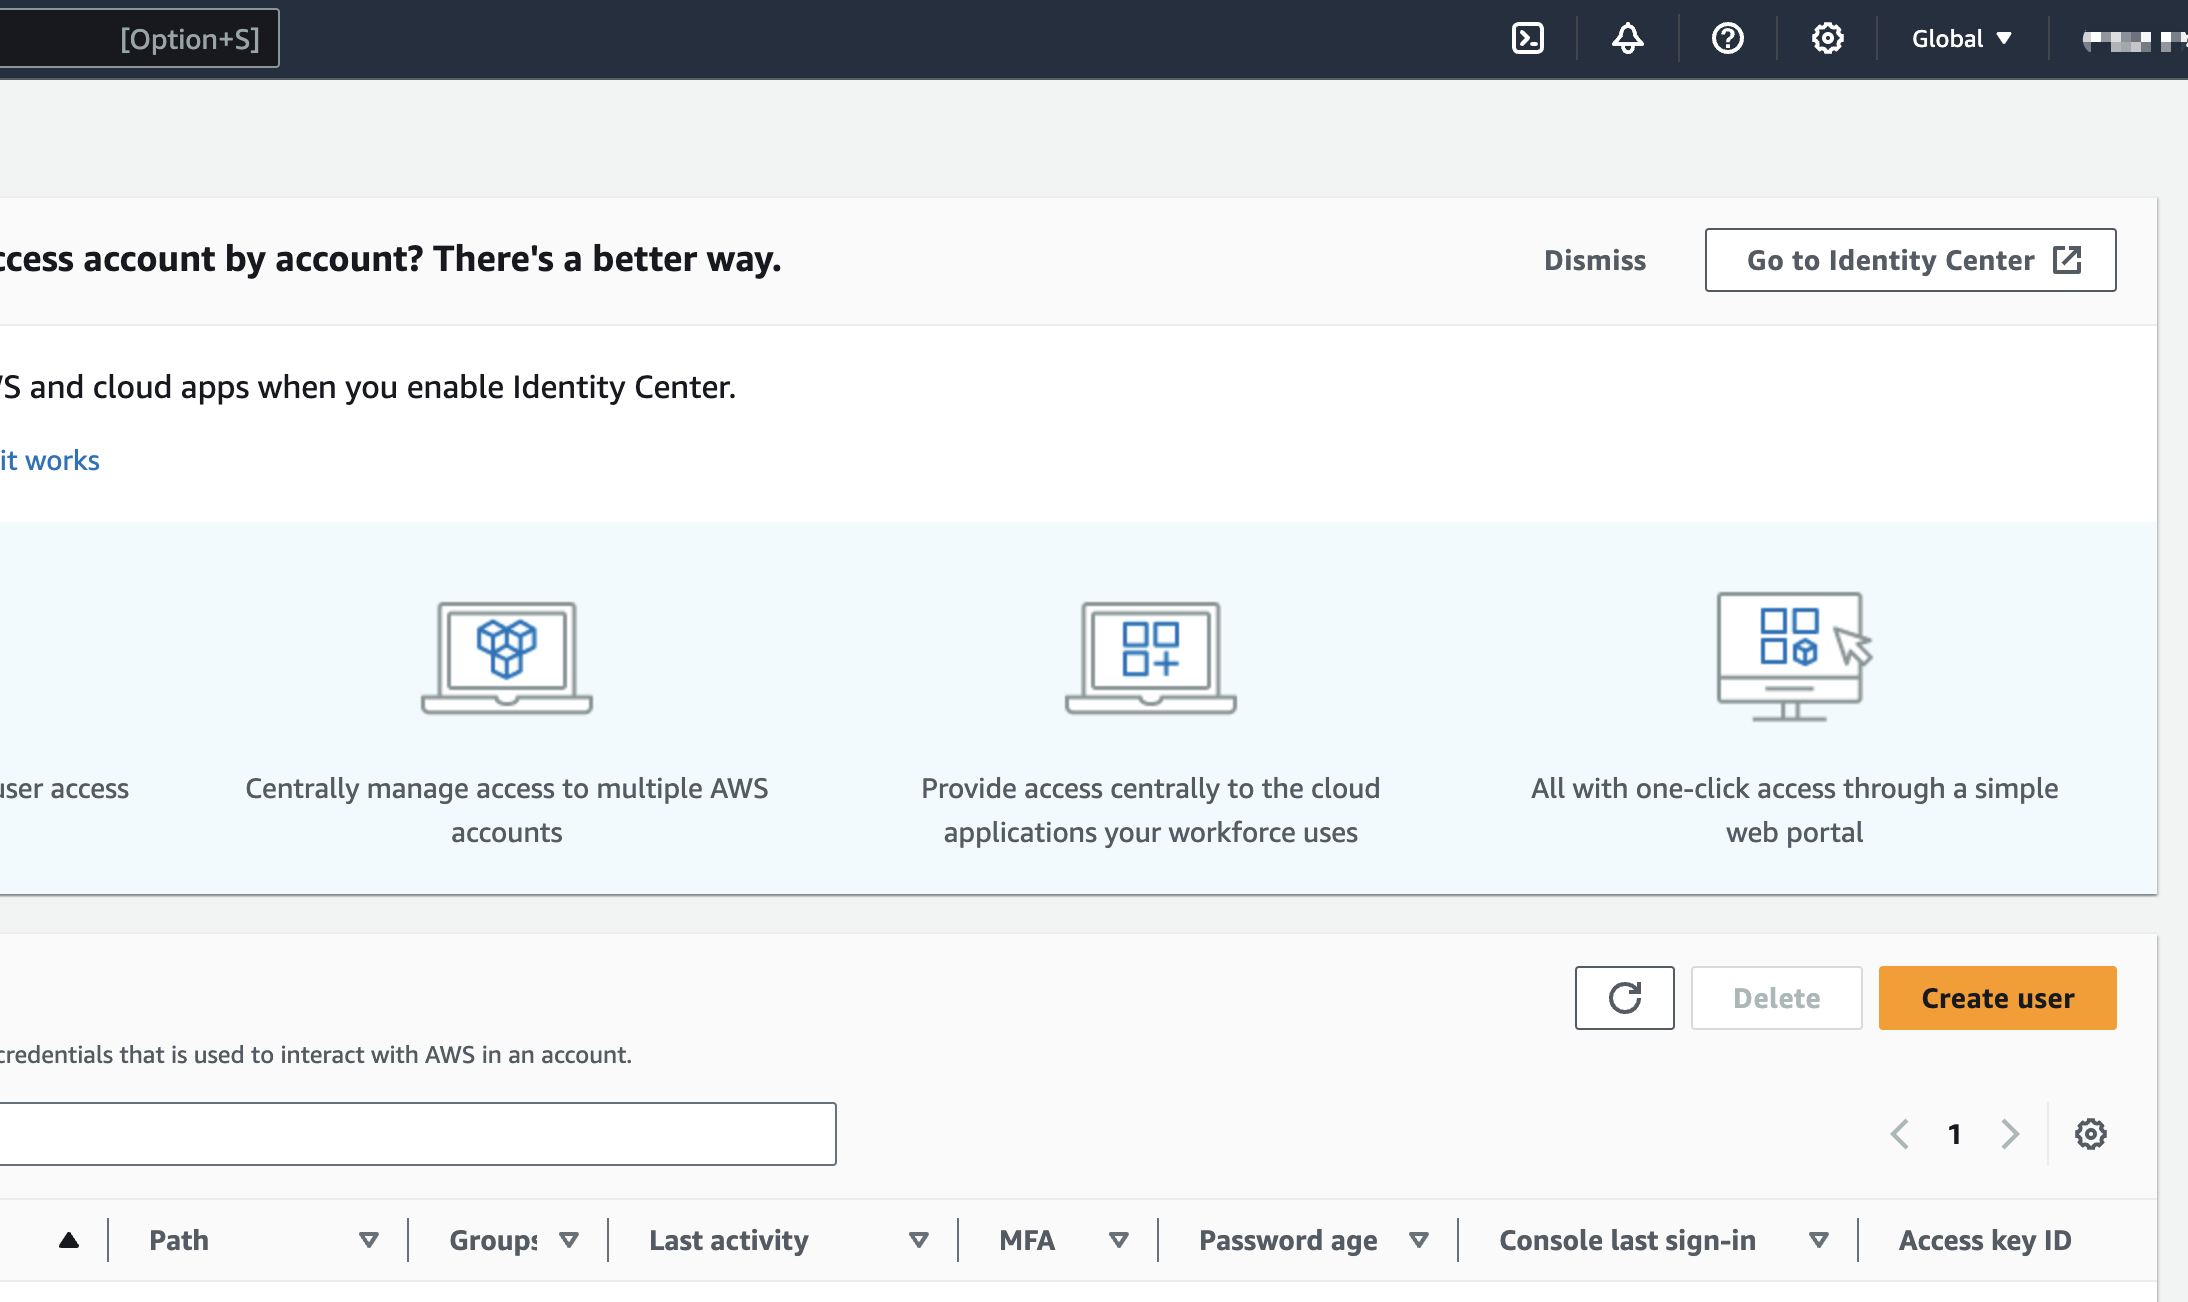
- In the IAM dashboard, click on “Users” in the navigation pane on the left side.
- Click the “Add new users” button.
- Click on the “Create User” button.
- Enter a user name for the new user. This should be a name that easily identifies the user or the user’s purpose.
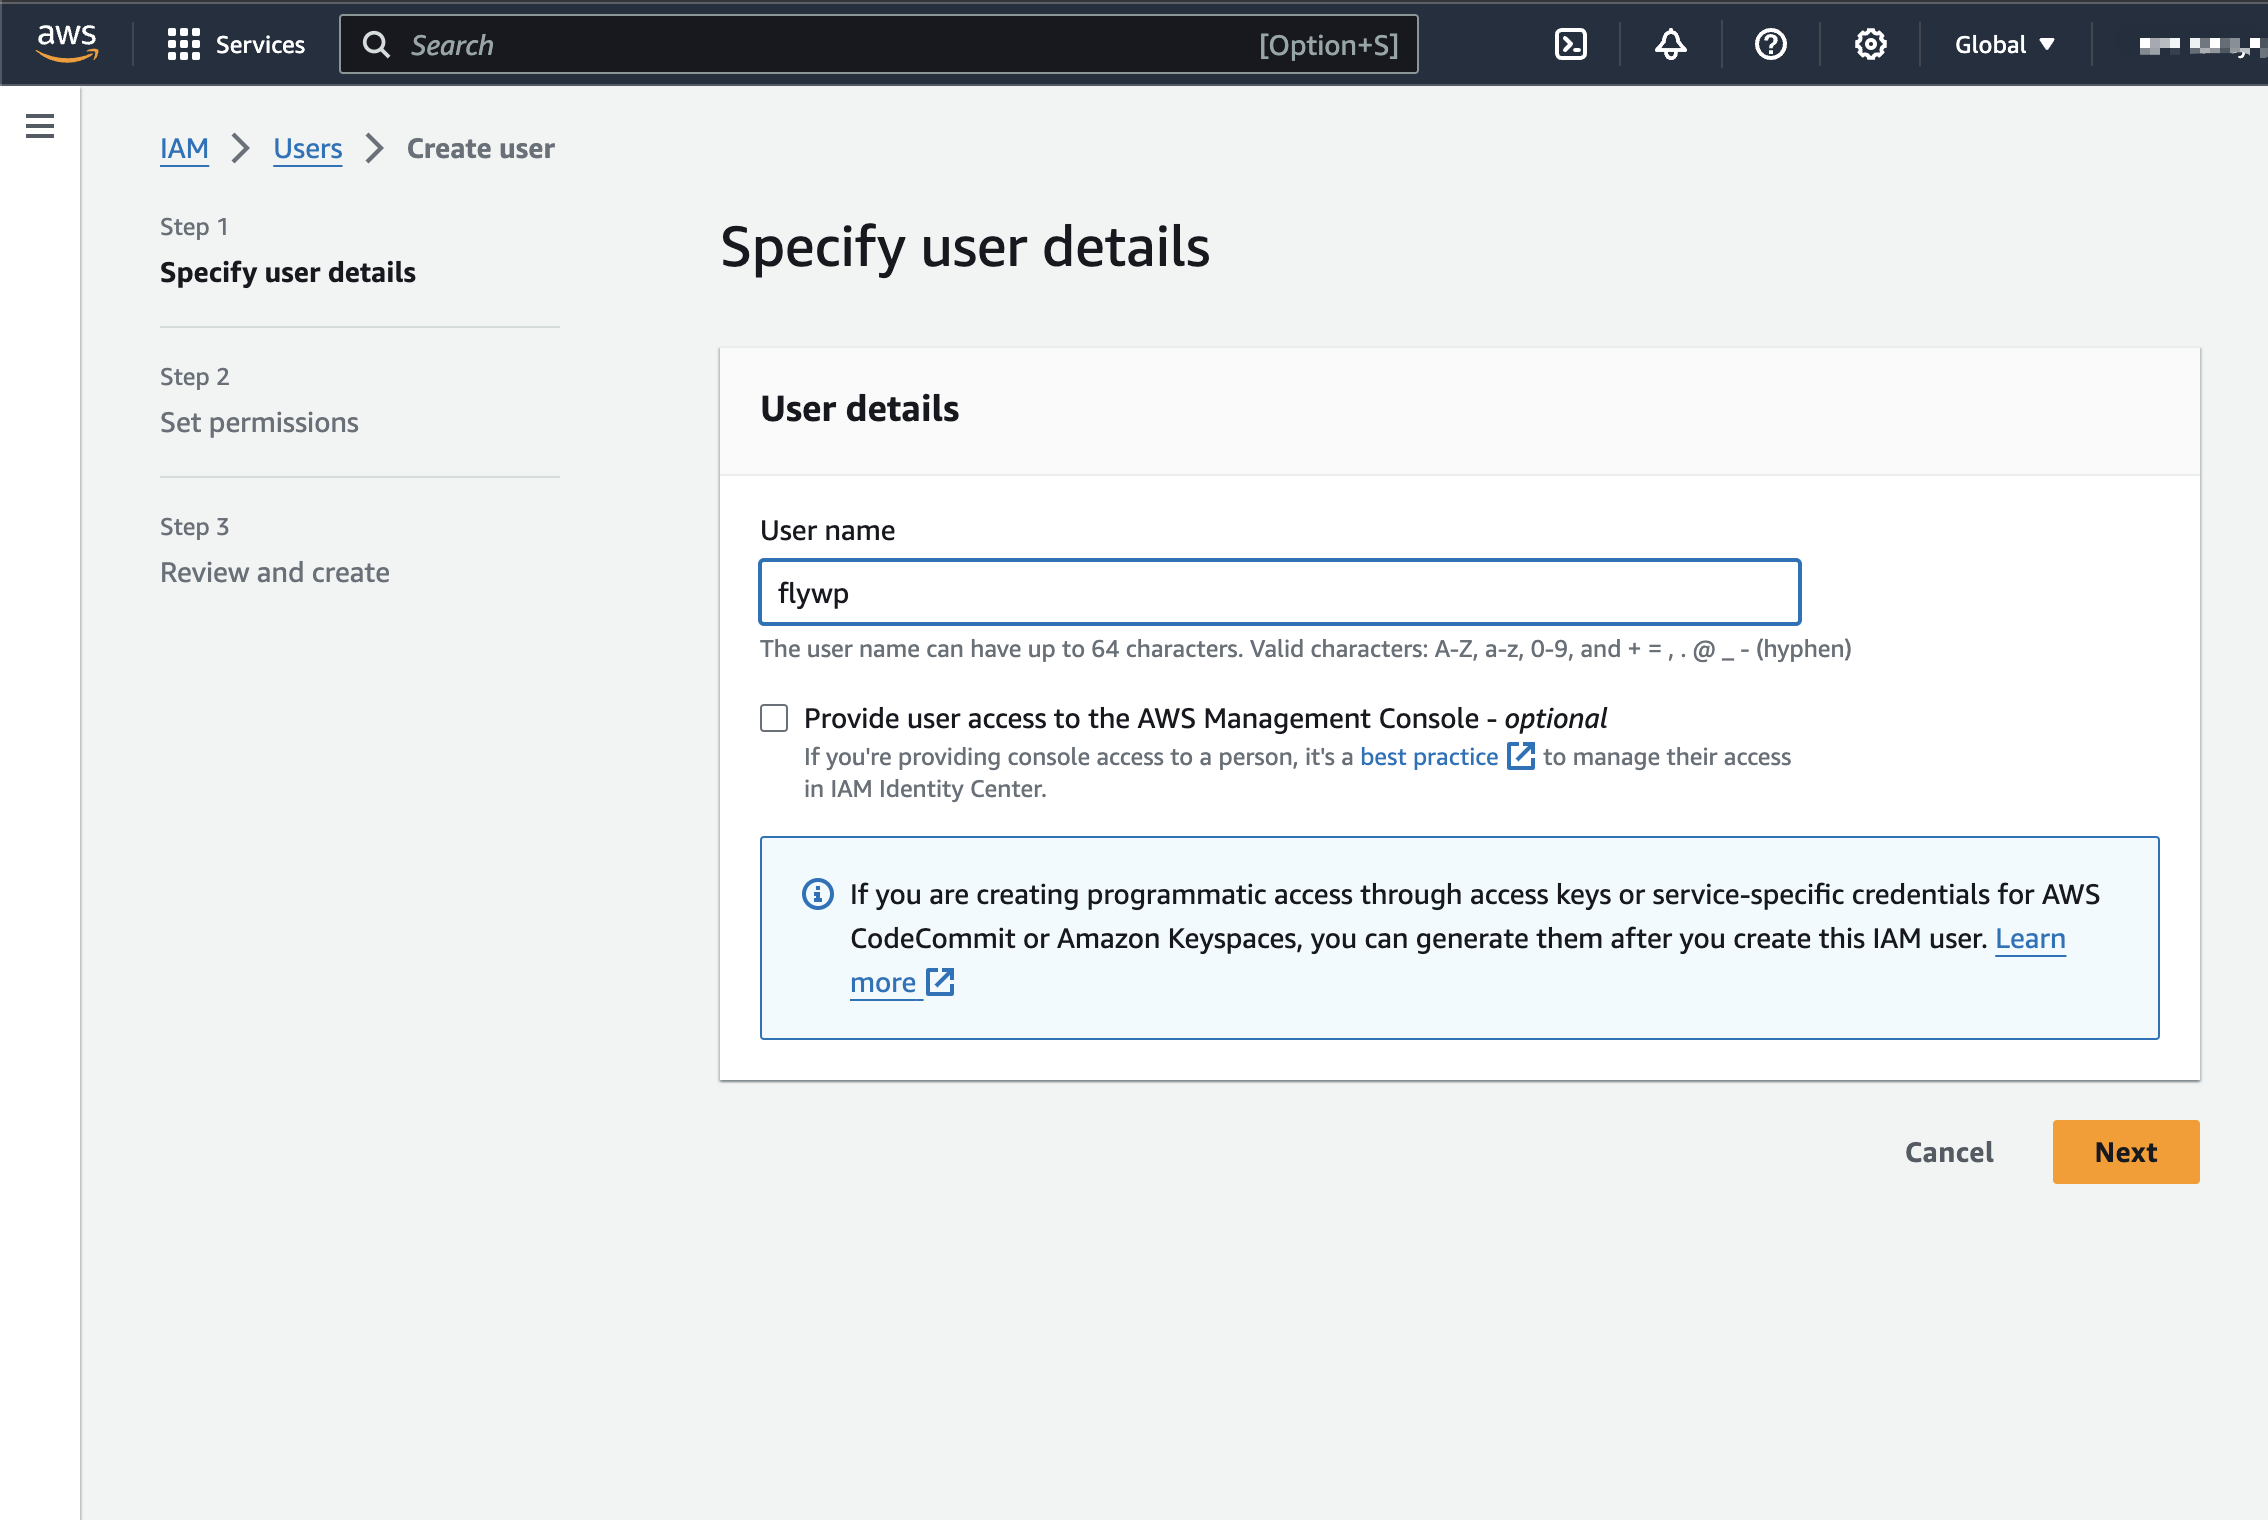
- In the “Access type” section, select “Full Access.” This enables an access key ID and secret access key for the AWS API, CLI, SDK, and other development tools.
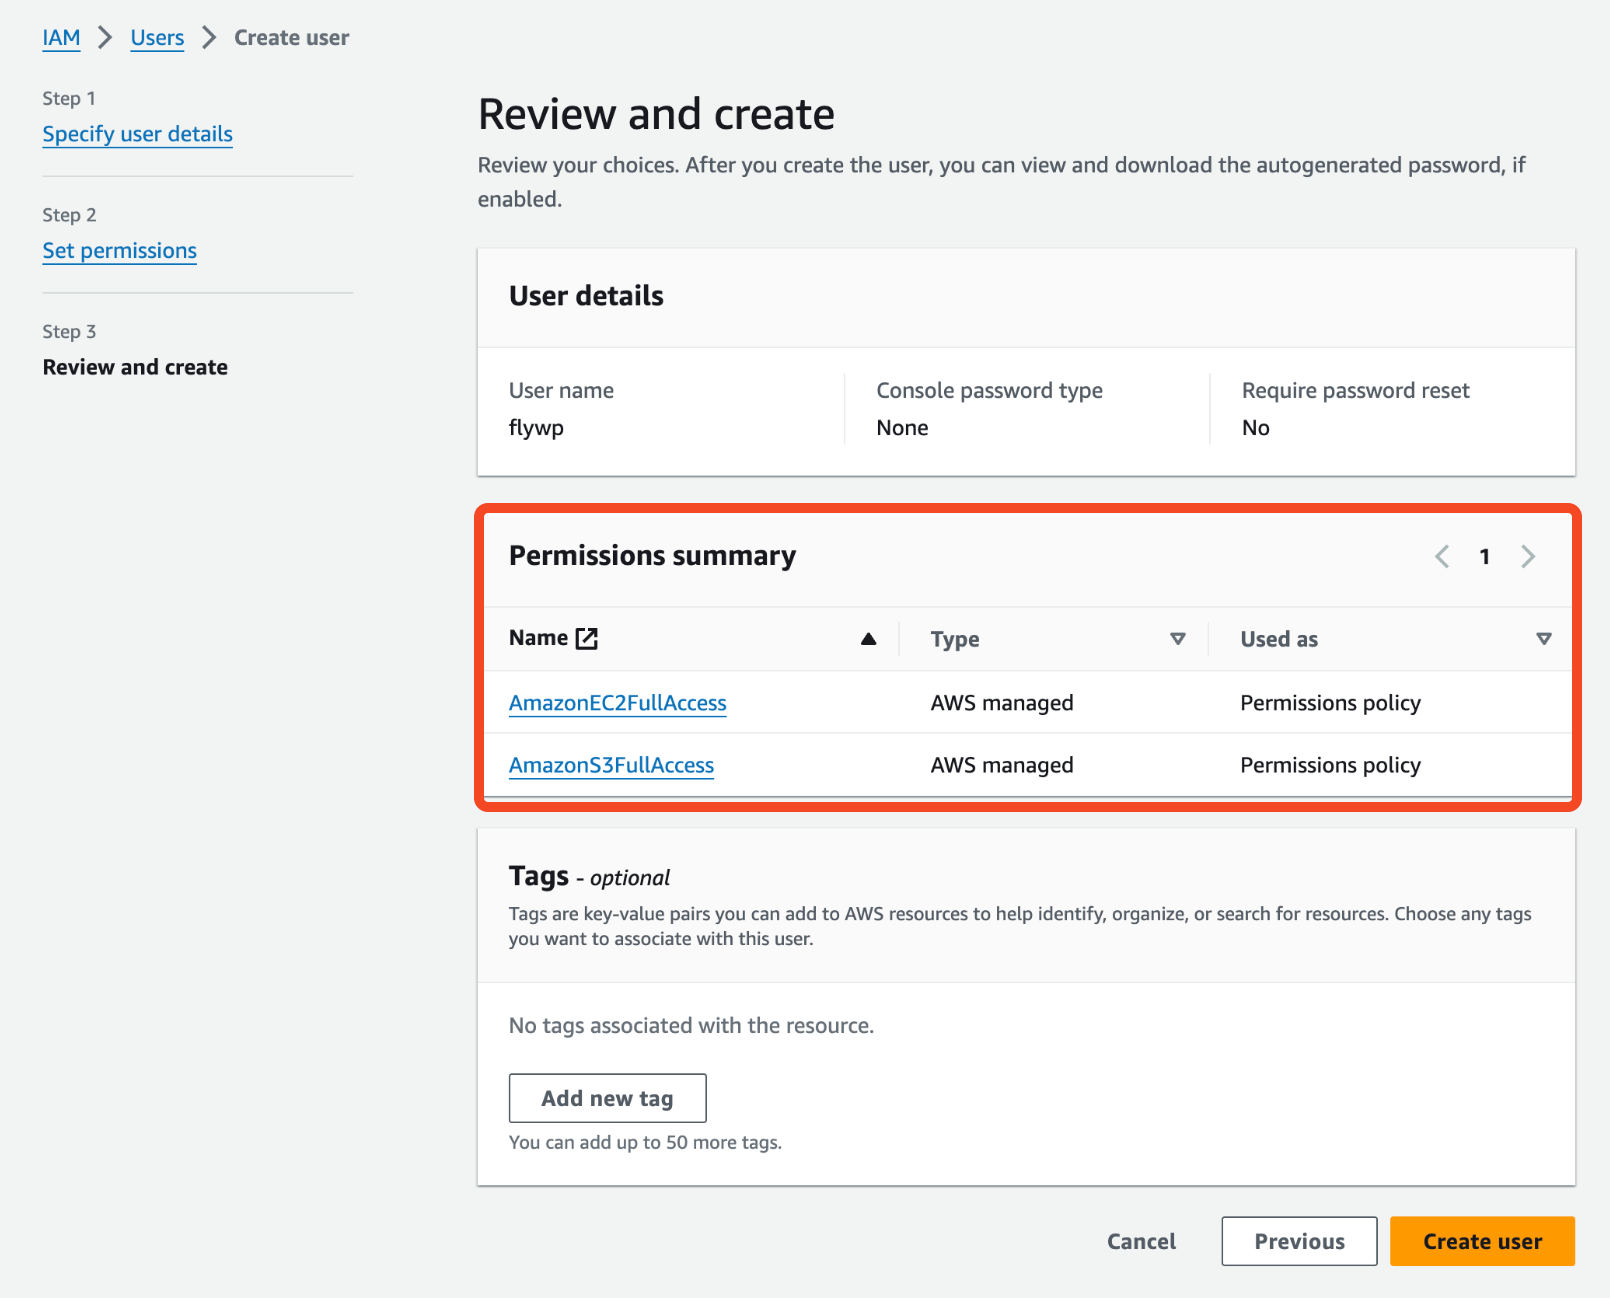
- Now click on the “create user” button and you’ll see the user has been successfully created.
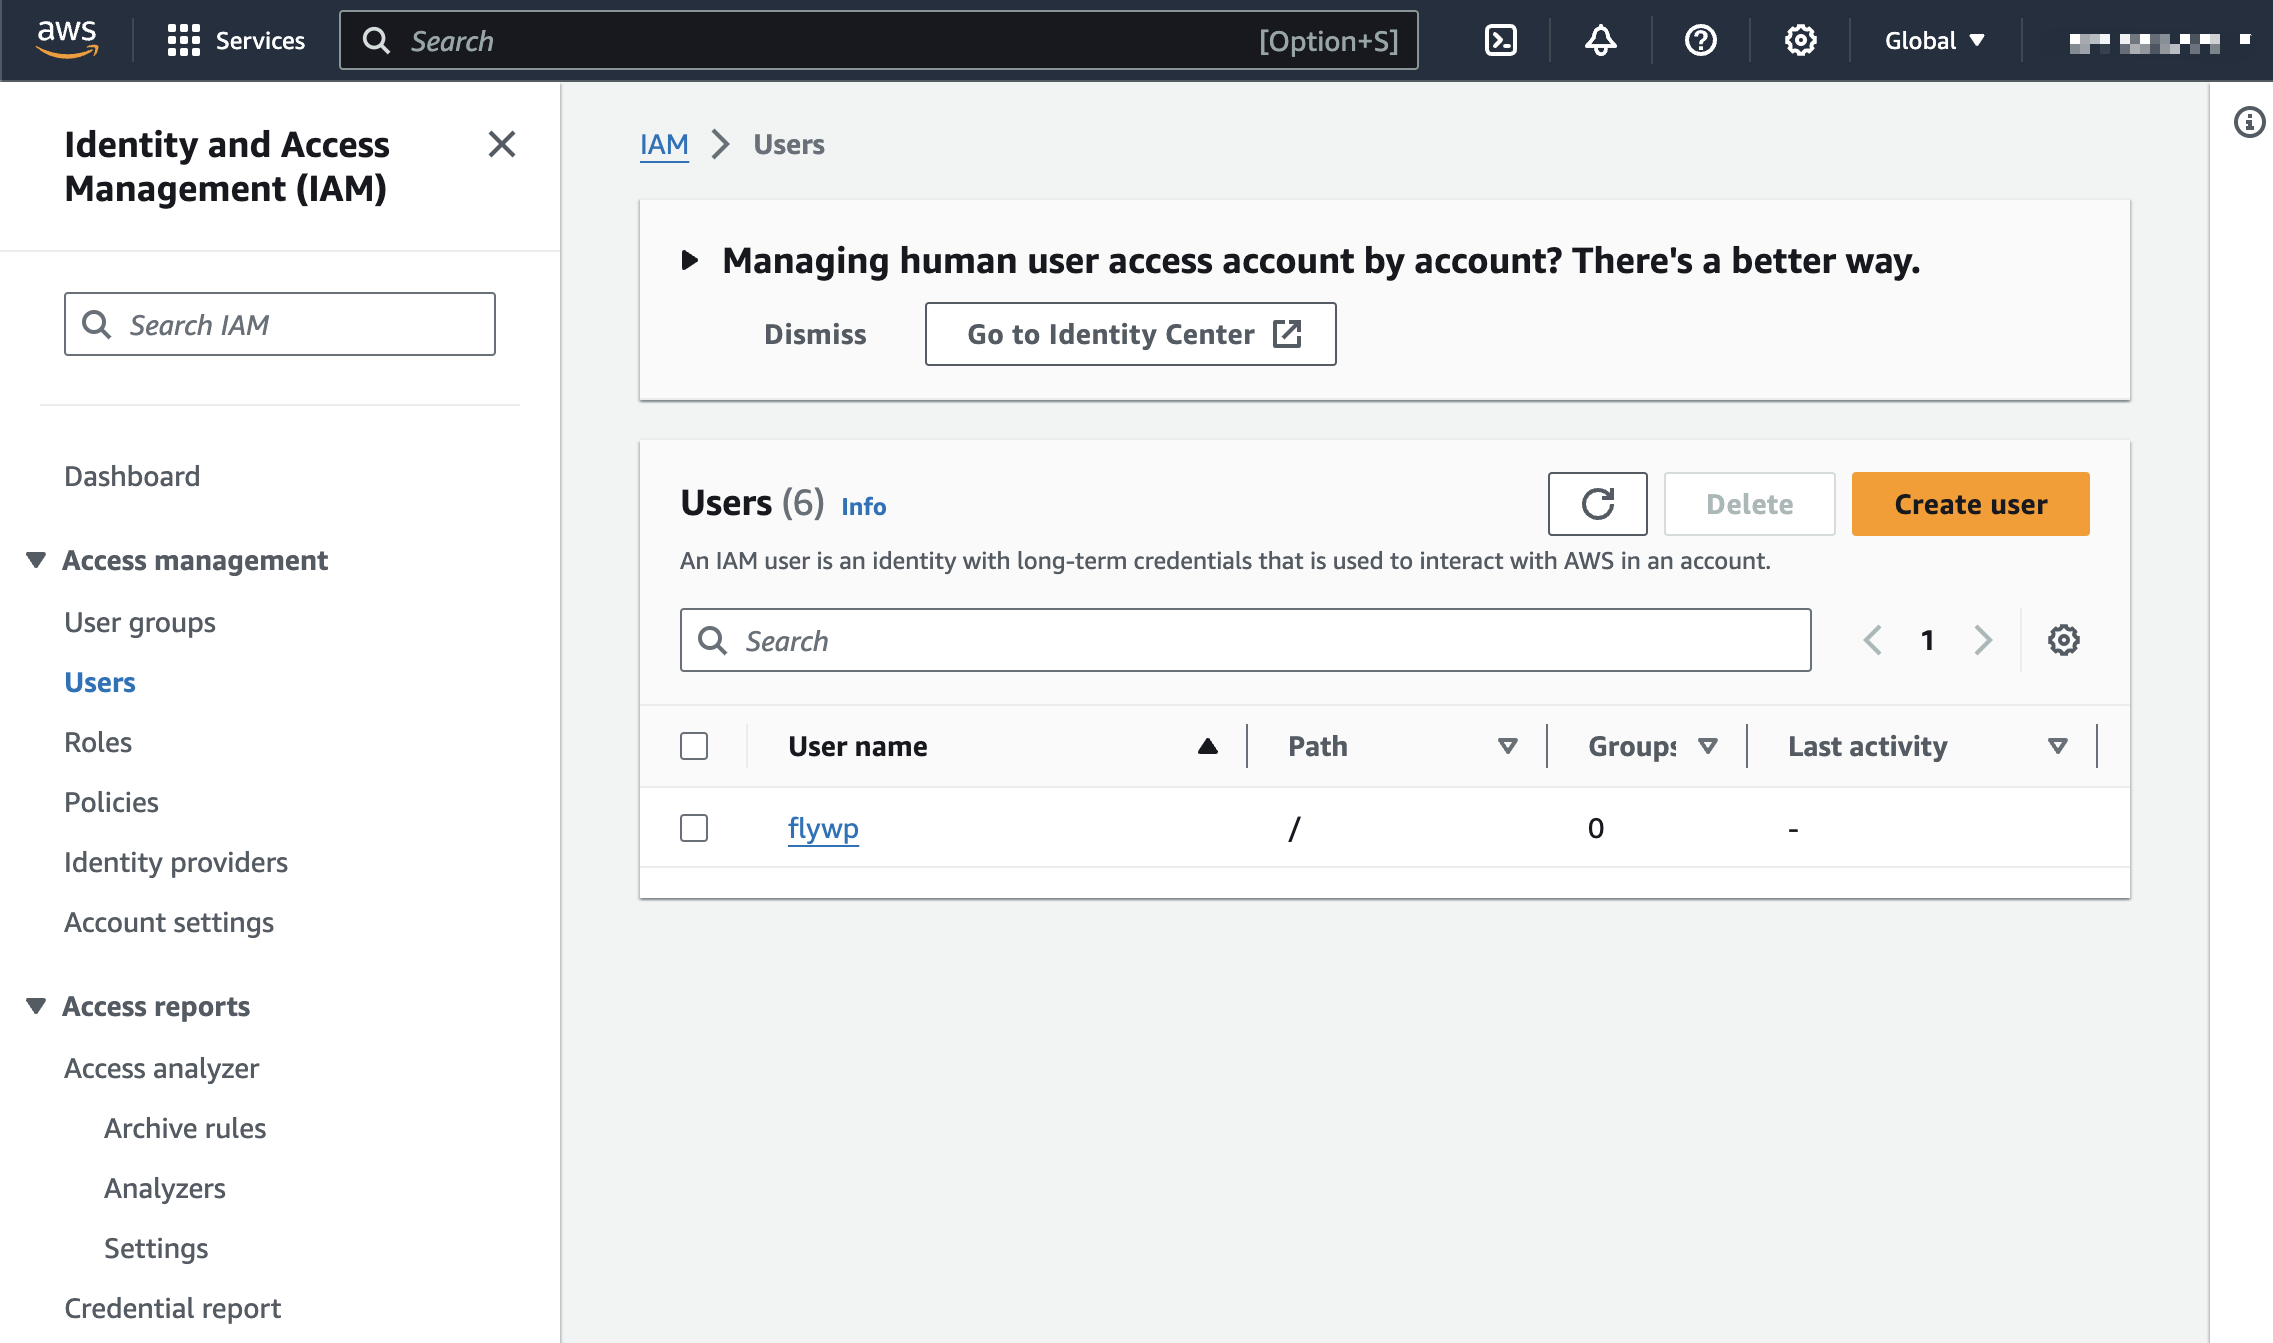
- Now enter into the user profile and tap on the security credential section
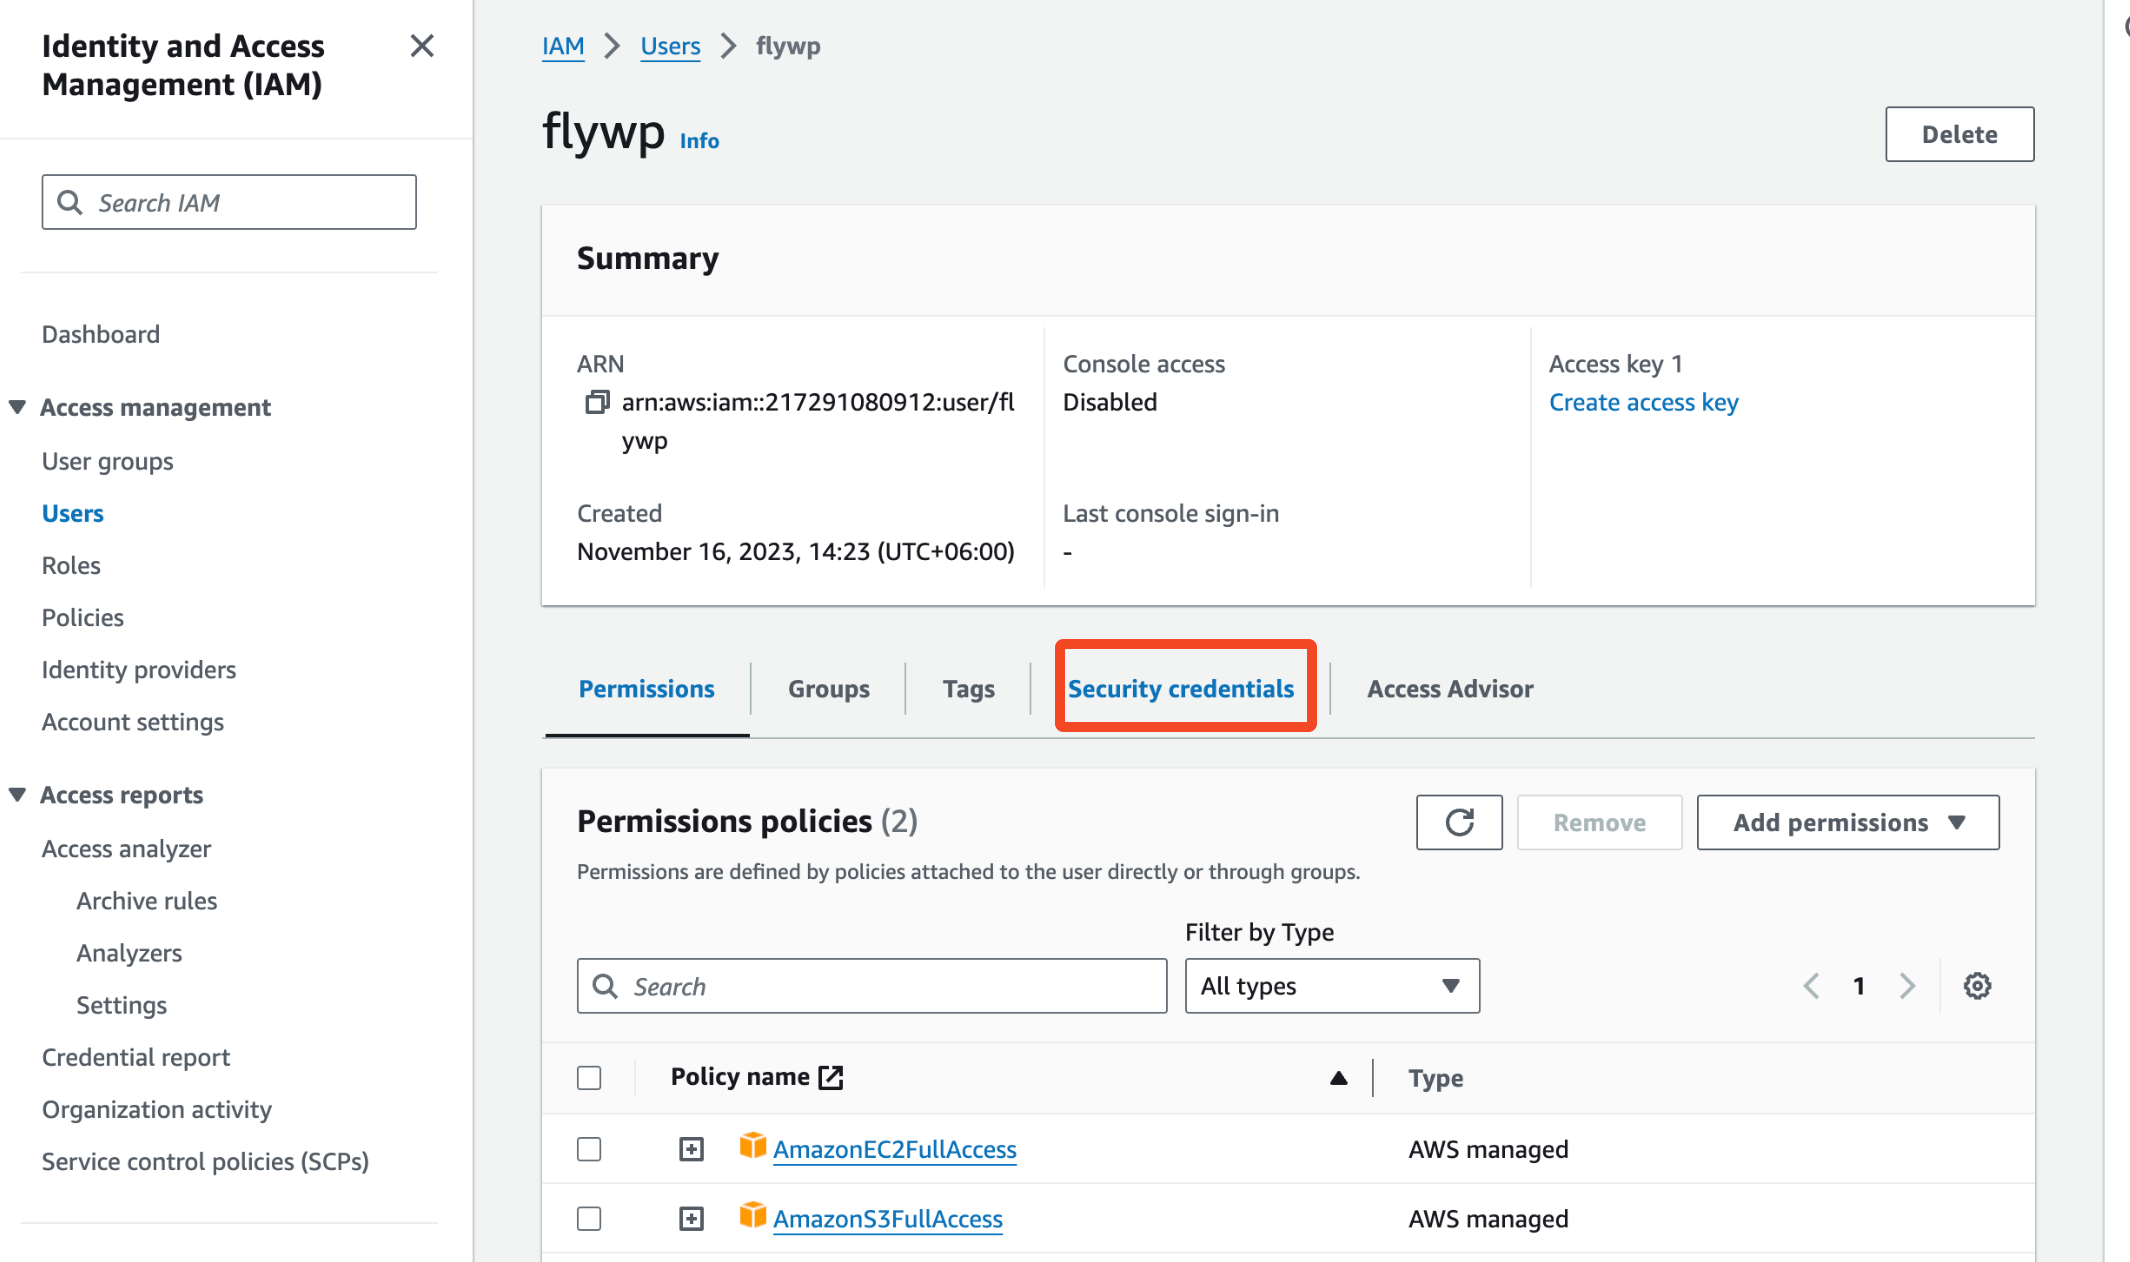
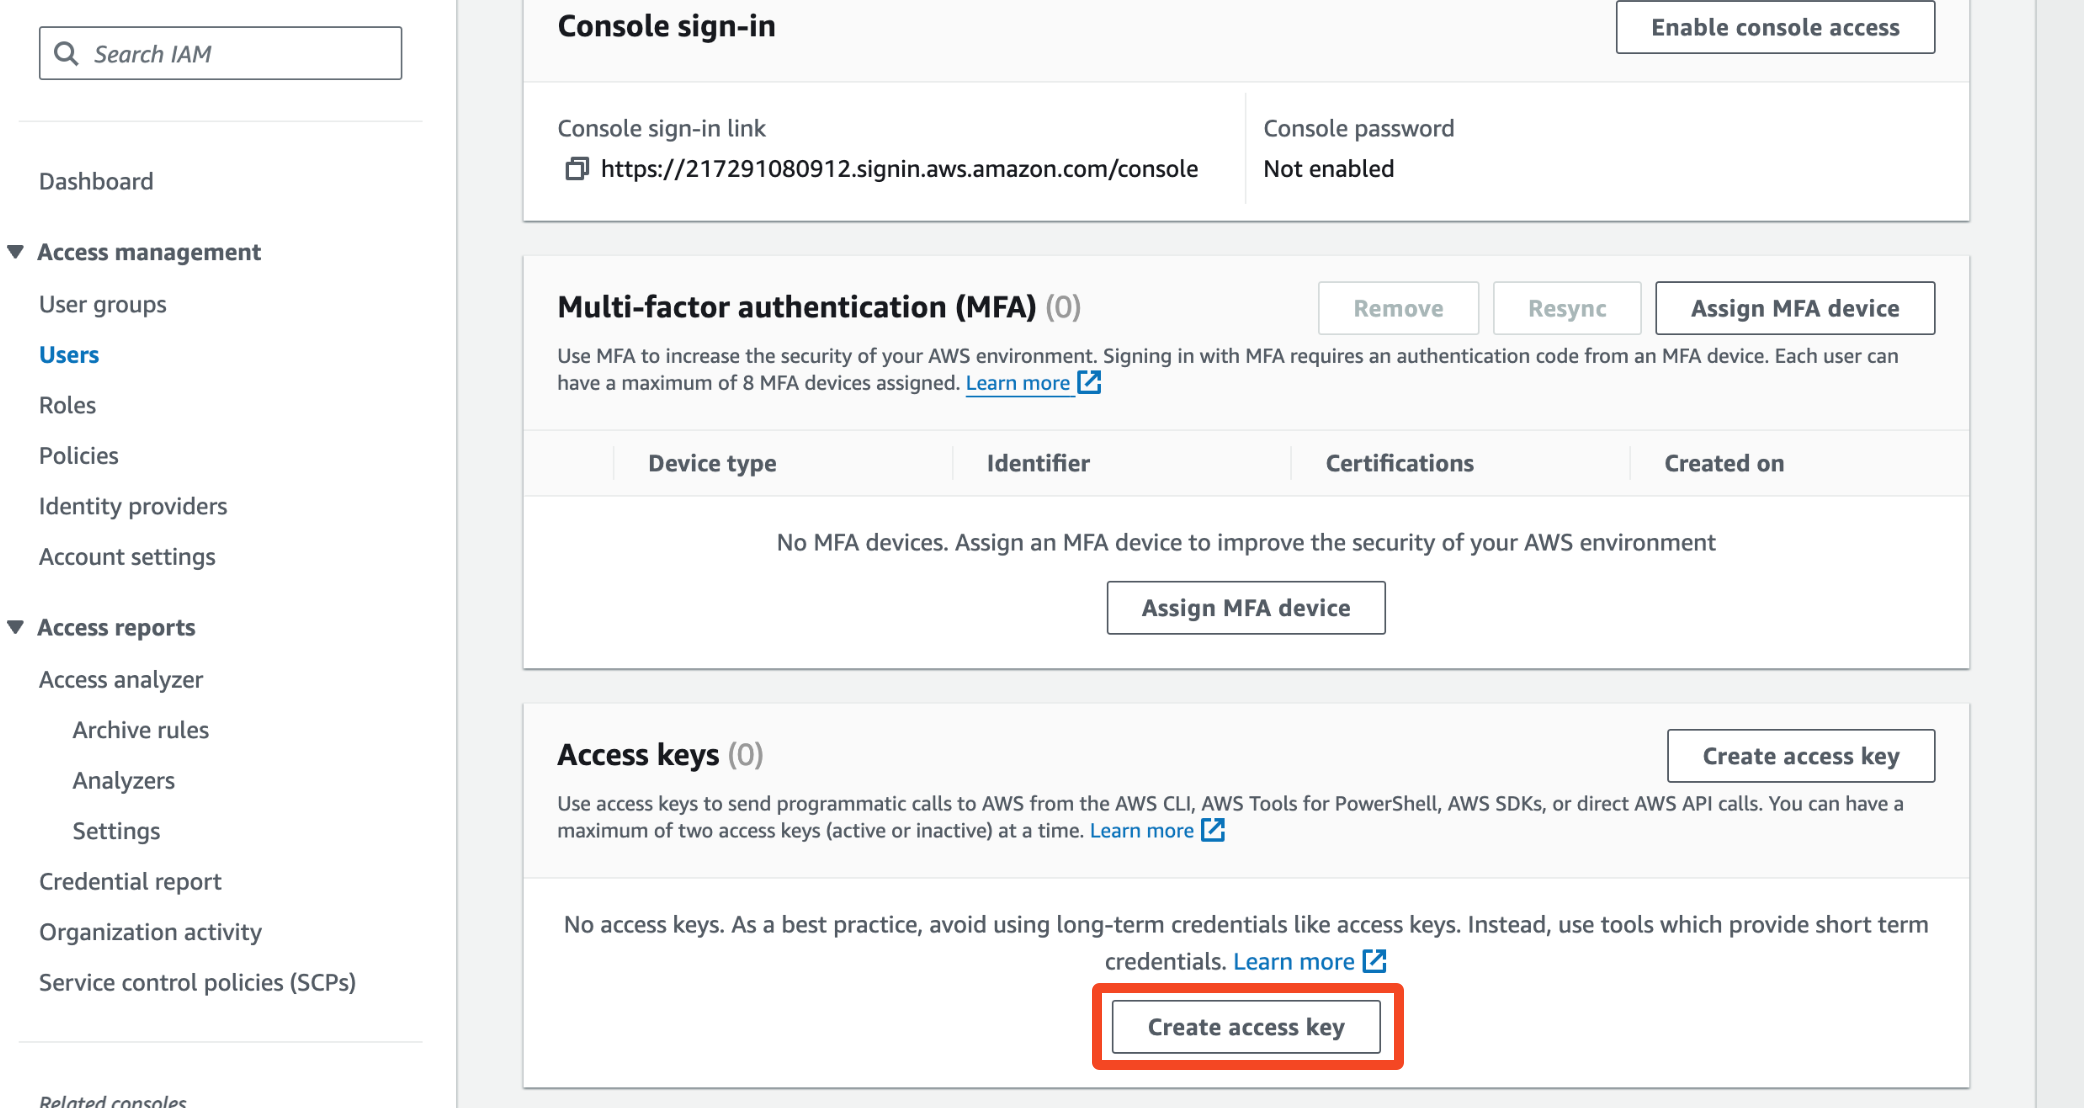
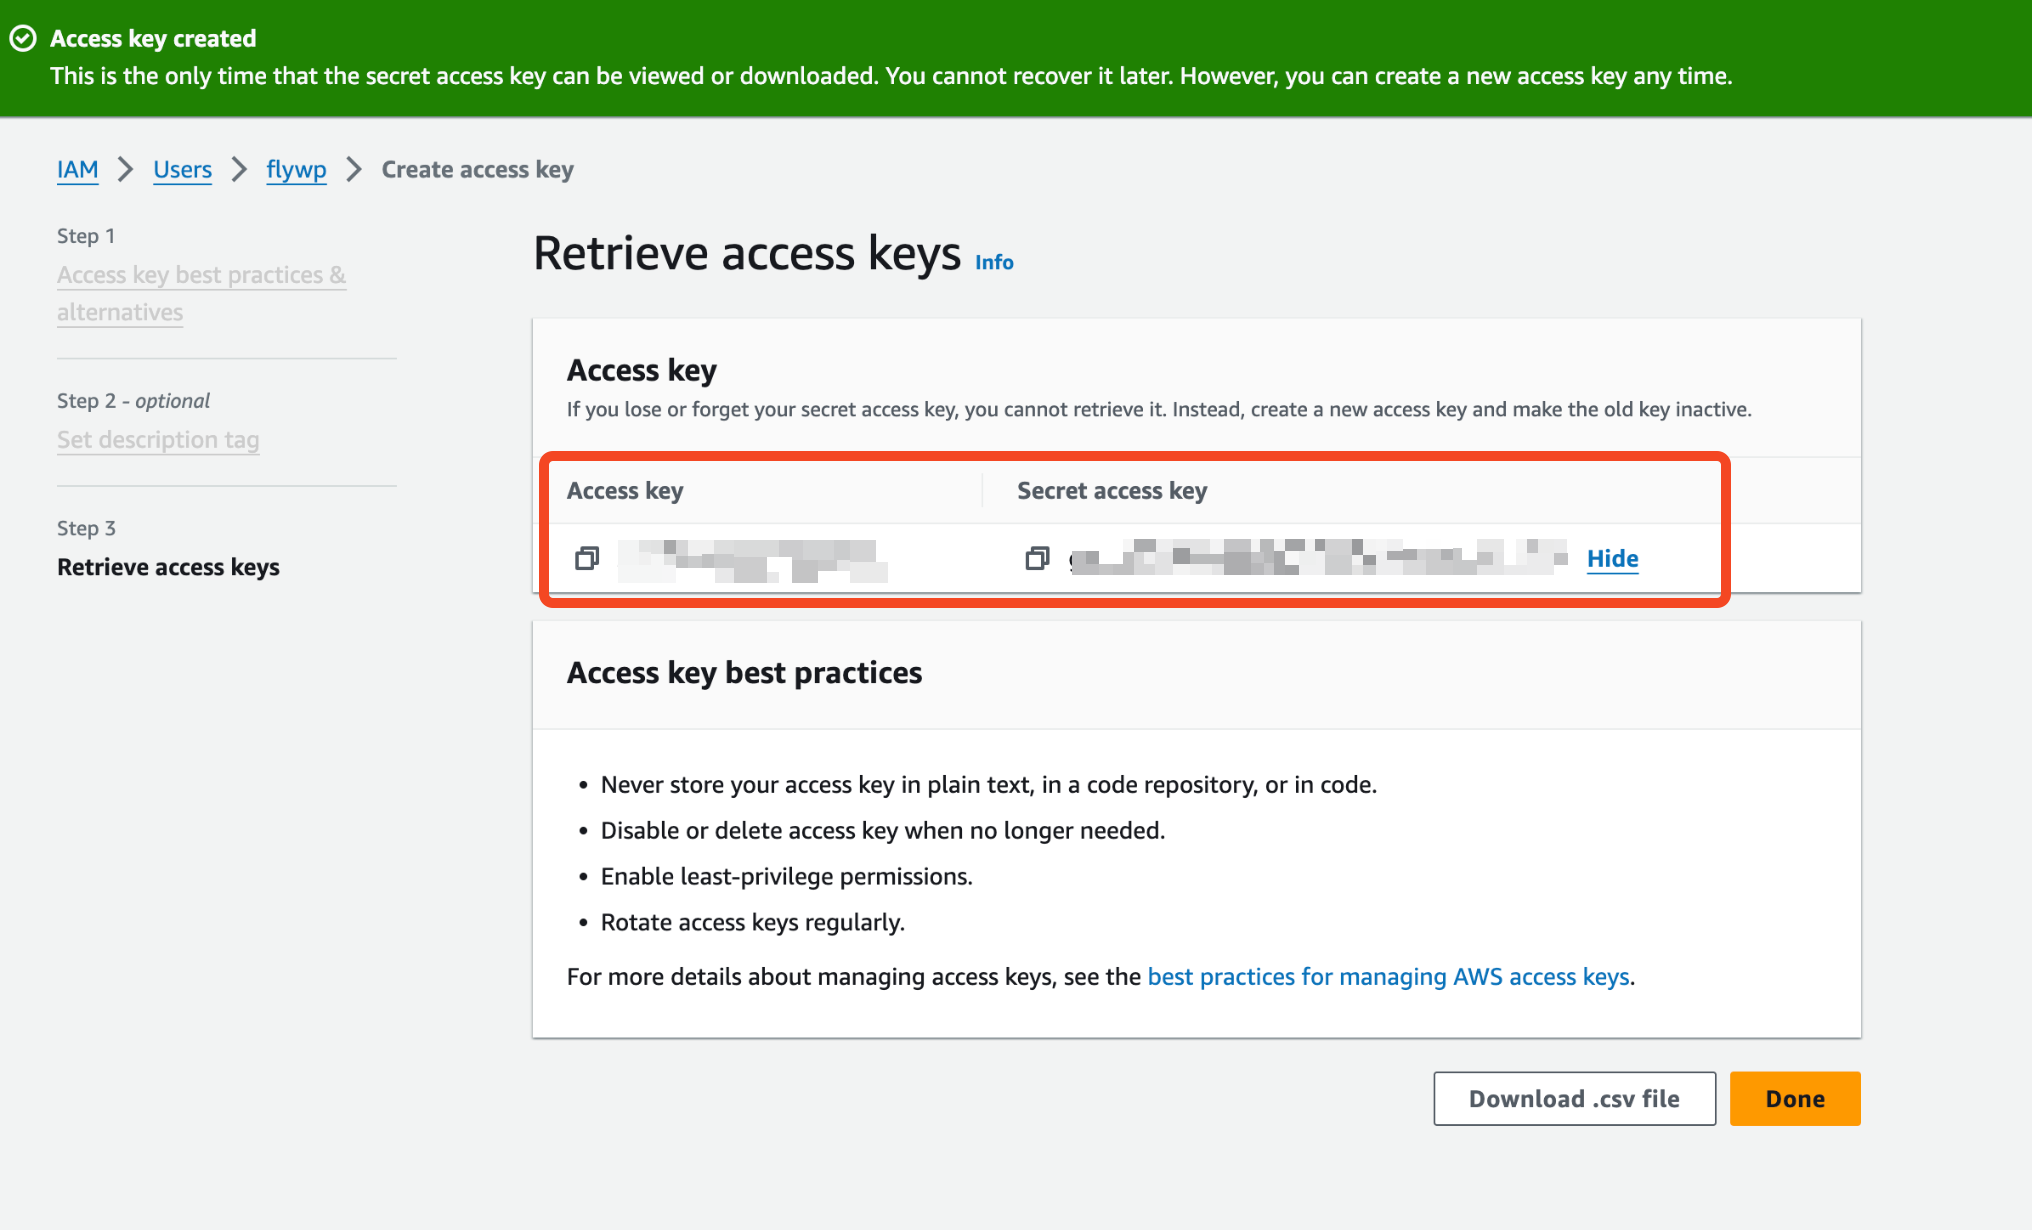
- Now click on the “Create access key” button.
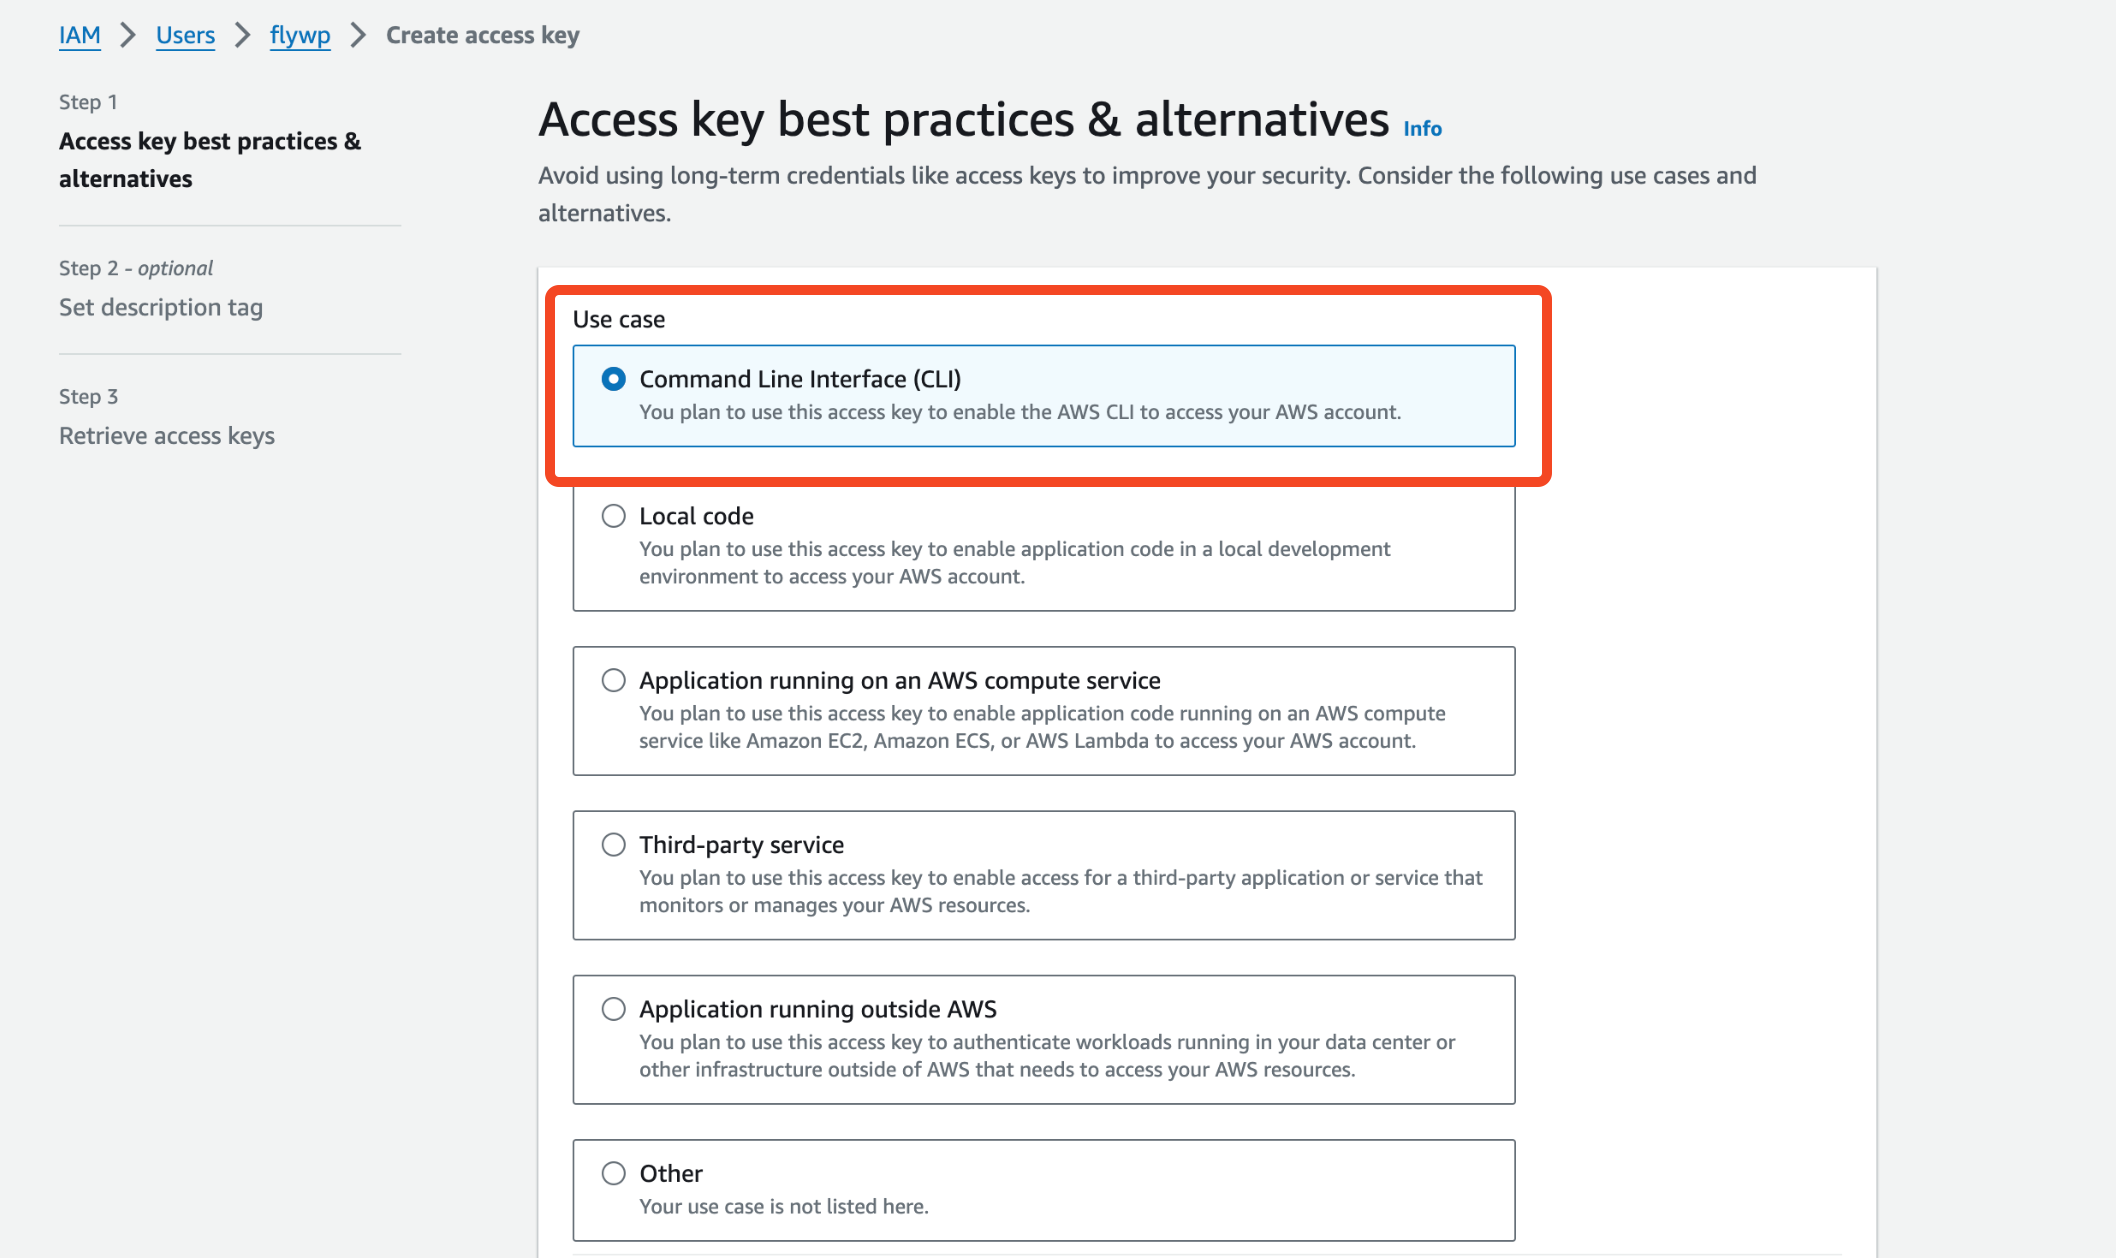
- Choose the use case for the keys.
- Give the name of the access keys.
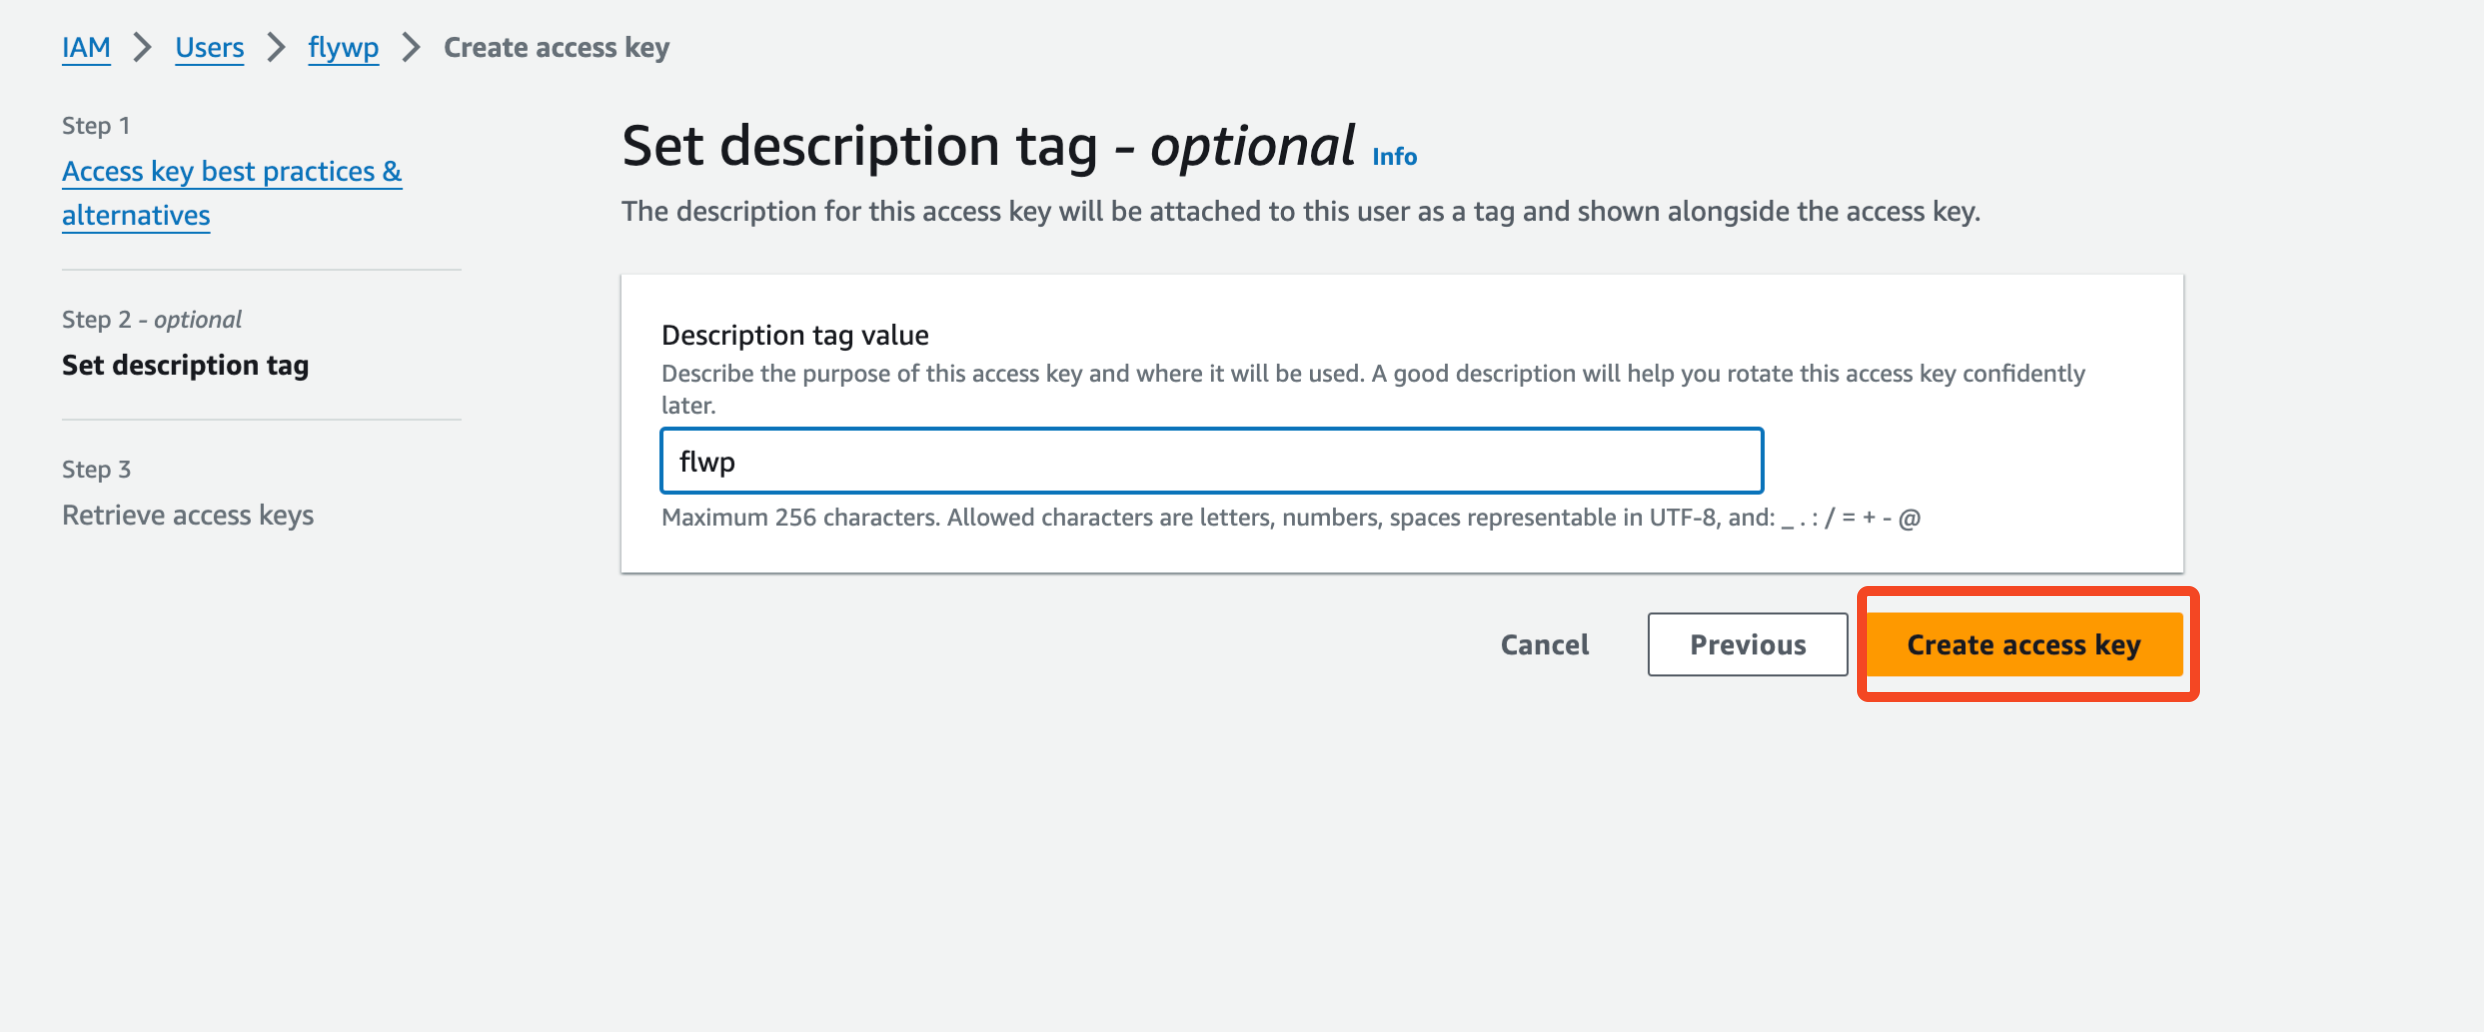
- Here are your access key ID and access token.
Step five:
- Fill in the information with your valid data. Remember, the profile settings in AWS are a little bit complex. For that, you can go through their official documentation for better guidance. Once you get the keys, click on the “Add Credential” button.
Step six:
- Yes, you have successfully added the AWS server in FlyWP. Now start adding servers and sites under it to make your WordPress server management super-fast and smooth.
Get an overview of the process from one of our influencer’s videos. Check out now!
That’s how you can add the AWS EC2 server in FlyWP.