SSH keys are cryptographic keys used to authenticate users to servers, offering a more secure method than traditional passwords. By leveraging both a public and a private key, SSH keys ensure secure, encrypted communication between the server and the client.
Table of Contents
- Public Key vs. Private Key
- Advantages of Using SSH Keys Over Passwords
- Adding SSH Keys in FlyWP
- Team SSH Keys in FlyWP
- How to Obtain the Public SSH Key
- Adding SSH Keys in FlyWP
- How to Log in to the Server using SSH
Public Key vs. Private Key
- Public Key: As the name suggests, this key is public and can be shared. It is placed on the server and used to lock the data that only the private key can unlock.
- Private Key: This key remains confidential and resides on the client’s machine. It’s used to unlock data encrypted by the public key. Under no circumstances should the private key be shared or exposed.
The combination of the private key and the public key enables secure communication by ensuring that the client holds the matching private key for the public key on the server.
Advantages of Using SSH Keys Over Passwords
- Enhanced Security: SSH keys provide a higher level of security compared to password-based logins. It’s virtually impossible for attackers to deduce the private key, even if they have the public key.
- Automation: Systems and services can automate tasks like data transfers without needing to input passwords.
- Reduced Brute-Force Risk: Since there’s no traditional password, the risk of brute-force attacks is significantly diminished.
How to Obtain the Public SSH Key
Generating and accessing SSH keys varies depending on the operating system. Below are the methods for macOS, Windows, and Linux:
macOS & Linux:
- Generate SSH Key: If you haven’t already generated an SSH key, you can do so using the following command in the terminal:
ssh-keygen -t rsa -b 4096 - When prompted, press
Enterto accept the default file location and name. - You’ll then be asked to enter a passphrase. You can either enter a passphrase or just press
Enterto proceed without one. - Access Public SSH Key: To view your public key, use the
catcommand followed by the path to your public key. By default, the public key is saved in the~/.ssh/directory with the filenameid_rsa.pub.cat ~/.ssh/id_rsa.pub - Copy the displayed key to use it in FlyWP or any other application.
Windows:
Using PuTTY:
- Download and install PuTTY and PuTTYgen from the official website.
- Open PuTTYgen.
- Click the “Generate” button and follow the on-screen instructions.
- Once generated, you’ll see your public key in the “Public key for pasting into OpenSSH authorized_keys file” section.
- Copy the public key to use it in FlyWP or any other application.
Using Windows Subsystem for Linux (WSL):
If you have WSL installed, you can follow the macOS & Linux instructions above, as the process is identical.
Remember: Always keep your private key confidential. The public key, on the other hand, can be shared and is used to allow secure access to services that recognize your corresponding private key.
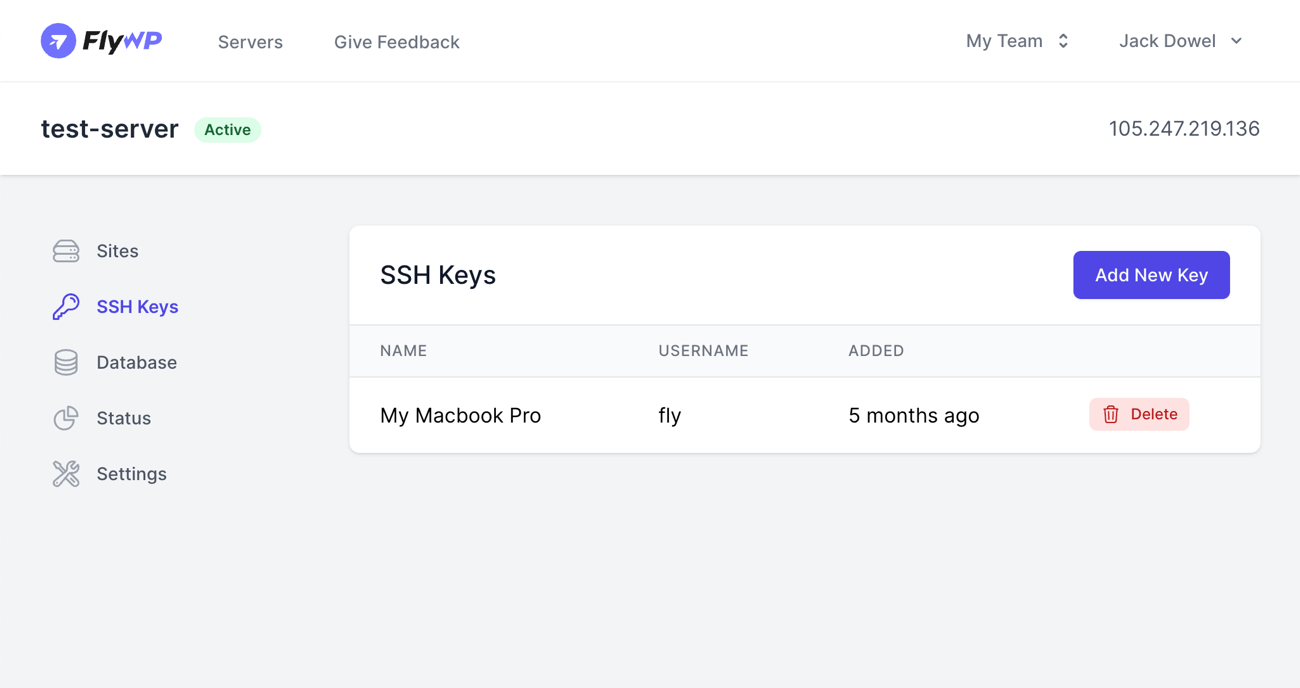
Adding SSH Keys in FlyWP
In the FlyWP dashboard:
- Navigate to your server.
- Click on “SSH Keys” in the side menu.
- Click “Add New Key” and input your public SSH key.
- Provide a descriptive name for the key, making it easier to identify later.
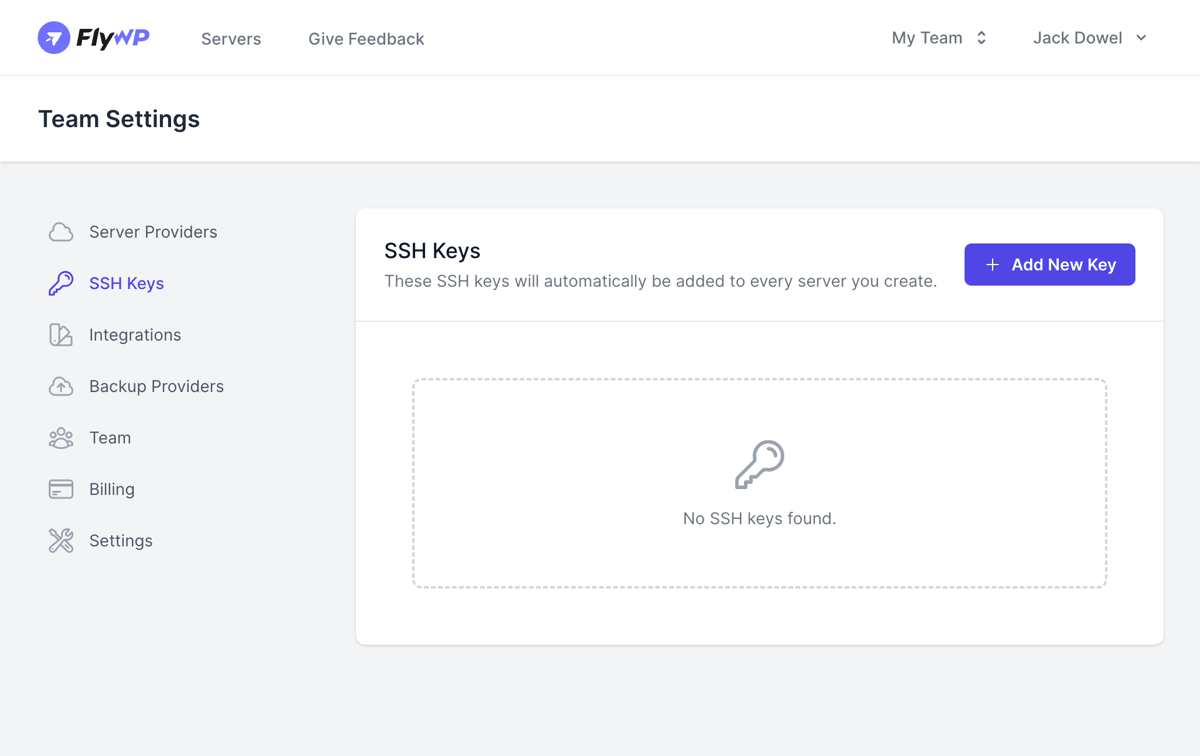
Team SSH Keys in FlyWP
For added convenience, FlyWP allows users to add SSH keys at the team level. Any SSH key added in the “Team Settings” section will automatically be integrated into every new server you create. This ensures that team members can securely access any new server without additional configuration steps.
How to Log in to the Server using SSH
Once you have your SSH key set up, you can use it to log in to your server. The following are instructions based on the operating system:
macOS & Linux:
- Open Terminal: Launch the Terminal application from your Applications folder or via a quick search.
- Login using SSH: Use the
sshcommand along with your username and server’s IP address. The default username for FlyWP servers isfly.ssh fly@YOUR_SERVER_IP
ReplaceYOUR_SERVER_IPwith the actual IP address of your server. - If prompted about the authenticity of the host, type
yesand pressEnter. - If you set a passphrase for your SSH key, you might be prompted to enter it.
Windows:
Using PuTTY:
- Launch PuTTY: Open PuTTY from your list of programs or from where you’ve saved the executable.
- In the Host Name (or IP address) field, enter your server’s IP address.
- In the Port field, ensure it’s set to
22(default for SSH). - Navigate to
Connection>SSH>Authin the left sidebar. - Click the “Browse” button next to Private key file for authentication and select your private key (
id_rsa.ppkif you used PuTTYgen). - Click the
Openbutton. - A terminal window will pop up. When prompted for the username, enter
fly.
Now you should be connected to your FlyWP server using SSH. Always ensure you’re operating in the correct directory and have the necessary permissions when making changes.
Note: Always keep your private key confidential and ensure regular backups. If you believe your private key has been compromised, generate a new pair of SSH keys immediately and update them in FlyWP.