Vultr is a cloud server provider that caters to developers, businesses, and individuals seeking a cost-effective, high-performance cloud infrastructure solution. The good news is that you can add this popular server manager to enhance server-related tasks with FlyWP. It requires just a few clicks to complete adding the server provider.
Let’s check out below the step-by-step process of adding Vultr to FlyWP.
How to add Vultr in FlyWP
Step one:
Like the DigitalOcean, this process is also the same.
- Find the server provider option
- Click on it and you’ll get the server provider lists. Then choose Vultr.
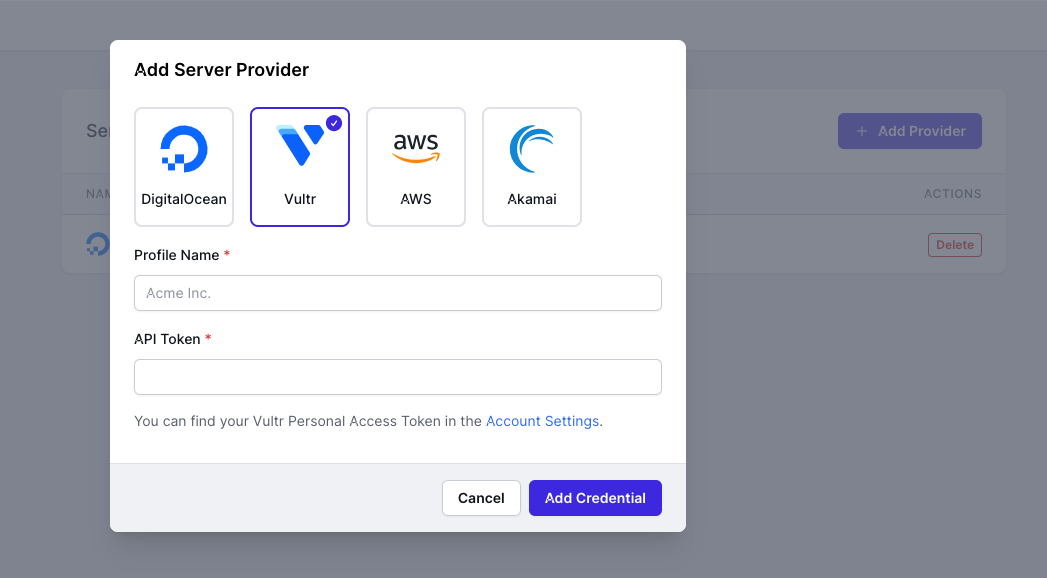
- Provide the profile name
- And the API token. Please follow this guideline to learn how to generate API keys in Vultr.
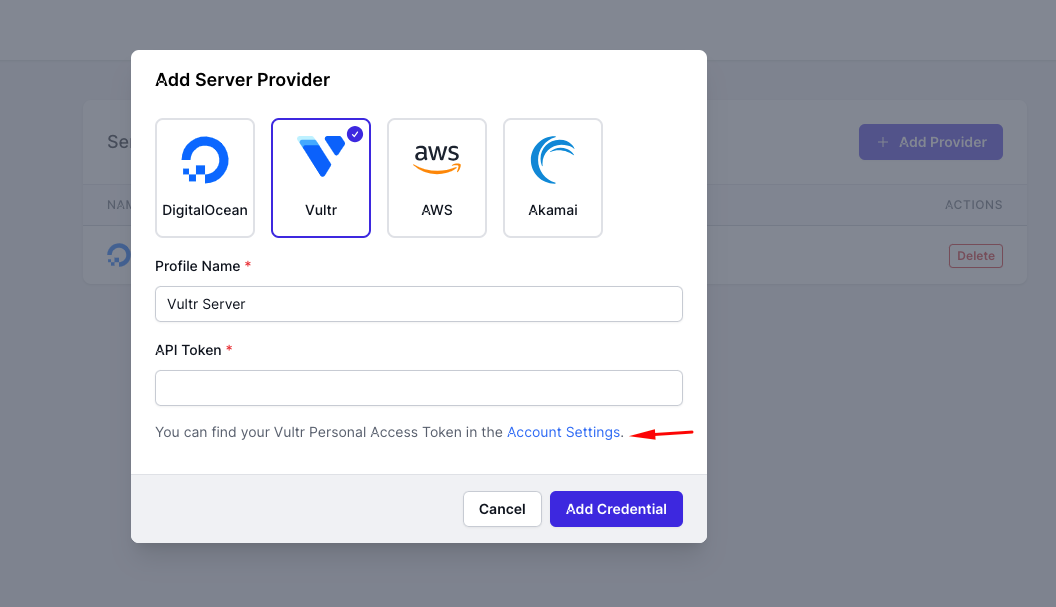
Step two:
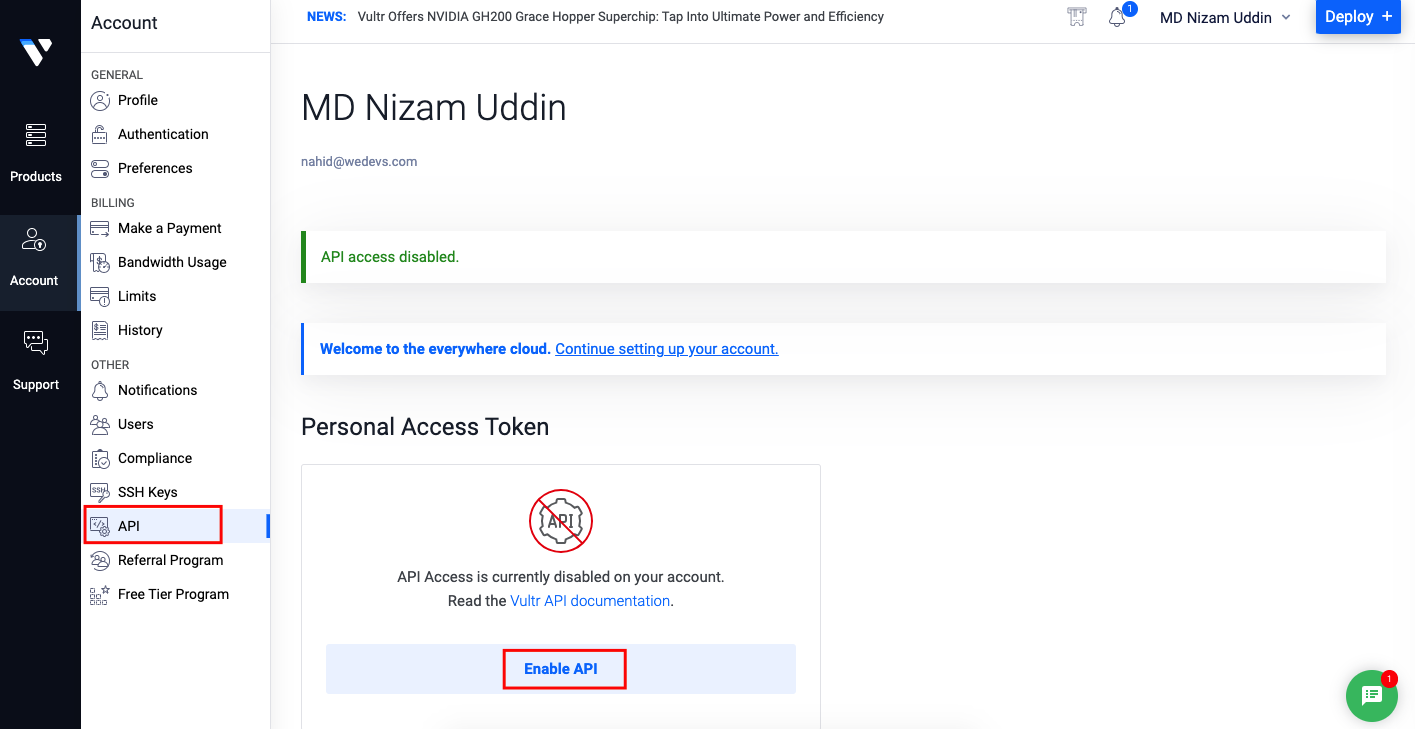
- Once you click on the “Account Settings“, you’ll land on this page.
- Then on the left side of the screen, click on the API and then click on the “Enable API” button.
Step three:
- You can find the API keys on the Vultr API page after you enable the keys. You can also follow the detailed documentation to learn more about the API keys.
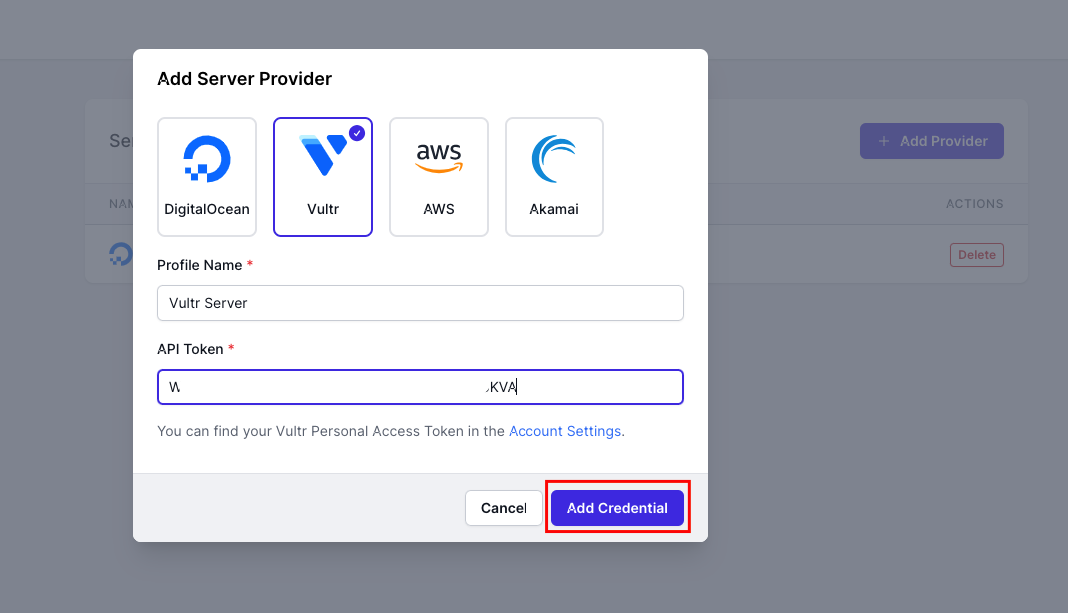
- After that, copy the code.

Step four:
- Paste the API keys here. After that, click on the “Add credential” button.
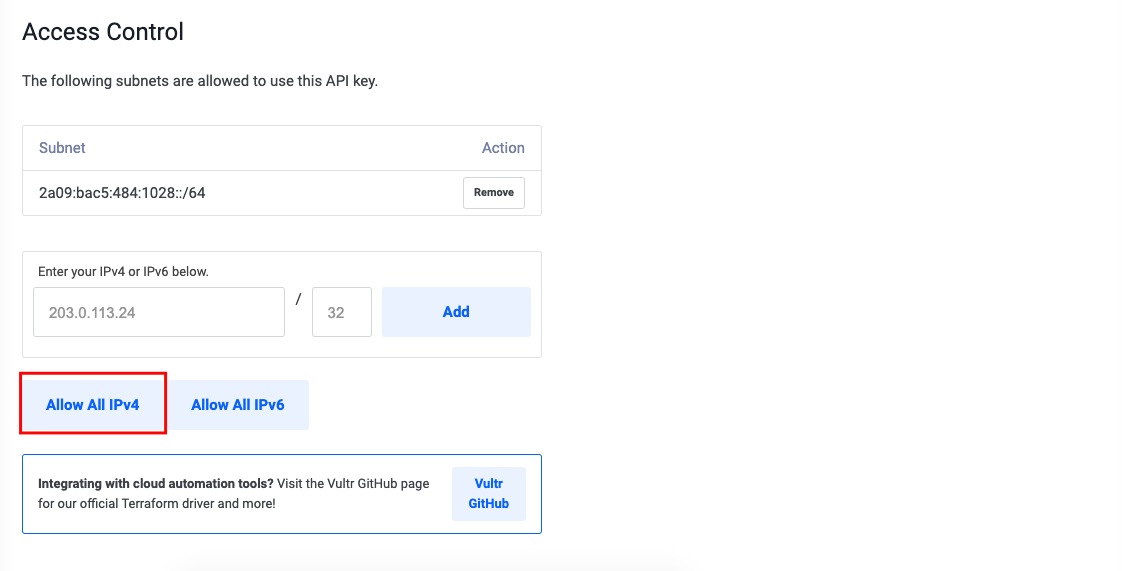
Important note:
While copying the API keys, don’t forget to enable the “Allow All IPv4” option. In the same page, you should see an Access Control section.
To allow FlyWP to access your Vultr account, you need to “Allow all IPv4”
- Once you’re done, you can see that you have successfully added Vultr as your server provider.
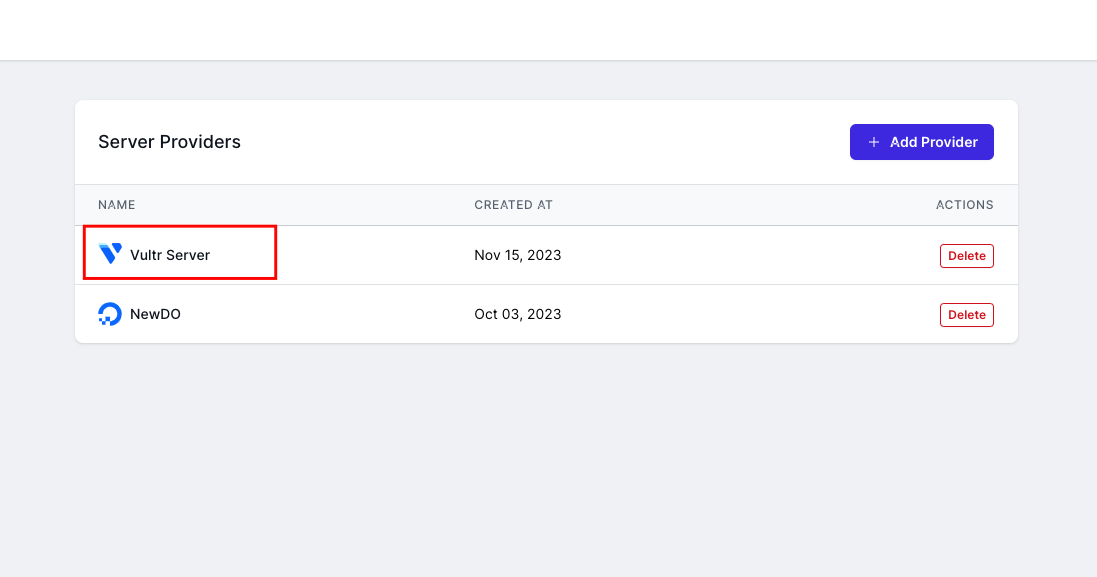
So this is how you can add the Vultr server to FlyWP. Now start adding servers and sites under it.