Using WP CLI can be very helpful for a variety of management tasks.
In FlyWP managed server, there are 2 ways to access WP-CLI for a site. One is to use the server CLI already provided to the server; another is to use the Docker exec command for direct access.
We will first go into installation, and then details of using WP-CLI through FlyWP Server CLI. For accessing WP-CLI with Docker exec, scroll down.
Quick Install
Ready to install? Just run this command in your terminal. It will download and execute the install.sh script, which takes care of everything for you:
curl -sL https://raw.githubusercontent.com/flywp/server-cli/main/install.sh | sudo bash
And voilà! The FlyWP server-cli tool is installed in (/usr/local/bin). You can run the command to check if it succeeded.
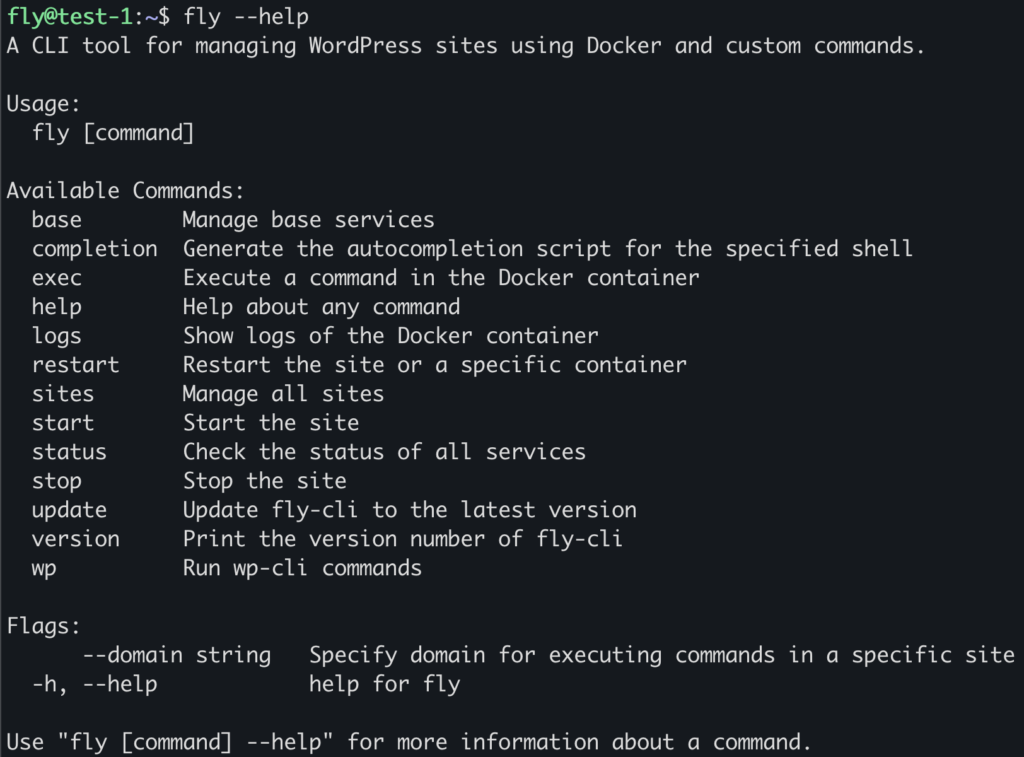
fly --help
Using WP-CLI through Fly CLI
FlyWP installs a helpful server CLI that makes it easier to manage your site using WP-CLI. You can run WP-CLI commands in two ways: either by specifying the domain every time or by working directly in your site’s directory.
When specifying the domain, the basic structure is:
fly wp --domain example.com <wp-cli-command> <options>
Working Directly in the Home Directory
Sites in FlyWP reside in the home directory. Once you log into your server, you list all available sites with:
ls
If your site’s domain is domain.tld. Instead of always appending --domain domain.tld to your commands, navigate to your site’s directory:
cd domain.tld
Once you’re in that directory, you can run WP-CLI commands without including the domain flag. For commands that have extra options or flags, you might still need to use the -- separator to ensure arguments are passed properly to WP-CLI.
Executing WP-CLI Commands
Plugin Management
- Plugin Install:
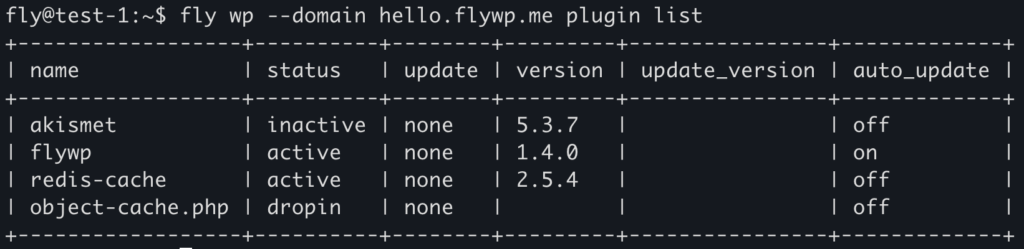
You can also install and activate plugins with the CLI. To install and activate a plugin, you can use:fly wp --domain example.com -- plugin install flywp --activate

- Without Additional Flags:
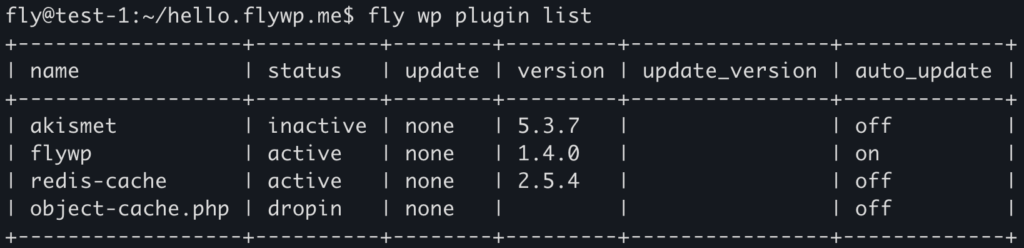
For simple commands that don’t need extra options, you can use:fly wp --domain example.com plugin list. After changing into your site directory, it becomes: fly wp plugin list
And to install and activating a plugin, it becomes:fly wp -- plugin install flywp --activate

- With Additional Flags:
If you need to pass extra options (e.g., output format), include the — separator:fly wp --domain example.com -- plugin list --format=csv.And to run the same command from within your site directory:fly wp -- plugin list --format=csv

Everything after the separator (--) is passed directly to WP-CLI.
Database Operations
Database Backup
To export your site’s database, you can bypass SSL verification (useful for avoiding SSL issues) and redirect the output to a backup file. Since additional flags are included, use the -- separator if needed:
- Specifying the domain:
fly wp --domain example.com -- db export --skip-ssl - > ./site_name_date.sql- Within your site directory:
fly wp -- db export --skip-ssl - > ./site_name_date.sqlNote: You can later restore this SQL file using phpMyAdmin.
Database Repair
To repair your site’s database, run the following command:
- Specifying the domain:
fly wp --domain example.com -- db repair --skip-ssl - Within your site directory:
fly wp -- db repair --skip-ssl
The separator here is used because additional flags (e.g., --skip-ssl) are being passed.
You can restore this backup from phpMyAdmin
Tricks and tips
- Two Ways to Specify Your Site:
- With the
--domainflag:fly wp --domain example.com <wp-cli-command> <options> - By changing into your site’s directory (e.g.,
cd domain.tld), allowing you to run:fly wp <wp-cli-command> <options>
- With the
- When to Use
--:- Not Required: For simple commands (e.g.,
fly wp plugin list,fly wp cache flush) that need no extra options. - Required: When additional flags or parameters are passed to WP-CLI. In these cases, add
--to ensure the arguments are correctly forwarded.
- Not Required: For simple commands (e.g.,
- Database Operations:
- Use the provided commands to export and repair your database. Remember that SQL backup files can be restored using phpMyAdmin.
- Use the provided commands to export and repair your database. Remember that SQL backup files can be restored using phpMyAdmin.
Direct WP CLI access with Docker exec
You can also access WP CLI directly through Docker. This will be most useful for scripting and automating mission-critical tasks.
If the domain is domain.TLD, then the change directory will look like the following command (change it as per your website’s name)
cd domain.tld
First, we will get inside the containers own shell to run these commands.
Now if you have an NGINX site, you can run WP CLI like this:
docker compose exec php wp
Or if you have an OpenLiteSpeed site;
docker compose exec --user=www-data openlitespeed wp
From there for example, showing all post list in an NGINX site:
docker compose exec php wp post list
For OpenLiteSpeed,
docker compose exec --user=www-data openlitespeed wp post list
Alternatively, if the Docker Compose command seems too long for you, you can go inside the container and run wp commands as usual.
For Nginx site,
docker compose exec php bash
For OpenLiteSpeed,
docker compose exec openlitespeed bash
…and now as you’re inside the container. You will be able to run wp commands like you’re used to.
wp cli version
Example
# Display the version currently installed.
$ wp cli version
WP-CLI 2.10.0
For Automation
If you wish to use WP CLI for automation, then you can use the following structure for automating tasks.
docker compose -f /home/fly/example.tld/docker-compose.yml exec php sh -c "wp plugin list"
For OpenLiteSpeed,
docker compose -f /home/fly/example.tld/docker-compose.yml exec --user www-data openlitespeed sh -c "wp plugin list"
While the command itself is long, it helps bring reliability for mission-critical automation and stability.