Backup and Restore
Safeguard your website’s content with FlyWP’s easy-to-use site backup feature. This guide will step you through the backup process. Our site backup feature integrates seamlessly with Amazon S3, Digital Ocean Spaces, Cloudflare R2, and Google Cloud Storage.
Accessing Backup Providers Settings
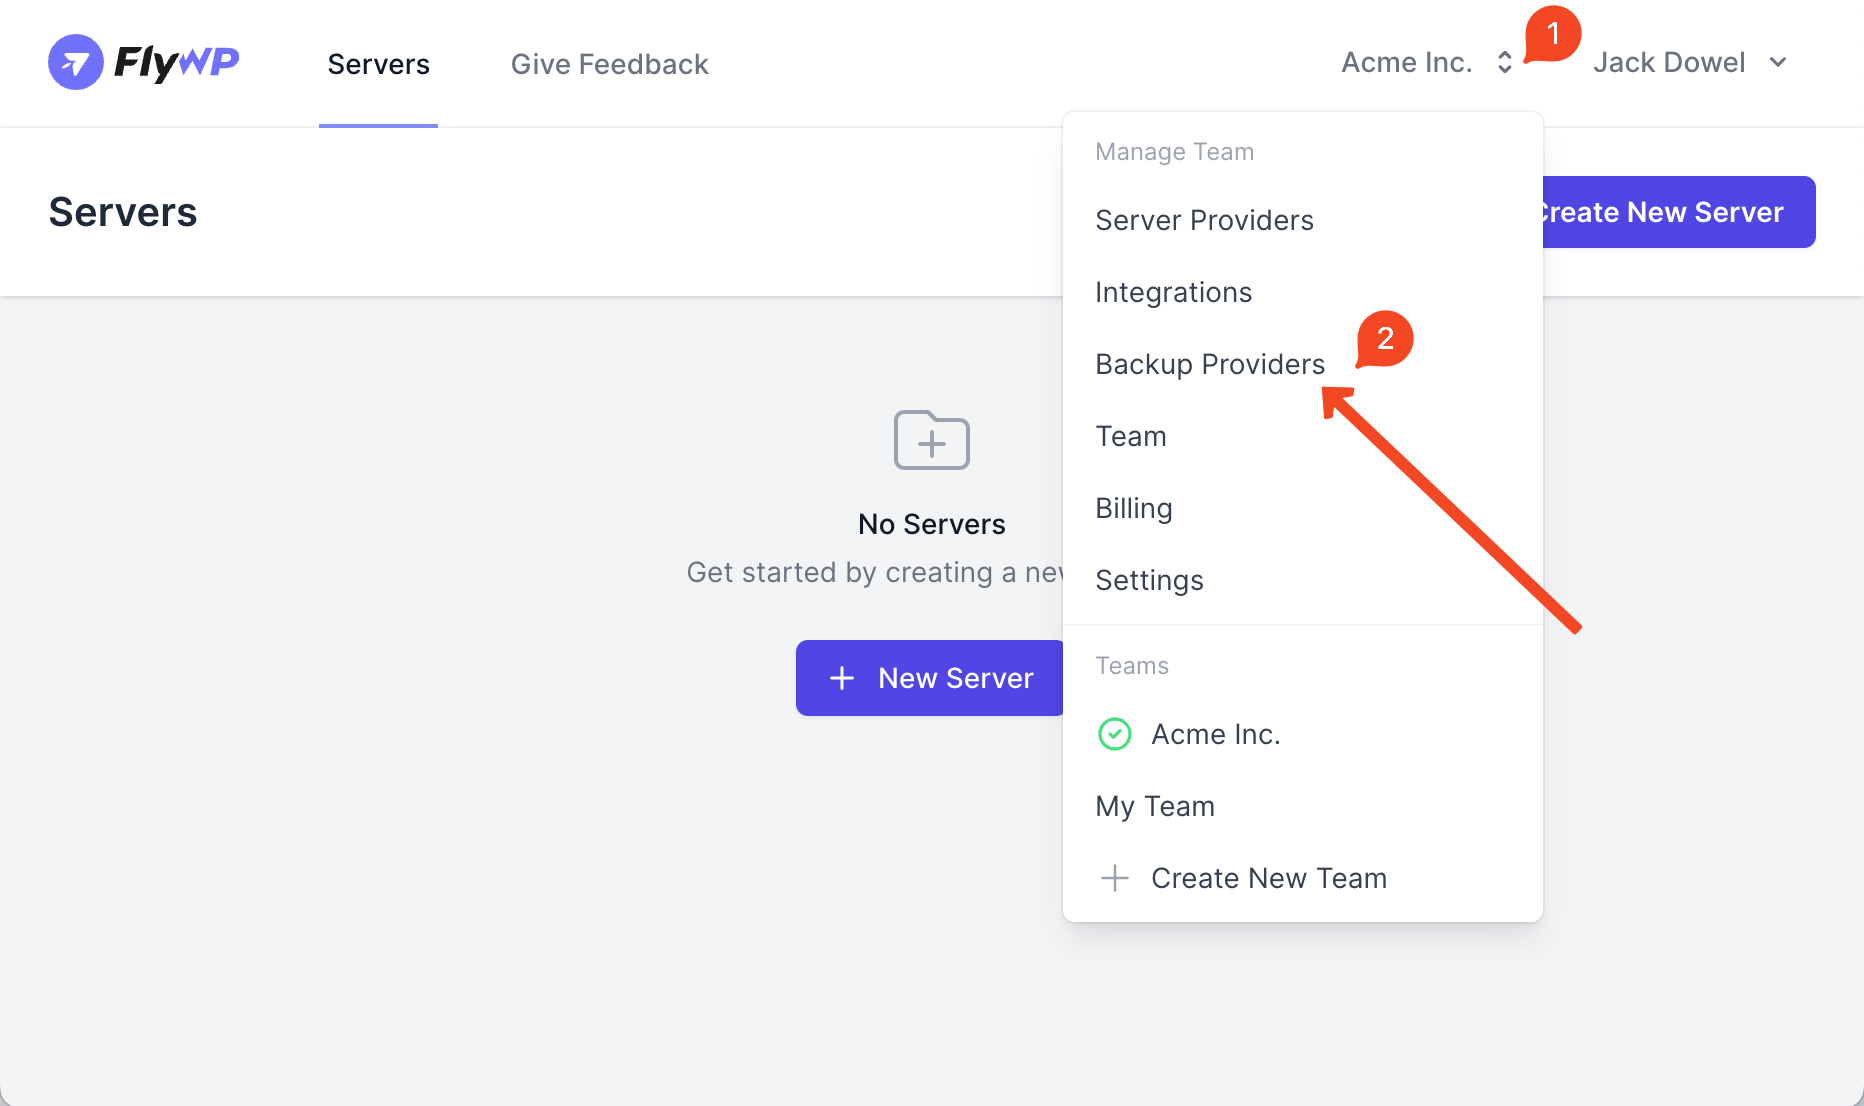
Section titled “Accessing Backup Providers Settings”- Head to your Team settings.
- Click on the “Backup Providers” page.
Setting up Your Backup Provider
Section titled “Setting up Your Backup Provider”Here’s how to make sure your backups are sent to the right place:
- Inside the “Backup Providers” page, input the necessary credentials for your preferred backup provider.
- Tip: Specific instructions for integrating with each backup provider can be found on their respective documentation pages.

Configuring Individual Site Backup
Section titled “Configuring Individual Site Backup”Make your backup suit your needs by configuring these settings:
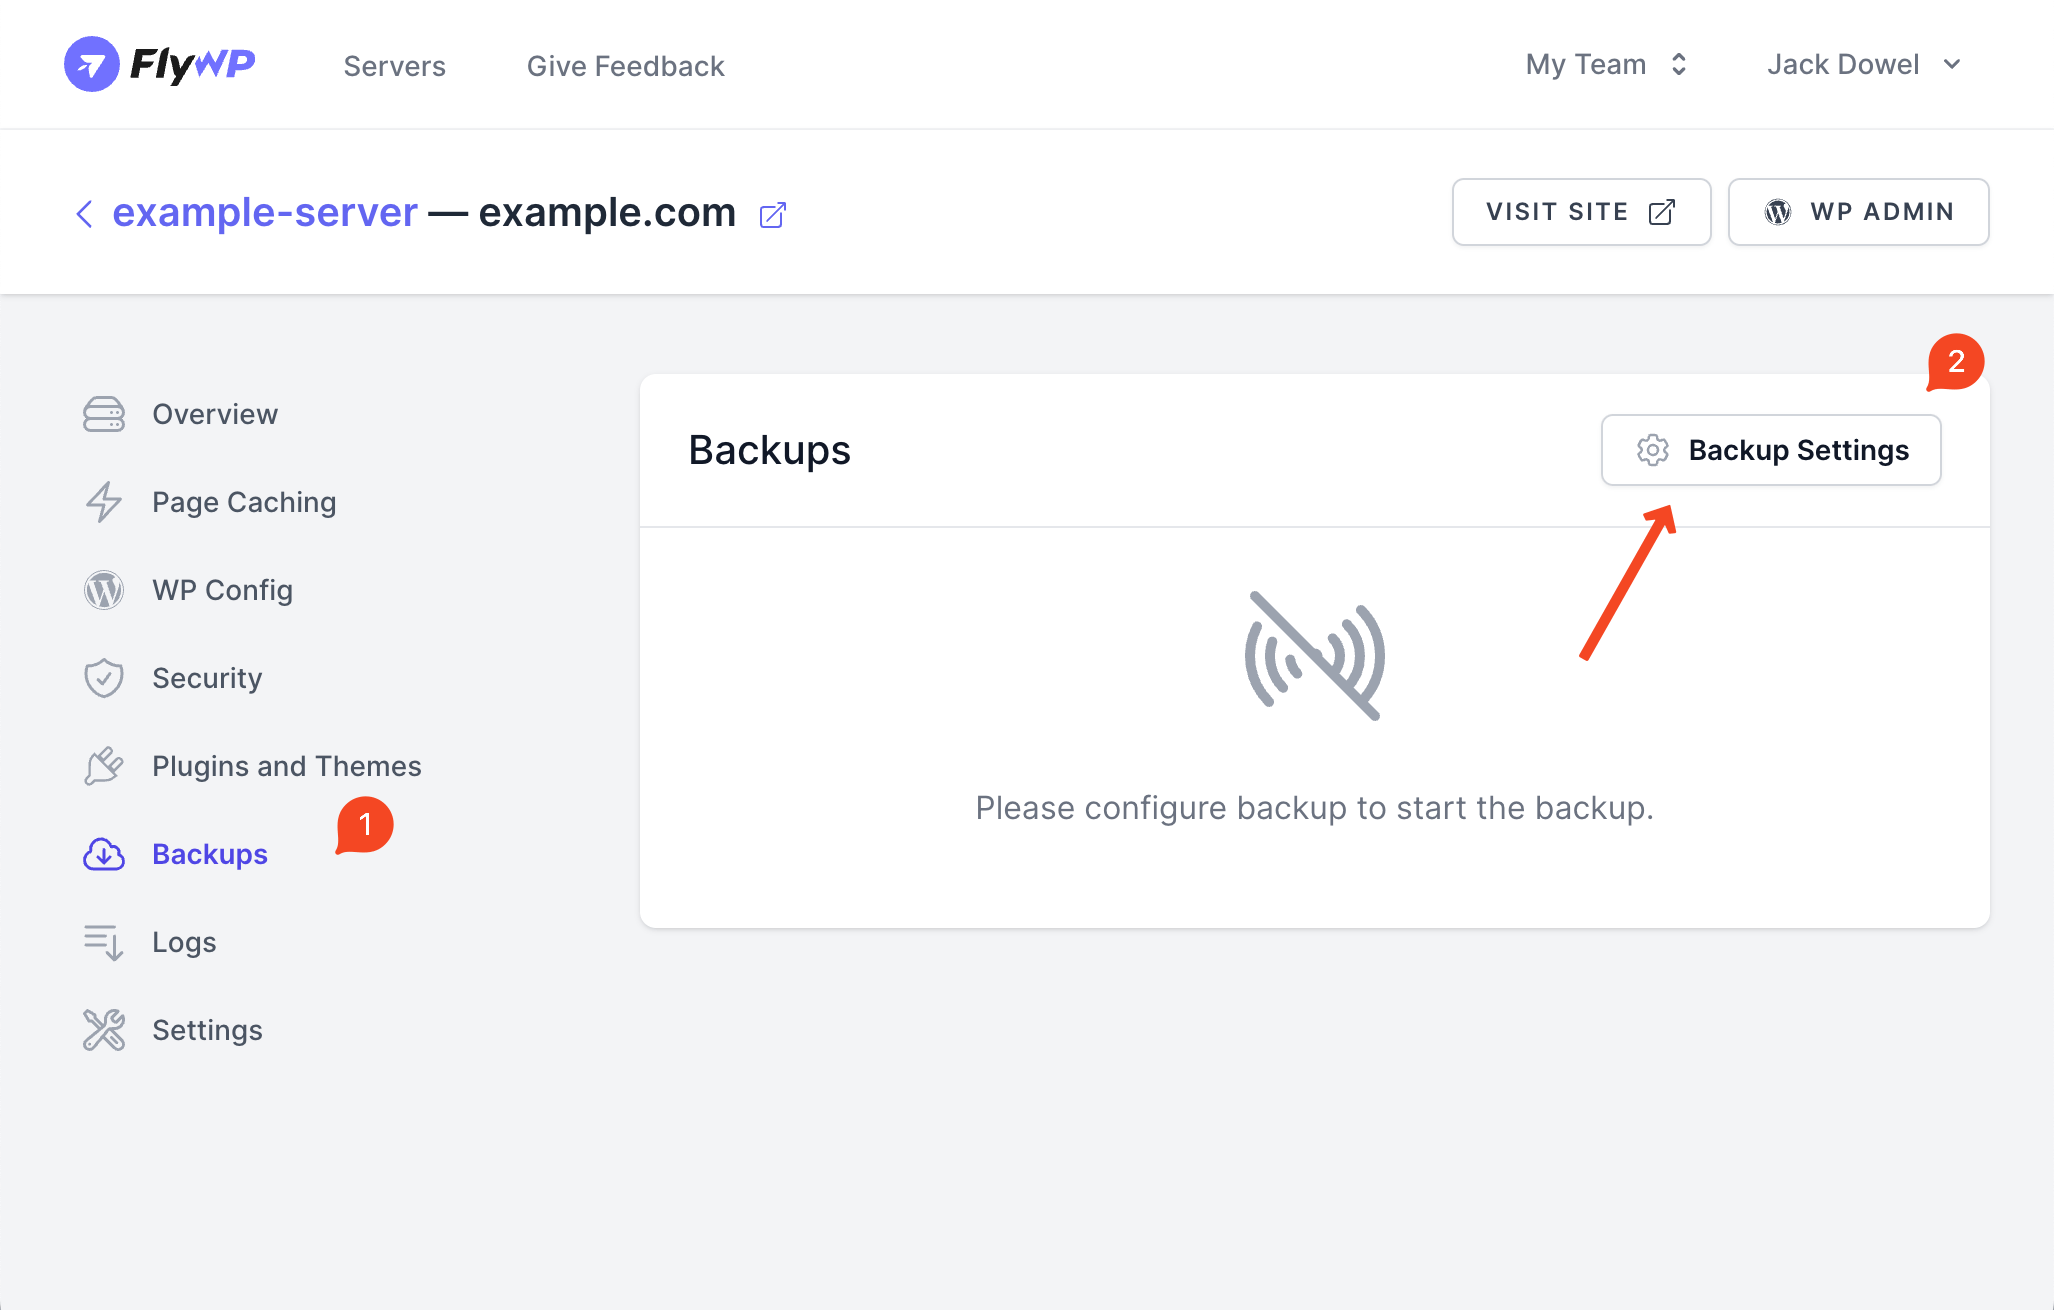
- Choose the website you want to backup on FlyWP.
- Proceed to the “Backups” page for that website.
- Press the “Backup Settings” button.
Follow the on-screen instructions:
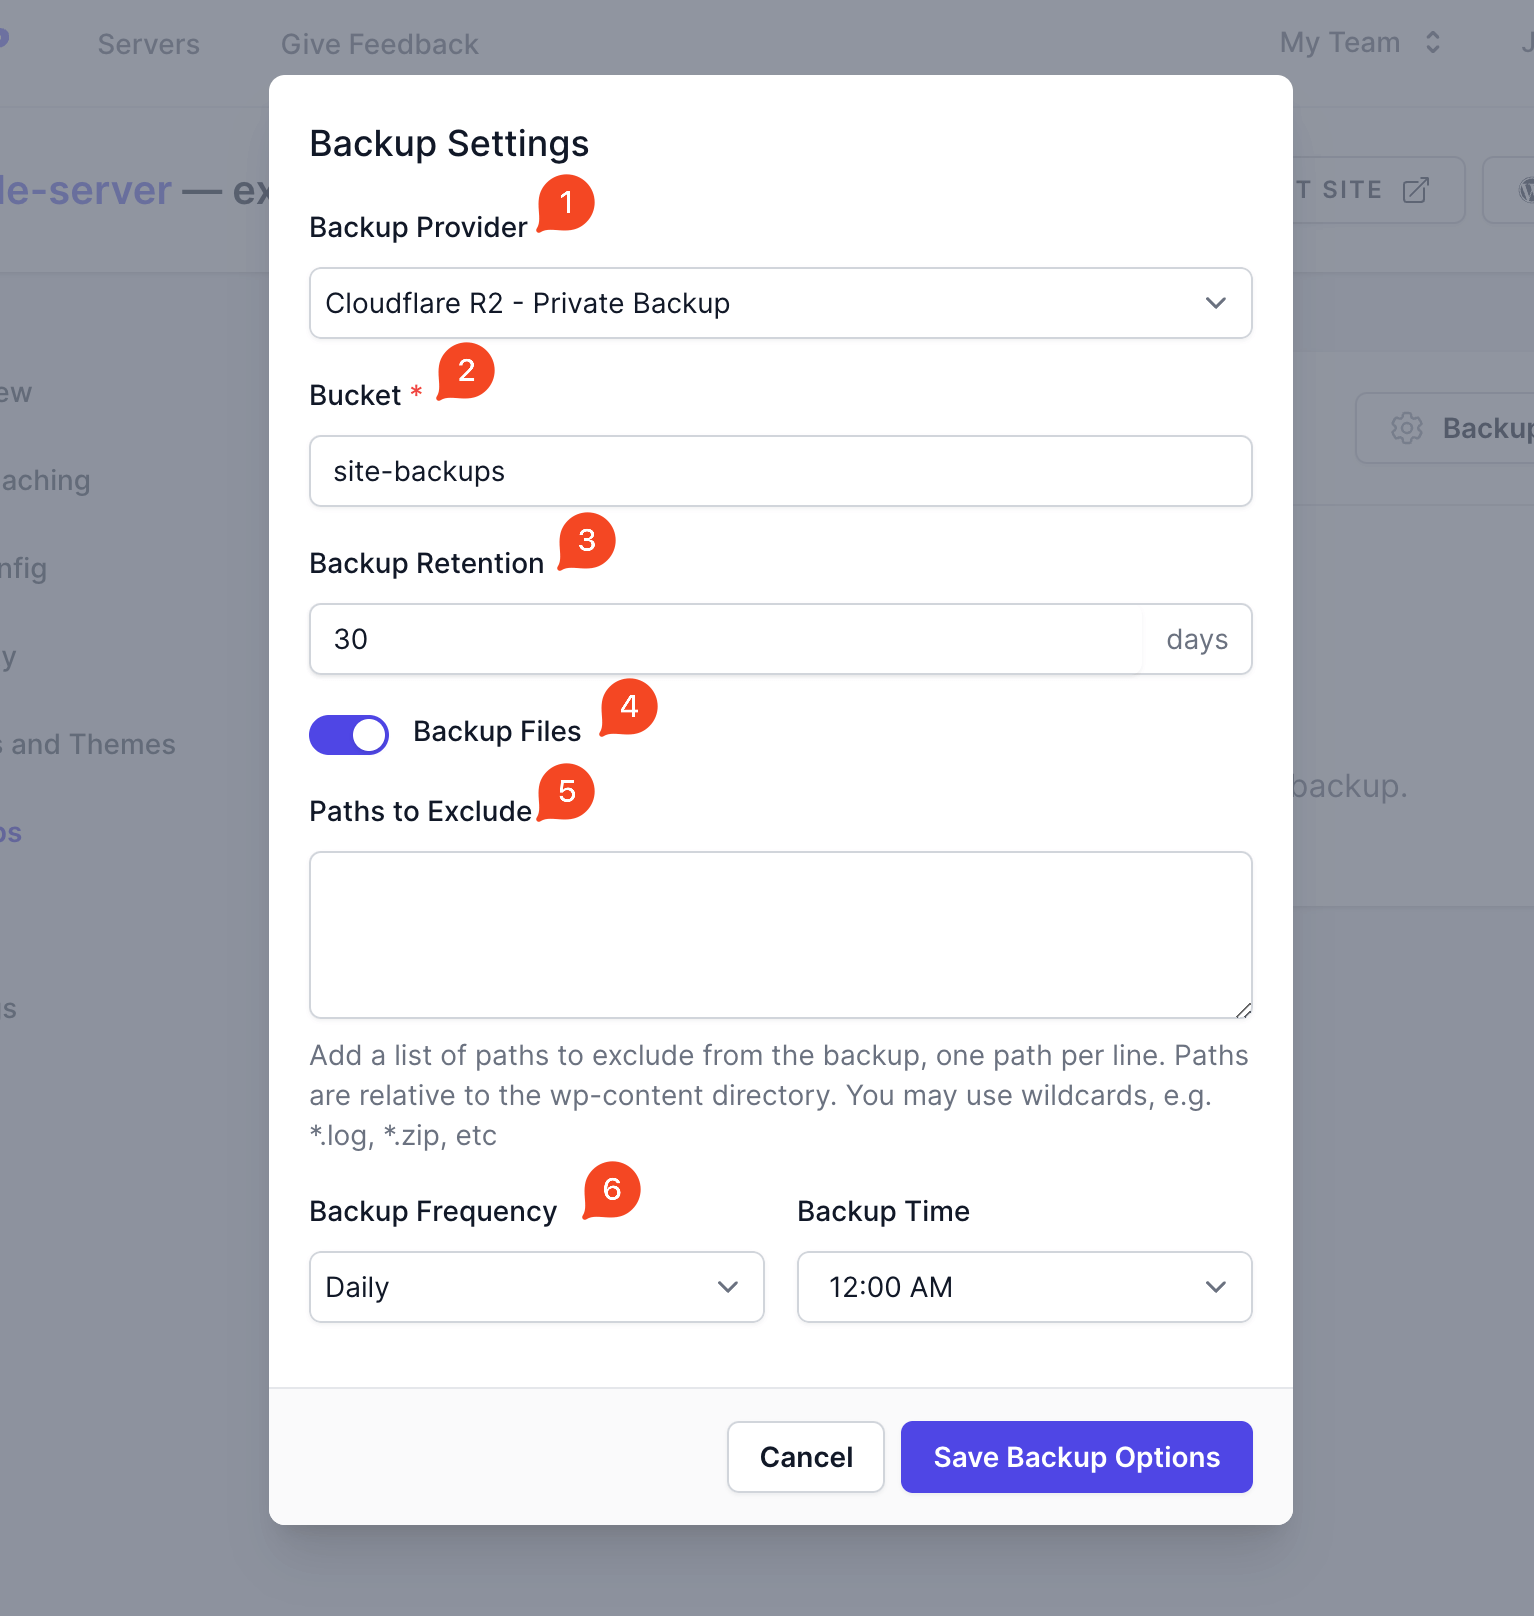
- Backup Provider: Select from the list of providers you’ve set up.
- Bucket Details: Specify the name of your storage area.
- Provider Info: Depending on your choice, you might need to share more details like where you want the data stored.
- Retention Days: Choose the length of time you want each backup saved.
- File Backup:
- Use the “Backup files” toggle if you want to backup site files.
- If there are certain files or paths you’d rather not backup:
- List them in the “Paths to Exclude” box.
- Remember: Paths should start from the
wp-contentdirectory, e.g.,*.log,*.zip. Enter each on a new line.
- Backup Schedule:
- Pick “Daily” or “Hourly” backup frequencies.
- If going for daily backups, select the hour that suits you best.
Backup Storage and Organization
Section titled “Backup Storage and Organization”Wondering how your backups are kept tidy? Here’s the structure:
- Database backups:
BUCKET_NAME/DOMAIN_NAME/DATE-database.sql.gz - File backups:
BUCKET_NAME/DOMAIN_NAME/DATE-files.tar.gz

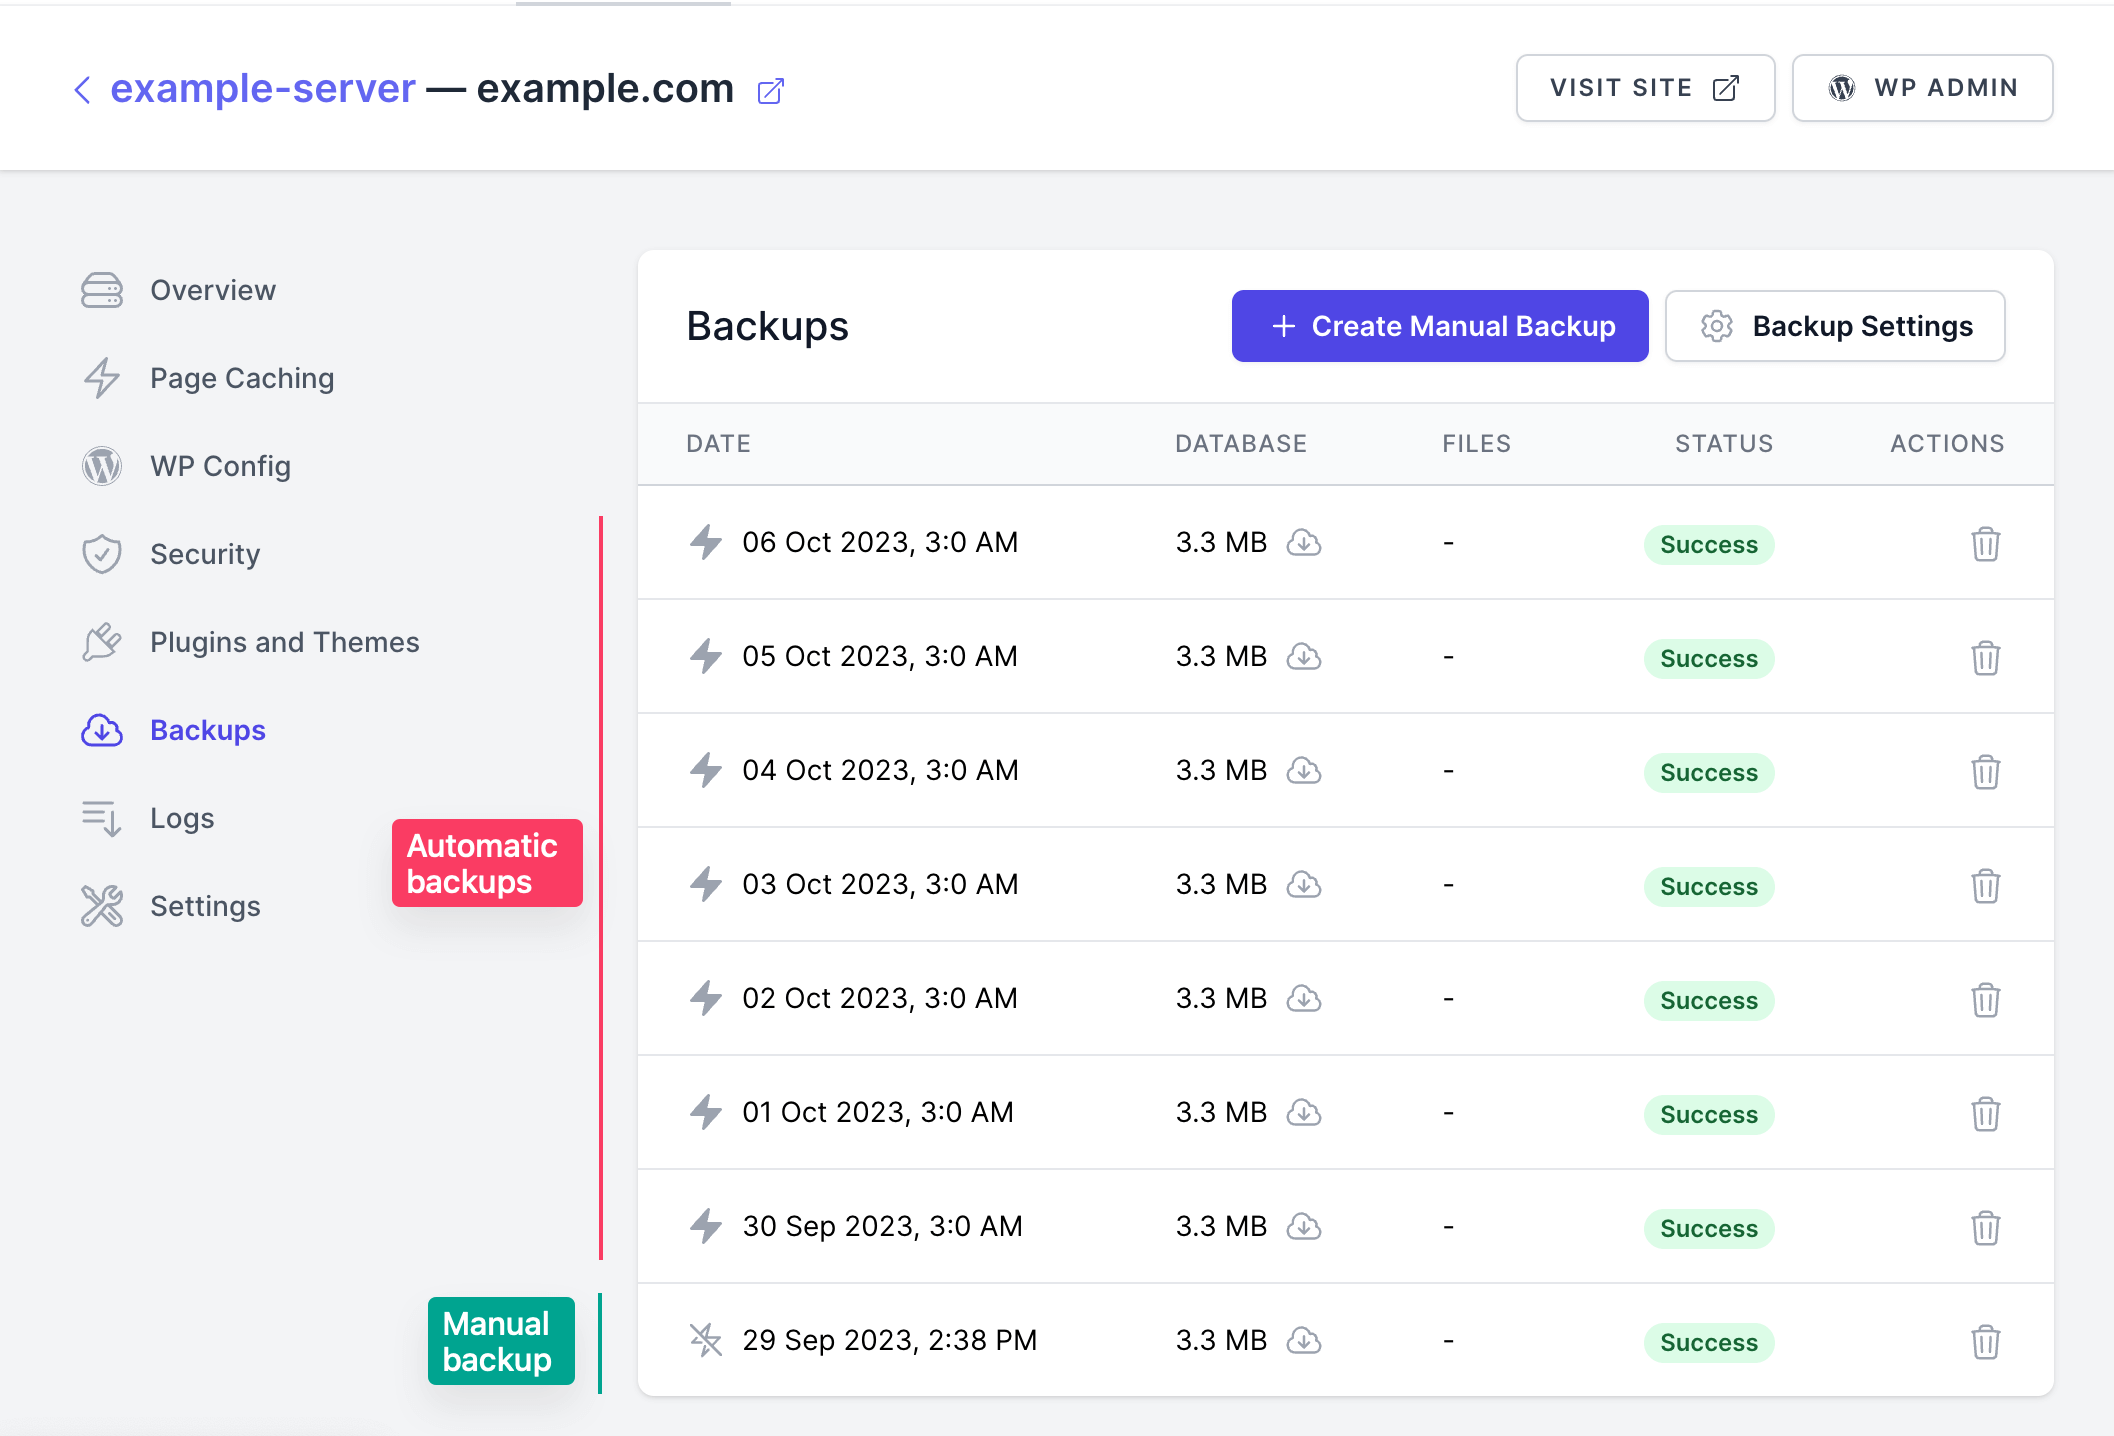
Every site you backup will have its own neat folder, with each backup file clearly date-labeled.
Still stuck? How can we help?