Apart from the available server providers, FlyWP allows you to add a custom server. This means you don’t have to rely on the available servers if you don’t want to use them.
Here in this guide, we’ll let you show how to add a customer server in FlyWP to manage your server efficiently. But before we go, let’s see what you’ll get using a custom server.
Benefits of using a custom server
There are several benefits that you will get with a custom server. From having full control over the server to optimizing performance, a custom server provides full flexibility for your server management-related tasks.
- Customization and Control: With a custom server, you have complete control over the hardware, software, and configurations. This level of customization allows you to tailor the server environment to meet the specific needs of your applications, ensuring optimal performance and security.
- Cost Efficiency: While setting up a custom server can be significant upfront, it may be more cost-effective in the long run than relying on cloud services or managed hosting. You pay for the hardware once, and ongoing operational costs can be lower, especially for stable workloads.
- Privacy and Security: Hosting your server provides greater data privacy and security control. You can implement security measures and protocols specific to your organization’s requirements, and sensitive data can be kept within your infrastructure, reducing the risks associated with third-party data centers.
- Performance Optimization: Custom servers allow you to optimize hardware components such as CPUs, RAM, and storage for your specific workload. This can result in better performance and responsiveness, especially for resource-intensive applications.
- Scalability Control: You can scale your infrastructure based on your organization’s growth and requirements. You can upgrade hardware components or add new servers to your cluster as needed without being constrained by the limitations of a cloud provider’s offerings.
How to add a custom server in FlyWP
Step one:
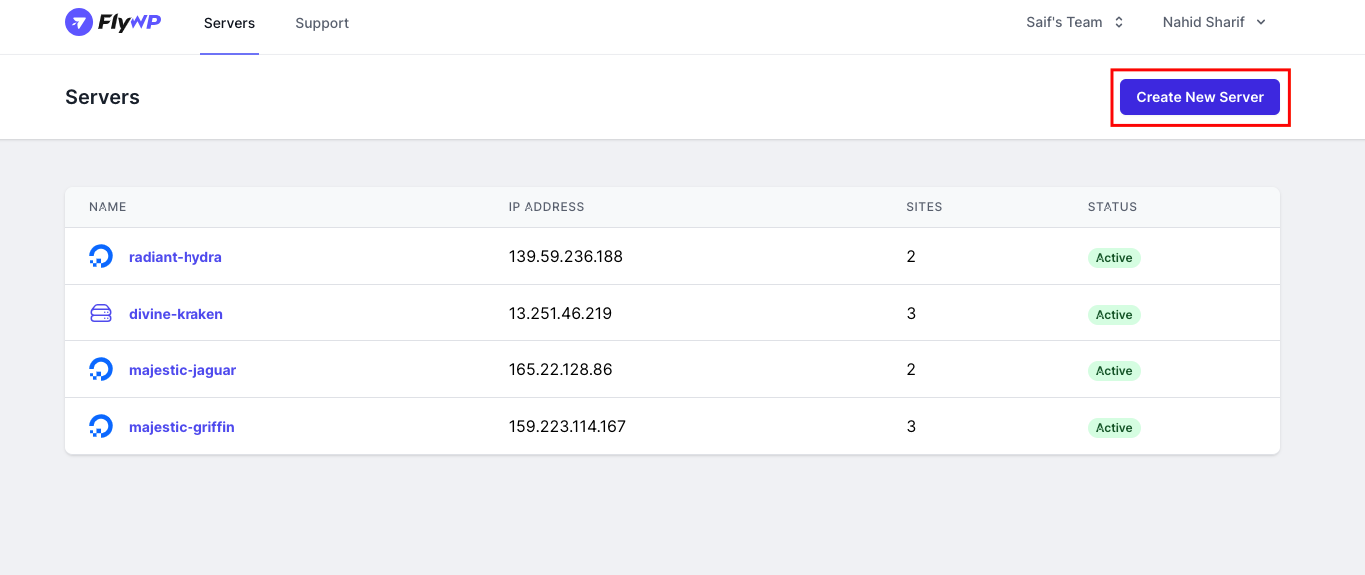
- Login to FlyWP and then go to the server page.
- Here you will find the “Create new server” button.
- Click on “Use My Cloud Account” and then click on “Custom”, and you will need to fill out this information
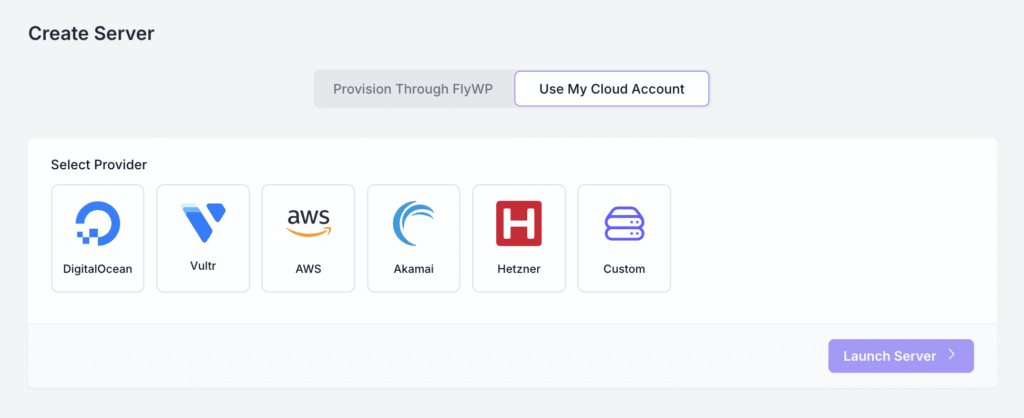
- Server hostname: The main name of the server
- IP address and private IPs will be provided by your preferred service provider
- Port is fixed: 22
- Operating system: It’s also fixed

- Now log in to your root user and follow the on screen FlyWP installation command. (FlyWP will offer you to copy and run the installation command with your own token at this stage, you don’t need to type this from the following image)
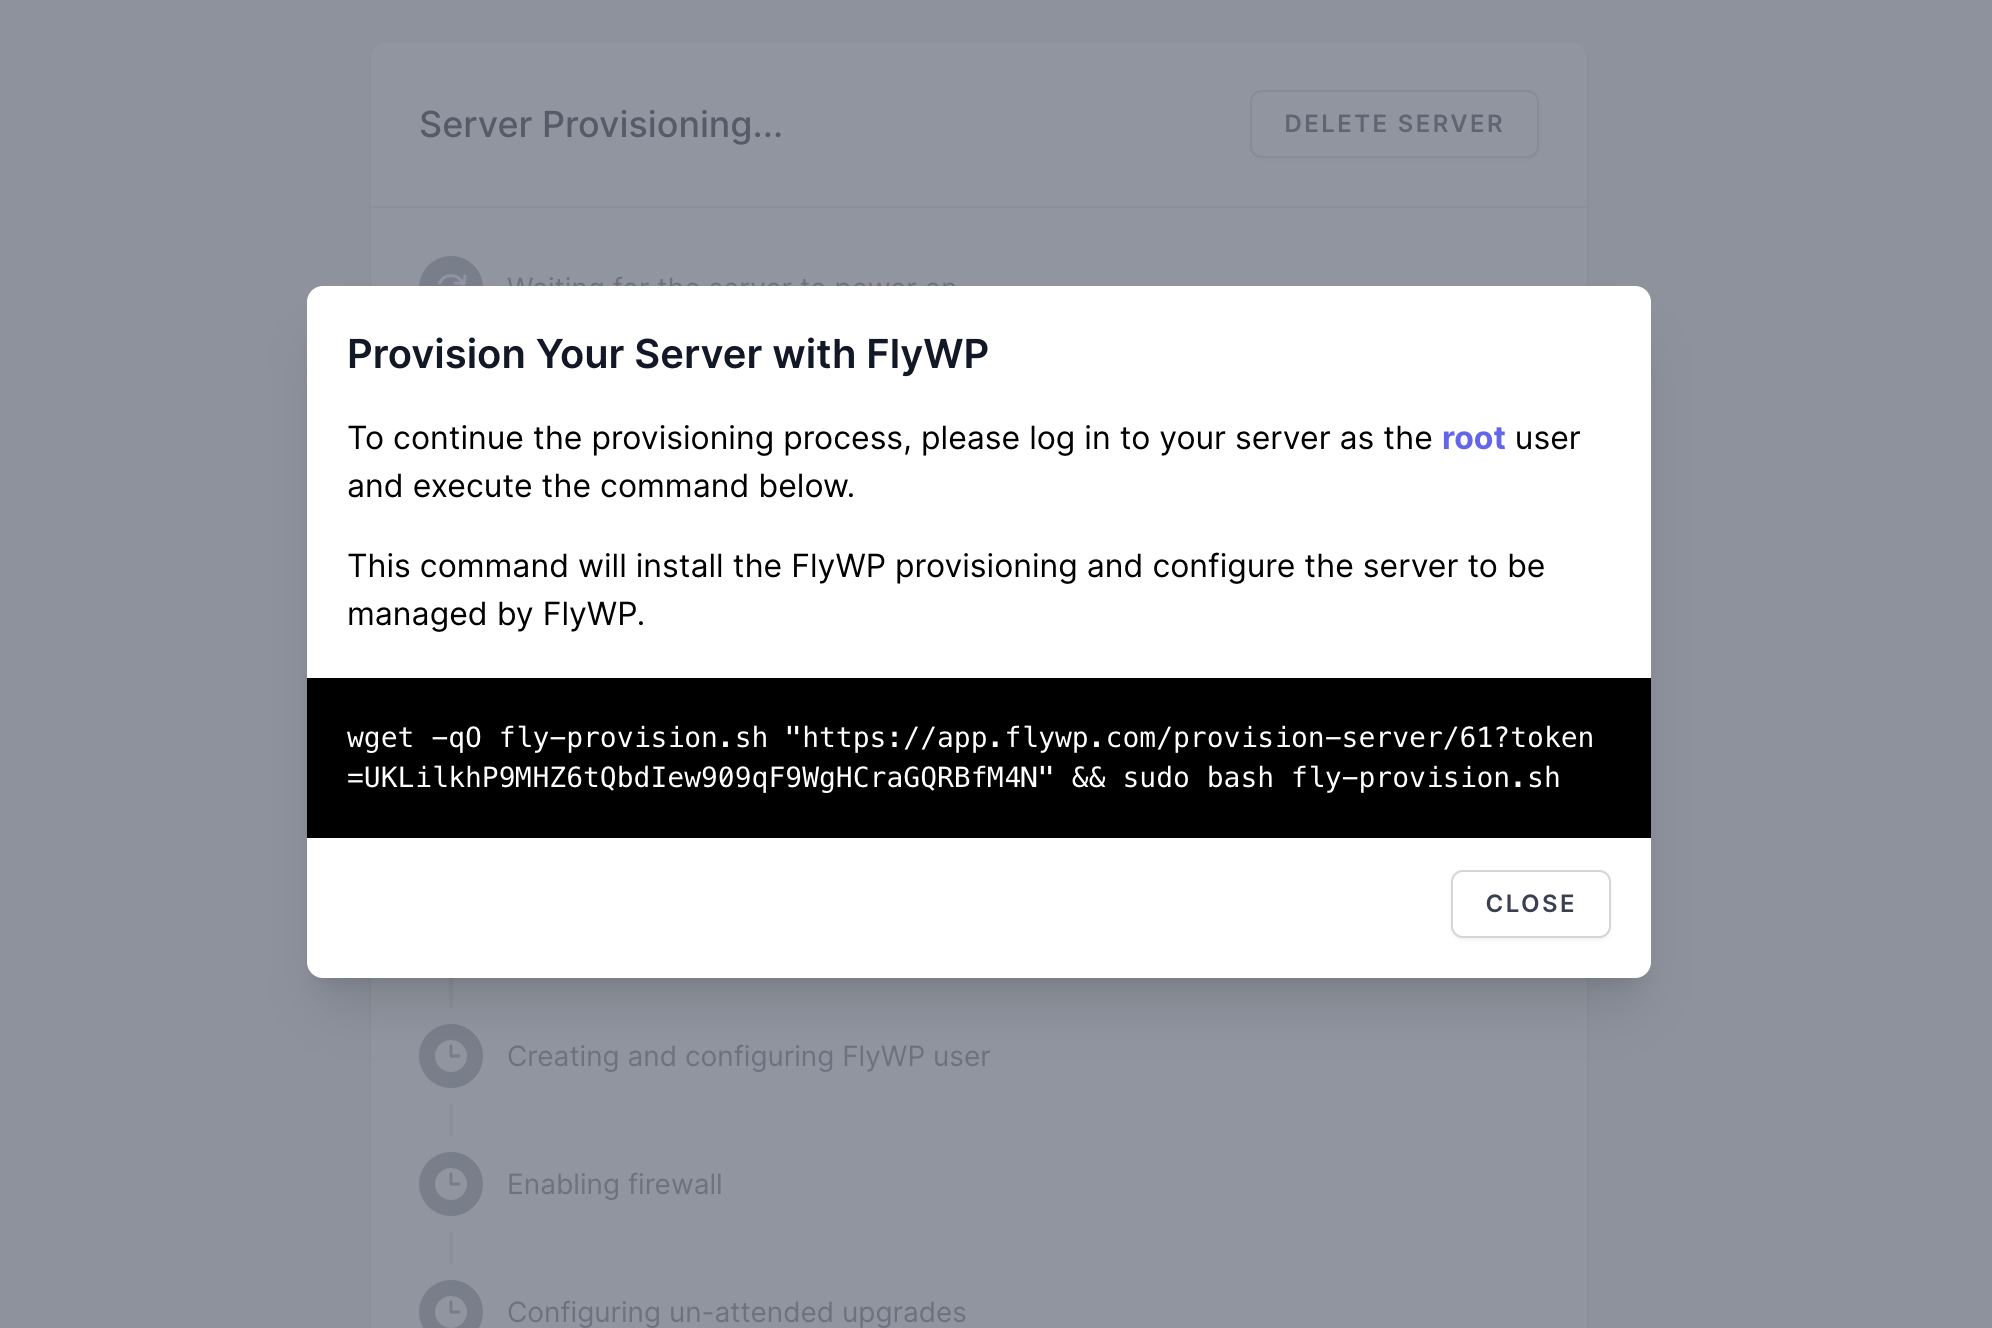
- Here, add the command line to your root directory

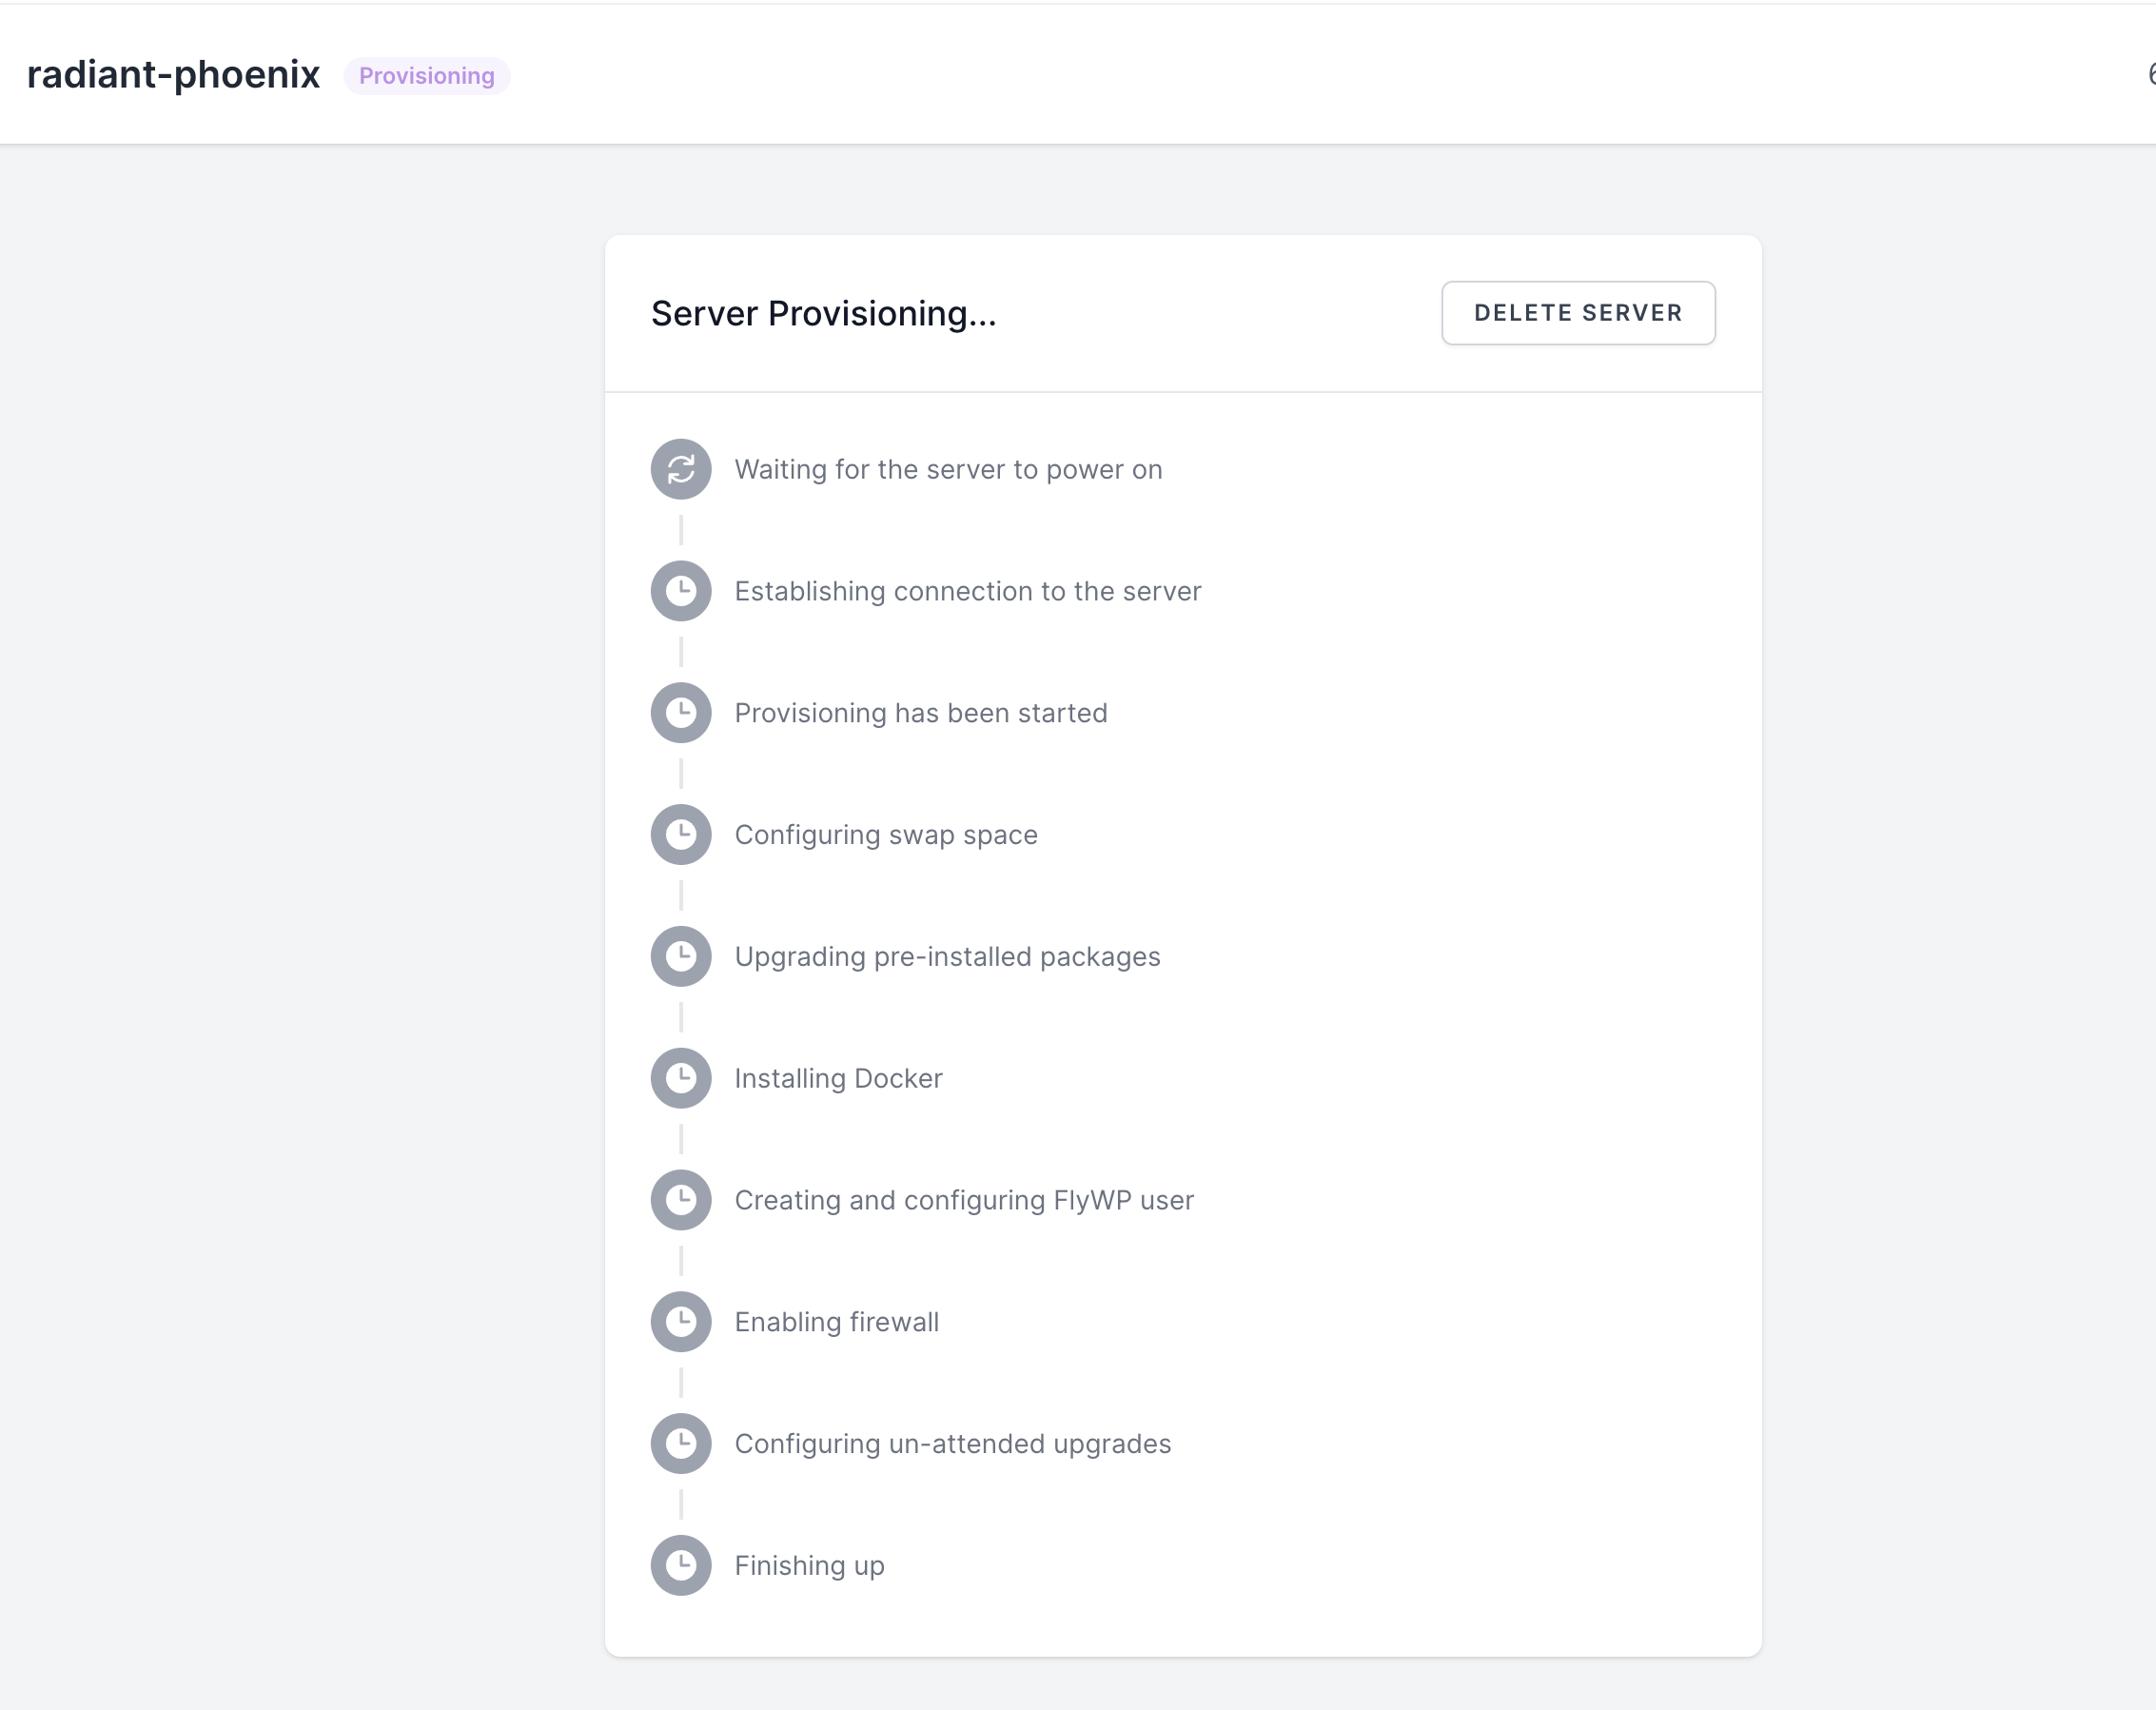
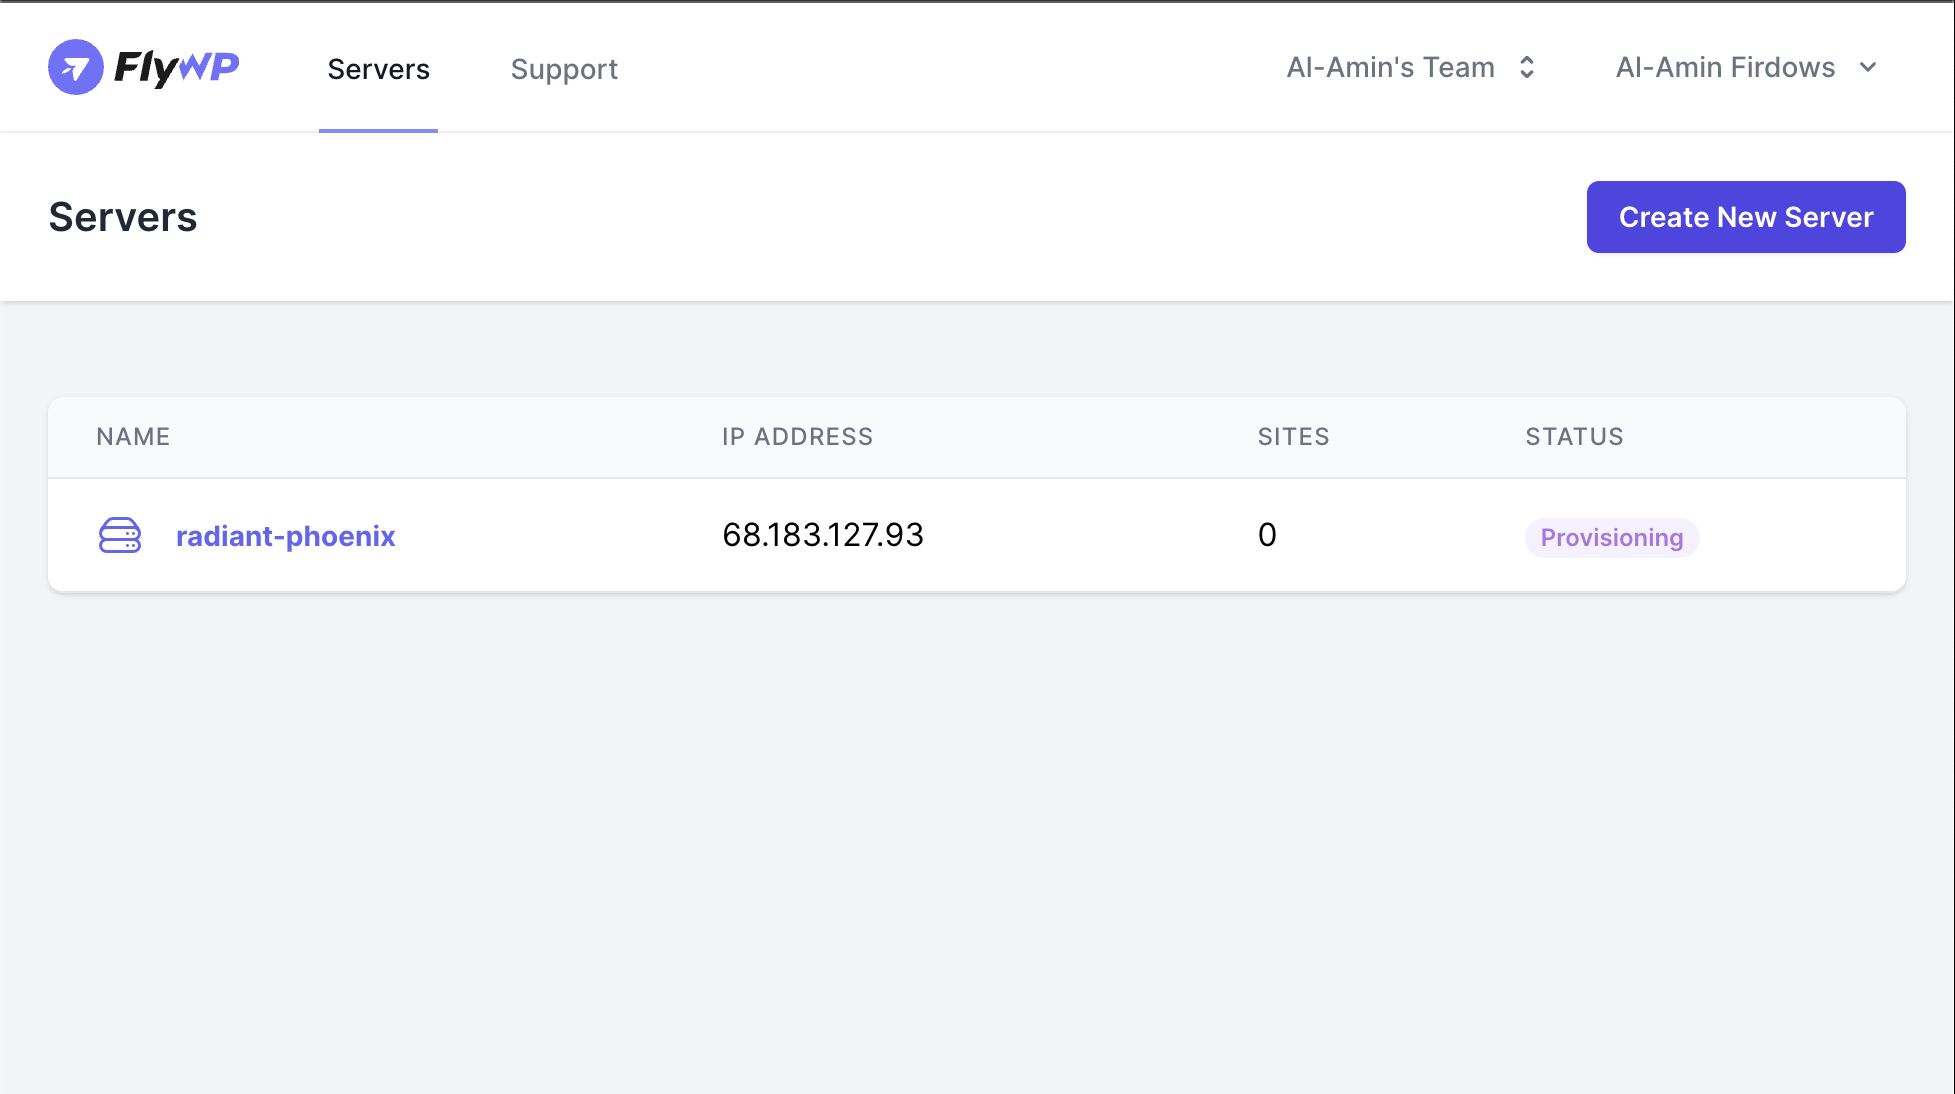
- Then you must see how the provisioning process is going forward. Wait for a while to complete the process.
- Then you must see that your custom server is here in the list.
So that’s all. By following the steps, you can easily create a custom server in FlyWP.