Hetzner is a leading web hosting provider offering robust server solutions for individuals and businesses. They specialize in dedicated servers, cloud servers, and other hosting options, all known for their affordability and high performance.
Now you can use this robust solution with FlyWP to create servers and sites. In this documentation, we’ll show how to integrate the Hetzner cloud server with FlyWP and start managing sites in no time.
Let’s get started!
Video Tutorial
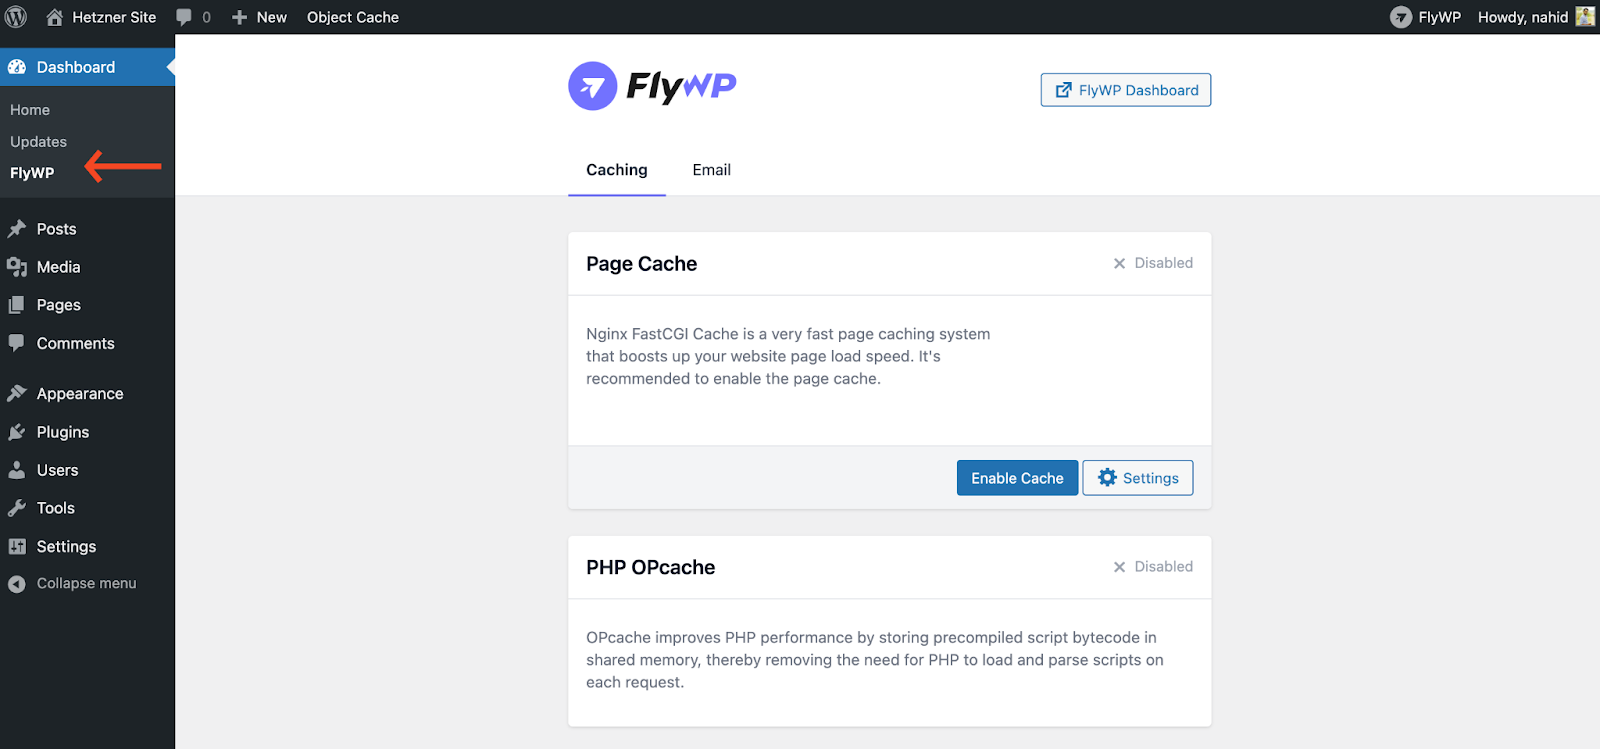
Configuring Server Provider
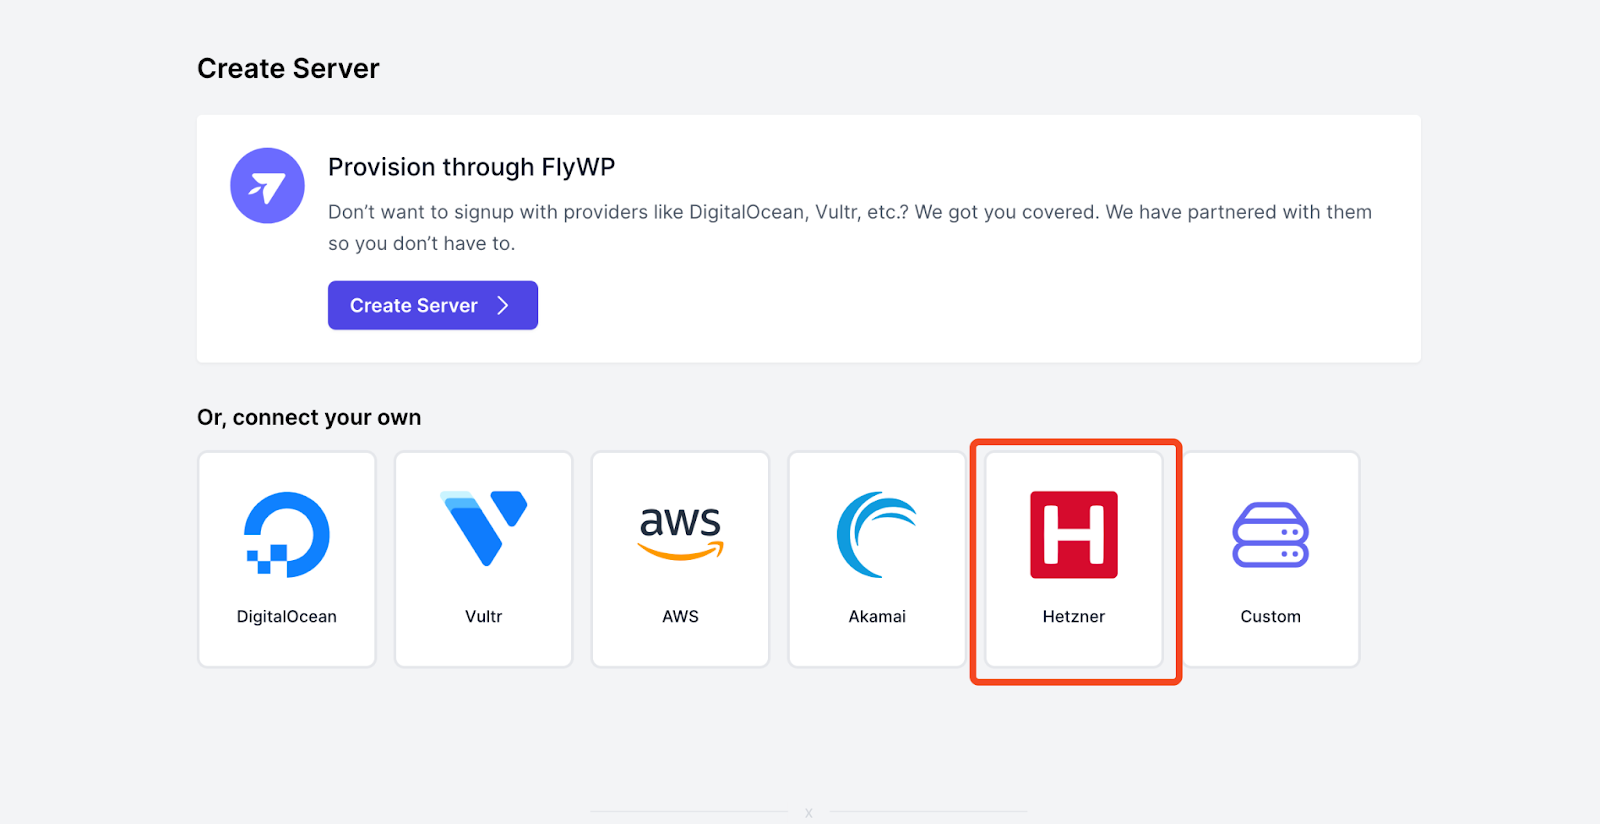
- First, open the Server page inside the FlyWP. And you will find “Hetzner”. Click on it to proceed with the next step.
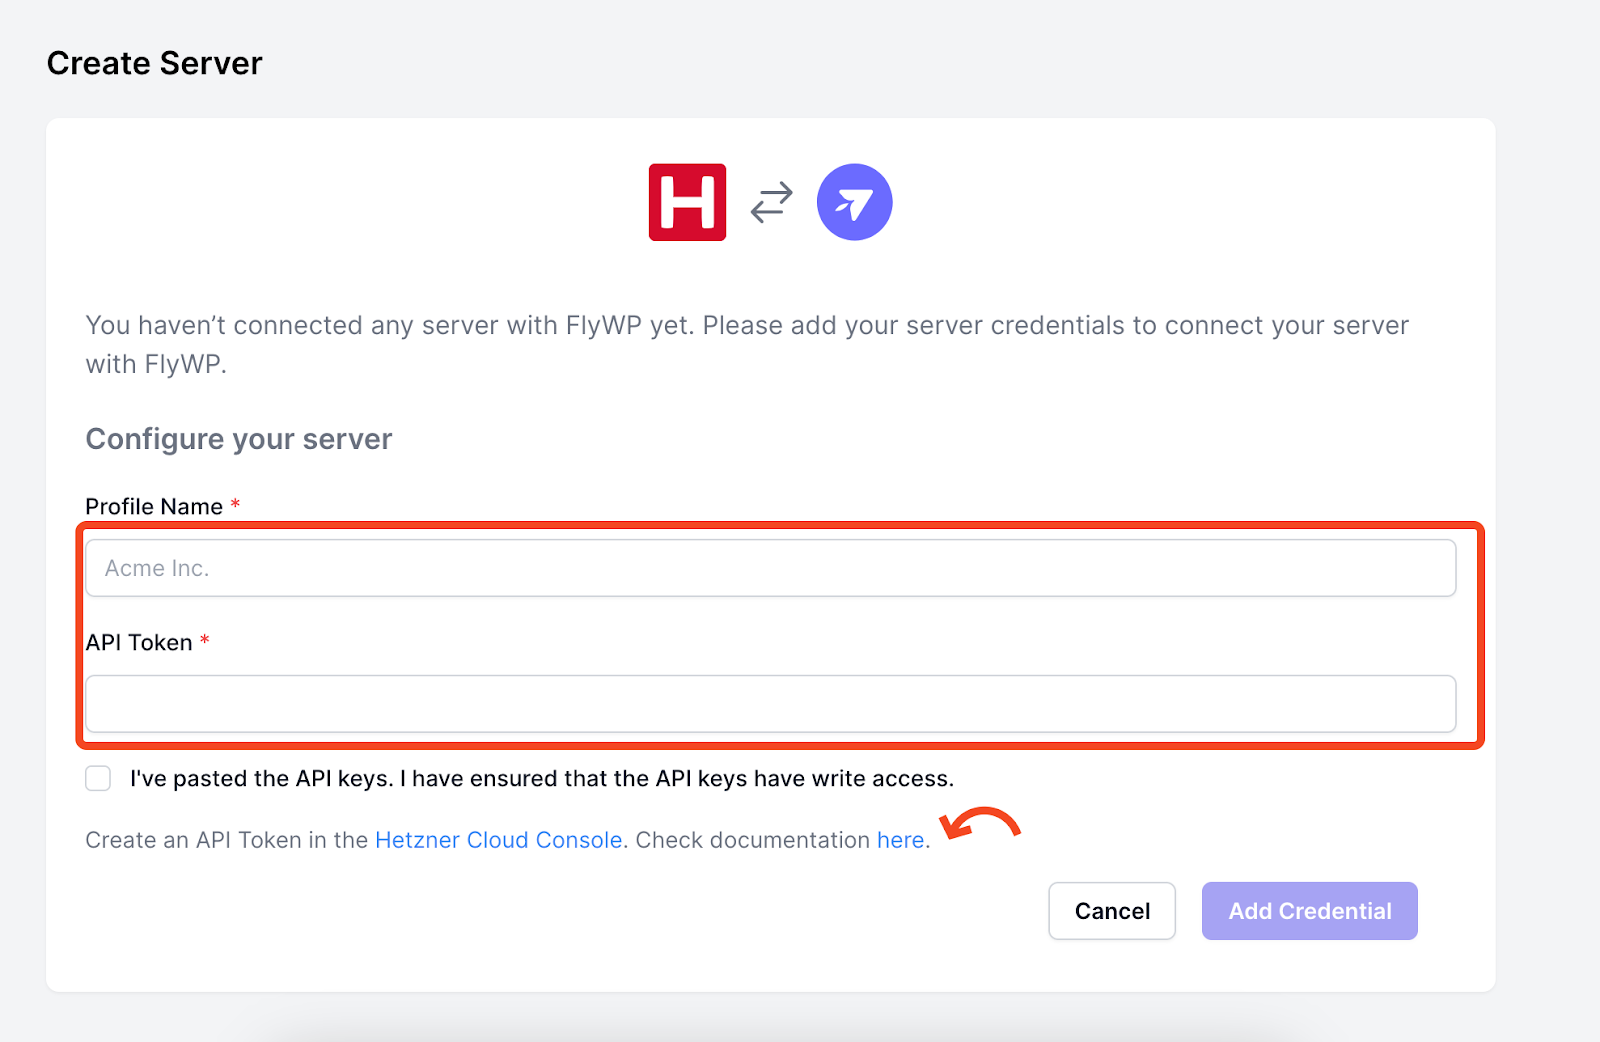
- Here, you need to provide the profile name and API token
Here is the link for directly getting to the console page – https://console.hetzner.cloud/projects
Also, you can get a detailed guide to get started. Here is the documentation – https://flywp.com/docs/account/server-providers/hetzner/
Getting the API Keys
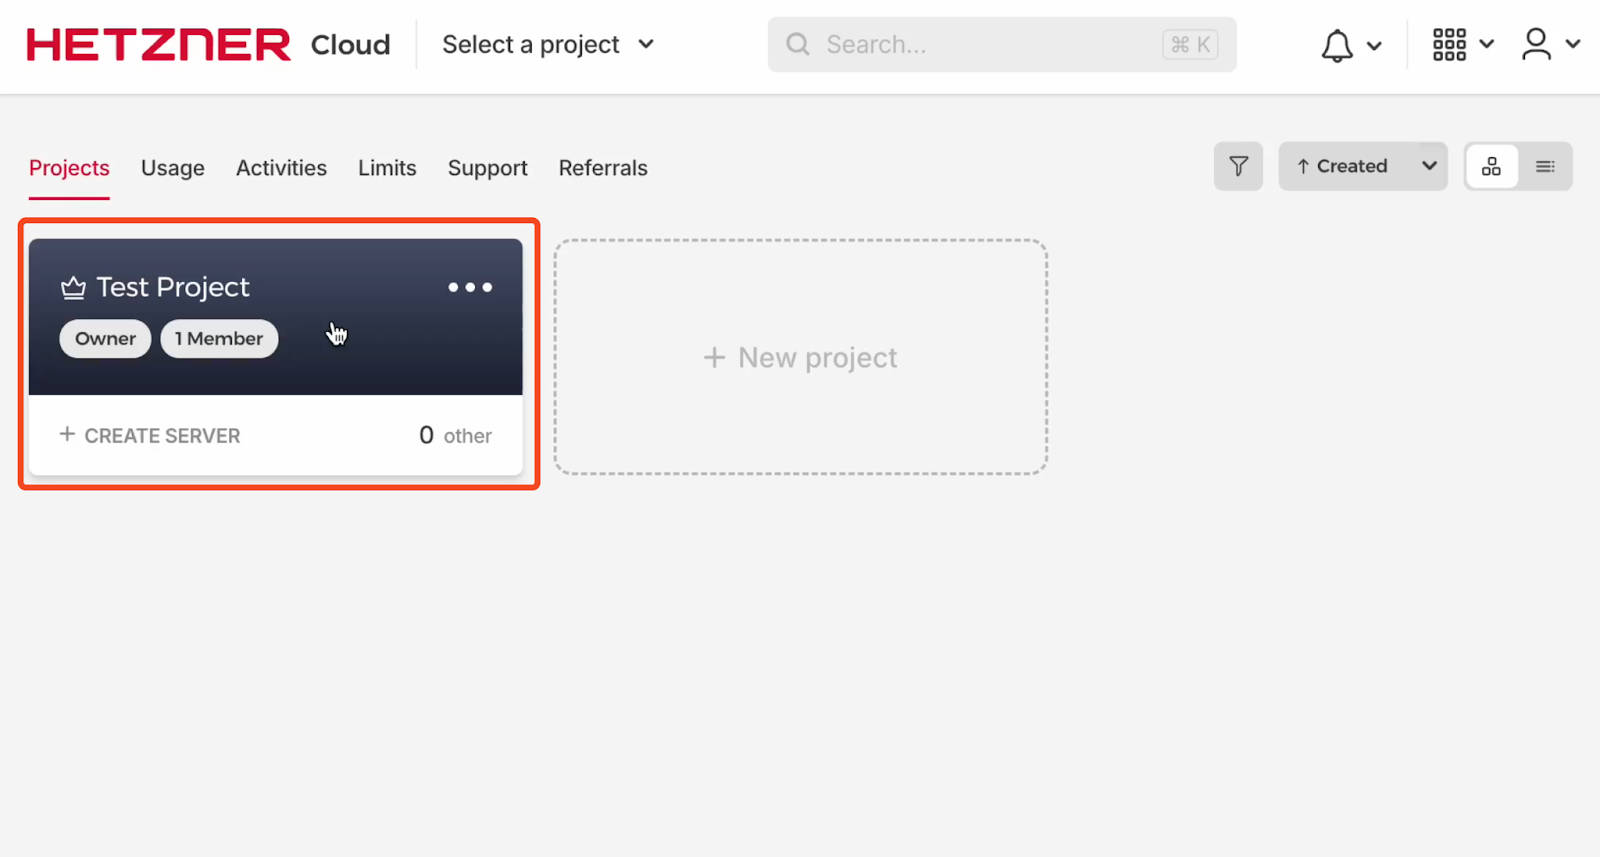
- On the console page, you’ll find the project. Click on it.
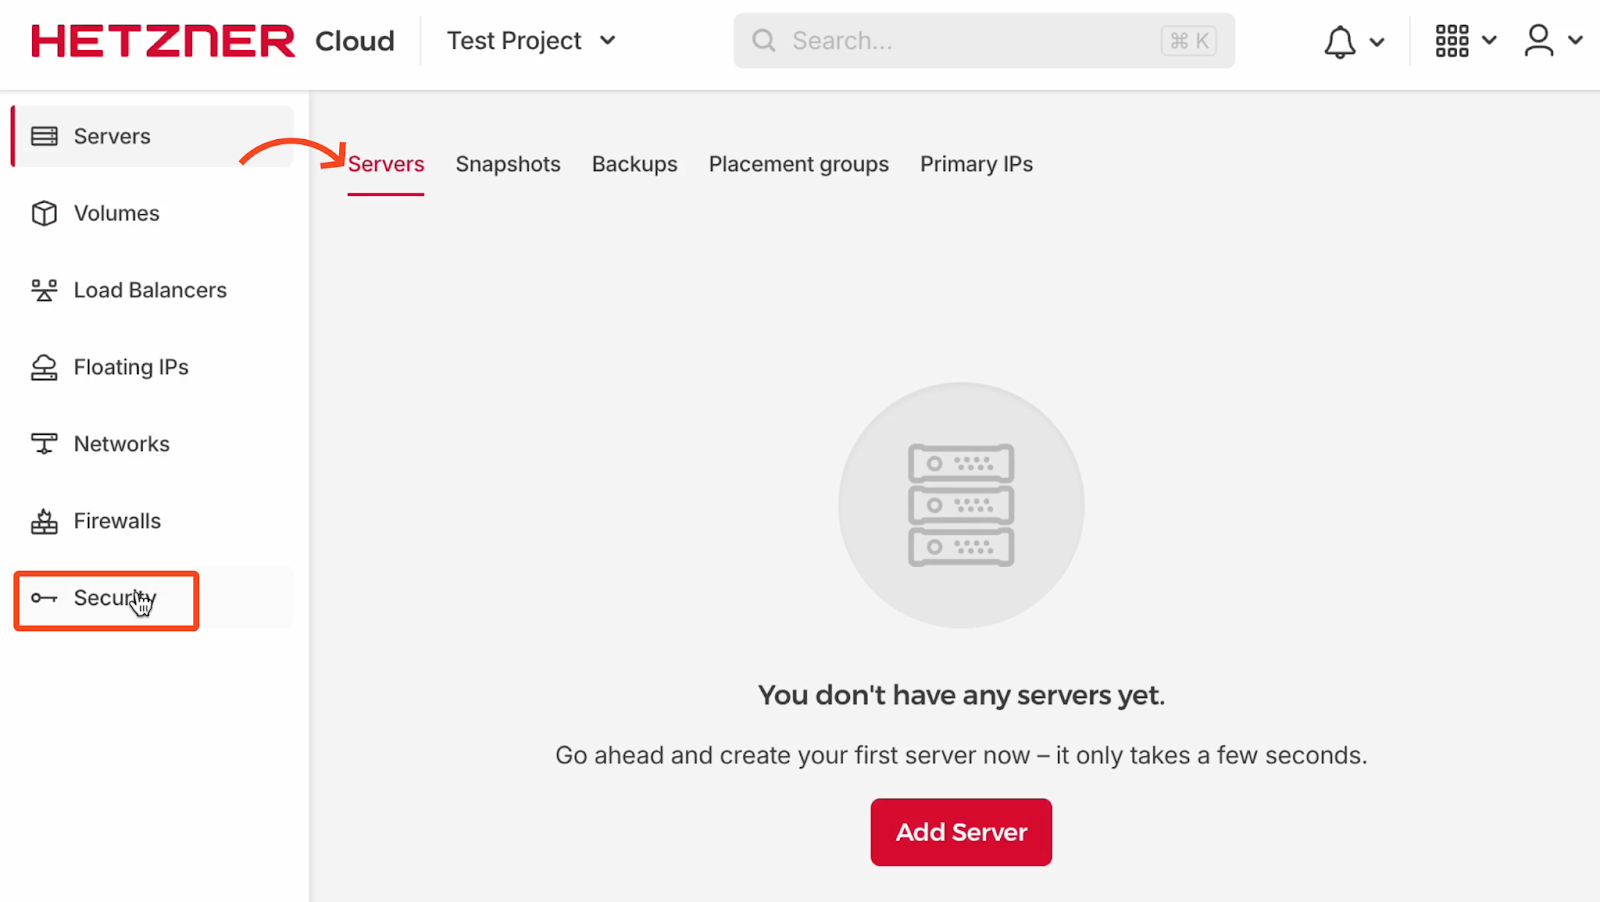
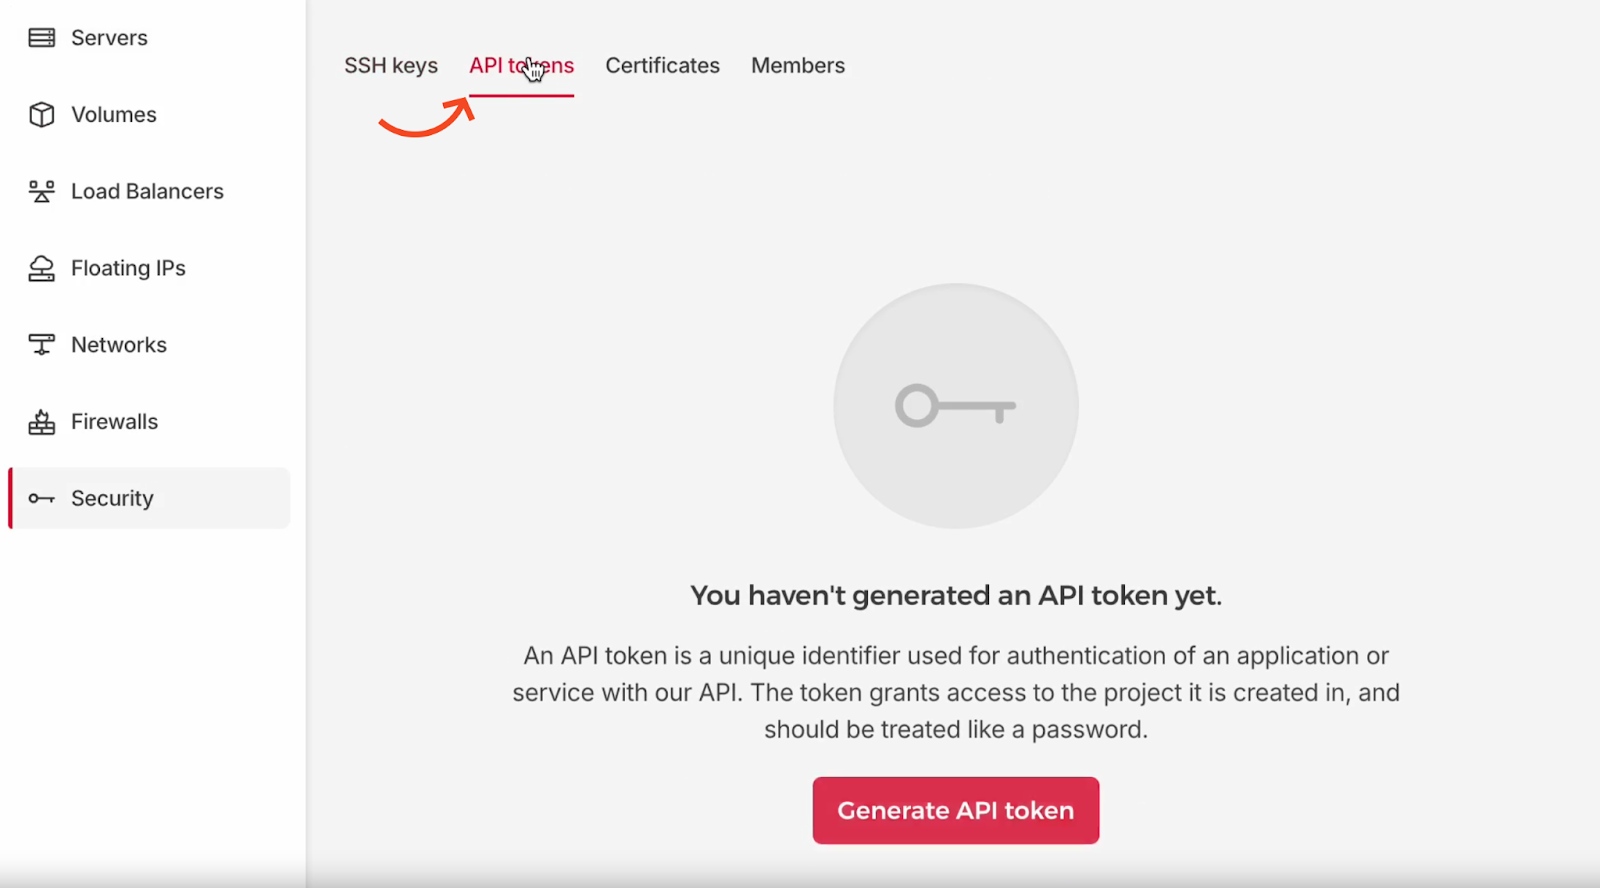
- Click on the servers tab, and then click on the security section.
- Then move to the API tokens and create the API token.
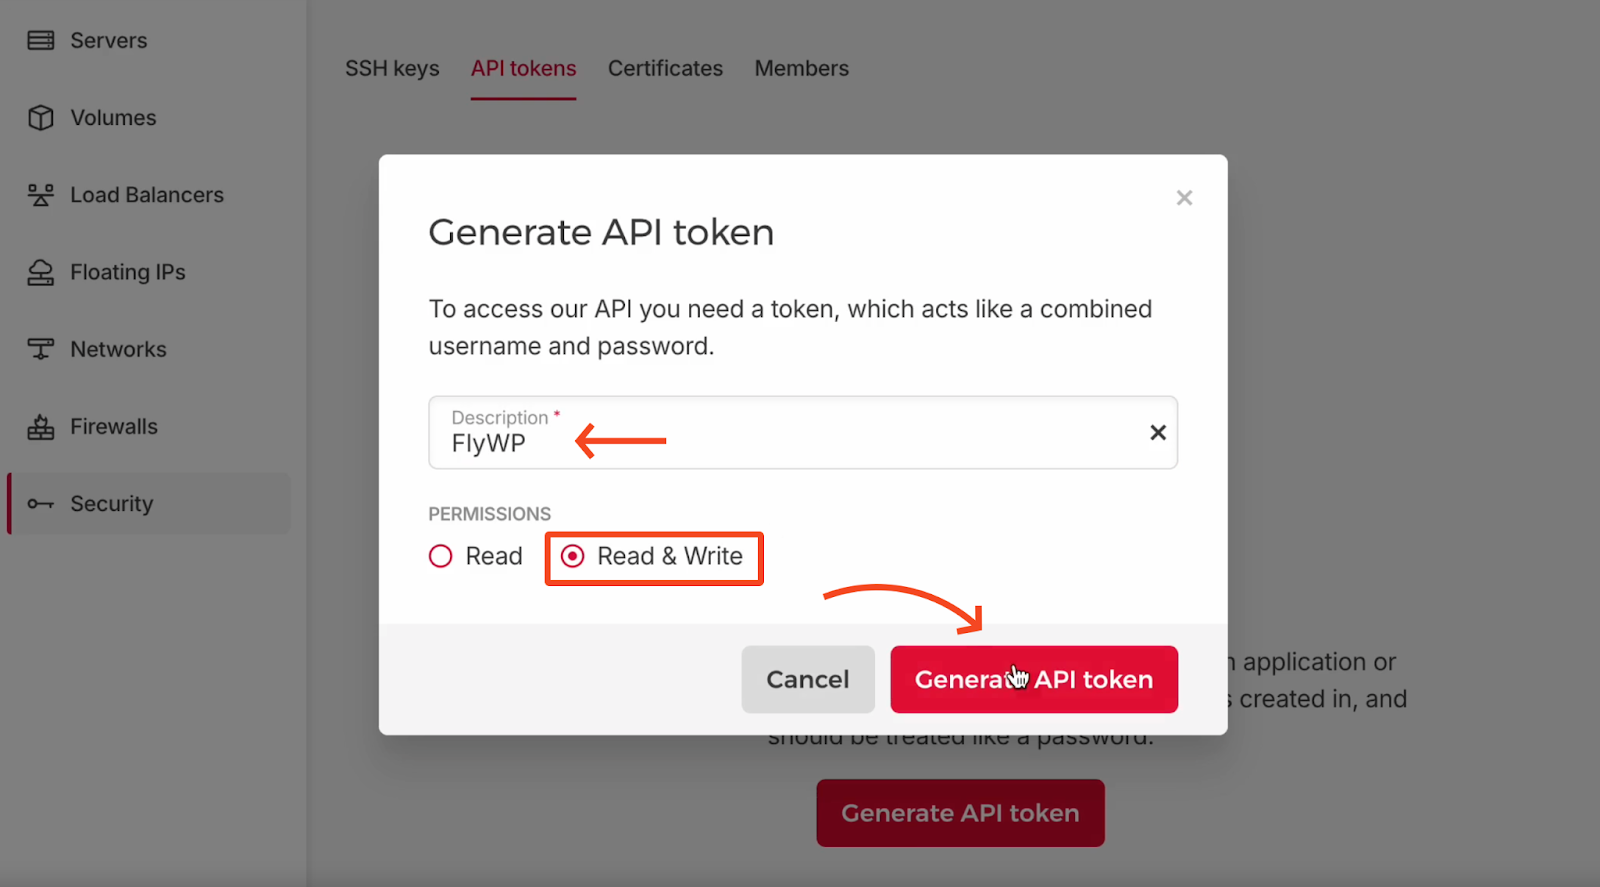
- Describe your API token and choose the “Read & Write” option. Then click on the Generate API Token.
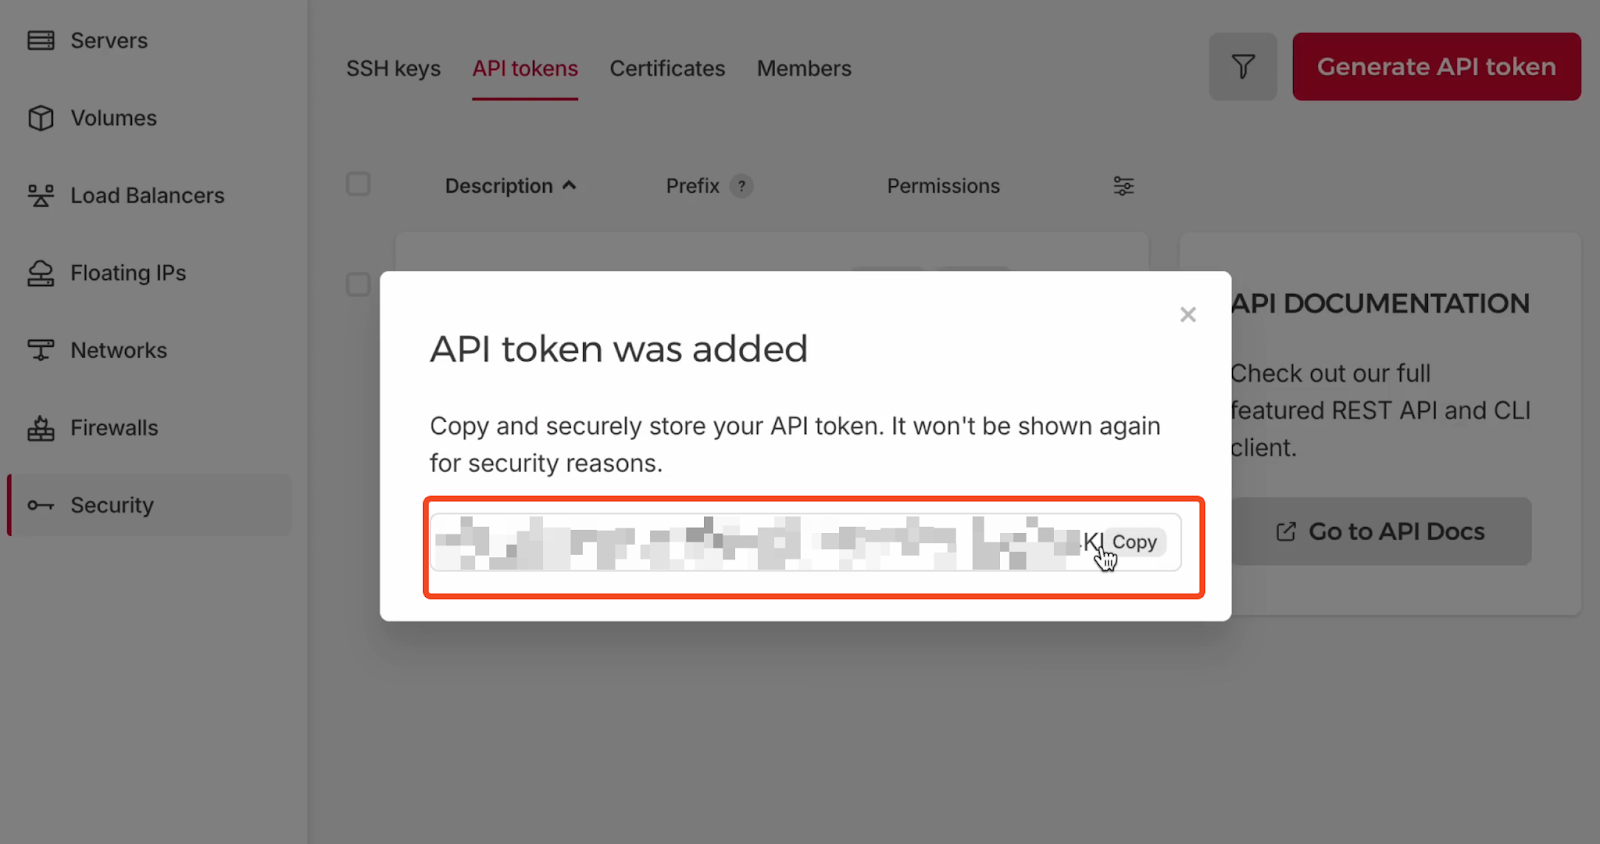
- The API token has been created. Now just copy it and use it on the FlyWP server’s page.
Adding API Credentials
- Enter your server name and paste the copied API tokens here. Also, don’t forget to tick mark the API access confirmation.

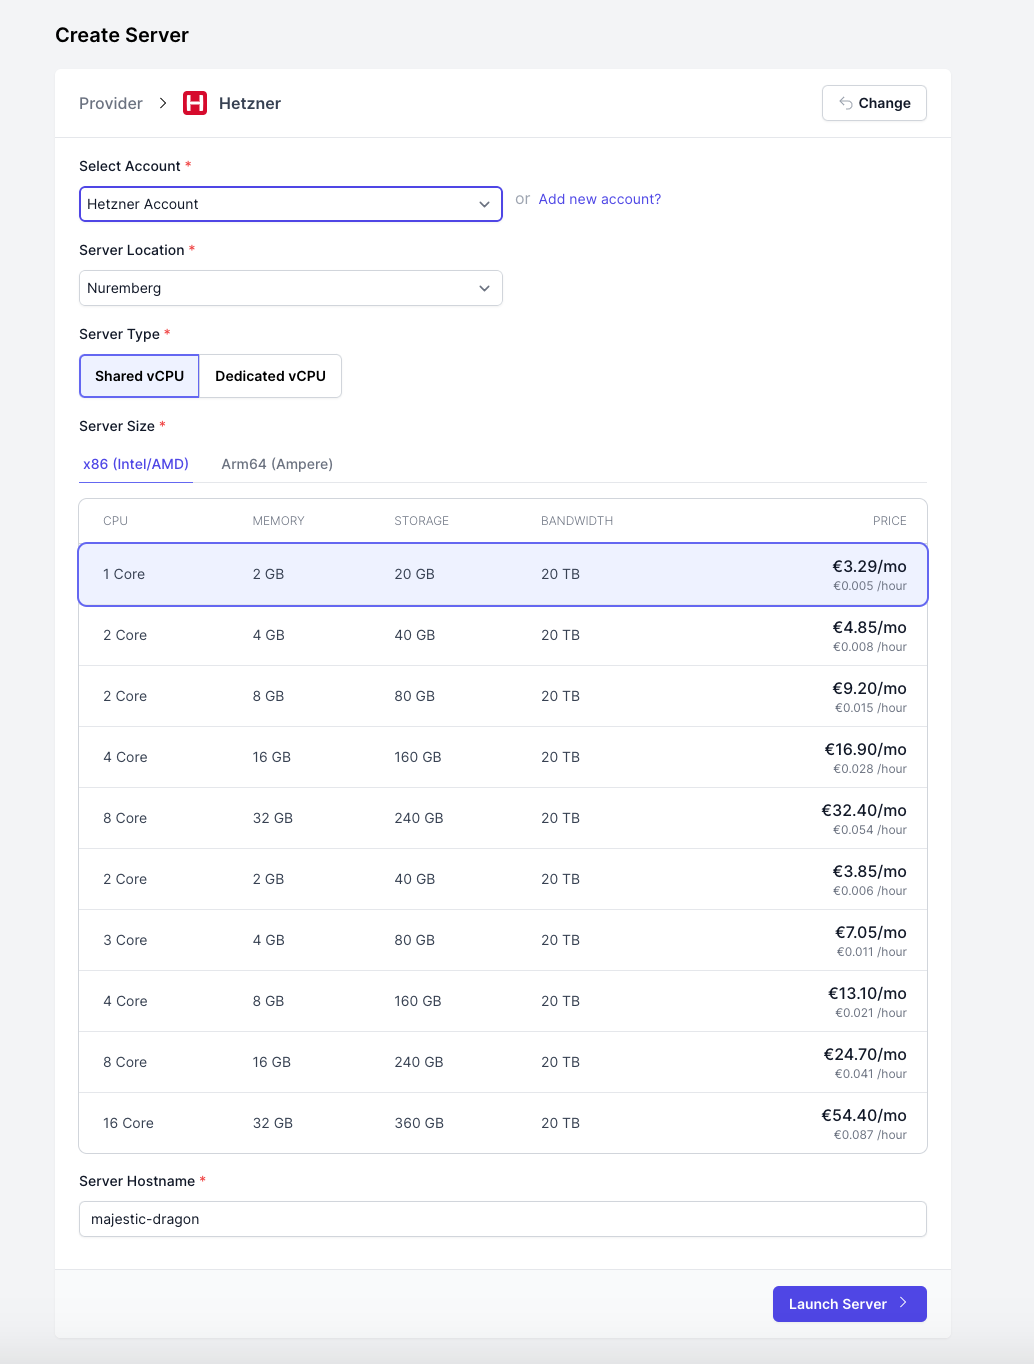
- Check the information before proceeding, like account name, location, server type, server size, and hostname. And then click on the launch button.
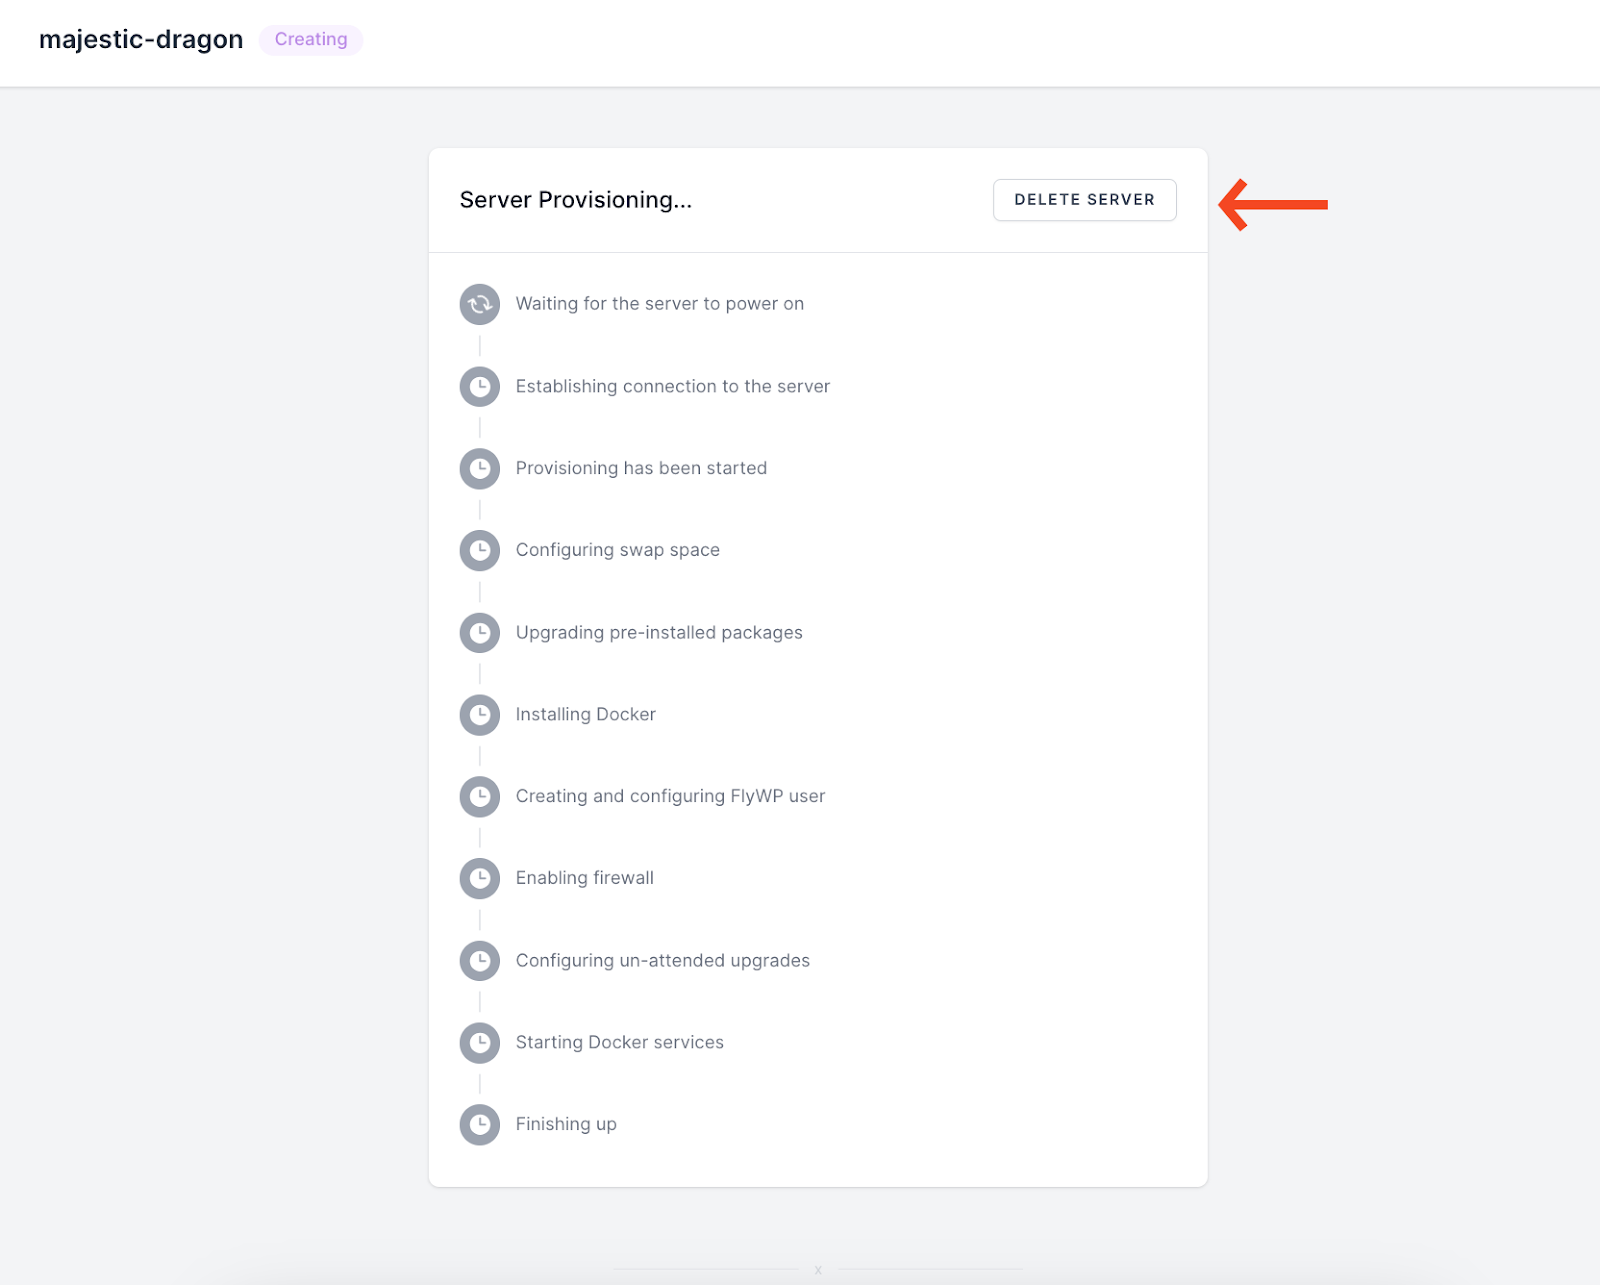
- You must be seeing the server provisioning process. Wait a bit to complete the process.
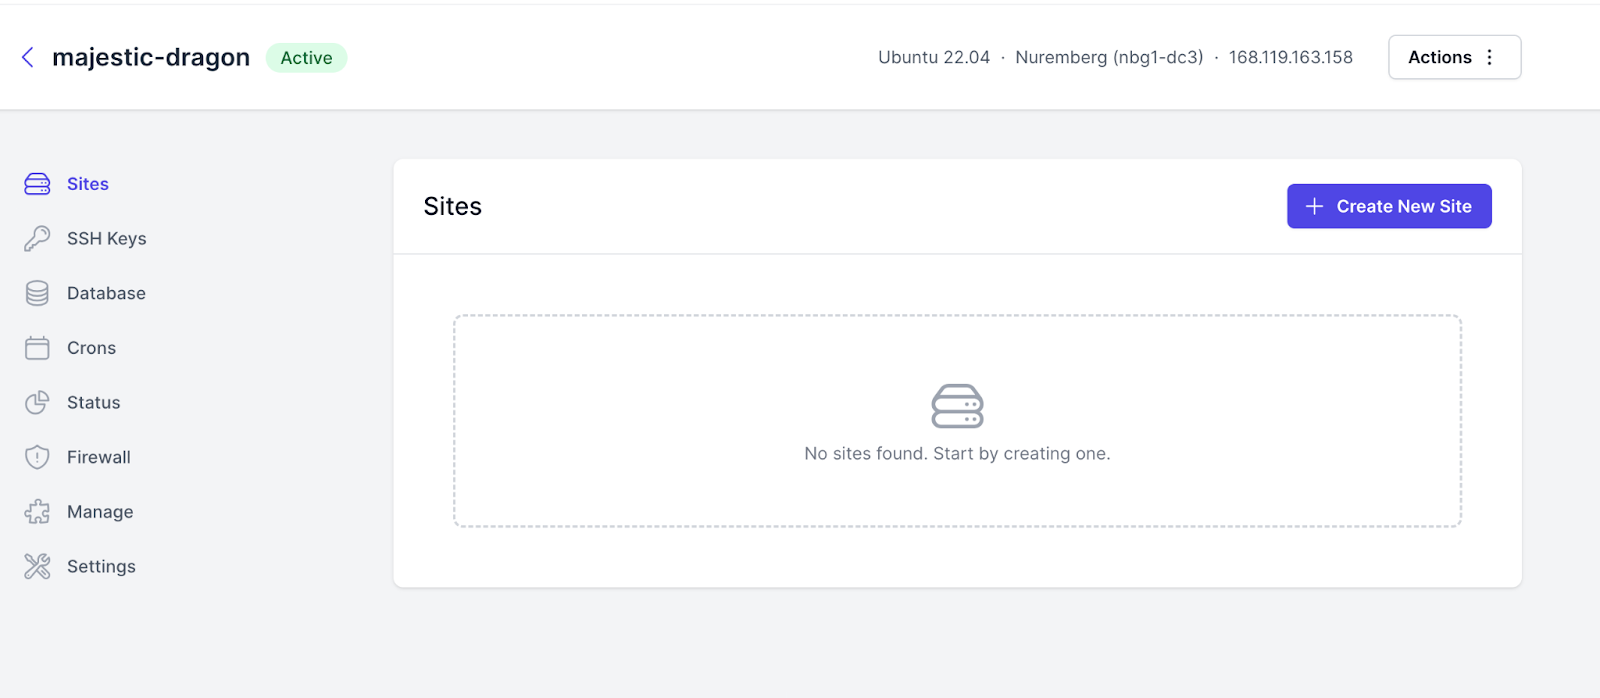
- Your server is ready to create and manage WordPress sites.
Creating a WordPress site with Hetzner Server
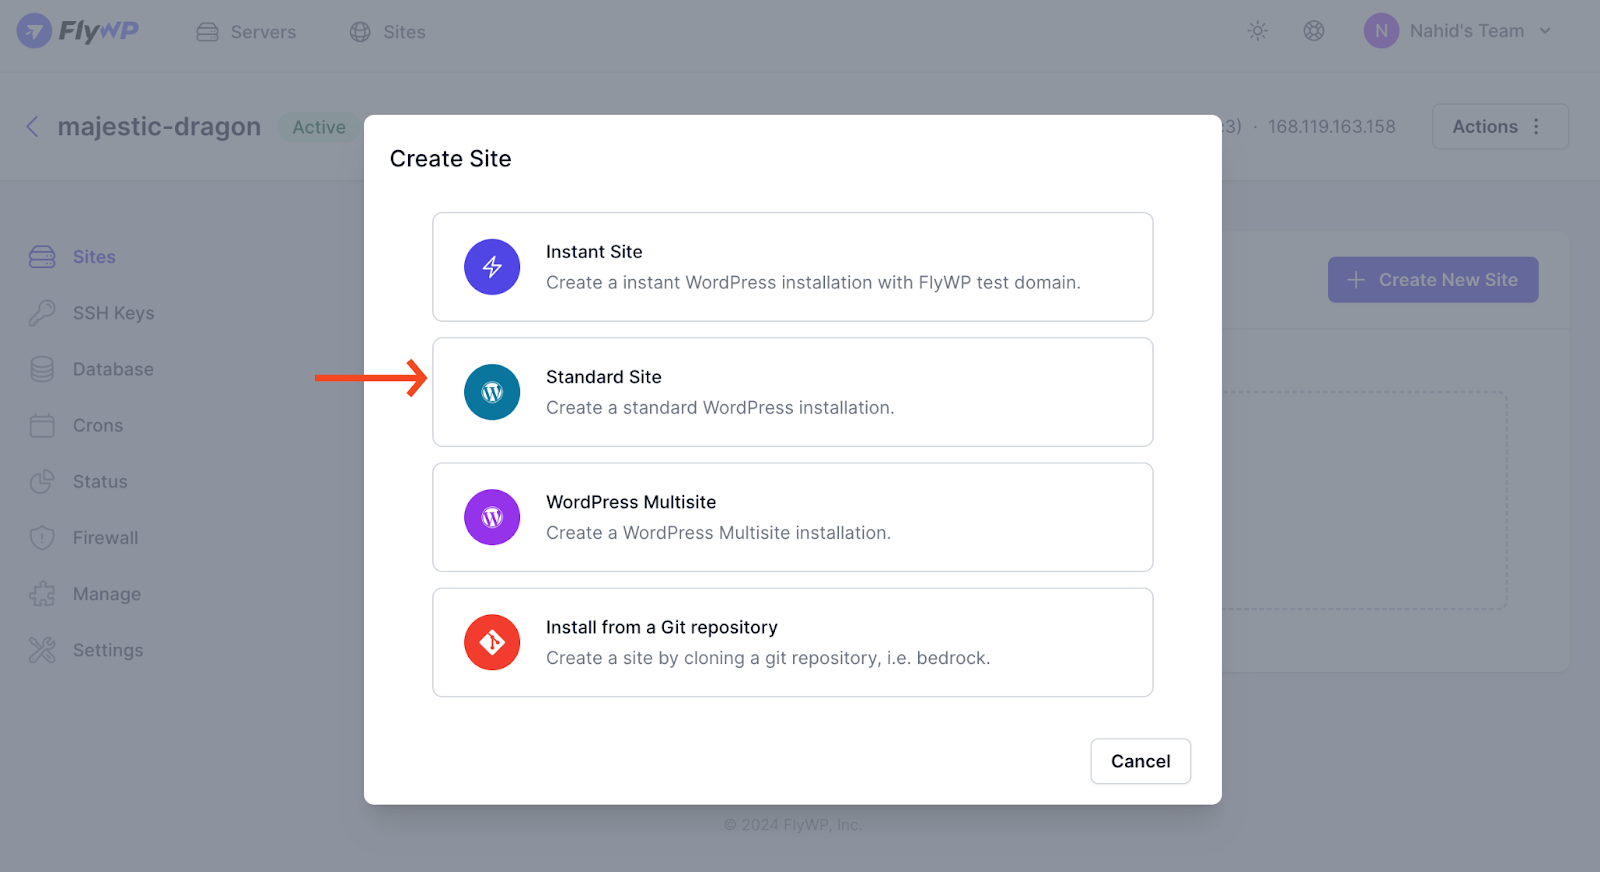
- Click on “Create New Site” and select the “Standard Site” option.
- You need to provide your site’s information here. Like domain name, PHP version, and verify your domain.
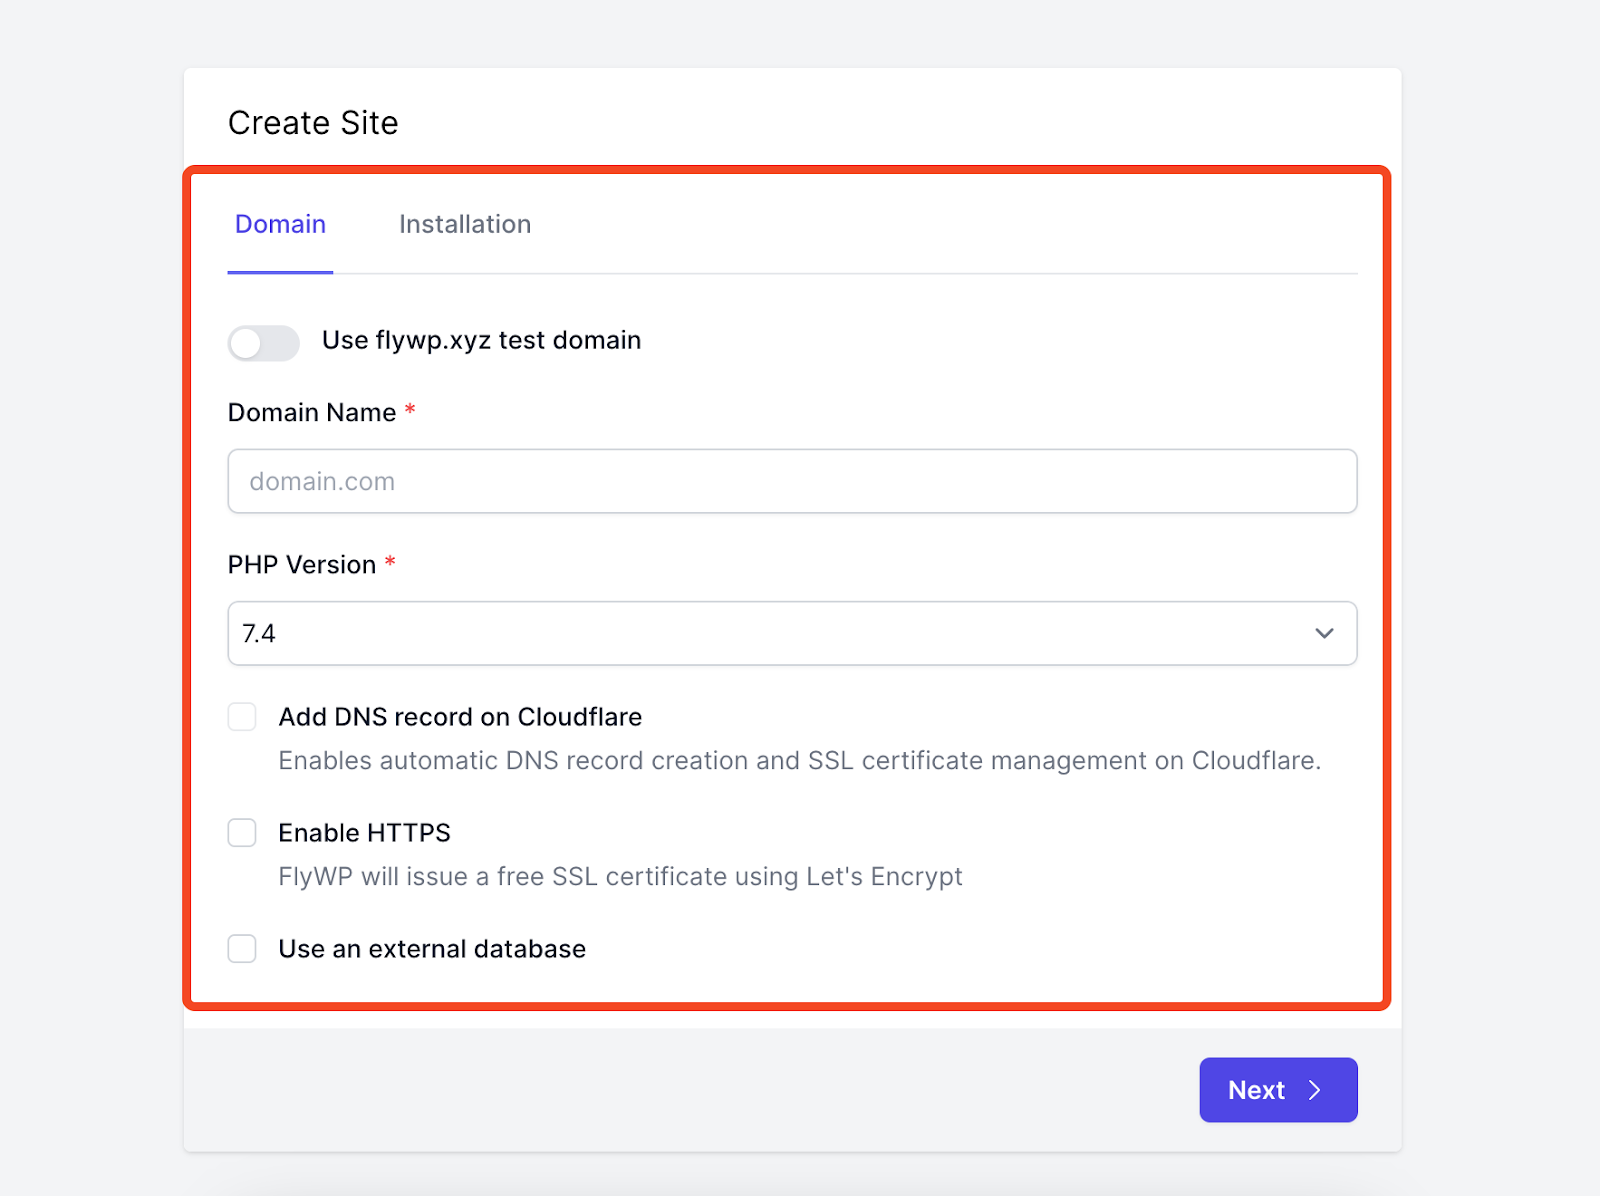
- But you can use our test domain feature by enabling the option. And then proceed to the next stage.

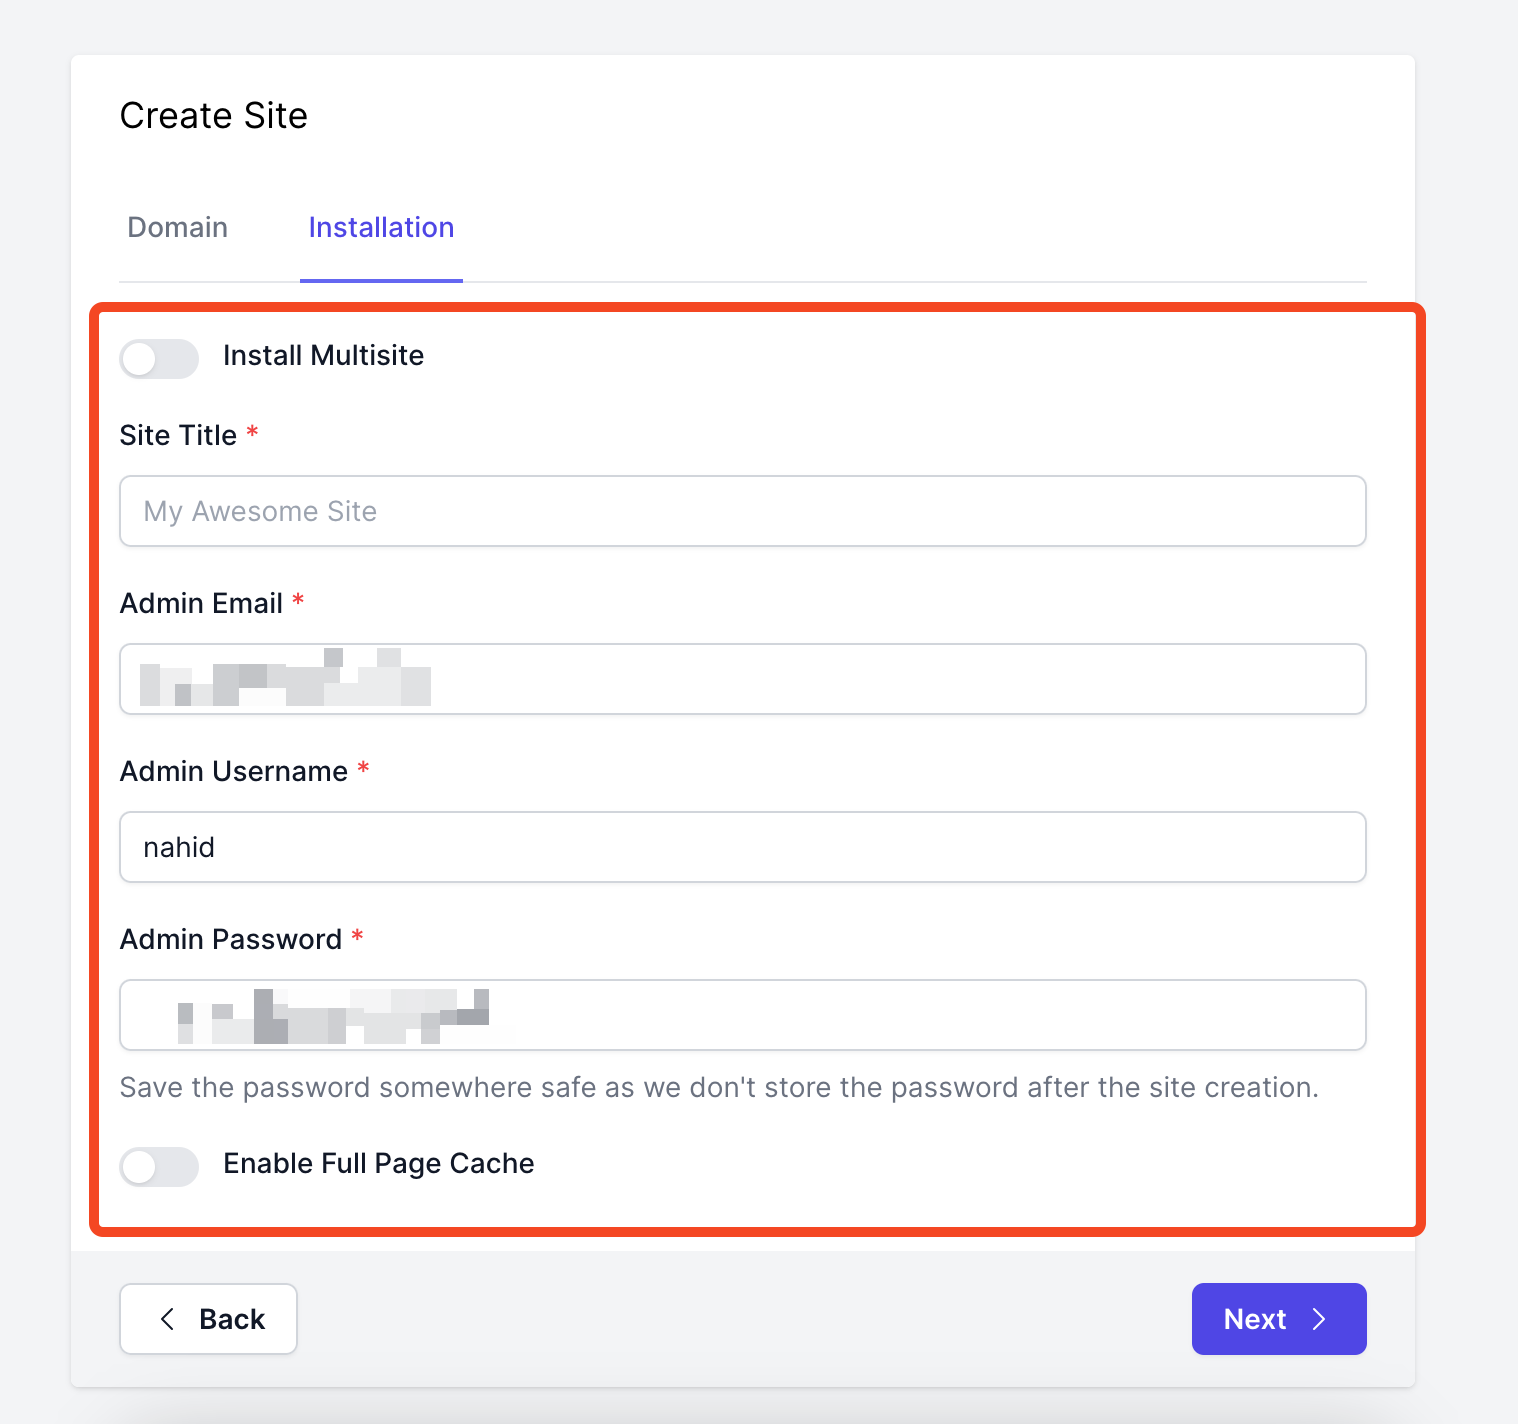
- Provide site name, admin email, username, password, and page cache (optional). Once done, hit the next button.
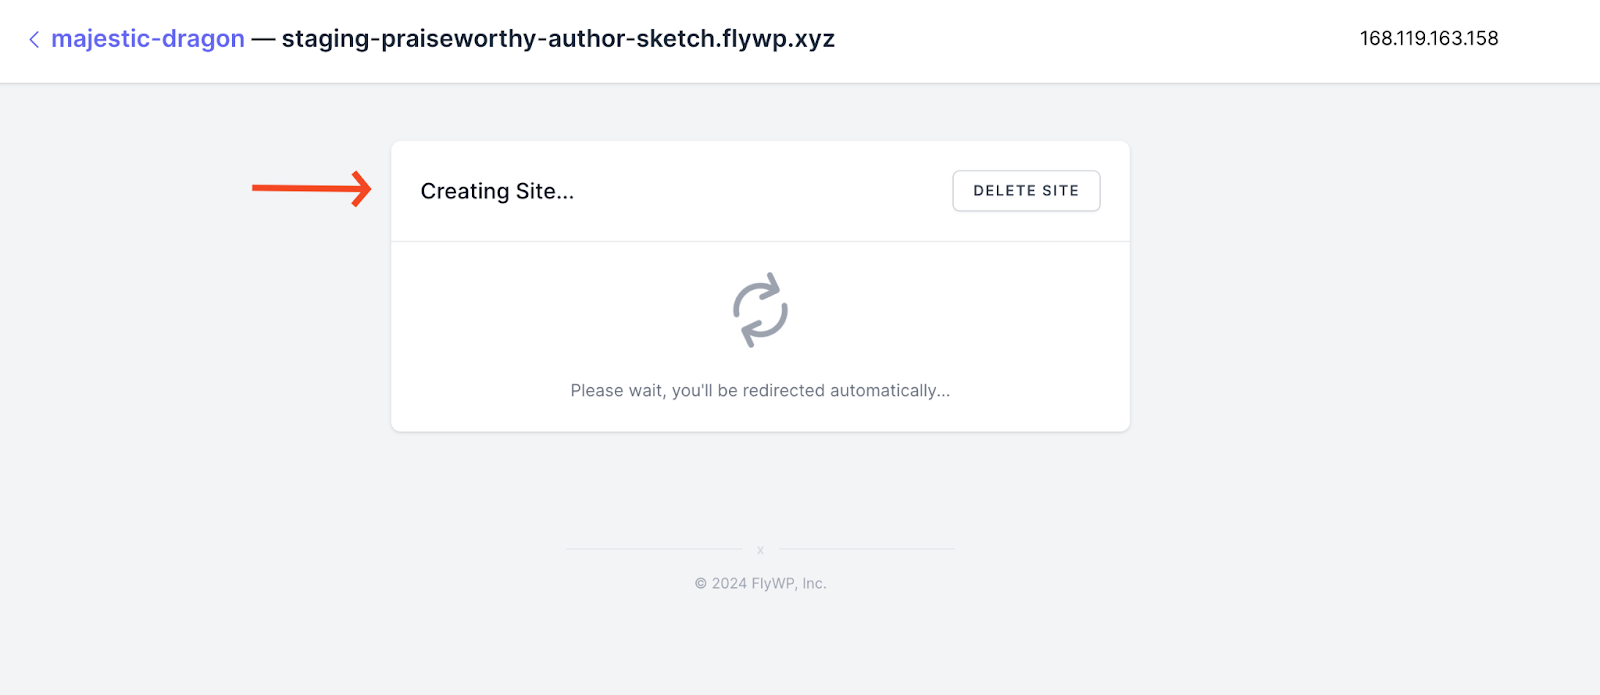
- You will see that your site has been created in less than a minute.
- See your site is ready.
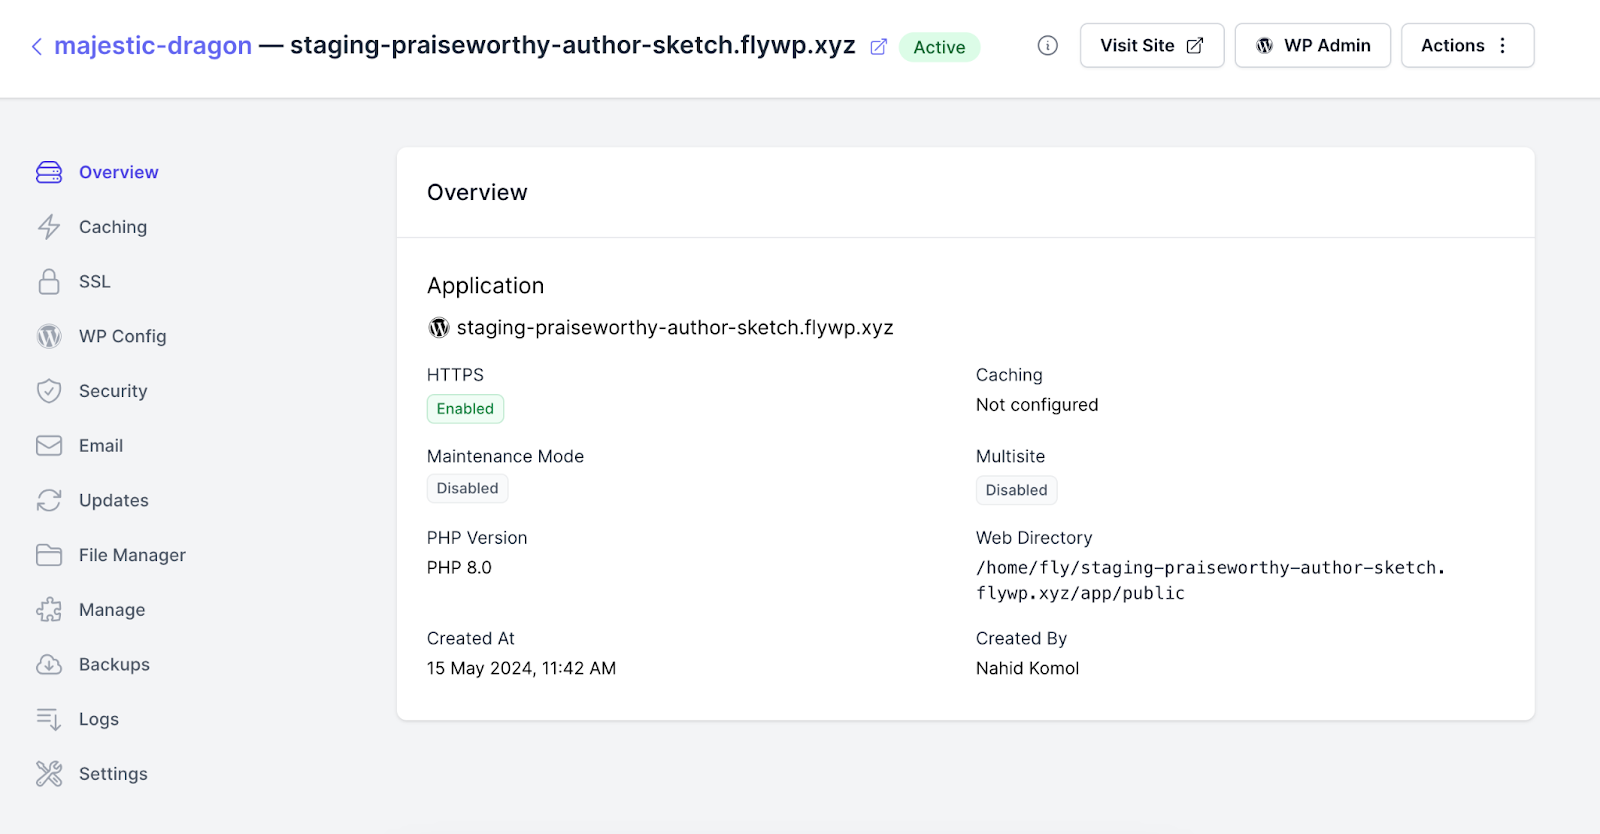
- Now you can directly visit your site from the “Visit Site”. Also, log in to your site from the magic login “WP Admin”.

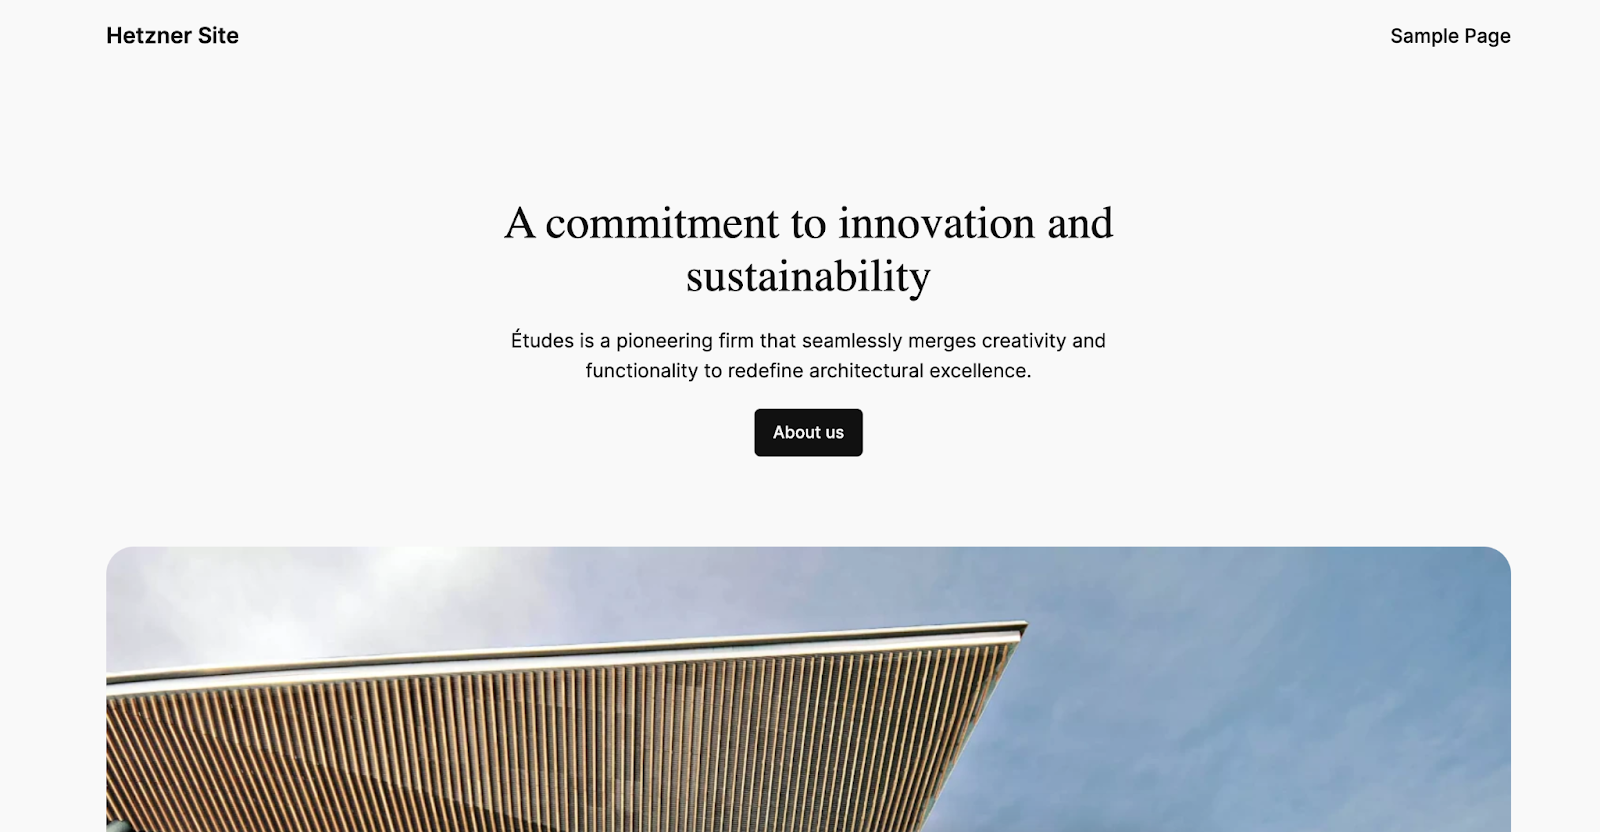
- Here’s the preview of the live site
- Here’s the preview after logging in through the Magic Login.
So this is how you can create and manage sites with FlyWP using the Hetzner server provider.