FlyWP makes spinning up new WordPress sites incredibly efficient with Site Blueprints. Instead of manually installing your favourite plugins, activating themes, configuring user accounts, and running post-deployment configurations every single time, you can use a template to automate the process.
To make things even faster, FlyWP now includes Global Blueprints. These are ready-made, optimisation-focused templates preconfigured directly by the FlyWP team. They appear alongside your own custom blueprints during site provisioning, giving you an instant, expert-vetted baseline for your production environments.
What are Global Blueprints?
While standard blueprints are custom templates created and managed by you or your team, Global Blueprints are built-in templates provided natively by FlyWP.
- Preconfigured Stack: They come pre-loaded with optimal core settings, essential utility configurations, and structural best practices.
- No Setup Required: They are instantly available on your account without requiring any initial composition or file management.
- Side-by-Side Availability: When launching a new site, you can choose between your own tailored team blueprints or a FlyWP Global Blueprint from a single dropdown interface.
How to Provision a Site Using a Global Blueprint
Using a Global Blueprint requires no changes to your standard workflow. You can select them directly during the server or site deployment phase.
1. Initiate Site Creation:
Log into your FlyWP dashboard, navigate to your desired server, and click the Create New Site button to launch the site installer.
2. Select the Blueprint Category:
In the site installation form, look for the Site Blueprint option under Installation page. Open the dropdown menu. You will see your existing custom team blueprints grouped alongside the new Global Blueprints preconfigured by FlyWP.
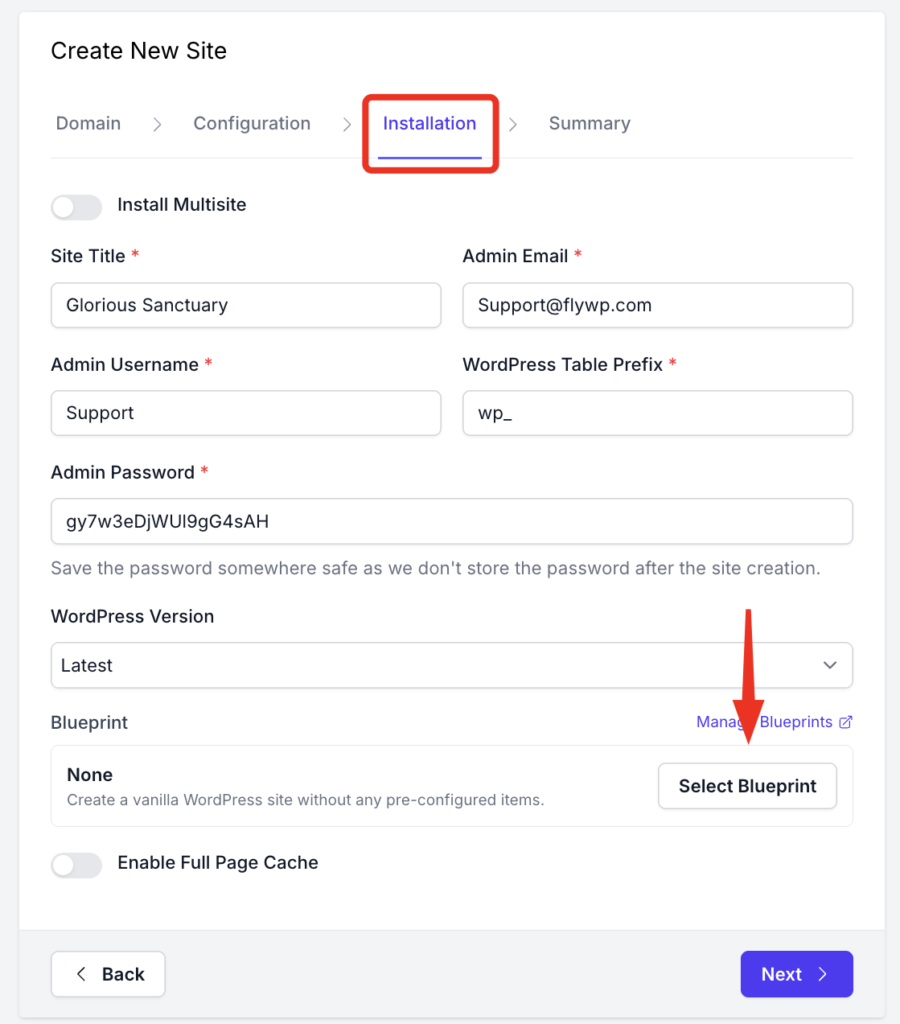
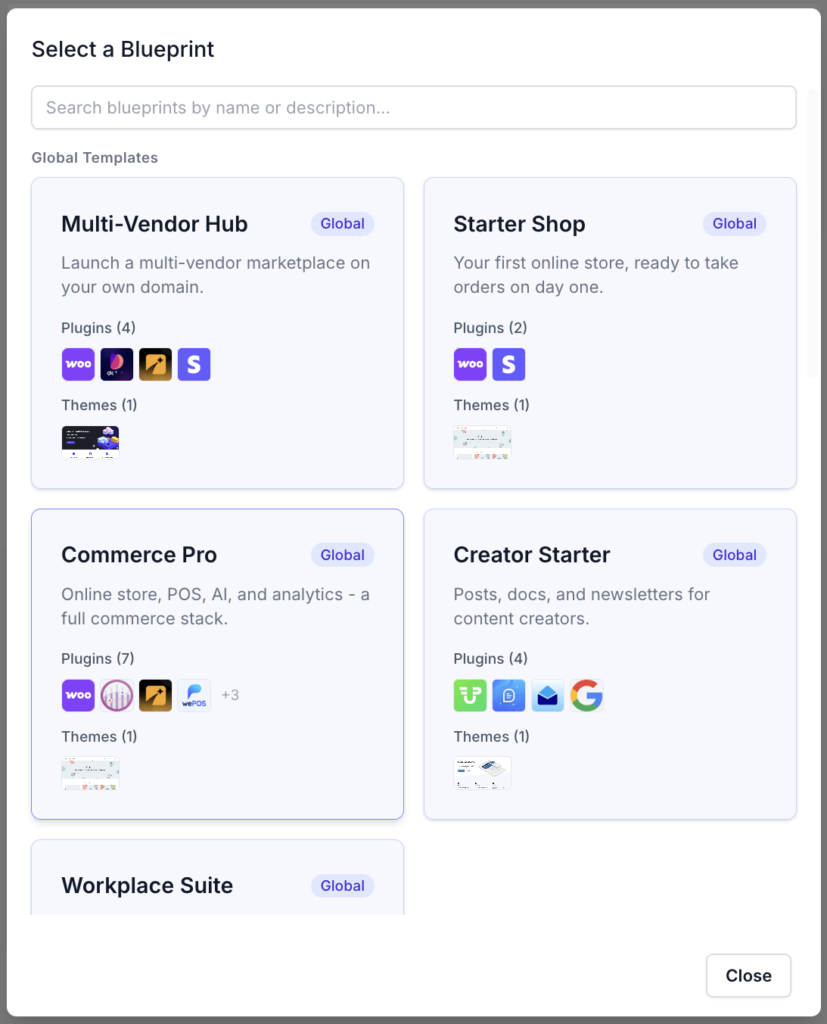
3. Review the Blueprint Configuration
Select the specific Global Blueprint you want to use. The interface will display a quick overview of the pre-packaged plugins, active themes, and default user configurations associated with it.
4. Finalise and Deploy
Fill out your remaining site details (such as domain name and PHP version) and click Create Site. FlyWP’s automated backend will take over, provisioning the Docker container, installing WordPress, and executing the blueprint payload.
Blueprint Options Breakdown
When choosing how to construct your site, it helps to understand how the two tiers of blueprints interact in your environment:
| Feature | Custom Blueprints (Your Team) | Global Blueprints (FlyWP) |
| Origin | Created manually by you or your agency team. | Pre-built and maintained directly by FlyWP. |
| Availability | Restricted to your specific team or account space. | Available universally to all FlyWP users out of the box. |
| Custom Themes | Supports premium themes via public .zip download URLs. | Uses highly optimised, stable repository frameworks. |
| Post-Deploy Scripts | Supports custom WP-CLI automation scripts. | Preconfigured with standardised server-level and application optimisations. |
Pro Tip: If you love a FlyWP Global Blueprint but need to inject a specific premium plugin or API key into it for every project, deploy a temporary site using the Global Blueprint, then add your modifications.