Overview
Swap space acts as overflow memory when your server’s RAM is fully utilized. While FlyWP allows you to adjust swap size, each server is already provisioned with an optimized swap configuration by default.
Note: The value shown in the dashboard (e.g., 1 GB) is simply the selectable option, not necessarily the currently optimized setup applied to your server.
Where to Find It
- Go to Server Dashboard
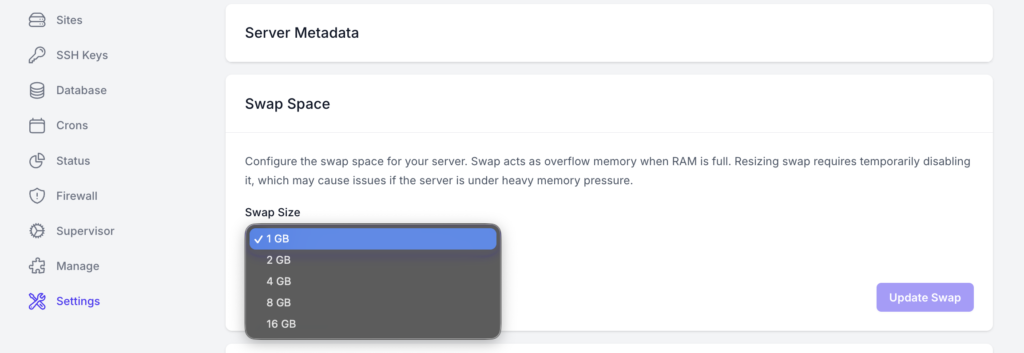
- Navigate to Settings
- Locate the Swap Space section
Default Behavior
- Every FlyWP server is configured with an optimized swap size automatically
- The dropdown displays preset values for manual adjustment
- You typically do not need to change this setting
When (and When Not) to Increase Swap
Avoid increasing swap unless necessary. In most cases, the default optimized configuration is sufficient.
Only consider increasing swap if:
- Your server consistently runs out of memory
- You notice performance issues due to memory pressure
- You are running unusually memory-intensive workloads
How to Increase Swap Space
If you’ve determined that increasing swap is necessary:
- Open the Swap Size dropdown
- Select your desired swap size:
- 1 GB
- 2 GB
- 4 GB
- 8 GB
- 16 GB
- Click Update Swap
Important Notes
- Updating swap may temporarily disable it during resizing
- Your server will be restarted and the entire process can take upto 5-10 minutes
- This can impact performance if your server is under heavy load
- Swap is slower than RAM, so it should not be used as a primary solution for insufficient memory
Recommendation
Stick with the default optimised configuration unless you have a clear reason to change it. If you frequently need more memory, consider upgrading your server’s RAM instead of relying on swap.