Bulk Migration
Bulk Migration moves every WordPress site from one hosting server onto a FlyWP server in a single run. You give FlyWP SSH access to your old server once, it finds the sites for you, and it copies them across one at a time while you watch the progress. Your old sites stay online the whole time, and nothing switches over until you say so.
If you only need to move one site, the existing single-site methods are simpler. Bulk Migration is for the case where you are leaving a host and want everything on it.
Supported sources
Section titled “Supported sources”| Source | Status | Guide |
|---|---|---|
| Cloudways | Available | Bulk Migration from Cloudways |
Support for more hosting providers is on the way.
Before you start
Section titled “Before you start”- Create your FlyWP server first. A bulk migration is started from the server you are migrating onto, so the destination has to exist before you begin. There is no step in the wizard for choosing one.
- Get SSH access to your old server: an IP address, a username, and a password. Your source guide above covers exactly where to find these.
- Check you have room. The destination server needs enough free disk for every site you select, plus working space. FlyWP measures this for you before anything is copied.
How a bulk migration works
Section titled “How a bulk migration works”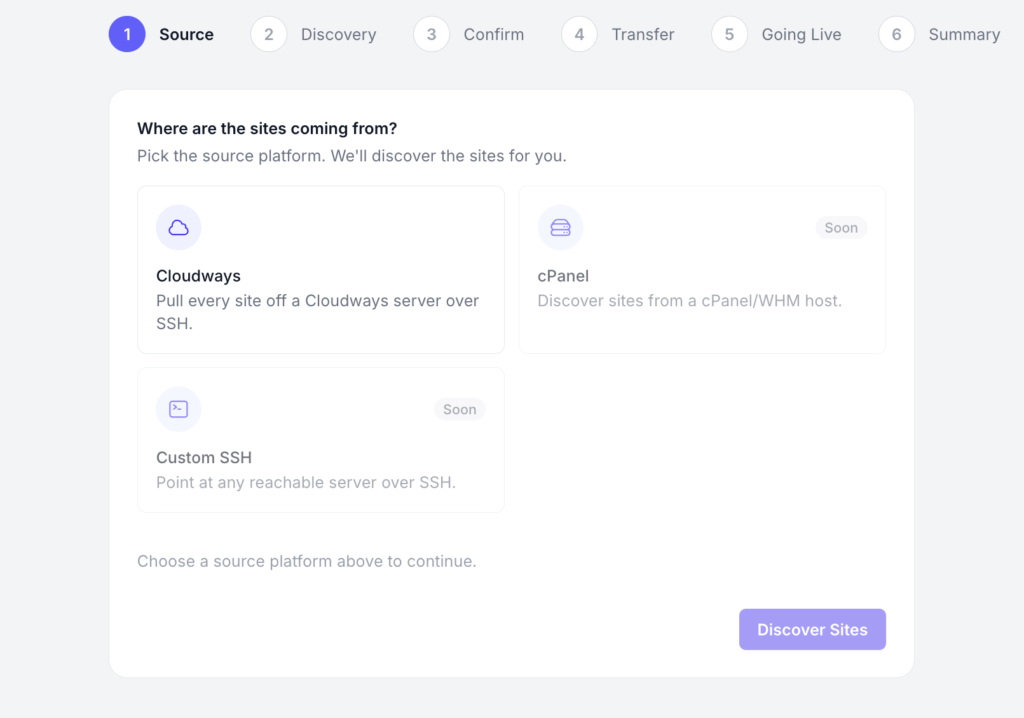
The wizard runs in six steps. Two of them wait for you; the rest run on their own.
- Source: you pick the platform you are migrating from and enter its SSH details.
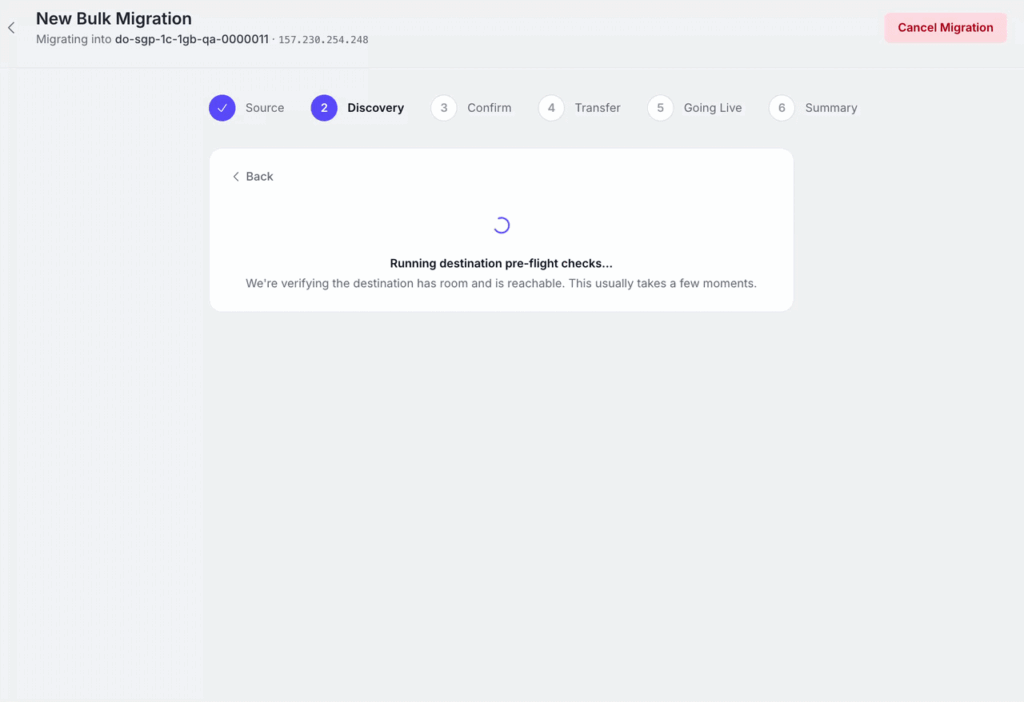
- Discovery: FlyWP connects to your old server, starts the migration agent on it, and lists every WordPress site it finds. Sites whose files are found but whose database cannot be read are excluded automatically, with the reason shown. This step then runs pre-flight checks against the destination server: that it has room (Destination storage), that the source is authorized on it (Source authorized on destination), and that the two servers can reach each other (Destination access verified).
- Confirm: you decide. Under the heading Review your migration, you see every site that was found, its size, and whether the selection fits the destination. Nothing has been copied at this point. Tick the sites you want and click Start Migration.
- Transfer: each selected site is copied and verified, one site at a time. Large sites take a while; the page shows which site is in progress and how far along it is, with counts for Queued, In progress, Ready to go live, and Failed.
- Going Live: you decide again. Once every site has been copied and verified, they wait. When you click Go Live, FlyWP stands each site up on the destination and serves it on a temporary test domain so you can check it before moving your real domain.
- Summary: what the run produced, with a link to your migrated sites and, if anything failed, a retry button.
Note: nothing is copied before you click Start Migration, and nothing is stood up on the destination before you click Go Live. Both are deliberate stopping points.
Starting a bulk migration
Section titled “Starting a bulk migration”- Log in to your FlyWP dashboard.
- Open the server you want to migrate onto.
- On the Sites tab, click Migrate.
- In the Migrate Your Site window, choose Bulk Migration.
- Pick your source platform, enter its SSH details, and click Discover Sites.
- Follow the wizard through to Go Live.
Note: you can close the tab at any point. The wizard remembers where the migration got to, so reopening it from the Migrations page puts you back on the right step. A migration in progress keeps running whether or not the page is open.
What gets migrated
Section titled “What gets migrated”For each site, FlyWP copies the site’s files and its database, and carries over the PHP, WordPress, and database versions it was running on the old server.
The following are not migrated:
- Server-level configuration: cron jobs, custom server settings, and anything outside the site’s own directory.
- Email. Mail hosted on the old server does not move.
- DNS. Your domains keep pointing at the old host until you change them yourself. See Going Live and DNS Cutover.
- WordPress multisite networks. Multisite is not yet supported by bulk migration. Move those networks with one of the single-site methods listed under Next Steps.
Limits
Section titled “Limits”| Limit | Value |
|---|---|
| Migrations running at once, per team | 3 |
| Migrations per source server | 1 at a time, across all of FlyWP |
| Sites copied at once | 1 (sequential, not parallel) |
| Sites per migration | No fixed limit |
| Time allowed to find sites | 10 minutes |
A migration that finishes with some sites failed stays available for retry for 15 minutes. After that it is closed out and releases its hold on the source server, and you would need to start a new migration for the sites that failed.
Only one migration can run against a given source server at a time, across all of FlyWP. If someone else on your team already has one running against the same IP address, yours will not start until theirs finishes.
Any team member who can see your servers can start a bulk migration. There is no separate plan or role requirement.
Destination storage
Section titled “Destination storage”At the Confirm step, FlyWP adds up what your selection actually needs and compares it against the destination’s free space. The estimate covers four things:
- Site data: the files and databases being copied.
- Working copy while each site goes live: temporary space for the largest single site.
- Docker and WordPress per site: roughly 600 MB for each site’s container and clean WordPress install.
- Free space kept in reserve: 5% of the payload, or 2 GB, whichever is larger, so the server is never filled to the last byte.
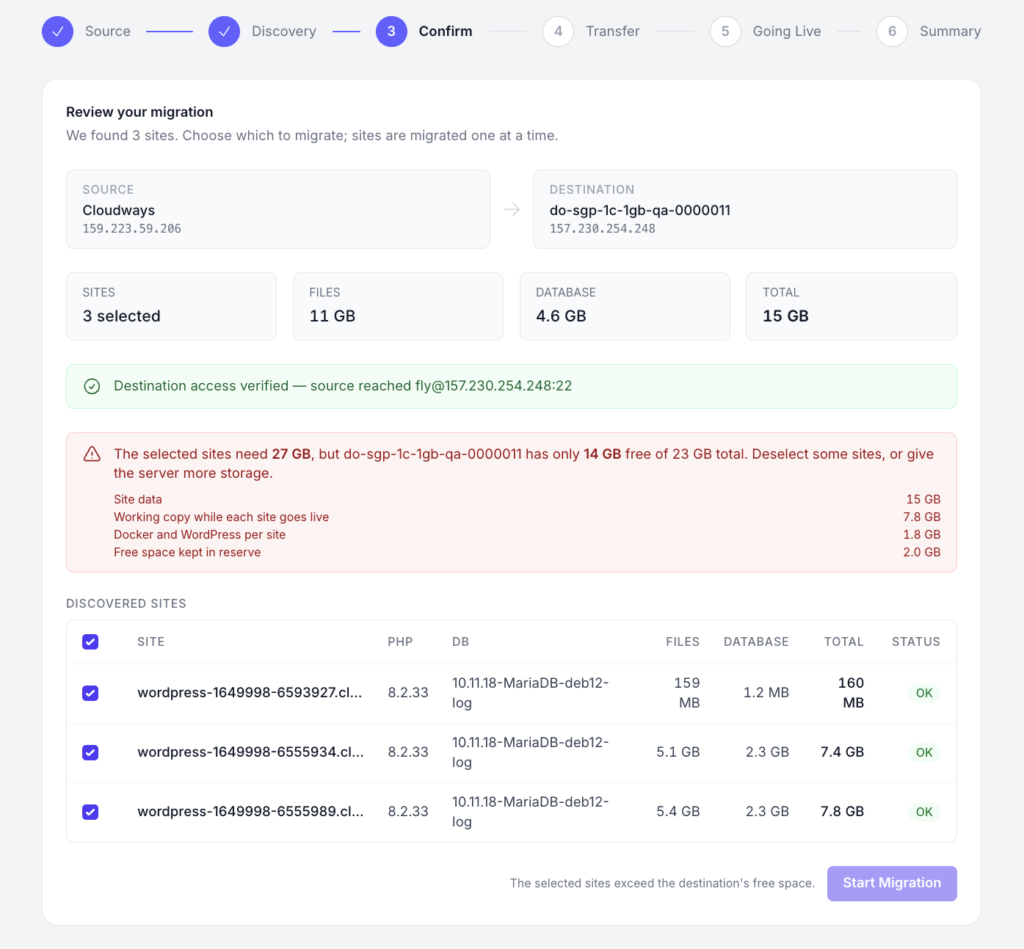
If the selection does not fit, Start Migration is disabled and you are told how much is needed against how much is free. Deselect some sites and run them as a second migration, or give the server more storage.
If FlyWP cannot measure the free space, or a site did not report its size, you will see a warning instead of a block: the migration is allowed to go ahead, but it may run out of room.
How it works under the hood
Section titled “How it works under the hood”You do not need any of this to run a migration, but it is useful to know what is happening on your servers.
- FlyWP connects to your source server over SSH and installs a small migration agent on it. The agent is what reads your sites and copies them.
- Your site data goes directly from your old server to your FlyWP server. It does not pass through FlyWP’s own infrastructure at any point.
- Your source server needs to be able to make outbound HTTPS connections, so the agent can report progress back.
- On the destination, FlyWP connects as the
flyuser using a temporary key created for that migration and removed afterwards. - The SSH credentials you enter are encrypted at rest and used only for that migration.
- When the migration settles, the agent is stopped and removed from your source server.
Managing your migrations
Section titled “Managing your migrations”Click Migrations in the sidebar to see every bulk migration for your team, past and present.
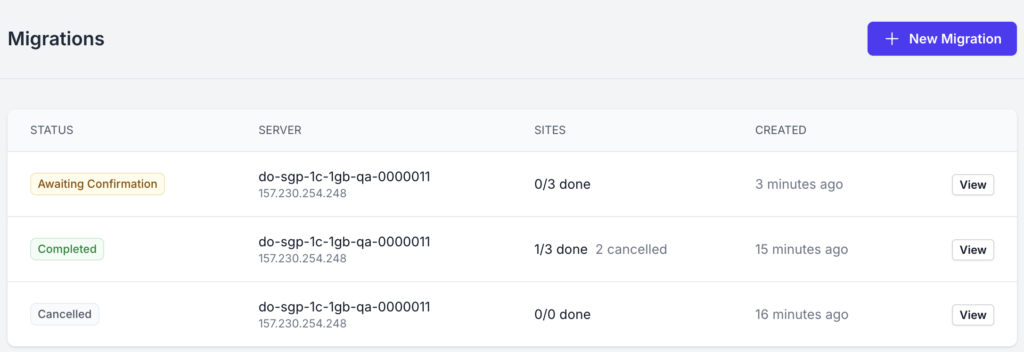
- Resuming: click into any migration to return to the step it is on.
- Cancelling: a migration can be cancelled at any point before it finishes, from the Cancel Migration button in the wizard header. Sites that have already gone live stay live; the rest stop where they are.
- Retrying failures: if a migration finishes with some sites failed, a retry button appears on the summary, labelled with the number that need it, such as Retry 3 Failed Sites. The failed sites are copied and verified again from the start, and then wait for you to take them live. Sites that already migrated are left exactly as they are.
Note: cancelling a migration that has already settled with failures gives up the retry. Retry the failed sites first, and cancel only once you are done with them.
Next Steps
Section titled “Next Steps”- Bulk Migration from Cloudways
- Going Live and DNS Cutover
- Troubleshooting Bulk Migration
- How to Migrate WordPress Sites from Any Hosting to FlyWP
- How to migrate a site manually
- How to Clone and Transfer WordPress Sites on FlyWP
Still stuck? How can we help?