Send FlyWP Alerts to n8n
n8n is a workflow tool. A FlyWP webhook starts an n8n workflow each time an alert arrives, and from there you can post to any app n8n supports.
Before you start
Section titled “Before you start”- A paid FlyWP plan, and the team Owner or Team Admin role.
- An n8n workflow that can receive web requests. Use the n8n address that is reachable from the internet over HTTPS.
Step 1: Create the Webhook node in n8n
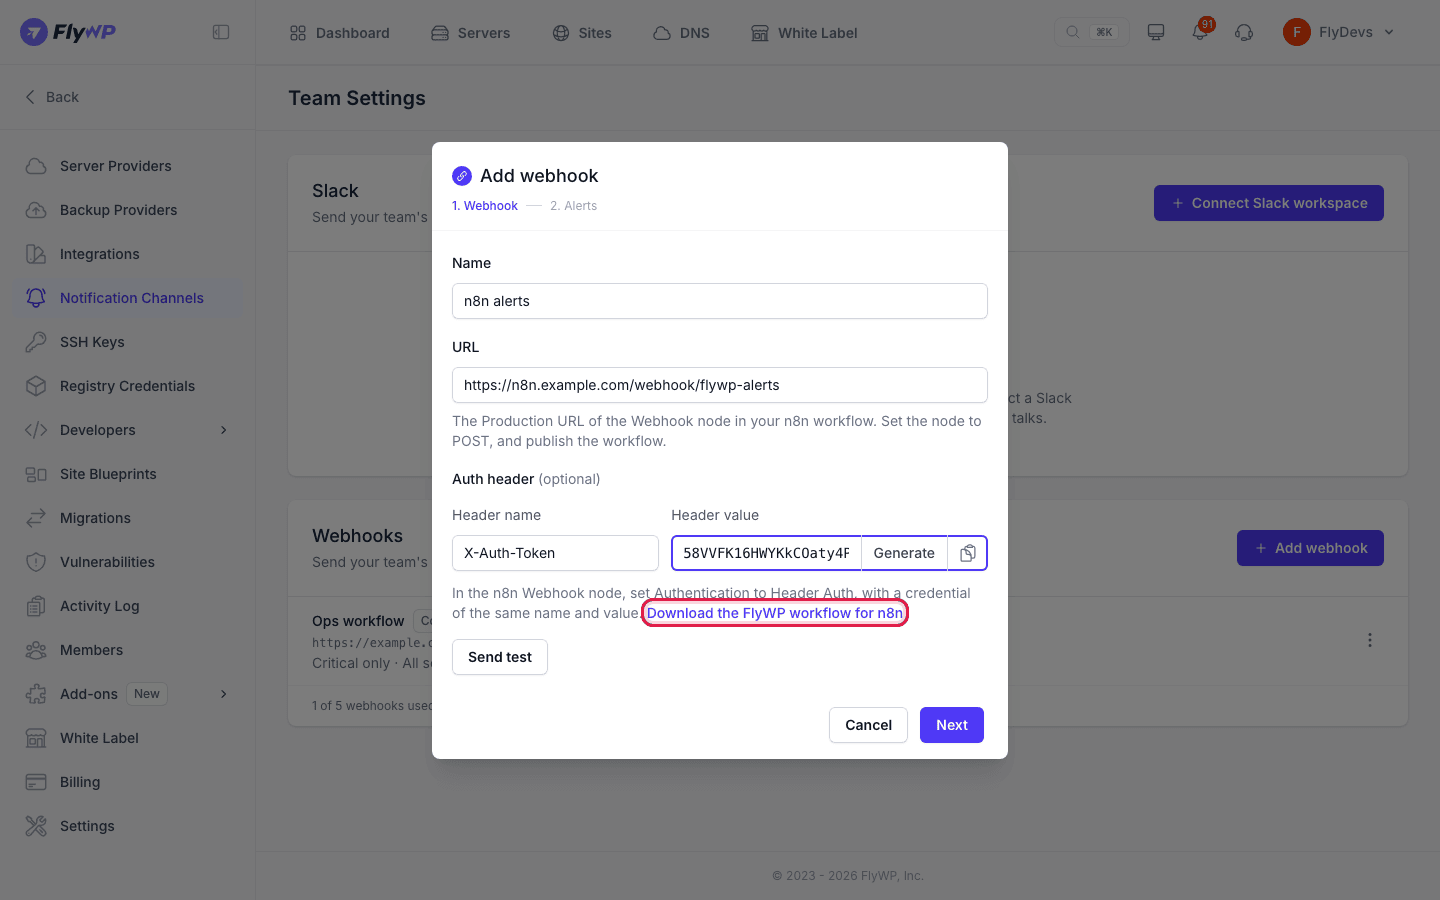
Section titled “Step 1: Create the Webhook node in n8n”You can build the workflow yourself, or start from the one FlyWP provides. To use it, click Download the FlyWP workflow for n8n in the Add webhook form, then import the file in n8n. It has a Webhook node set to POST with Header Auth, a check for test messages and a check for recoveries, ready for you to connect your own apps.
To build it yourself:
- In n8n, create a workflow and add a Webhook node.
- Set HTTP Method to POST.
- Set a Path, for example
flywp-alerts. If two FlyWP teams send to one n8n, give each team its own path. - Set Authentication to Header Auth.
- Create a new Header Auth credential:
- Name: a header name, such as
X-Auth-Token. - Value: a long random value. You can generate one in FlyWP in the next step, and paste it here.
- Name: a header name, such as
Step 2: Copy the Production URL and publish
Section titled “Step 2: Copy the Production URL and publish”- In the Webhook node, open the Production URL tab and copy the address. Do not use the Test URL: it contains
/webhook-test/and works only while you listen for a test event in n8n. - Publish the workflow. A webhook on the Production URL answers only while the workflow is published.
Step 3: Add the webhook in FlyWP
Section titled “Step 3: Add the webhook in FlyWP”-
Go to Team Settings → Notification Channels.
-
In the Webhooks card, click Add webhook.
-
Enter a Name, such as
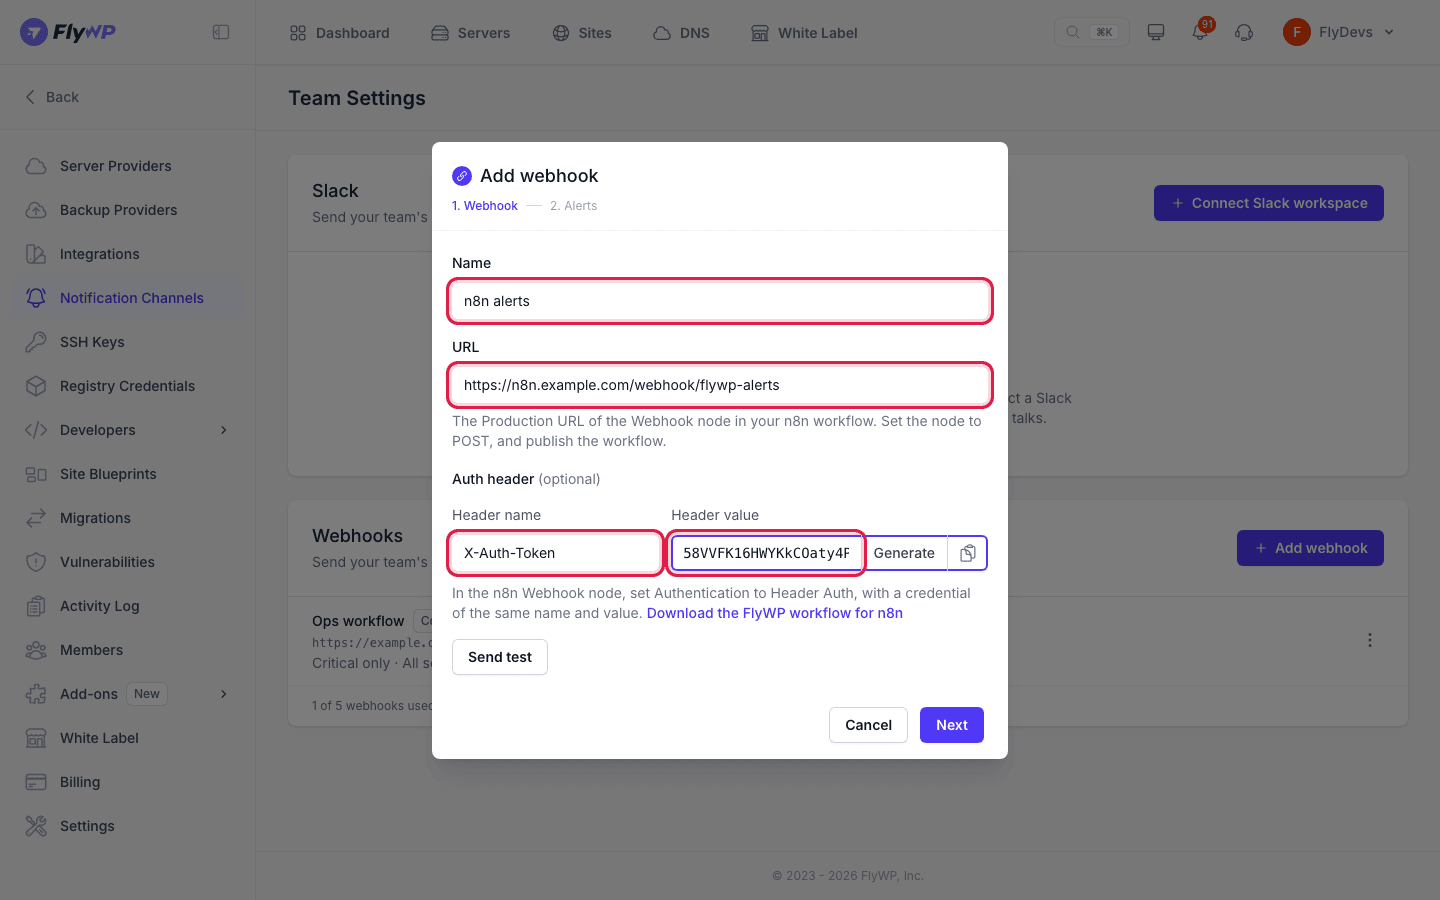
n8n alerts, and paste the Production URL into URL. -
Under Auth header, enter the same Header name as the n8n credential. Click Generate for a Header value, copy it with the copy button, and use the same value in the n8n credential. The name and value must match in both places.
-
Click Send test. FlyWP should show Delivered. In n8n, the Executions list shows a run.
-
Click Next. Choose the alerts level and the servers, then click Save.
Step 4: Use the alert in your workflow
Section titled “Step 4: Use the alert in your workflow”n8n puts the JSON body in a body field. In an expression, read the fields like this:
| You want | Expression in n8n |
|---|---|
| The headline | {{ $json.body.title }} |
| The severity | {{ $json.body.severity }} |
| The site | {{ $json.body.site.domain }} |
| A link back to FlyWP | {{ $json.body.url }} |
| Whether it is a recovery | {{ $json.body.recovery }} |
| Whether it is a test | {{ $json.body.test }} |
Add an If node on {{ $json.body.recovery }} to send "problem" and "recovered" messages differently. Add another on {{ $json.body.test }} to ignore the test from Send test. The workflow FlyWP provides already does both.
If it does not work
Section titled “If it does not work”| What you see | What to check |
|---|---|
| Failed: The receiver answered 404 Not Found. | This usually means the URL is the Test URL, or the workflow is not published. Use the Production URL and publish. |
| Failed: The receiver answered 403 Forbidden. | This usually means the header name or value in FlyWP does not match the n8n credential. |
| Failed: The certificate of … is not valid. | The n8n address needs a valid HTTPS certificate. |
| Failed: No answer in 10 seconds. | The workflow takes too long to answer. In the Webhook node, answer right away and run the slow steps after it. |
| Failed: The address must start with https://. | Use the https:// address of your n8n. |
| Failed: This address is not reachable from the internet. | n8n runs on a private or local address. Use a public HTTPS address. |
Open Delivery log on the webhook to see the answer n8n gave for each delivery.
Related guides
Section titled “Related guides”- Webhooks for Notification Channels: the full webhook reference, the JSON message and the alert codes.
- Notification Channels: alert levels and which servers and sites a channel gets.
Still stuck? How can we help?
View as Markdown