FlyWP allows you to seamlessly connect your pCloud account to store your website backups securely in the cloud. This guide will walk you through the process of adding pCloud as a backup provider and configuring it for your sites.
Step 1: Add pCloud as a Backup Provider
First, you need to connect your pCloud account to your FlyWP team.
- Navigate to Team Settings from your FlyWP dashboard.
- Select Backup Providers from the sidebar.
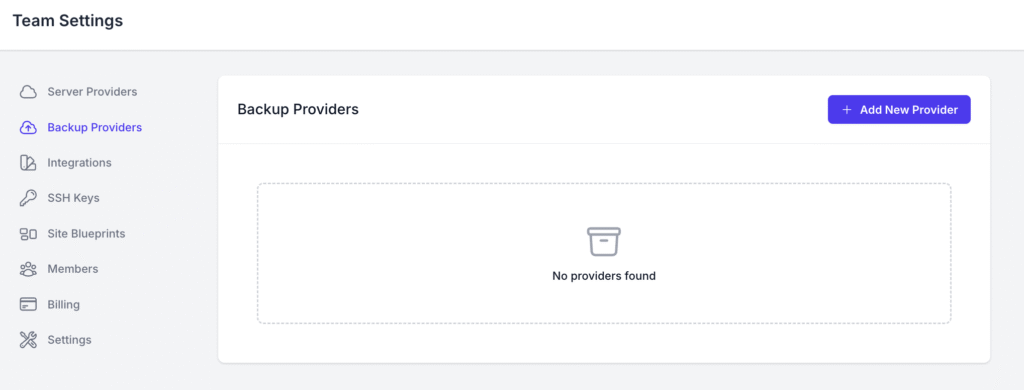
- Click the + Add New Provider button.
- A window will appear with a list of providers. Select pCloud.
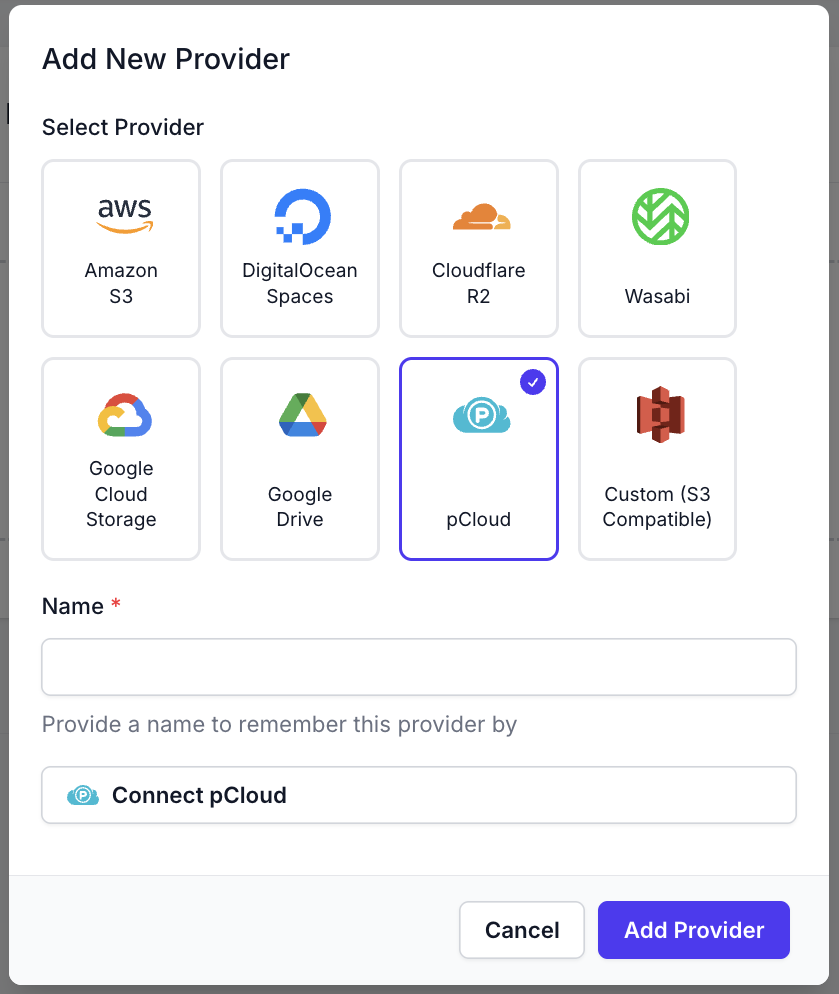
- Give your provider a recognisable name (e.g., “My Personal pCloud”).
- Click the Connect pCloud button. You will be redirected to pCloud to authorise FlyWP to access your account.
Step 2: Prepare Your pCloud Account
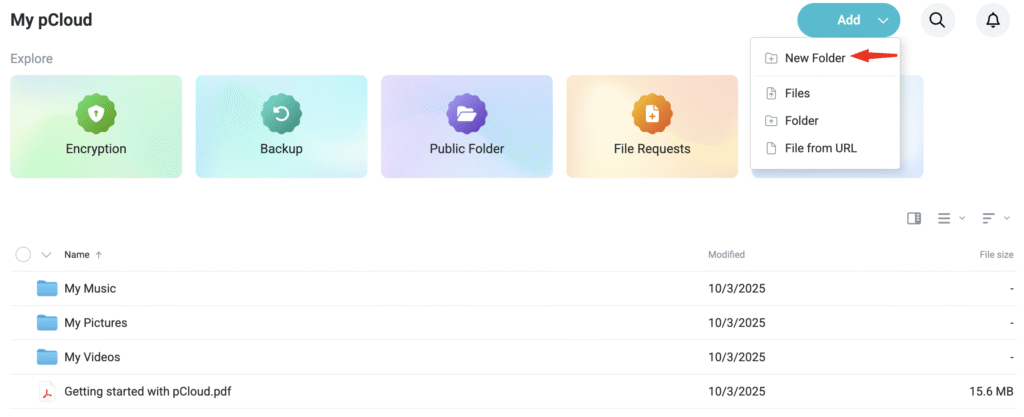
Before you can configure backups for a site, you need a dedicated folder in your pCloud account where FlyWP will store the backup files.
- Log in to your pCloud account in a new browser tab.
- Create a new folder. We recommend naming it something clear, like FlyWP Backups.
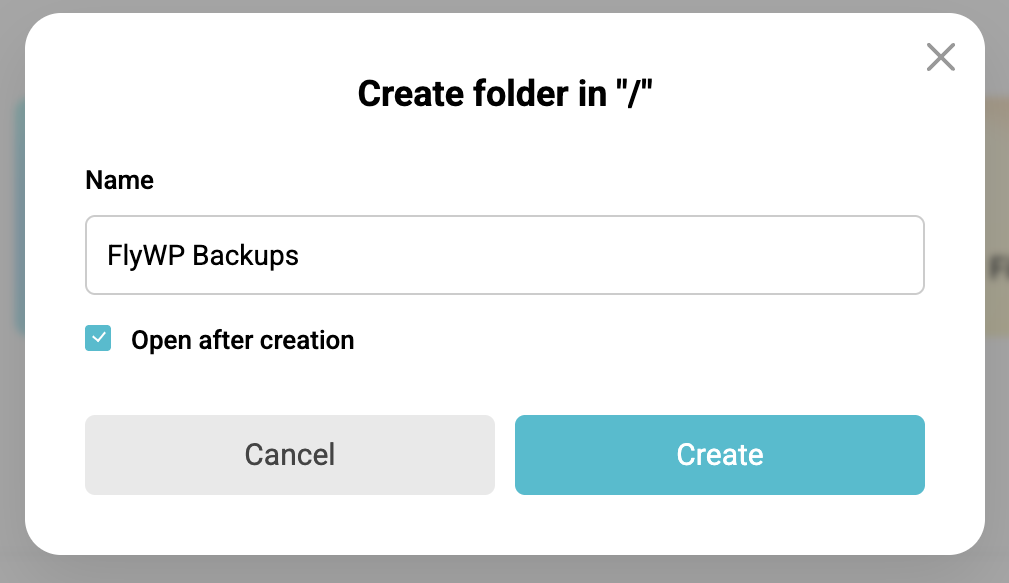
- Open the newly created folder.
- Look at the URL in your browser’s address bar. You will see something like my.pcloud.com/#/filemanager?folder=FOLDER_ID. The FOLDER_ID is a string of numbers.

- Copy this numeric Folder ID. You will need it in the next step.
Step 3: Configure Backups for Your Site
Now you can tell a specific site to use your newly configured pCloud provider.
- Navigate to the site you want to back up within FlyWP.
- Go to the Backups tab in the site management sidebar.
- Click on the Backup Settings button.
- In the Backup Provider dropdown, select the pCloud provider you created in Step 1.
- In the Root Folder ID field, paste the numeric Folder ID you copied from the pCloud URL in Step 2.
- Configure your desired Backup Retention, Frequency, and other settings.
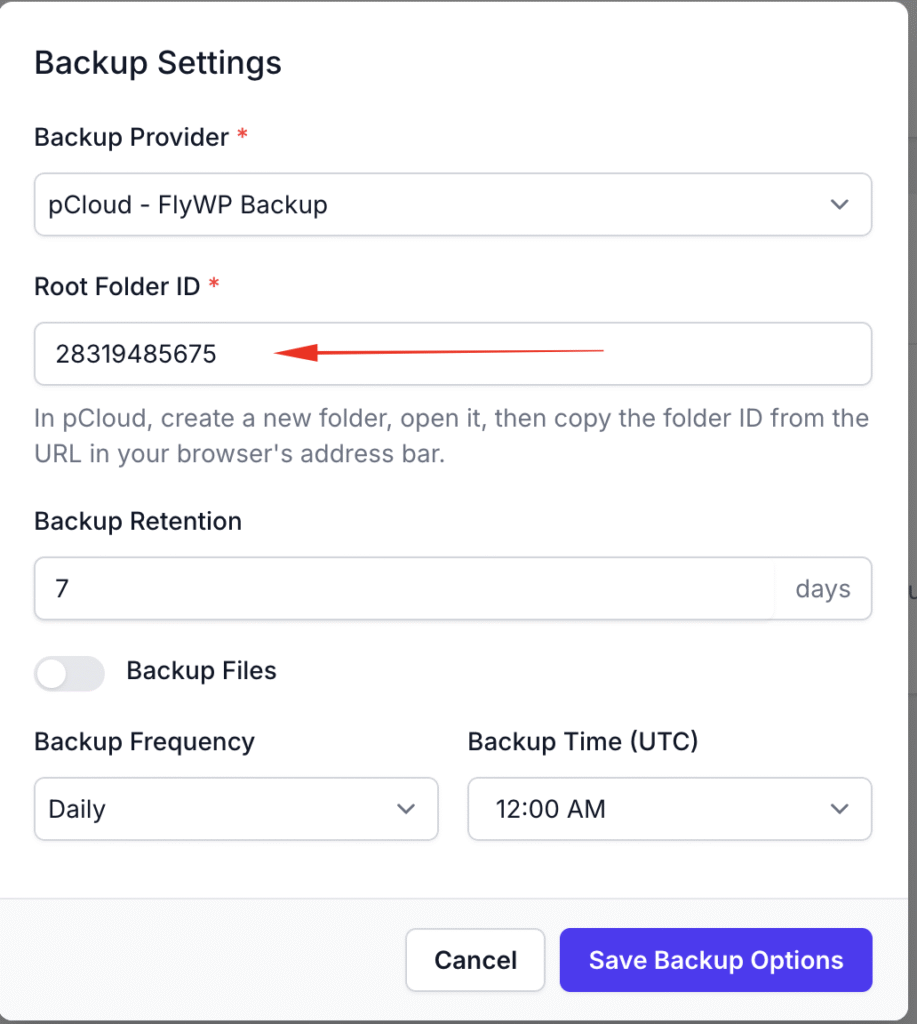
- Click Save Backup Options.
That’s it! Your site’s backups will now be automatically saved to the specified folder in your pCloud account according to the schedule you set.