
How to Configure DigitalOcean Spaces?
DigitalOcean Spaces is a scalable, secure, and cost-effective object storage service from DigitalOcean. Designed to be a direct competitor to Amazon S3, Spaces offers seamless integration with DigitalOcean’s existing suite of products, including Droplets and Kubernetes. By using DigitalOcean Spaces with your applications:
- Cost-Efficiency: Often more affordable than traditional storage providers.
- Performance: Integrated with DigitalOcean’s network for faster content delivery.
- Security: Built with DigitalOcean’s robust security infrastructure.
To add a backup provider with DigitalOcean Spaces, please follow the steps below:
– Log into your account
– Navigate to your project
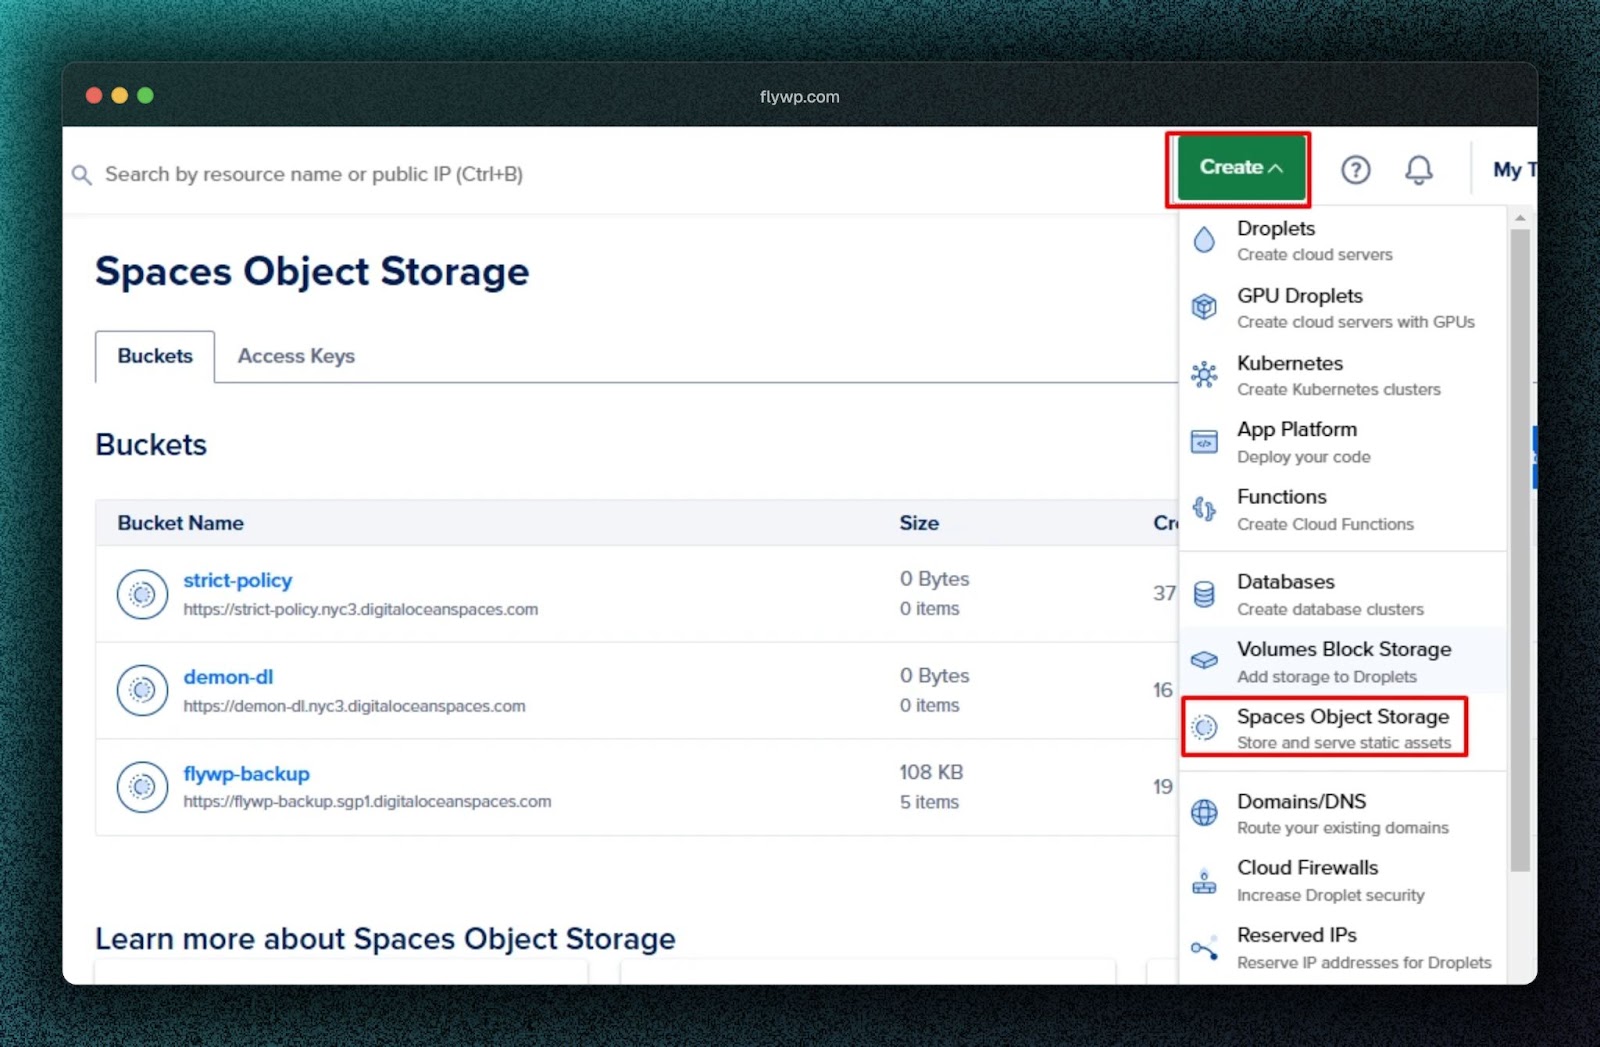
– Click on “Create” > “Spaces Object Storage”
– Follow along the steps to create an Object Storage Bucket
– Create an API key for access
First, create a Spaces Object Storage from your DigitalOcean Dashboard.
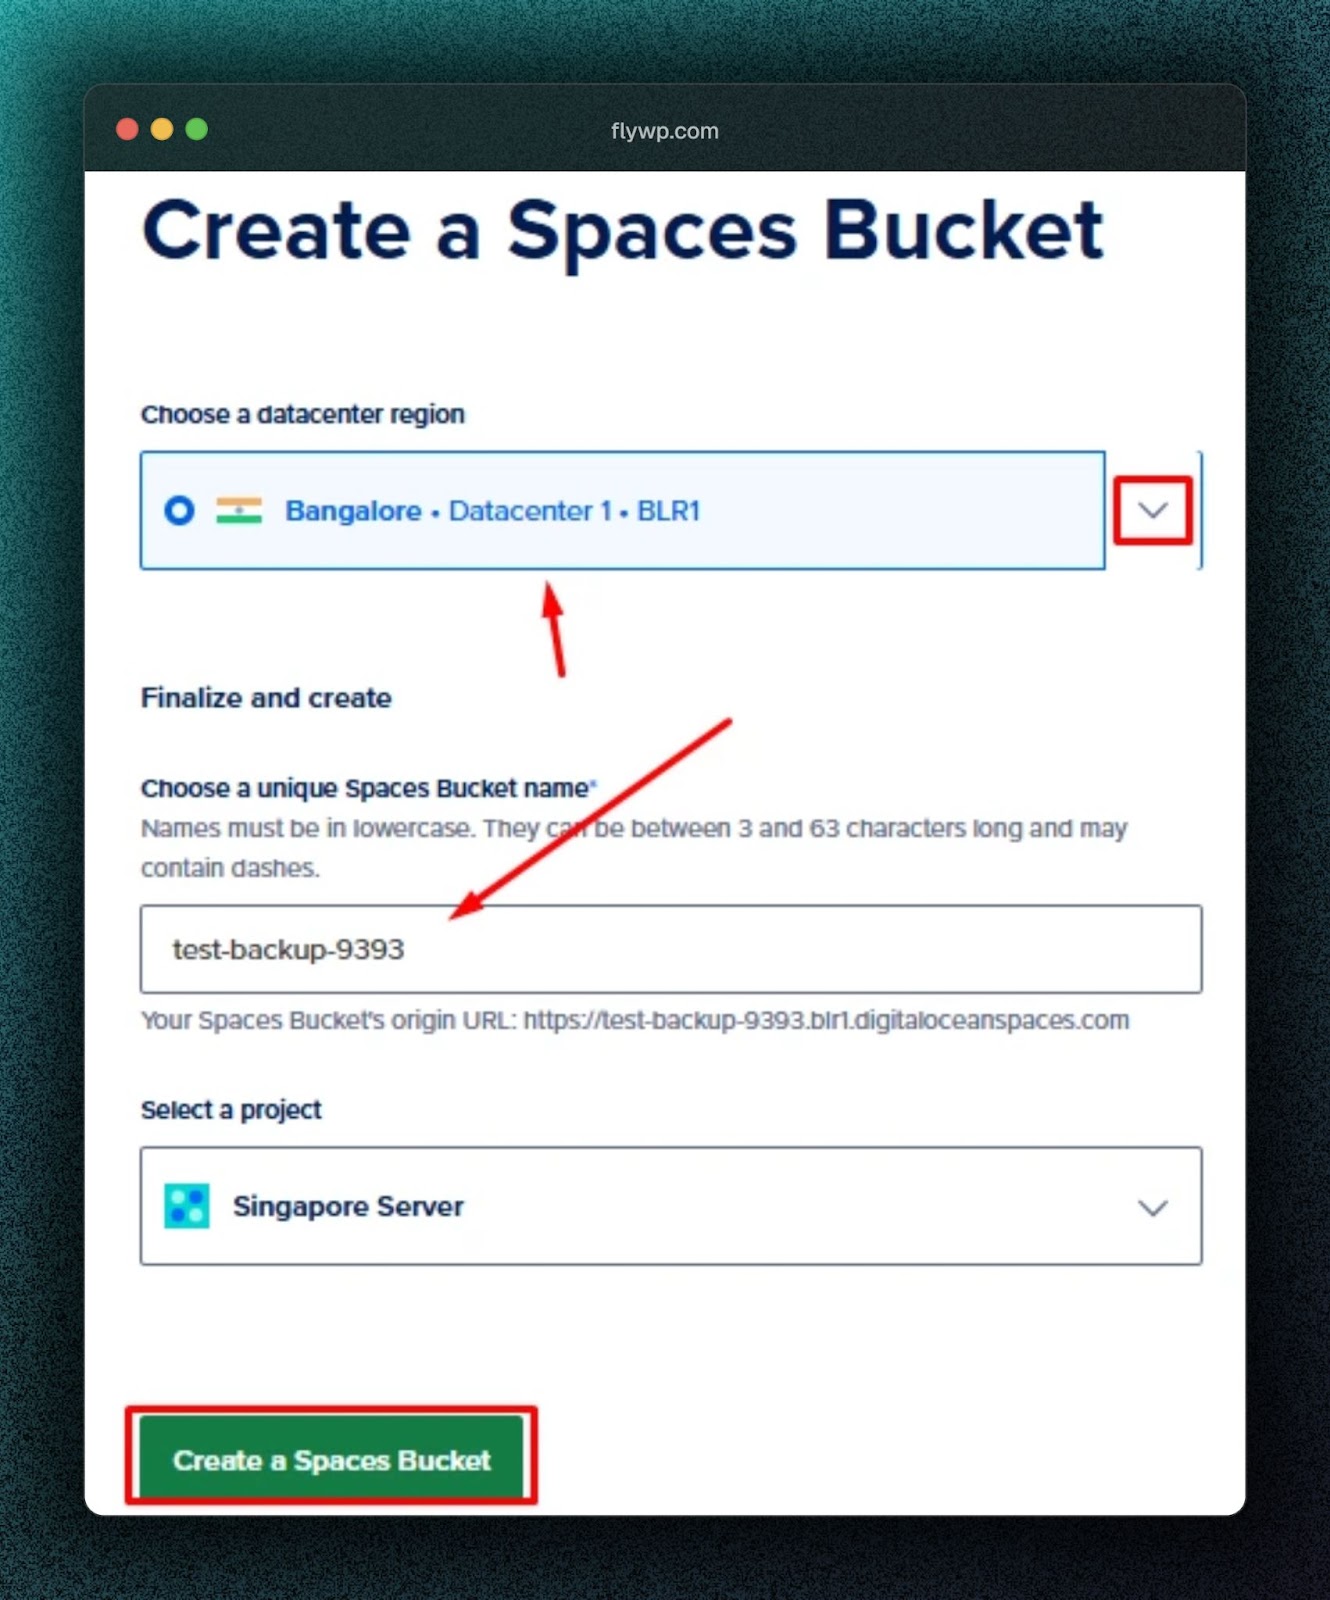
After selecting Spaces Object Storage, it will redirect you to the page “Create a Spaces Bucket”. From this section, you can select a region that will host your backup. We suggest you choose the region closest to your server, By selecting the closest one, the backup process will be faster than other regions.
You have to choose a Unique Name for your bucket. After setting a unique name for your bucket, select “Create a Spaces Bucket”.
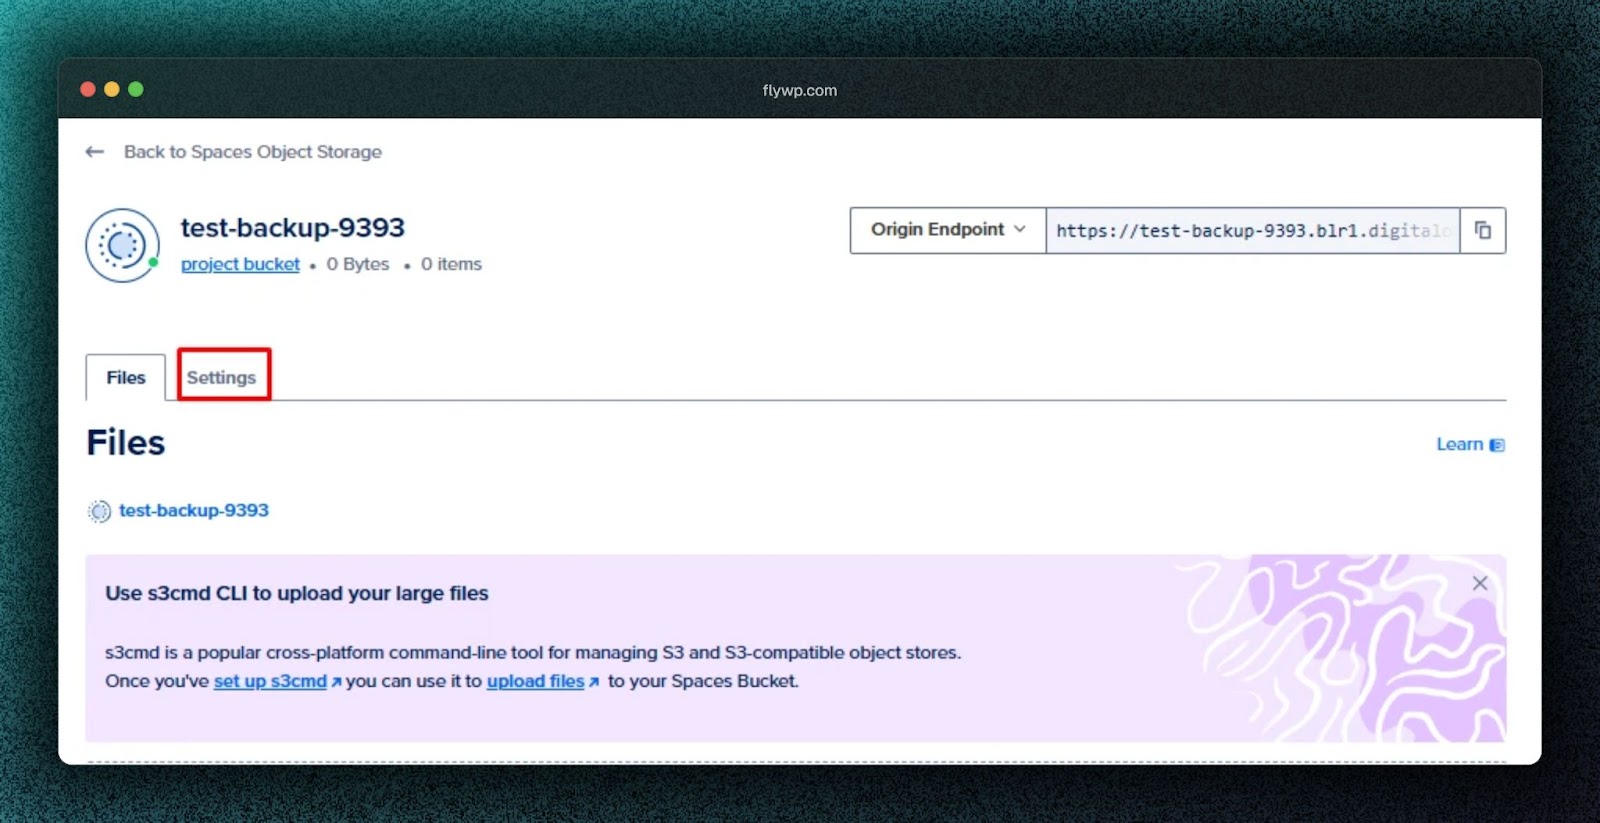
Here, your object storage creation is done. Now, you have to create a secure Access Key for authentication.
After that, you will get an overview of your Object storage bucket. On this page, select Settings > `Create Access key`
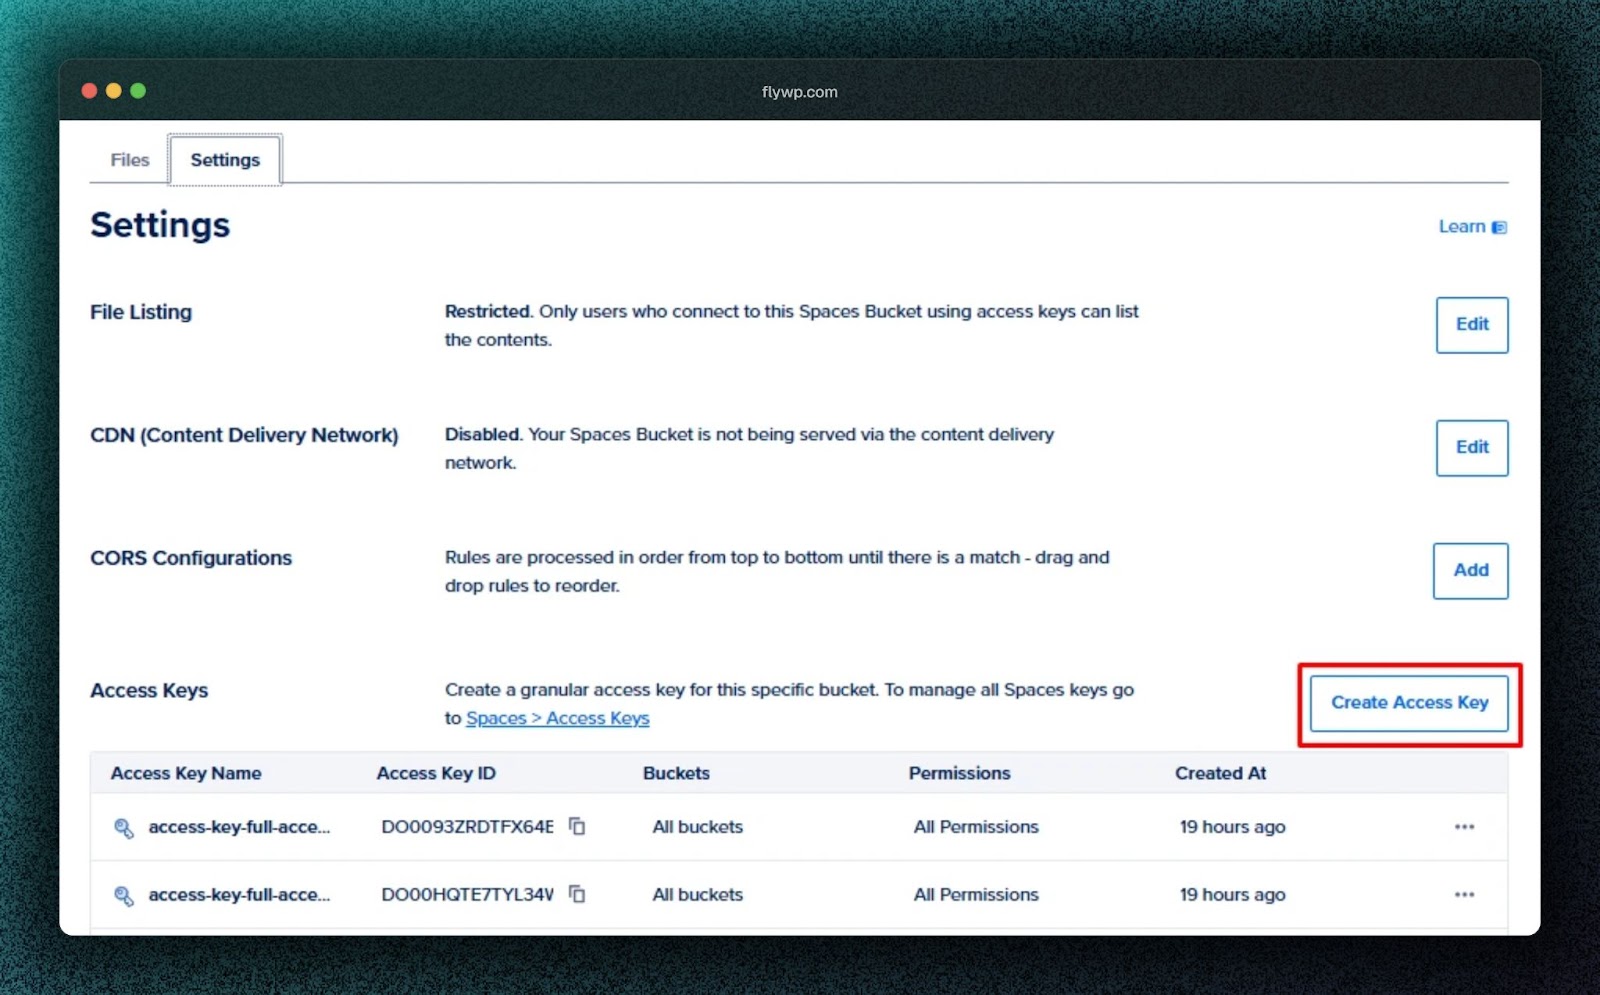
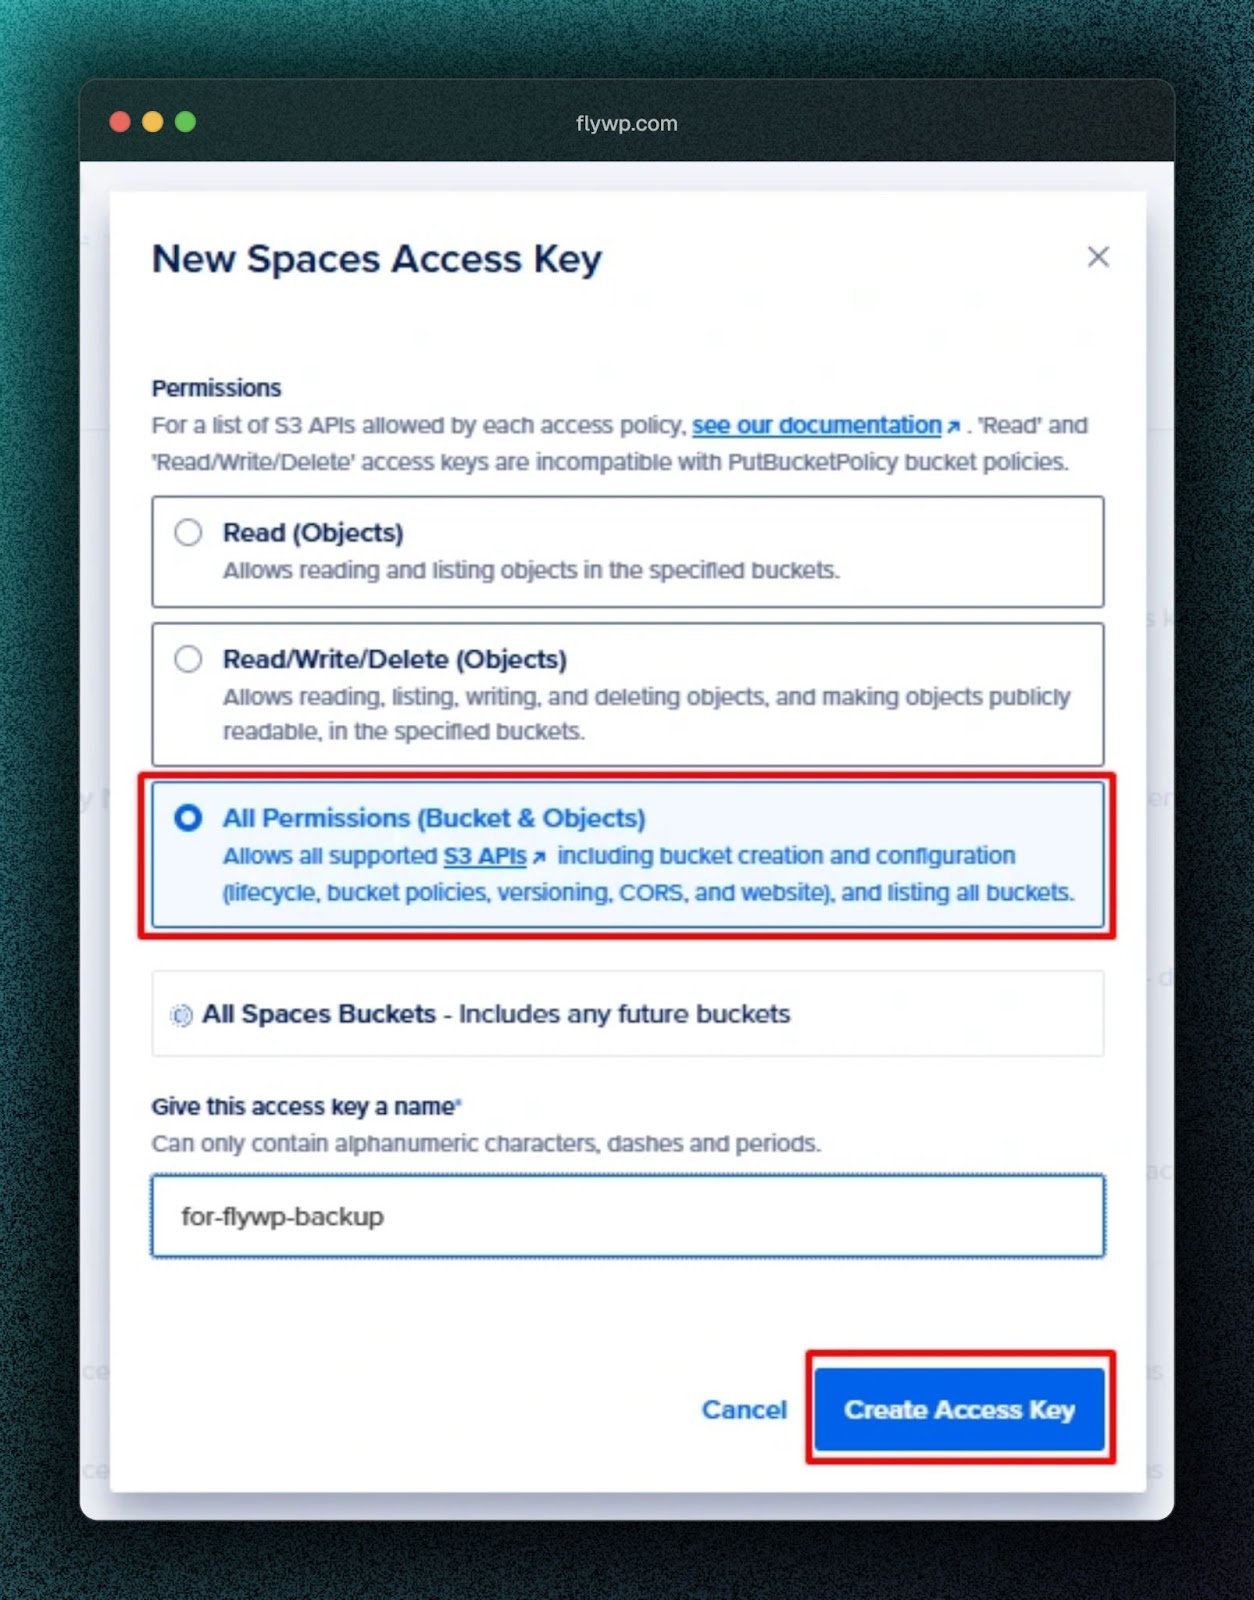
This will take you to the Access Key creation menu. For compatibility, we suggest you select “All Permission” here. After configuring permission, select Create Access Key.
After Access Key creation is done, DigitalOcean will show something like the following image: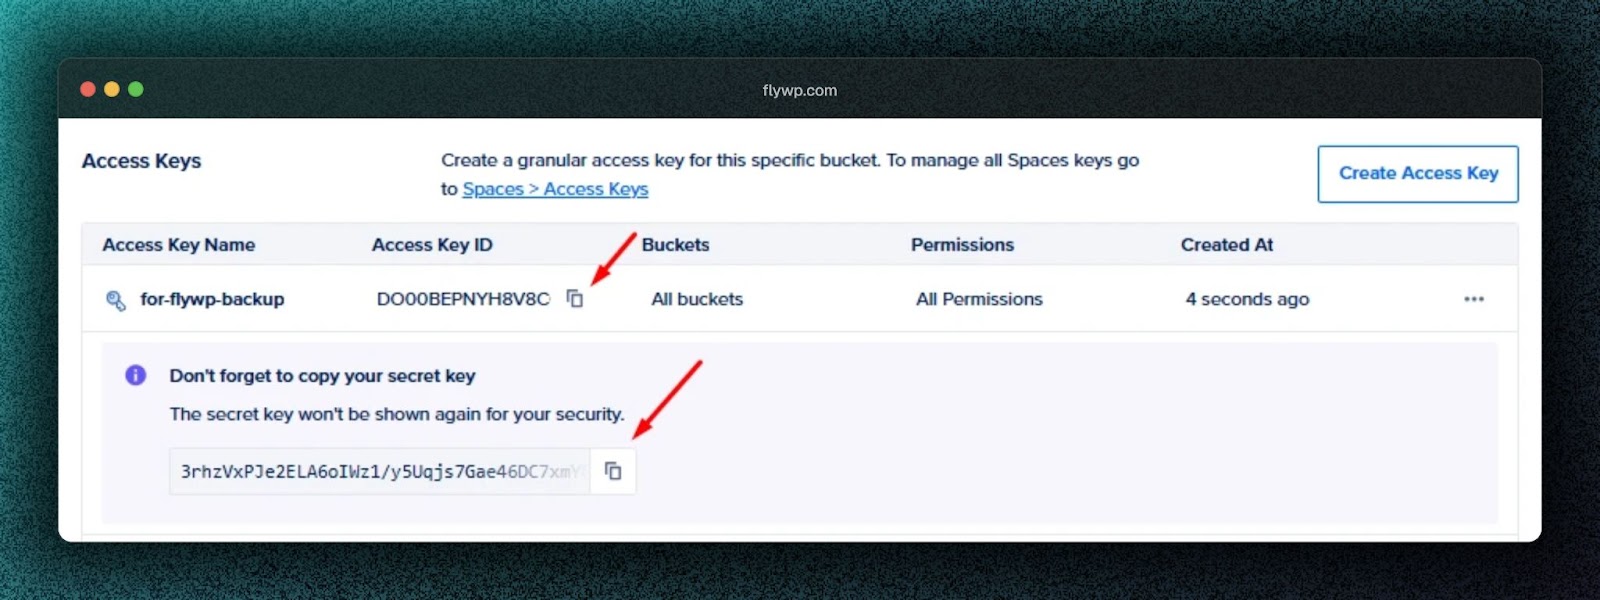
From this page, copy both the Access Key ID and the Secret Key.
Important: Please note that DigitalOcean will not show this secret key again. When you see it, copy it and store it somewhere safe.
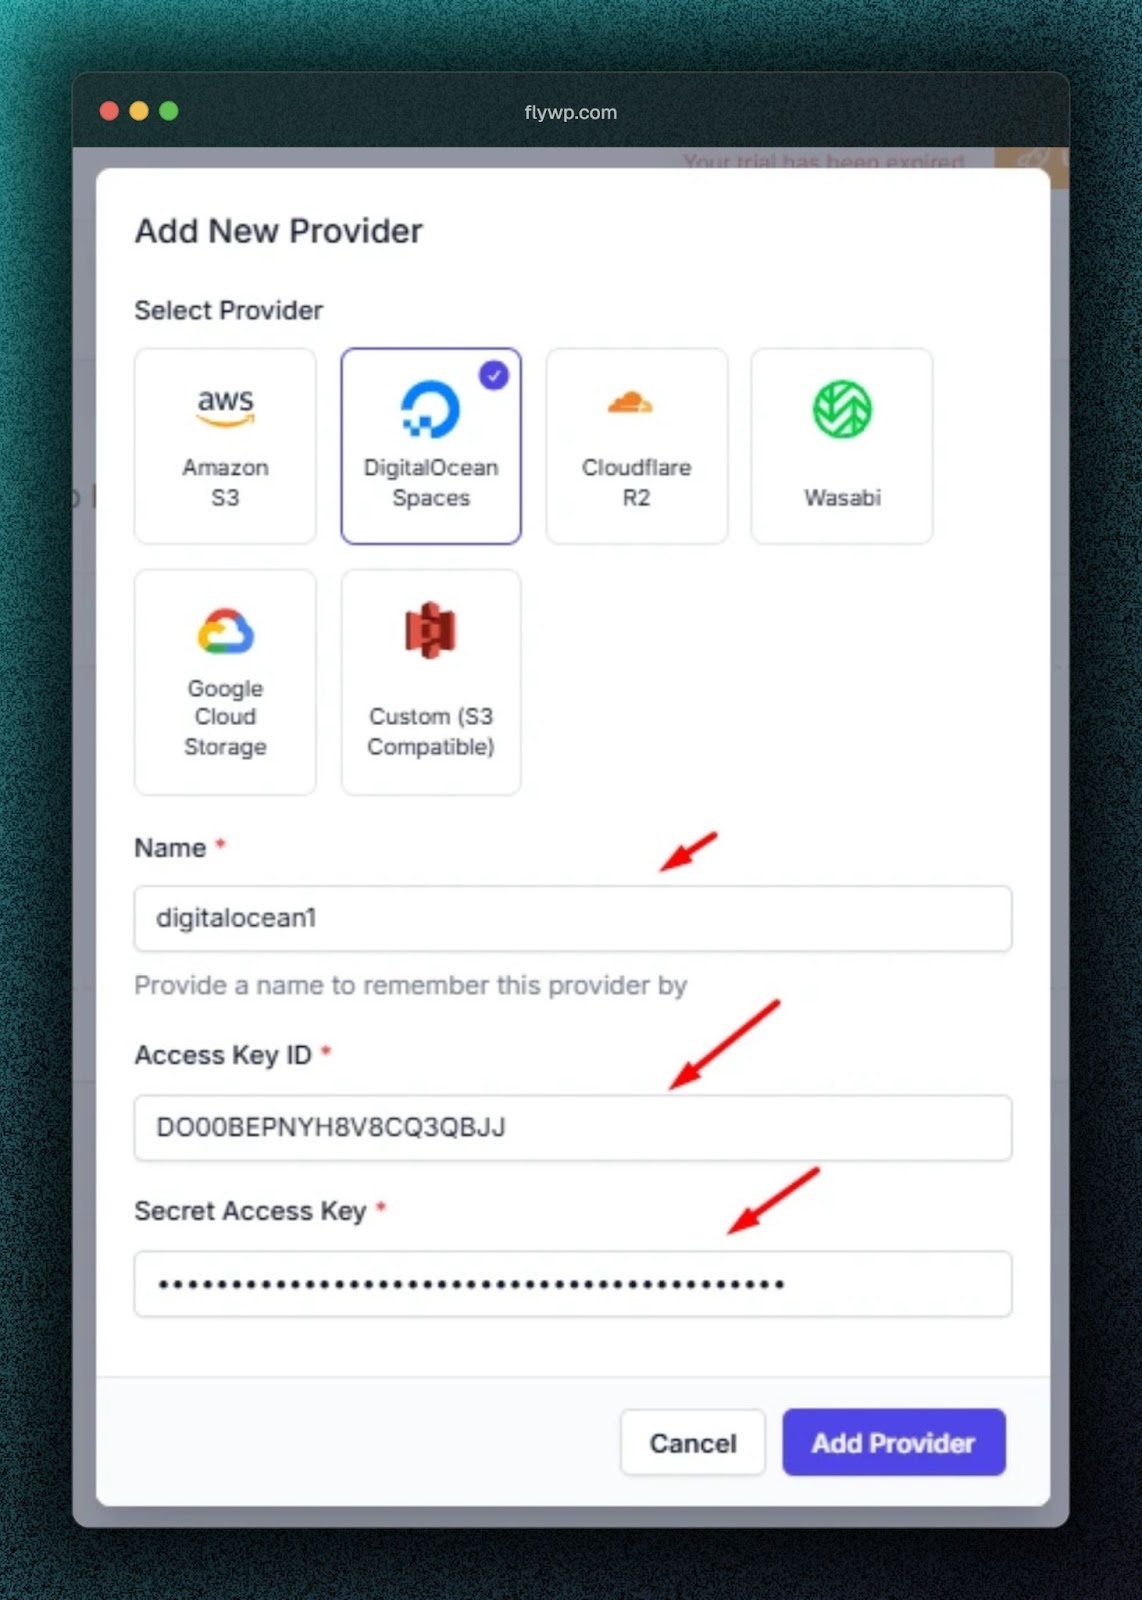
To add this key to your FlyWP dashboard, go to FlyWP settings, select Backup Providers, and then Add New Provider.

Now, select DigitalOcean from the available provider list and add all the information such as Name (Random), Access Key ID, and, Secret Access Key from DigitalOcean. You will find this information on your DigitalOcean Dashboard as described above.
How to use DigitalOcean Spaces as a backup provider for WordPress sites?
To use DigitalOcean Backup as a backup destination for your website using FlyWP, Follow these steps:
- Navigate to the site Dashboard of the site you wish to backup.
- Select Backups, then Backup Settings.

Site Backup Settings

- Select DigitalOcean from the list
- Enter the bucket name from DigitalOcean Spaces
- Set the region where the bucket is located. [Note: selecting the wrong region will lead to Backup failure]
- Adjust the remaining settings if needed.
After making changes, click Save Backup Options button.
Note: Saving the backup settings directly on your server might take 1-10 seconds.

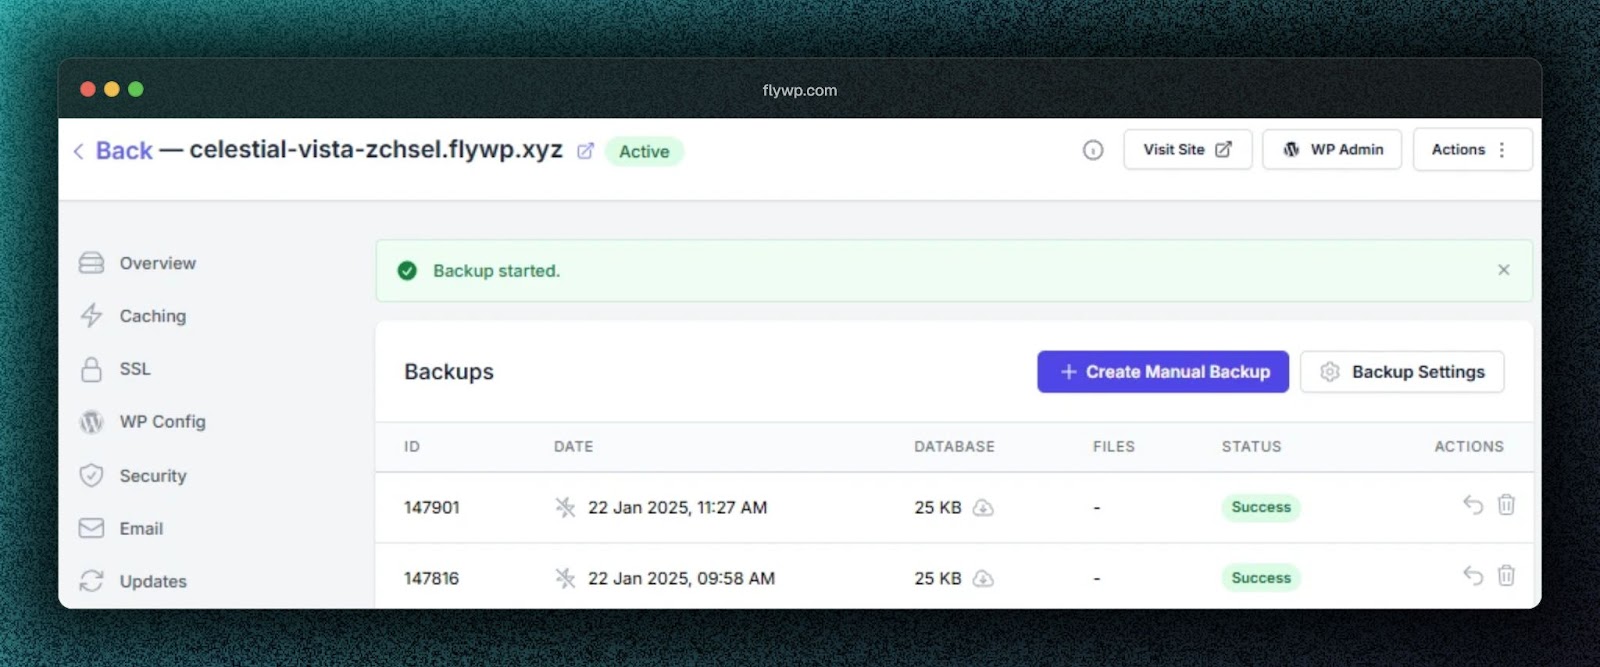
Automated backups will now be up and running. You can try to create a manual backup to test it out.
Thats it. Cheers!