What is a Site Blueprint?
A Site Blueprint is a powerful feature in FlyWP that allows you to create a reusable template for new WordPress installations. Instead of configuring every new site from scratch, you can define a blueprint with your preferred plugins, themes, users, and even content. This saves a significant amount of time, reduces manual errors, and ensures consistency across all your projects.
Key Features
With a single blueprint, you can automate the following tasks for any new site:
- Plugin Installation: Automatically install and activate free plugins from the WordPress.org repository or premium plugins from a direct download link.
- Theme Installation: Automatically install and activate a free theme from WordPress.org or a premium theme.
- User Creation: Preconfigure new user accounts with specific roles and secure passwords.
- Content Import: Import posts, pages, media, and more from a standard WordPress export file (
.wxr). - Custom Automation: Run a custom post-deployment script for advanced configurations using WP-CLI.
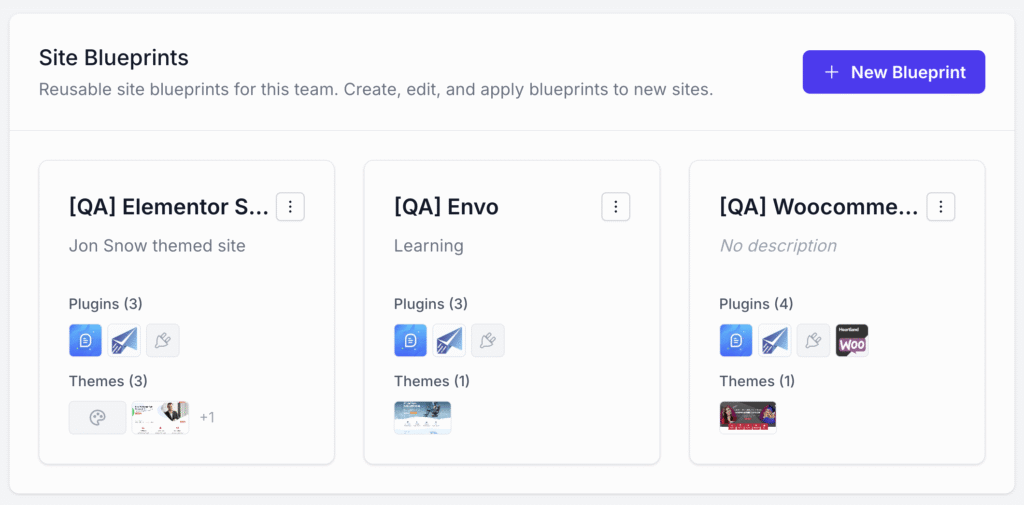
Creating and Managing Blueprints
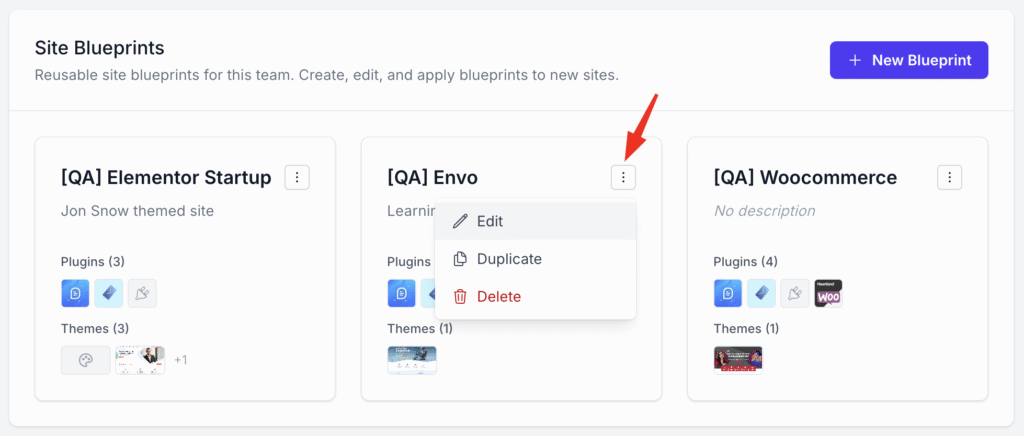
You can create, edit, duplicate, or delete blueprints from the Blueprints section in your FlyWP dashboard.
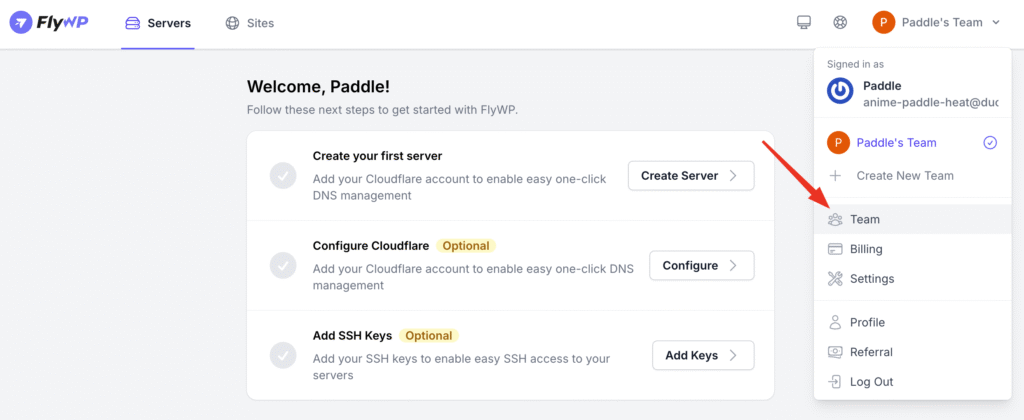
- First, Navigate to your team.
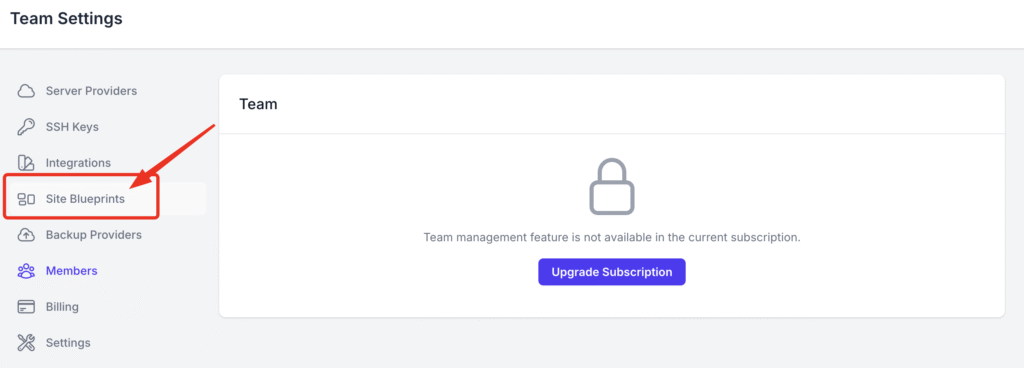
- From your Team page, go to Site Blueprints.
- To create a new one, click “New Blueprint”.
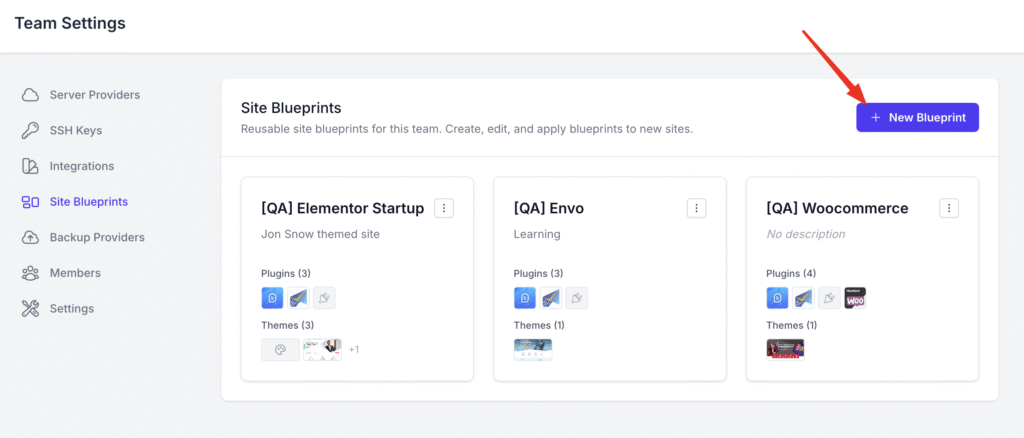
- To manage an existing one, select the 3 dots from the Blueprints panel and Edit, Duplicate, Delete.
Blueprint Configuration
When creating or editing a blueprint, you will be presented with the following configuration sections.
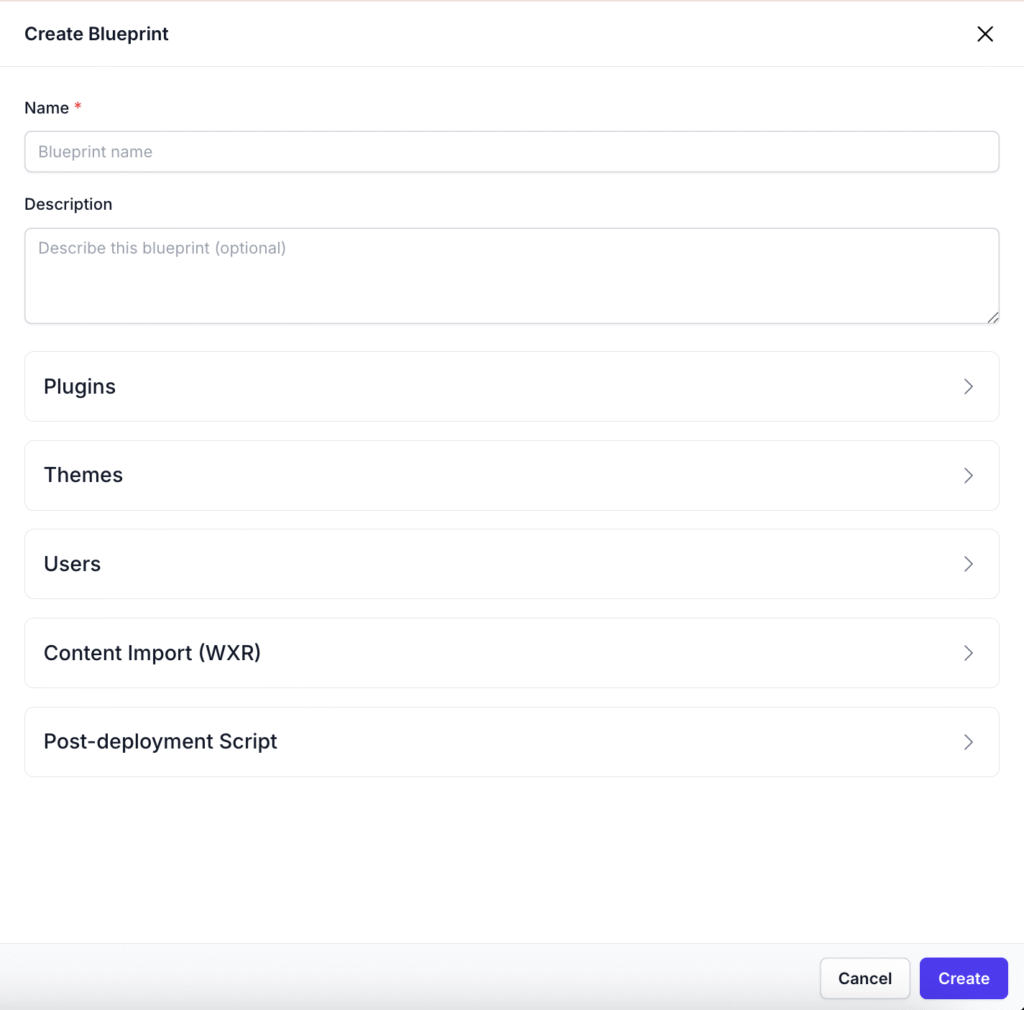
General Information
- Blueprint Name: A unique and descriptive name for your template (e.g., “Standard Client Site”, “WooCommerce Starter Kit”).
Plugins
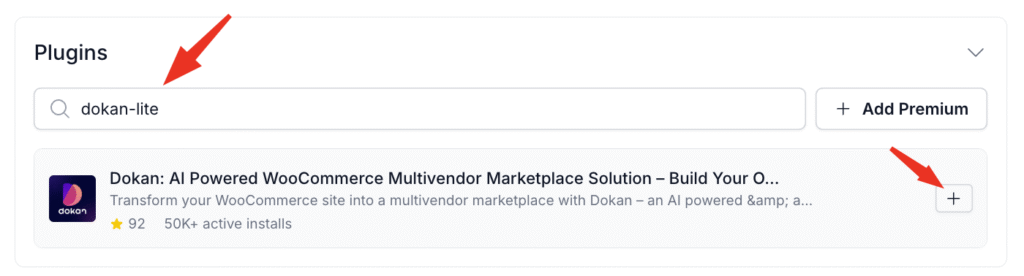
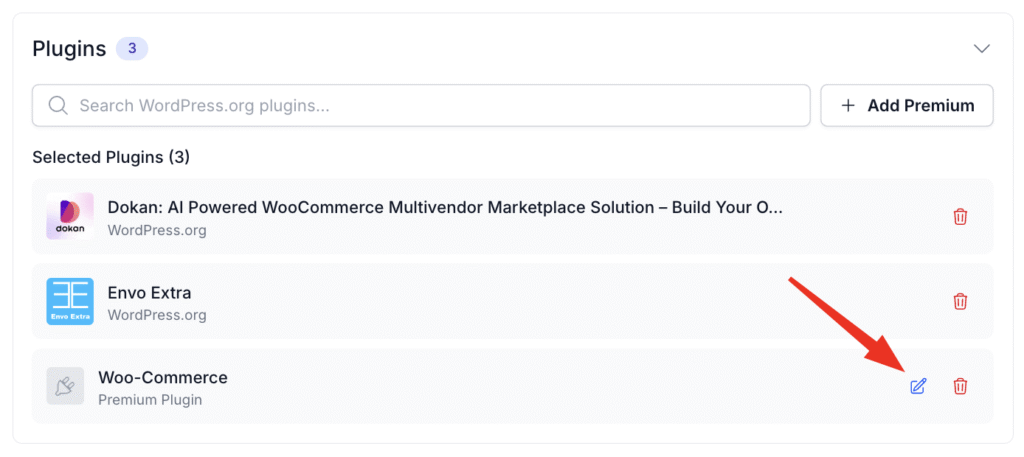
Add any number of plugins to be installed on a new site.
- Free Plugins (WordPress.org):
- Search for plugins by their name or slug.
- Click on the Plus ( + ) icon to add the plugin to your blueprint.
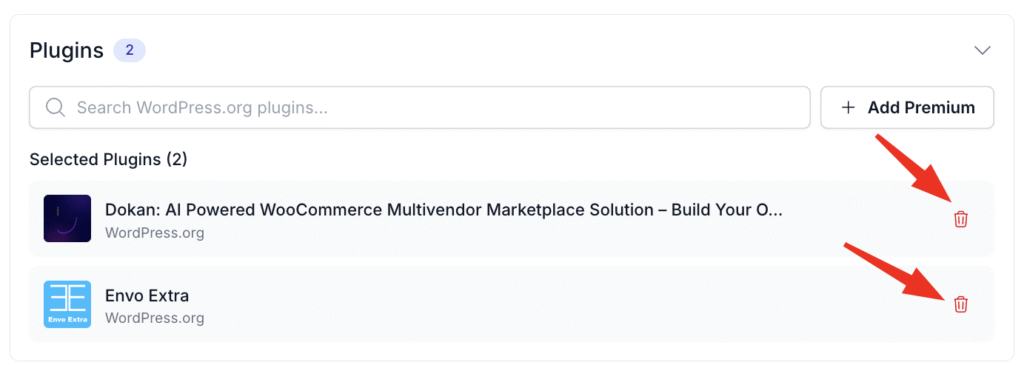
- To remove a plugin, a selected Plugin, simply click on the Bin icon.
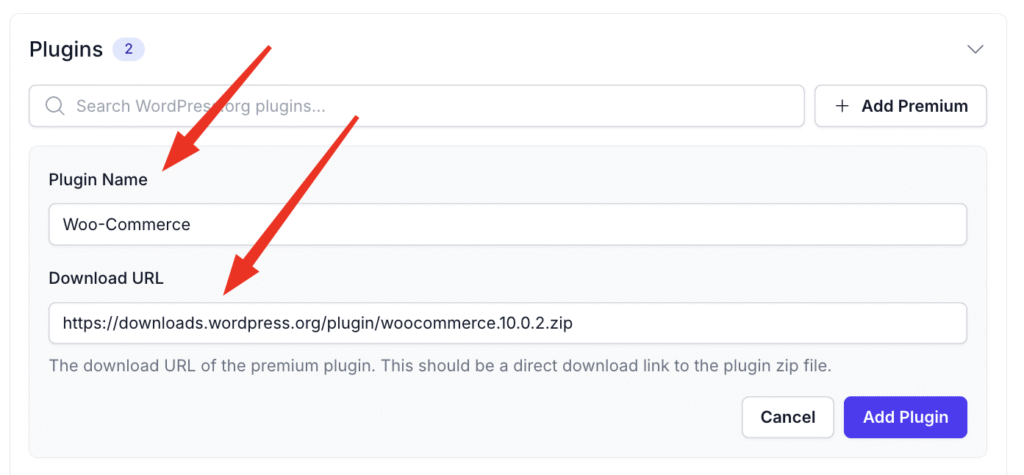
- Premium / Custom Plugins:
- Provide a direct, public download URL to the plugins
.zipfile along with an identifiable name. - You can edit the custom plugin just by clicking on the edit button.
- Provide a direct, public download URL to the plugins
Themes
Choose the theme that will be installed and activated.
- Free Theme (WordPress.org):
- Search for a theme by its name or slug. The selected theme will be automatically activated.
- Premium / Custom Theme:
- Provide a direct, public download URL to the theme’s
.zipfile. The theme will be automatically activated.
- Provide a direct, public download URL to the theme’s
User Creation
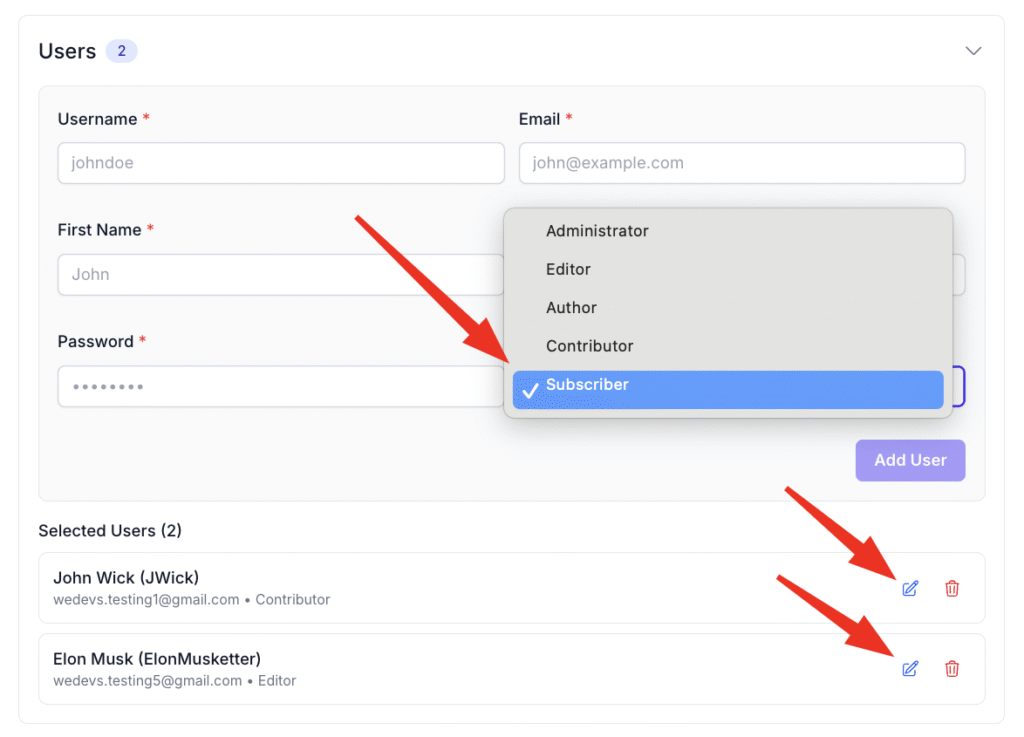
Create one or more default user accounts. This is ideal for setting up client accounts or standard administrative users.
For each user, you must define:
- Username: The login name for the user.
- Password: A secure password for the account.
- Role: The user’s permission level. Choose from:
- Administrator
- Editor
- Author
- Contributor
- Subscriber
Content Import (WXR)
Upload a WordPress Extended RSS (.wxr) file to import content into the new site. This is perfect for migrating content from a starter site or another project.
About WXR Import:
- WXR files contain WordPress content exported from another site.
- The import includes posts, pages, comments, categories, tags, and media.
- Content will be imported after the WordPress site is created.
- Large files may take several minutes to import. The process runs in the background, and you can monitor its status in the deployment log. However, a lower PHP execution timeout may cause issues.
Post-Deployment Script
For advanced users, you can provide a bash script that runs after all the above steps are completed. This allows for limitless customization using WP-CLI. The script will be run from the site’s root folder.
Sample Script:
The $WP_CLI_IMAGE variable is automatically set to openlitespeed or php depending on the server stack you choose for the site. Use the –user flag to get the best possible compatibility.
PS: the --user=www-data section is only applicable for OpenLiteSpeed sites, not for NGINX/PHP sites. If your script is having issues with permissions on your PHP/NGINX site, you can safely remove this section. And if you are going to do a lot of complex tasks, we would suggest adding a delay of 30 seconds before the script, as other tasks such as SSL can sometimes cause conflicts.
#!/bin/bash

# Post-deployment script
# This script runs after your WordPress site is created

# Example: Install additional plugins via WP-CLI
# docker compose exec --user=www-data $WP_CLI_IMAGE wp plugin install contact-form-7 --activate

# Example: Update WordPress options
# docker compose exec --user=www-data $WP_CLI_IMAGE wp option update blogname "My New Site"

# Example: Create additional pages
# docker compose exec --user=www-data $WP_CLI_IMAGE wp post create --post_type=page --post_title="About Us" --post_status=publish


# Update All installed Plugins
# docker compose exec --user=www-data $WP_CLI_IMAGE wp plugin update --all

echo "Post-deployment script completed successfully!"
Log output
The logs for your Post-Deployment script are located on your server. You can view them through the web-based terminal. The file location is as follows:
~/.provision/log-blueprint-script-site_id.log
Tips on using Post-Deployment Script
You can use the Post-Deployment Script to create a custom role for your users. Check out WP-CLI doc for automating a lot of manual tasks.
First, create a role.
# Create role for Approver.
docker compose exec --user=www-data $WP_CLI_IMAGE wp role create approver Approver

# Create role for Product Administrator.
docker compose exec --user=www-data $WP_CLI_IMAGE wp role create productadmin "Product Administrator"

# Create a clone of an existing Role 'administrator'
docker compose exec --user=www-data $WP_CLI_IMAGE wp role create --clone=administrator productadmin "Product Administrator"
Now, we can assign a user the role we created. In this example, bobby is an existing user
# Assign a user with the role Product Admin, the Format is,
# wp user set-role <username> productadmin

docker compose exec --user=www-data $WP_CLI_IMAGE php wp user set-role bobby productadmin
Alternatively, you can create a new user with a specific role that we just created.
docker compose exec --user=www-data $WP_CLI_IMAGE wp user create alex [email protected] --role=approver --user_pass=jas9dasdn20Random!
Using a Blueprint to Deploy a Site
- Begin the standard “Create New Site” process in FlyWP.
- You will see an option to set a site “blueprint” in the installation page.

- Select your desired blueprint from the dropdown menu.
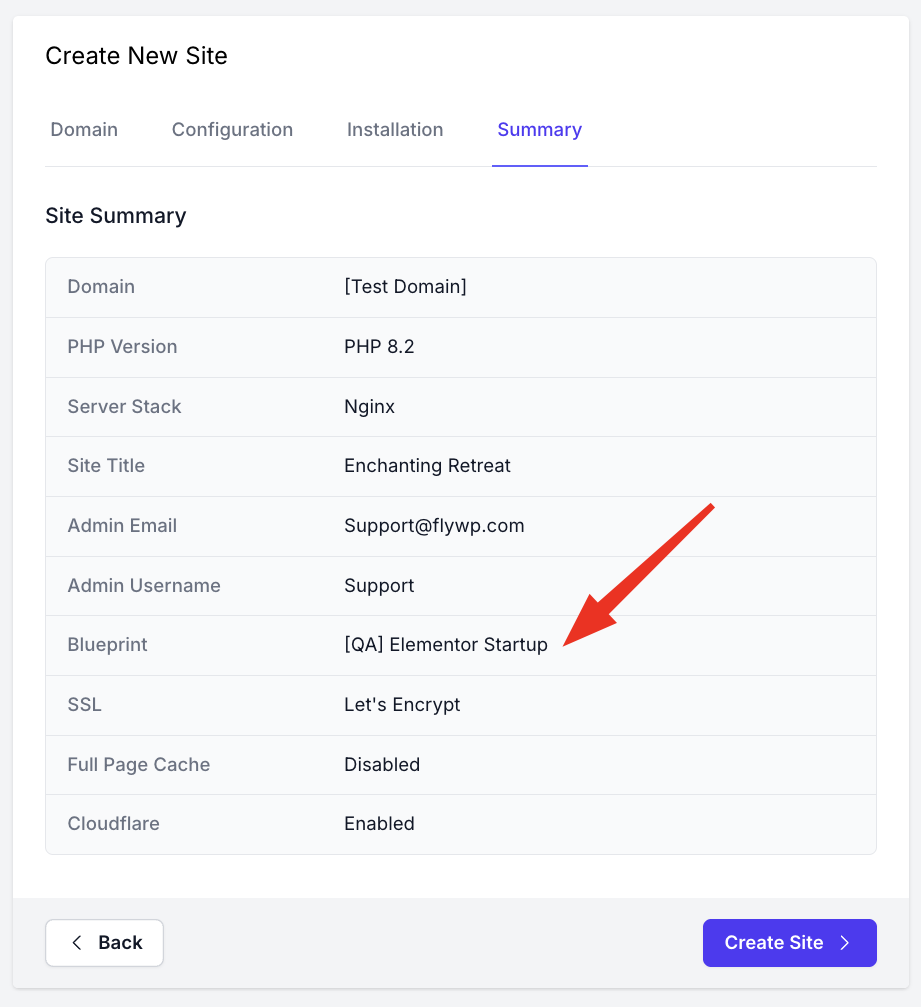
- Fill in any remaining site details and click “Create Site”. You can see the overview of your selected blueprint from here as well.
- FlyWP will handle the rest, executing all the steps defined in your blueprint automatically. You can watch the progress in the site’s deployment log.
FAQs:
- Can I create a blueprint with custom user roles?
No, it’s not possible to create custom user roles directly within the blueprint settings for now.
However, you can achieve this by using the Post-Deployment script. This feature allows you to runwp-clicommands to create a new role and assign it to a user right after the site is created. You can find an example script Post Deployment scripts. - Is it possible to convert an existing site into a blueprint?
Unfortunately, this feature is not currently available. FlyWP does not support converting an existing, configured WordPress site into a reusable blueprint. If this is a feature you’d like to see, you are welcome to submit a feature request on the FlyWP Feedback Hub. - Can blueprints pre-activate premium plugins and themes with license keys?
Any plugin or theme you include in a blueprint will be automatically activated upon site creation.
However, FlyWP cannot automatically insert license keys that require manual entry in the WordPress admin dashboard. If your premium plugin or theme offers aWP-CLIcommand or an API method to activate its license, you can automate this process using the Post-Deployment Script feature. - How do I update the plugins within a blueprint?
A blueprint doesn’t store the plugins themselves, but rather the links to them. When you create a site from a blueprint, FlyWP downloads the plugins from the URLs you provided.- For plugins from the WordPress.org repository, FlyWP will always fetch the latest version.
- For premium plugins added via a URL, FlyWP will download whatever version the link points to. If the link always points to the latest version, your new sites will have it.
- How do I update the plugins within a blueprint?
A blueprint doesn’t store the plugins themselves, but rather the links to them. When you create a site from a blueprint, FlyWP downloads the plugins from the URLs you provided.- For plugins from the WordPress.org repository, FlyWP will always fetch the latest version.
- For premium plugins added via a URL, FlyWP will download whatever version the link points to. If the link always points to the latest version, your new sites will have it.
- If a link provides an outdated version, you can use the Post-Deployment script to run a
wp plugin update --allcommand to ensure all plugins are updated to their latest versions after installation. An example is available in the documentation.
The Site Blueprints feature in FlyWP revolutionizes the way you launch new WordPress sites—automating plugin and theme installation, user provisioning, content import, and custom post-deployment tasks in a single, reusable template. This not only ensures consistency and reduces setup time but also minimizes manual errors and accelerates your project delivery.
Ready to transform your WordPress workflow? Log in to your FlyWP dashboard and create your first Site Blueprint today, or contact our support team for personalized assistance. Experience the power and simplicity of FlyWP—your fastest path from concept to live site.