
FastCGI caching stores fully rendered web pages as static files, allowing subsequent requests to be served instantly without reprocessing. This technique significantly boosts website speed and reduces server load. FlyWP offers an easy way to manage FastCGI caching for WordPress, ensuring faster page loads and improved performance.
PS: Advanced FastCGI Caching is only available on NGINX sites
Table of Contents
- Introduction to Page Caching
- Configuring Page Caching via FlyWP Dashboard
- Managing Page Caching via FlyWP Helper Plugin
Configuring Page Caching via FlyWP Dashboard
To set up page caching directly from the FlyWP dashboard:
Accessing Page Caching Settings:
- Navigate to the specific site you wish to configure.
- Click on the Caching menu available under the site options.
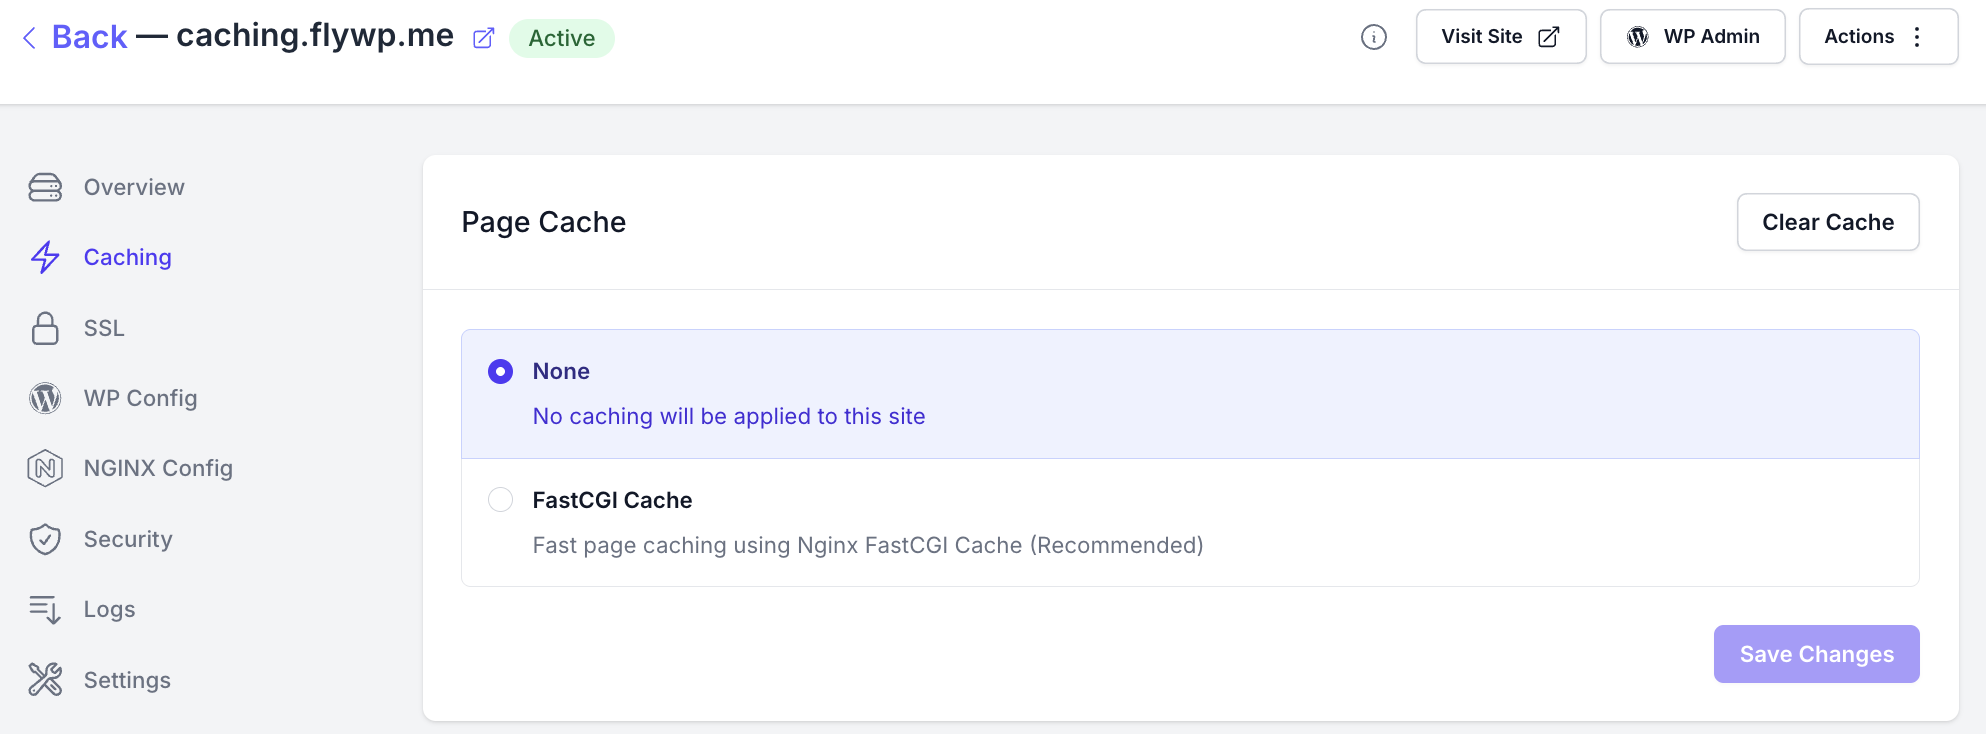
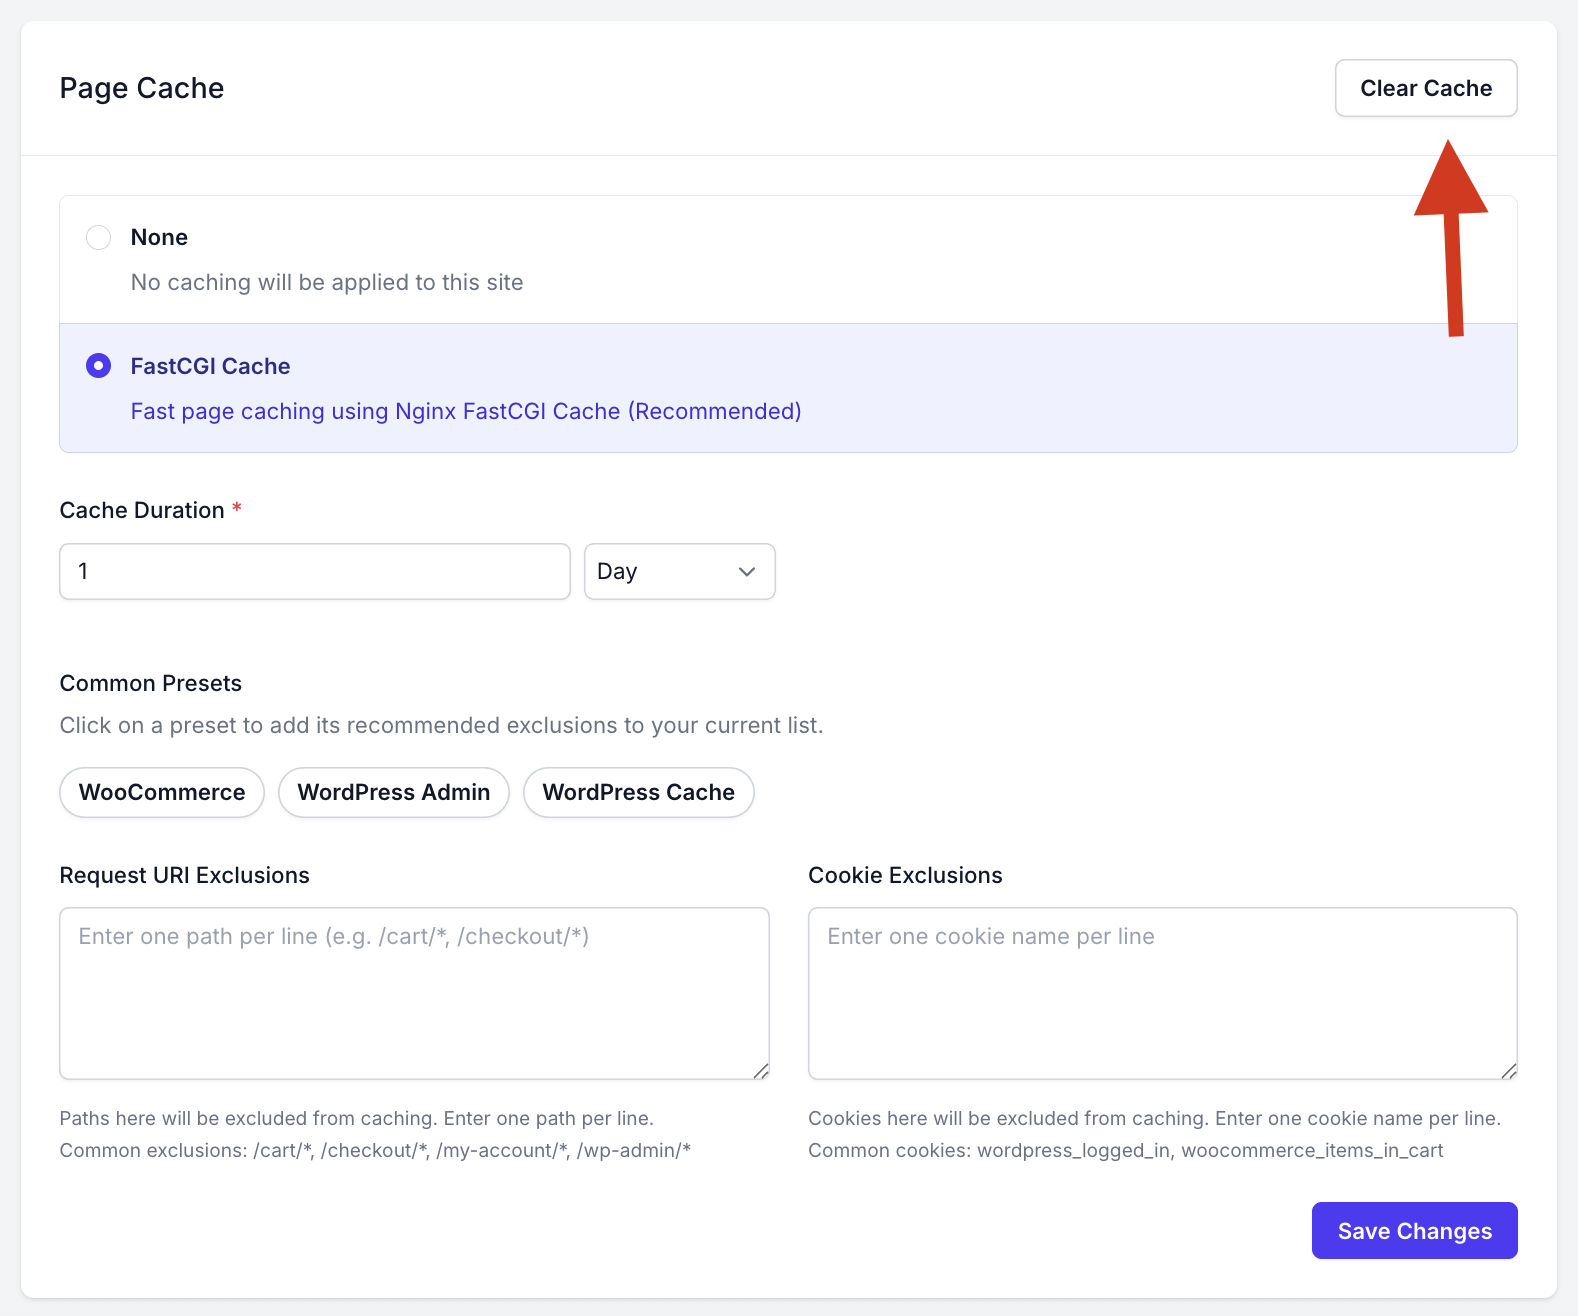
Choosing Your Cache Setting:
- None: By selecting this option, no caching will be applied to your site. This means every time a user accesses a page, the server will process the request fresh without relying on any cached content.
- FastCGI Cache: This option enables fast page caching powered by Nginx FastCGI Cache. When activated, pages are cached using the Nginx mechanism, dramatically reducing response times for subsequent page requests.
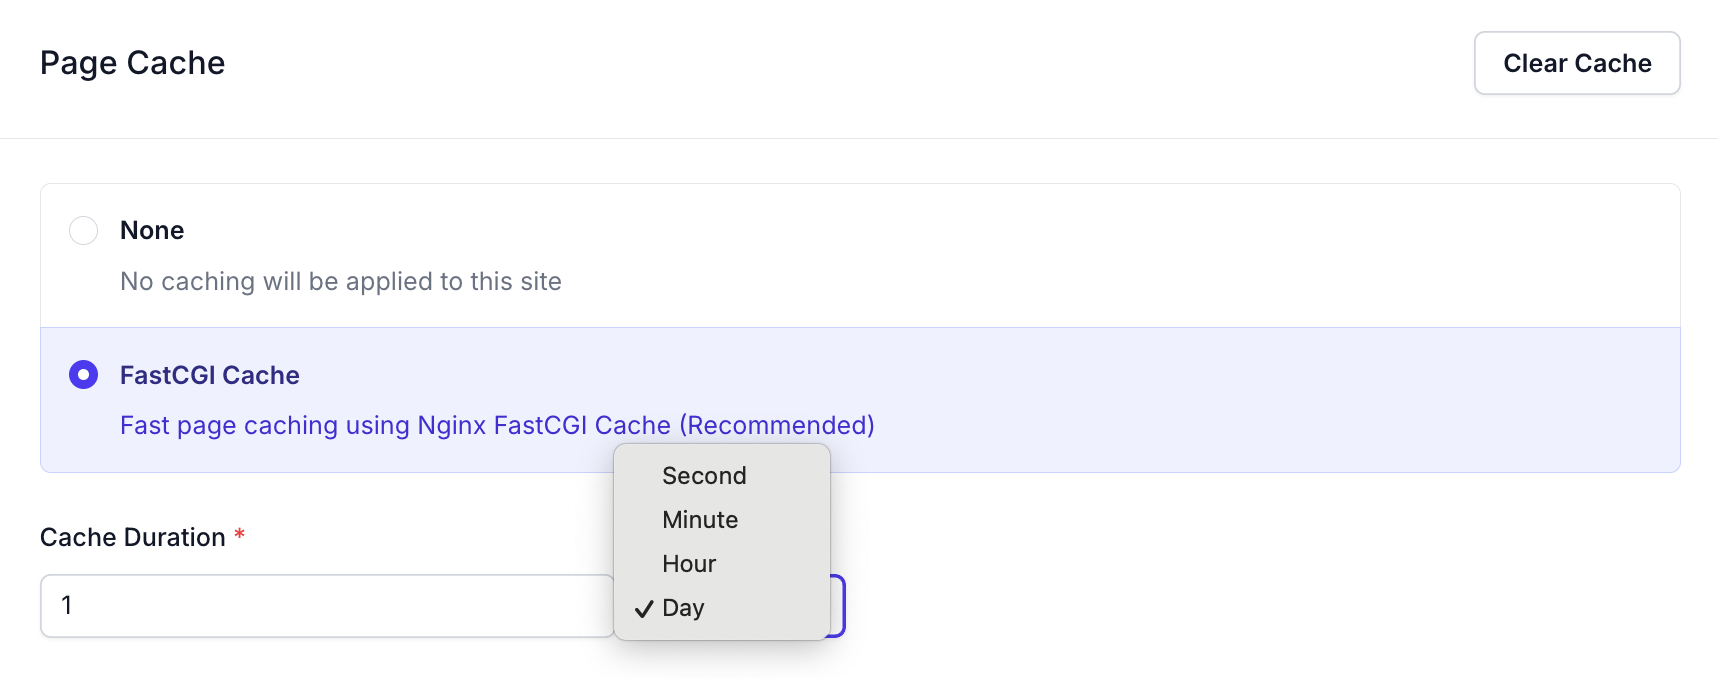
Cache Management:
FlyWP provides our user with many different options to customise a site’s FastCGI caching,
Cache Duration: Take control of your page’s cache lifespan with FlyWP! You can now set a custom cache duration, ranging from days down to seconds. Once your defined cache expire duration, FastCGI will automatically refresh the cache file upon the next request for that page.
Exclusions
FlyWP’s caching system is designed for maximum speed, but some pages and user interactions should always remain dynamic. The Exclusions feature gives you precise control over what not to cache, ensuring your site’s critical functions work flawlessly for every user.
By excluding specific content, you can prevent issues like users seeing someone else’s shopping cart or administrators viewing a cached version of the dashboard. FlyWP allows you to configure exclusions in two primary ways:
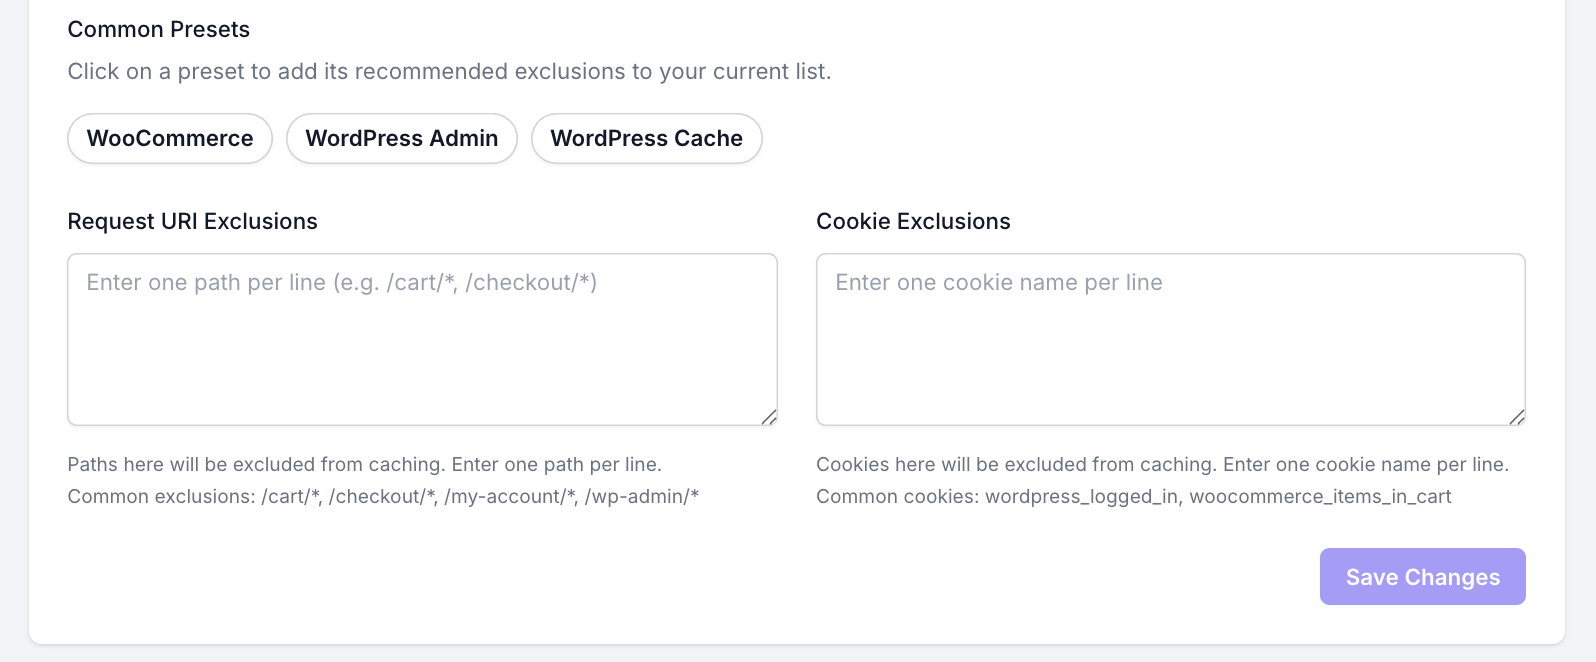
Request URI Exclusions
This feature allows you to prevent pages from being cached based on their URL path (the part of the URL that comes after your domain name). To exclude a path, simply enter it into the text area, with one path per line.
This is particularly useful for pages that contain dynamic, user-specific information. You can use wildcards (*) to match patterns, making it easy to exclude entire sections of your site.
How it works:
If a request URI matches one of the patterns in your exclusion list, FlyWP will not serve a cached version of that page. Instead, it will fetch a fresh copy directly from the server.
Common Examples:
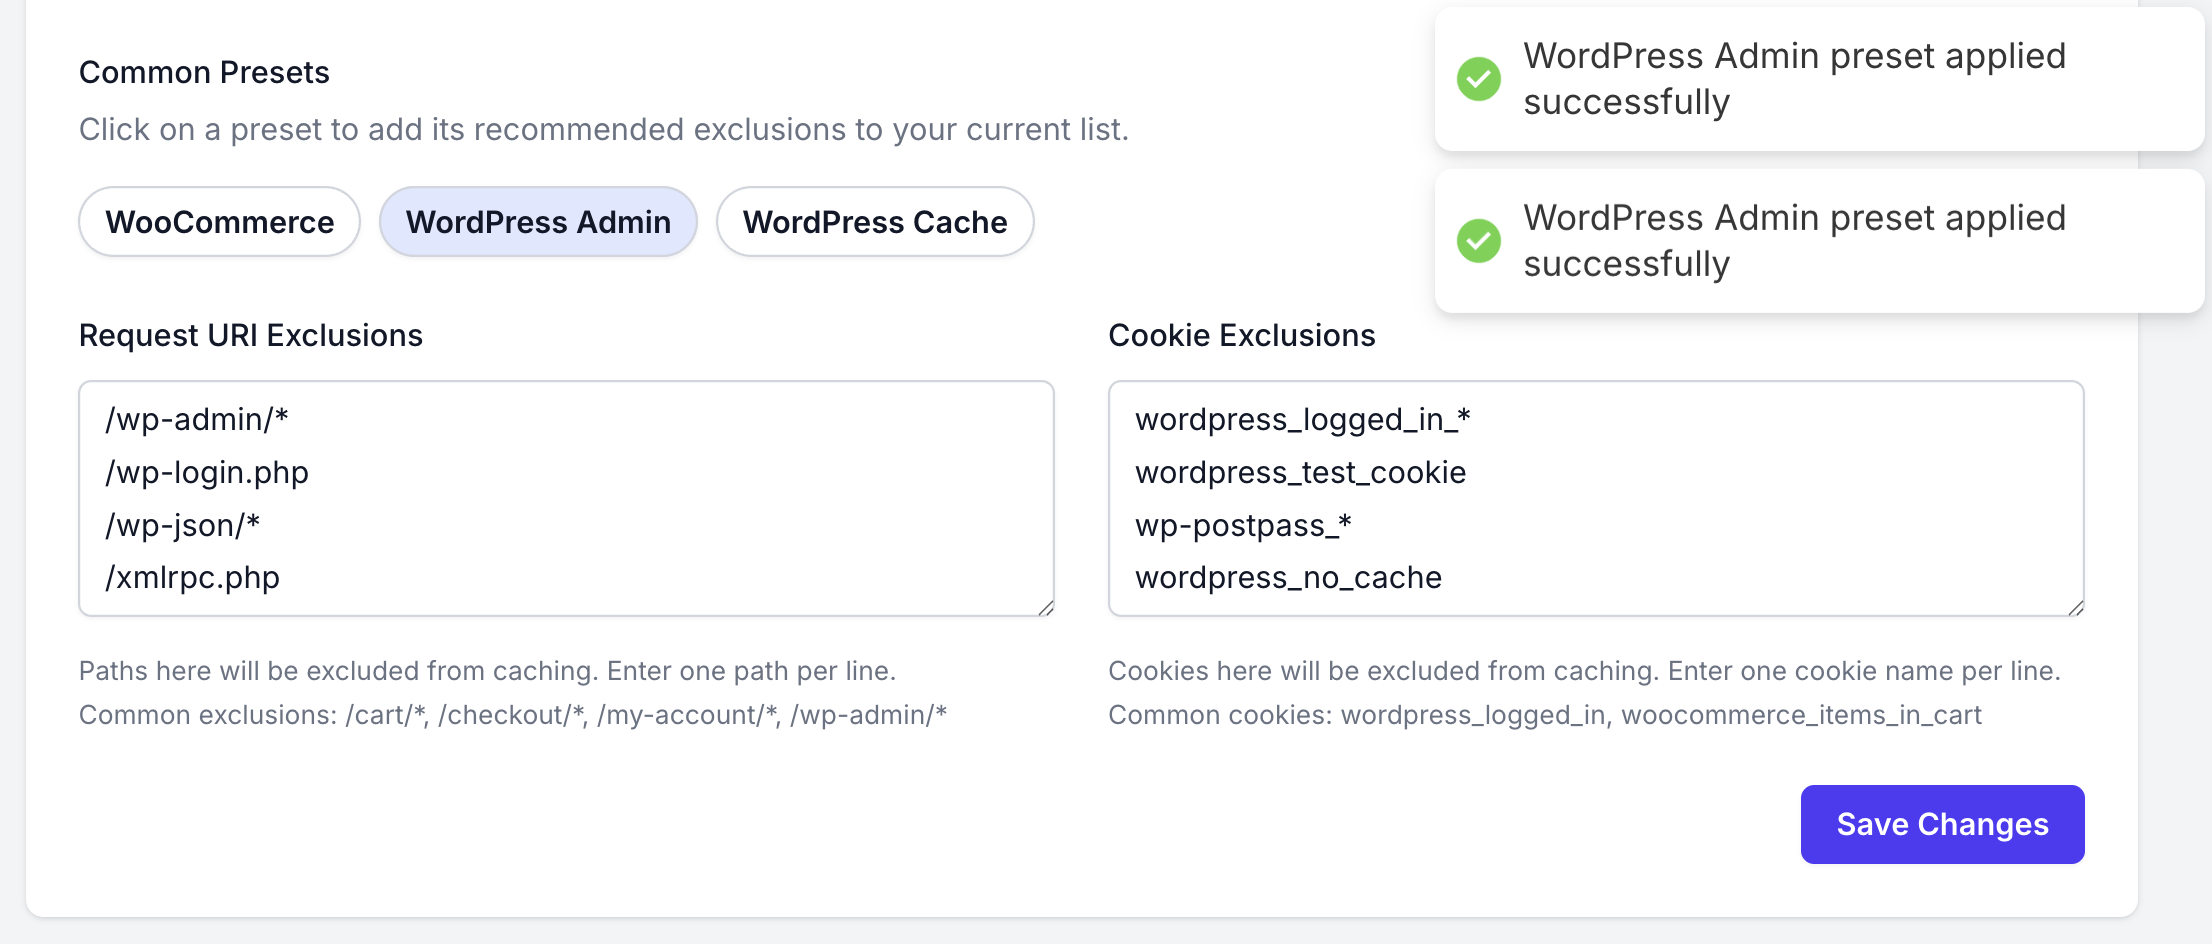
/cart/*: Excludes the main cart page and any sub-pages (e.g., /cart/update/)./checkout/*: Ensures the entire checkout process remains dynamic./my-account/*: Prevents caching of all user account pages./wp-admin/*: A critical exclusion to ensure the WordPress dashboard is never cached.
Cookie Exclusions
This feature allows you to bypass the cache entirely for visitors who have a specific cookie in their browser. When FlyWP detects the presence of a specified cookie in a visitor’s request, it skips the cache and serves a live version of the page directly from your server.
This is the best way to handle user-specific content for logged-in users or shoppers. To add an exclusion, enter the name of the cookie, with one name per line.
How it works:
When a visitor with a matching cookie requests a page, they are treated as a “non-cacheable” user for that request, ensuring they receive personalised, real-time content.
Common Examples:
wordpress_logged_in: The standard cookie for any logged-in WordPress user. Excluding it ensures users see their admin bar and correct permissions.woocommerce_items_in_cart: This cookie is set when a customer adds an item to their cart. Excluding it ensures the cart contents are always accurate.
To make setup even easier, FlyWP includes Common Presets for popular configurations like WooCommerce and WordPress Admin, allowing you to apply recommended exclusions with a single click.
Common Tips for Exclusions
- Start with Presets: Always begin by applying the relevant presets (like WooCommerce or WordPress Admin). They cover the most common and critical exclusions, providing a solid foundation.
- Use Wildcards Wisely: The asterisk (*) is your best friend for excluding entire directories. For example, instead of adding
/account/orders,/account/downloads, and /account/settings separately, you can simply use/account/*. - Check Your Plugins: Some plugins create their own dynamic pages or use specific cookies. If you use a forum plugin (like bbPress), a membership plugin, or an LMS, check their documentation for pages and cookies that should not be cached.
- How to Find Cookie Names: If you need to exclude a custom cookie, you can find its name using your browser’s developer tools. In Chrome, go to DevTools > Application > Cookies. In Firefox, use Tools > Browser Tools > Web Developer Tools > Storage > Cookies.
- Test Your Exclusions: After adding new rules, always test them. Open your site in an incognito/private browser window to simulate a new visitor. Then, perform the action that should trigger the exclusion (e.g., log in, add an item to the cart) and ensure the page is not being served from the cache.
- URI vs. Cookie Exclusions: Remember the difference. Use URI Exclusions for specific pages that should never be cached for anyone (e.g., /
checkout). Use Cookie Exclusions to bypass the cache for specific users across the entire site (e.g., logged-in users).
Mastering exclusions ensures a fast, reliable, and personalised experience for every visitor
Clearing the Cache:
- If you’ve enabled FastCGI Cache, you’ll notice a “Clear Cache” button on the same page.
- Clicking this will immediately clear the Nginx cache, which is useful if you’ve made recent changes to your site that aren’t reflected due to cached content.
Managing FastCGI Caching via FlyWP Helper Plugin
FlyWP provides a WordPress plugin called “FlyWP Helper” to manage site settings directly from your WordPress dashboard. Here’s how you can manage your page caching settings using this plugin:
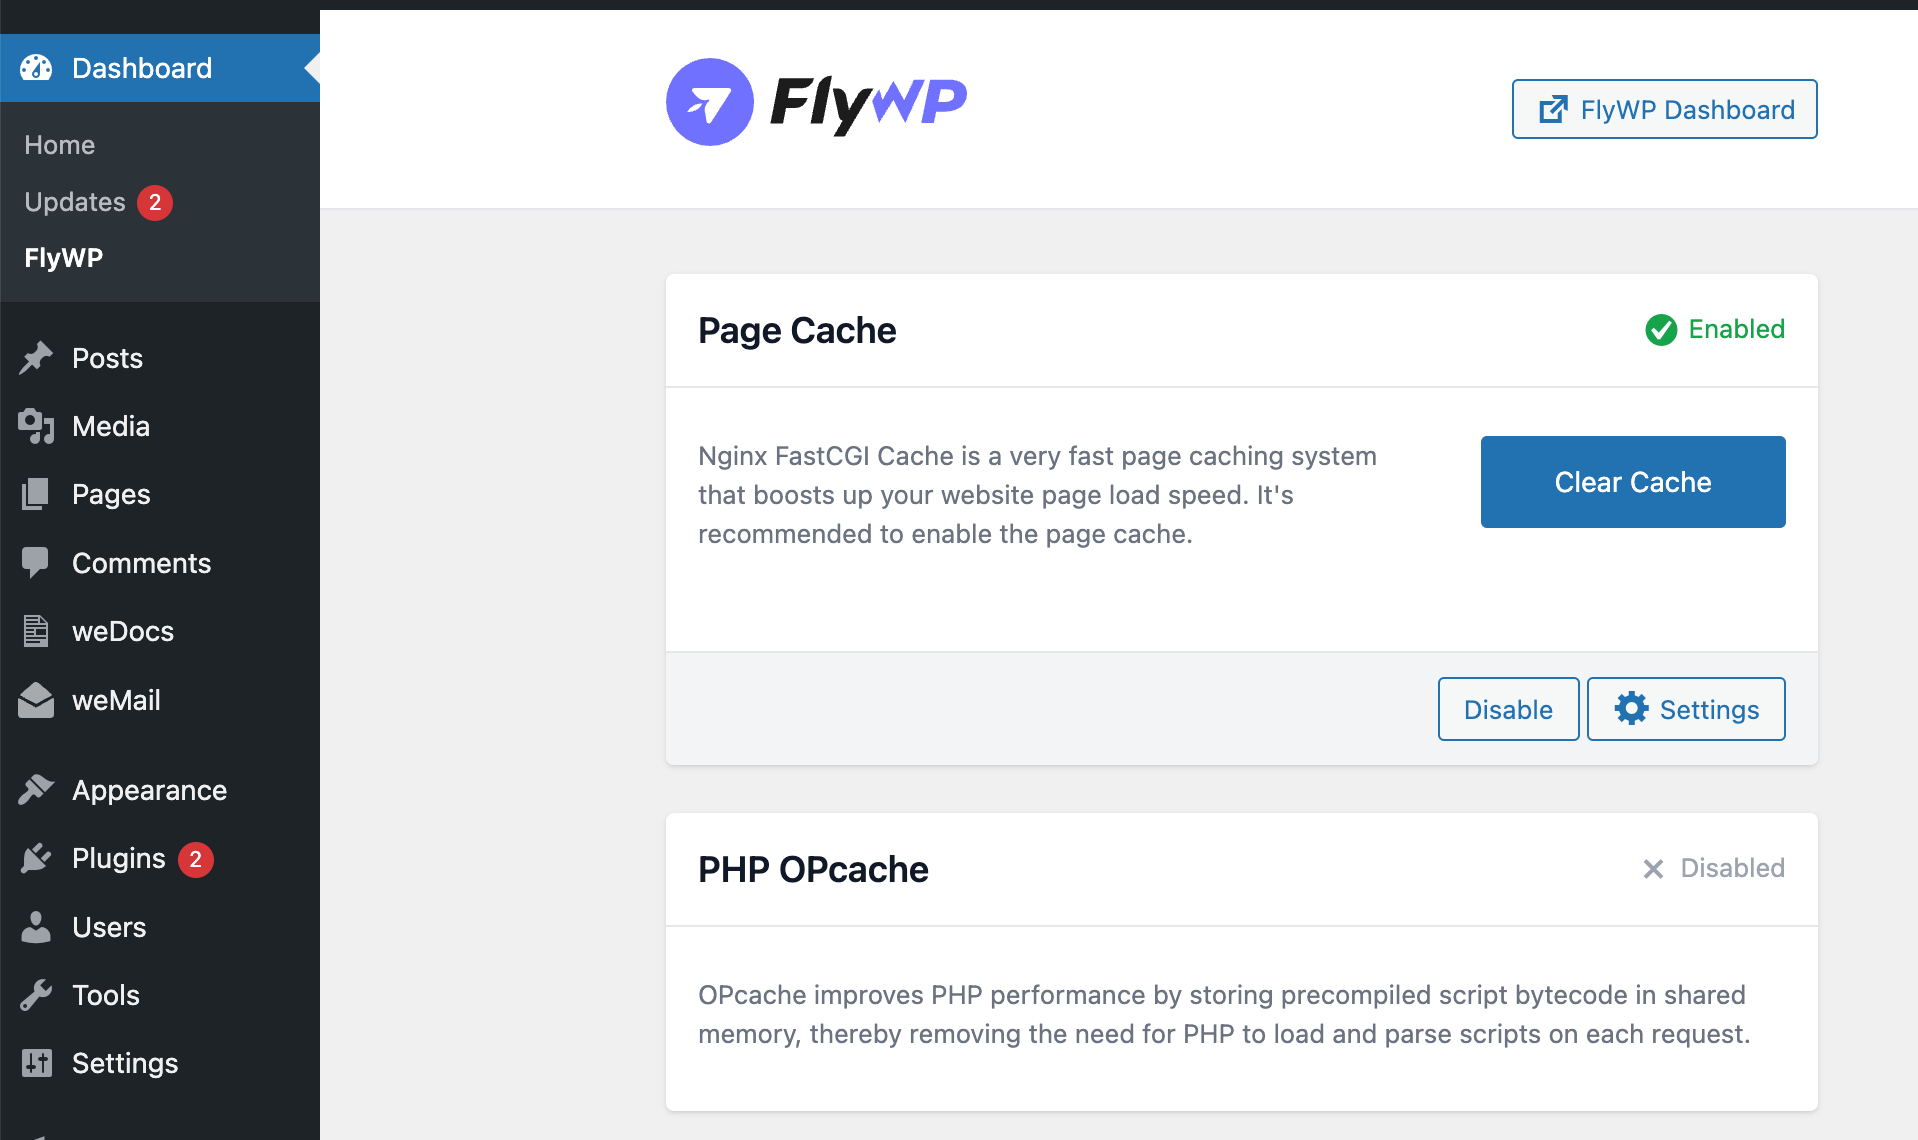
Accessing the Plugin:
- From your WordPress dashboard, navigate to the installed plugins.
- Find and click on the “FlyWP Helper” plugin.
Toggling Page Caching:
- Within the plugin interface, you’ll see options similar to the FlyWP dashboard for caching:
- None: Ensure no caching is applied.
- FastCGI Cache: Enable Nginx FastCGI Cache for faster page loads.
Clearing the Cache from WordPress:
- Just like in the FlyWP dashboard, the “FlyWP Helper” plugin also provides a “Clear Cache” button if FastCGI Cache is enabled.
- Use this button to swiftly clear the cache after making updates or changes to your site’s content.
With FlyWP’s straightforward page caching configurations, both on its platform and via its WordPress plugin, managing your site’s performance has never been easier. Remember, while caching accelerates page load times, it’s crucial to clear the cache after making significant changes to ensure your visitors see the most updated content.