FlyWP is dedicated to continually enhancing our platform’s security and usability based on user feedback. We are pleased to announce a significant update that streamlines SSH access to your managed servers through a new centralized IP whitelisting system.
What is IP Whitelisting?
IP whitelisting is a security measure used to control and restrict access to a network, server, or specific services by allowing only traffic from trusted IP addresses. Any attempt to access the system from an IP address, not on the list is blocked, reducing the risk of unauthorized access.
How to Whitelist FlyWP on Hosting Firewall
To maintain uninterrupted SSH access and ensure smooth operations, FlyWP users are required to whitelist the following IP address on their hosting provider end.
FlyWP IP Address: 49.13.31.45 , 91.107.195.115, 168.119.100.163, 188.34.177.5
Whitelist this IP address to ensure uninterrupted access and smooth operations.
You can configure whitelisting in 2 methods. You can configure either of the shared methods. Let’s explore those in detail.
Method 1 (Best & Recommended)
- Login to your cloud hosting provider (e.g. Digital Ocean, Vultr, Hetzner, Akamai, or Custom) panel.
- Then from your dashboard, Go to Setting → Security → Firewall then Create a Rule → Save as shown. In our case, we created a firewall rule in Digital Ocean.
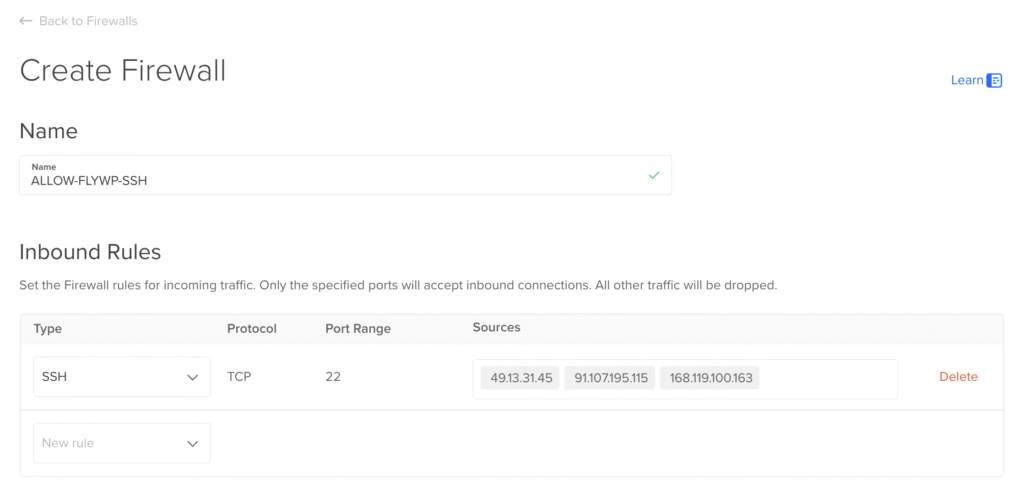
- Give a “Name” for the Firewall Rule so that you can manage it properly. Then set the “Type” based on your preference.
- Now enter the IP address “49.13.31.45” in the Source field & “Save”.
- You’re done whitelisting the FlyWP central server with your hosting provider.
Note: The setting route/menu could be different depending on the hosting providers. But the configuration process is pretty same.
Method 2
If you aren’t familiar so much with your hosting provider’s panel. You can set this inside FlyWP as well. Let’s have a quick look on this:
- Login to your FlyWP Dashboard, Then click on the “Server” that you want to create a firewall rule.
- Then click on “Firewall” from the left side menu → Click on the “Add New Rule” button on the right side of Firewall Rules.

- Write a suitable “Name” that you understand to manage this in need.
- Then Enter “22” in the “Port” field for SSH connection.
- Now Enter the IP “49.13.31.45” in the “From IP Address” field.
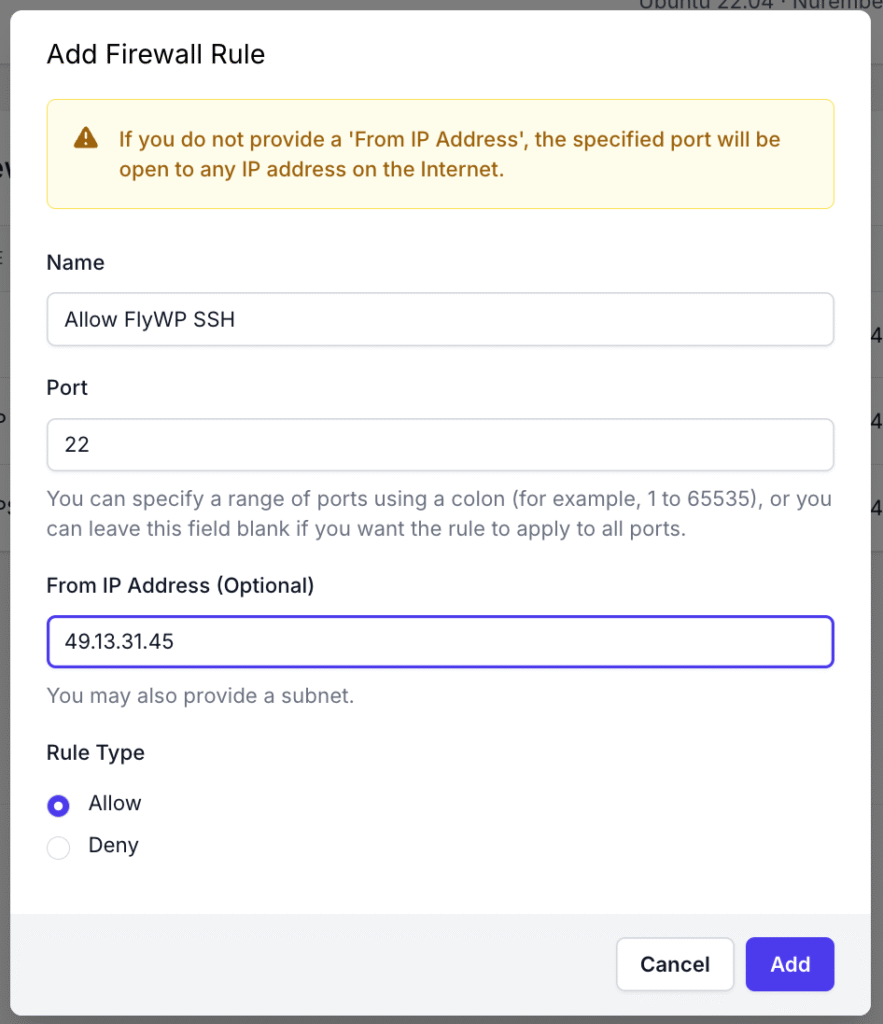
- Choose “Allow” in the ‘‘Rule Type” option.
- Finally, click on the “Add” button. You’re all set.
Note
- Allow – means you can access your servers with your mentioned IP and Ports on FlyWP.
- Deny – means your requests from the mentioned port and IP will be rejected to access servers on FlyWP.
Need Assistance?
If you have any questions about the new whitelisting process or need assistance implementing these changes, please contact FlyWP support or Feel free to E-mail us [email protected].