FlyWP provides an intuitive interface to manage databases for your server environment. With the integrated phpMyAdmin console, managing databases becomes a breeze. Here’s a guide to understanding and utilizing the database page on FlyWP.
Table of Contents:
- Accessing the Database Page
- phpMyAdmin Console
- Logging-in into phpMyAdmin
- Database Management
- Database User Management
- Database Credentials
- Security Recommendations
The Database page in FlyWP offers direct access to your databases. It integrates with phpMyAdmin, a popular open-source database management tool, allowing you to view, edit, and manage your databases directly from the FlyWP dashboard.
Accessing the Database Page:
- Navigate to the FlyWP dashboard.
- Click on
Servers. - Select the server for which you wish to access the database.
- On the left sidebar, click on
Database.
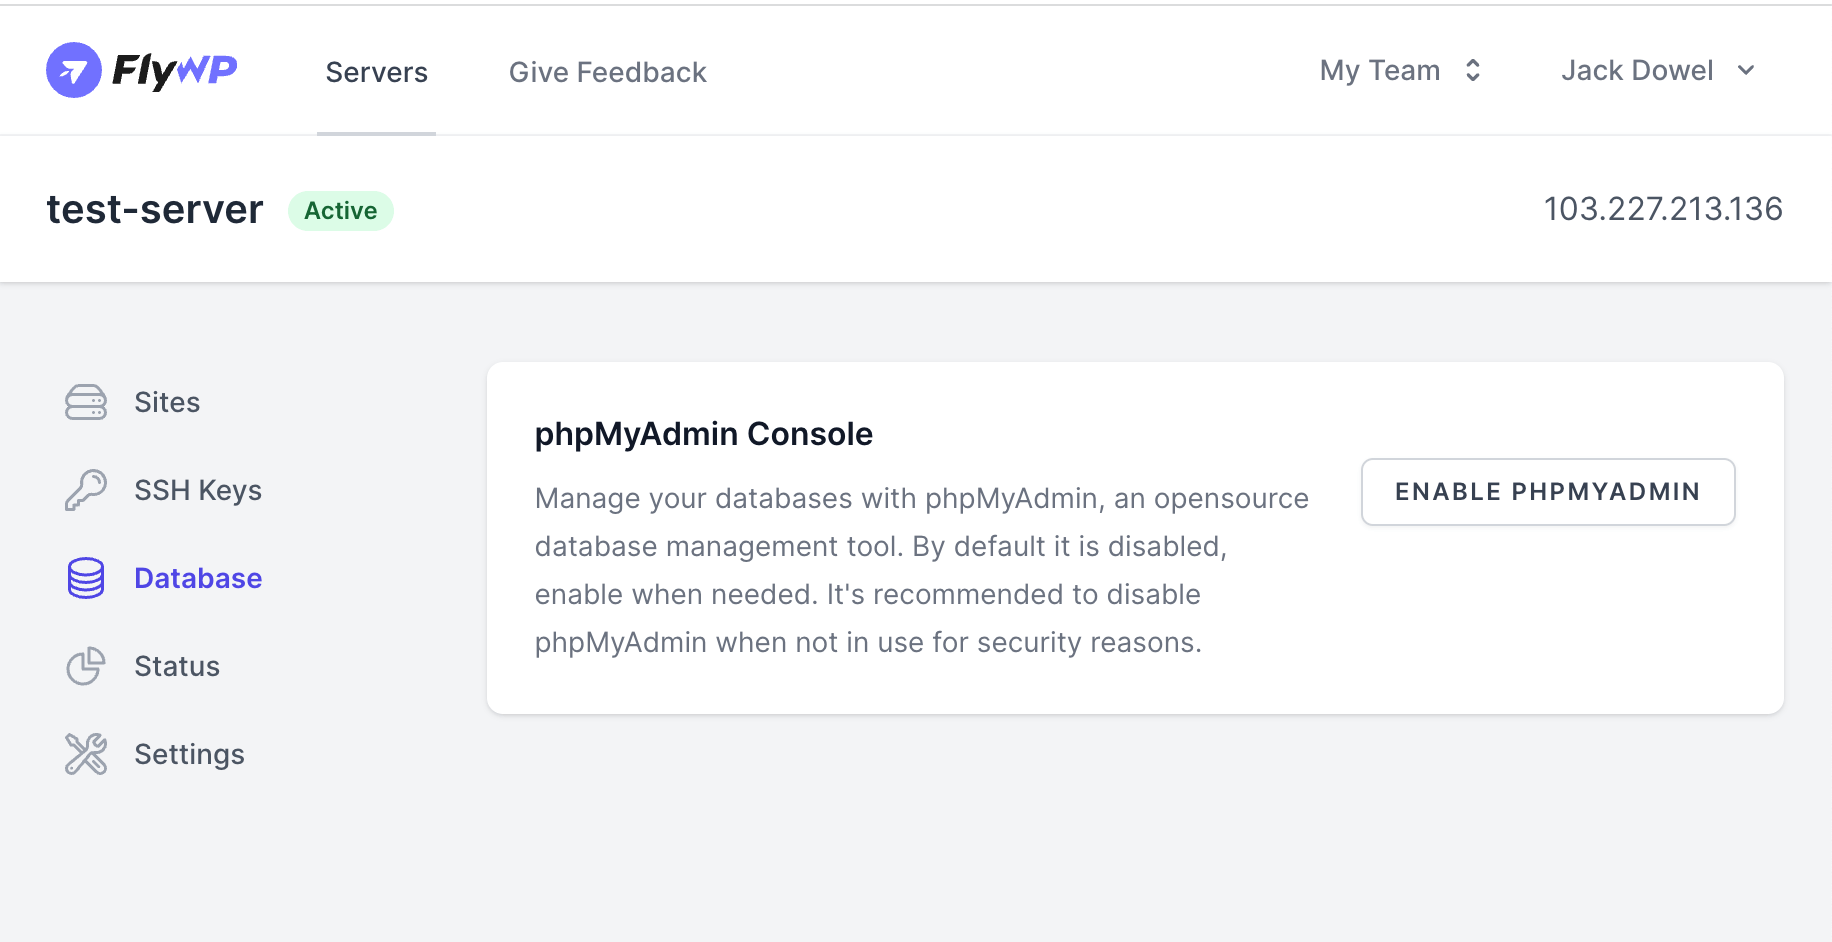
phpMyAdmin Console
phpMyAdmin is a free software tool that provides a user-friendly interface to manage MySQL databases. It allows you to perform operations like creating, modifying, deleting databases, tables, fields, and more.
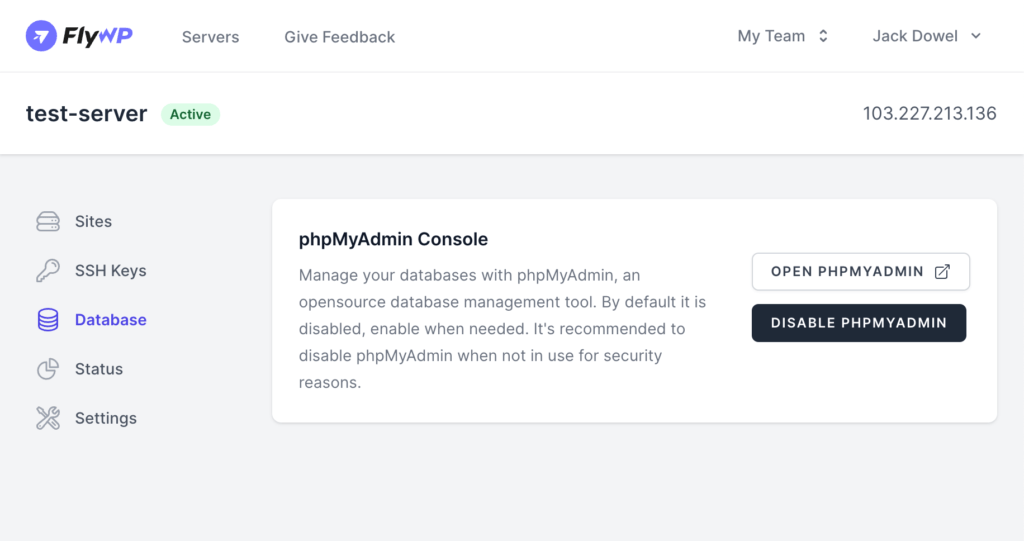
Accessing phpMyAdmin:
- By default, phpMyAdmin is disabled for security reasons. Click on
ENABLE PHPMYADMINto access it. - Once done with your tasks, it’s recommended to disable it by clicking on
DISABLE PHPMYADMIN.
Logging-in into phpMyAdmin
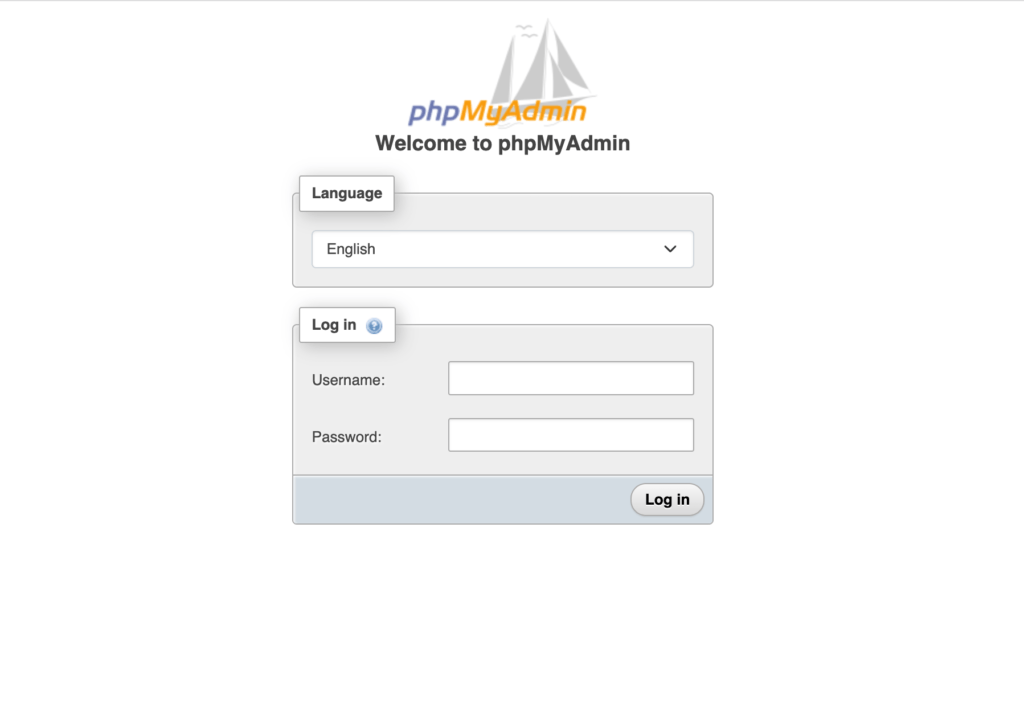
When you visit the phpMyAdmin page from the link, you’ll be presented with a login screen with Username and Password.
When you provision a server, you receive an email containing the newly created server details. In that email, you’ll find the database credentials of your server. The root username of your server is always “root“. Find the root password in your email to login into phpMyAdmin as the root user.
Also, whenever you create a new site, you also receive an email containing the database username and password specifically for that site. For security reasons, it’s always recommended to log in as a non-root user. In this case, login as the site user. Use the username and password from your site creation email.
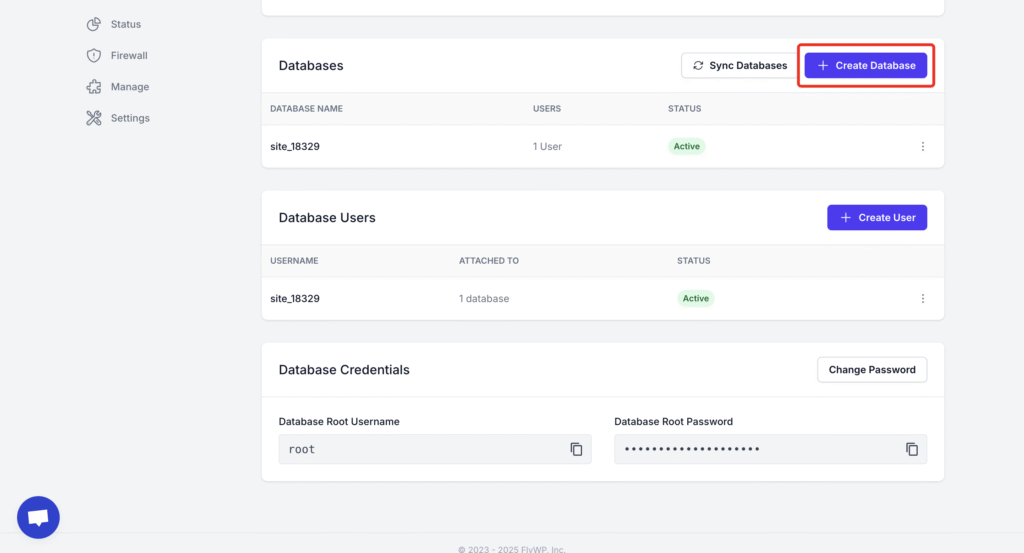
Database Management: Your Command Center
This section is your central hub for overseeing all your databases. You can effortlessly see what you’ve got, create brand-new ones, and ensure everything is perfectly in sync.
Your Database List:
Here, you’ll find a neat table showcasing all your existing databases. It provides a quick overview with:
- Database Name: The unique name you’ve given to your database.
- Users: A count of how many users are currently connected to this database.
- Status: An indicator showing whether the database is active and ready for use (e.g., “Active”).
Keeping Things Fresh:
- Sync Databases: Hit this button to refresh your database list and ensure you’re always viewing the most up-to-date information.
Creating a New Database:
- Create Database: Ready to set up a new database? Just click this button to get started!
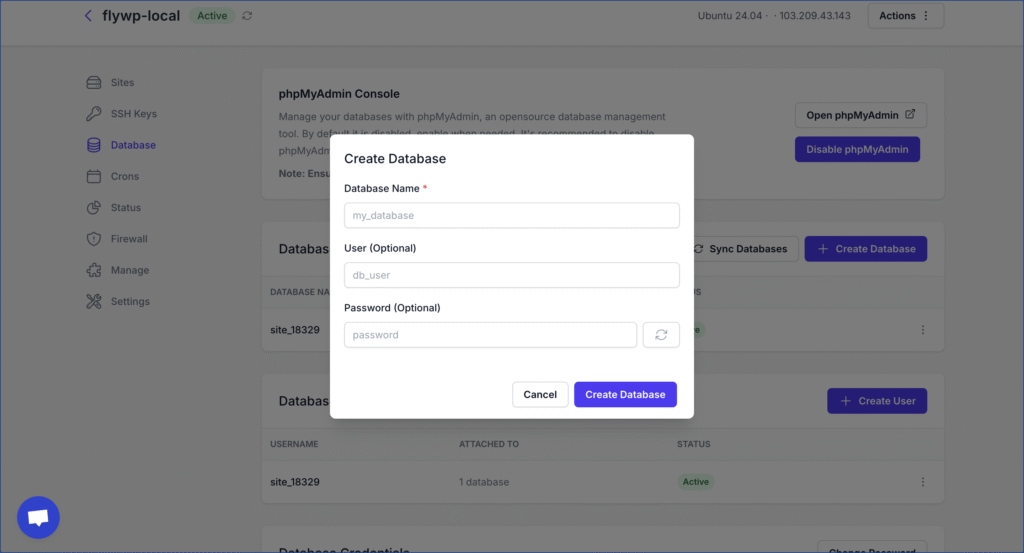
Creating a New Database (Walkthrough):
When you click “Create Database,” a friendly little window will pop up, guiding you through the process:
- Database Name (Required): This is where you’ll give your new database a memorable and descriptive name.
- User (Optional): You can choose to assign a specific user to this database right away.
- Password (Optional): If you’re creating a user, you can set their password here. We even have a handy button to generate a super strong, secure password for you!
- Cancel Button: If you change your mind or need to step away, click this to close the window without creating anything.
- Create Database Button: Once all the details are filled in, click this to bring your new database to life!
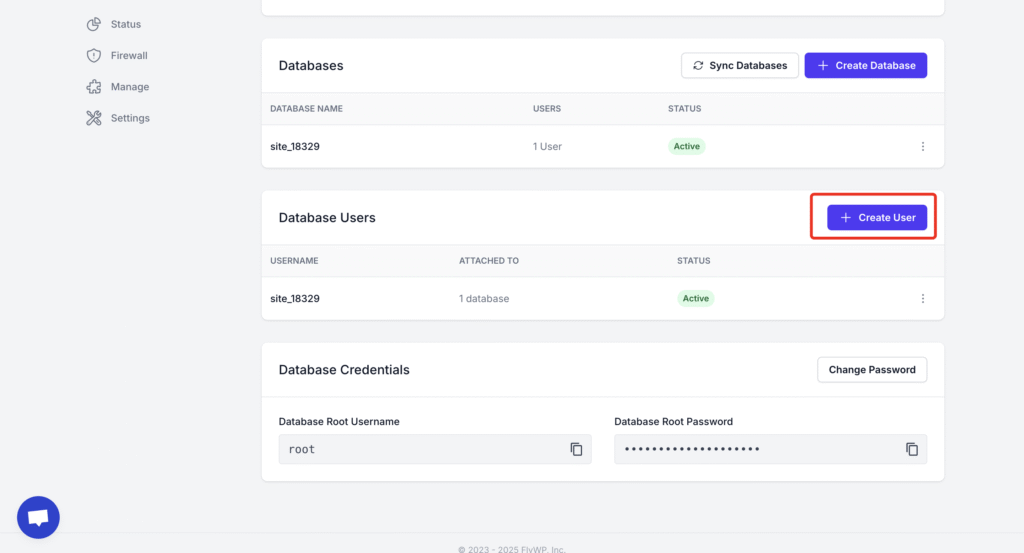
Database User Management: Controlling Access
This is where you take charge of who has access to your precious databases. You can easily create new users, view your existing ones, and update their passwords and access permissions with just a few clicks.
Your Database Users List:
This table provides a clear overview of all your database users, including:
- Username: The login name for each database user.
- Attached To: Indicates which databases each user is connected to.
- Status: Shows their current status (e.g., “Active”).
Adding a New User:
- Create User: Need to set up a new user? Click here to begin!
Creating a New Database User (Walkthrough):
Clicking “Create User” will open another helpful window to guide you:
- Username (Required): Choose a unique and easily identifiable username for your new database user.
- Password (Required): Set their password here. Don’t forget to use our password generator for maximum security!
- Database Access: This is a cool feature! You can precisely pick which databases this user can access by checking the boxes next to them (for example, site_18329). There’s also an “All Databases” option if you want them to have universal access to all current and future databases.
- Cancel Button: If you decide not to create the user, simply click here to close the window.
- Create User Button: All details are correct? Click this to add your new user!

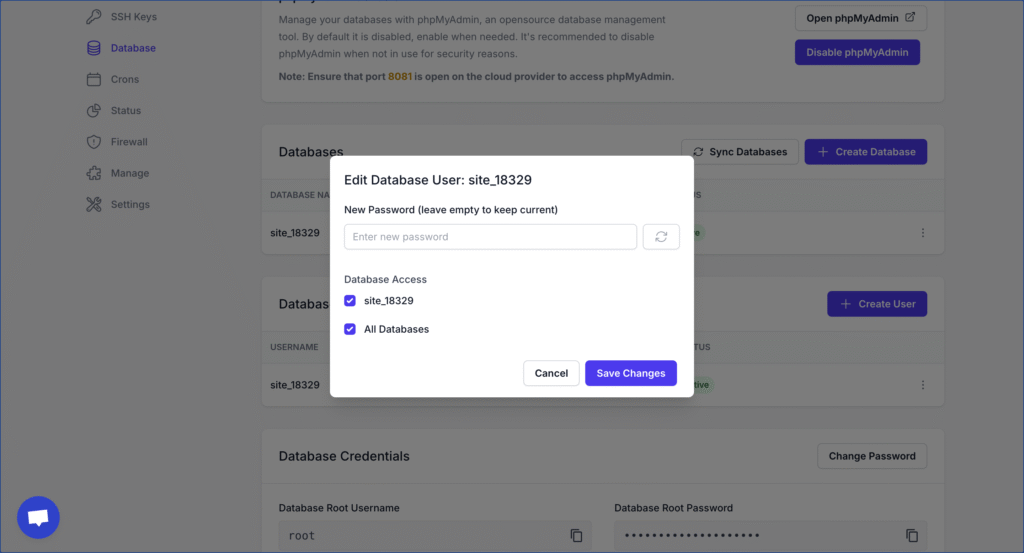
Editing a Database User (Walkthrough):
Sometimes, you’ll need to make adjustments to existing users. When you choose to edit a user, you’ll see a similar, intuitive window:
- New Password (Optional): If you wish to change their password, enter the new one here. If you leave this field blank, their current password will remain unchanged.
- Database Access: Just like during creation, you can easily adjust which databases they can access. Simply check or uncheck the relevant boxes, including the “All Databases” option.
- Cancel Button: Close the window without saving any changes you’ve made.
- Save Changes Button: Click this to apply all your updates to the database user.
Database Credentials: Your Server’s Keys
This small but mighty section gives you a quick and secure overview of your main database credentials.
Your Root Credentials:
- Database Root Username: You’ll see your server’s primary root username here (typically “root”).
- Database Root Password: This is masked for security, but you’ll find options to reveal it temporarily or copy it to your clipboard if you need it for external tools.
- Change Password: Need to update your root password for enhanced security? This button will guide you through that process.
Security Recommendations:
- Always disable phpMyAdmin when not in use to minimize potential security risks.
- Regularly backup your databases.
With FlyWP’s integrated database management features, maintaining and managing your databases becomes straightforward and efficient. Remember to always prioritize security and perform regular backups for safety.
With FlyWP’s integrated database management features, maintaining and managing your databases becomes straightforward and incredibly efficient. Remember to always prioritize security and perform regular backups for peace of mind!