
Follow this step-by-step guide to configure a wildcard SSL certificate using Cloudflare on FlyWP.
Prerequisites
- Access to your FlyWP dashboard.
- A Cloudflare API token with permission to edit DNS records. You can create one by visiting Cloudflare API Tokens.
Steps to Configure Wildcard SSL
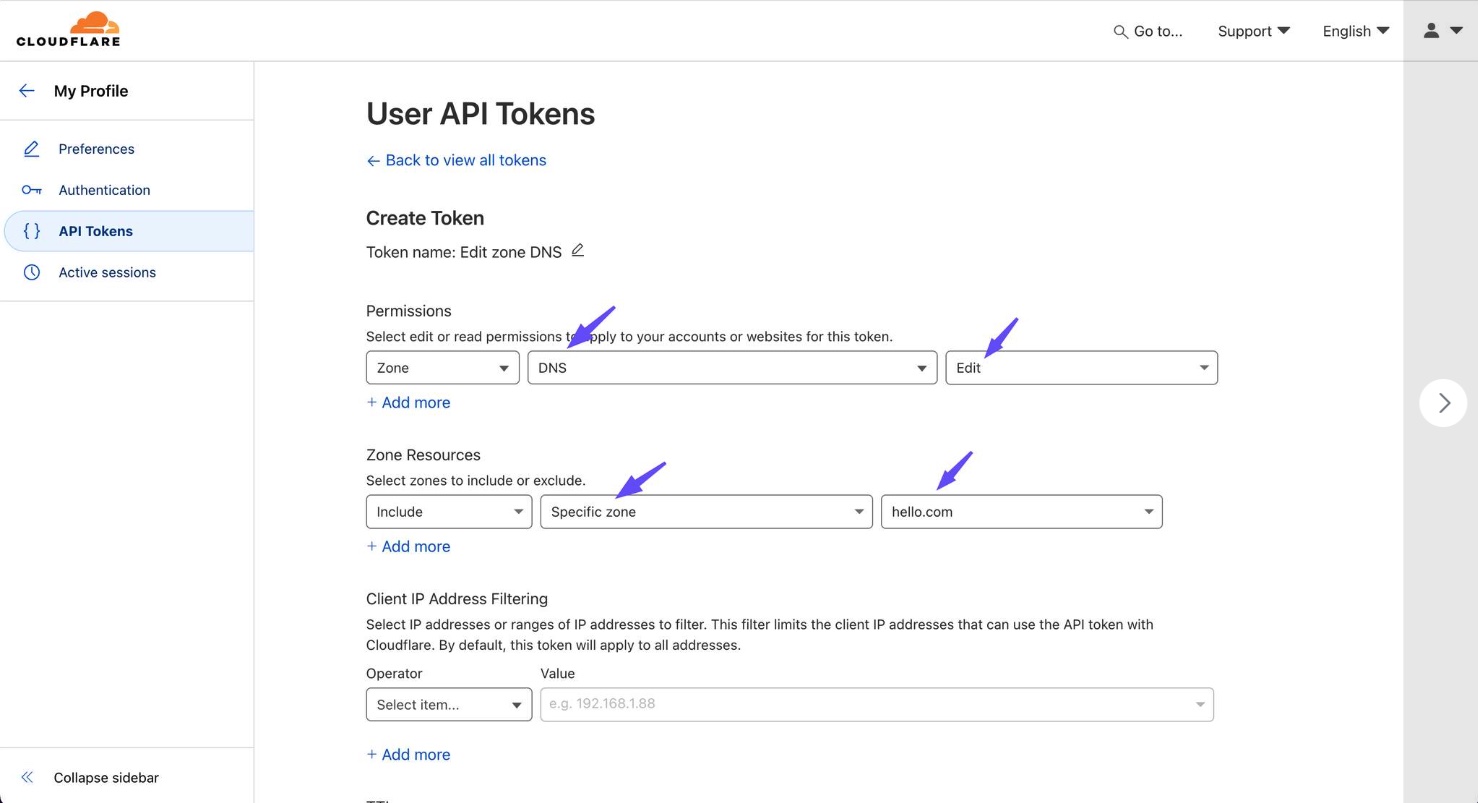
1. Create a Cloudflare API Token
- Go to the API Tokens page on Cloudflare.
- Create an API token with the necessary DNS permissions for your domain.
2. Access the SSL Settings on FlyWP
- Log in to your FlyWP dashboard and open the site for which you want to install the wildcard SSL certificate.
- Navigate to the SSL tab.
3. Configure SSL with Let’s Encrypt
- Select the Let’s Encrypt option under the SSL settings.
- Confirm your domain names to ensure they match what you want to secure with the wildcard certificate.
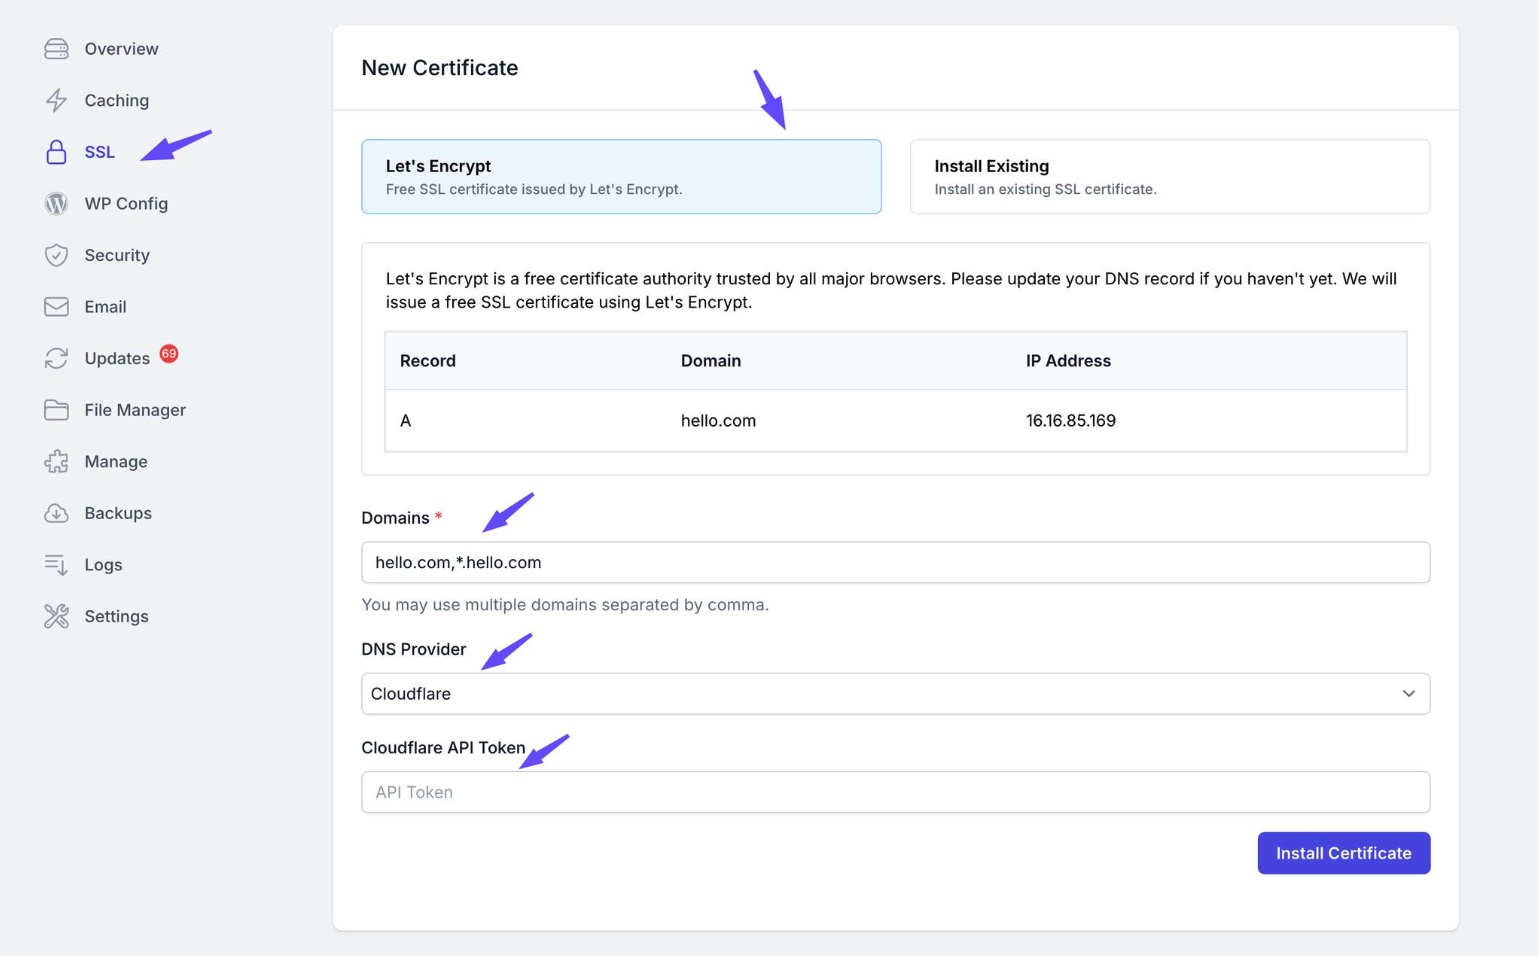
4. Set Cloudflare as DNS Provider
- Choose Cloudflare as the DNS provider.
- Paste your Cloudflare API Token in the provided input box.
5. Install and Activate the Certificate
- Click the Install Certificate button to start the generation process.
- Once the wildcard SSL certificate is generated, click the Activate button to enable it.
Additional Notes
- Ensure your domain is proxied through Cloudflare so the SSL works seamlessly.
- If you face any issues, double-check your Cloudflare API token permissions and domain configurations.
With these steps, your wildcard SSL certificate should be successfully installed and activated on your FlyWP site.