Getting Started with FlyWP
Welcome to FlyWP! Whether you’re launching your first website or managing multiple domains, our platform is designed to simplify the process. Follow this guide to get up and running with your servers and integrations, especially with Cloudflare.
1. Provisioning a Server
Before creating a server, you’ll need to set up a server provider. Here’s how:
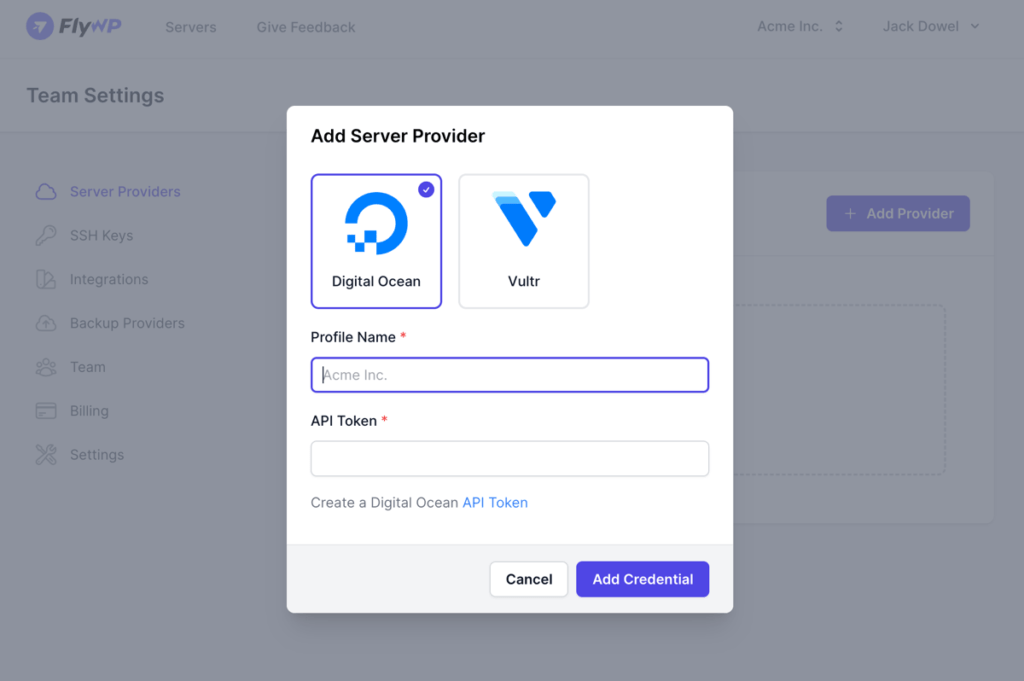
a. Add a Server Provider
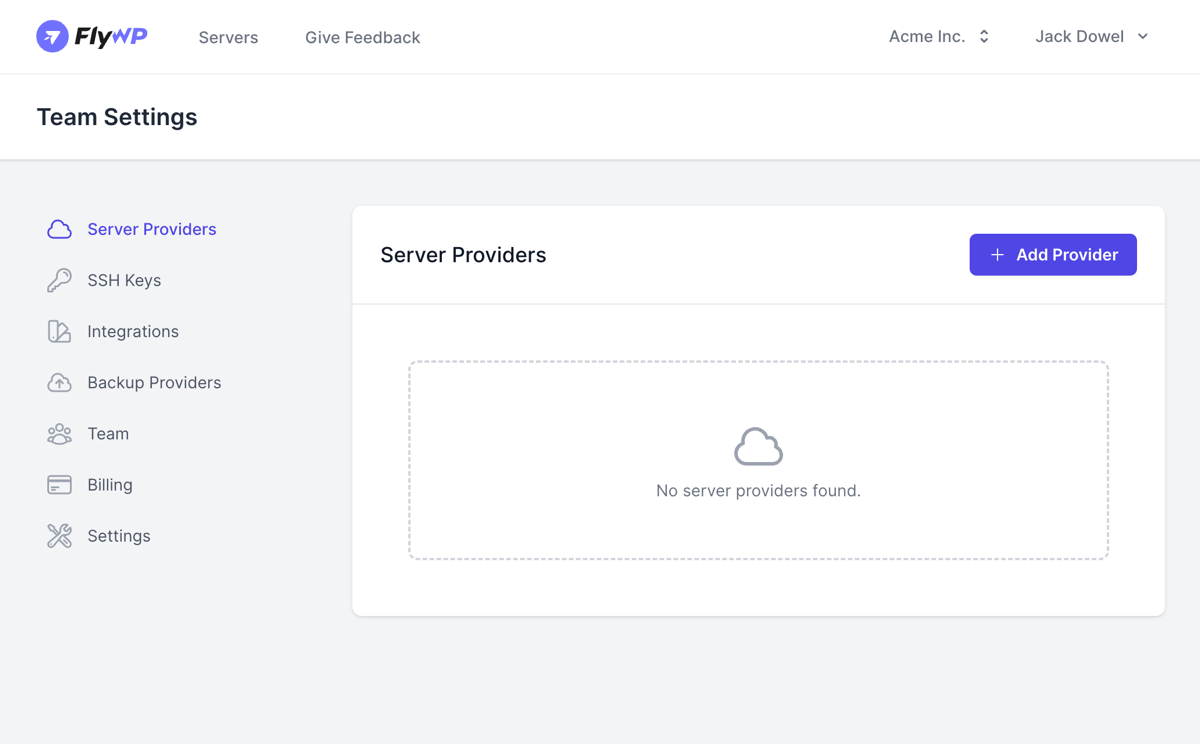
- From the FlyWP dashboard, navigate to
Team Settings. - Under the sidebar menu, click on
Server Providers. - Follow the on-screen instructions to add and authenticate your preferred server provider.
2. Configuring Cloudflare Integration
FlyWP allows you to integrate with Cloudflare for enhanced DNS management, caching, and security:
a. Connect to Cloudflare
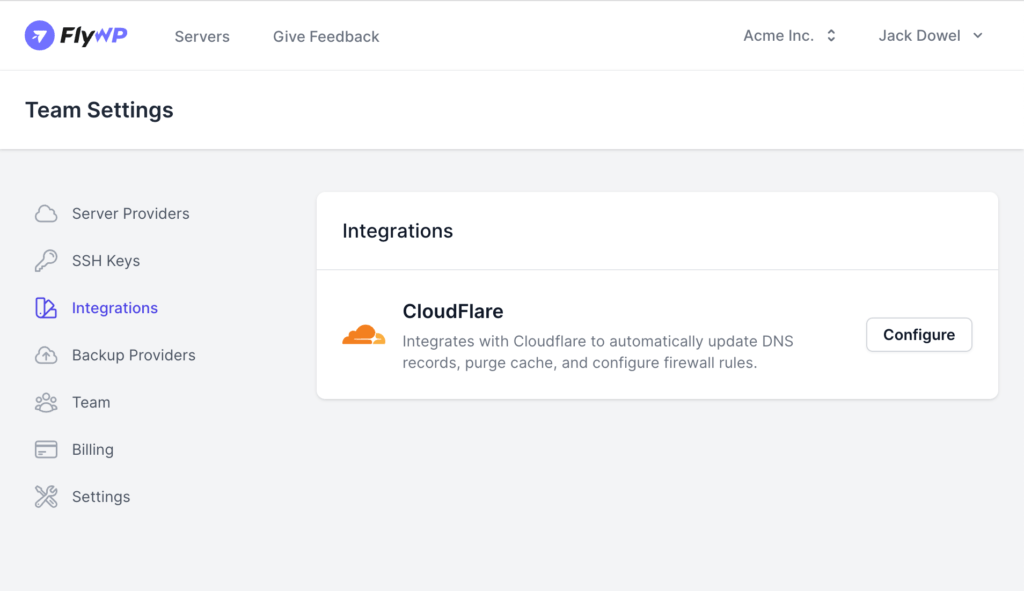
- From the FlyWP dashboard, navigate to
Team Settings. - Click on
Integrations. - Next to the Cloudflare logo, click on the
Configurebutton. - Connect your Cloudflare account by entering your Cloudflare account name and email.
- Provide the required API Token or Global API Key (you can find this in your Cloudflare dashboard).
- Click
Save.
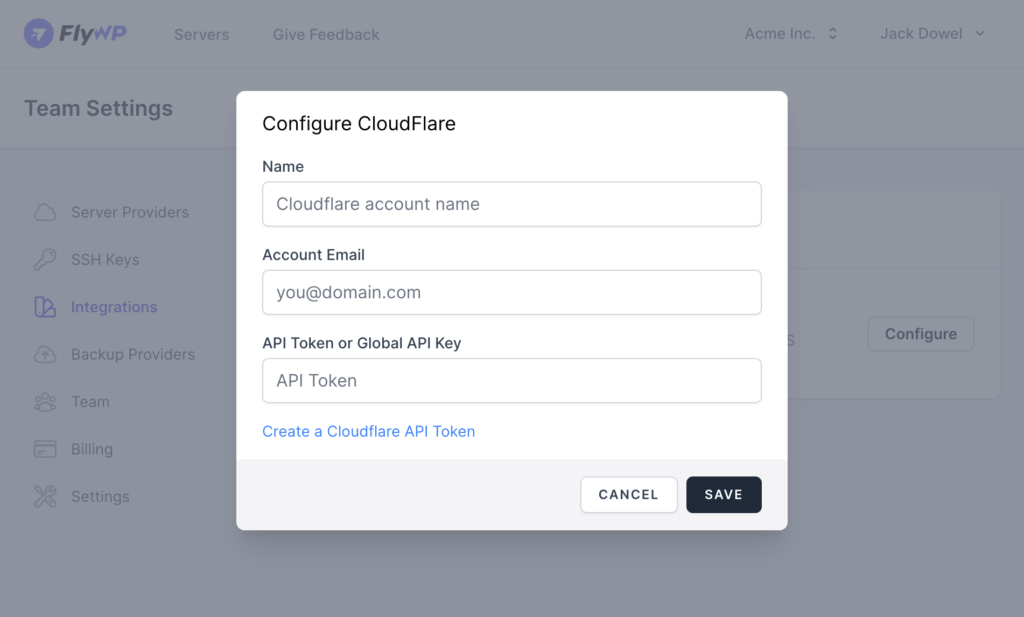

Remember, integrating with Cloudflare can help in automatically updating DNS records, purging cache, and configuring firewall rules.
3. Creating a Server
With your server provider in place and Cloudflare configured, you’re all set to create a server:
a. Launch a New Server
- From the FlyWP dashboard, click on
Servers. - Select
Add New Server. - Choose your previously added server provider from the dropdown list.
- Follow the on-screen instructions to finalize your server settings and provision it.
Once your server is up and running, you can further configure its settings, manage databases, and more directly from the FlyWP dashboard.
4. Creating a Site
After your server is up and running, you can start creating websites.
- Click on ‘Create New Site’ from your server’s dashboard.
- Enter the
Domain Namefor your website. If you’re just testing, you can utilize the FlyWP test domain by selecting ‘Use flywp.xyz test domain’. - For ease of SSL and DNS management, opt for the ‘Add DNS record on Cloudflare’ option if available.
- Select your desired
PHP Version. - Click ‘Next’ to proceed to the installation tab.
- Provide your website’s
Title,Admin Email,Admin Username, and a strongAdmin Password. - For enhanced site performance, consider enabling ‘Full Page Cache’.
- Click ‘Next’ to finalize the site creation. Your site will be ready in a few moments!
Congratulations, you’ve succes/sfully set up your FlyWP environment! Continue exploring the platform’s features, and feel free to reach out to our support team for any assistance.