Migrating one WordPress website to a new server is relatively straightforward. But what happens when you need to move 10, 20, or even 50 websites?
For WordPress agencies, developers, and hosting providers, a multi-site WordPress site migration can quickly become complicated. Every website has its own files, database, configuration, plugins, themes, and domain settings. A small mistake can result in broken websites, missing data, or unexpected downtime.
The good news is that you don't have to treat every migration as a completely separate project. With proper preparation, the right migration approach, and a structured workflow, you can move multiple WordPress websites to a new server safely and efficiently.
In this guide, you'll learn how to migrate multiple WordPress websites to a new server, compare the different migration methods, avoid common mistakes, and simplify the entire process using a centralized server management platform.
Why Migrate Multiple WordPress Websites to a New Server?
Businesses and agencies move their WordPress websites to a new server for several reasons:
- Better server performance: Move to infrastructure with more CPU, RAM, storage, and bandwidth to handle growing traffic.
- Lower hosting costs: Consolidate websites onto a more cost-effective server or cloud provider.
- Better scalability: Move to infrastructure that can accommodate additional websites and increasing resource demands.
- Improved server management: Switch to a platform that provides better control over multiple WordPress installations.
- Hosting provider changes: Migrate from shared hosting or managed hosting to a cloud VPS or dedicated server.
- Better security and reliability: Adopt infrastructure with improved backup, monitoring, and security configurations.
For agencies managing client websites, a server migration is also an opportunity to standardize infrastructure and make it easier to manage multiple WordPress sites from one dashboard afterwards.
However, migrating several websites takes more than copying files from one server to another. You need to plan the process carefully to avoid downtime and data loss.
What to Consider Before Migrating Multiple WordPress Websites
Before moving any website, prepare both your existing and new server environments. A little planning can prevent hours of troubleshooting later.
1. Audit Your Existing Server
Start by creating an inventory of every website hosted on your current server. For each one, document:
- Domain name and current server IP
- WordPress version
- PHP version and required extensions
- Website file size
- Database size
- Active themes and plugins
- Custom configurations and integrations
- Scheduled tasks and cron jobs
- SSL certificate and DNS configuration
Also flag websites with special requirements, such as WooCommerce stores, membership platforms, multilingual websites, or high-traffic applications. These need extra attention during migration.
2. Choose the Right New Server
Your new server needs enough resources to run every website without creating performance bottlenecks. Consider:
- CPU: Enough processing power for concurrent requests, background tasks, and database operations.
- RAM: Sufficient memory for PHP workers, MySQL, caching services, and other running processes.
- Storage: The combined size of website files, databases, backups, and expected future growth.
- Bandwidth: Monthly traffic and file delivery requirements.
- Server stack: Compatibility with your websites' PHP versions, database requirements, and web server configurations.
You should also decide between Nginx and OpenLiteSpeed based on your performance requirements and existing configurations. Our Nginx vs OpenLiteSpeed comparison covers the trade-offs.
If you're moving multiple client websites, don't size the server on average usage alone. Leave room for traffic spikes and future growth.
3. Create a Complete Backup
Never begin a server migration without a verified backup. For every website, back up:
- WordPress core files
- Themes and plugins
- Uploads and media files
- Database exports
- The
wp-config.phpfile - Custom server configuration files
- Any application files outside the standard WordPress directory
Keep backups organized by domain name so you can identify and restore individual websites if something goes wrong:
migration-backups/├── example.com/│ ├── files.tar.gz│ ├── database.sql│ └── wp-config.php└── clientsite.com/ ├── files.tar.gz ├── database.sql └── wp-config.phpAfter creating backups, verify that the files are accessible and the database exports are not corrupted. For extra safety, keep a copy off the server too, for example in Cloudflare R2 object storage.
Important: If your websites receive frequent updates, customer registrations, or eCommerce orders, plan a final data synchronization before switching DNS. A backup taken several hours before migration may not contain the latest information.
4. Prepare a Migration Checklist
Track the progress of every website in one place, so nothing gets overlooked when you're moving dozens of sites:
| Website | Backup | Files | Database | SSL | Tested | DNS updated |
|---|---|---|---|---|---|---|
| example.com | Done | Done | Done | Done | Done | Pending |
| clientsite.com | Done | Done | Done | Pending | Pending | Pending |
| shop.example.org | Done | In progress | Pending | Pending | Pending | Pending |
A spreadsheet works fine. What matters is that every domain has its own row and every step has a clear status.
Different Ways to Migrate Multiple WordPress Websites
There isn't one right way to migrate WordPress websites. The best method depends on the number of websites, their sizes, your technical experience, and your infrastructure.
1. Manual Migration Using SSH, SFTP, and Database Export
Manual migration gives you complete control. You use SSH, SCP, SFTP, rsync, and MySQL tools to transfer website files and databases between servers.
Advantages:
- Complete control over files and configurations
- No dependency on a migration plugin
- Suitable for large websites and customized environments
- Flexible for server-to-server migration
Limitations:
- Requires command-line knowledge
- Repetitive when managing many websites
- Easy to make mistakes with database credentials and permissions
- Requires manual testing and configuration
This method suits developers and server administrators comfortable with Linux.
2. Migration Using WordPress Plugins
Migration plugins package website files and databases into transferable archives or provide automated migration workflows. Popular options include Duplicator, All-in-One WP Migration, and WP Migrate.
Advantages:
- Beginner-friendly interfaces
- Less command-line work
- Convenient for individual websites
- Some tools support remote migration and database synchronization
Limitations:
- Large websites may hit upload or execution limits
- Plugin compatibility can become an issue
- Some advanced features require paid plans
- Repeating the process across many websites is time-consuming
Plugins are a reasonable option for moving a single site to a new host, but they're rarely the most efficient approach for agencies moving dozens of installations.
3. Migration Using Hosting Control Panels
Some hosting providers and control panels include built-in migration utilities that automate file transfers, database imports, and website configuration.
Advantages:
- Centralized website management
- Less manual configuration
- Convenient when migrating between compatible environments
Limitations:
- Migration support may depend on the source hosting provider
- Custom configurations may require manual adjustments
- Not every control panel supports every hosting environment
4. Migration Using a Server Management Platform
A server management platform gives you one interface for your cloud servers and WordPress installations. Instead of handling every website separately through SSH and different hosting dashboards, you manage your infrastructure from one place.
Depending on the platform, this can simplify:
- Connecting and configuring new servers
- Deploying WordPress websites
- Cloning, transferring, or bulk-migrating websites
- Managing SSL certificates
- Configuring backups
- Monitoring website resources
For agencies managing multiple WordPress websites, this approach cuts down on repetitive server administration.
How to Migrate Multiple WordPress Websites to a New Server: Step-by-Step
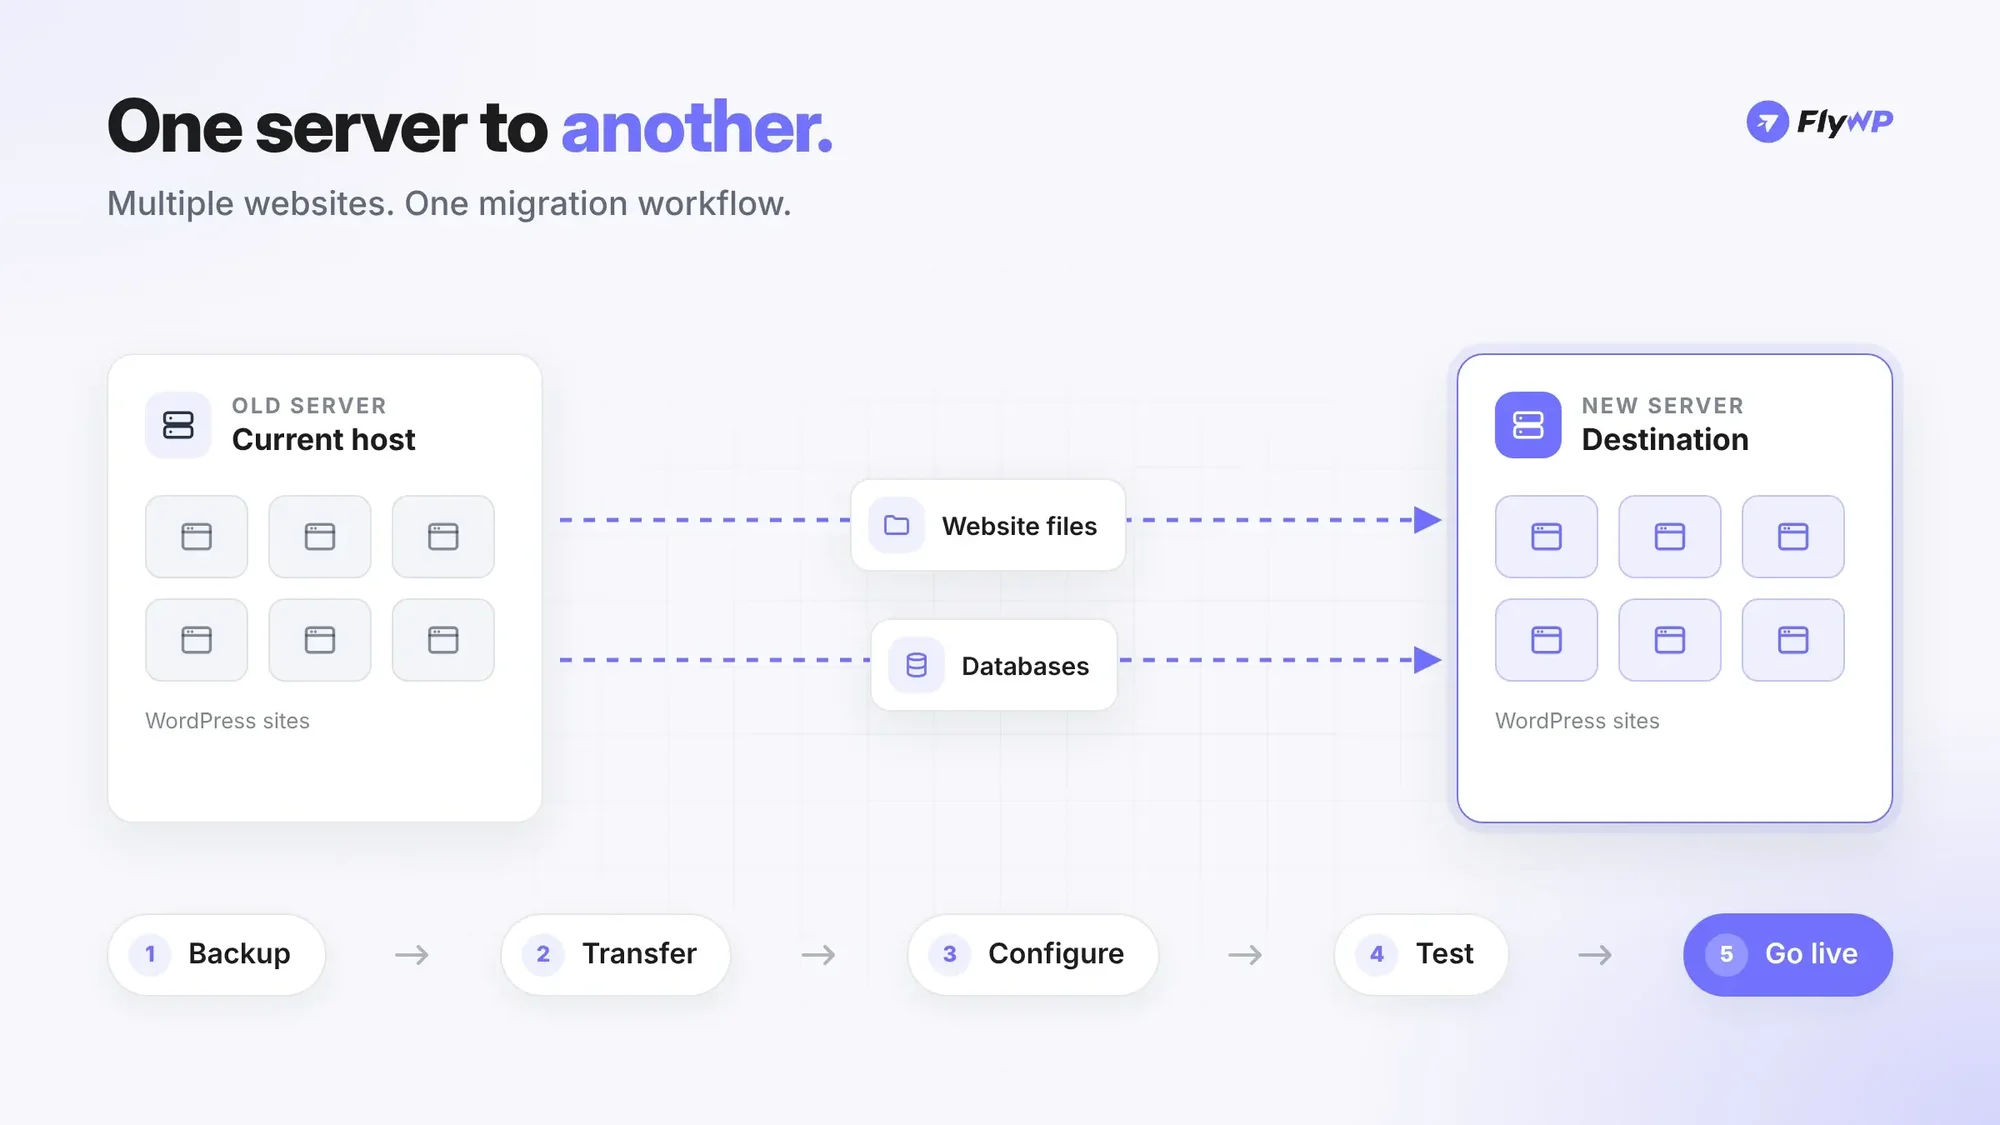
Now let's walk through the actual migration. This tutorial uses a manual server-to-server approach, which gives you full control over files, databases, and configurations.
We'll assume you have:
- An existing Linux server hosting multiple WordPress websites
- A new Linux server with sufficient resources
- SSH access to both servers
- Domain and DNS management access
- Administrative access to the WordPress installations
Step 1: Set Up Your New Server
Start by preparing the destination server. At a minimum, you'll need:
- A supported Linux distribution
- Nginx or OpenLiteSpeed
- A compatible PHP version and the required PHP extensions
- MySQL or MariaDB
- Firewall and SSH configuration
- Sufficient storage and memory
Update your server packages before installing anything. On Ubuntu:
sudo apt update && sudo apt upgrade -yNext, configure your web server, PHP, and database services. Give each website its own document root:
/var/www/├── example.com/│ └── public/├── clientsite.com/│ └── public/└── anothersite.com/ └── public/Each website should also have its own isolated database and configuration.
Pro tip: If you're managing multiple websites, a server management platform can provision the server and deploy WordPress for you instead of configuring every component by hand.
Step 2: Create Backups of All WordPress Websites
Before transferring anything, create a complete backup of every website on the old server.
Archive each website's files with tar:
mkdir -p ~/migration-backups/example.comtar -czf ~/migration-backups/example.com/files.tar.gz -C /var/www/example.com publicExport the database with mysqldump:
mysqldump -u DB_USER -p --single-transaction --quick DB_NAME > ~/migration-backups/example.com/database.sqlReplace DB_USER and DB_NAME with the website's actual database username and name. You'll find both in its wp-config.php. The --single-transaction flag takes a consistent snapshot of InnoDB tables without locking the site.
Repeat this for every website, keeping each one in its own folder. For large websites, transfer files in manageable batches.
Before you move on, confirm that every website has both a file archive and a database export.
Step 3: Transfer Website Files to the New Server
Once the backups are ready, copy them to the destination server. For a single archive, scp works:
scp ~/migration-backups/example.com/files.tar.gz user@NEW_SERVER_IP:~/migration-backups/example.com/For large websites, rsync is the better option. It can resume interrupted transfers and only sends files that changed since the last run:
rsync -avz --progress /var/www/example.com/public/ user@NEW_SERVER_IP:/var/www/example.com/public/To move several websites in one go, loop over your domains. This creates each destination directory first, then syncs the files:
for site in example.com clientsite.com anothersite.com; do ssh user@NEW_SERVER_IP "mkdir -p /var/www/$site/public" rsync -avz /var/www/$site/public/ user@NEW_SERVER_IP:/var/www/$site/public/doneCopy the database exports across as well:
rsync -avz ~/migration-backups/ user@NEW_SERVER_IP:~/migration-backups/After the transfer, compare file sizes and check that important directories, especially wp-content/uploads, were copied in full.
Step 4: Migrate WordPress Databases
Website files alone aren't enough. Each website also needs its database.
First, create a separate database and user for each website on the new server. Open the MySQL shell with sudo mysql, then run:
CREATE DATABASE example_db CHARACTER SET utf8mb4 COLLATE utf8mb4_unicode_ci;CREATE USER 'example_user'@'localhost' IDENTIFIED BY 'use-a-strong-password';GRANT ALL PRIVILEGES ON example_db.* TO 'example_user'@'localhost';FLUSH PRIVILEGES;Next, import the database backup:
mysql -u example_user -p example_db < ~/migration-backups/example.com/database.sqlRepeat this for every website, and record each database name and its credentials. You'll need them in the next step.
Important: Never share one database between independent WordPress websites unless you have a specific, properly configured architecture that requires it.
Step 5: Update WordPress Configurations
After importing the database, update each website's wp-config.php:
sudo nano /var/www/example.com/public/wp-config.phpSet the new database details:
define( 'DB_NAME', 'example_db' );define( 'DB_USER', 'example_user' );define( 'DB_PASSWORD', 'use-a-strong-password' );define( 'DB_HOST', 'localhost' );Save the file, then check file permissions. A typical starting point for a standard Linux WordPress installation is 755 for directories and 644 for files:
sudo find /var/www/example.com/public -type d -exec chmod 755 {} \;sudo find /var/www/example.com/public -type f -exec chmod 644 {} \;Set ownership to the user and group your web server and PHP-FPM run as. On a typical Ubuntu Nginx setup, that's www-data:
sudo chown -R www-data:www-data /var/www/example.com/publicYour actual ownership requirements may differ depending on your PHP-FPM pool and deployment setup. Repeat the configuration for every migrated website.
Step 6: Configure Domains and SSL Certificates
Every website needs its domain configured on the new server, pointing to its own document root. For Nginx, a basic server block looks like this:
# /etc/nginx/sites-available/example.comserver {    listen 80;    listen [::]:80;    server_name example.com www.example.com;
    root /var/www/example.com/public;    index index.php;
    location / {        try_files $uri $uri/ /index.php?$args;    }
    location ~ \.php$ {        include snippets/fastcgi-php.conf;        fastcgi_pass unix:/run/php/php8.3-fpm.sock;    }}
Enable it and reload Nginx:
sudo ln -s /etc/nginx/sites-available/example.com /etc/nginx/sites-enabled/sudo nginx -t && sudo systemctl reload nginxThis is only a minimal example. A production server also needs security rules, caching, and tuned PHP-FPM handling. Our annotated Nginx config for WordPress walks through a complete setup.
Then set up an SSL certificate. With Let's Encrypt and Certbot on Nginx:
sudo certbot --nginx -d example.com -d www.example.comNote: Certbot's default HTTP validation only succeeds once the domain resolves to the new server. If you need HTTPS working before the DNS switch, use DNS validation (Certbot has plugins for most DNS providers) or copy the existing certificate from the old server. Otherwise, test over HTTP in the next step and issue the certificate right after you update DNS.
Confirm the certificate is installed and HTTPS requests work, then repeat for every website.
Step 7: Test Websites Before Updating DNS
This is one of the most important steps. Don't point your domains to the new server yet.
Test each website first with a local hosts-file override. This sends only your own computer to the new server, without changing public DNS:
NEW_SERVER_IP example.com www.example.comNEW_SERVER_IP clientsite.com www.clientsite.comAdd these lines to your hosts file (/etc/hosts on macOS and Linux, C:\Windows\System32\drivers\etc\hosts on Windows), replacing NEW_SERVER_IP with the new server's IP address. Then visit each website in your browser and check that:
- The homepage and internal pages load correctly
- The WordPress admin dashboard is accessible
- Images and media files display
- Forms and contact pages work
- Plugins and themes function properly
- WooCommerce checkout and order workflows work, where applicable
- Permalinks and redirects are correct
- No PHP or database errors appear
Pay special attention to database consistency on WooCommerce and other frequently updated websites. If the old server receives new orders, registrations, or content during testing, those changes need to be synchronized before the final DNS switch.
Remove the hosts-file entries when you're done, so you see what real visitors see.
Step 8: Update DNS Records
Once every website has passed testing, point the domains to the new server. Log in to your DNS provider and update the relevant A records:
| Type | Name | Value | TTL |
|---|---|---|---|
| A | @ | NEW_SERVER_IP | 300 |
| A | www | NEW_SERVER_IP | 300 |
The exact records depend on your existing setup. For example, www may be a CNAME to the root domain, and you may also have an AAAA record for IPv6 that needs updating.
Lower the TTL to around 300 seconds well before the migration, if your DNS provider allows it. Do this at least as long ahead as the current TTL, so resolvers have time to pick up the shorter value. This helps the new records spread faster, although actual propagation and caching vary.
If you use Cloudflare or another DNS proxy, check that its proxy and SSL settings are compatible with the new server.
After updating DNS, monitor each domain until it resolves to the new server.
Important: DNS changes don't reach every visitor instantly. Keep the old server running while traffic moves to the new infrastructure.
Step 9: Perform Final Checks and Monitor Websites
After updating DNS, monitor the migrated websites carefully. Check:
- Website availability
- SSL certificate status
- Server resource consumption
- PHP and web server error logs
- Database connectivity
- Page load performance
- Contact forms and transactional emails
- Scheduled tasks and cron jobs
- Backup configuration
For dynamic websites, make sure no new content, registrations, or orders are still being written to the old server.
Keep the old infrastructure available until you've confirmed the migration succeeded and all critical traffic reaches the new server. Only then decommission the old server.
Common Challenges When Migrating Multiple WordPress Websites
Even with careful preparation, a multi-site migration can surface unexpected issues. Here are the most common ones and how to handle them.
1. Website Downtime
Why it happens: DNS changes, server configuration errors, incomplete file transfers, or database connection problems.
How to avoid it: Test each website before switching DNS, lower the DNS TTL ahead of time, and keep the old server available during the transition.
2. Large File Transfer Failures
Why it happens: Network interruptions, insufficient disk space, or connection timeouts.
How to avoid it: Use rsync for large transfers. It supports incremental synchronization, so you can resume and update transfers instead of starting over.
3. Database Connection Errors
Why it happens: Incorrect database names, usernames, passwords, host settings, or database permissions.
How to avoid it: Verify the credentials in each wp-config.php and test connectivity before switching DNS.
4. PHP Version Compatibility
Why it happens: The new server runs a PHP version that an older plugin, theme, or custom code doesn't support.
How to avoid it: Audit PHP requirements before migration and test each website on the destination PHP version. On FlyWP, you can change a website's PHP version per site.
5. Missing Media Files
Why it happens: An incomplete uploads directory transfer or incorrect file permissions.
How to avoid it: Verify the wp-content/uploads directory and compare file counts or checksums where practical.
6. Broken URLs and Serialized Data
Why it happens: An incorrect search-and-replace, or changing the website URL without accounting for serialized WordPress data.
How to avoid it: Use WP-CLI search-replace or a migration tool that handles serialized data correctly. Always back up the database first, and start with a dry run:
wp search-replace 'https://old-domain.com' 'https://new-domain.com' --all-tables --dry-runOnly run the actual replacement after reviewing the results and confirming that a domain change is necessary. Moving a website to a new server doesn't require changing its domain or site URL.
7. SSL and DNS Configuration Issues
Why it happens: Incorrect DNS records, certificate installation problems, or mismatched SSL settings.
How to avoid it: Verify each domain's configuration, SSL certificate, and proxy settings after migration.
How to Minimize Downtime During Multi-Site Migration
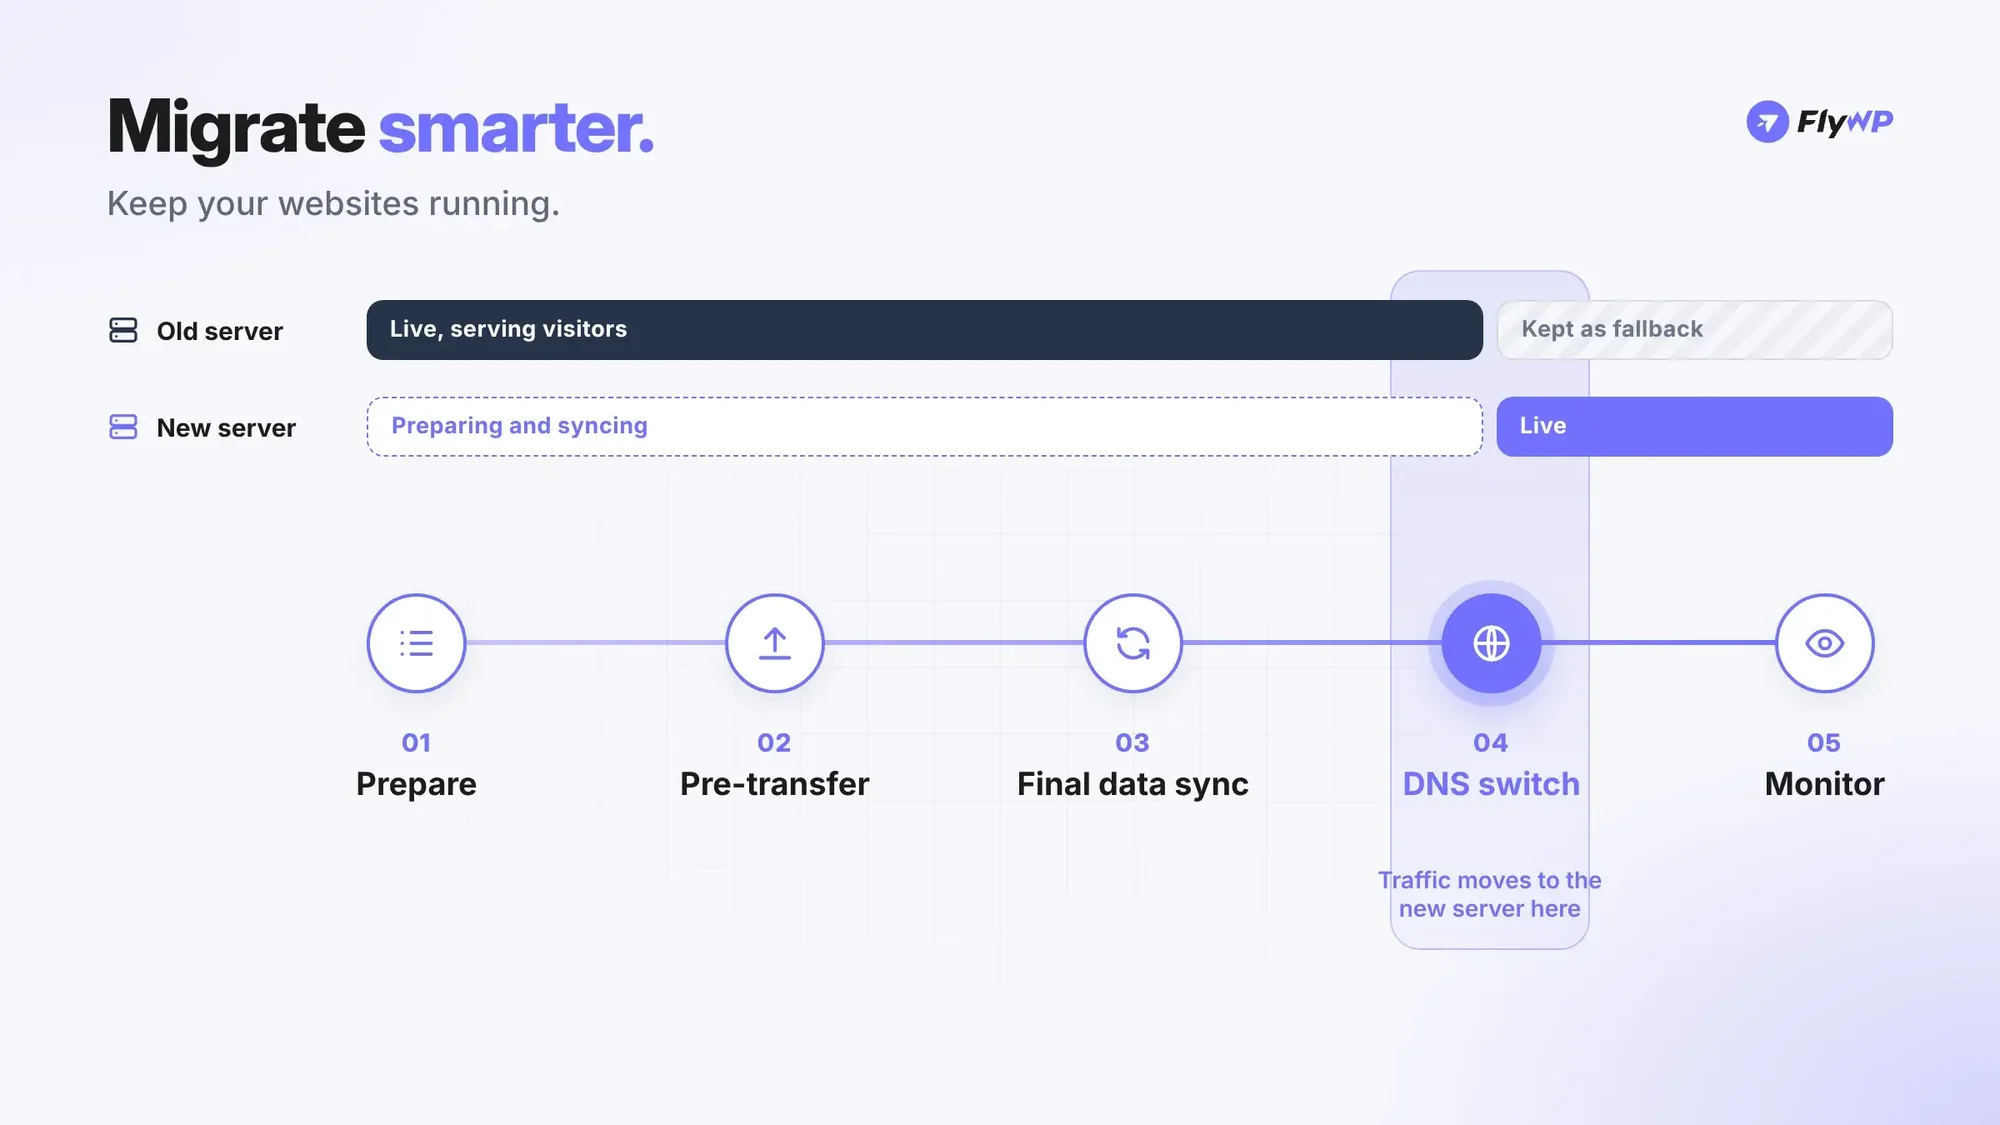
For agencies and businesses, downtime means lost leads, missed orders, and unhappy clients. The goal is to prepare the new server in advance and keep the gap between the final sync and the DNS cutover as short as possible.
Follow these practices:
- Lower DNS TTL in advance. A shorter TTL helps record updates spread faster, though existing resolver caches may still delay the transition.
- Keep the old server running. Don't shut down your existing infrastructure right after changing DNS. Some visitors will still reach the old server for a while.
- Schedule the migration during low-traffic hours. This matters most for eCommerce and membership websites.
- Transfer the bulk of the data before the migration window. Moving most files and databases ahead of time leaves less work for the final cutover.
- Synchronize dynamic data before switching. For websites that receive orders, comments, or registrations, plan a final database sync or a short content freeze. Never import an old database over a newer one.
- Test everything before changing DNS. Confirm every website works on the destination server before sending visitors there.
- Monitor both servers after cutover. Watch traffic, logs, and application behavior on the old and new servers until the transition is complete.
With these precautions, you can significantly reduce the risk of downtime during a multi-site migration.
Simplify Multiple WordPress Website Migrations with FlyWP
Manually migrating multiple WordPress websites takes considerable time, especially across several client projects. You need to transfer files, migrate databases, configure server environments, verify installations, and coordinate DNS changes for every domain.
FlyWP is a managed cloud hosting and server management platform for WordPress and modern web projects. It gives agencies a more centralized way to move an entire hosting environment: you manage your cloud infrastructure, deploy WordPress websites, and use dedicated migration workflows from one dashboard.
1. Prepare Your Destination Server
Start by connecting or provisioning your destination server through FlyWP. You can create servers on DigitalOcean, Vultr, Akamai (Linode), AWS, and Hetzner, or connect any other Ubuntu server (including Google Cloud or Azure instances) as a custom server. FlyWP Managed Servers are also an option if you'd rather not manage a cloud account.
Once the server is ready, you manage its WordPress installations through the FlyWP dashboard.
Read: How to connect a server provider to FlyWP.
2. Migrate Multiple Websites with Bulk Migration
If you're moving websites off Cloudways, FlyWP's Bulk Migration moves every site on the old server in a single run. Instead of migrating websites one by one, you start a bulk migration from your destination server: open the server's Sites tab, click Migrate, and choose Bulk Migration.
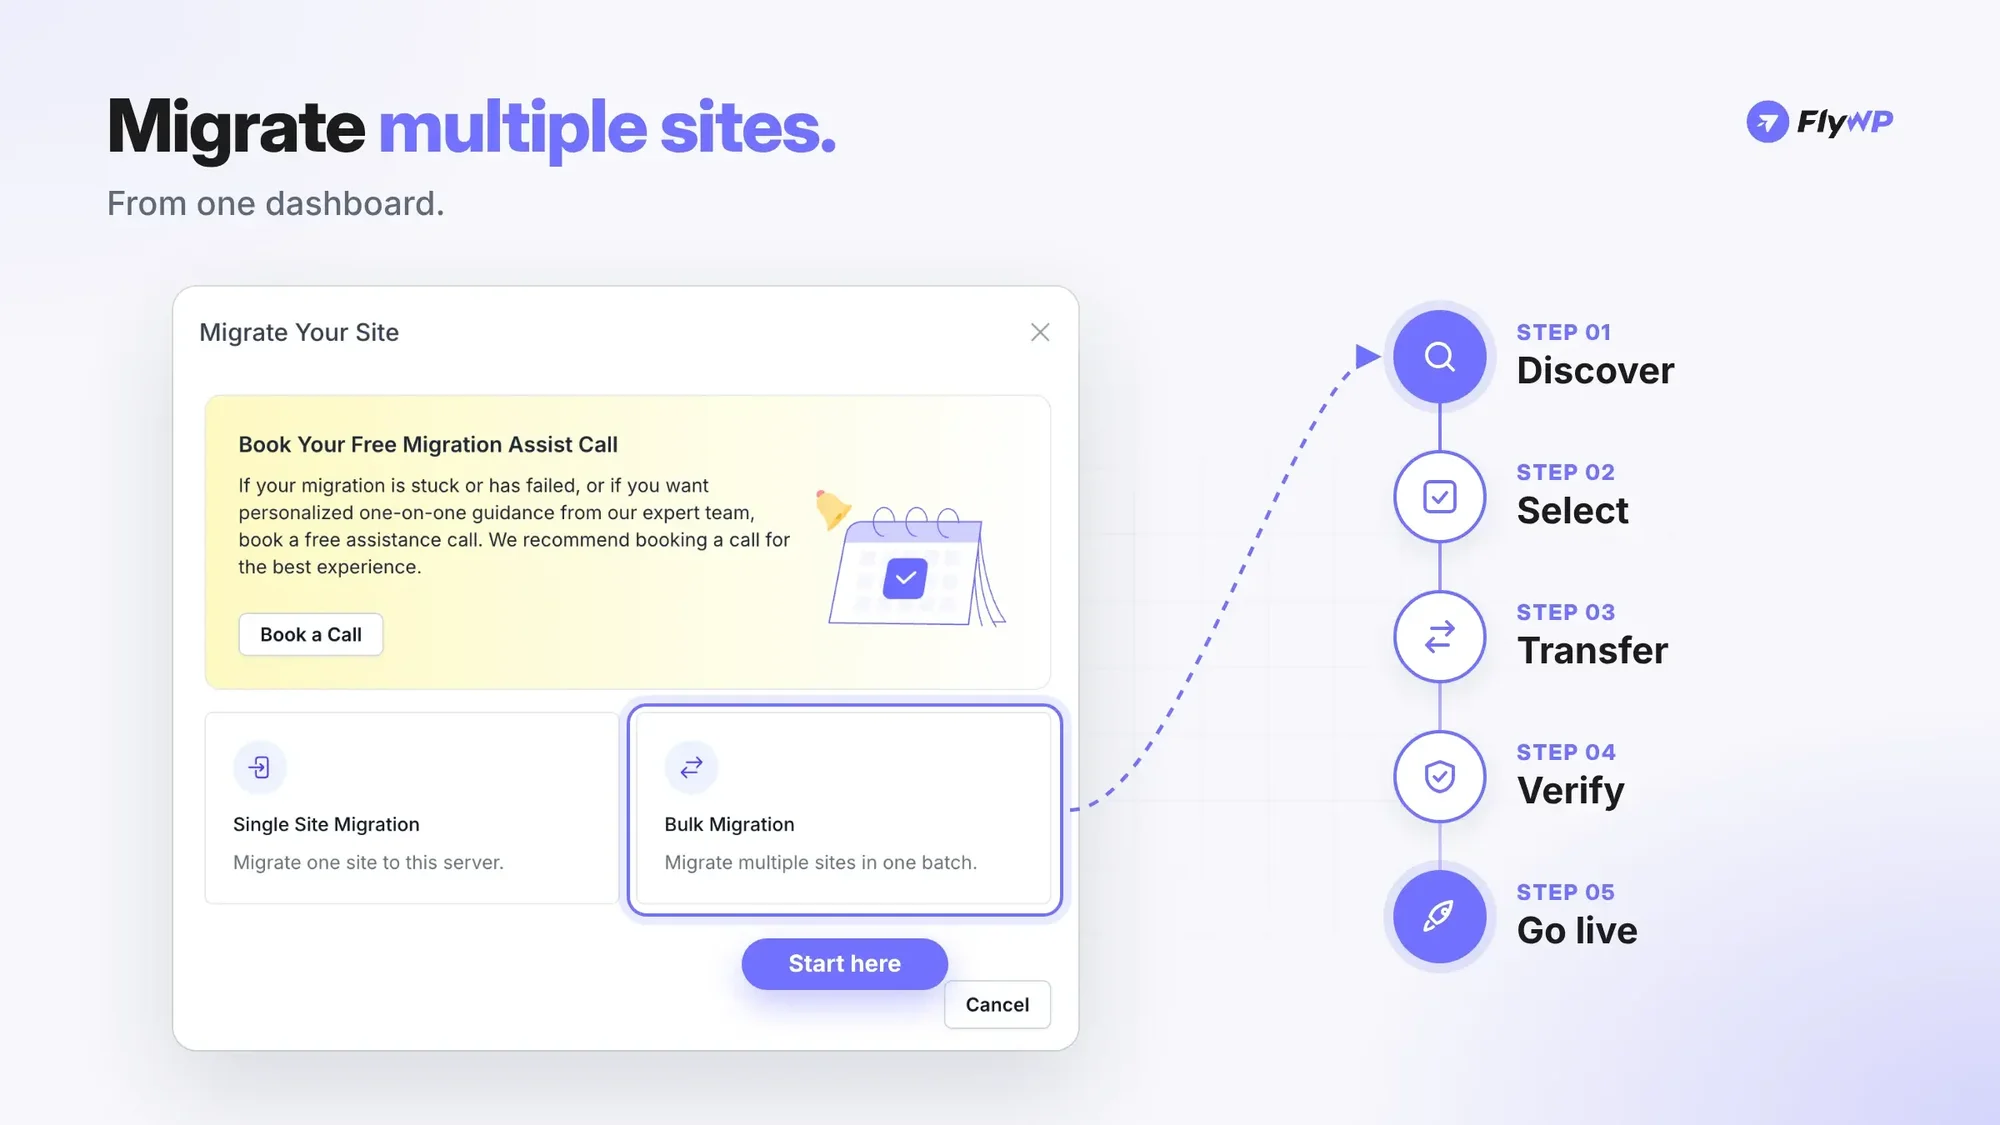
Here's how it works:
- Select the source: Enter your old Cloudways server's public IP and SSH credentials.
- Discover websites: FlyWP connects to the source server, finds the WordPress installations, and runs pre-flight checks on the destination.
- Review your websites: See every discovered website, its size, and whether your selection fits the destination's storage. Nothing has been copied yet.
- Start the migration: Select the websites you want to move and click Start Migration.
- Transfer websites: FlyWP copies and verifies the selected websites one at a time, showing progress as it goes.
- Go live: When you click Go Live, each website is brought up on the destination server on a temporary test domain, so you can check it before changing DNS.
Your source websites stay online throughout, and nothing goes live on the destination until you say so.
What gets migrated:
- WordPress website files
- Website databases
- The PHP, WordPress, and database versions each site was running
What doesn't: Server-level configuration (such as cron jobs), email hosted on the old server, and DNS records. You'll need to handle those separately.
Important: Bulk Migration currently supports Cloudways as its source platform, with more providers on the way. For other hosts, use Single Site Migration from the same Migrate window, which works with WordPress sites on any hosting.
Read the FlyWP Bulk Migration guide for the complete process and requirements.
3. Transfer Individual Websites Between Servers
If you're moving selected websites or an existing FlyWP-managed installation, use the Clone and Transfer workflow. Pick a destination server and move the website without repeating the whole deployment by hand.
This is useful when you're:
- Moving selected client websites to a new server
- Distributing websites across multiple servers
- Creating copies for staging and testing
- Moving websites between FlyWP servers
Learn more: How to clone and transfer WordPress sites on FlyWP. For a broader look at cloning methods, see our guide on how to clone a WordPress site.
4. Manage Your Websites from One Dashboard
Migration is only the beginning. After the move, FlyWP's centralized dashboard helps you:
- Manage website configurations, domains, and free SSL certificates
- Configure automated backups to external storage, and restore them
- Manage WordPress core, plugin, and theme updates
- Monitor website and server resources
- Manage team access and permissions for everyone who maintains client websites
That means less time on repetitive server administration and more time growing your agency.
Move your WordPress sites to FlyWP →
Post-Migration Checklist: What to Verify
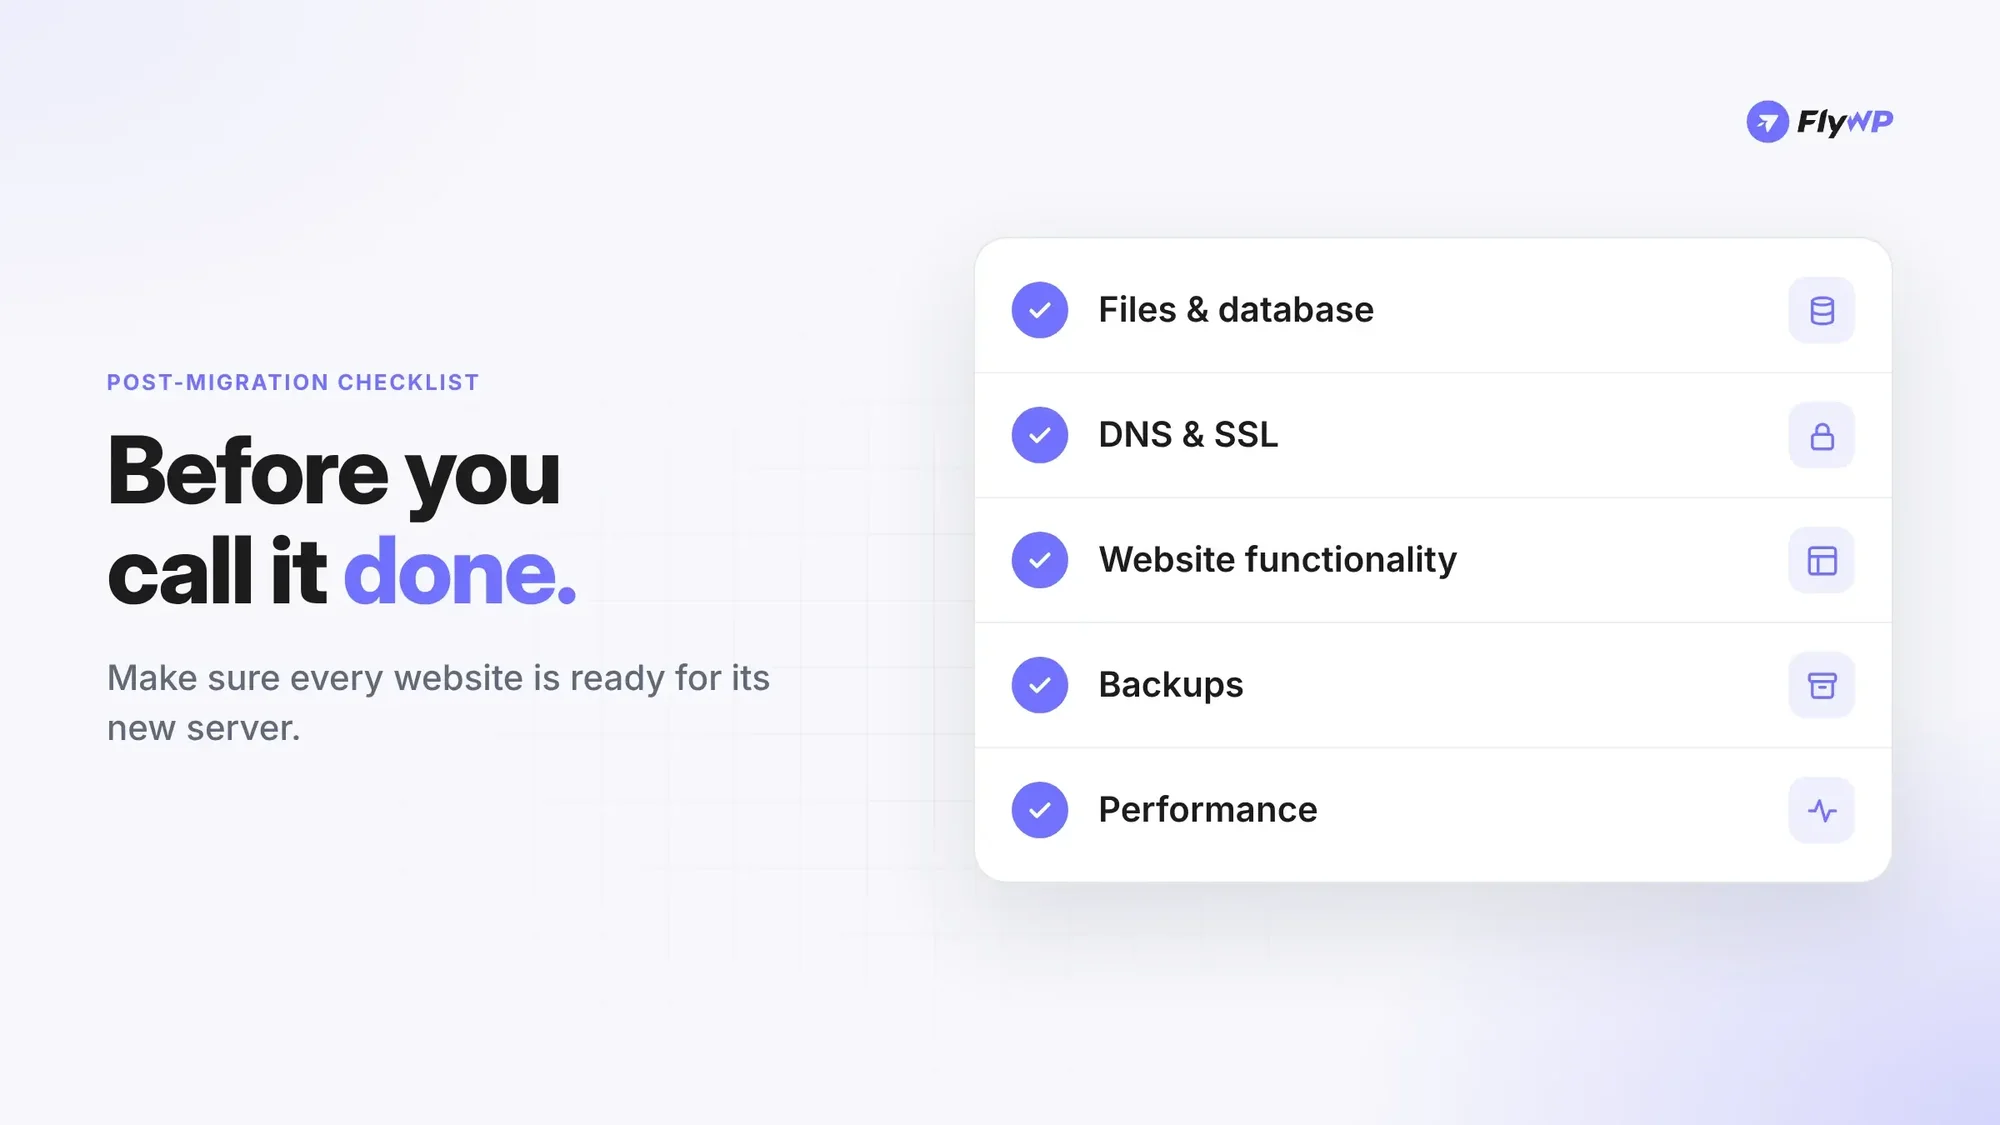
Before you call the migration complete, confirm that:
- All website files have been transferred
- All databases have been imported successfully
- Database credentials are updated
- Homepages and internal pages load correctly
- Images and media files are accessible
- WordPress admin dashboards work
- Plugins and themes function properly
- PHP versions and extensions are compatible
- Domain DNS records point to the new server
- SSL certificates are active
- Redirects and permalinks work
- Forms and transactional emails work
- WooCommerce orders and checkout are verified
- Cron jobs and scheduled tasks are configured
- Backups are configured on the new server
- Server resources and error logs are being monitored
- The old server is retained until the migration is confirmed
Frequently Asked Questions
How do I migrate multiple WordPress websites at once?
You can migrate multiple WordPress websites using SSH, rsync, database exports, migration plugins, or a server management platform. The process involves backing up each website, transferring files and databases, configuring the destination server, testing the websites, and updating DNS records. For larger migrations, move websites in batches and track each domain in a migration checklist. If you're leaving Cloudways, FlyWP's Bulk Migration moves every site on the server in one run.
Can I move multiple WordPress websites to one server?
Yes. A single server can host multiple independent WordPress installations, as long as it has enough CPU, RAM, storage, and bandwidth. Each website should have its own document root, database, and server configuration.
What is the easiest way to migrate a WordPress website to another server?
For a single website, a migration plugin or your hosting provider's migration tool is convenient. For multiple websites, a structured server-to-server workflow using rsync and database exports gives you more control. A server management platform can also simplify deployment and ongoing administration.
How long does it take to migrate multiple WordPress websites?
It depends on the number of websites, file and database sizes, network speed, server configuration, and how much testing you do. A small website may take little time, while large eCommerce websites or installations with extensive media libraries can take significantly longer.
Will migrating WordPress websites affect SEO?
A server migration doesn't harm SEO by itself if your domains, URLs, content, redirects, and availability stay consistent. Mistakes such as broken URLs, missing pages, incorrect canonical tags, or prolonged downtime can hurt organic search performance. After migrating, check Google Search Console, crawl important pages, verify redirects, and monitor indexing and organic traffic.
Can I migrate WordPress websites without downtime?
You can minimize downtime, but whether you reach zero depends on the website's architecture and your migration process. Preparing the destination server in advance, transferring data early, syncing dynamic data, testing before DNS changes, and keeping the old server available all reduce disruption significantly.
Do I need to change DNS records when migrating a WordPress website?
If the website is moving to a server with a different public IP address, you'll generally need to update its DNS A records to point to the new server. If you keep the same IP address or use another routing arrangement, such as a load balancer or proxy, the required changes may differ.
How do I migrate a WordPress website without losing data?
Create verified backups of website files and databases, transfer all the data, and test the destination website before switching DNS. For dynamic websites, run a final synchronization of new orders, registrations, comments, and other changes made during the migration.
What is the difference between WordPress Multisite and multiple WordPress websites?
WordPress Multisite is a single WordPress installation that runs a network of websites. Multiple independent WordPress websites are separate installations, each with its own files, database, and configuration. Their migration requirements and workflows differ, so confirm which one you're moving before you start.
Final Thoughts
Migrating multiple WordPress websites to a new server doesn't have to be overwhelming. Prepare your infrastructure, create verified backups, transfer files and databases carefully, test every website, and manage DNS changes strategically.
For agencies and developers handling many client websites, the right server management workflow also reduces repetitive administration and makes future migrations easier. If you want a more organized way to deploy, migrate, and manage WordPress websites across cloud servers, explore FlyWP and bring your whole portfolio under one dashboard.