Are you looking to duplicate your WordPress site without breaking the original structure? Here in this tutorial, we’ll be providing you with an easy guide to fully clone your WordPress site with ease. Without following any complex process or technical stuff, you can easily do that by yourself using FlyWP.
Creating a professional website takes time and effort as it serves as a platform to showcase your portfolio and promote your business. There are various reasons why you might need to duplicate your website, such as for further development or backup purposes.
But all these should not compromise your site’s structure or general settings. That’s why you must follow certain rules to smartly clone your website. And this is where FlyWP could help and give you the proper heads-start.
Yes, before we go more deep, let’s check out the common reasons behind website cloning!
Why do you need to clone your website?
There must be several reasons to clone a website. It depends on the requirements and purposes of the website owner. For that, you need to consider why you need website cloning. Some generalized reasons include plugin and theme testing, security testing, redesign purposes, website migrations, or experimental reasons.
But for your help, we compiled two major reasons for it. Let’s check out below.
- For development and testing purposes: This is a common use case for web developers. Cloning a website creates a copy that can be used to test new features or make design changes without affecting the live site. This is like creating a practice space to experiment before going on stage.
- For backup purposes: Having a clone of your website can be helpful in case the original website experiences technical problems. If something goes wrong, the clone can be used to restore the website quickly and minimize downtime. This is similar to backing up important documents on your computer.
It’s important to note that cloning a website does not copy everything. For instance, a clone typically won’t include the website’s database, which might store things like user information or product catalogs.
What to consider before cloning your website
After knowing the basic reasons to clone a website, now it’s required to learn the things before doing it. Yes, you must have some considerations before going to clone a website. Creating a website requires valuable time, effort, and mindset.
A simple mistake could ruin all of your effort in minutes. That’s why you need to make a checklist before cloning your website.
Let’s find out them below!
Purpose: Clearly define why you need a clone. Is it for development and testing, creating a backup, or something else? Understanding your goal will guide the cloning process and what elements need to be included.
Technical expertise: Cloning a website can involve copying files, databases, and configurations. Depending on your technical skills, you might need help from a developer to ensure everything is transferred correctly.
Content replication: Remember, a clone typically doesn’t copy dynamic content like user data or blog posts. You’ll need to decide if you want to replicate this content in the cloned version.
Permissions and copyright: If you’re cloning a website for reference or inspiration, make sure you have permission to use any copyrighted material. Stealing content is never okay!
Testing and maintenance: Once cloned, your new website will need testing to ensure everything functions properly. Don’t forget to factor in ongoing maintenance for the cloned site, such as security updates.
How to clone a WordPress site using FlyWP (testing site)
To get started with FlyWP and clone a website, you need to follow the workflow below.
- Add a server provider
- Create a server
- Create a test site with FlyWP
- Clone your website
- Customize your WordPress site
Step one: add a server provider
First of all, you need to add a server provider. FlyWP has five different server providers: DigitalOcean, Vultr, AWS, Akamai, and Hetzner.
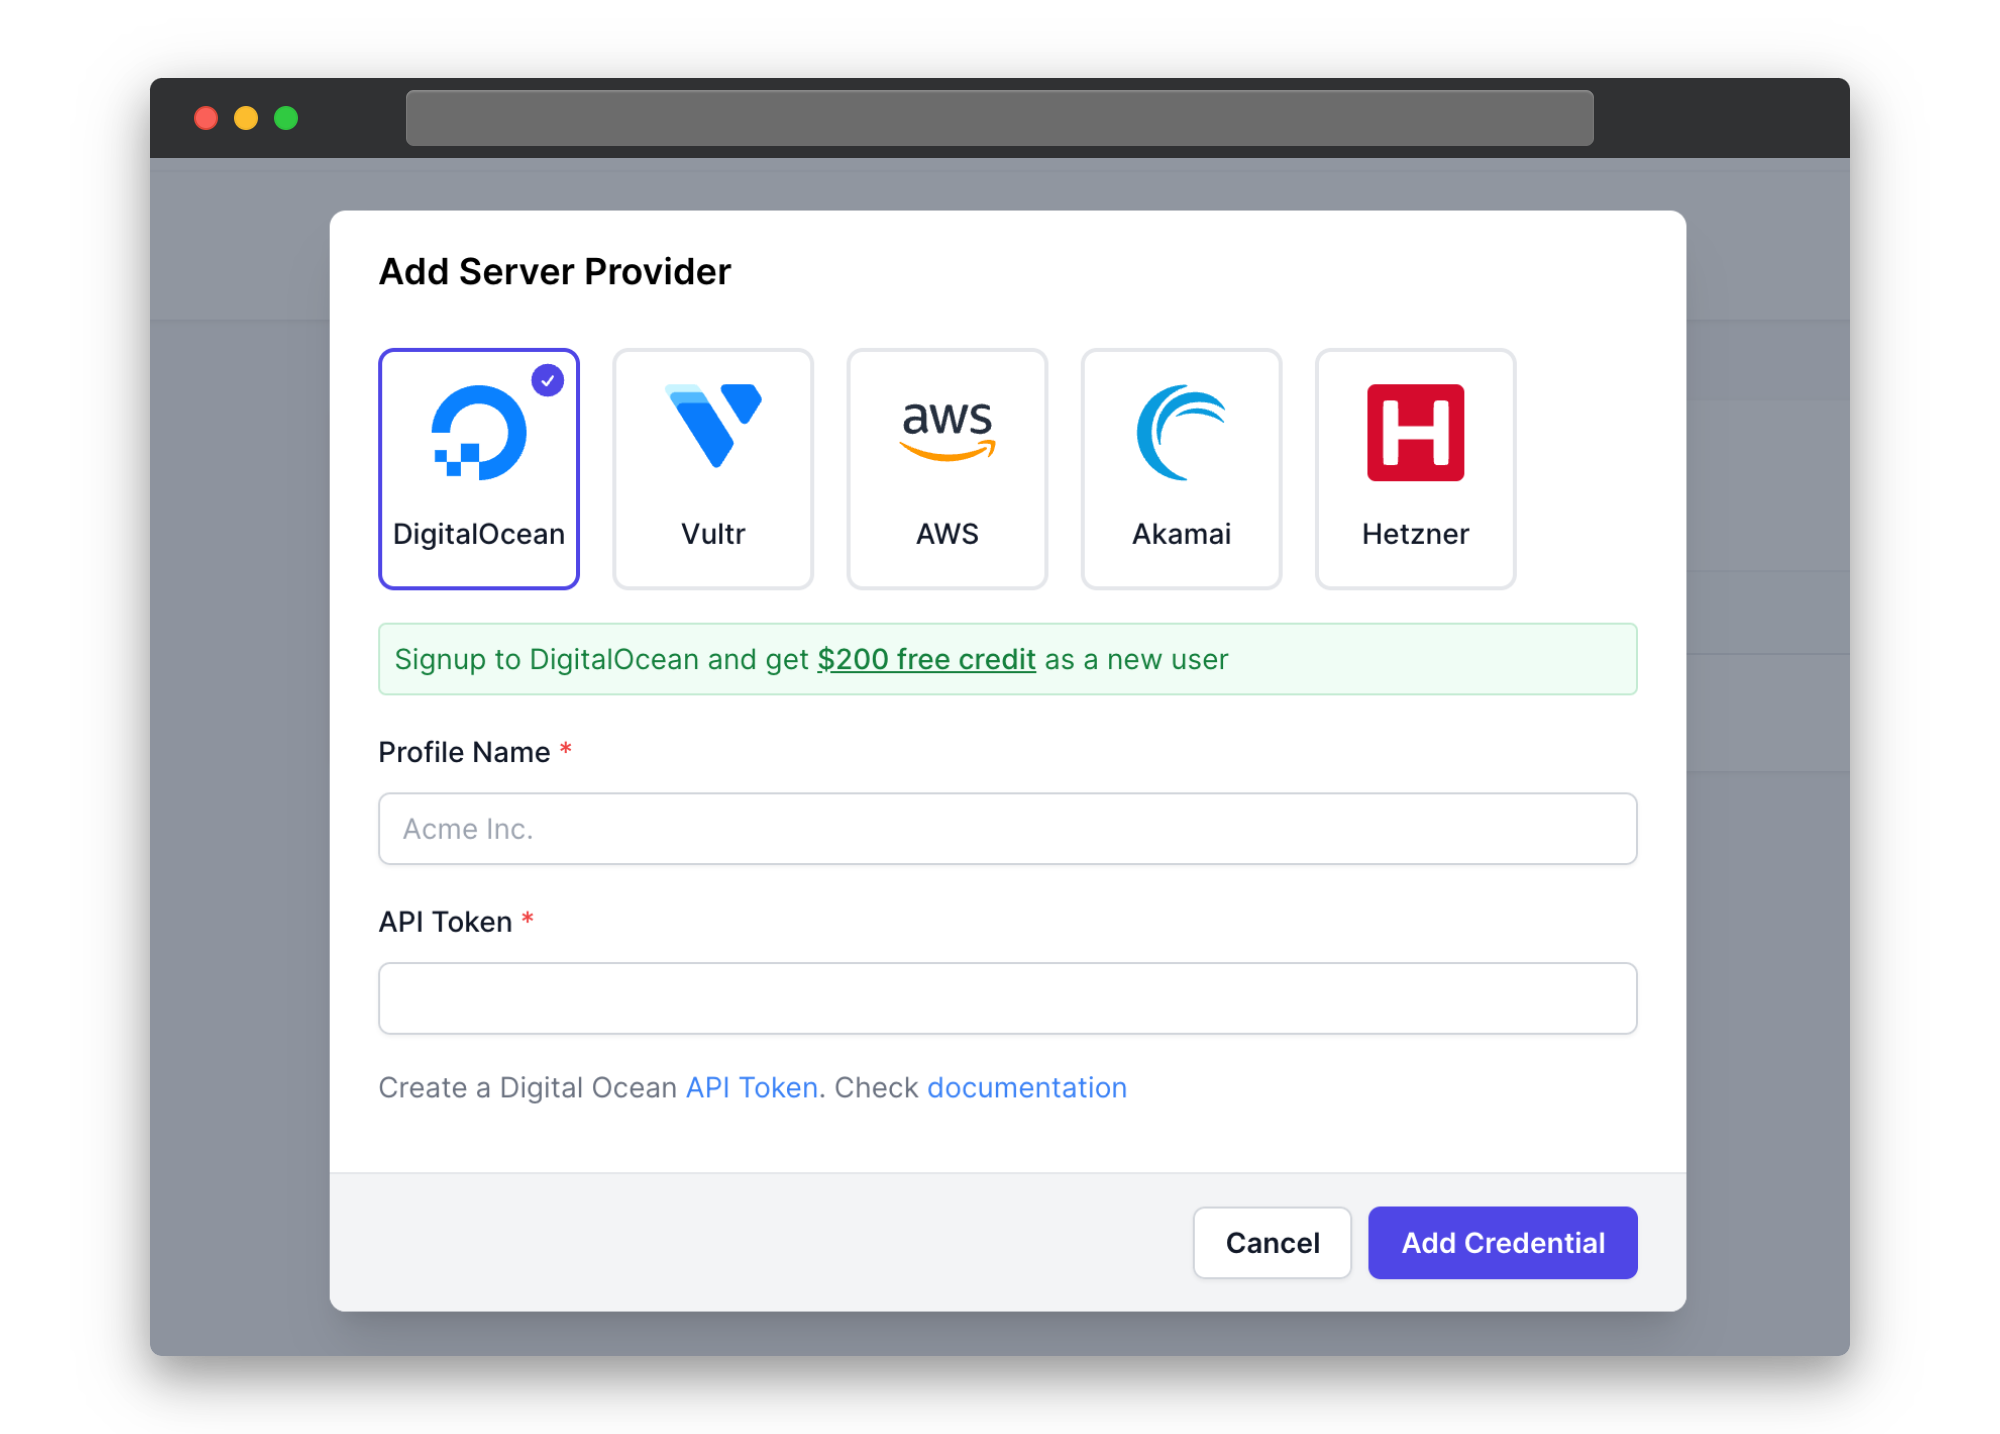
✅ Get a quick start with FlyWP using the popular server providers
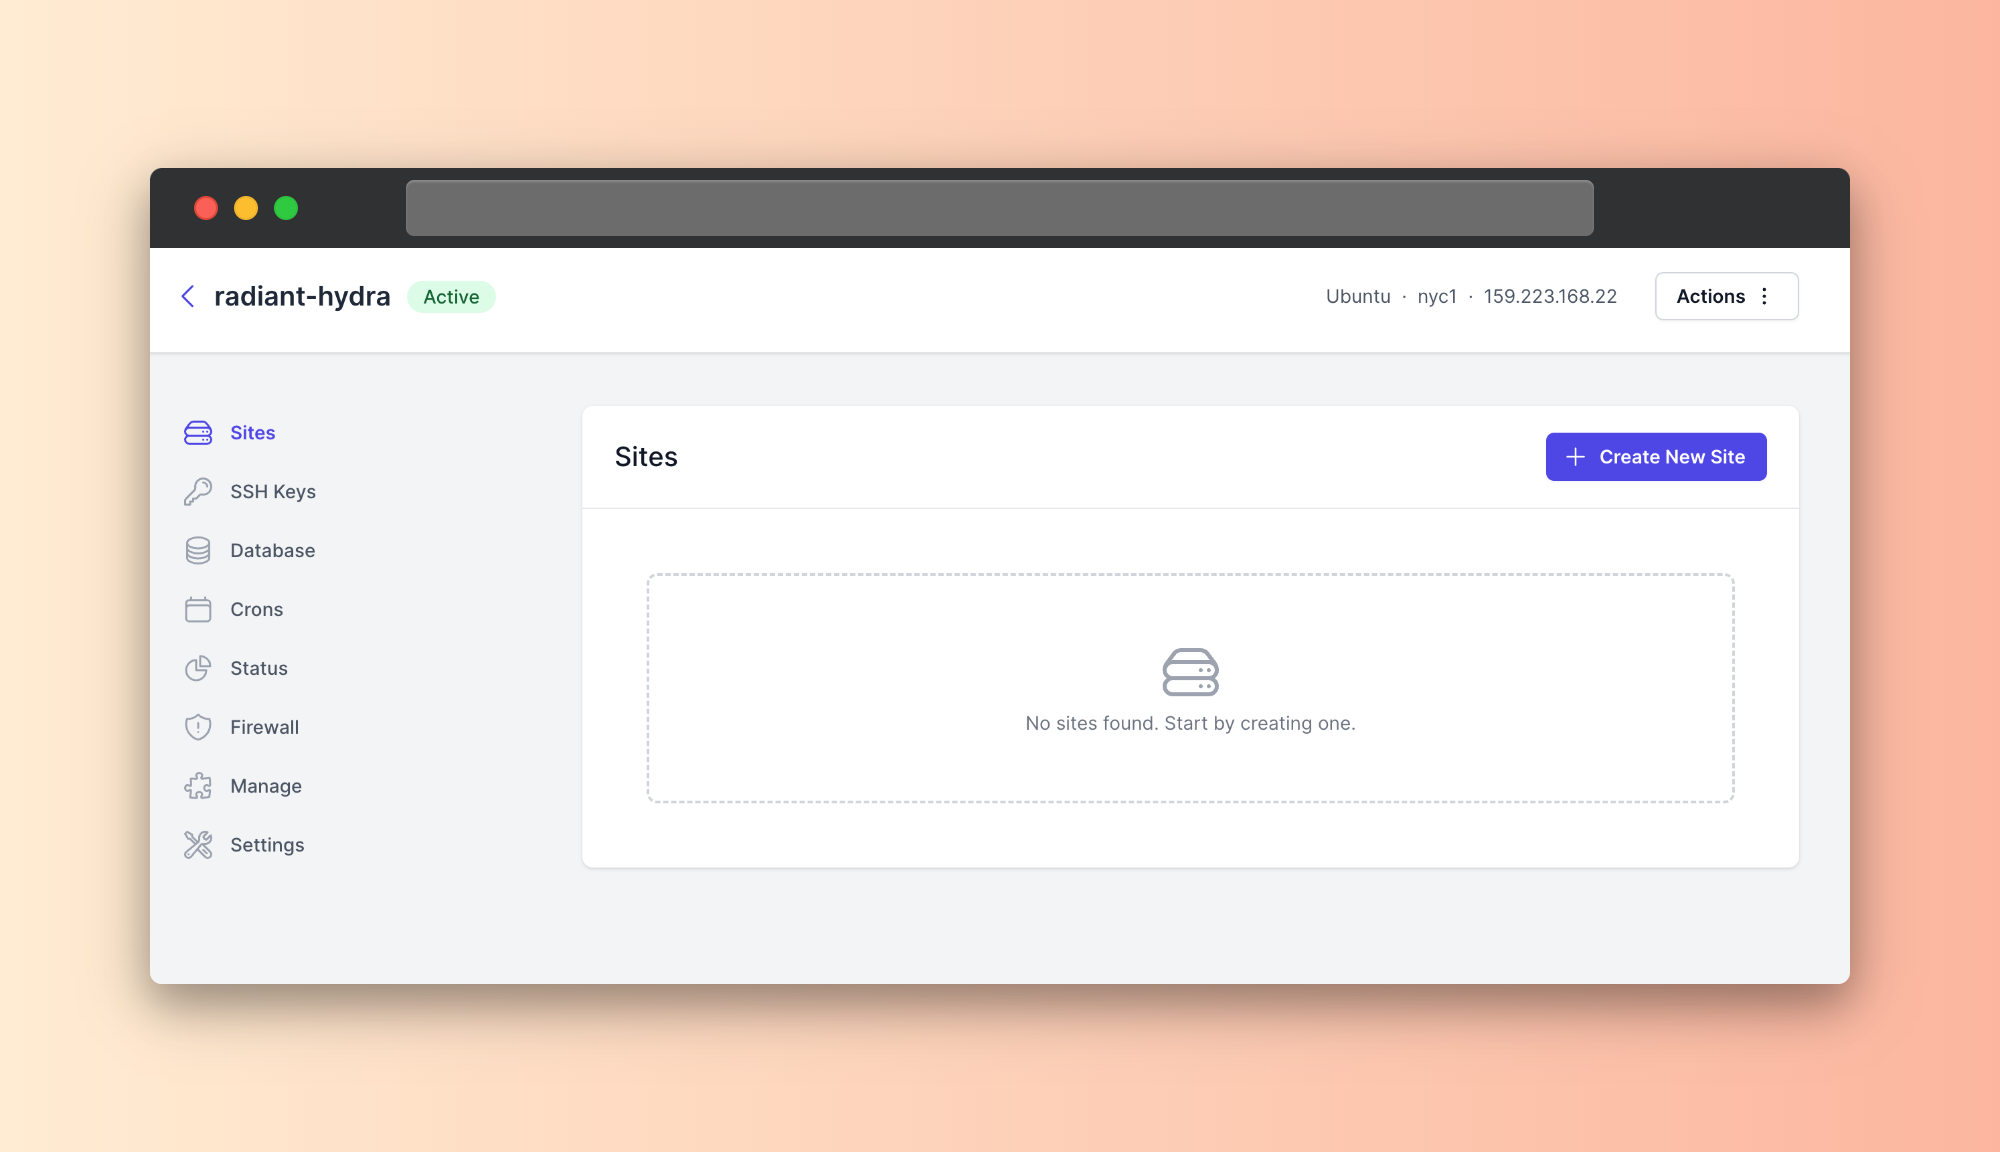
Step two: create a server
The next task is to add a server. After you have added the server provider, it will directly provide a credential to add a server. Either you can continue directly with FlyWP or the available servers.

✅ Here is a quick tour of how to provision through FlyWP
Step three: create a test with FlyWP
After you are done with the server, it’s time to create a test site with FlyWP. Let’s see how to do it.
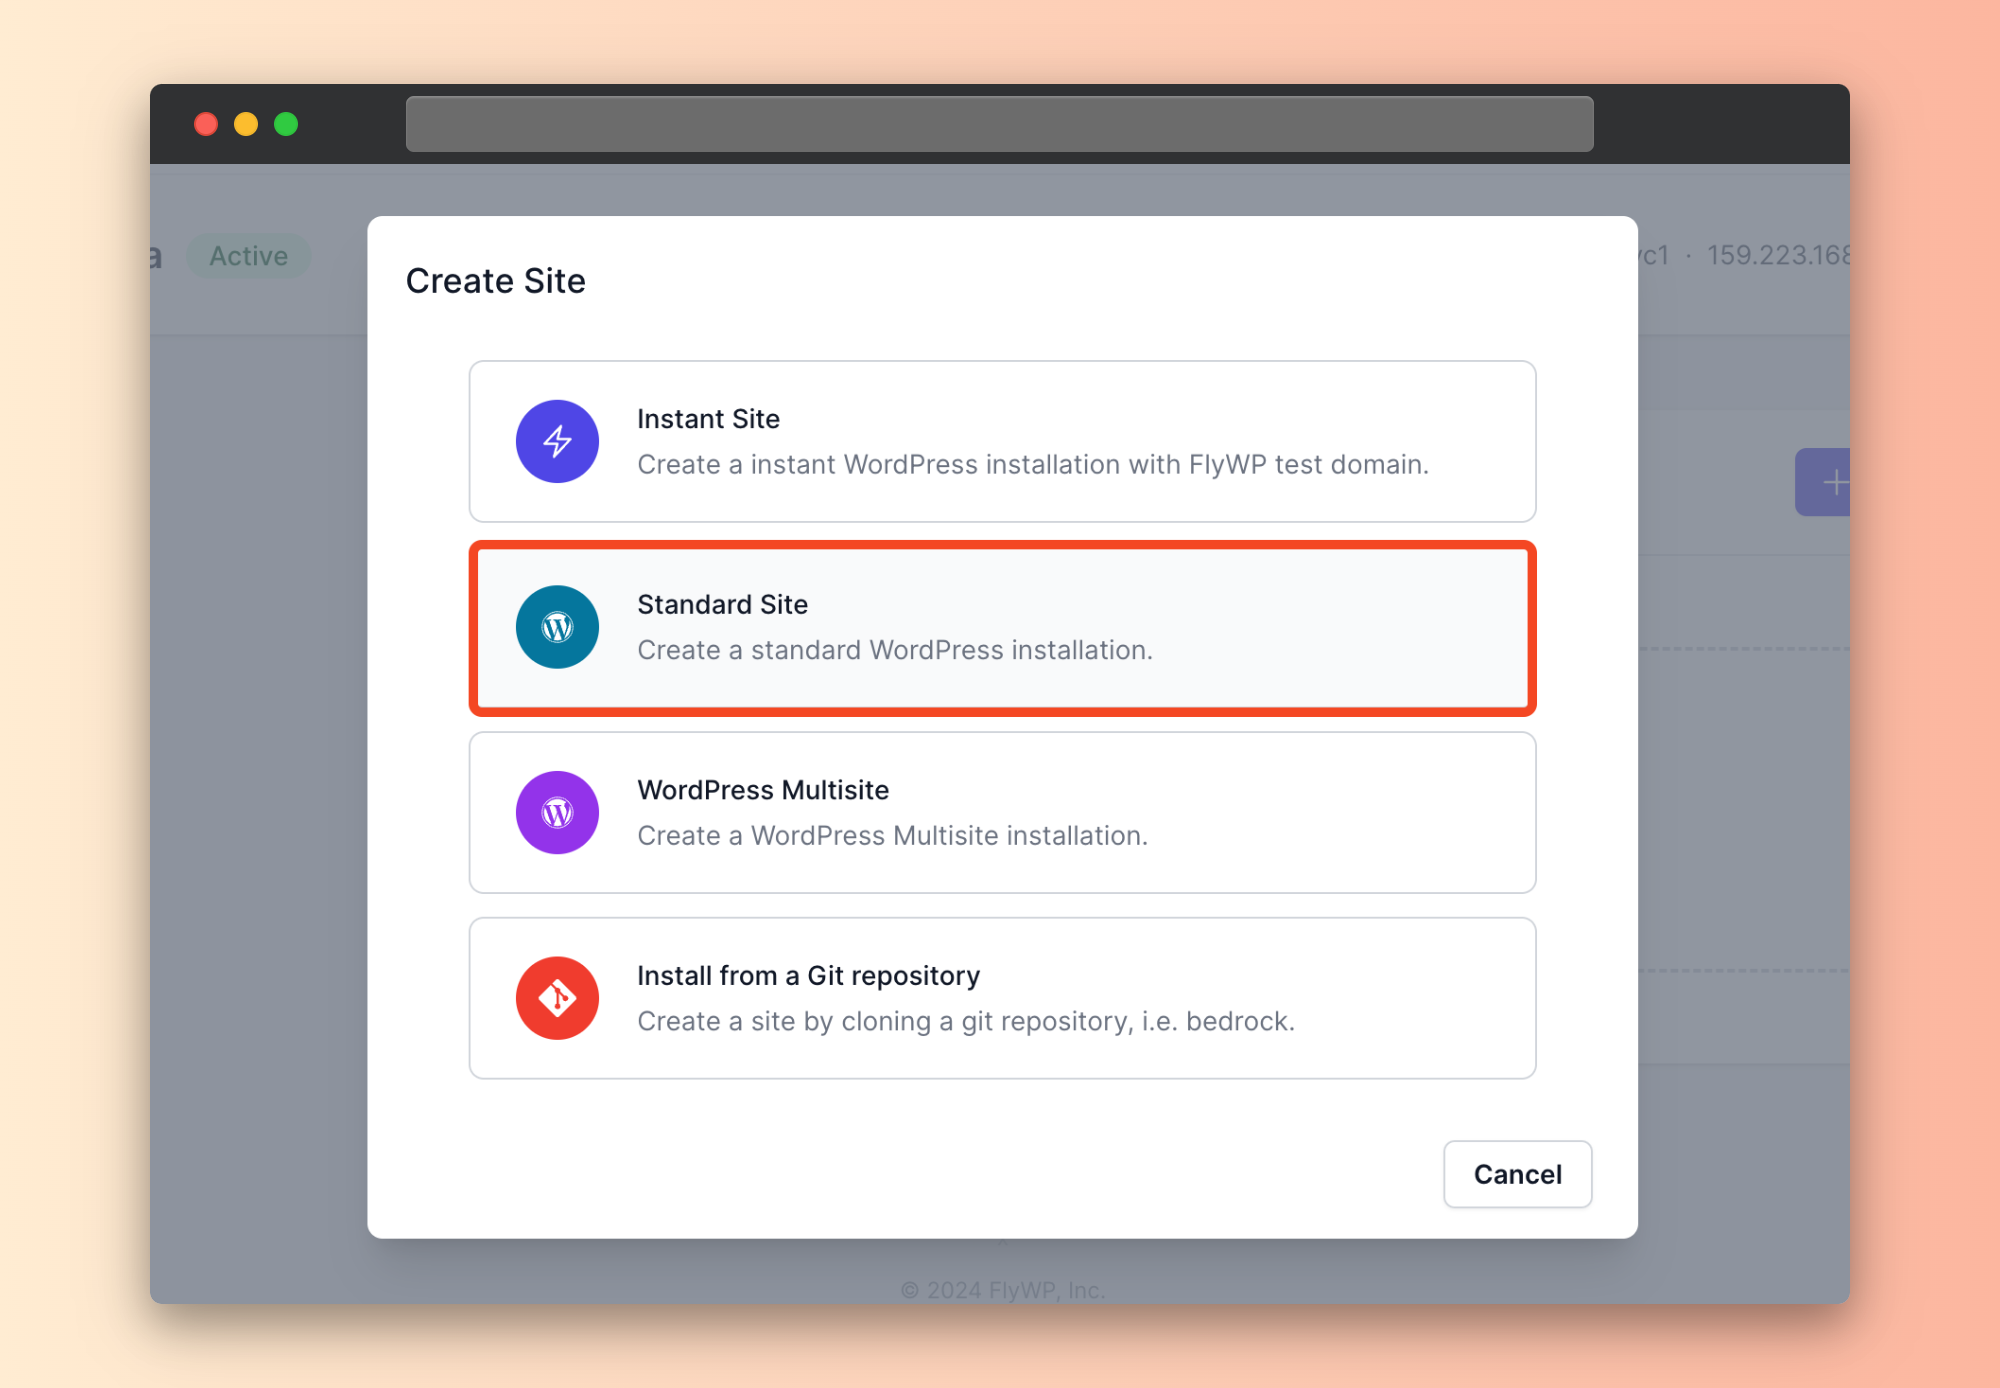
- Head to the site section of the FlyWP dashboard. Here you’ll find the “Create New Site” option.
- Select a standard site.
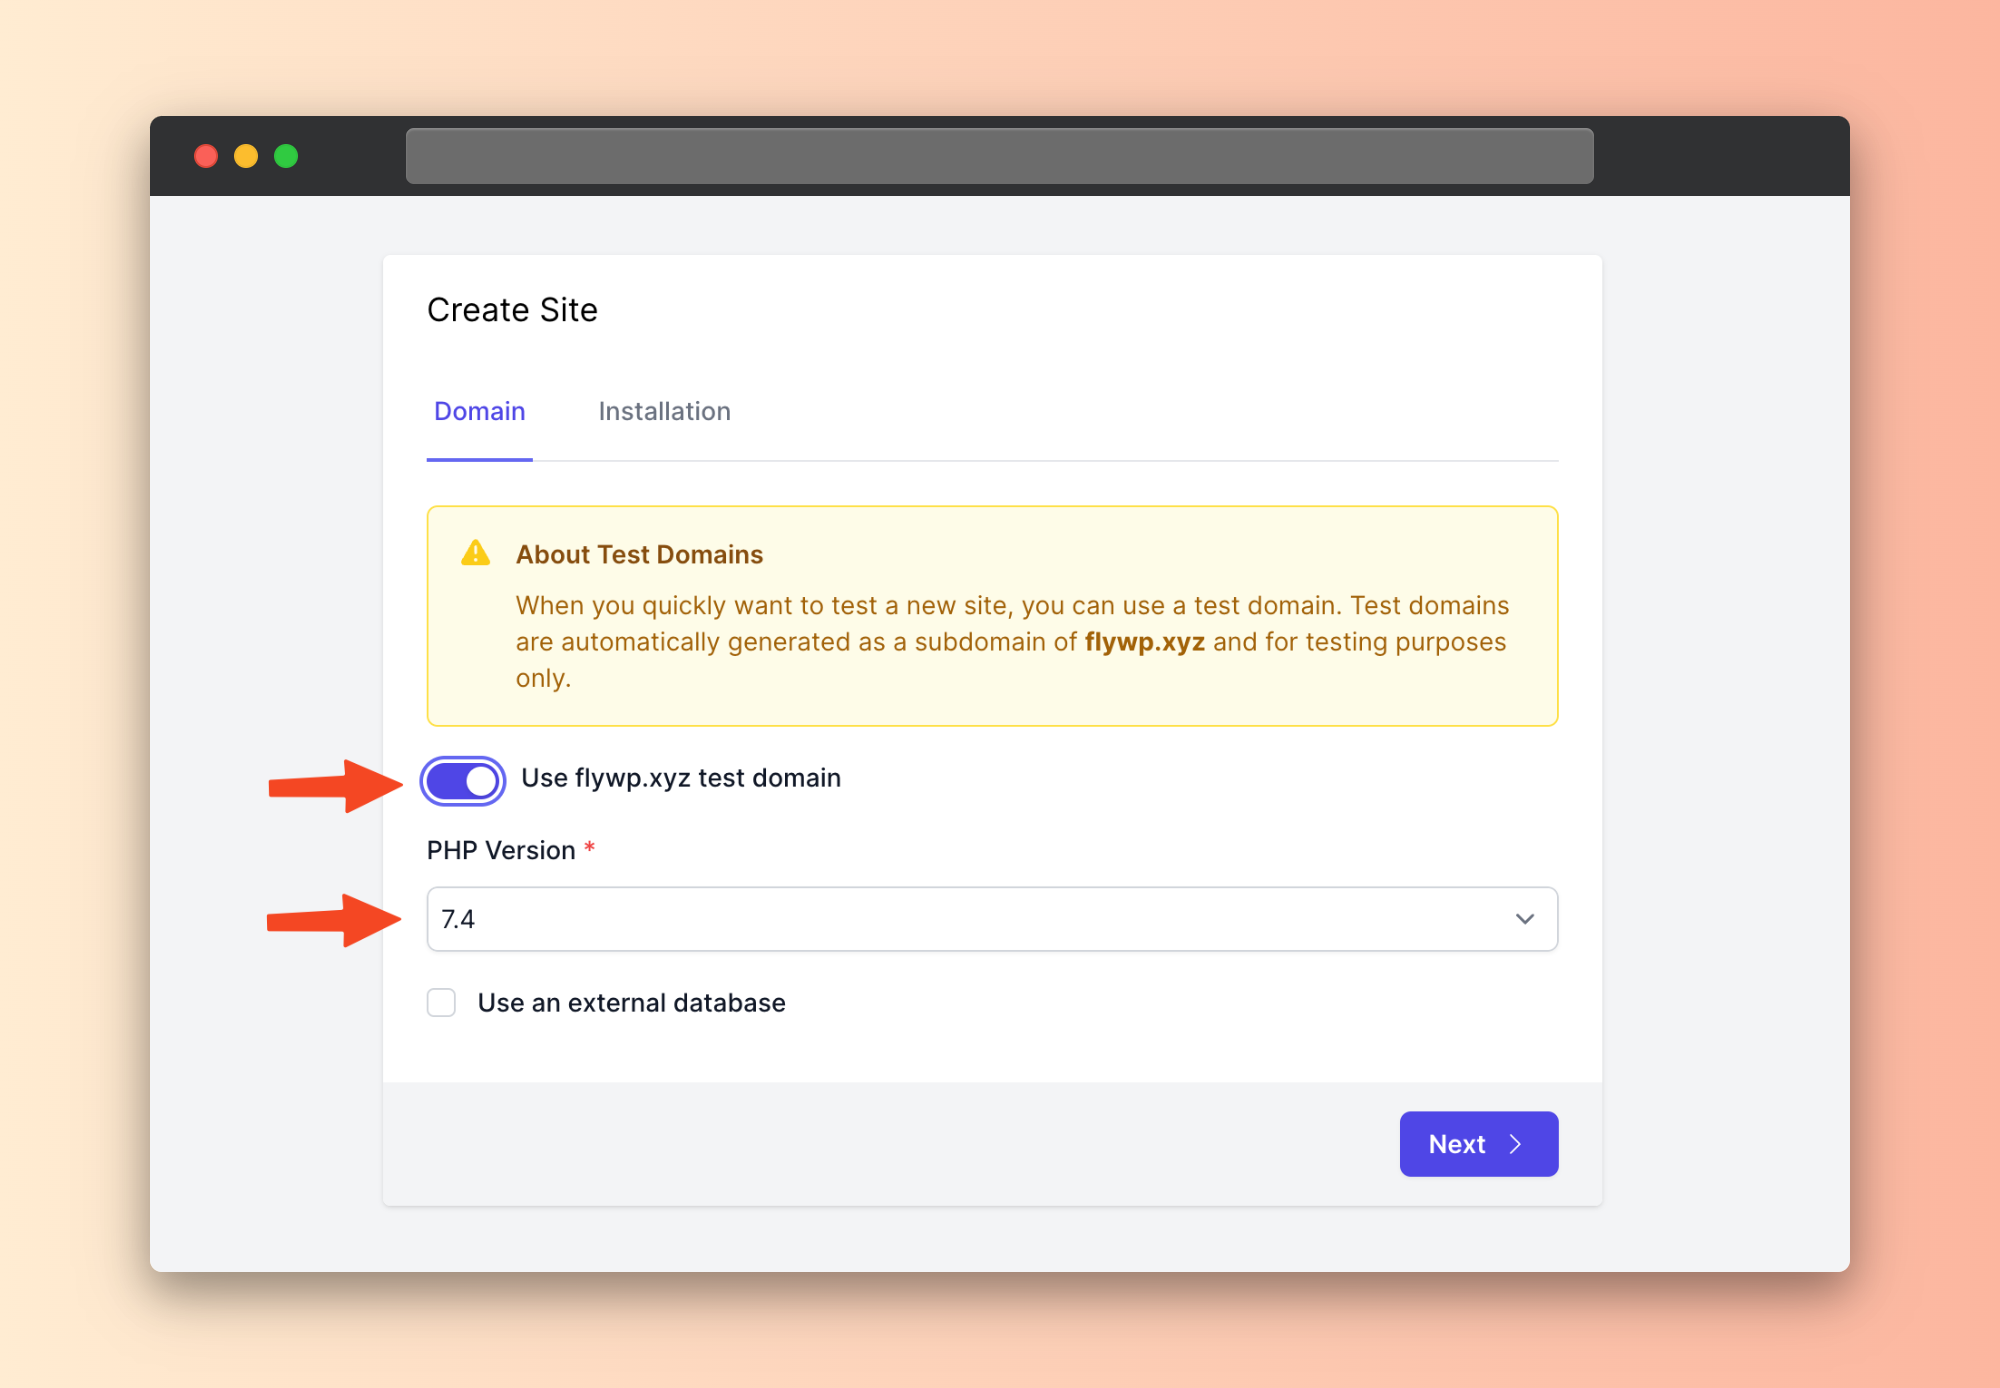
- Here, toggle the “Use flywp.xyz test domain” option. Also, choose the PHP version.
Get a quick tour of how to configure PHP version management.
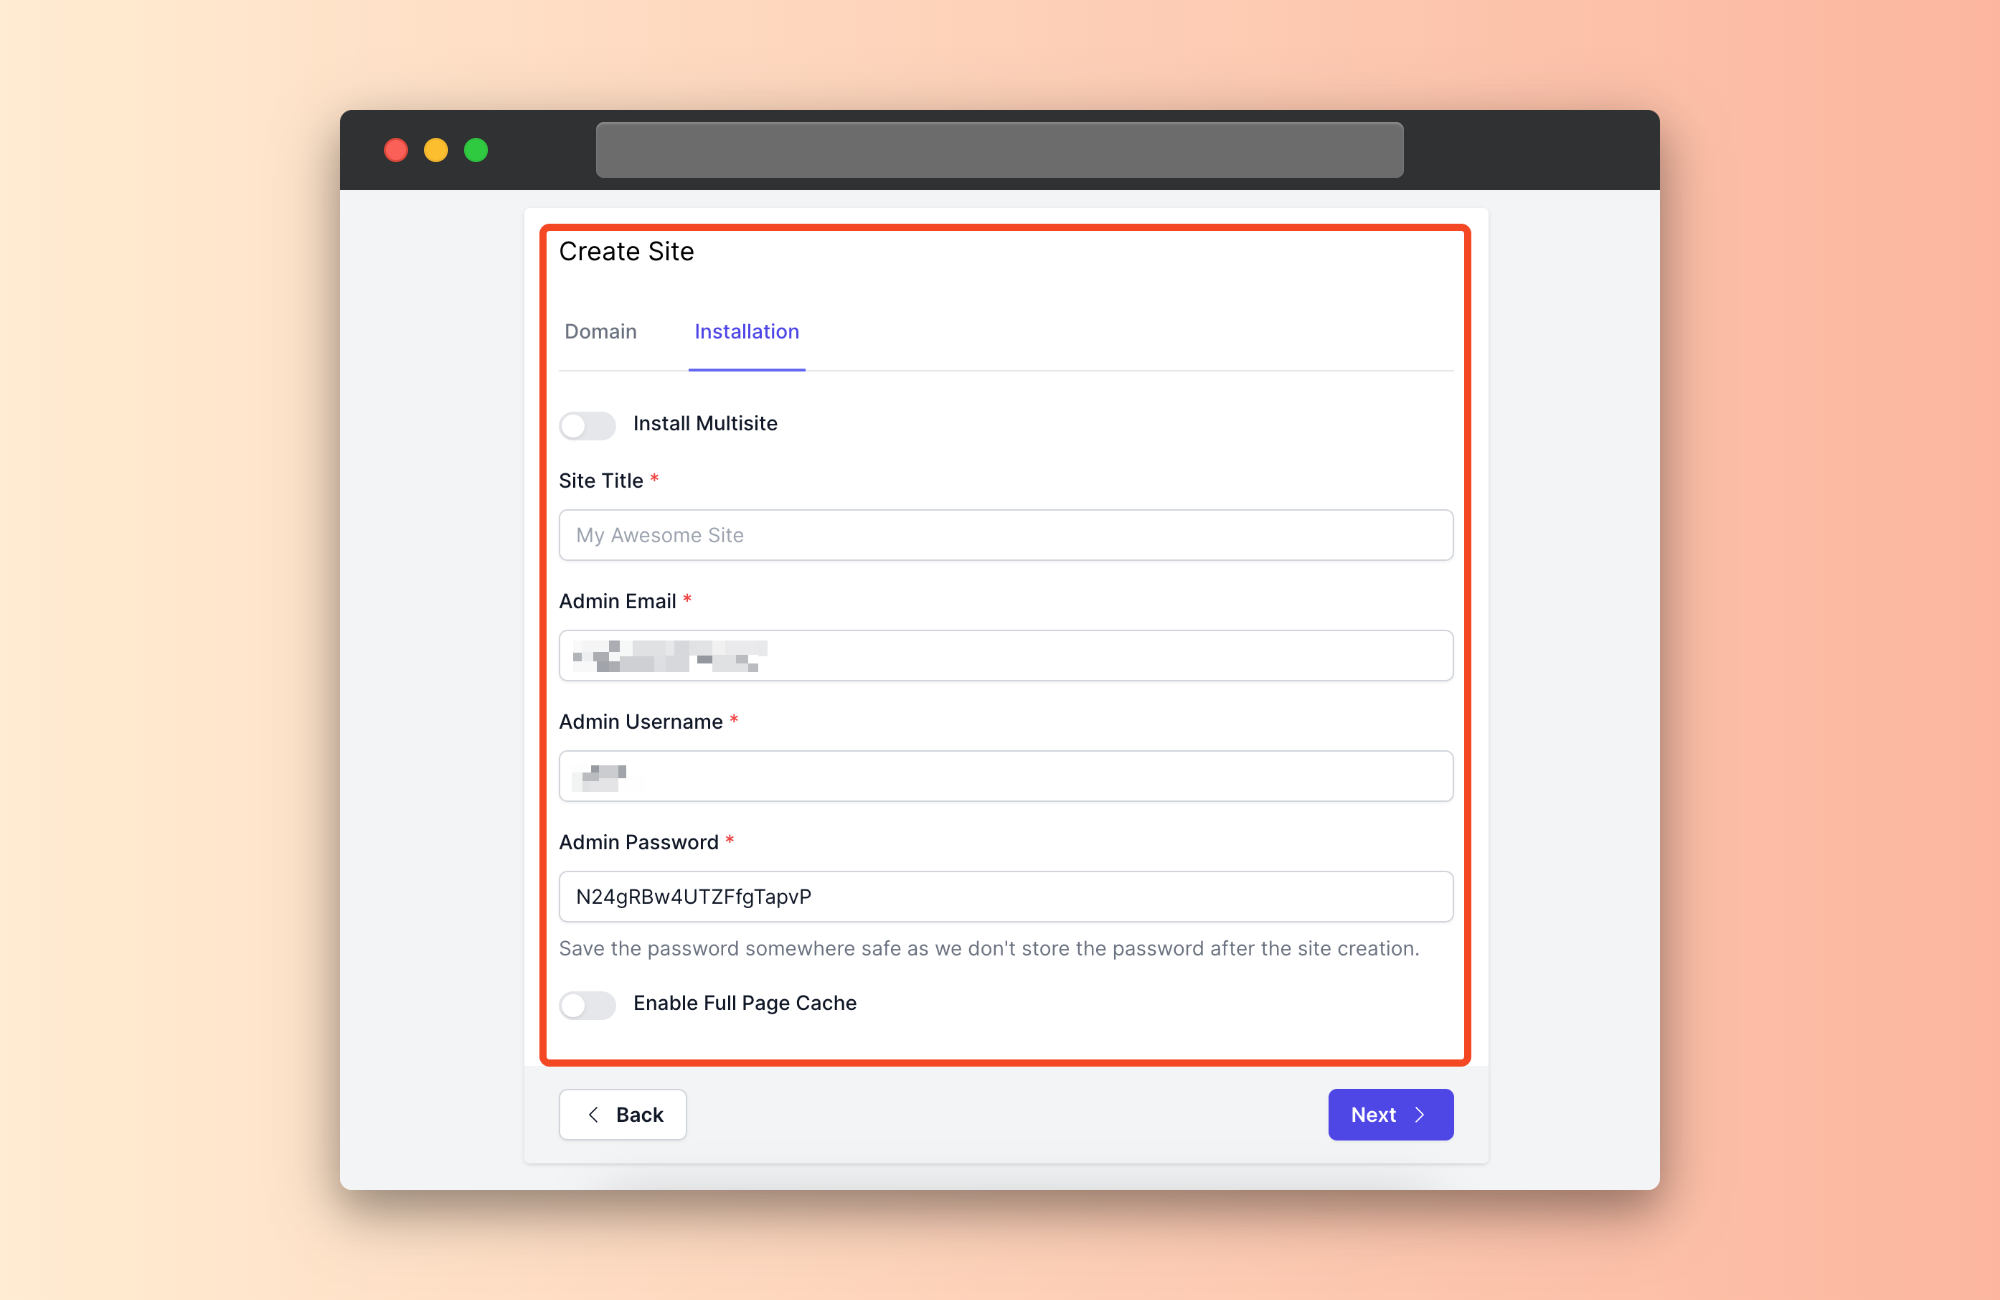
- Here, provide your site name, email, username, and password. Also, you can enable full page cache and activate the caching feature for your website. Then hit the next button.
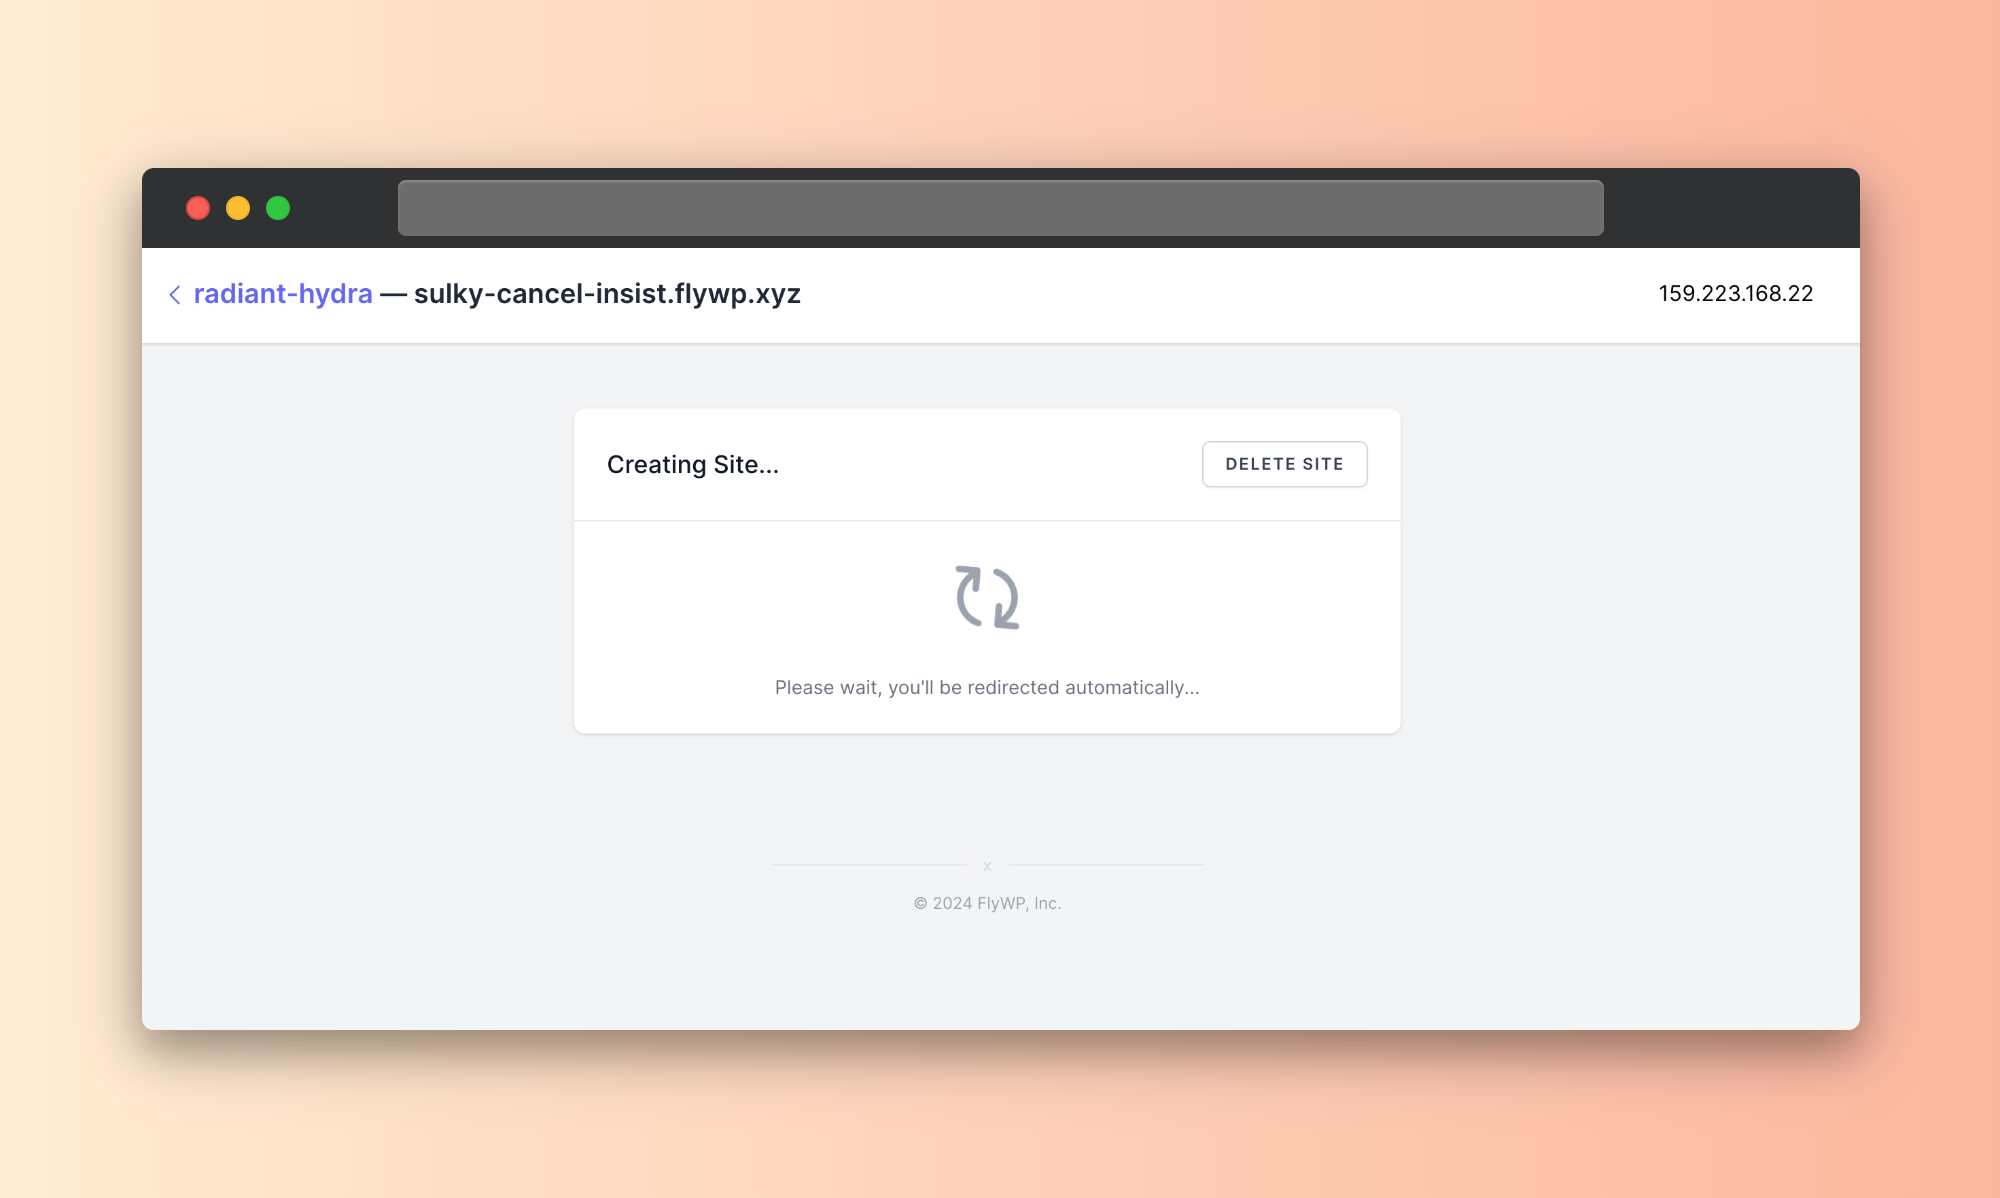
- You’ll be getting a message about site creation. Wait a bit to fully complete the process.
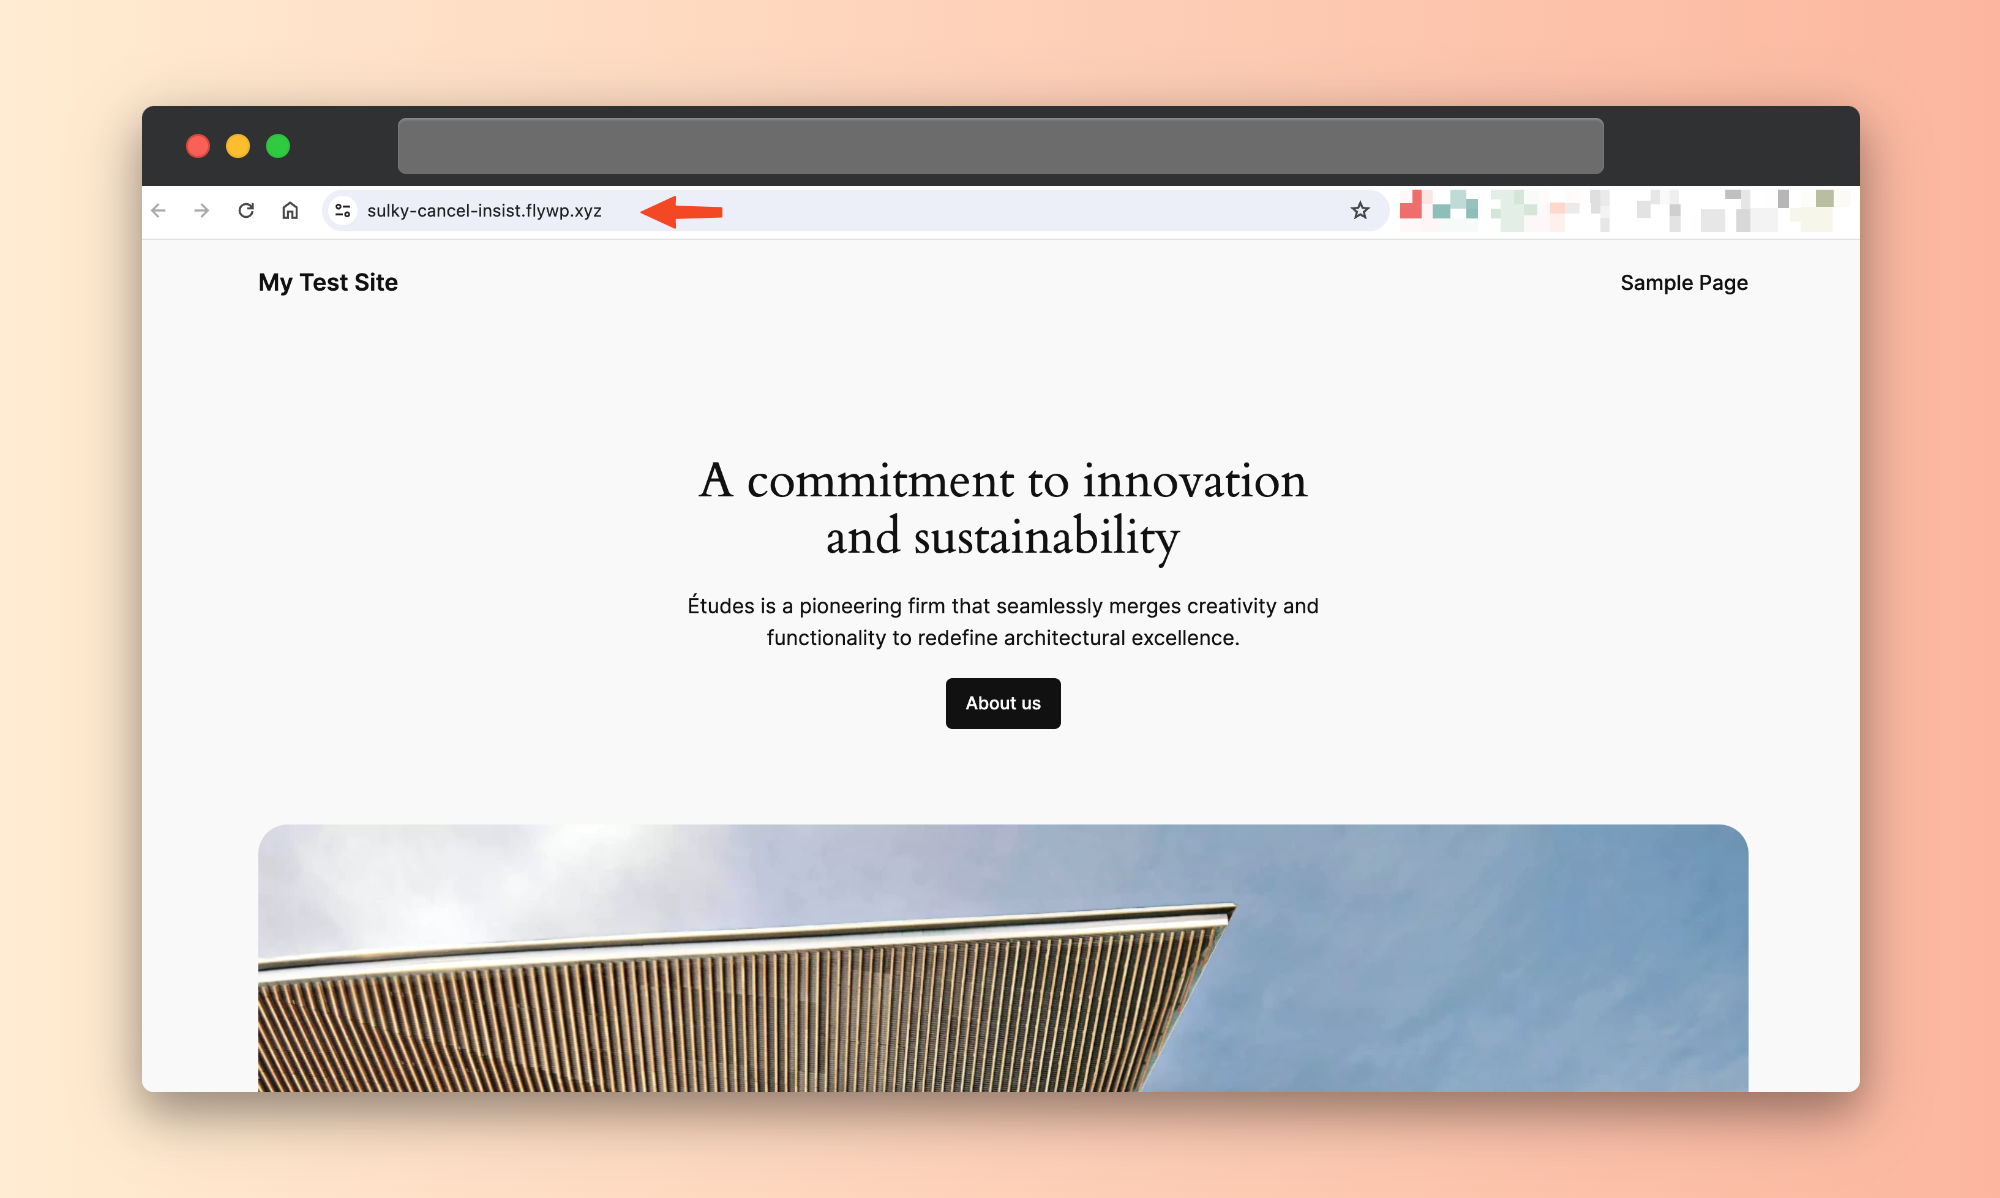
- Your website is ready to use. Click on the “visit site” button to preview your website.
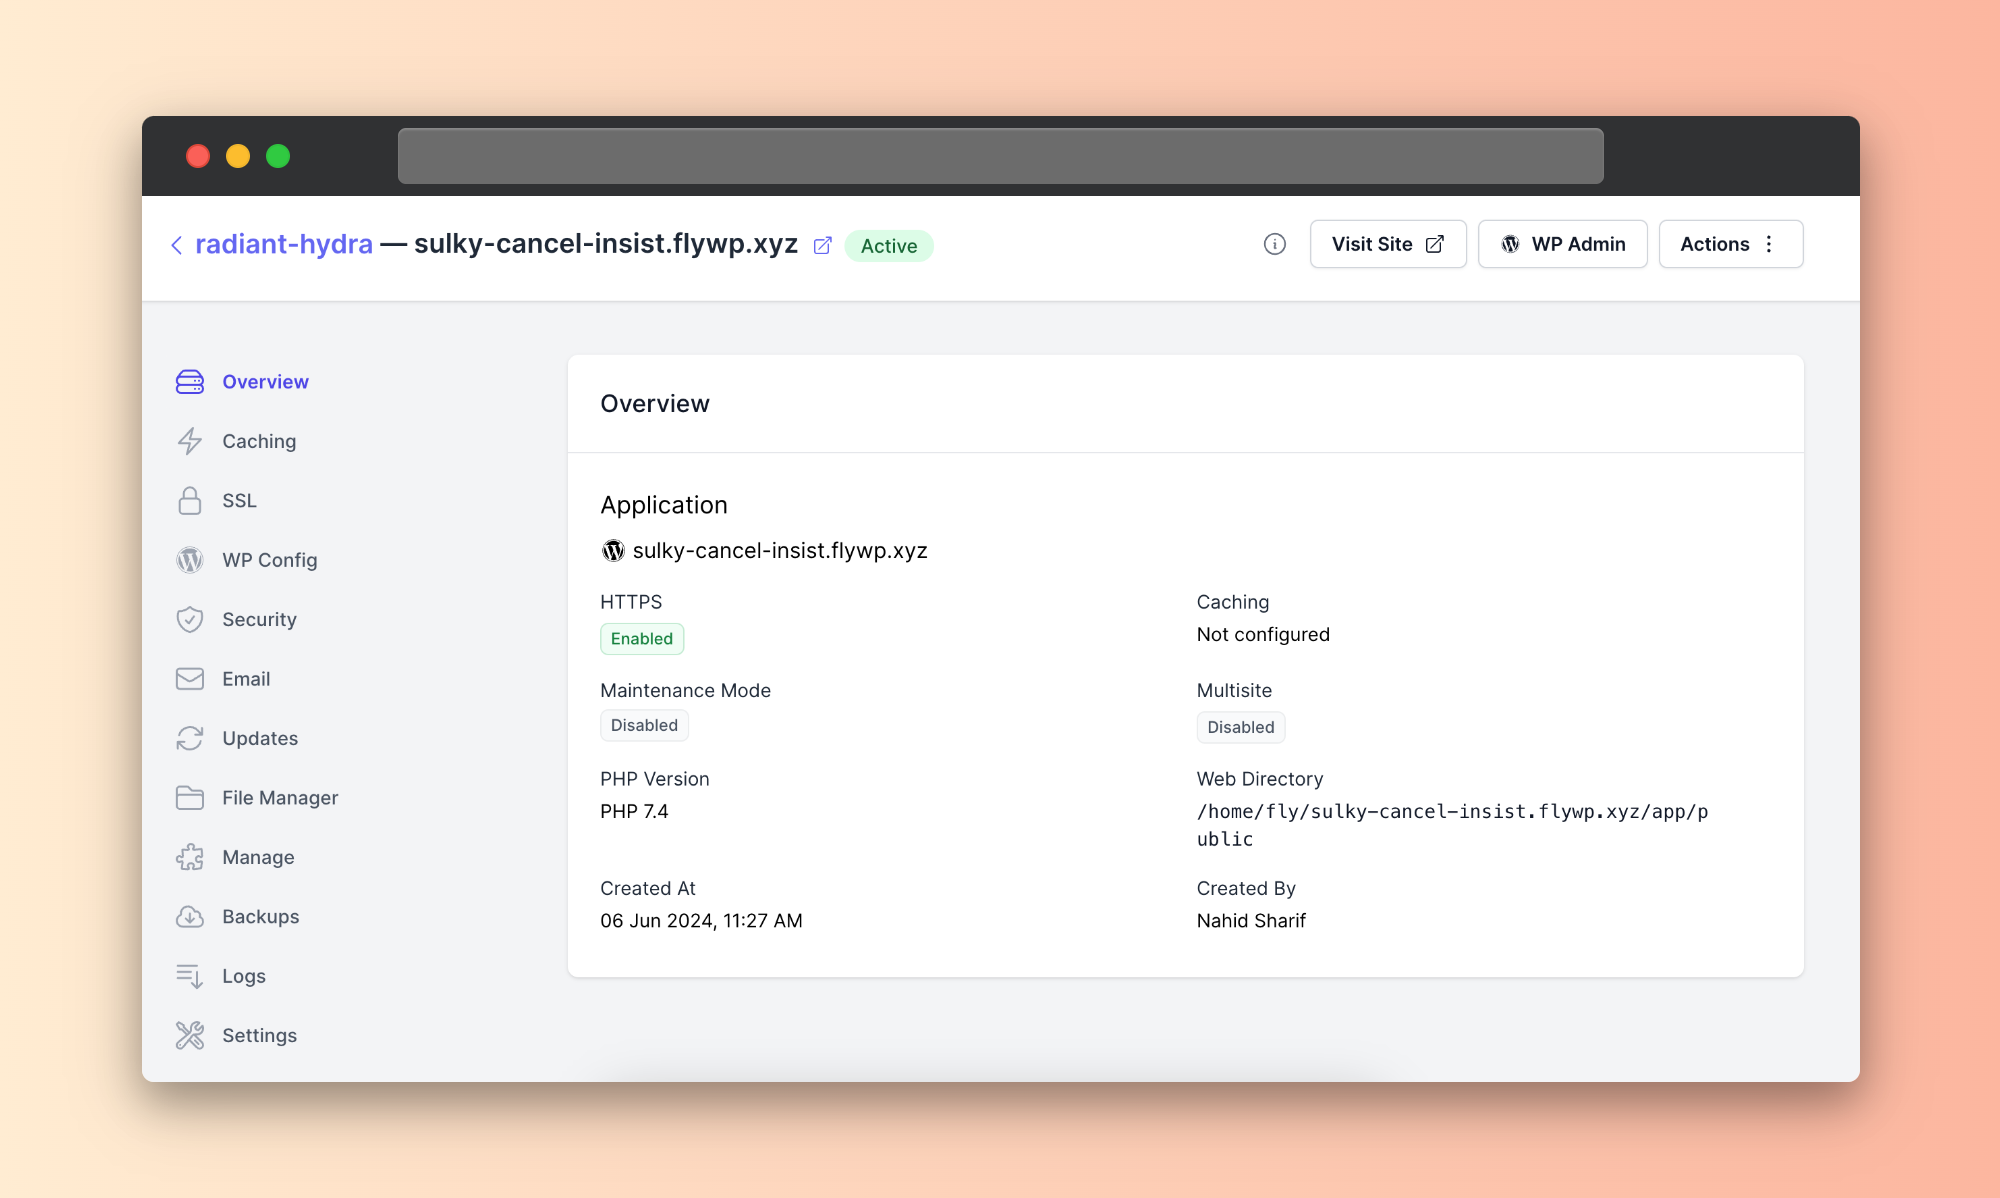
- Here’s a preview of your website. You can see the test site’s URL: sulky-cancel-insist.flywp.xyz
Step four: clone your website
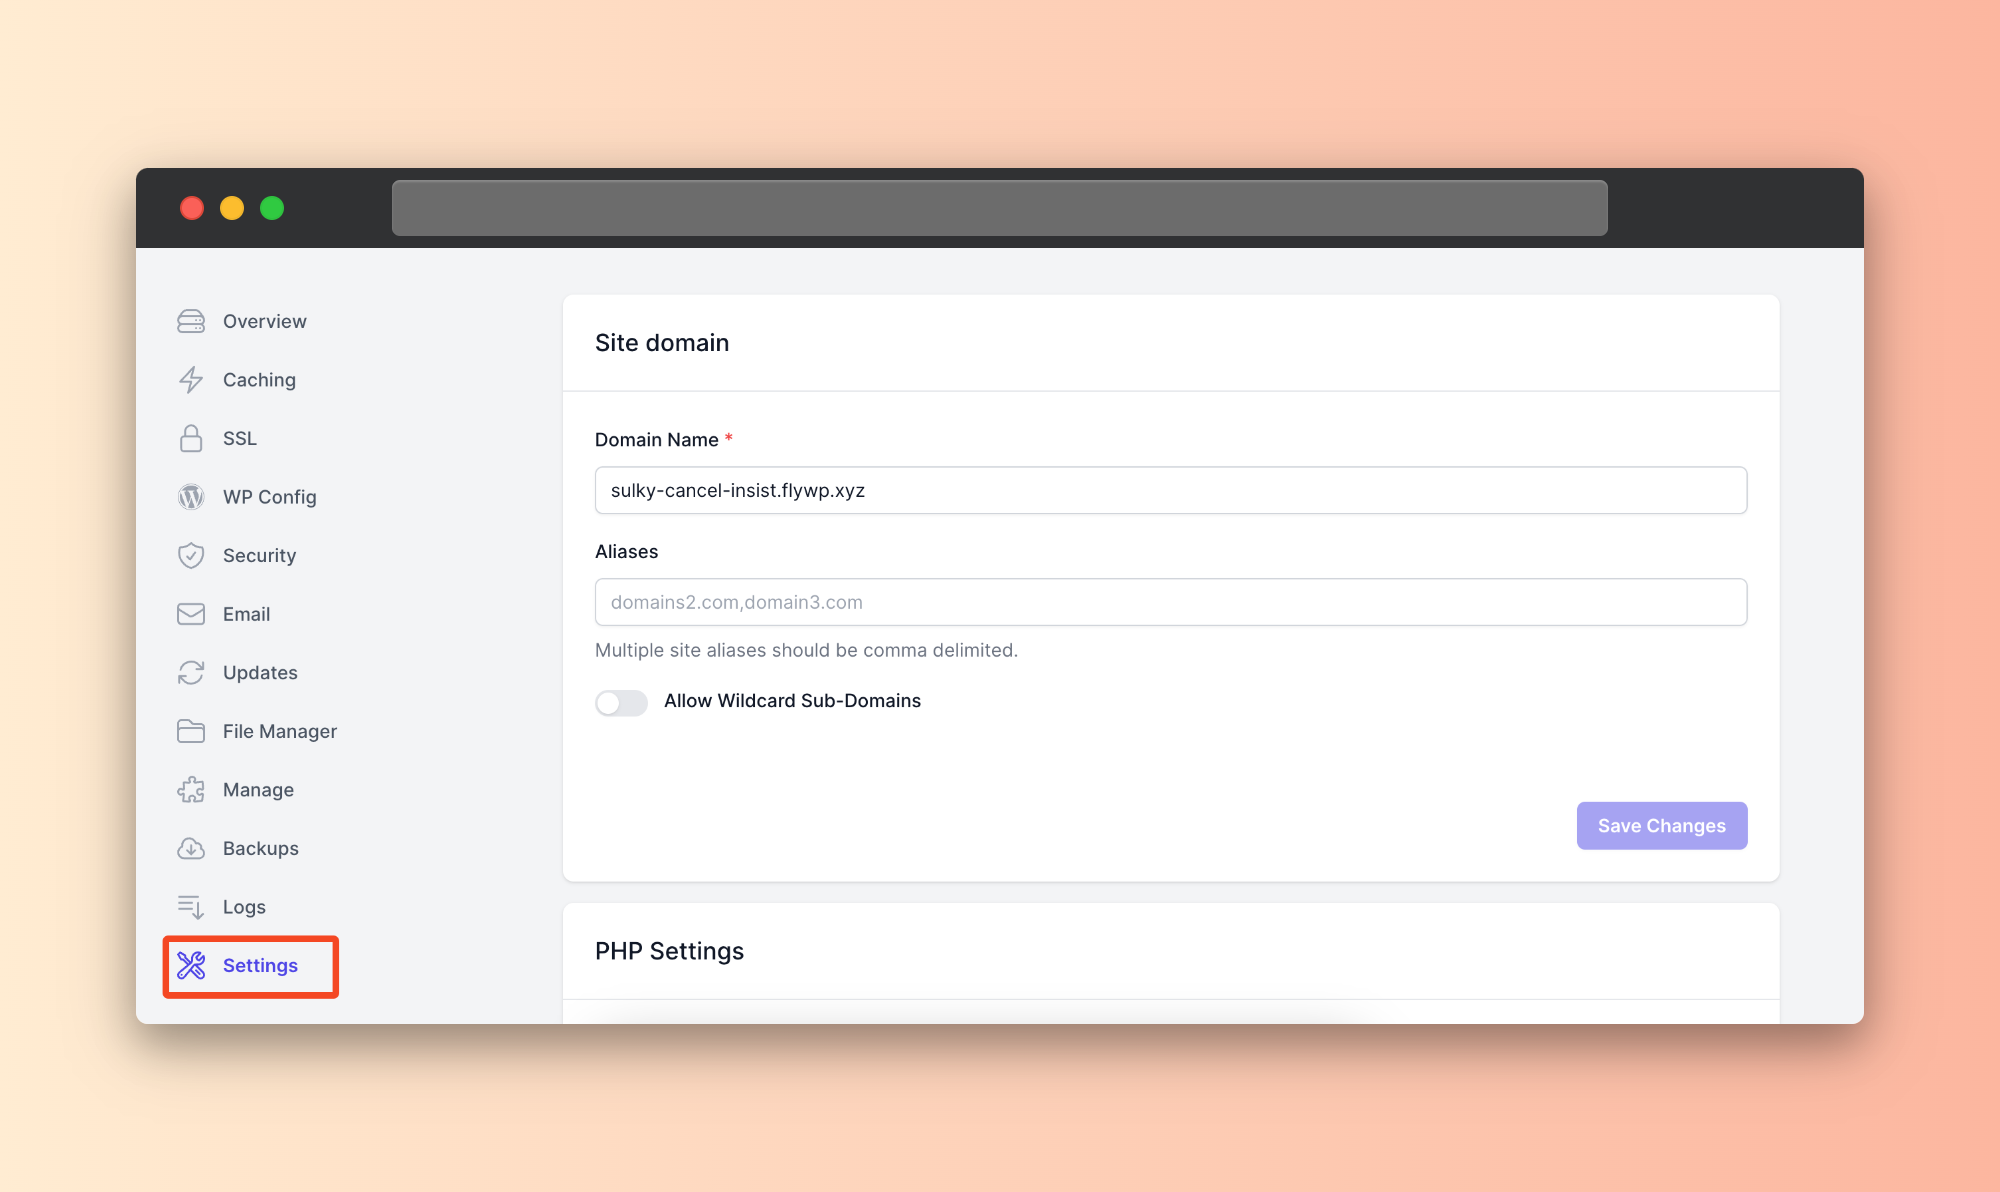
- Move to the website’s settings.
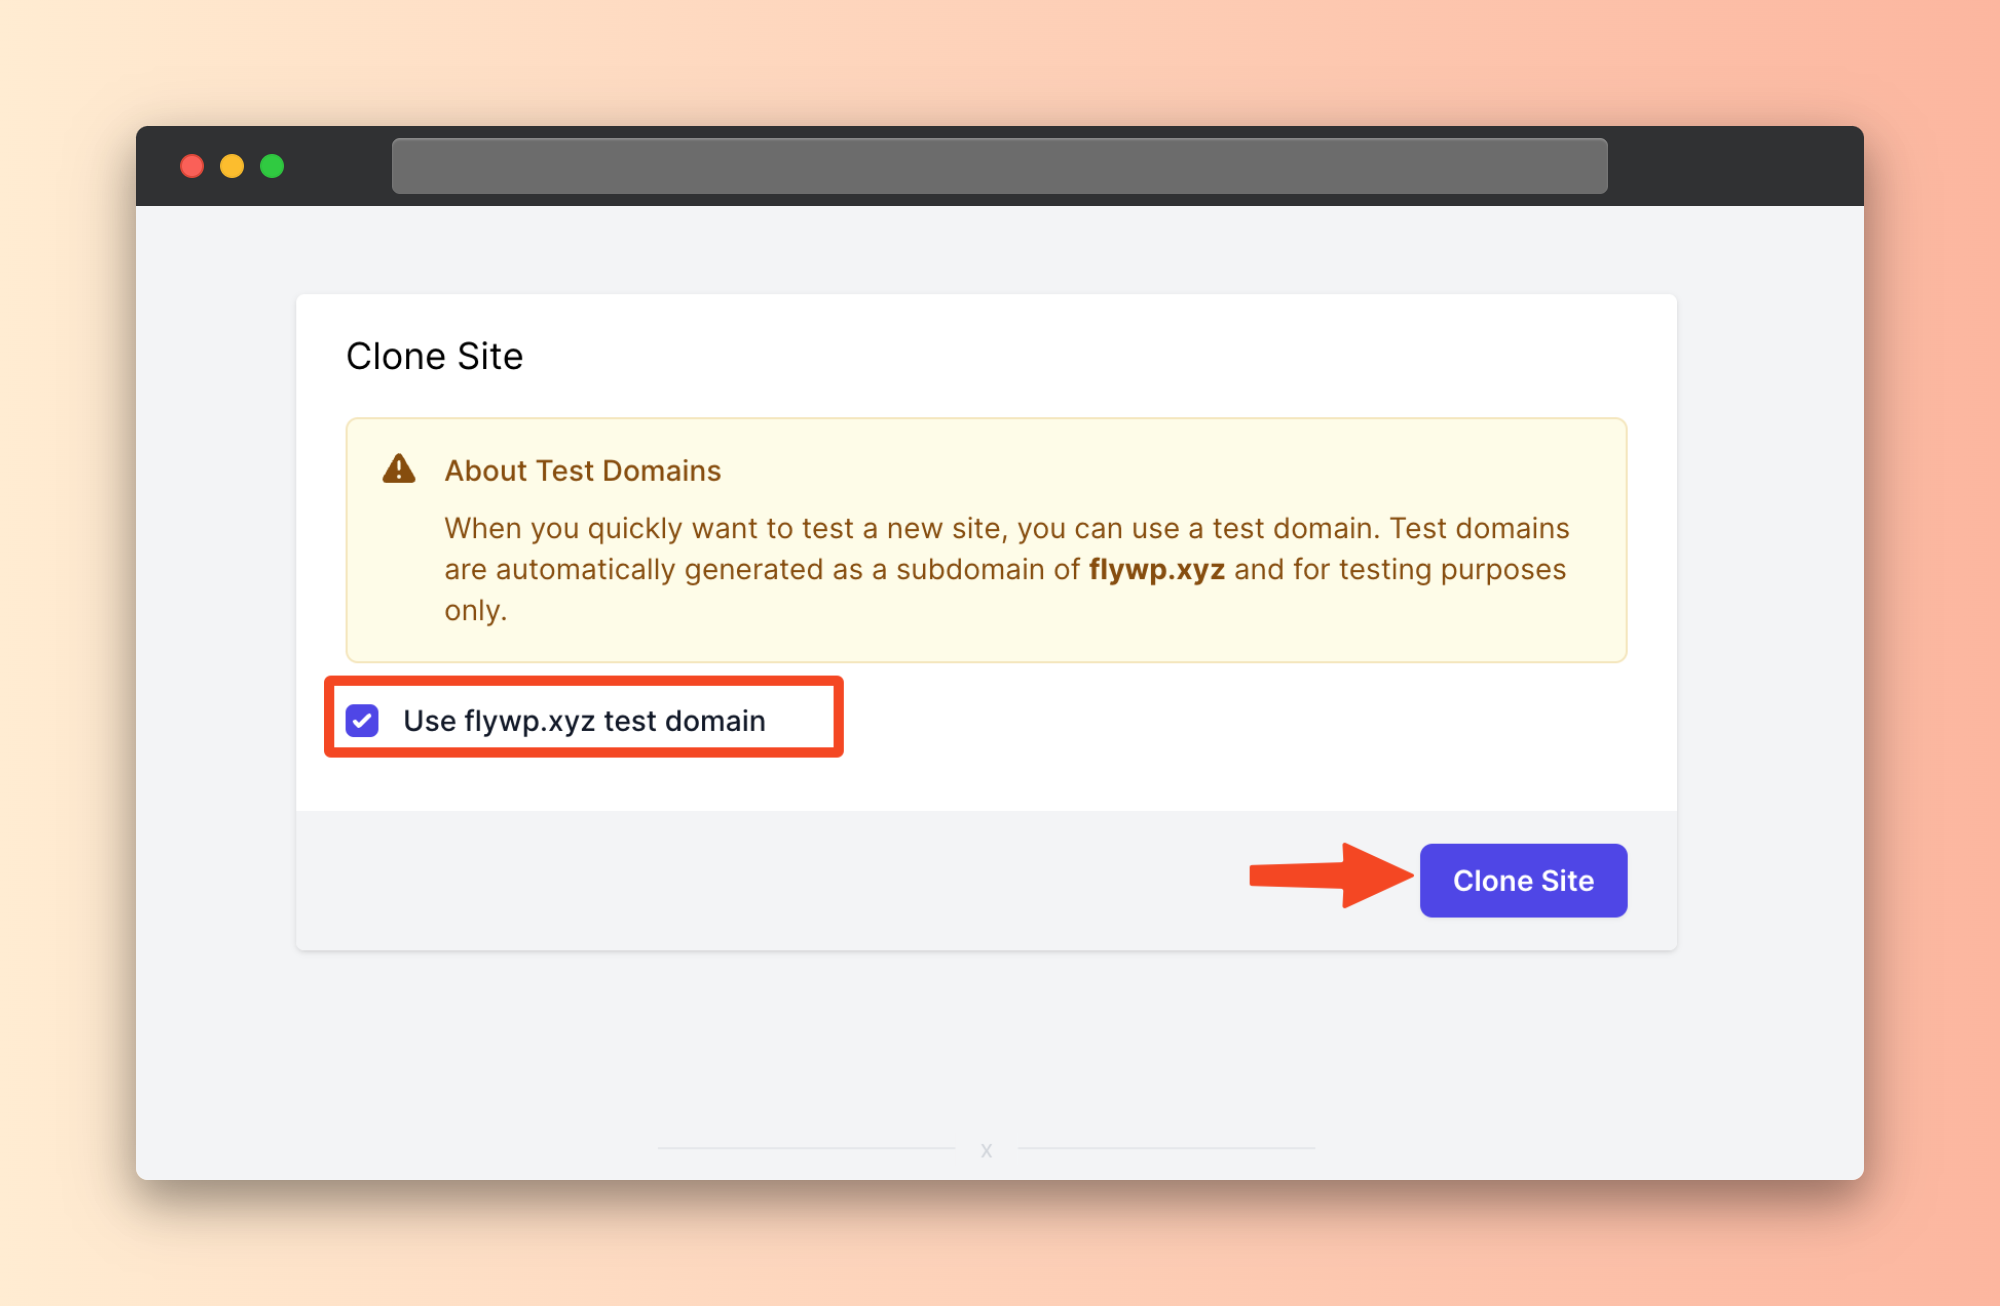
- Scroll down, and you’ll find the “clone site” option.
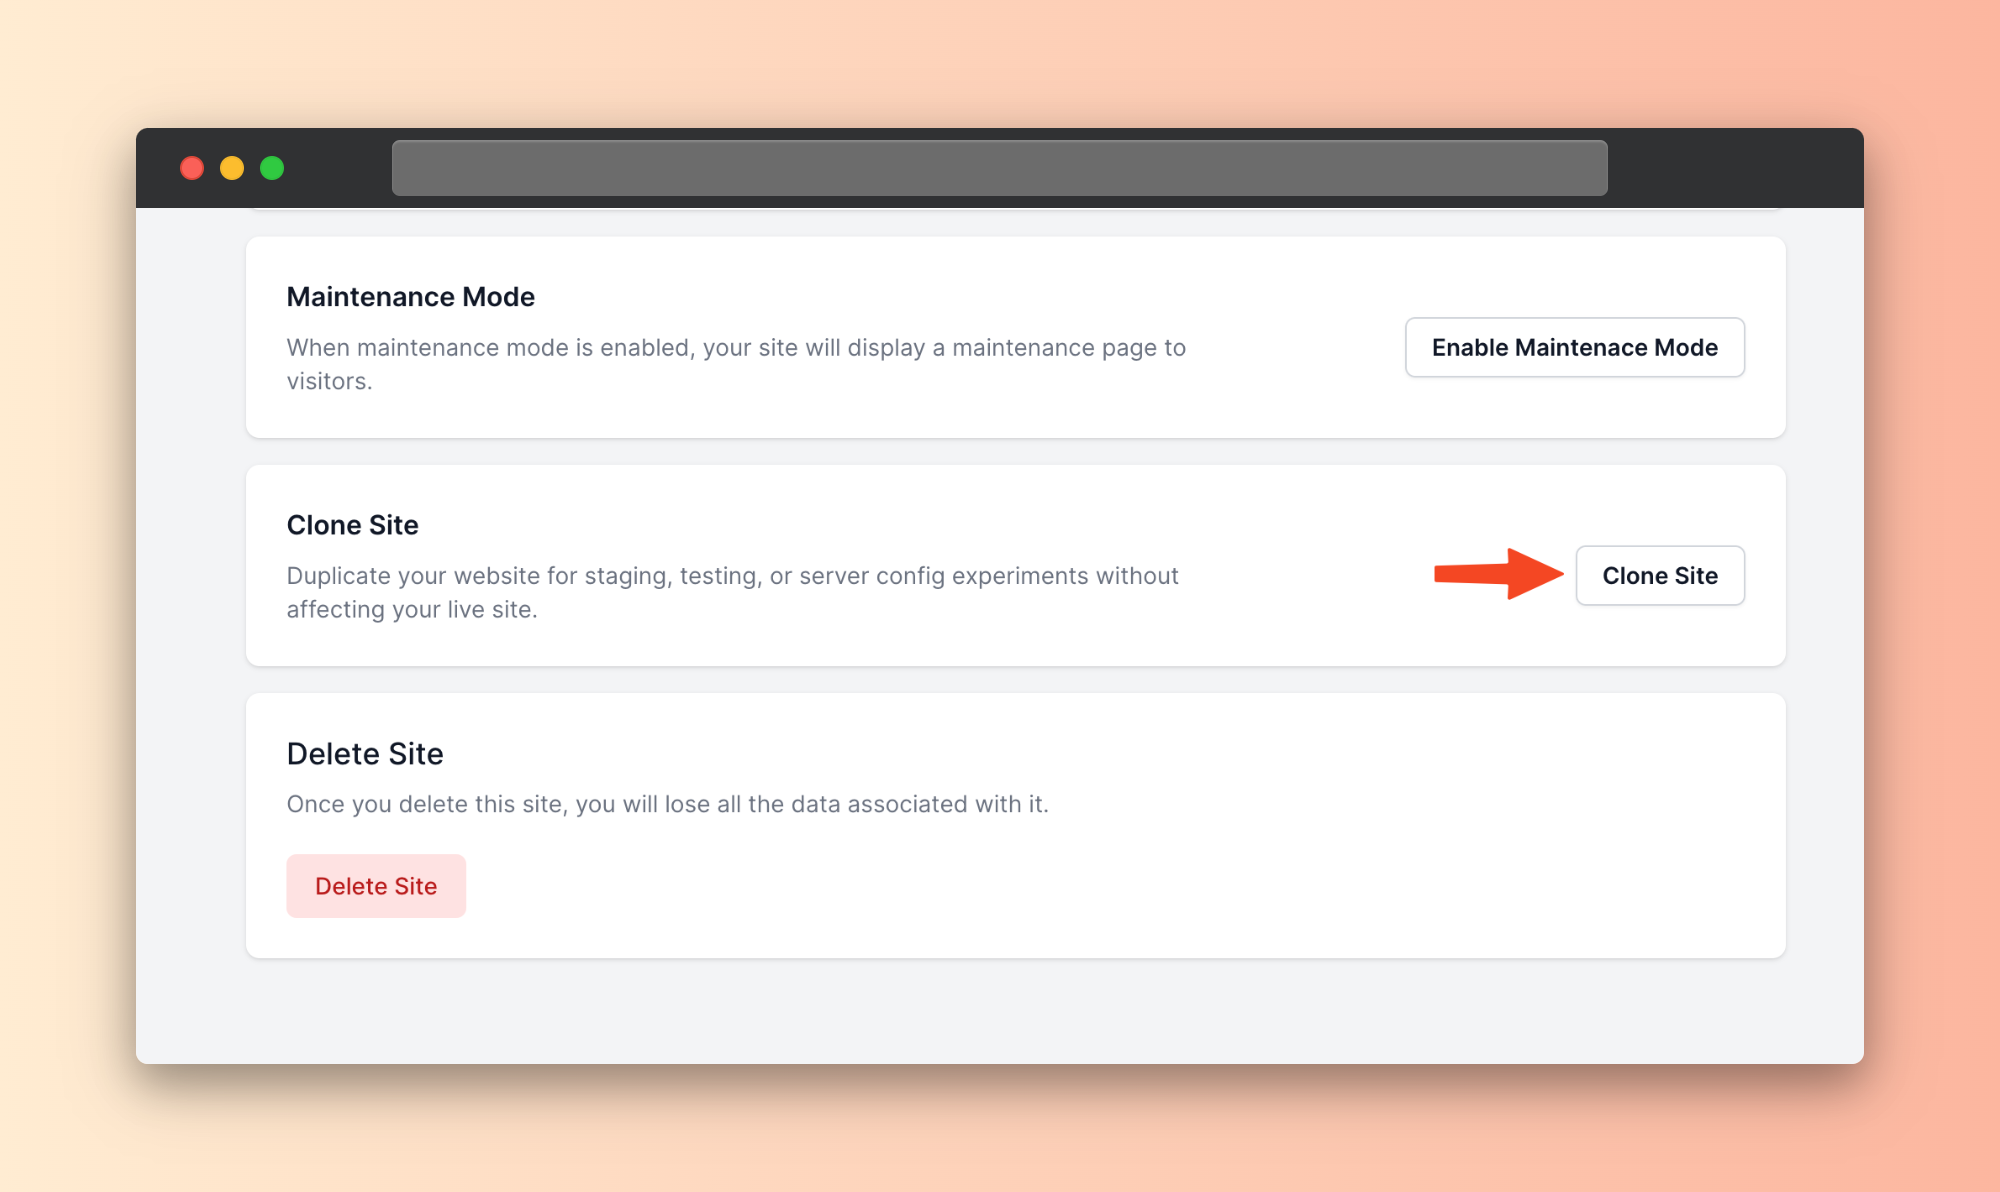
- Now, enable the “use flywp.xyz test domain” option. And then click on the “clone site” button.
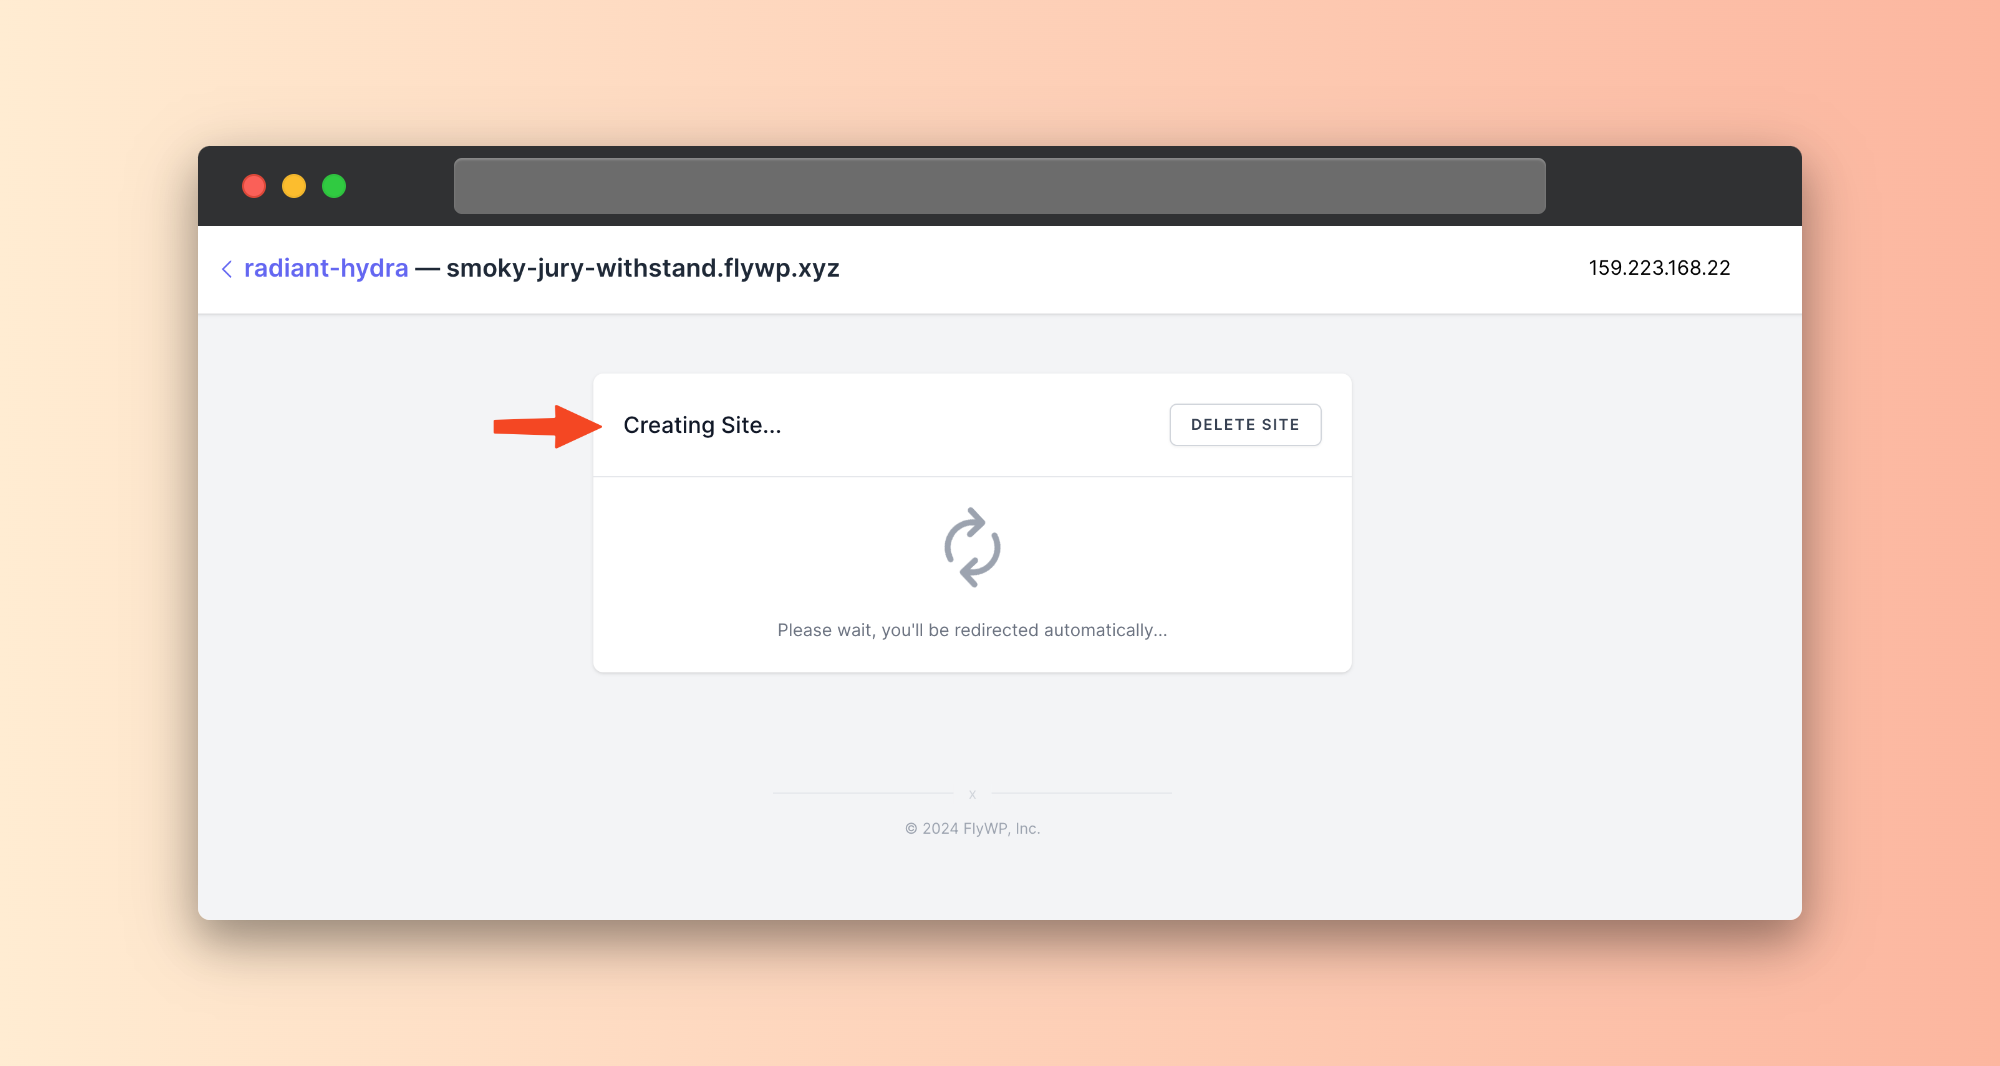
- Similarly, you’ll see a workflow that is creating your website. Wait a bit to complete the process.
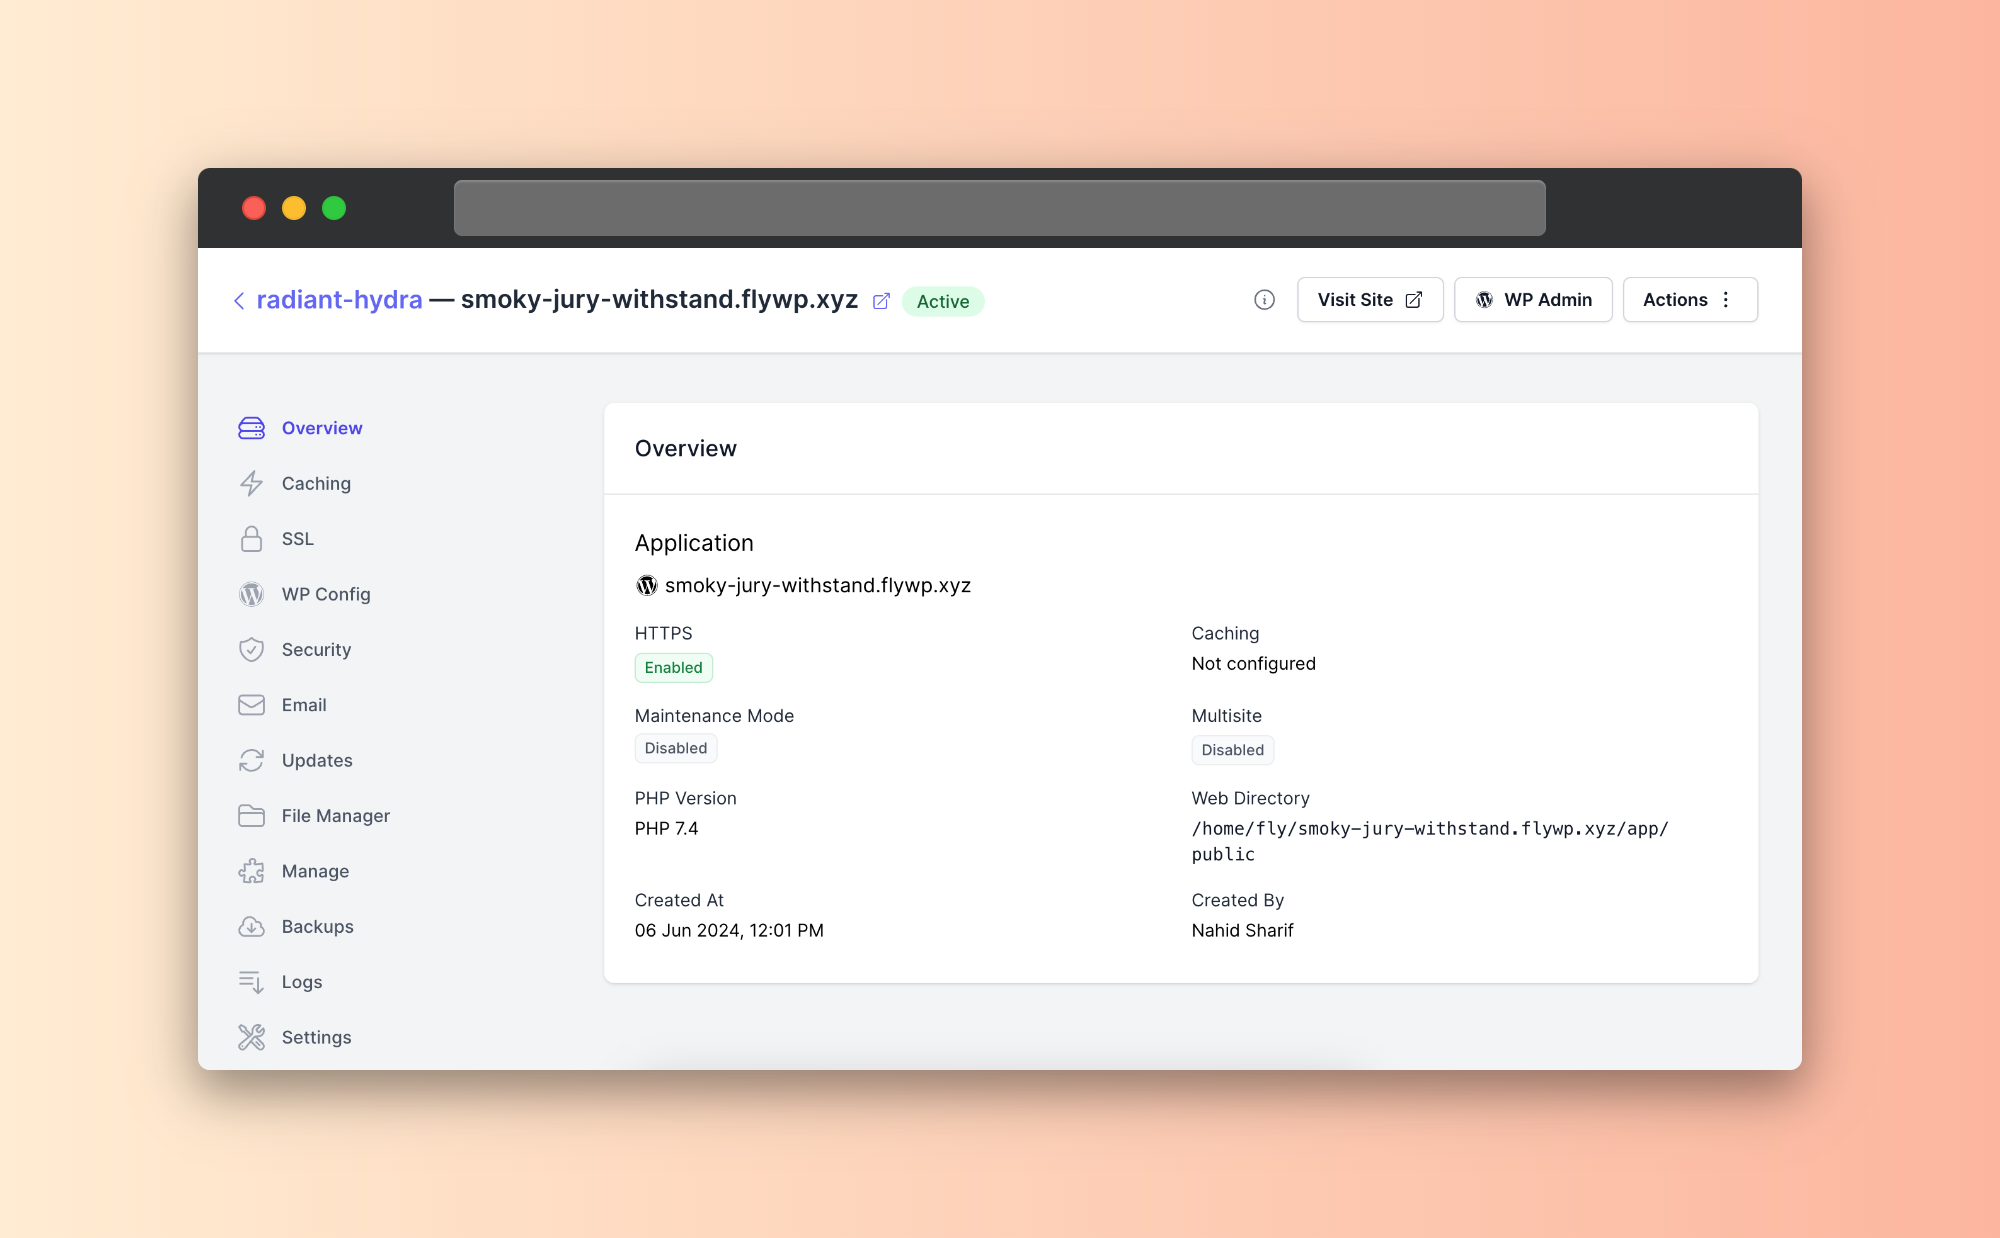
- That’s all you have successfully created and cloned a WordPress site with FlyWP.
Step five: customize your WordPress site
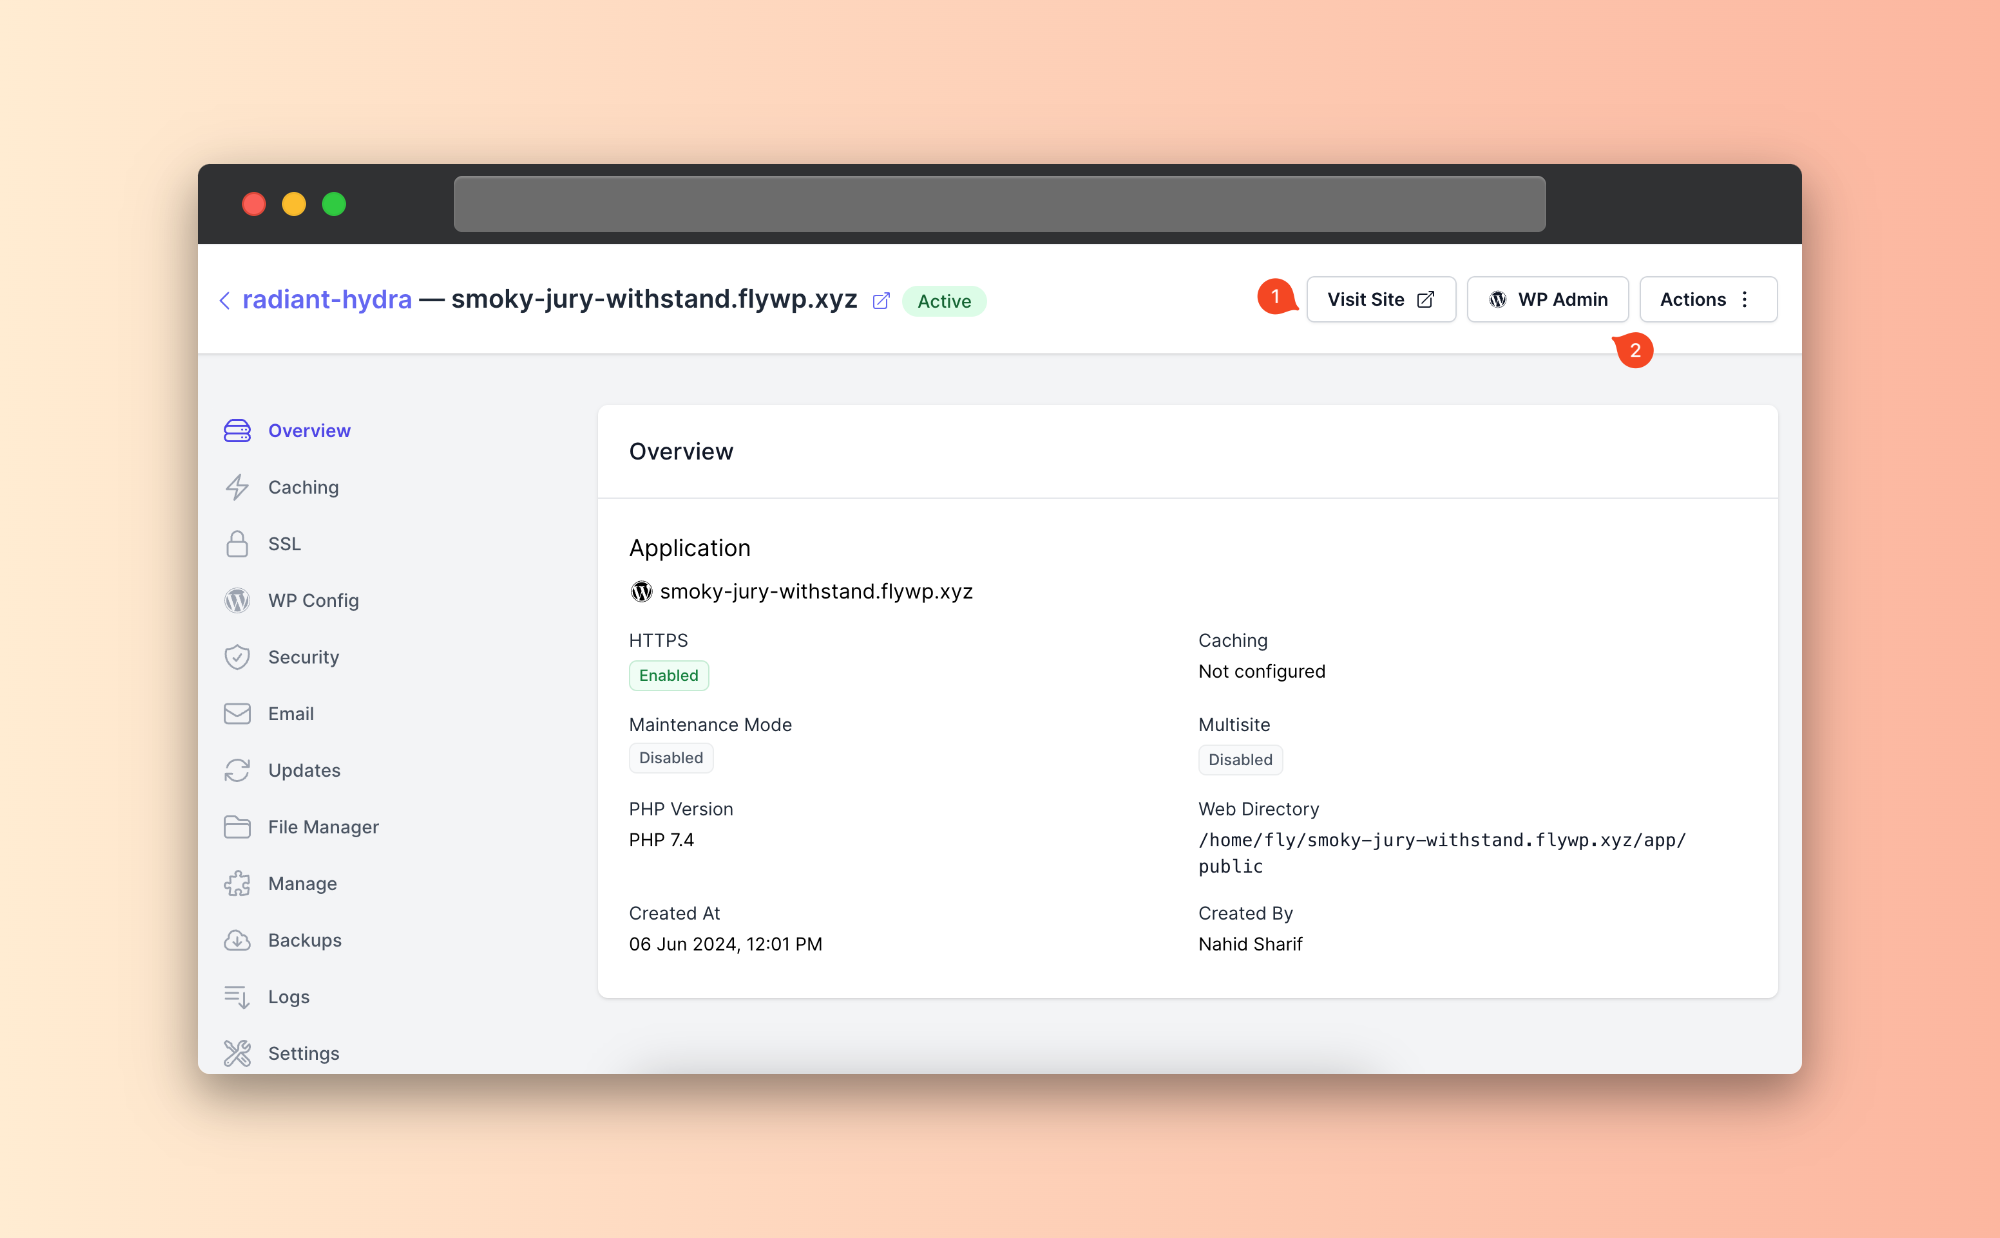
Now preview your website using the “visit site” option. Also, check the available options on the left sidebar.
- Overview: You’ll get an overview of the site, like HTTPS, PHP version, caching, multisite, and more.
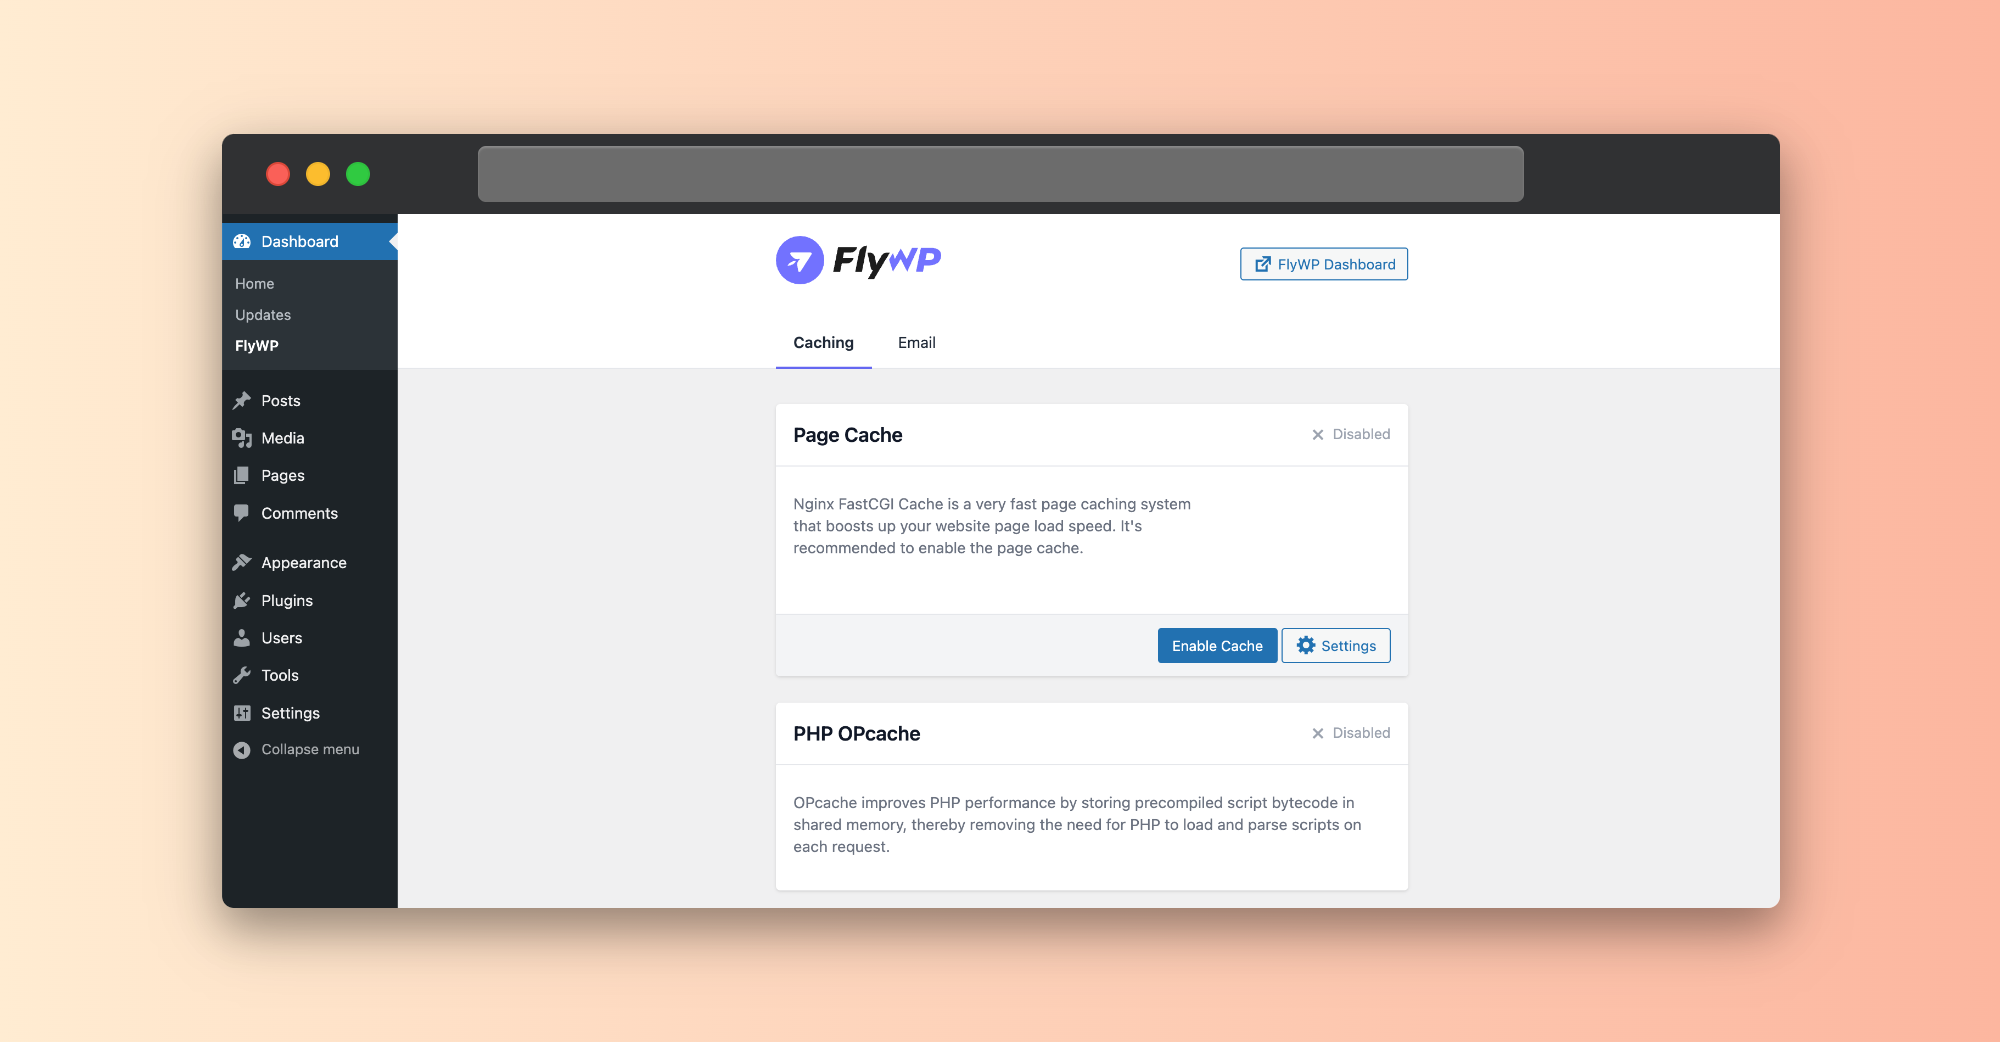
- Caching: Here, you can determine whether to enable the page cache or not.
- SSL: You can install an SSL certificate and a custom SSL to secure your website.
- WP config: You will find WP-config-related data about your WordPress site. Also, a manual editing option is available.
- Security: Enable or disable security measures on your WordPress site from here.
- Email: You can enable the email-sending options from here.
- Updates: Update themes, plugins, and the WordPress core from here.
- File manager: WordPress file management-related options are available here.
- Manage: Get the database credentials here and also configure your website’s options with some mandatory services.
- Backups: Create, delete, or schedule a backup of your website from here.
- Logs: Get an overview of your website’s logs.
- Settings: Perform your website with some general settings like site domain name change, PHP version management, maintenance mode, and so on.
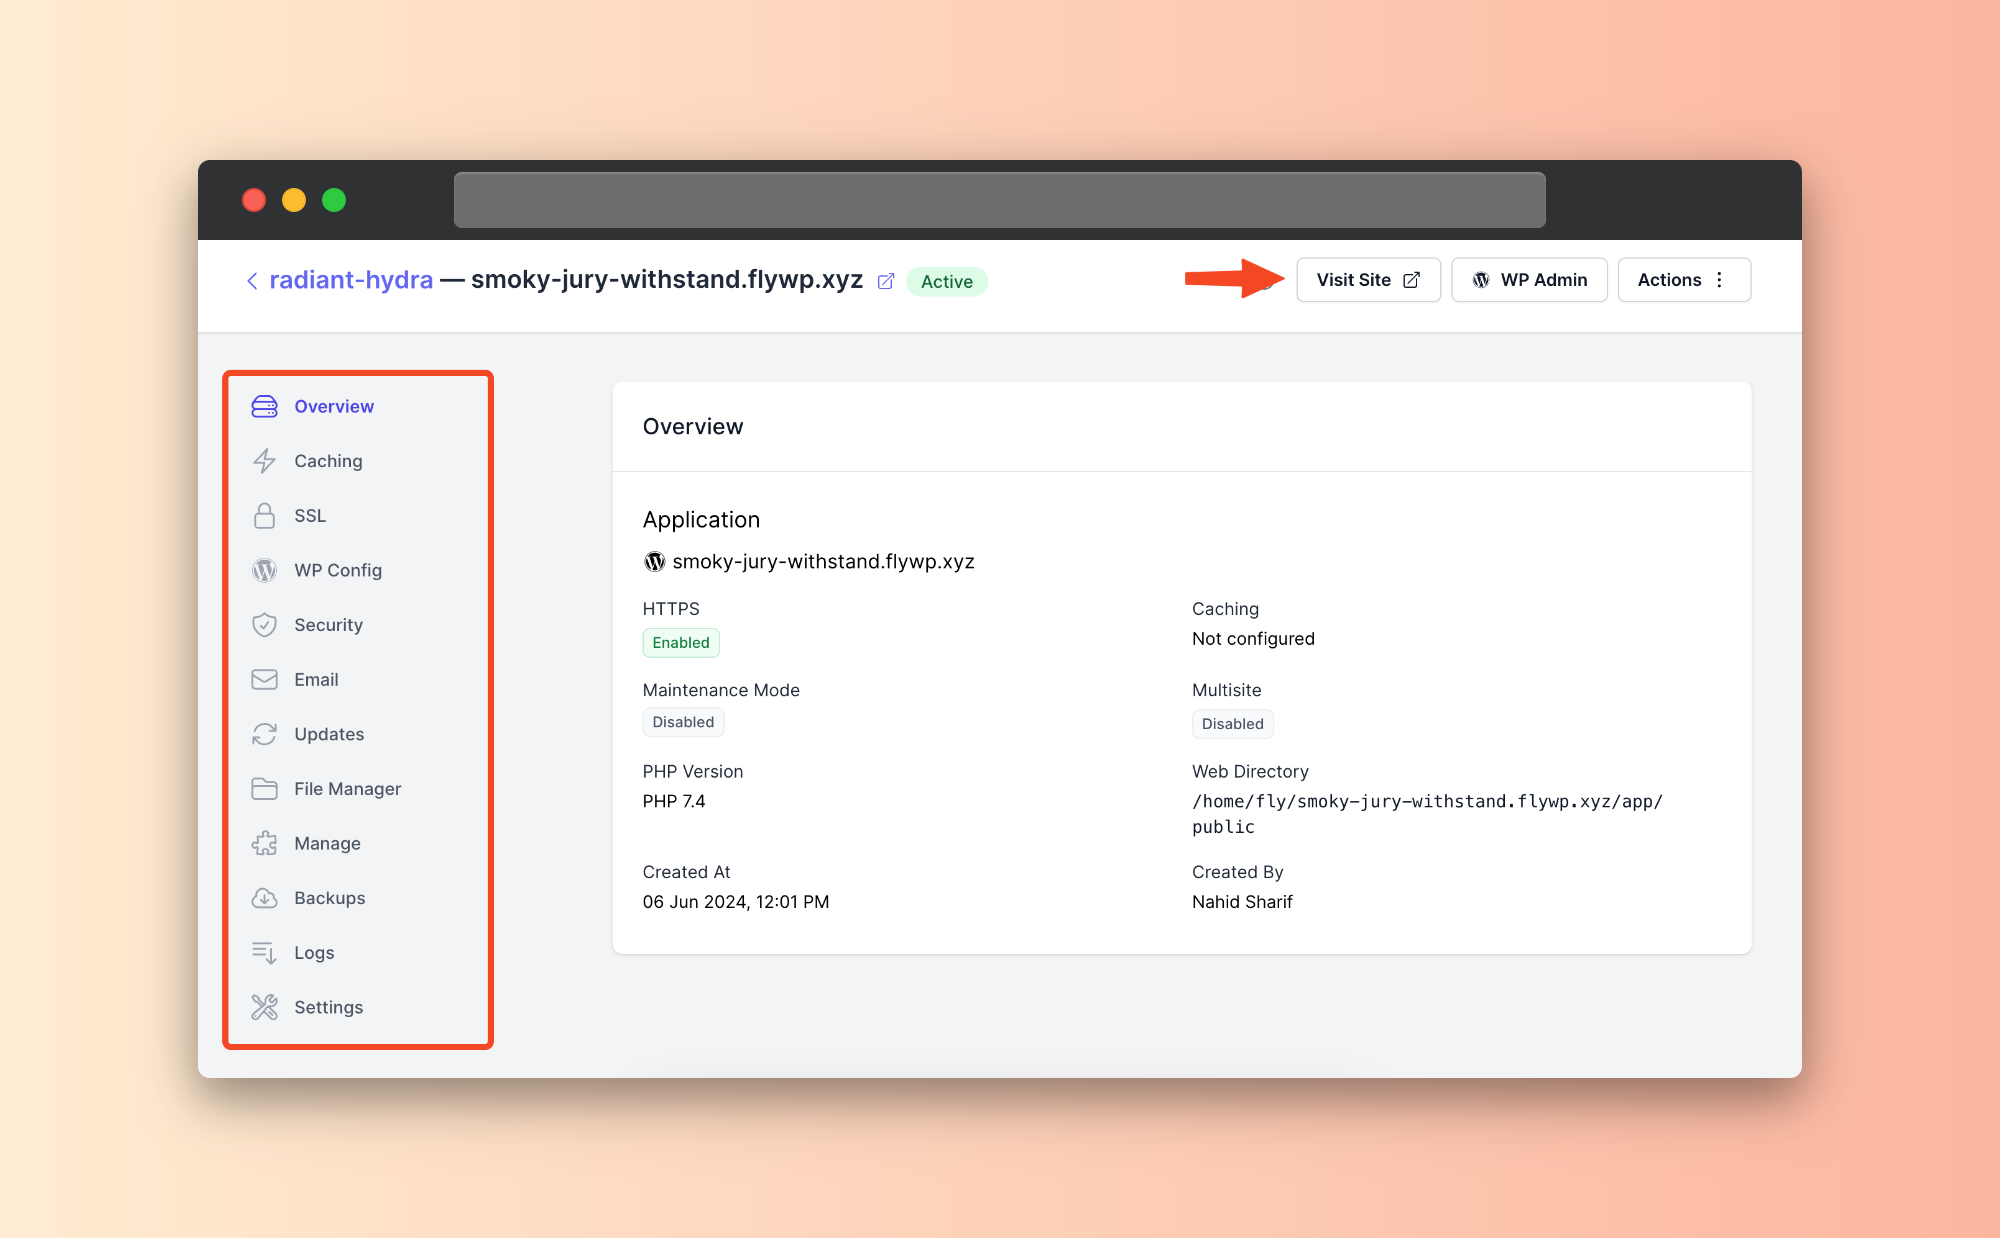
- Now click the (1) “visit site” button to preview your website. To access your website easily, click the (2) “WP Admin” button. You’ll be redirected to the backend of your WordPress site.
- After you visit the backend, you can see the available options for FlyWP. From here, you can configure the settings.
So that’s how you can clone a WordPress site with FlyWP using the cloning feature. Remember, we showed the process of creating a testing site with FlyWP. But you can clone a live domain as well as with FlyWP. We’ll cover it later in a separate post. For quick help, you can check out the post to learn how to migrate a site from one domain to another.
Post-considerations after cloning a WordPress site
We all know that cloning a WordPress site means making an exact copy of your current WordPress website. This helps create a staging environment, move to a new host, or create backups. After cloning a WordPress site, it’s important to consider several factors to ensure that the new site works correctly and securely.
Here are the key post-considerations:
- Check permalinks: After cloning, ensure that permalinks are set correctly. Go to Settings > Permalinks and verify that the structure matches your original site.
- Update URLs: If the cloned site is going to a new domain or directory, update all internal links to reflect the new URL structure. You can use plugins like Velvet Blues Update URLs or do a search and replace in the database.
- Update configuration files: If necessary, update configuration files such as wp-config.php to reflect any changes in database credentials, paths, or other settings.
- Reset user permissions: If the site is being used for testing or staging, reset user permissions so that only authorized individuals have access.
- Check for absolute URLs: Scan your site for any hardcoded absolute URLs that might still point to the original domain. These can cause issues with content loading or linking properly.
- Test functionality: Thoroughly test all functionalities of the cloned site to ensure everything works as expected. This includes forms, plugins, themes, and any custom functionalities.
- Update plugins and themes: Ensure all plugins and themes are up-to-date. Sometimes, the cloned site may have outdated versions installed.
- Check for hardcoded paths: Verify that no hardcoded file paths in your theme or plugins could break when moved to a different server or directory.
- Update Robots.txt and.htaccess: If necessary, update robots.txt and.htaccess files to reflect any changes in site structure or settings.
- Consider SEO: If the cloned site is a production site, update SEO settings, including meta tags, titles, and descriptions, to avoid duplicate content issues.
- Backup regularly: After cloning and setting up the site, create a backup. Regular backups are crucial for security and disaster recovery purposes.
- Monitor performance: Keep an eye on the performance of the cloned site, especially if it’s on a different server. Monitor for any issues with speed or resource usage.
Summary
The post has come to an end. We hope you find this tutorial helpful in terms of cloning a WordPress site. Website cloning is a long and tiresome process. You must have patience to complete the entire process.
Therefore, to conclude, let’s recap the whole thing once again:
- Set your clear intention
- Consider why you need website cloning
- Use FlyWP website cloning feature
- Focus on the post-considerations after cloning
If you have liked our post, then you might want to read our other informative articles. Don’t forget to check out our newsletter to get more insightful guides like this one.