There is no doubt that WordPress is the most popular CMS right now. There are several reasons behind this. Why not? This popular CMS is expanding day by day to help businesses grow and thrive through different plugins and themes.
This is why WordPress holds a whopping 43.1% share of all websites on the internet. This translates to over 34 million live websites currently using WordPress. Now you can understand the magnificence of WordPress and how it has created an impact on users.
However, let’s now talk about its installation and setup process. To be honest, it’s a matter of minutes to fully install and set up a WordPress site on any hosting provider you’re using. The fact is, you have to follow different steps to complete the entire process. However, FlyWP is here to make it easy.
Yes, FlyWP is right there to minimize the hassle for you. Under a single dashboard, you can add and manage servers and sites as you want. Also, configure the WordPress-related stuff efficiently. Before we begin, let’s find out the things you should consider when installing a WordPress site.
A quick navigation:
- What to consider before installing a WordPress website (7 important things)
- How to install and set up WordPress with FlyWP
- Step 1: Sign up or log in to FlyWP
- Step 2: Create a server
- Step 3: Create your WordPress Site
- Step 4: Install the WordPress site
- Step 5: Visit your site
- Step 6: Easy theme and plugin installation
- Step 7: Choose a theme
- Step 8: Add plugins
- Step 9: Customize your site
- Step 10: Launch your website with FlyWP!
- Post-installation maintenance things
- The final words
- Some Common FAQs on Installing and Setting Up a WordPress Site with FlyWP
What to consider before installing a WordPress website (7 important things)
WordPress is an incredibly popular platform that has a vast reach and presence on the internet. And we are already aware of this. A vast number of users will tell the truth about how powerful WordPress is as a worldwide content management system.
Additionally, WordPress is available in over 200 languages, making it accessible to a truly global audience. This level of translation and localization is a testament to the commitment of the WordPress team to make their platform available to as many people as possible, regardless of their geographic location or language.
These statements prove the popularity and accessibility of WordPress. So while you choose this CMS to install either on your local server or live hosting, be sure to follow these things carefully. It will help you to avoid unwanted fatal error like error establishing database connection.
- Choose your hosting: Your hosting service is where your website lives on the internet. Look for a reliable host that offers great support and is known for good performance. FlyWP is a great choice, especially for WordPress sites.
- Pick a domain name: Your domain name is your website’s address on the web. Choose one that’s easy to remember and reflects what your site is about.
- Plan your site’s purpose: Think about what you want your website to do. Is it a blog, an online store, or a portfolio? Knowing this helps you decide on the look and features you will need.
- Check WordPress requirements: Make sure the hosting service you choose supports the technical requirements for running WordPress. Most good hosting services, like FlyWP, will take care of this for you.
- Think about themes and plugins: Have an idea of the kind of design (theme) you want for your site, and any extra functions (plugins) you will need. Don’t worry about the details yet, just start thinking about your needs.
- Set up a maintenance plan: Running a website means regular updates and backups. Think about how you will handle this. Many hosting services offer tools to help.
- Consider your budget: While WordPress itself is free, hosting, themes, and plugins can cost money. Plan how much you’re able to spend.
By considering these steps before installing WordPress, you will set yourself up for a smoother setup process and a more successful website.
How to install and set up WordPress with FlyWP
Let’s introduce FlyWP, your all-in-one solution for WordPress site management, which is perfectly tailored for individuals and businesses alike. This platform shines with its streamlined server management, top-notch security features, and tools that developers love.
FlyWP is ideal for those in search of an integrated solution that promotes efficient teamwork, delivers robust performance, and offers flexible backup option, it stands out as a particularly advantageous choice.
Leveraging FlyWP means not only making your website management smoother but also ensuring it remains secure and performs at its best, making it a wise choice for anyone serious about their online presence.
Now let’s go through the detailed process of installing and setting up a WordPress site with FlyWP, step by step.
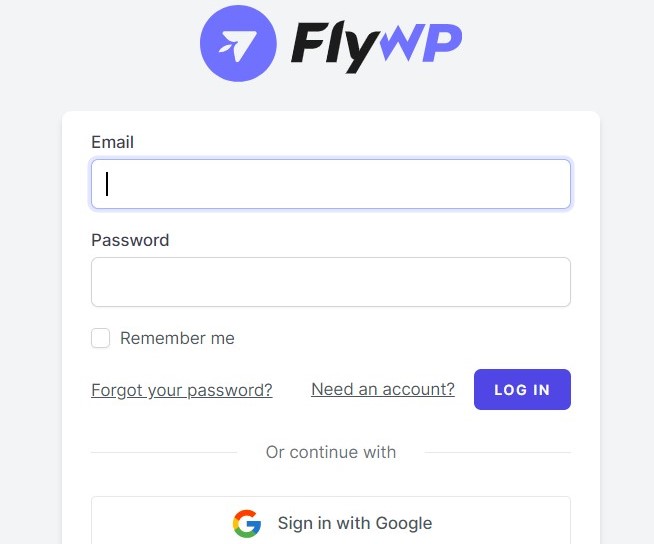
Step 1: Sign up or log in to FlyWP
- First, go to app.FlyWP.com
- If you’re new, sign up. If you already have an account, just log in
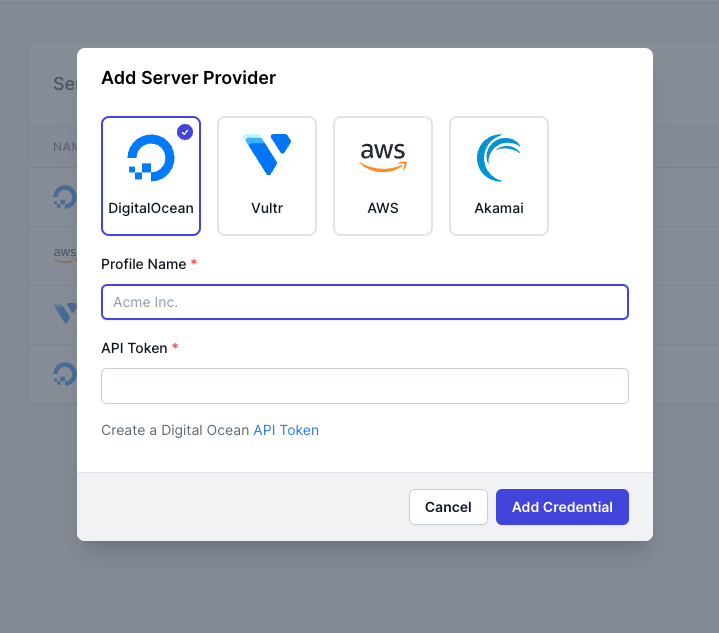
- After logging in, you will see the server providers page. Here, you will see all the server providers listed on the page.
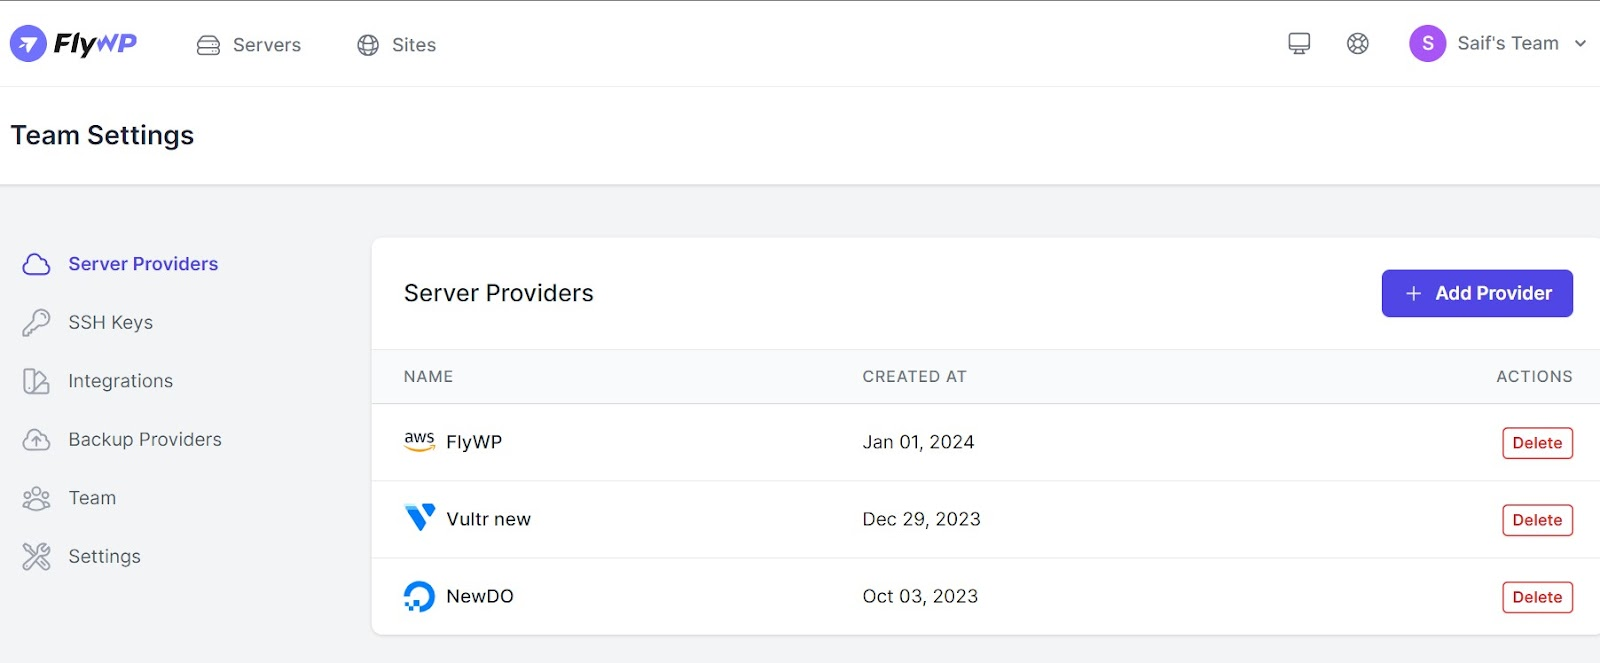
- Click ‘Add Provider’ to set up a server provider; this option will guide you through the initial steps.
Here, you can see that FlyWP works with many different server types and hosting services. This means you can choose any server you prefer for your WordPress site, giving you lots of control over how your site is set up.
Step 2: Create a server
- After adding the server providers, you need to create a server. Once you click on it, you can see the available providers. Select any of the suitable ones.
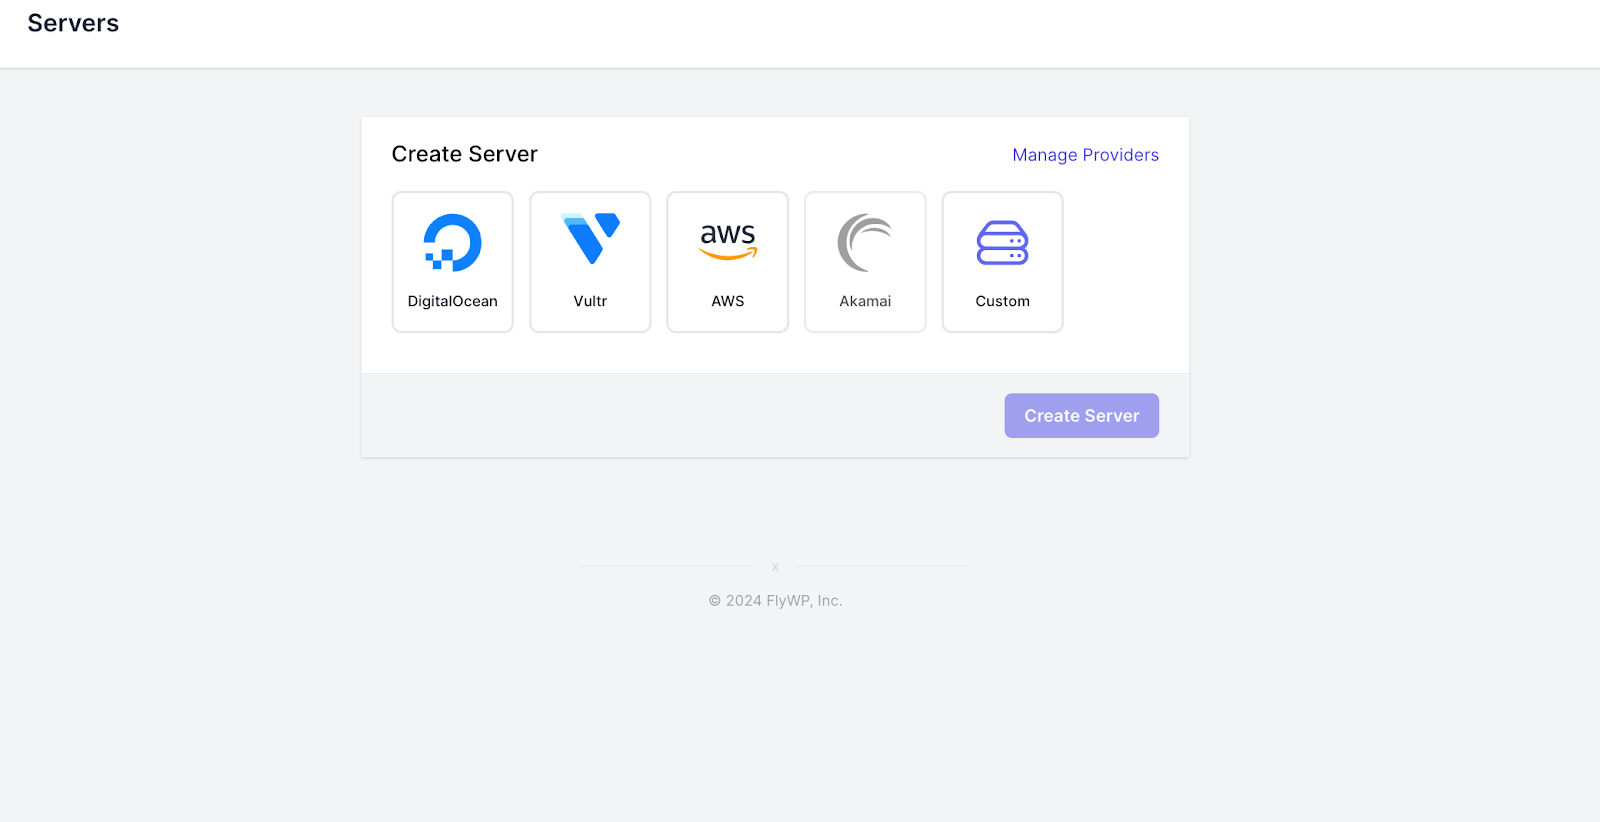
You also can check our documentation for a clear understanding of how to create servers with FlyWP. Once your server is up, you can further configure its settings, manage databases, and more directly from the FlyWP dashboard.
Step 3: Create your WordPress Site
- After your server is ready, find the option to create a new site.
- Enter your site’s details, like its domain name and the admin credentials you want to use.
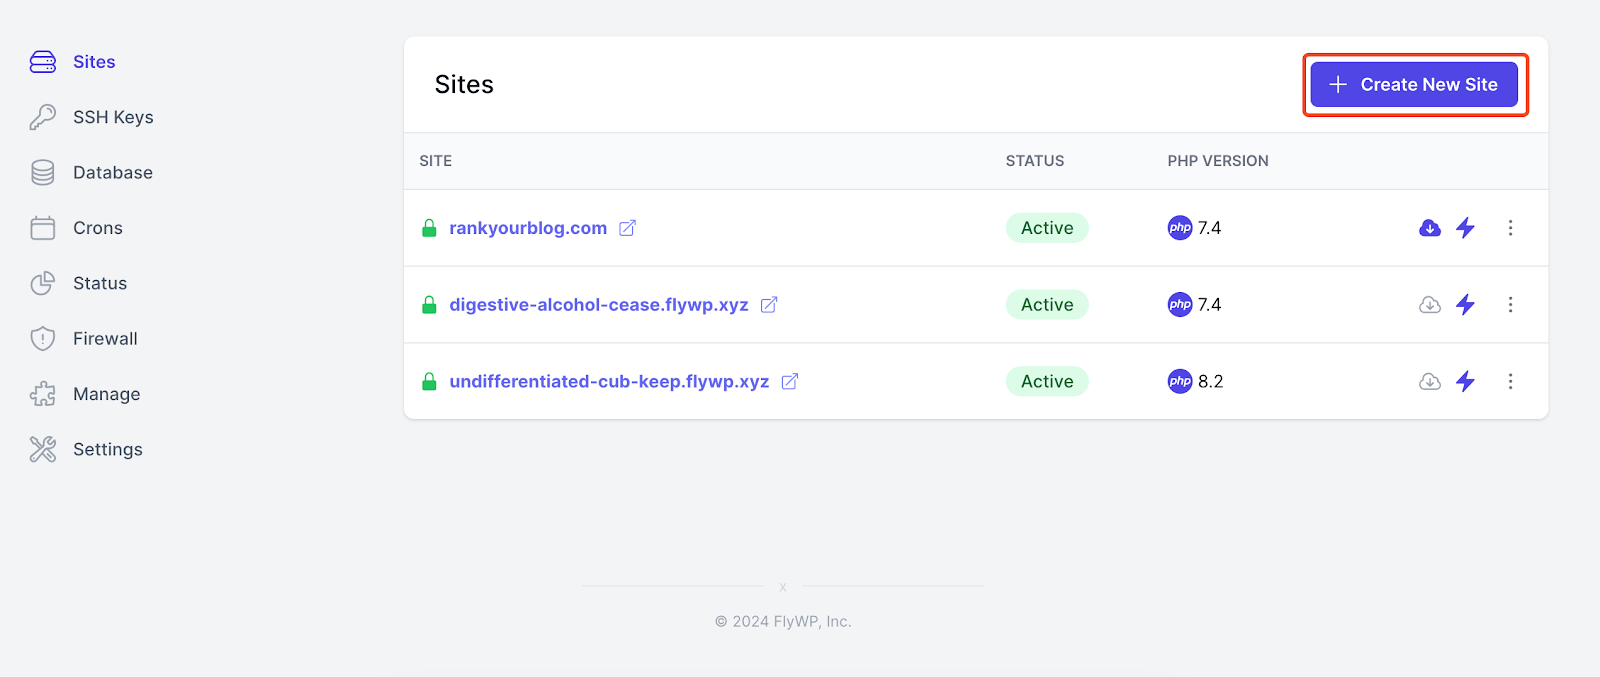
- By selecting the “Create New Site” prompts, you will go through the WordPress setup process.
- Clicking “Create New Site” from the dashboard on the right side, you will find multiple options to create your site; you can choose one according to your needs.
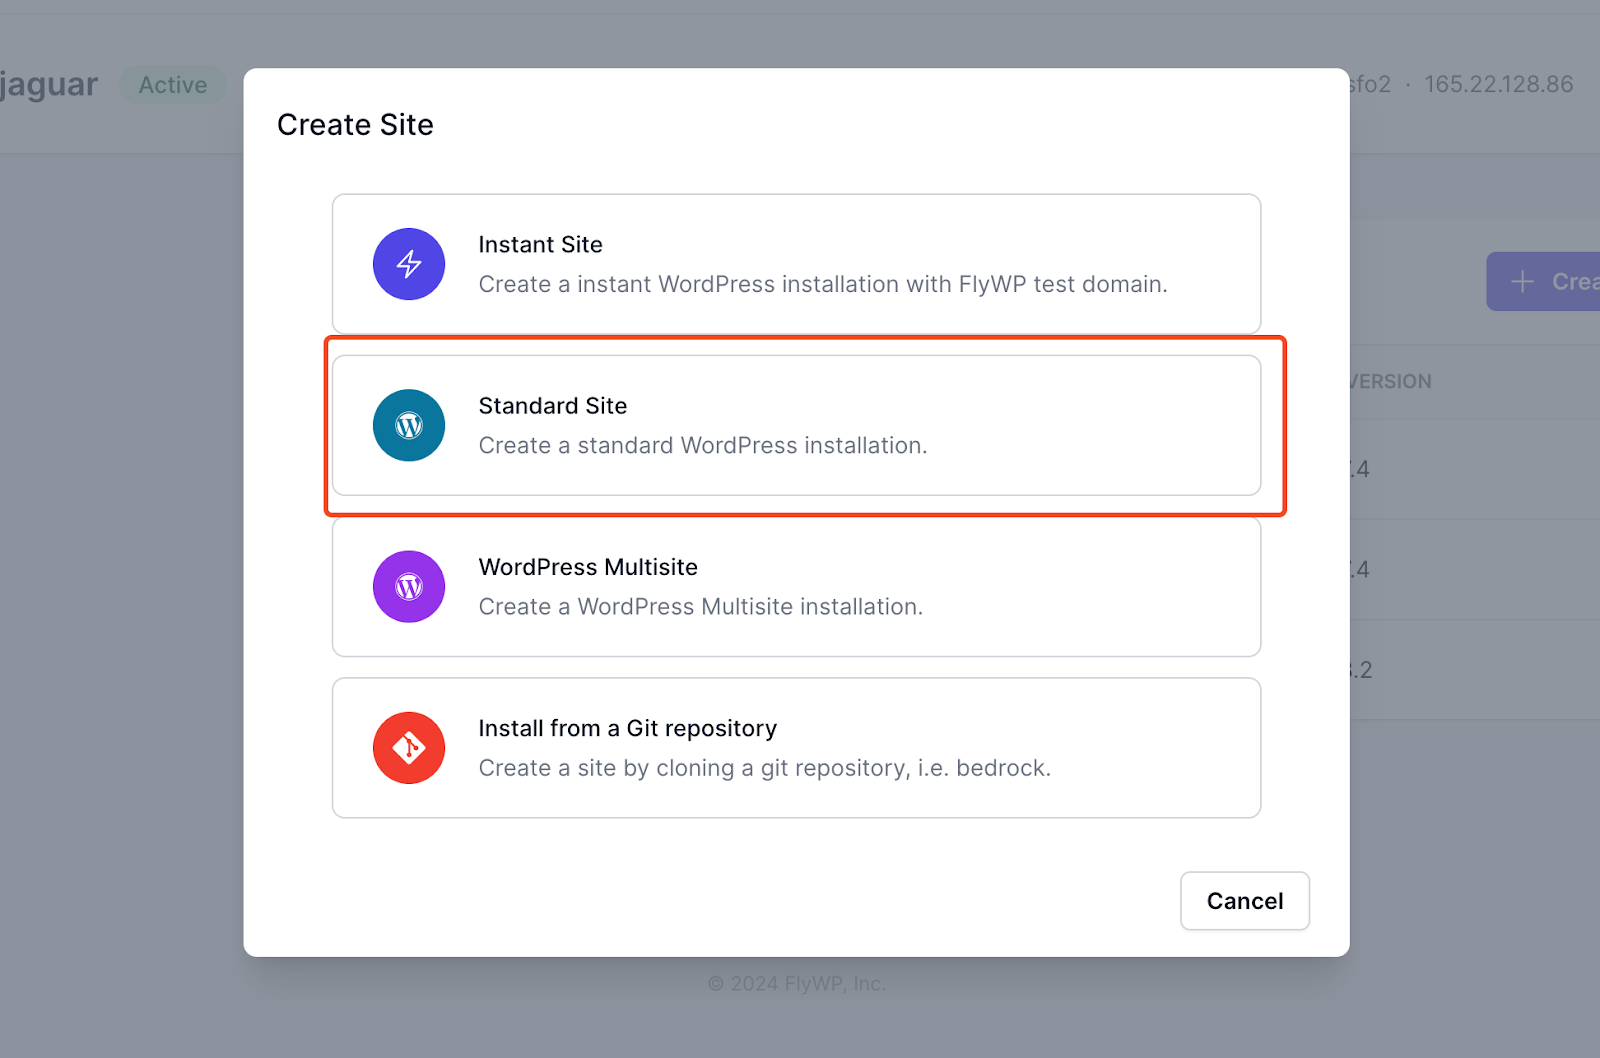
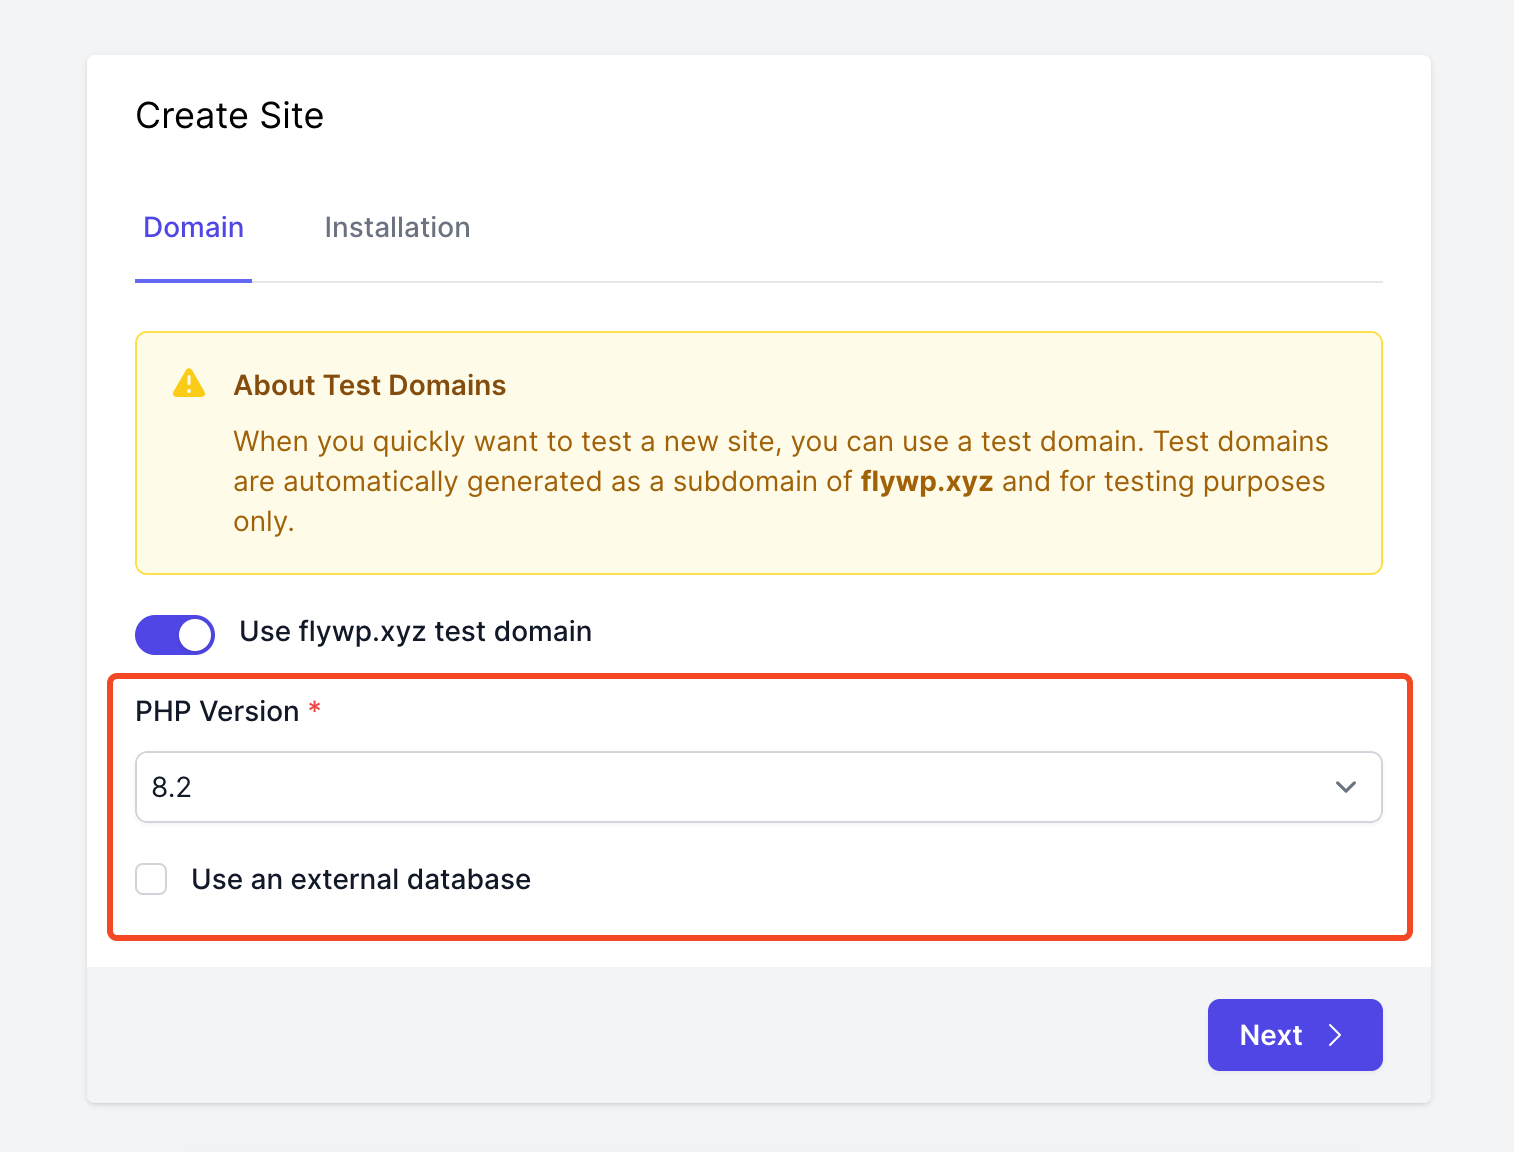
- Now, enter the Domain Name [reflects what your site is about as we discussed it in this blog earlier] for your website. If you are just testing, you can utilize the FlyWP test domain by selecting “Use flywp.xyz test domain“.
You can check out the detailed documentation on creating a site and migrating to a new one.
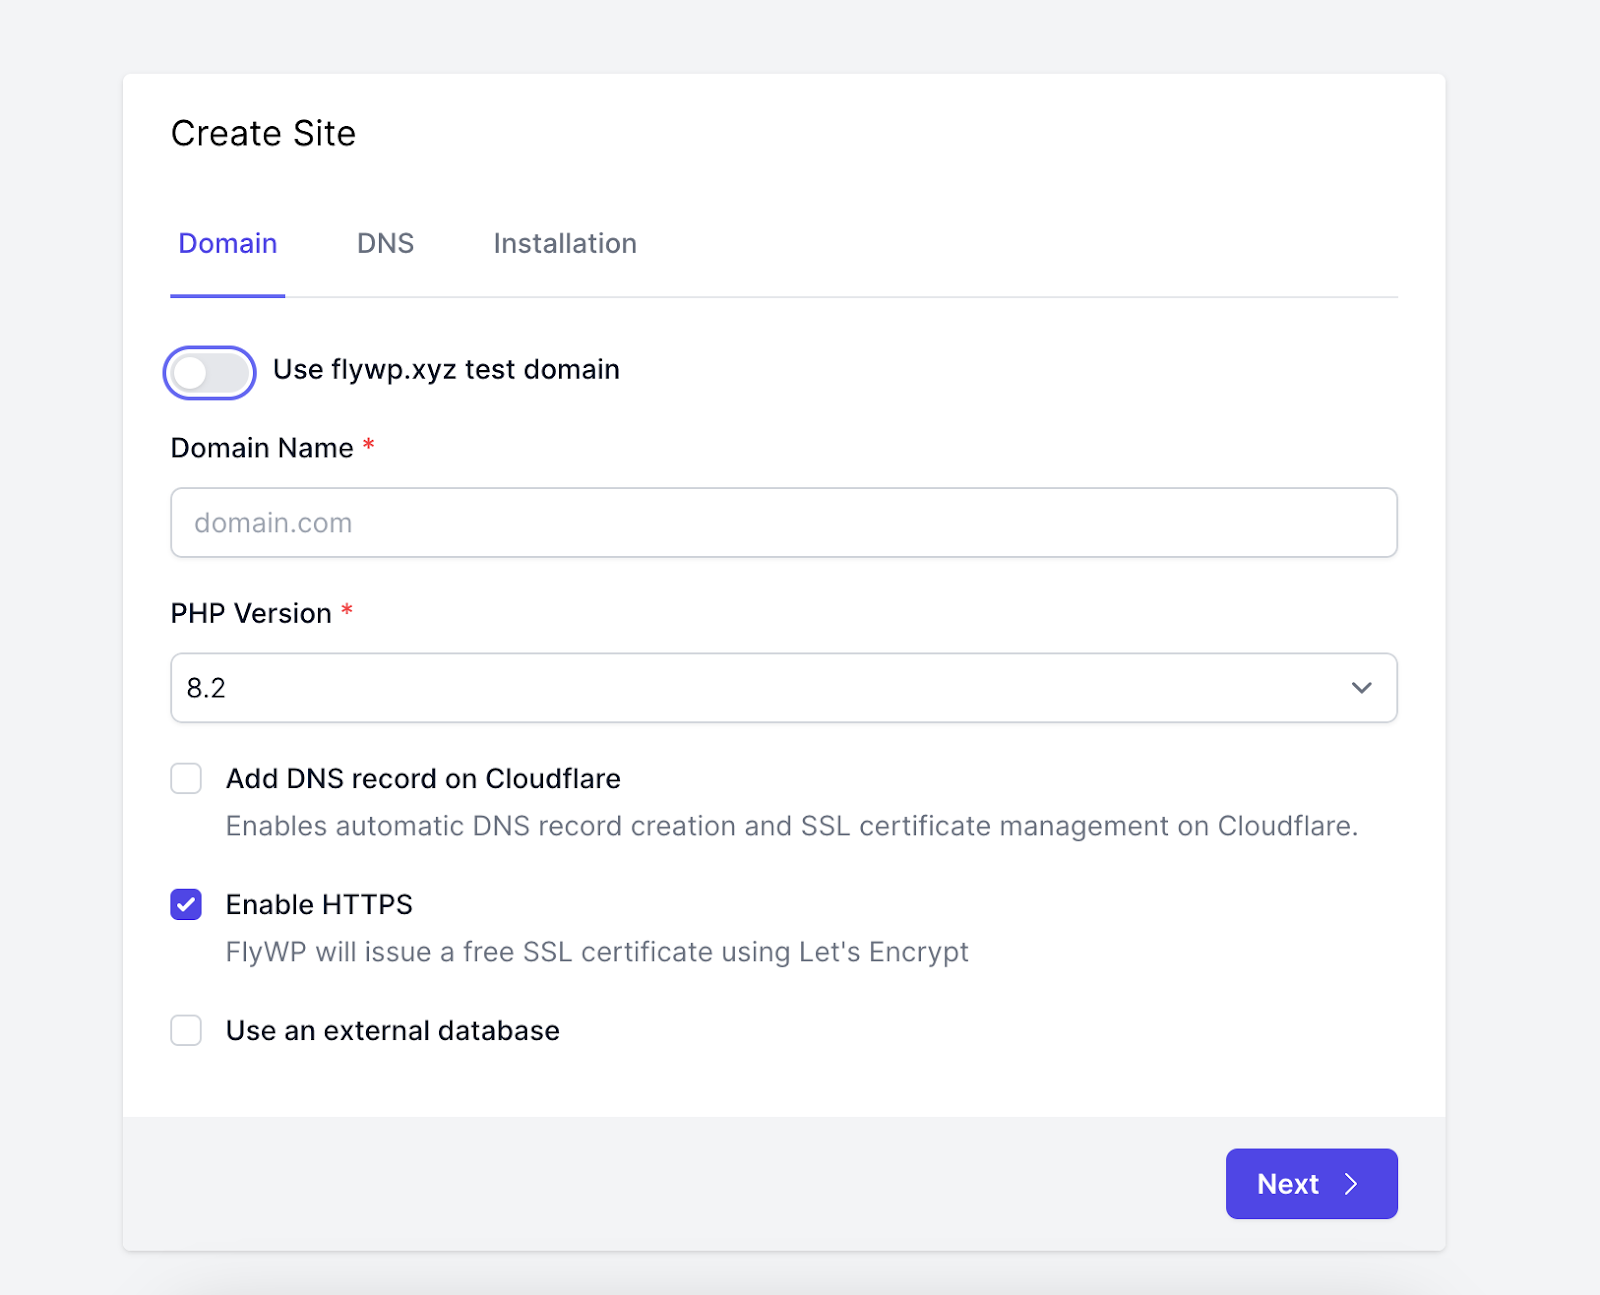
- If you enter a domain name, you will opt for the ‘Add DNS record on Cloudflare’ option available and HTTPS.
- Select your desired (updated) PHP version.
- Click ‘Next’ to proceed with the installation process.
Step 4: Install the WordPress site
- Provide your website’s title, admin email address, admin username, and admin password.
- For enhanced site performance, consider enabling ‘Full Page Cache’.
- Click ‘Next’ to finalize the site creation. Now your site is ready to go within a few moments!

Congratulations on launching your WordPress site with FlyWP! Now you can access all the exciting features FlyWP offers!.
Don’t forget to make the most of your 14-day free trial to discover everything available on FlyWP.
You can also check out our documentation on the full features of FlyWP and how to Manage Your WordPress Site with FlyWP
Step 5: Visit your site
- Now, you can directly visit your site from here. Plus, you can enter your site’s dashboard from the “WP Admin” button.
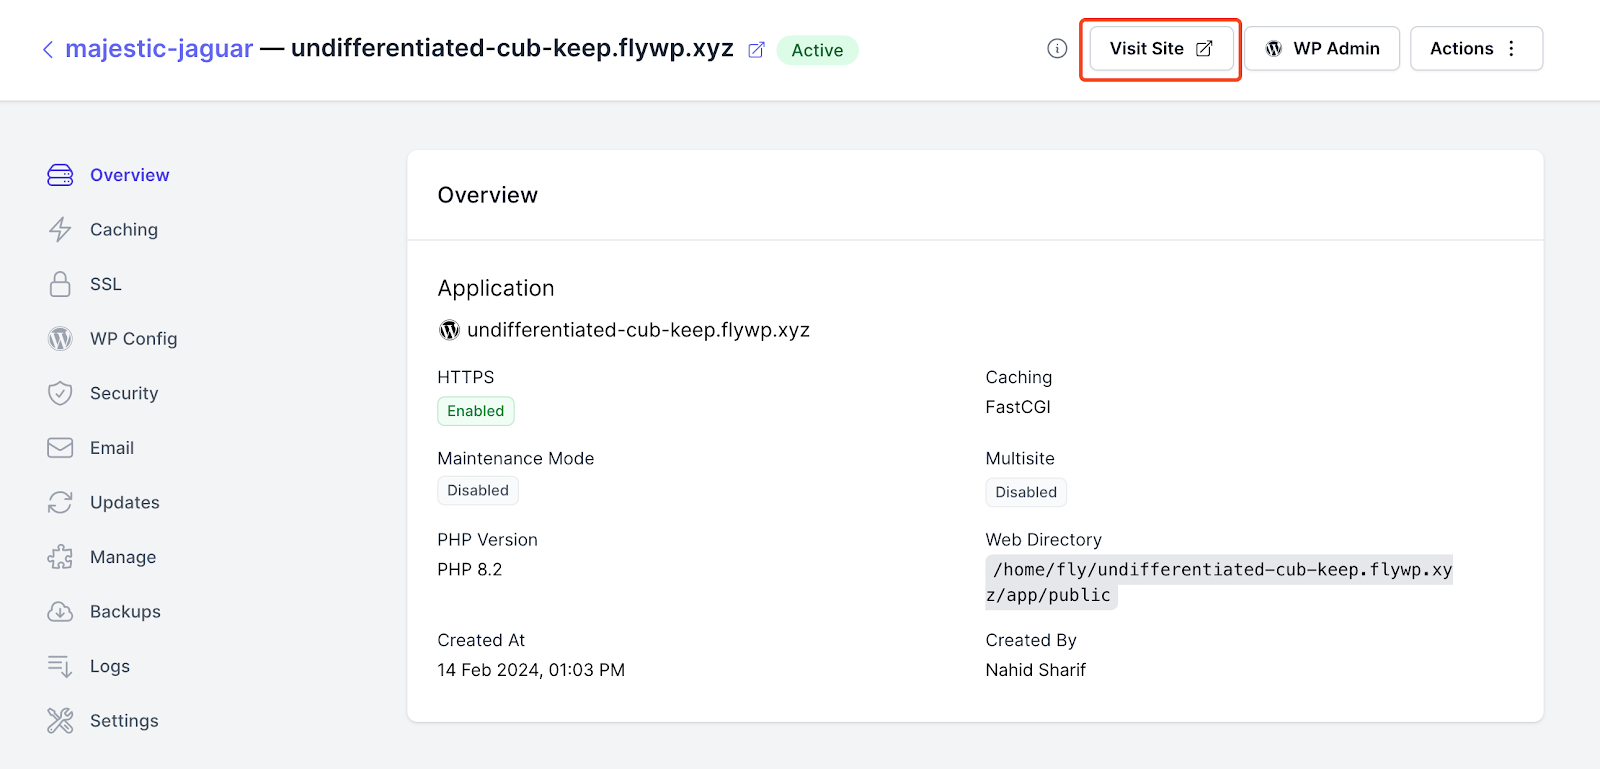
- Now your WordPress site is ready to use. See, your test site is ready.

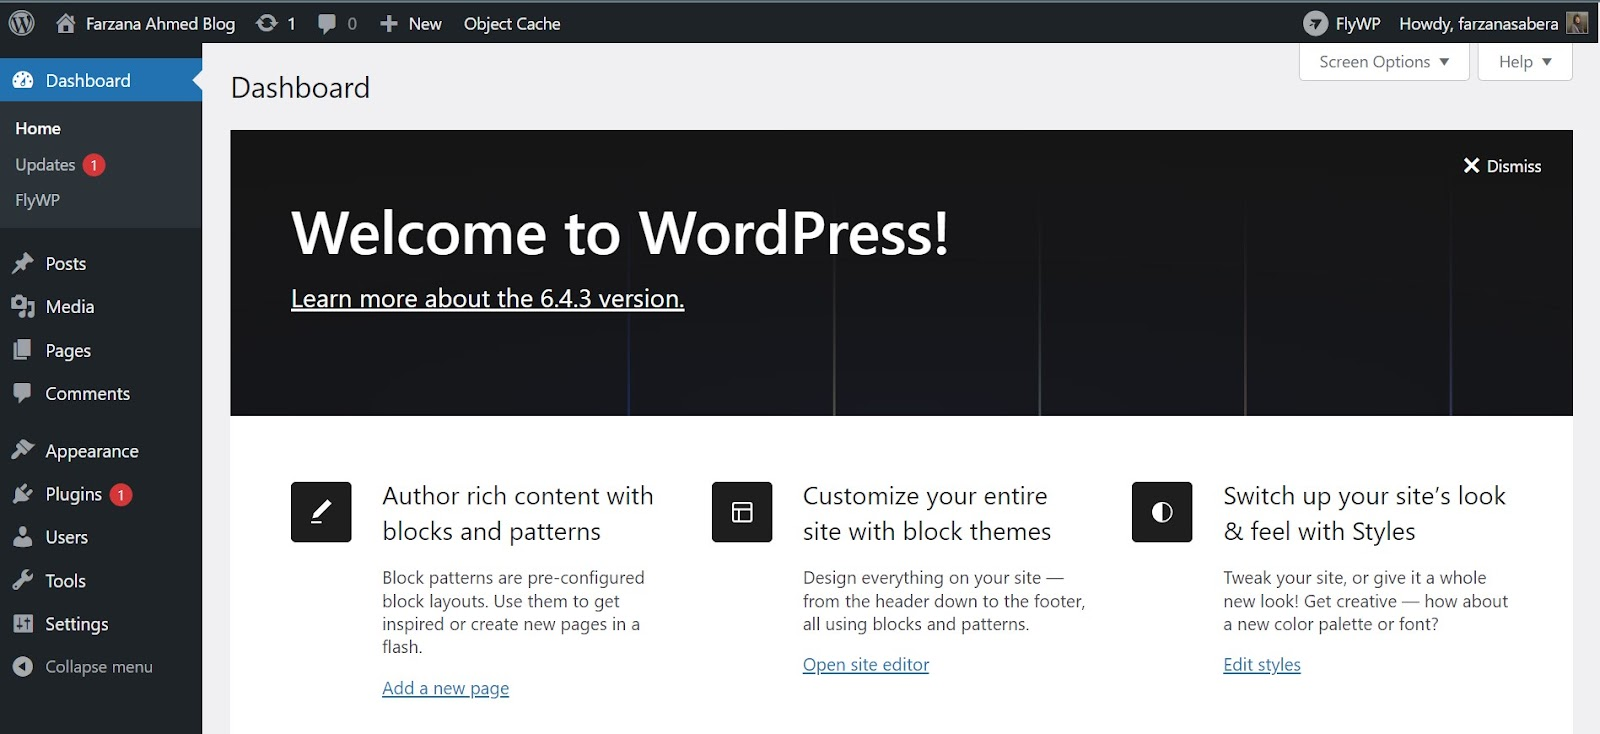
- By clicking “WP Admin” you will find your dashboard ready. Now, enjoy the full features of the WordPress site.
Step 6: Easy theme and plugin installation
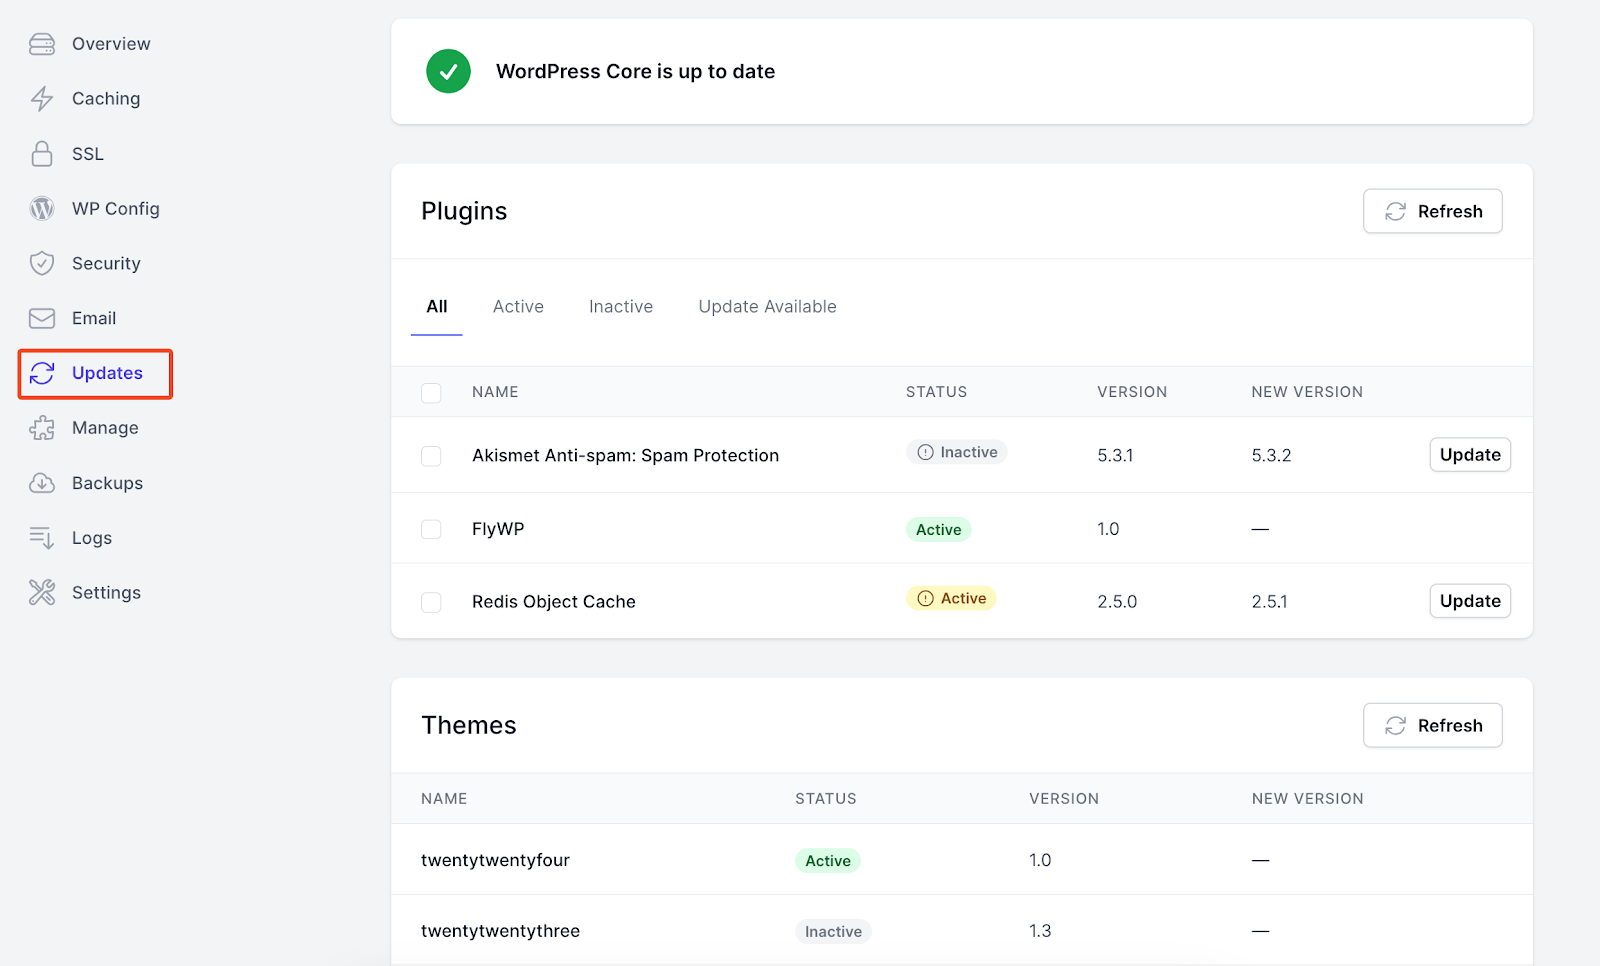
Customizing your site with themes and plugins is straightforward with FlyWP’s integrated dashboard. From your FlyWp dashboard, just click on the “Updates” button and you will get all the details here.
- WordPress core update: Here you can update your WordPress core.
- Plugin update: Update, deactivate, activate, or remove plugins from here.
- Theme update: Like plugins, you can do the same thing for themes also.
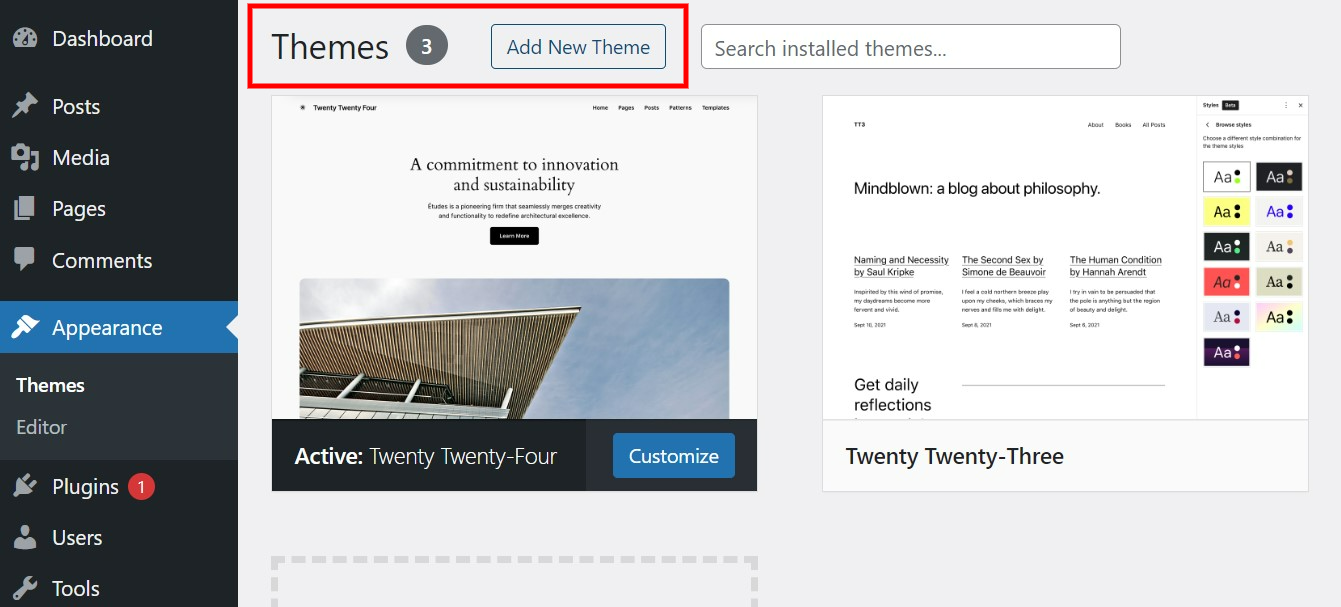
Step 7: Choose a theme
- To choose a theme for your website, go to the WordPress dashboard
- Go to “Appearance” > “Themes” to pick a theme you like.
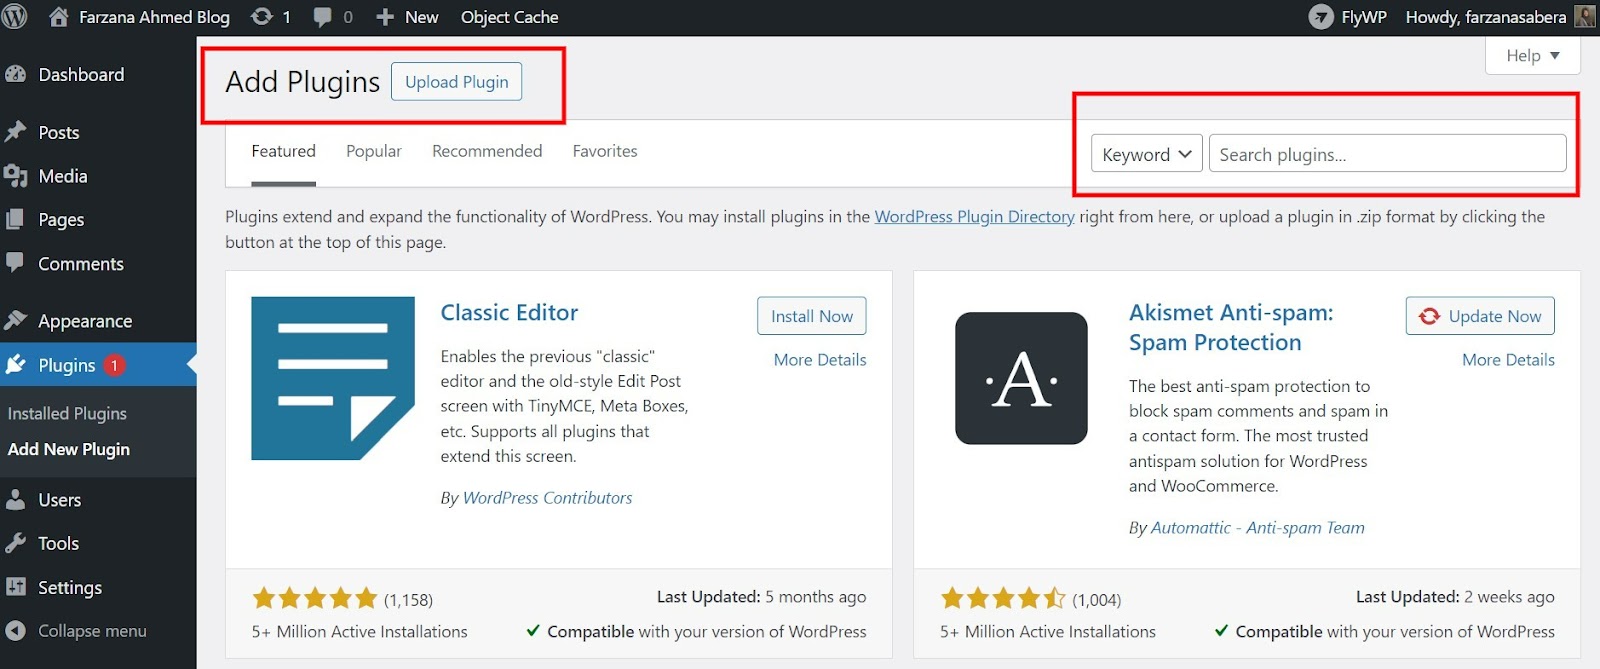
Step 8: Add plugins
Plugins will add extra features to your site.
- Go to “Plugins” > “Add New” and search for the ones you need.
- Some must-haves include security, SEO, and performance plugins.
Step 9: Customize your site
- Now, make your site yours. Customize your theme settings, add your first pages and posts
- Set up your menus as you want.
Step 10: Launch your website with FlyWP!
Check if everything looks good and works well. Congratulations! Your WordPress site is now live for the world to see!
Remember, starting a site is just the beginning. Keep it updated, back it up regularly, and always be on the lookout for new ways to improve it. With FlyWP, you will get a solid start. Welcome to the web!
Post-installation maintenance things
Once you’ve installed your WordPress site with FlyWP, there’s more to do to ensure it’s optimized, secure, and ready for visitors.
Let’s check the essential tasks you need to tackle right after your WordPress setup to lay a solid foundation for your website’s future.
- Choose a strong password: Security starts with a solid password. Create a complex admin password combining letters, numbers, and symbols. Avoid common words or dates associated with you.
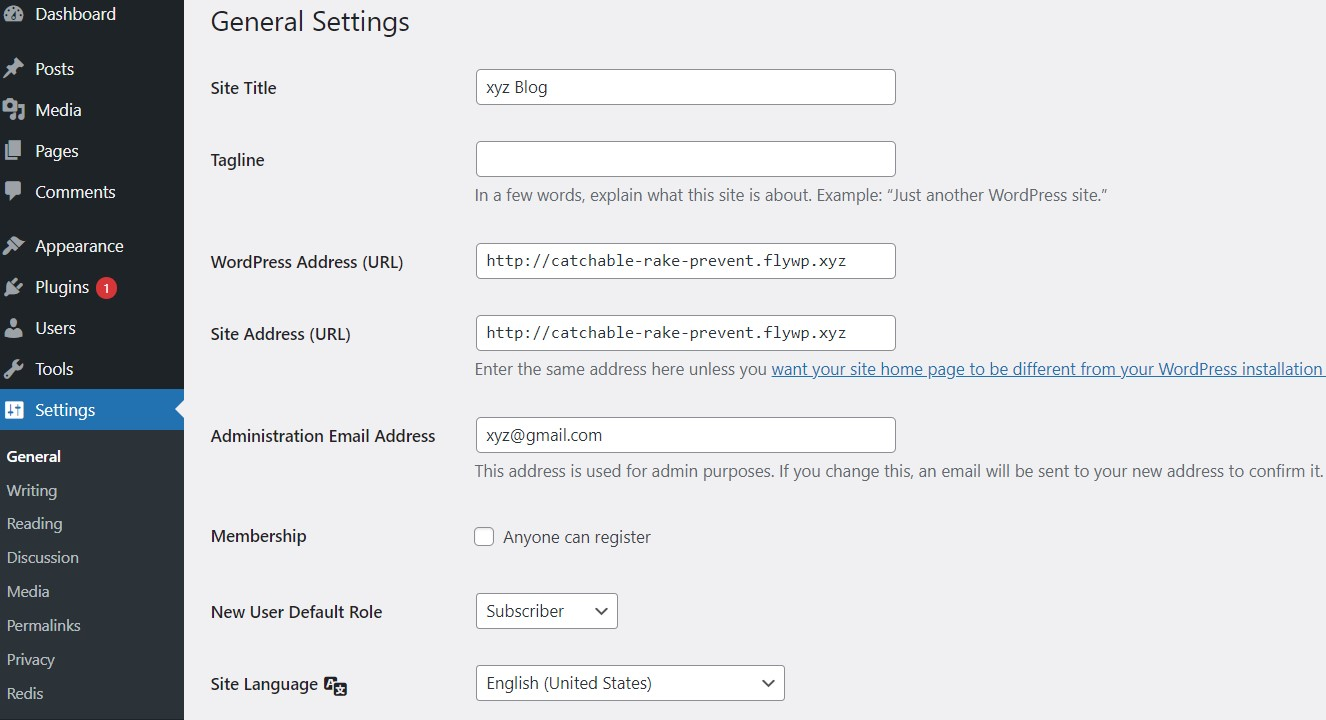
- Configure basic WordPress settings: Set up your site title, tagline, site URL, and other basic settings.
- Set up a backup solution: Implement a backup solution that automatically saves your site’s content, themes, and plugins regularly. Look for options within FlyWP. This way, if anything goes wrong, you can restore your site to its former state without panic.
- Update your site: WordPress, along with its themes and plugins, frequently releases updates. These often include critical security patches and functionality improvements. Regularly check for and apply these updates to protect your site from vulnerabilities and keep it running smoothly.
- Install a security plugin: Boost your site’s defenses by adding a security plugin. Look for one that offers features like firewall protection, malware scanning, and security monitoring. This will help shield your site from threats and give you peace of mind.
- Optimize for SEO: To get your site seen by more people, use an SEO plugin and follow recommended practices to improve your search engine rankings. Focus on optimizing your content with relevant keywords, creating quality backlinks, and ensuring your site is mobile-friendly.
- Customize your permalinks: WordPress allows you to customize your URL structure. Navigate to the Permalinks settings and choose a structure that includes post names. This makes your URLs readable and enhances SEO and user experience.
- Delete unused themes and plugins: Keeping your WordPress site clean is crucial. Uninstall any themes and plugins you don’t use to reduce security risks and improve site performance.
- Check your site’s speed: Site speed affects both user experience and SEO. Use tools like Google PageSpeed Insights to analyze your site’s performance and follow their recommendations to improve load times.
Consider caching plugins and image optimization to enhance speed further.
- Add your site to Google Analytics: Understanding your audience is key to growing your site. Google Analytics provides insights into your visitors’ behavior, which pages they visit, and how they found your site. Integrate Google Analytics to make informed decisions about your content and marketing strategies.
- Create essential pages: Ensure your site includes essential pages [A website basic pages] such as Contact, About Us, Privacy Policy, and Terms & Conditions. These pages build trust with your audience and comply with legal requirements and best practices.
Taking these steps after installing your WordPress website sets a strong foundation for success. Each step not only enhances your site’s functionality and security but also its potential to attract and retain visitors.
The final words
Setting up your WordPress site with FlyWP is a straightforward journey that sets the stage for your online success. By following these steps, you’re not just launching a website; you’re building a platform ready for growth, security, and user engagement.
Remember, the key to running a website lies in regular updates, backups, and staying in tune with your audience’s needs. With FlyWP by your side, you have all the tools and support to make your WordPress journey smooth and rewarding.
Some Common FAQs on Installing and Setting Up a WordPress Site with FlyWP
01. How long does it take to install WordPress on FlyWP?
Typically, just a few minutes to install WordPress on FlyWP.
02. What is WordPress, and why should I use it for my website?
WordPress is a popular content management system (CMS) that allows you to create, manage, and publish your content on the web without needing to learn coding. Its extensive plugin and theme ecosystems make it highly customizable.
03. Can I choose a custom domain name with FlyWP?
Yes, you can. During the setup process, FlyWP allows you to register a new domain or use an existing one. If you’re registering a new domain, simply search for your desired domain name and follow the steps to register it. If you’re using an existing domain, you will need to update your domain’s DNS settings to point to FlyWP’s servers.
04. How do I create my first post or page in WordPress?
To create a post:
- Go to ‘Posts’ > ‘Add New’ in your dashboard.
- Enter a title, add your content, and select or create categories and tags.
- Click ‘Publish’ to make your post live.
To create a page:
- Navigate to ‘Pages’ > ‘Add New.’
- Enter a title and add your content.
- Click ‘Publish’ to make the page live.
05. How can I ensure my WordPress site is secure?
To enhance your WordPress site’s security:
- Keep WordPress, themes, and plugins updated.
- Use strong passwords and change them regularly.
- Install a security plugin to monitor threats and enforce security practices.
- Enable SSL/TLS encryption for your site to secure data transfer.
06. Where can I get help if I face issues with my WordPress site on FlyWP?
FlyWP likely offers support 24/7 through various channels, including live chat, email, and a knowledge base. Check the ‘Support’ or ‘Help’ section in your FlyWP dashboard for specific contact details and resources.