Moving your website to a new host at the right time can prevent data loss or potential cyber attacks and boost website performance. For most website owners, WordPress website migration is a complex process. But with proper migration tools and the right guidance, it will be smooth and stress-free.
Besides the migration process, migrating a website to a new host is a big decision. You should always keep in mind that during the transformation process, you shouldn’t compromise user experience and uptime. Now, with the vast availability of plugins or SaaS tools, you can easily transfer your website without facing any technical issues.
This article is a step-by-step tutorial on how to migrate a WordPress site to a new host without losing data or impacting your site’s uptime.
When Should One Consider WordPress Site Migration?
To plan a smooth and strategic website migration, you need to find out the key considerations. It can be a pricing factor or a better hosting provider, or technicalities like performance, security, and load time. Let’s check out this section for a better understanding.
1. Hosting Limitation
When your website grows, so do the technicalities and other needs. If your existing hosting provider may not fulfill the increasing demand, like vast storage, good bandwidth, and scalability. Then you should look for such hosting solutions that provide an easy migration process.
2. Need for Better Security Features
Security should always be top priority if you are considering website migration. Cyber threats are the most common, and not all hosting solutions offer advanced security measures. If your existing host lacks essentials like DDoS protection, 2-layered authentication or automatic backups, your site could be at serious risk. Migrate to a host with scalable, robust, built-in security.
3. Frequent Downtime Issue
If your hosting provider can’t provide a good uptime percentage, then you really should look for a stable hosting solution that ensures 24/7 accessibility. Website uptime is something that you never should compromise, as it directly impacts your client trust & brand credibility.
4. Outdated Technology Stack
A core tech update is necessary to have good bandwidth & storage. An old technology stack can cause compatibility issues with newer themes and plugins, or even security risks can arise. A modern host offering the latest stable versions of PHP (like PHP 8.x), MariaDB, and support like Redis or Elasticsearch can improve both performance and compatibility.
5. Poor Customer Service
Customer service may look like a simple consideration regarding website migration, but imagine you’re facing downtime or security issues at midnight. A hosting provider with rated customer support may save you from such a technical incident immediately. Also, when dealing with advanced configurations, such as PHP version changes, SSL troubleshooting, or database timeouts, you need proper technical support with real WordPress expertise.
6. Planning For Website Redesign or Rebranding
Redesigning or rebranding means higher performance expectations, huge media files or increased traffic. If you’re planning for website redesign, then this is the perfect time to change your host. Combining a fresh new look for your website with faster, more reliable hosting ensures your visitors get the best experience.
7. Cost Inefficiency
Not all website owners want robust security or 99.99% uptime. Paying high fees for minimal resources doesn’t make sense. Hundreds of affordable hosting solutions provide customized plans according to need. Migrating allows you to cut costs while upgrading your hosting environment.
Read more: Cloud Server Pricing Explained: How to Host WordPress for Less
Top Proven Methods of WordPress Migrations
There are different types of migrations for your WordPress site depending on your needs. If you do manual migration or plugin migration, you need to follow some steps. In this section, we will discuss the general steps for each migration:
1. Manual Migration
Manual WordPress migrations are quite complex in terms of other migration processes. It involves manually copying files and the database.
- While you performing manual migration, you need a plugin called Duplicator to backup all the files.
- Now, the next part is setting up the new hosting account as well as your domain
- Export the database using cPanel.
- The next step is to copy the website’s file using the hosting’s file manager. In this process, you can compose the whole website in a folder.
- Now, log in to your new host’s cPanel & upload all the files you have downloaded previously.
- You have to create a new database on your new hosting account
- Import the database file you have exported earlier using phpMyAdmin.
- Now, update the database credentials in wp-config.php.
- Now, under the same domain, change the DNS settings to point to the new hosting provider.
- Lastly, test your site for any problems.
2. Plug-in-Based Website Migration
This process is quick & beginner-friendly as most of the work will be done by the tool. Migration plugins help you copy all your website’s files and database without requiring any technical skills.
From your current WP dashboard, search for a reliable migration plugin that you want to install. As an example- All-in-One WP Migration.
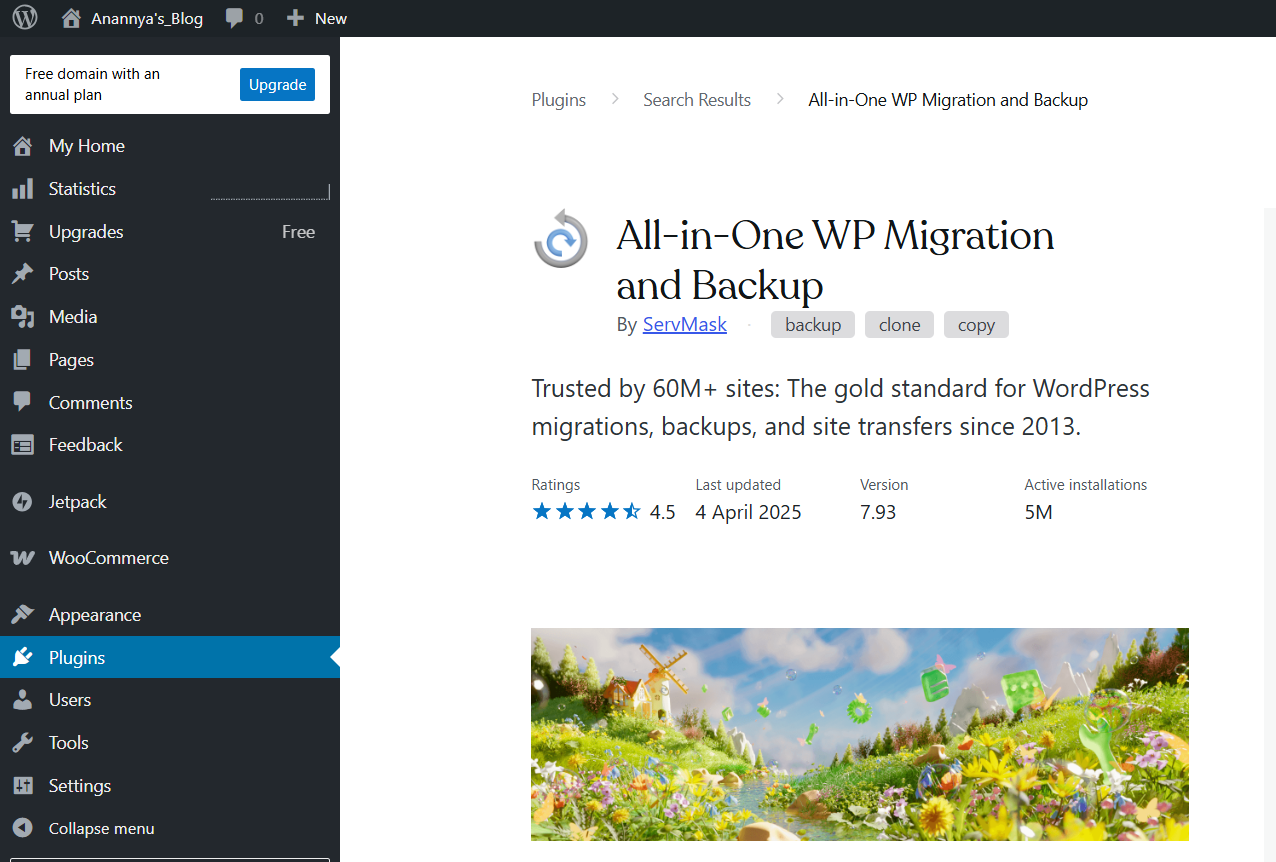
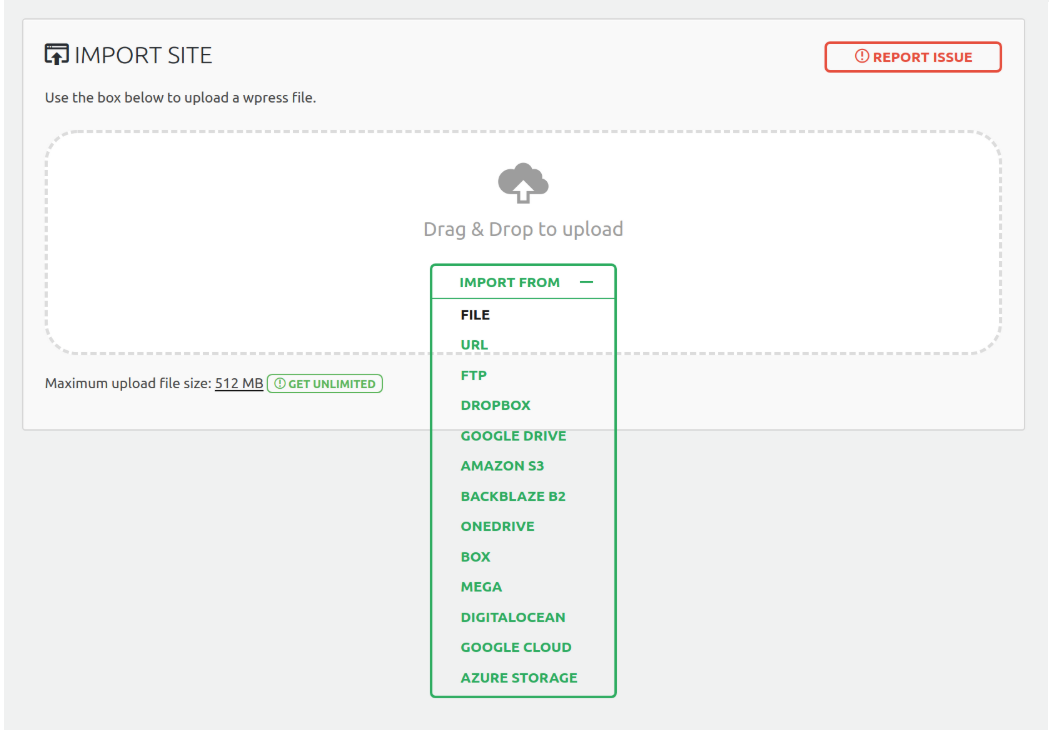
Then following the standard installation process, install & activate the plugin. From the plugin, navigate to the Export Site option.
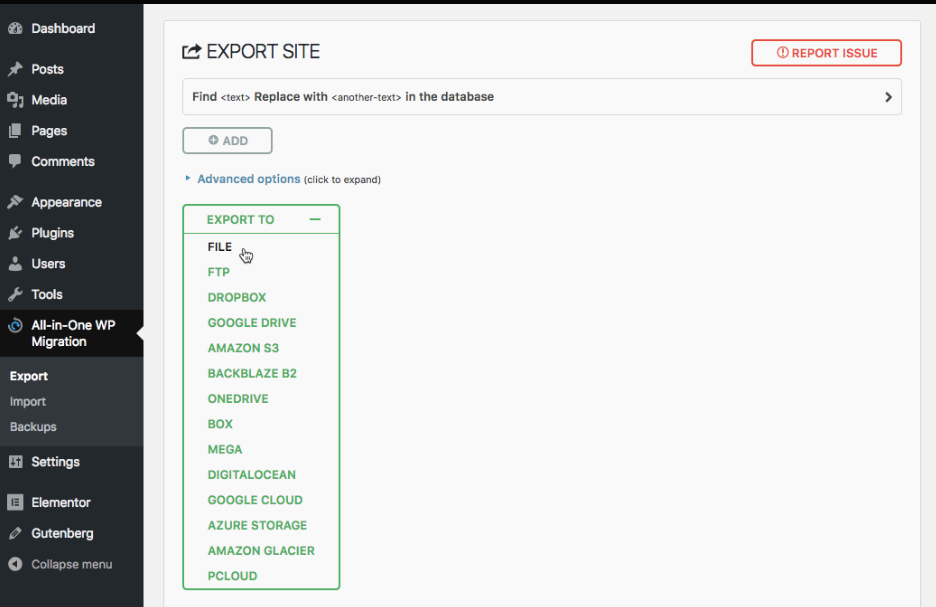
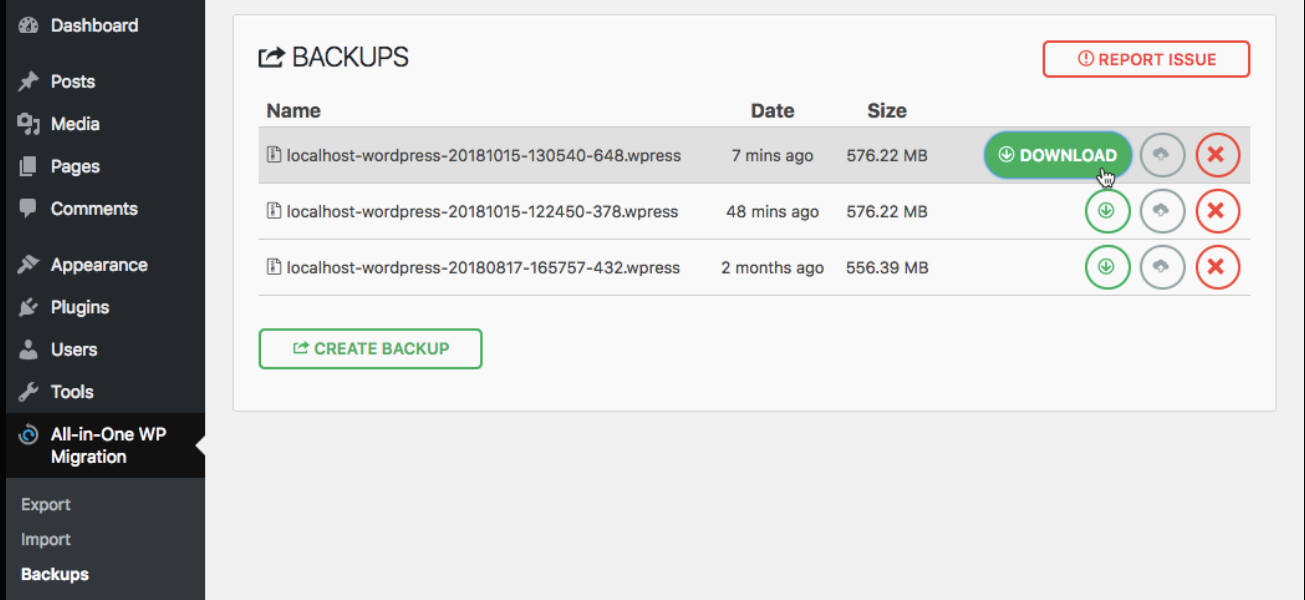
After selecting the location of the exported file, the plugin will start packaging your website data (files + database). Also, create a backup using the plugin. Then download the backup to your local computer environment. This backup file basically includes a compressed version of your site’s files.
Now, sign up & set up your new hosting plan. Install WordPress on your new hosting environment.
As your domain neme still point to old host you need to change this by entering new servers IP address or server host name. Access this information from new hosting control panel dashboard.
Then again, install the migration plugin using the previous process. Import the downloaded file. It will import the .wpress file you have downloaded earlier
Lastly, create MYSQL database on your new host. Scroll down your host’s control panel and click on the MySQL Databases icon.
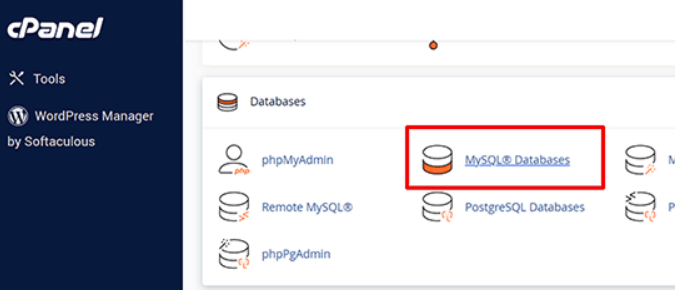
Create new database and provide all the credentials. And add a new user.
- Next step is to add the user to the database.
- Lastly change the DNS settings so that they refer to the new servers.
- Also, don’t forget to update the permalink settings.
3. WordPress Migration Using FTP
This process is similar to manual migration. It involves an FTP client to upload the old site’s files to the new host.
- At first, backup your file using any method plugin backup, cPanel, or via your web host.
- Like the previous methods, set up the new hosting account.
- Download any FTP clients and connect them to your old hosting server.
- Once connected, search the root directory and download all the website files to your local computer environment.
- Using phpMyAdmin, export the database in SQL file format.
- Now, create a new MySQL database on your new hosting. Provide the credentials like- username, password
- Again, go to your FTP client and connect it to your new hosting server.
- Find the root directory and upload all the files.
- Now, from the control panel of the new hosting account, select the database and import the SQL files
- Lastly, configure the wp-config.php file. Also, set up the DNS settings to align with your new host.
FlyWP’s Migration Tool: Built for Real-World Problems
Let’s be real. Migrating a WordPress site isn’t easy, especially if you’ve never peeked inside phpMyAdmin or edited a
wp-config.php
file. Most site owners just want to move their website without breaking it. But between manual methods, plugin setups, and FTP uploads, it’s easy to get lost, or worse, lose data.
That’s why FlyWP took a different approach. Instead of relying on third-party tools, FlyWP comes with its native migration module baked right into the dashboard. It’s not an extra plugin. It’s not a paid add-on. It’s just there, waiting to do the heavy lifting for you. Here’s why that matters:
- No messy manual backups or imports
- No downtime juggling DNS and database errors
- No need for coding or sysadmin skills
You click. FlyWP moves your site. That’s it.
Whether you’re leaving a shared hosting plan or switching from a self-managed VPS, FlyWP’s migration tool adapts to your setup. It even works with popular cloud providers like DigitalOcean, Vultr, Linode, AWS, or a custom server. So before diving headfirst into plugins, FTP clients, and SQL exports, take a breath. There’s an easier way, and it’s built into FlyWP.
How to Migrate a WordPress Site Using FlyWP (Step-by-Step)
Ready to switch hosts without the stress? Here’s how you can migrate your site using FlyWP in just a few clicks:
Step 1: Log in to FlyWP
Since you’re migrating the site to a new hosting server, adding that server inside FlyWP is the very first step before using its native migration tool. Here’s how you can migrate your site with FlyWP in just a few clicks:
- Head over to app.flywp.com and log in to your dashboard
- Click “Add Server”
- Choose your preferred provider (DigitalOcean, AWS, Vultr, Linode, or custom)
- You can also let FlyWP handle the provisioning, it sets up the server with all the latest tech.
Step 2: Select the “Migrate” Button
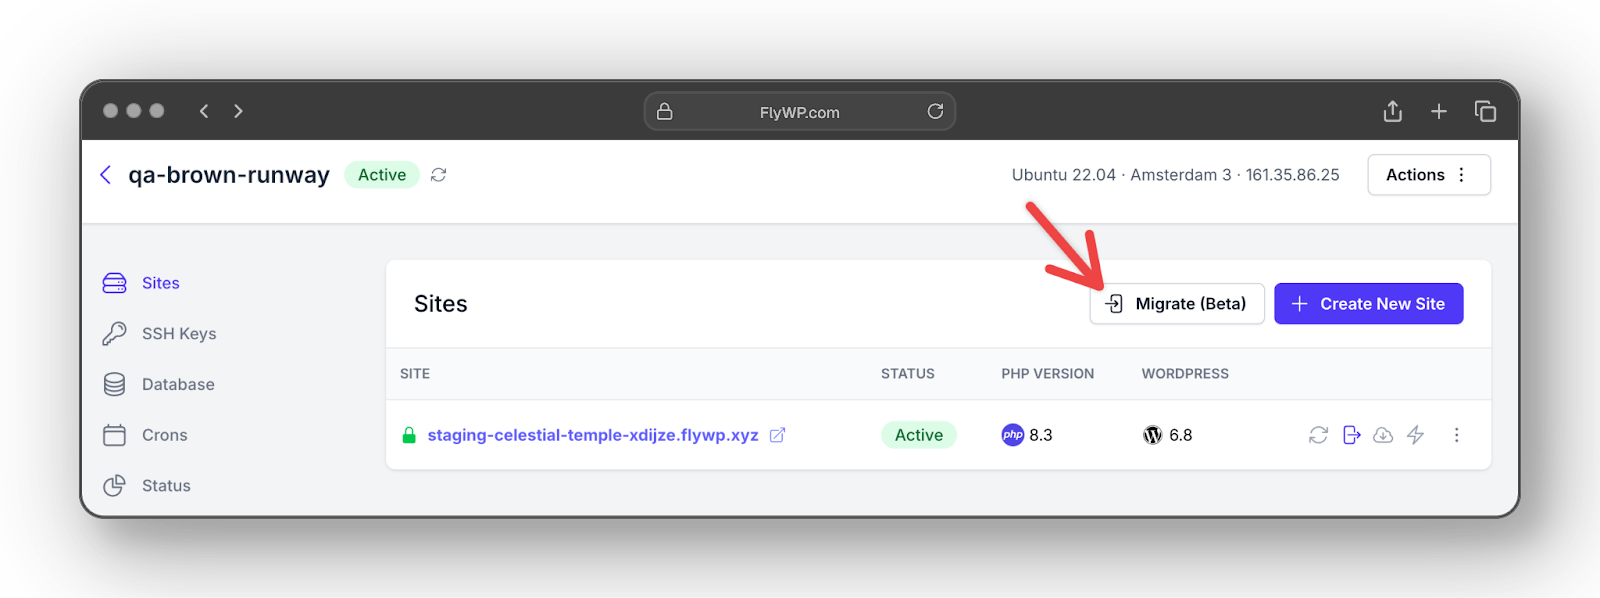
From the dashboard, hit the “Migrate” button. Then follow the follow the on-screen instructions.
Step 3: Connect Your Existing Site
Before the migration begins, FlyWP needs to connect with your existing site. And for that, you’ll need the FlyWP Migration plugin installed.
If you’re going the automatic route, this step happens almost on autopilot. Once you enter your existing site’s URL inside the FlyWP dashboard and hit “Connect to WordPress,” FlyWP jumps over to your site and requests permission to install the plugin for you.
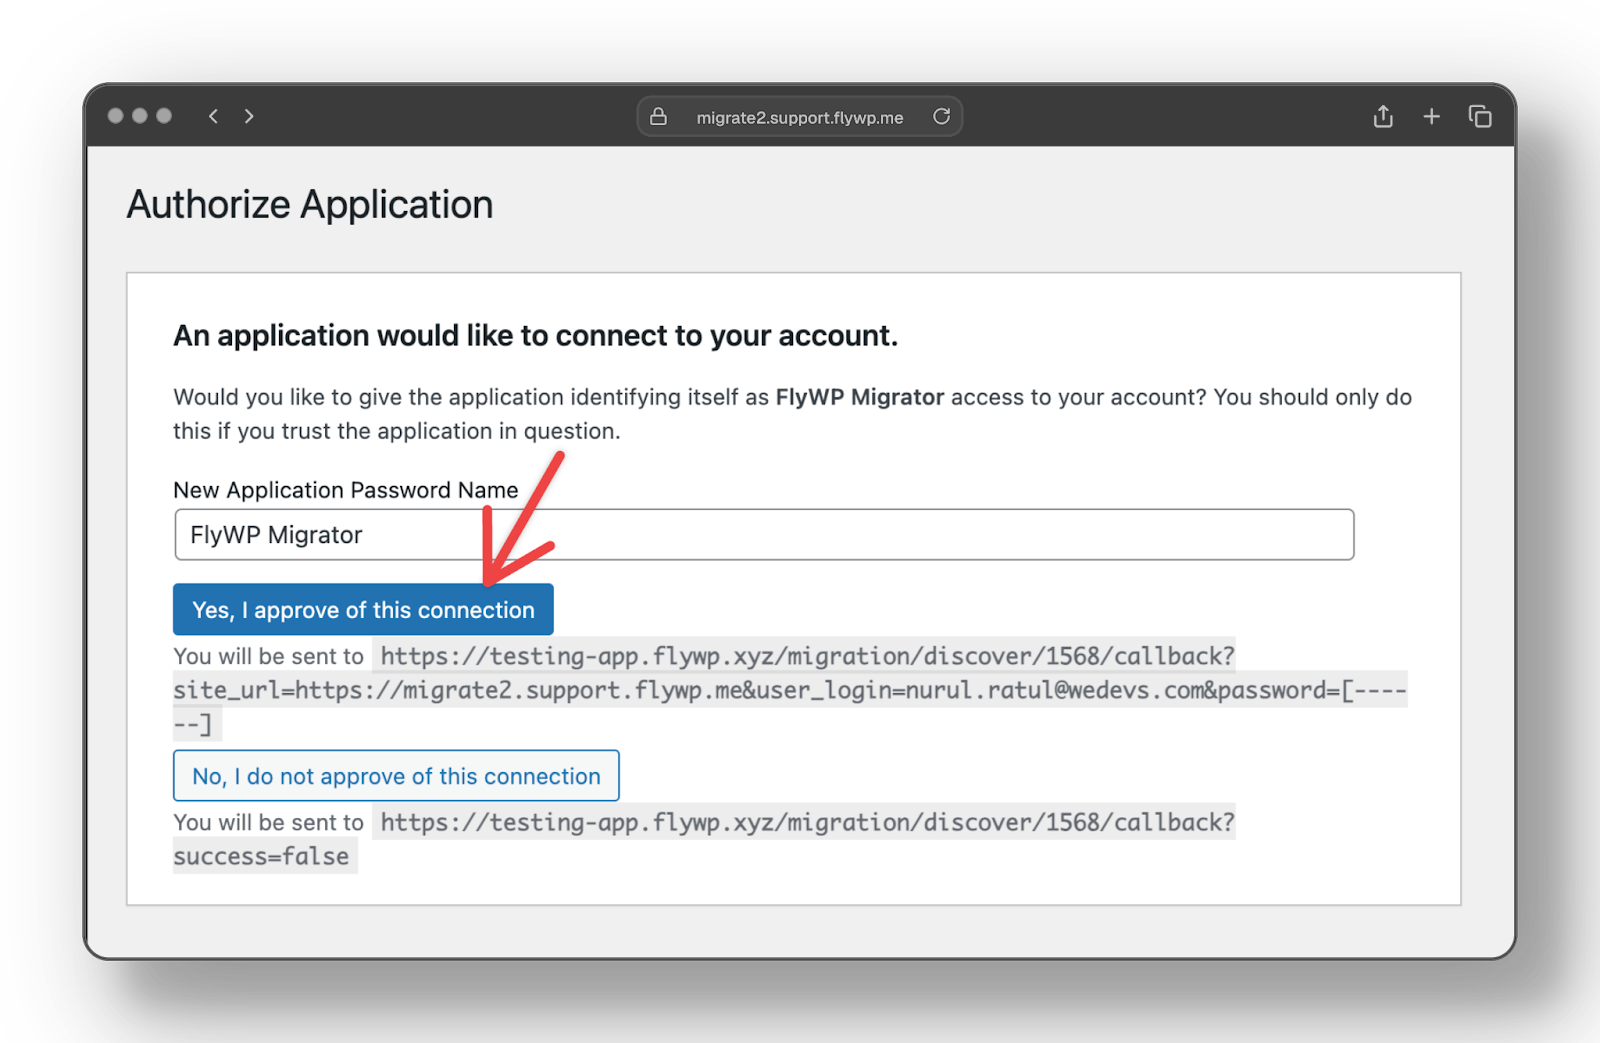
After you approve the connection, the plugin gets installed instantly, no manual action needed.
Prefer to do things yourself? Now, on the site you want to migrate, go to the WordPress dashboard and install the FlyWP Migration plugin.

Without the plugin, FlyWP can’t communicate with your current site. After installing and activating it, you’ll see prompts asking you to log in with your FlyWP credentials or token. This securely links your existing site with the FlyWP platform.
Step 4: Migrate the Site
Once connected, FlyWP will walk you through site creation. Choose your domain, PHP version (match the original), and settings. Review the summary. Click Migrate Site to begin. Wait for the progress bar to complete.
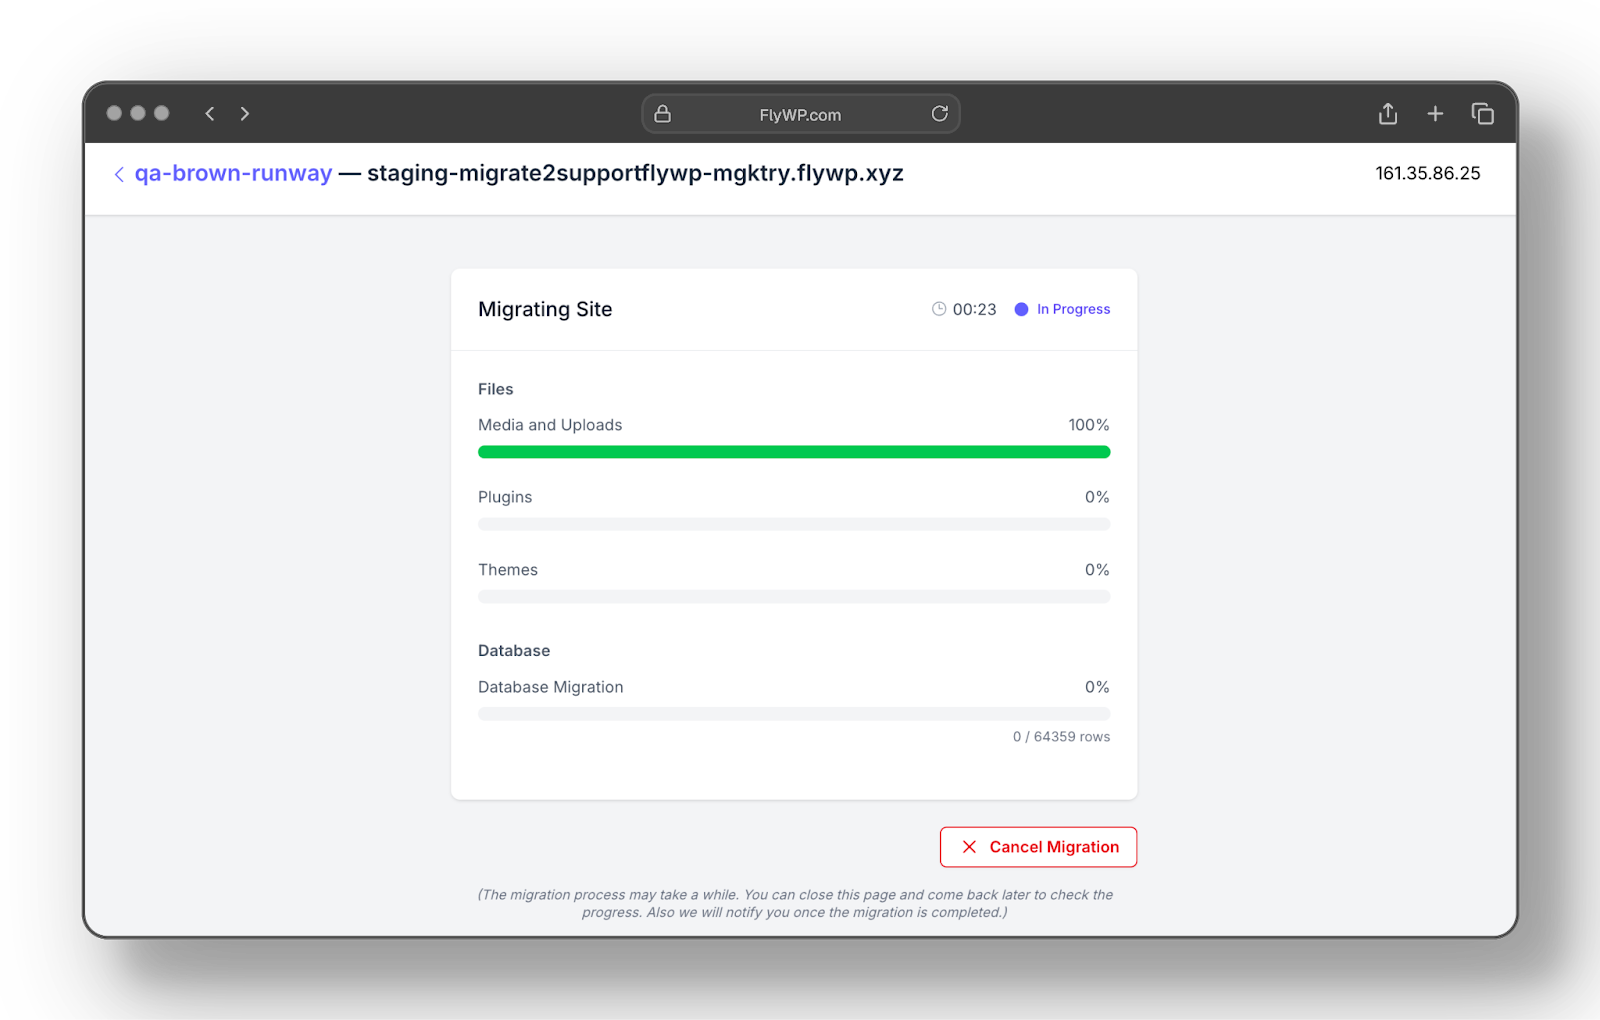
Once the migration is complete, FlyWP will guide you to point your domain to the new server. Update your DNS settings where your domain is registered. Your site is now live on your new host. No data lost. No downtime. And yes, all permalinks work just fine.
See the detailed doc here → How to Migrate WordPress Sites from Any Hosting to FlyWP
Pro Tip: Test Before Going Live
The migration feature is still in beta. So it’s safer to migrate into a test domain (like the default
.flywp.xyz
) first. You can switch to your real domain once everything looks good.
Ready to take your WordPress site to the next level? Try FlyWP and experience the difference.
Wrapping Up
Migrating a WordPress site doesn’t have to feel like something scary. With FlyWP’s native migration tool, whether you go automatic or manual, you’re just a few clicks away from a smooth transition. Just test things out before going live, especially since the feature is still in beta. And if anything feels off, try again or reach out to support.
Through the right guidance and tools, automatic migration is way easier compared to manual migration. Whatever the reason of your WordPress site migration, having a better understanding of the migration methods and the usage of plugins/tools is the key to maintaining site integrity and 100% uptime.
So, are you ready to migrate your WordPress site with FlyWP? All you have to do is choose the right hosting plan and follow this article.