Looking to connect a Vultr server with FlyWP but feeling unsure about how to start? Don’t worry. We’ve got you covered. This guide breaks everything down in a clear, easy-to-follow way.
By the end, you’ll know exactly how to connect your Vultr server and create a WordPress site using FlyWP, without any hassle. Keep reading.
Managing and hosting WordPress sites can be a daunting task, especially when dealing with server configurations and maintenance. That’s where Vultr and FlyWP come into play.
Vultr offers robust cloud hosting solutions, while FlyWP simplifies WordPress management. In this blog, we’ll guide you through the process of connecting a Vultr server with FlyWP, ensuring you can efficiently manage your WordPress sites with ease.
Before we go further with the tutorial, let’s learn a bit more about Vultr and FlyWP
Understanding Vultr and FlyWP

Here’s a short overview of the popular cloud server provider Vultr and server management solution FlyWP
What is Vultr?
Vultr is a cloud hosting provider known for its high-performance servers and flexible infrastructure. It offers a range of services, including cloud computing, block storage, and dedicated instances. Some of the key benefits of using Vultr for hosting include:
- Scalability: Easily scale your resources up or down based on your needs.
- Global network: Deploy servers in multiple locations worldwide.
- High performance: Benefit from fast SSD storage and powerful CPUs.
- Cost-effective: Competitive pricing with pay-as-you-go billing.
What is FlyWP?
FlyWP is a WordPress management tool designed to simplify the process of managing multiple WordPress sites. It provides a centralized dashboard where you can monitor, update, and maintain your WordPress installations. Key features of FlyWP include:
- Easy management: Manage multiple WordPress sites from a single interface.
- Automated updates: Keep your sites up-to-date with automatic updates for plugins and themes.
- Backups: Regular backups to ensure your data is safe.
- Performance monitoring: Track site performance and uptime.
Preparing Your Vultr Server
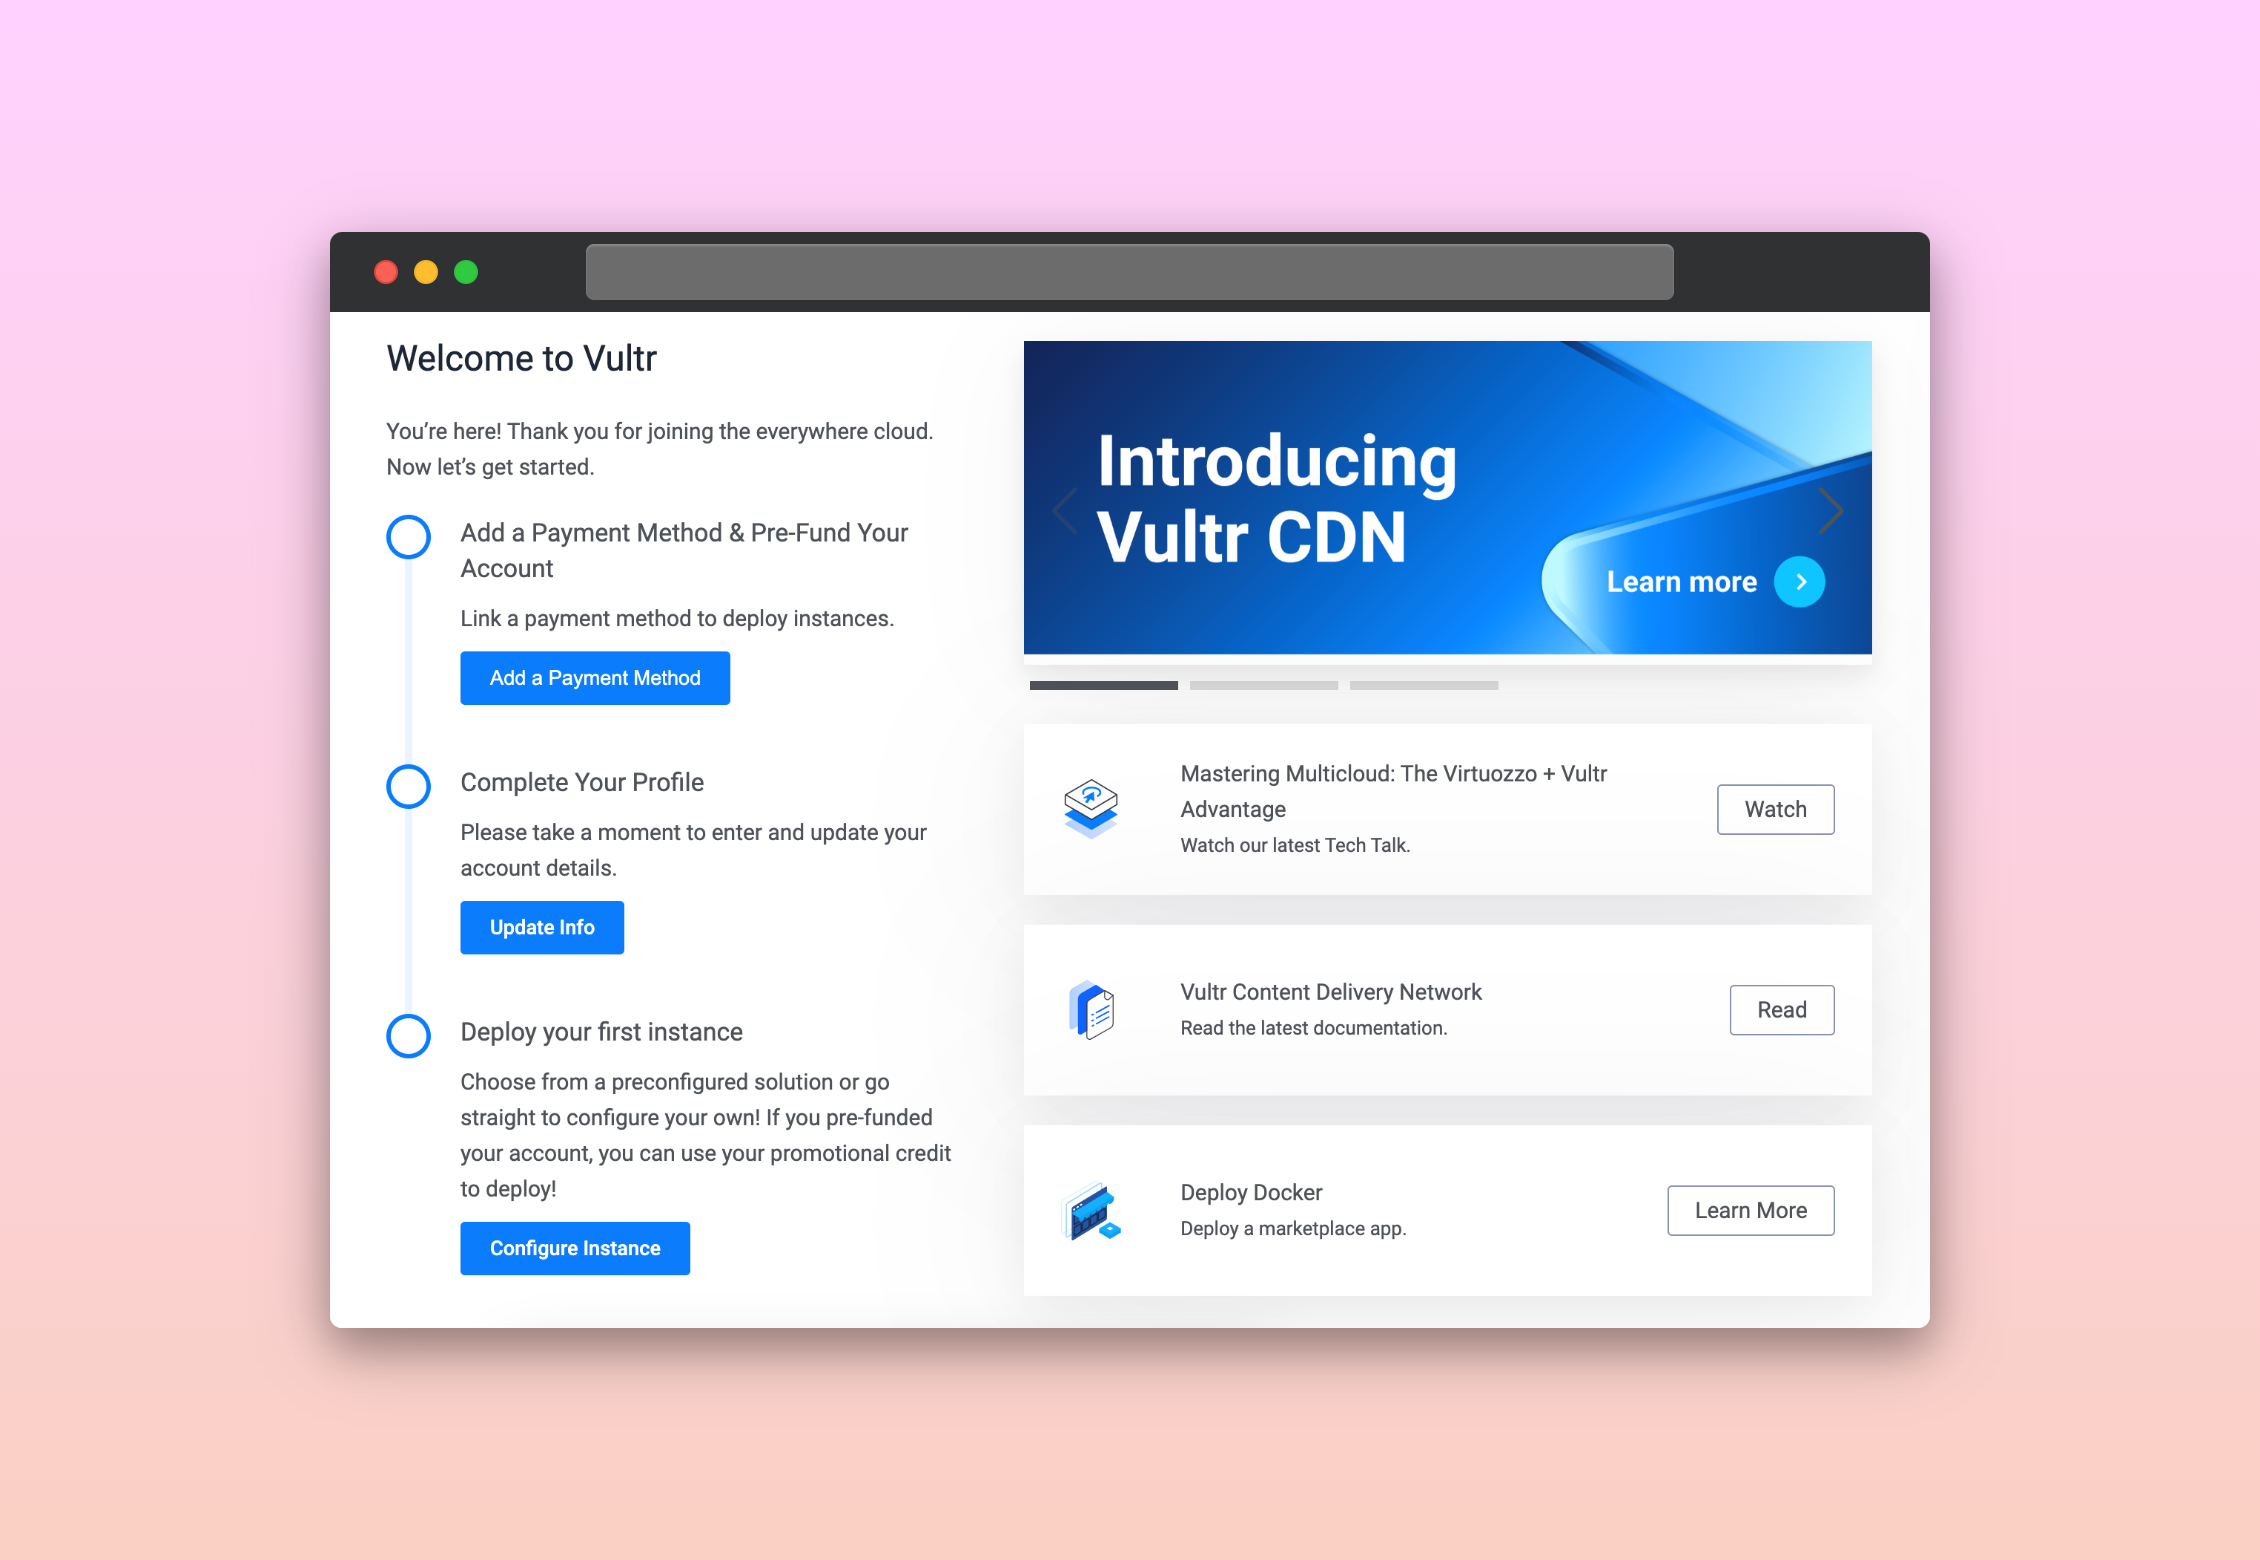
Before you can connect Vultr with FlyWP, you need to set up a Vultr account. Follow these steps:
- Sign up: Visit the Vultr website and sign up for an account.
- Verify email: Confirm your email address by clicking on the verification link sent to your inbox.
- Add payment method: Enter your payment details to enable server deployment.
- Choose a plan: Select a server plan that suits your needs. Vultr offers various plans based on CPU, memory, and storage requirements.
Step one: Setting up a Vultr account
- First, log in to Vultr account. Provide your email and password.
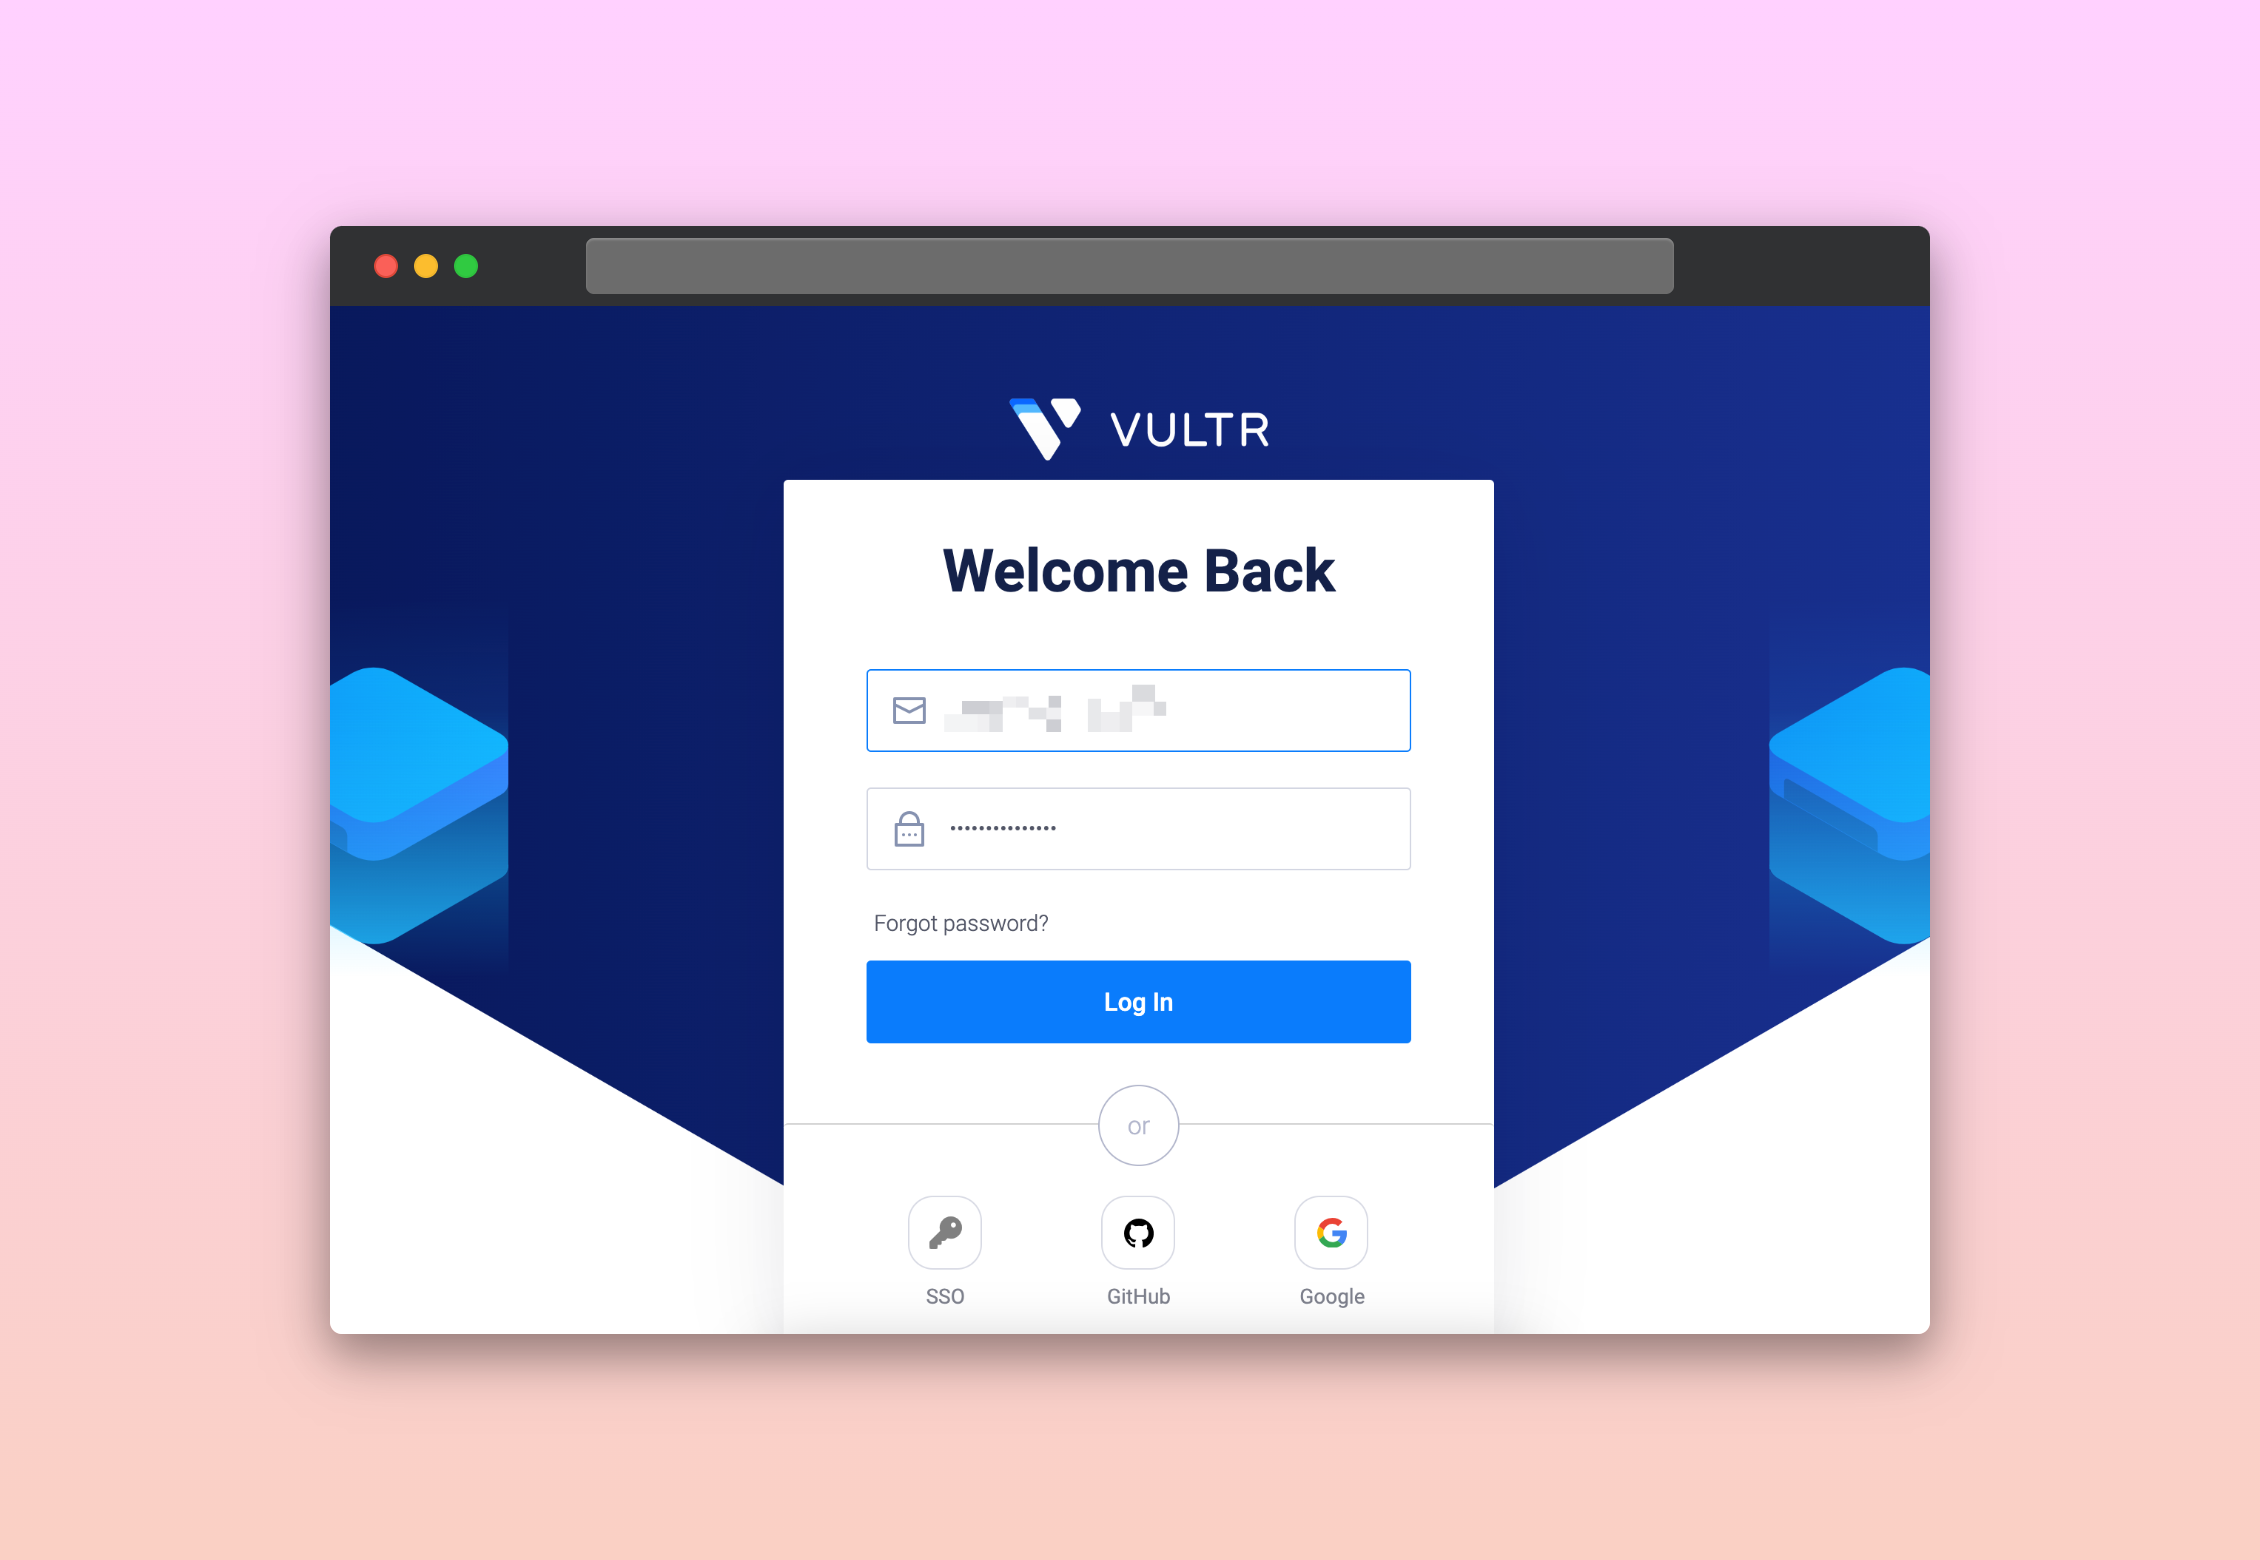
- Next, complete the process.
Step two: integrating Vultr with FlyWP
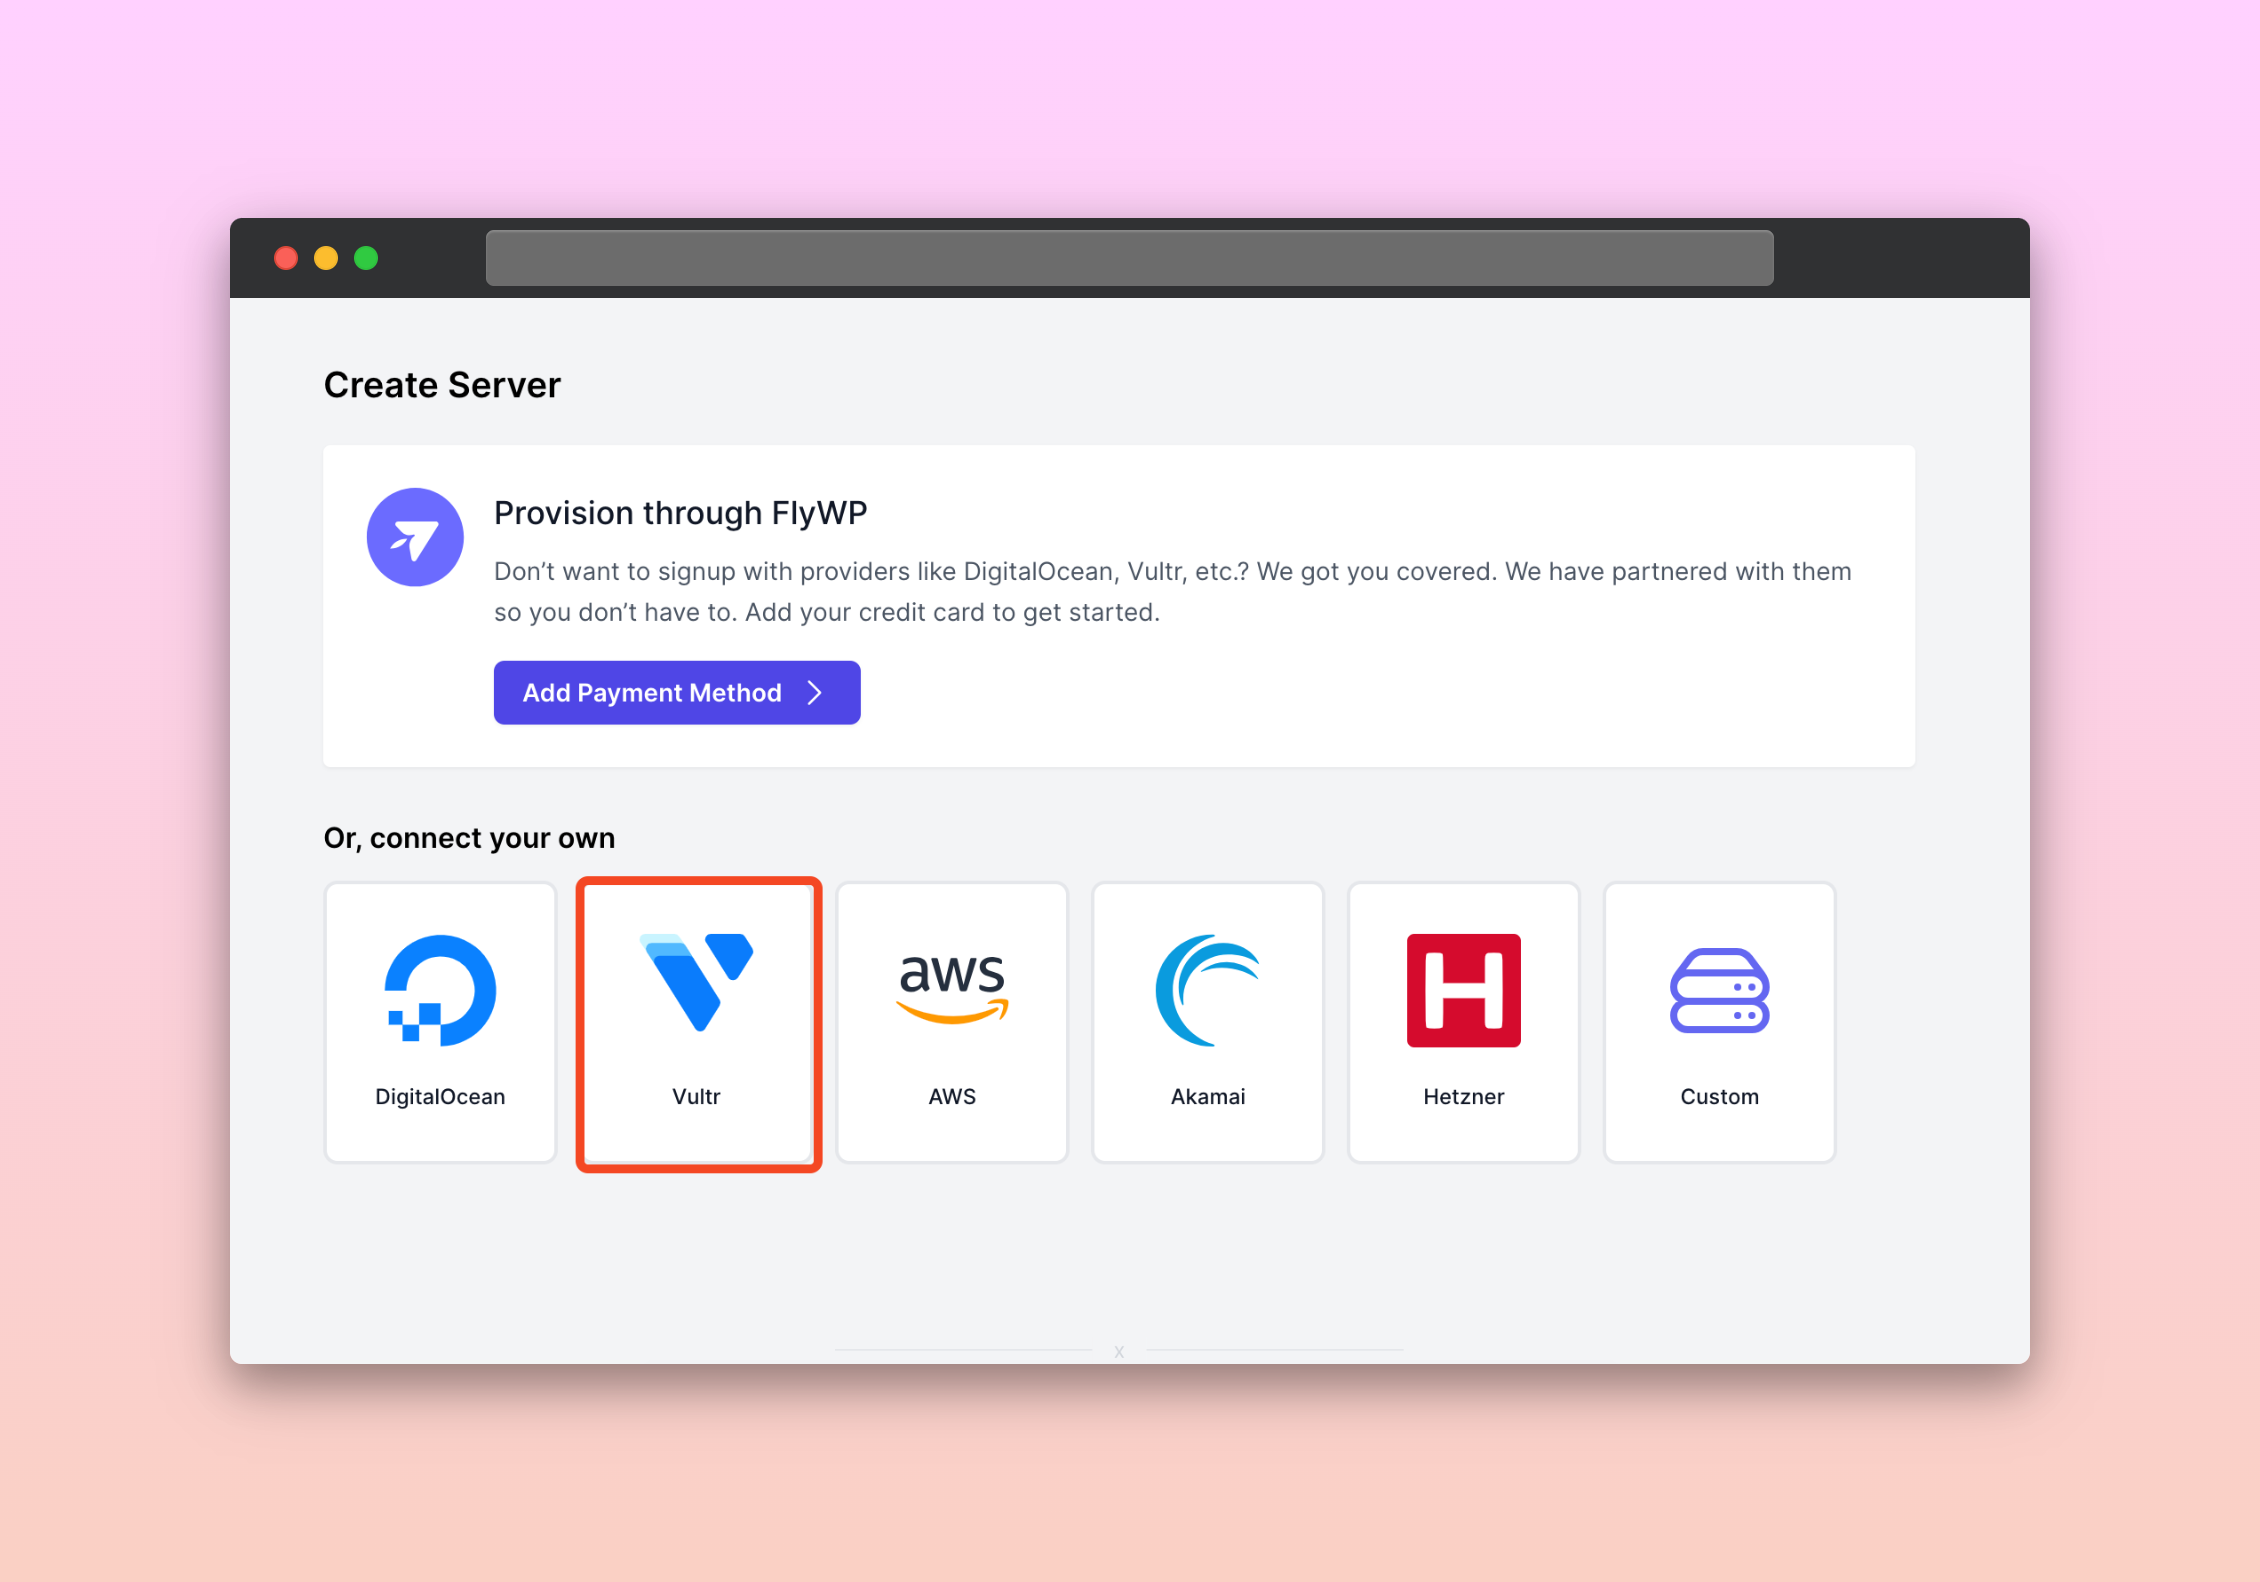
- Next, move to the servers section. And click on the “create new server” button.
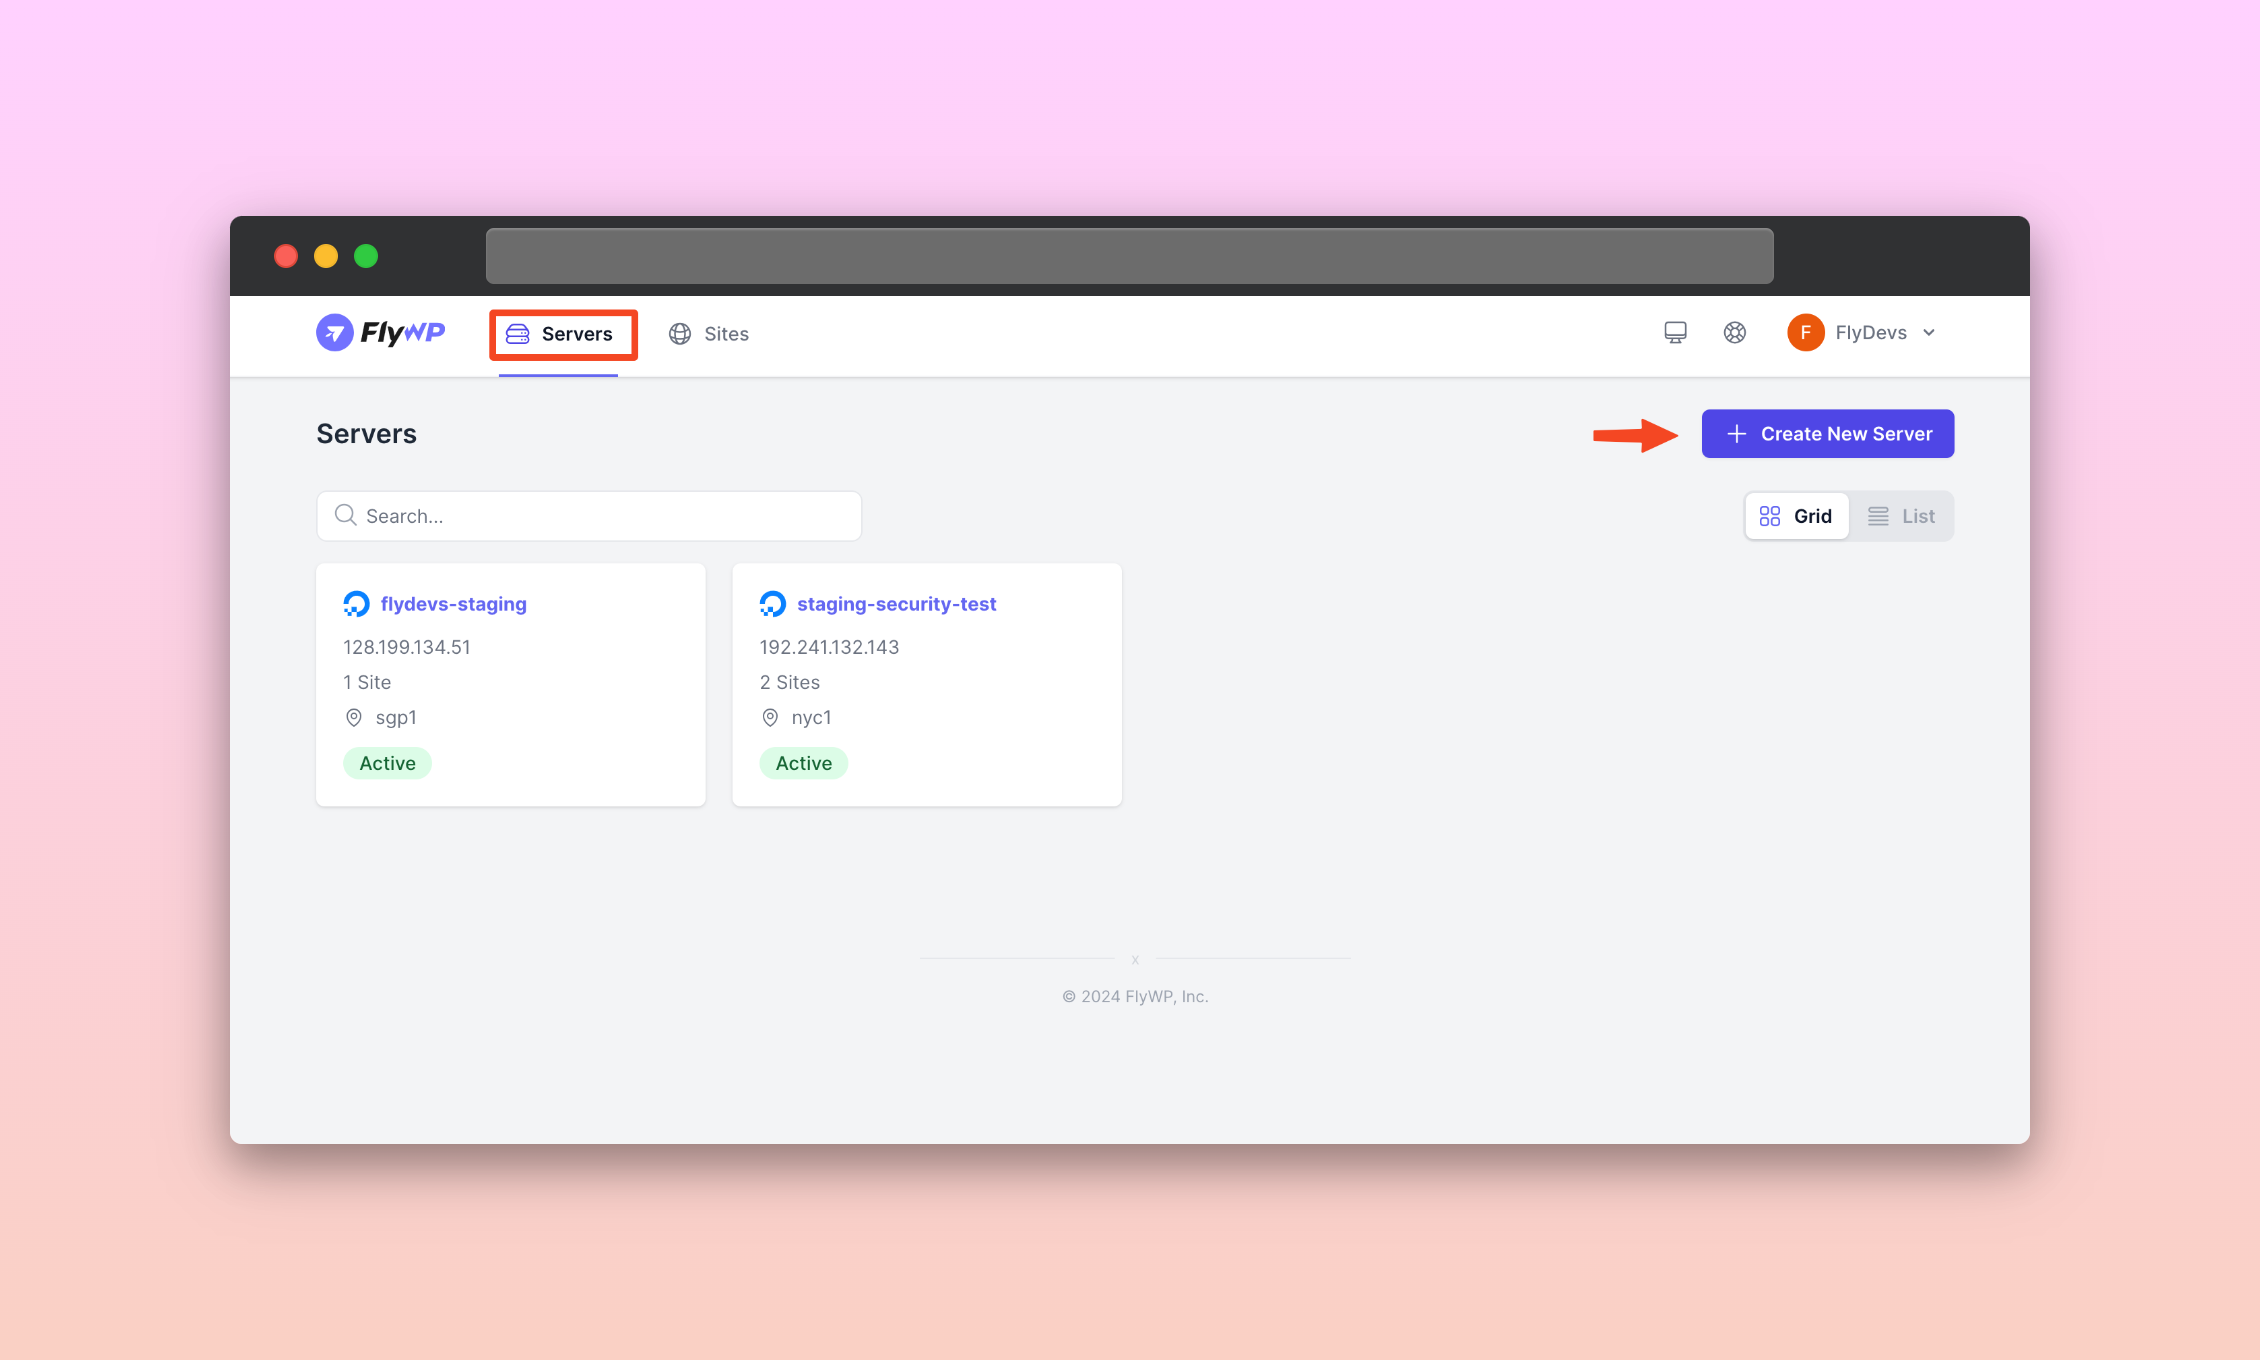
- Here, you’ll find the available server providers. From here, choose the “Vultr“.
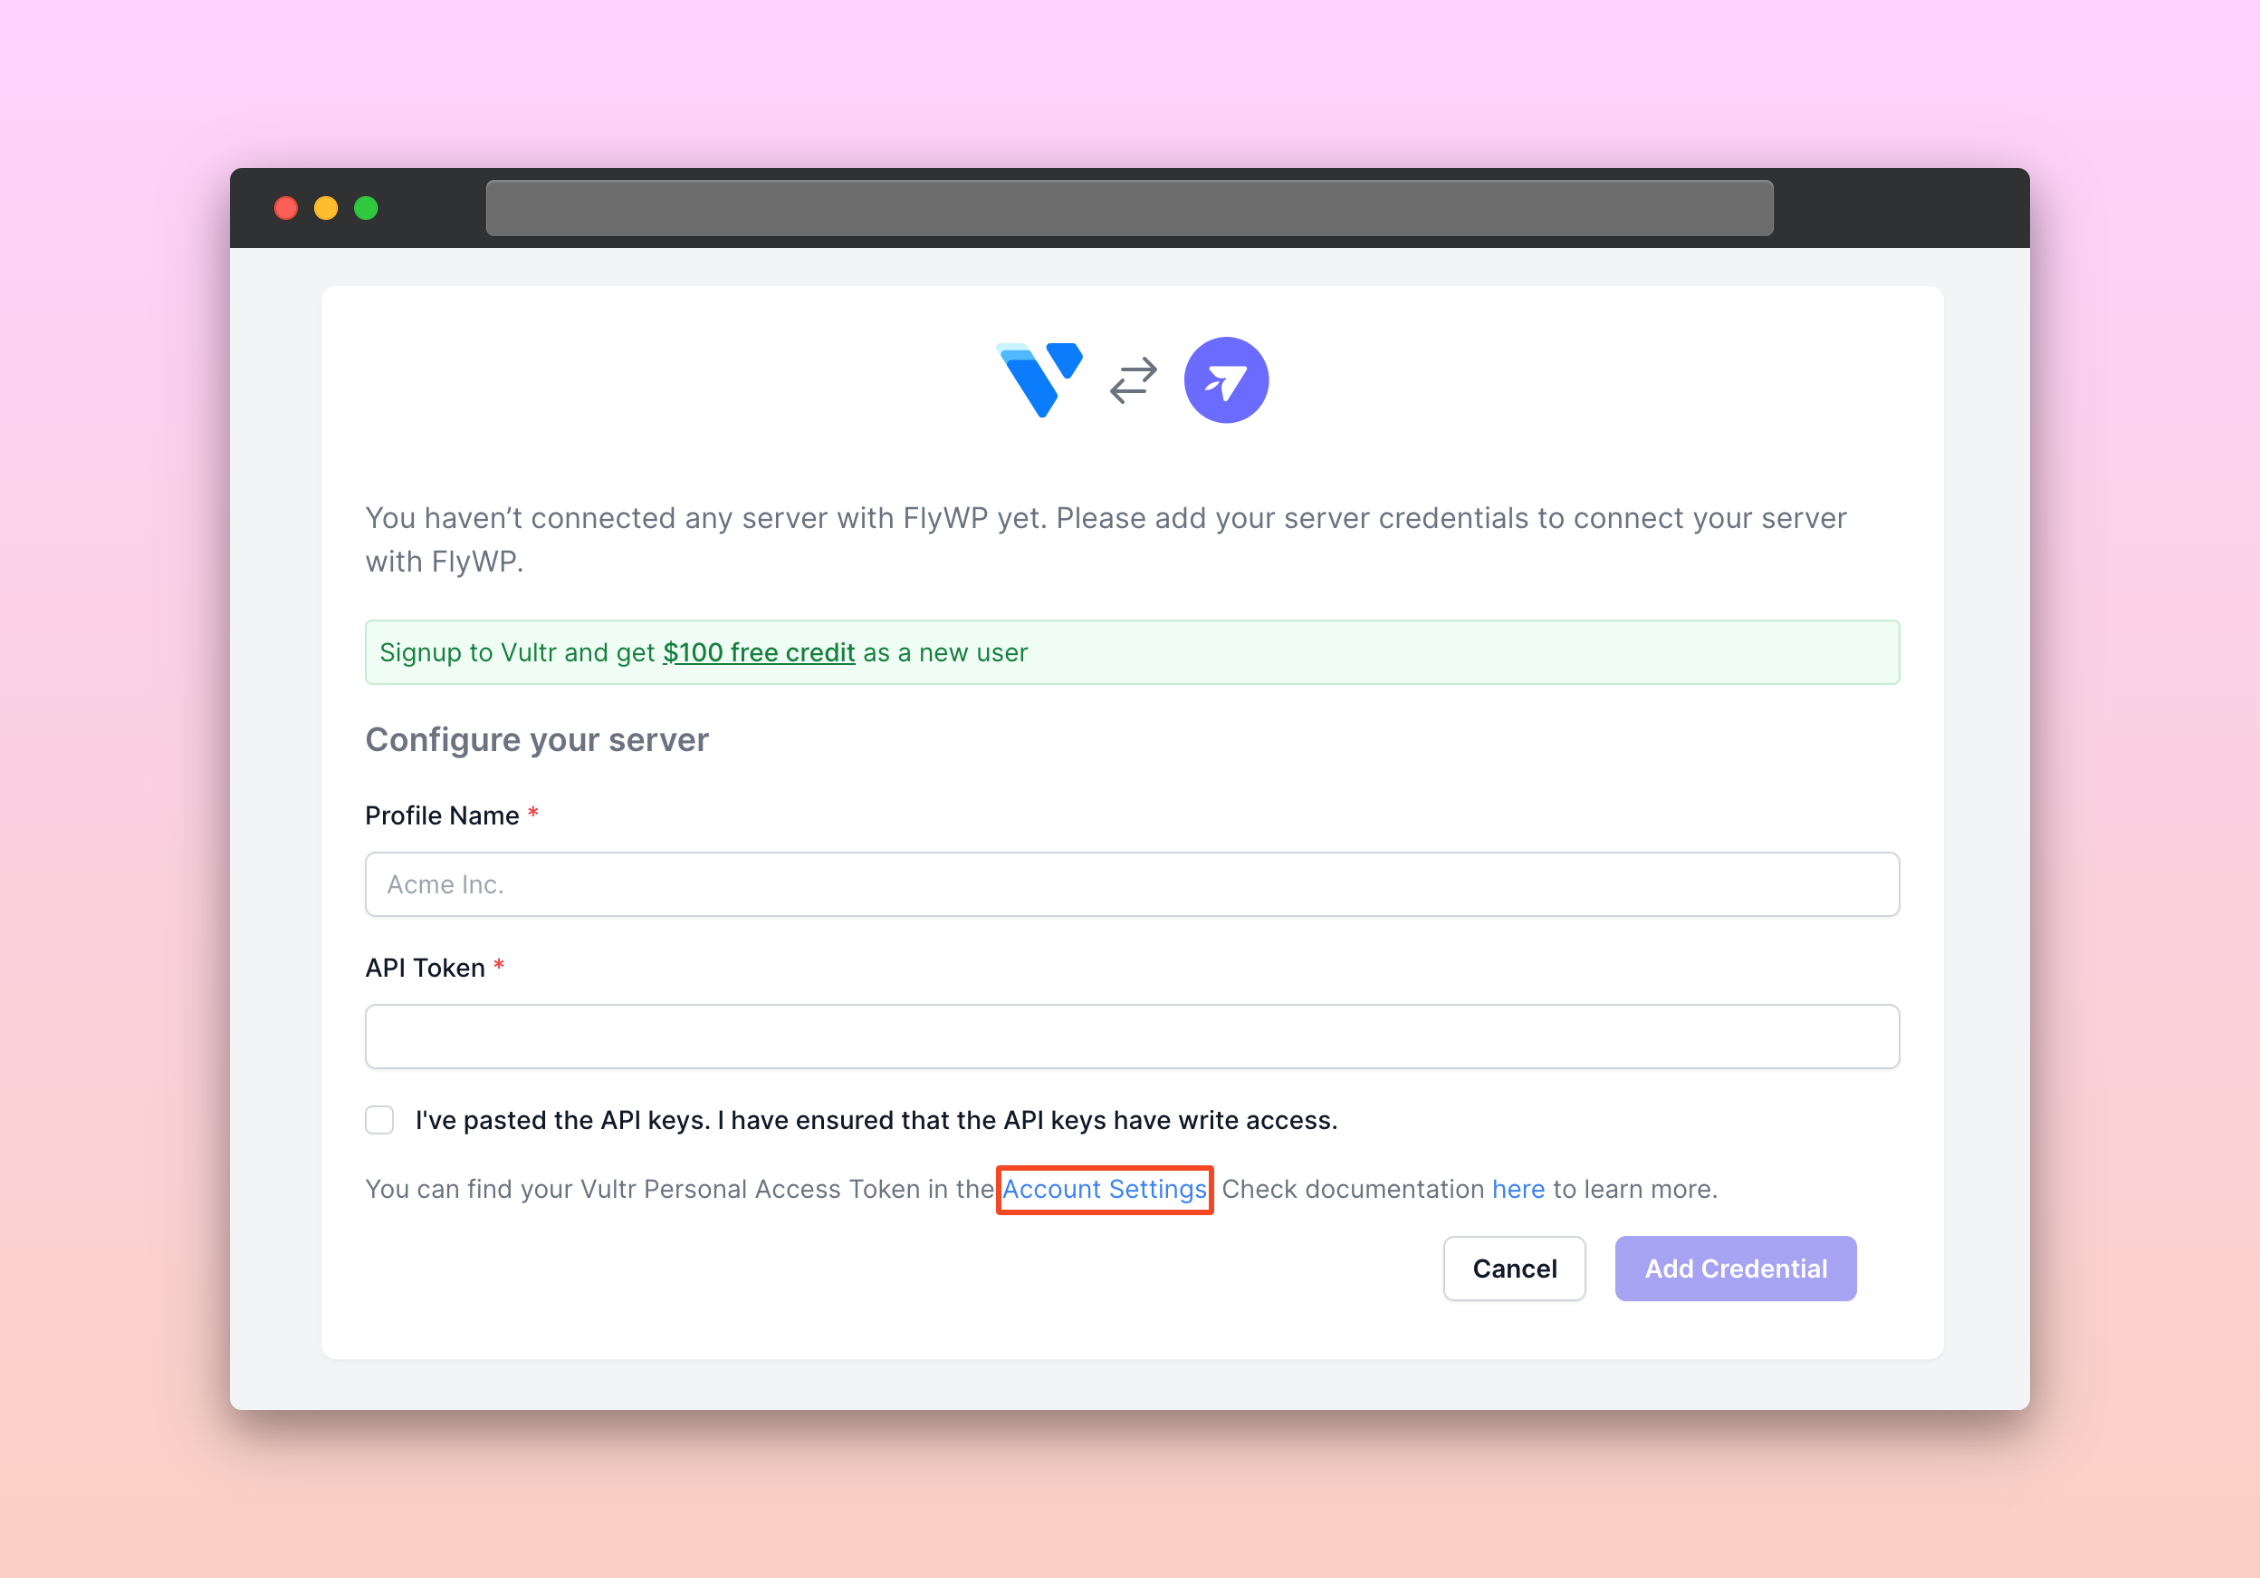
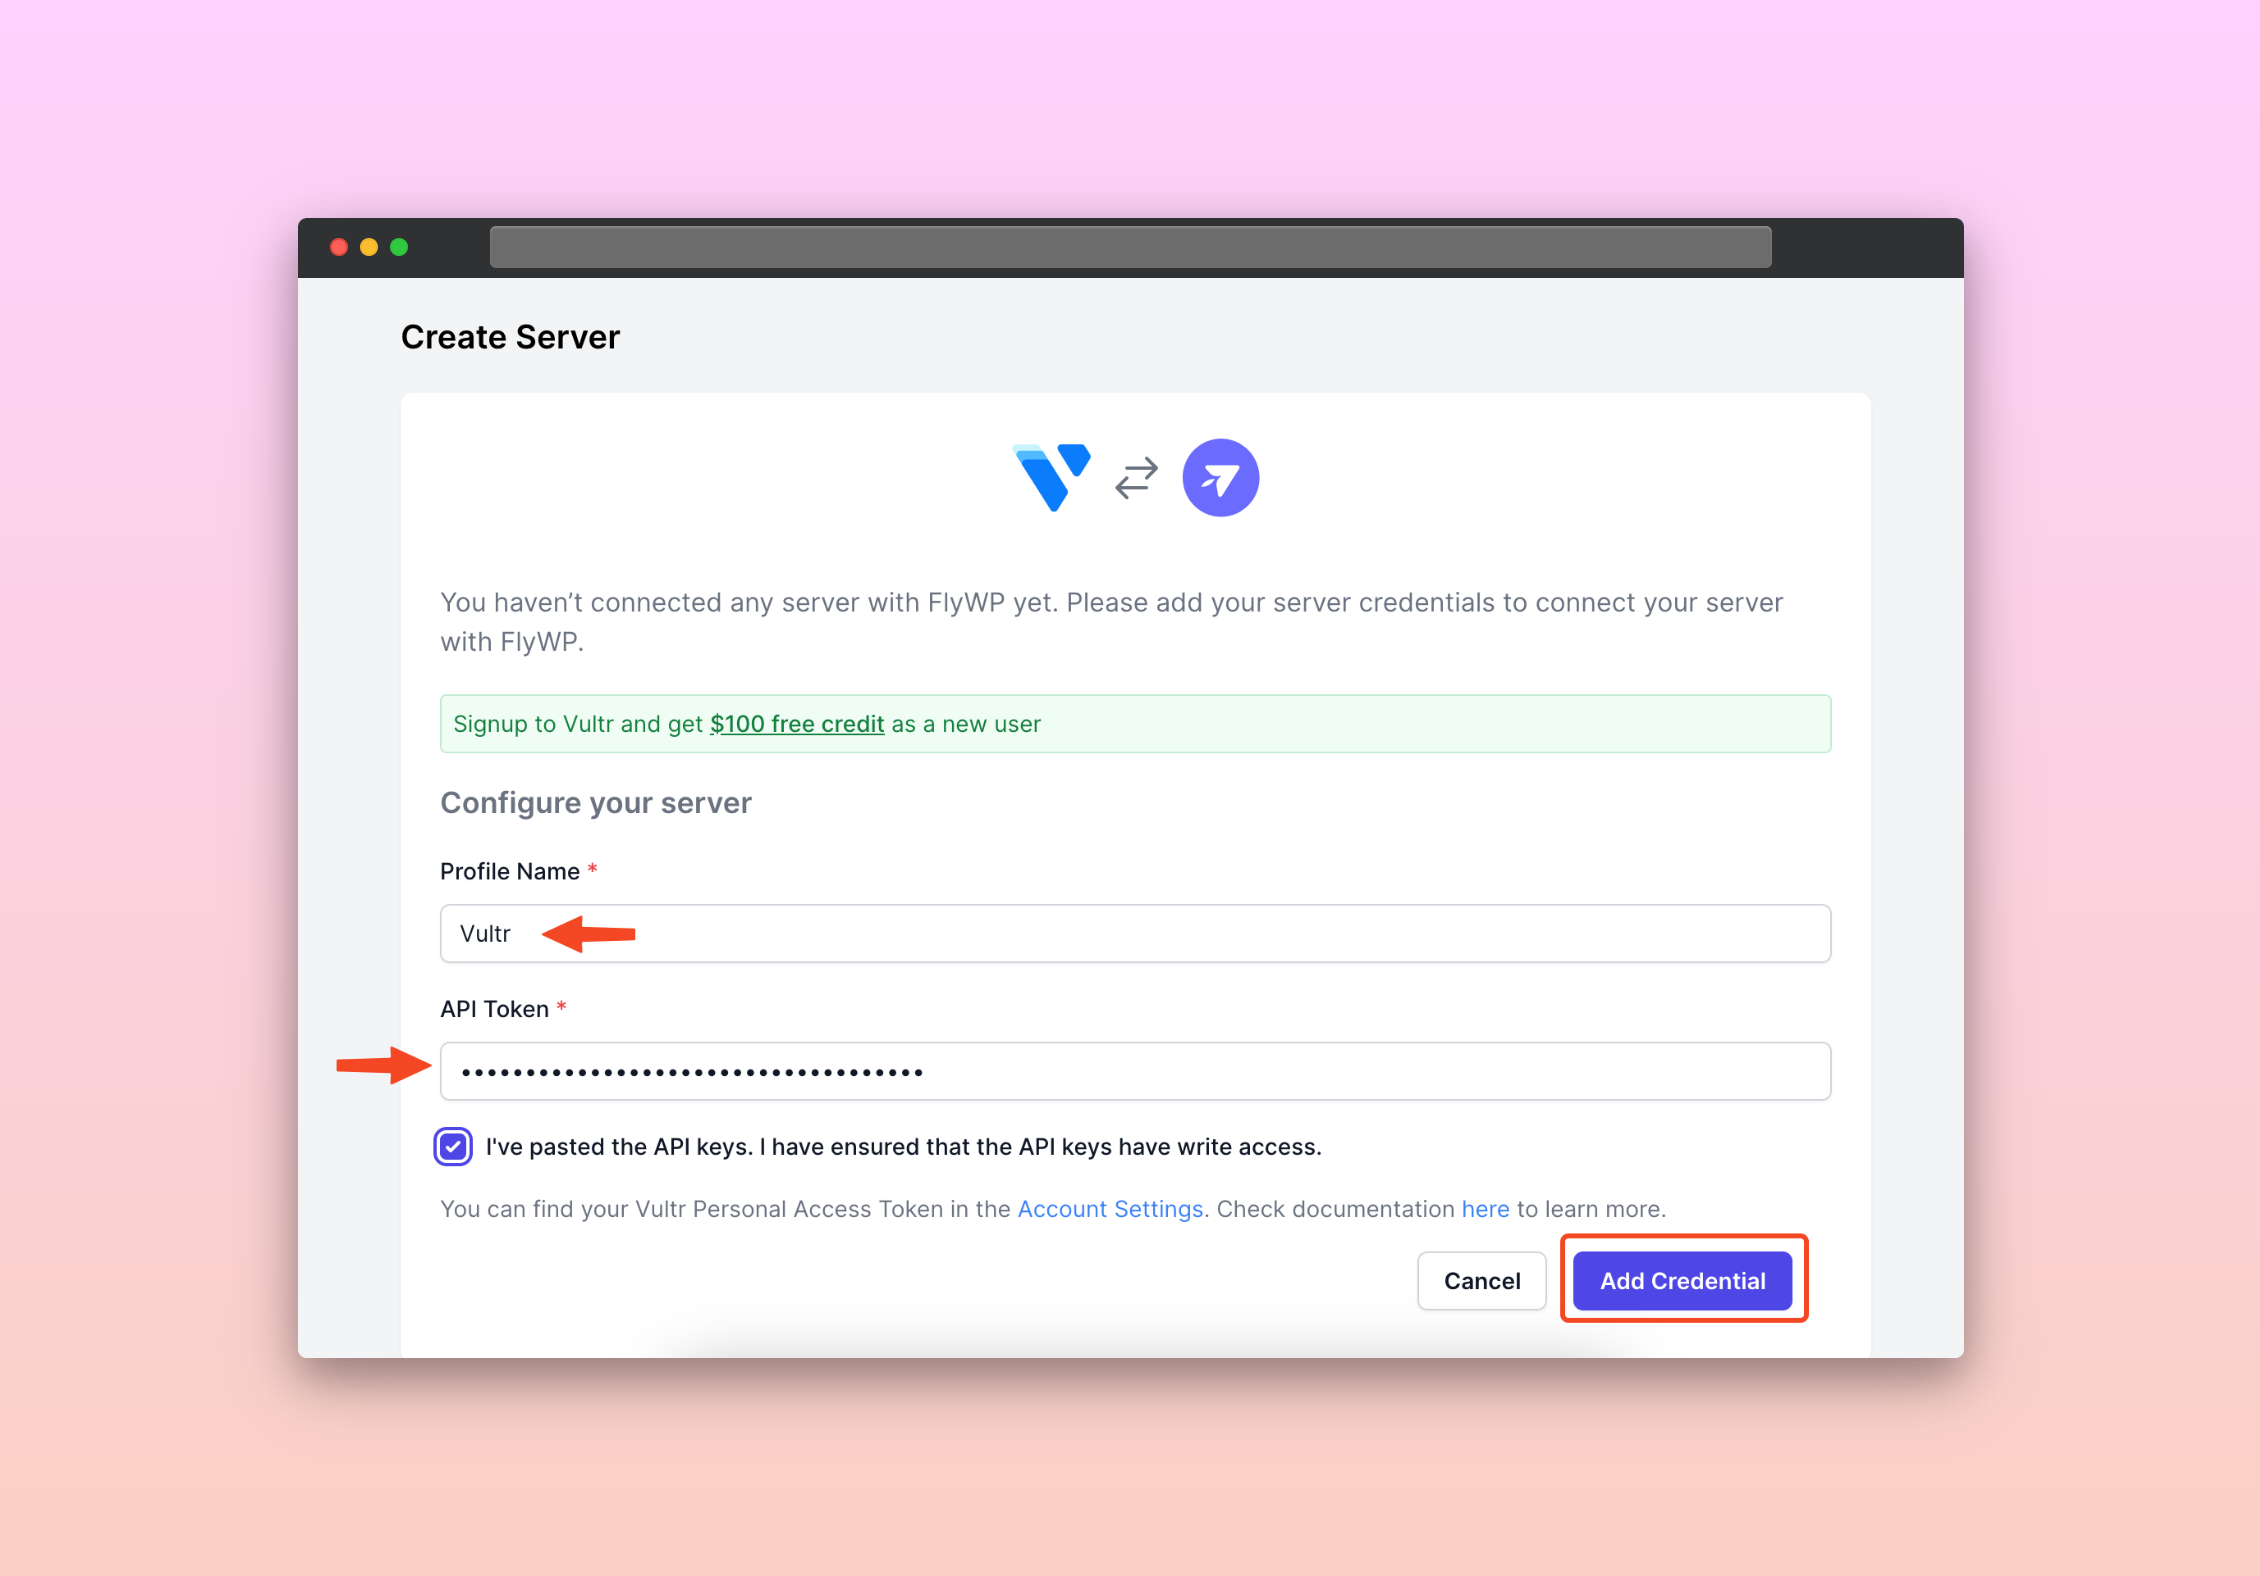
- Here, you need to provide a profile name and API token. For that, click on the “Account settings“. You’ll get to the Vultr API generation page.
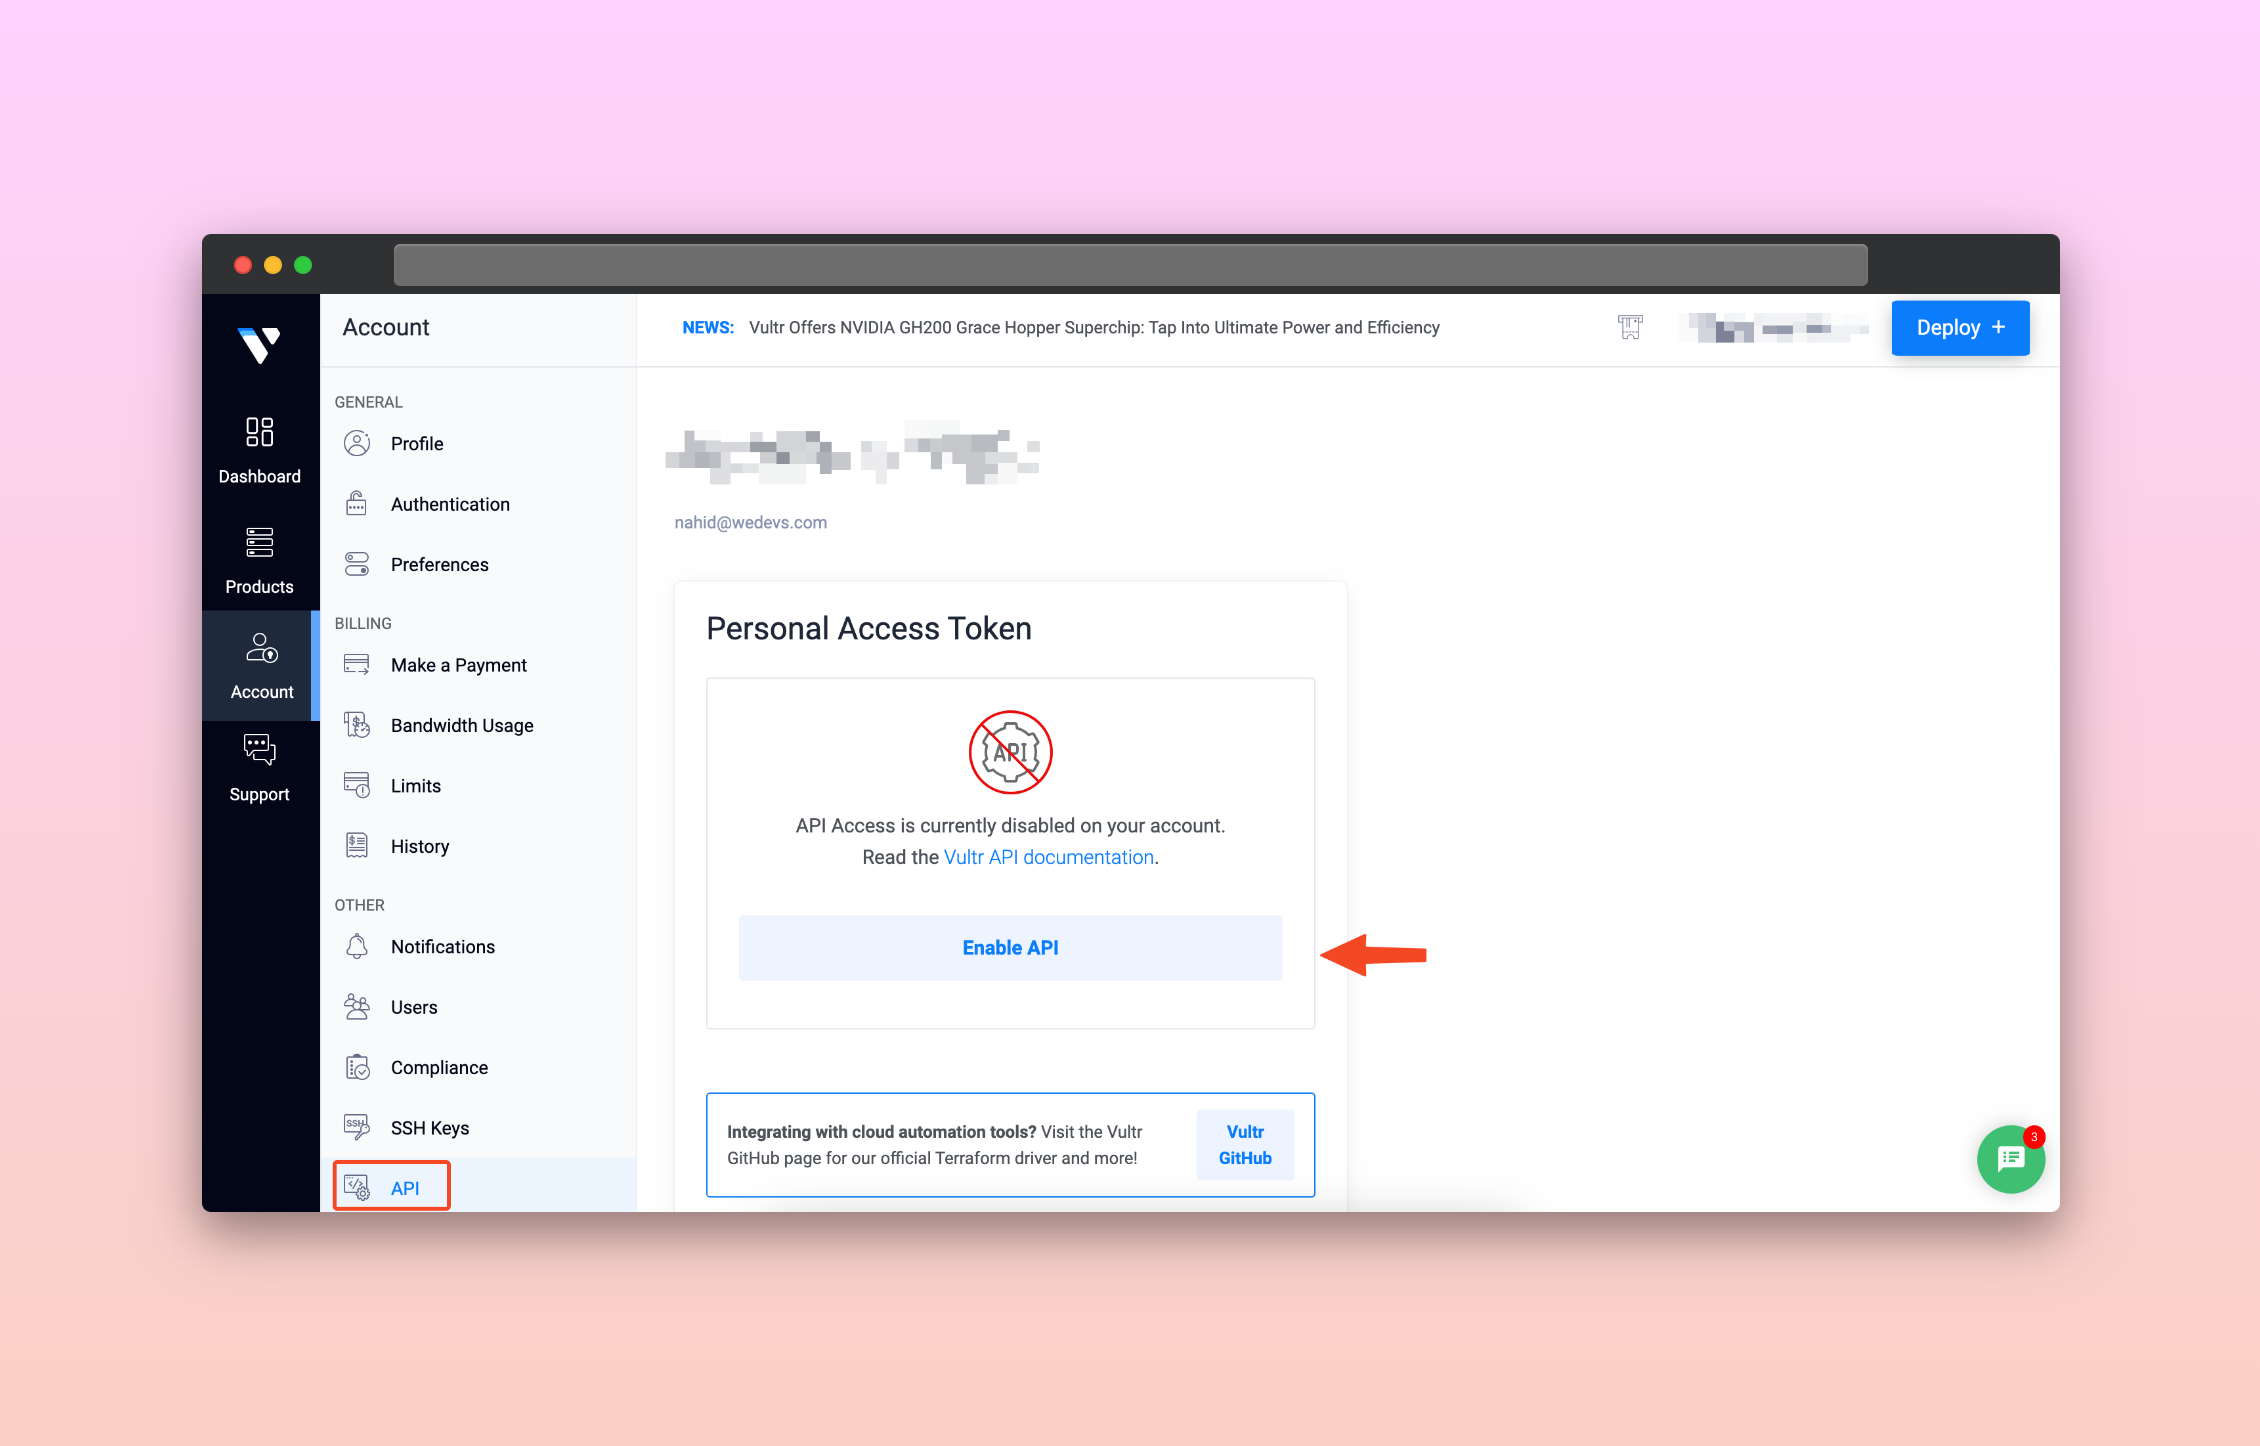
- Initially, the API system will be disabled. But you need to enable it.
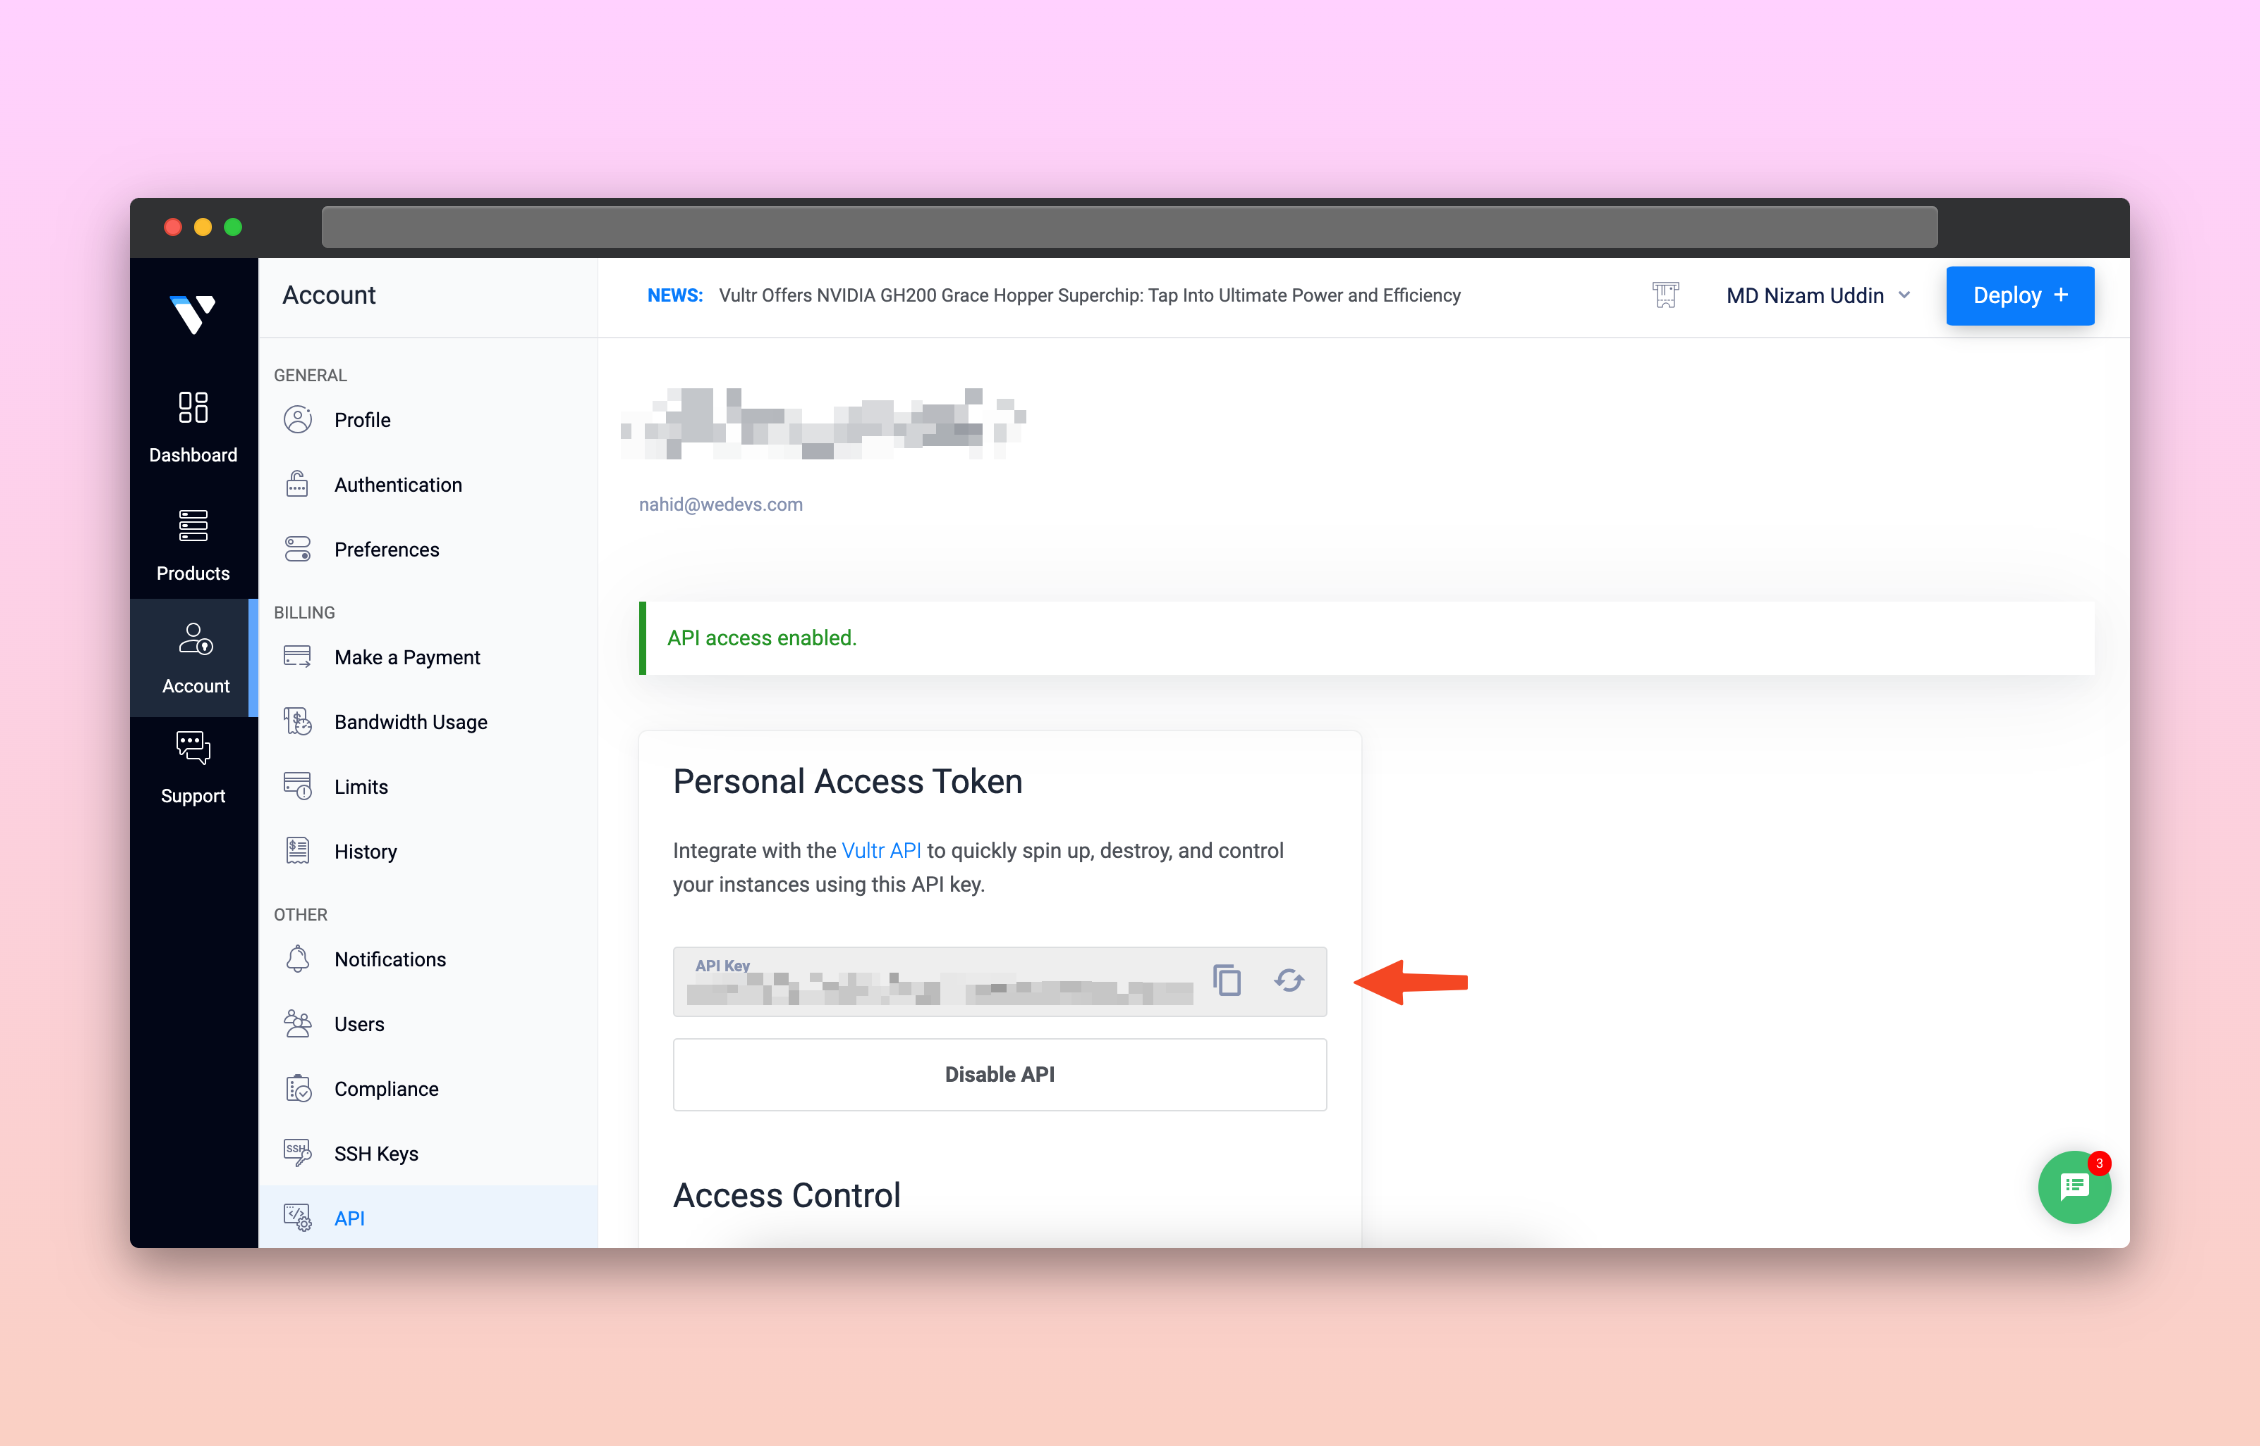
- After enabling the API, you’ll get a message. Then hit the generate button. And you will get a API token.
- Again go back to the FlyWP dashboard. And provide your profile name and API token. Don’t forget to tick the marked option before clicking on the “Add credential” button.
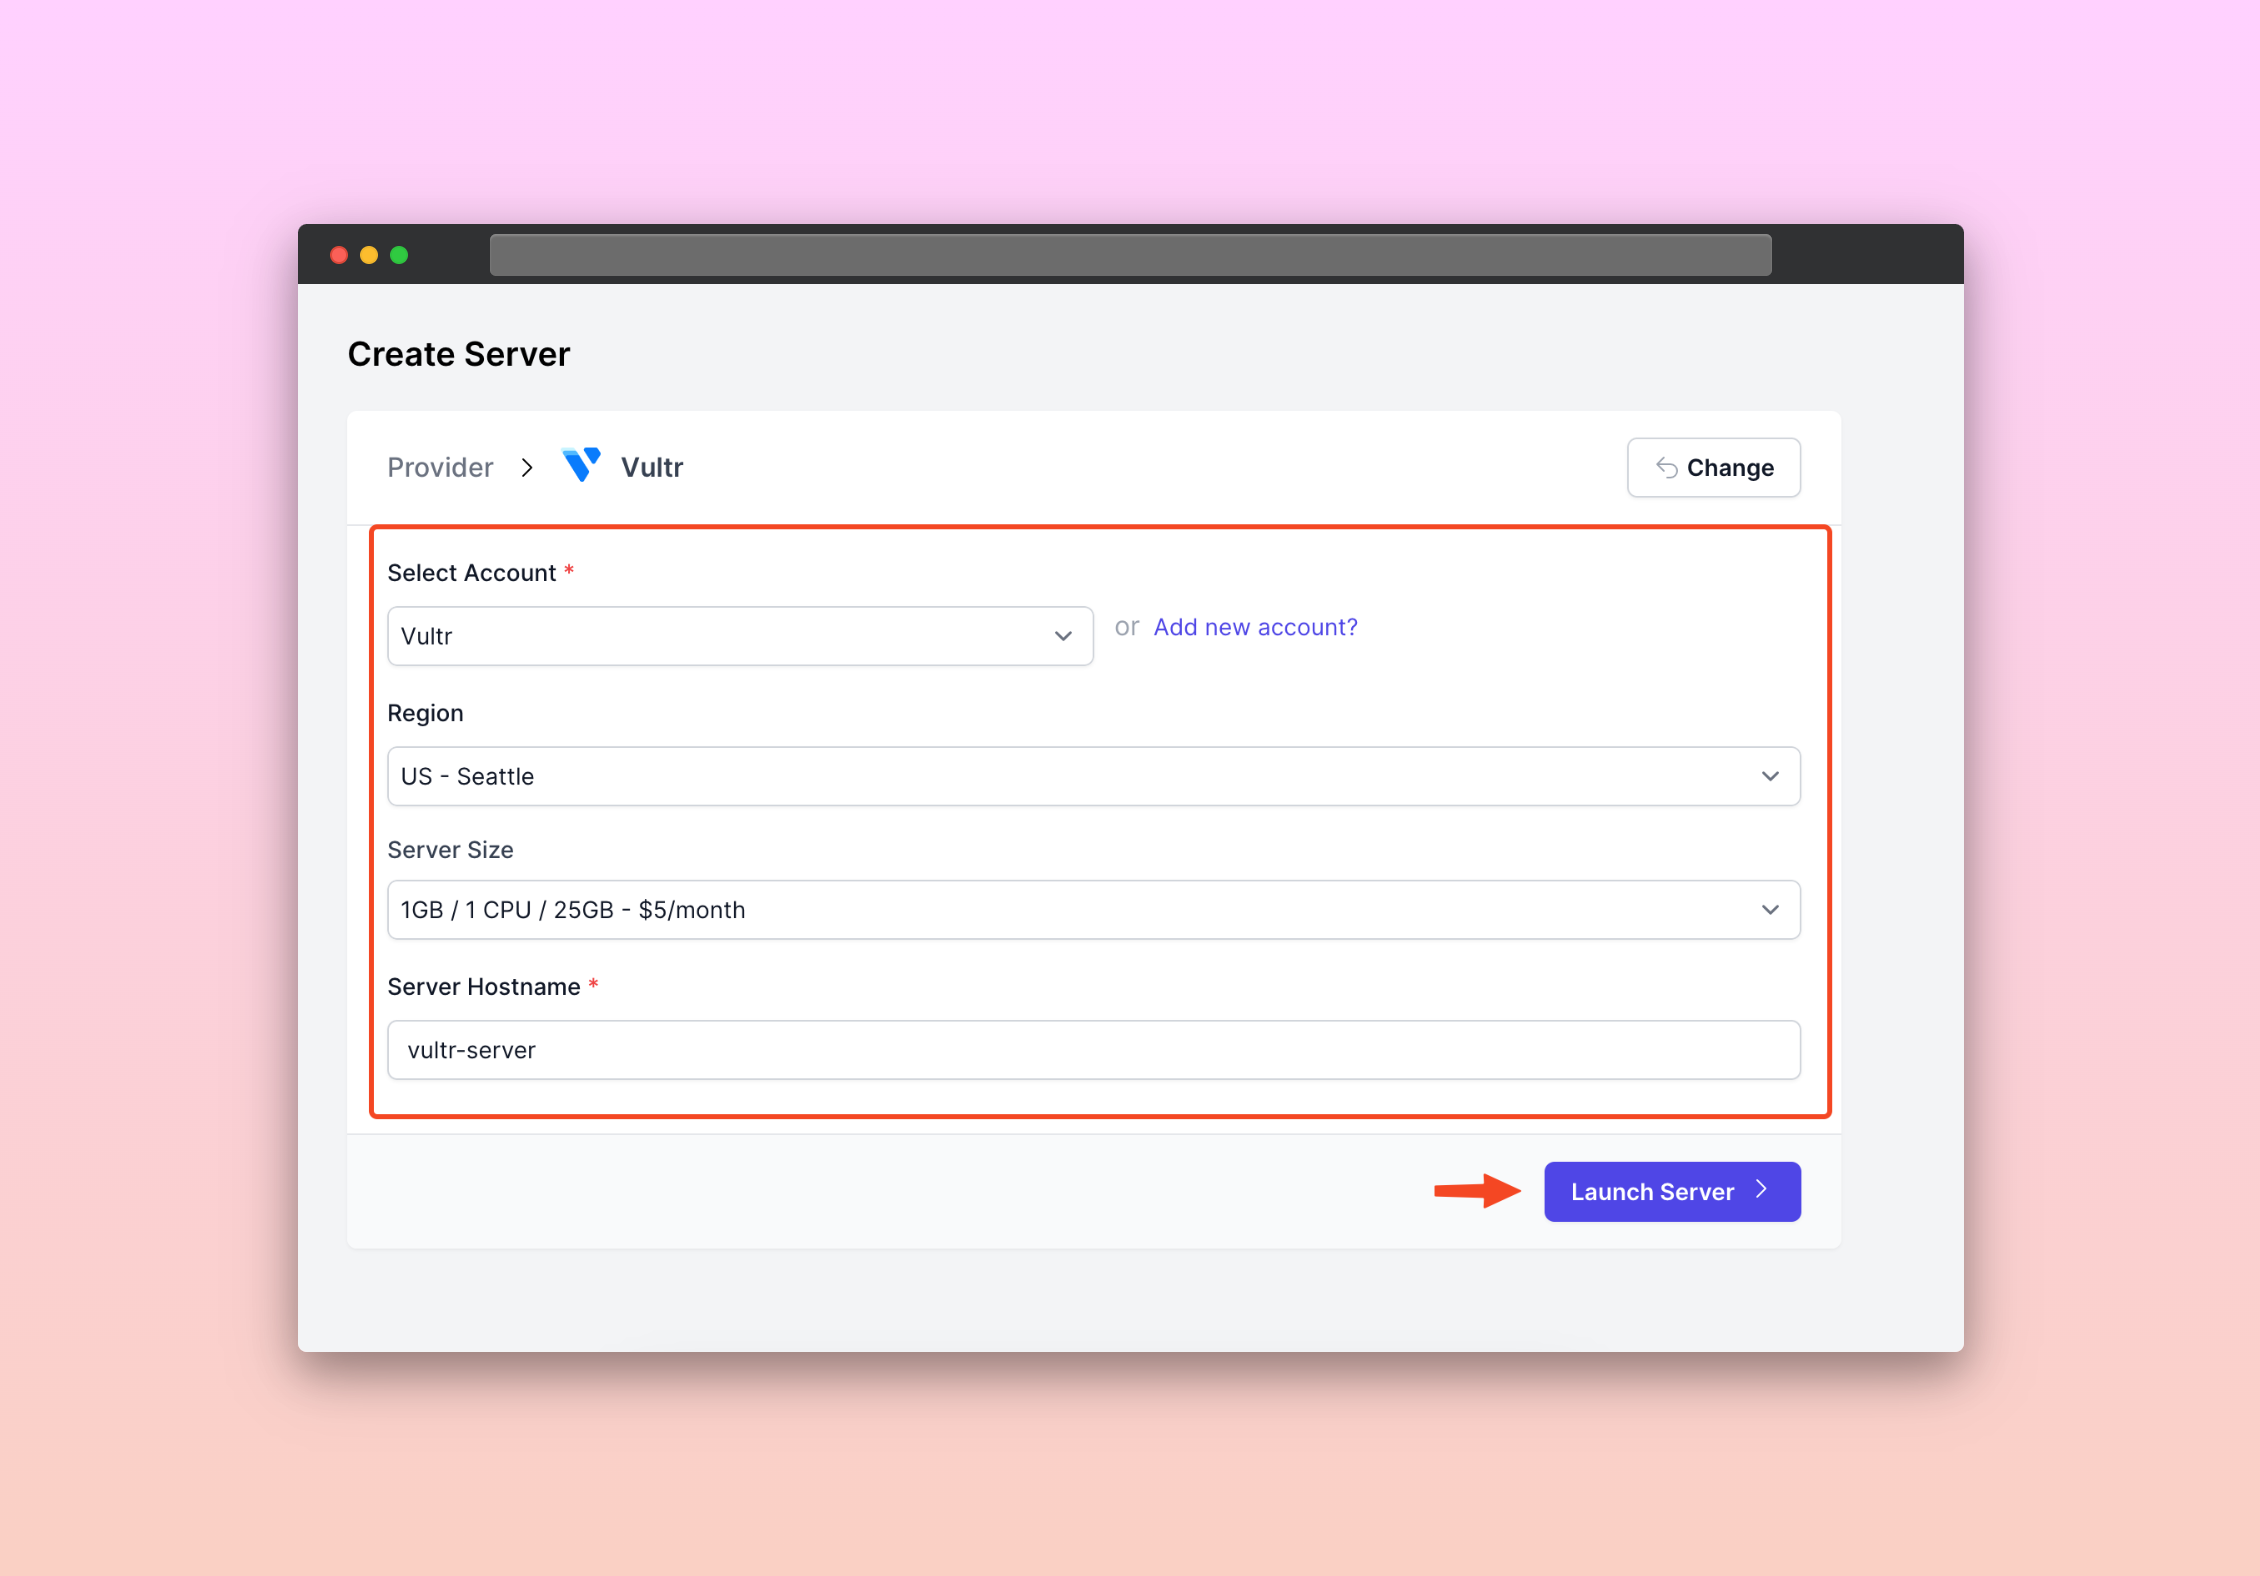
- Now provide the relevant information here to successfully add the Vultr server.
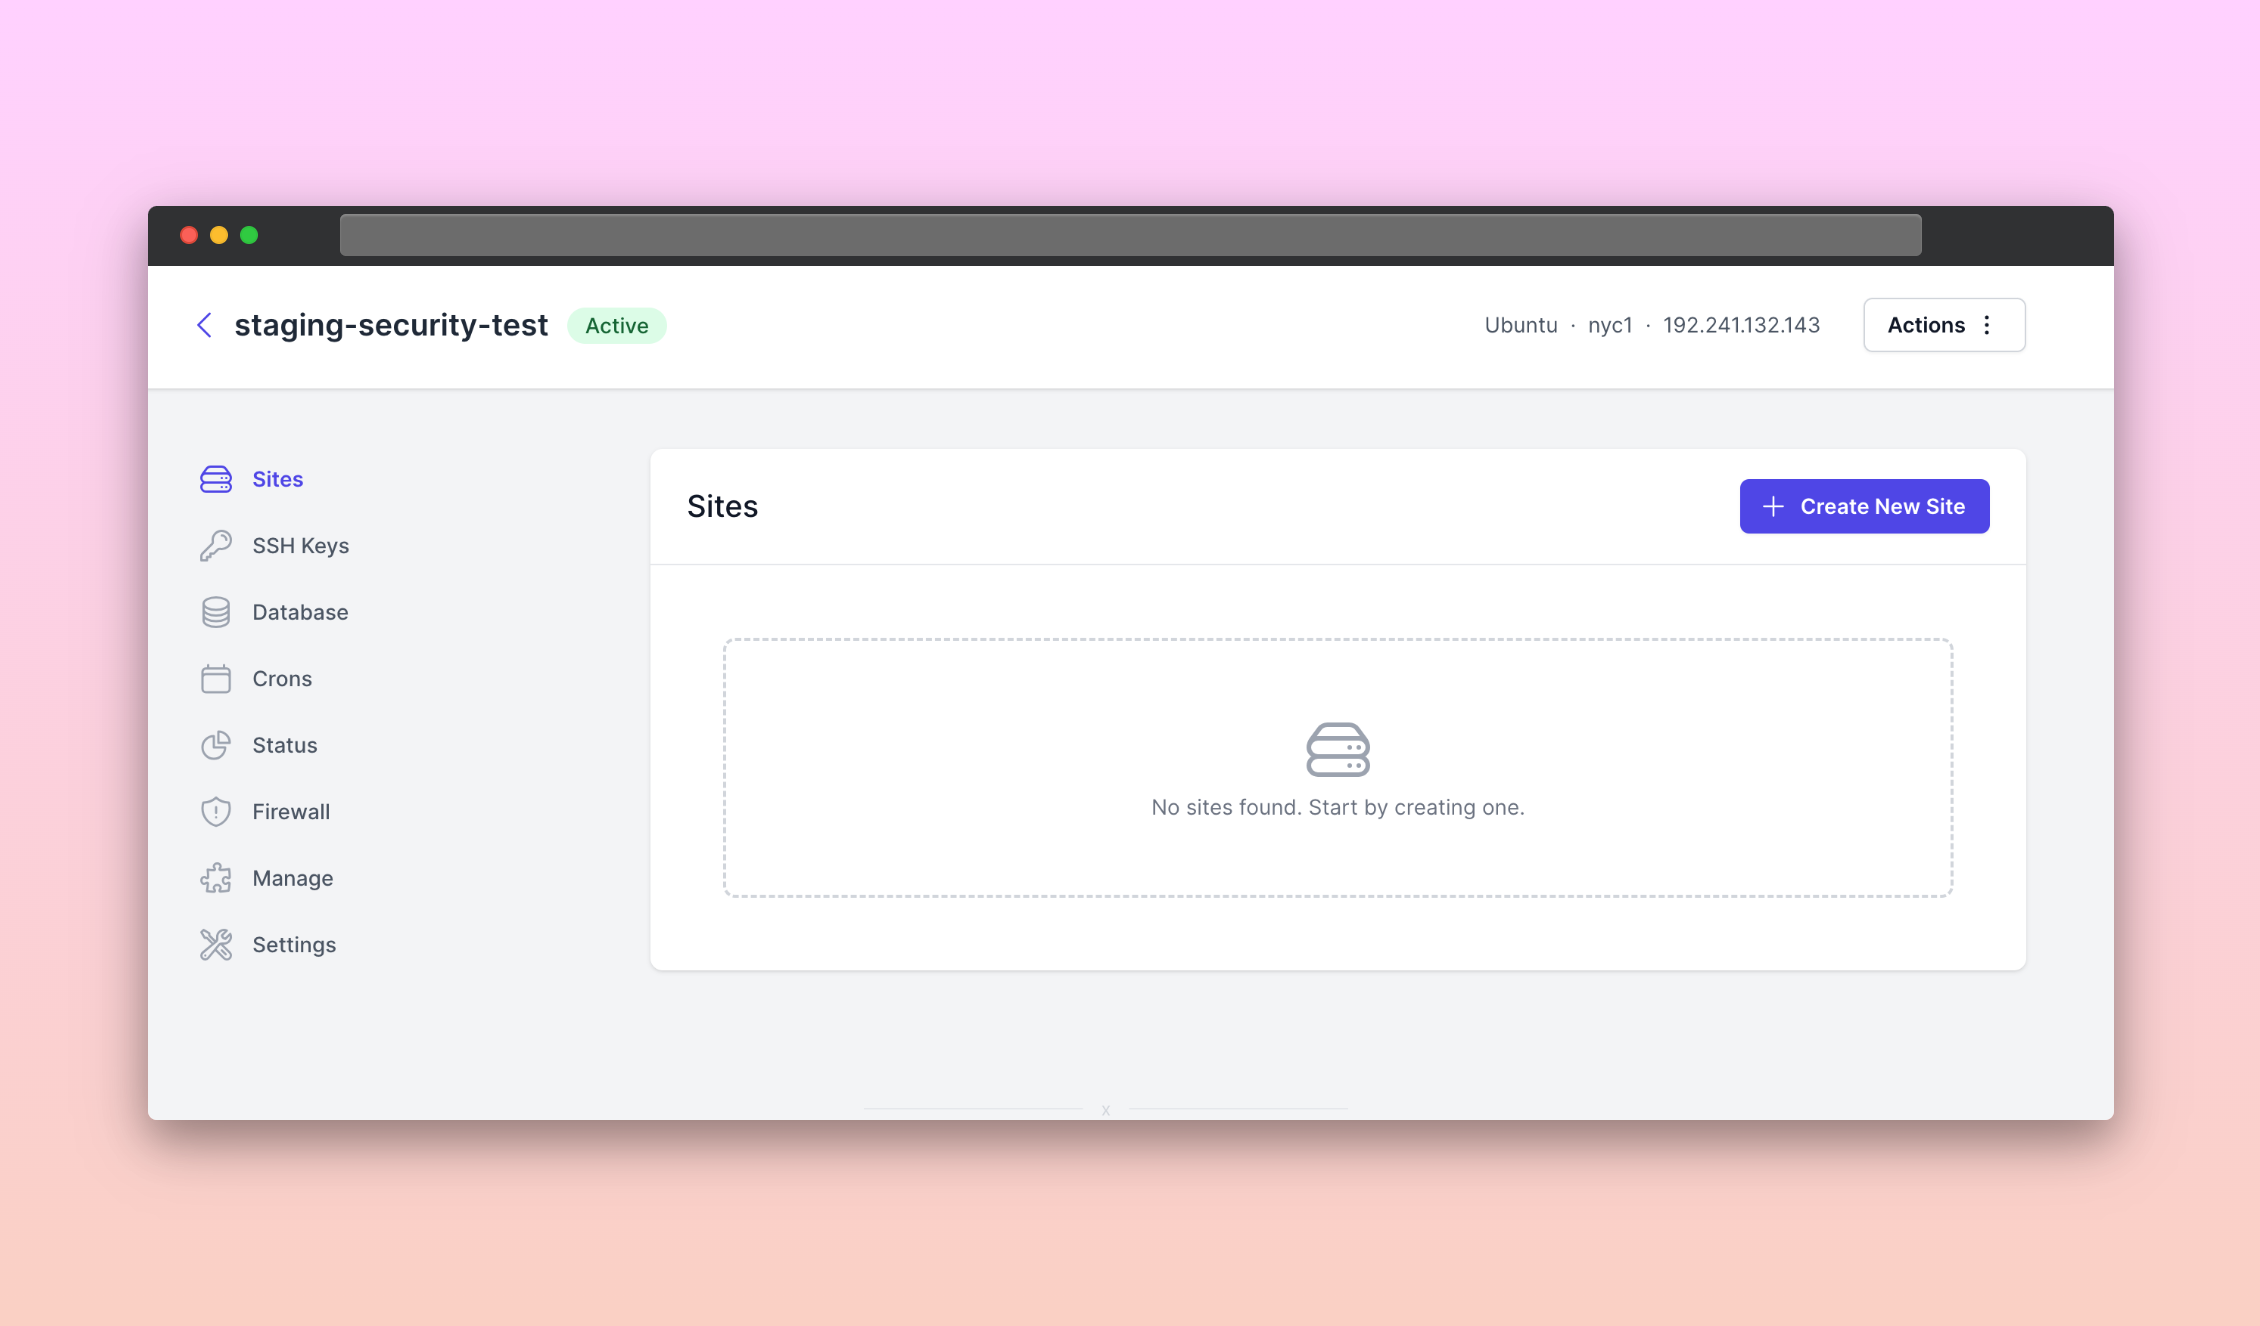
Finally, your server has been added. You’ll get an interface.
- Sites: From here you can create sites using FlyWP
- SSH keys: Add, remove, or delete SSH keys
- Database: Get all the crucial information and related options for the database here
- Crons: Create, remove, or delete cron jobs
- Status: Get an overview of the server status here
- Firewall: Set the firewall rules here
- Manage: Server management-related important options are available here
- Settings: Customize and configure the options for server settings
Step three: create and manage your WordPress site with FlyWP
- Now, click on the “Create New Site“.
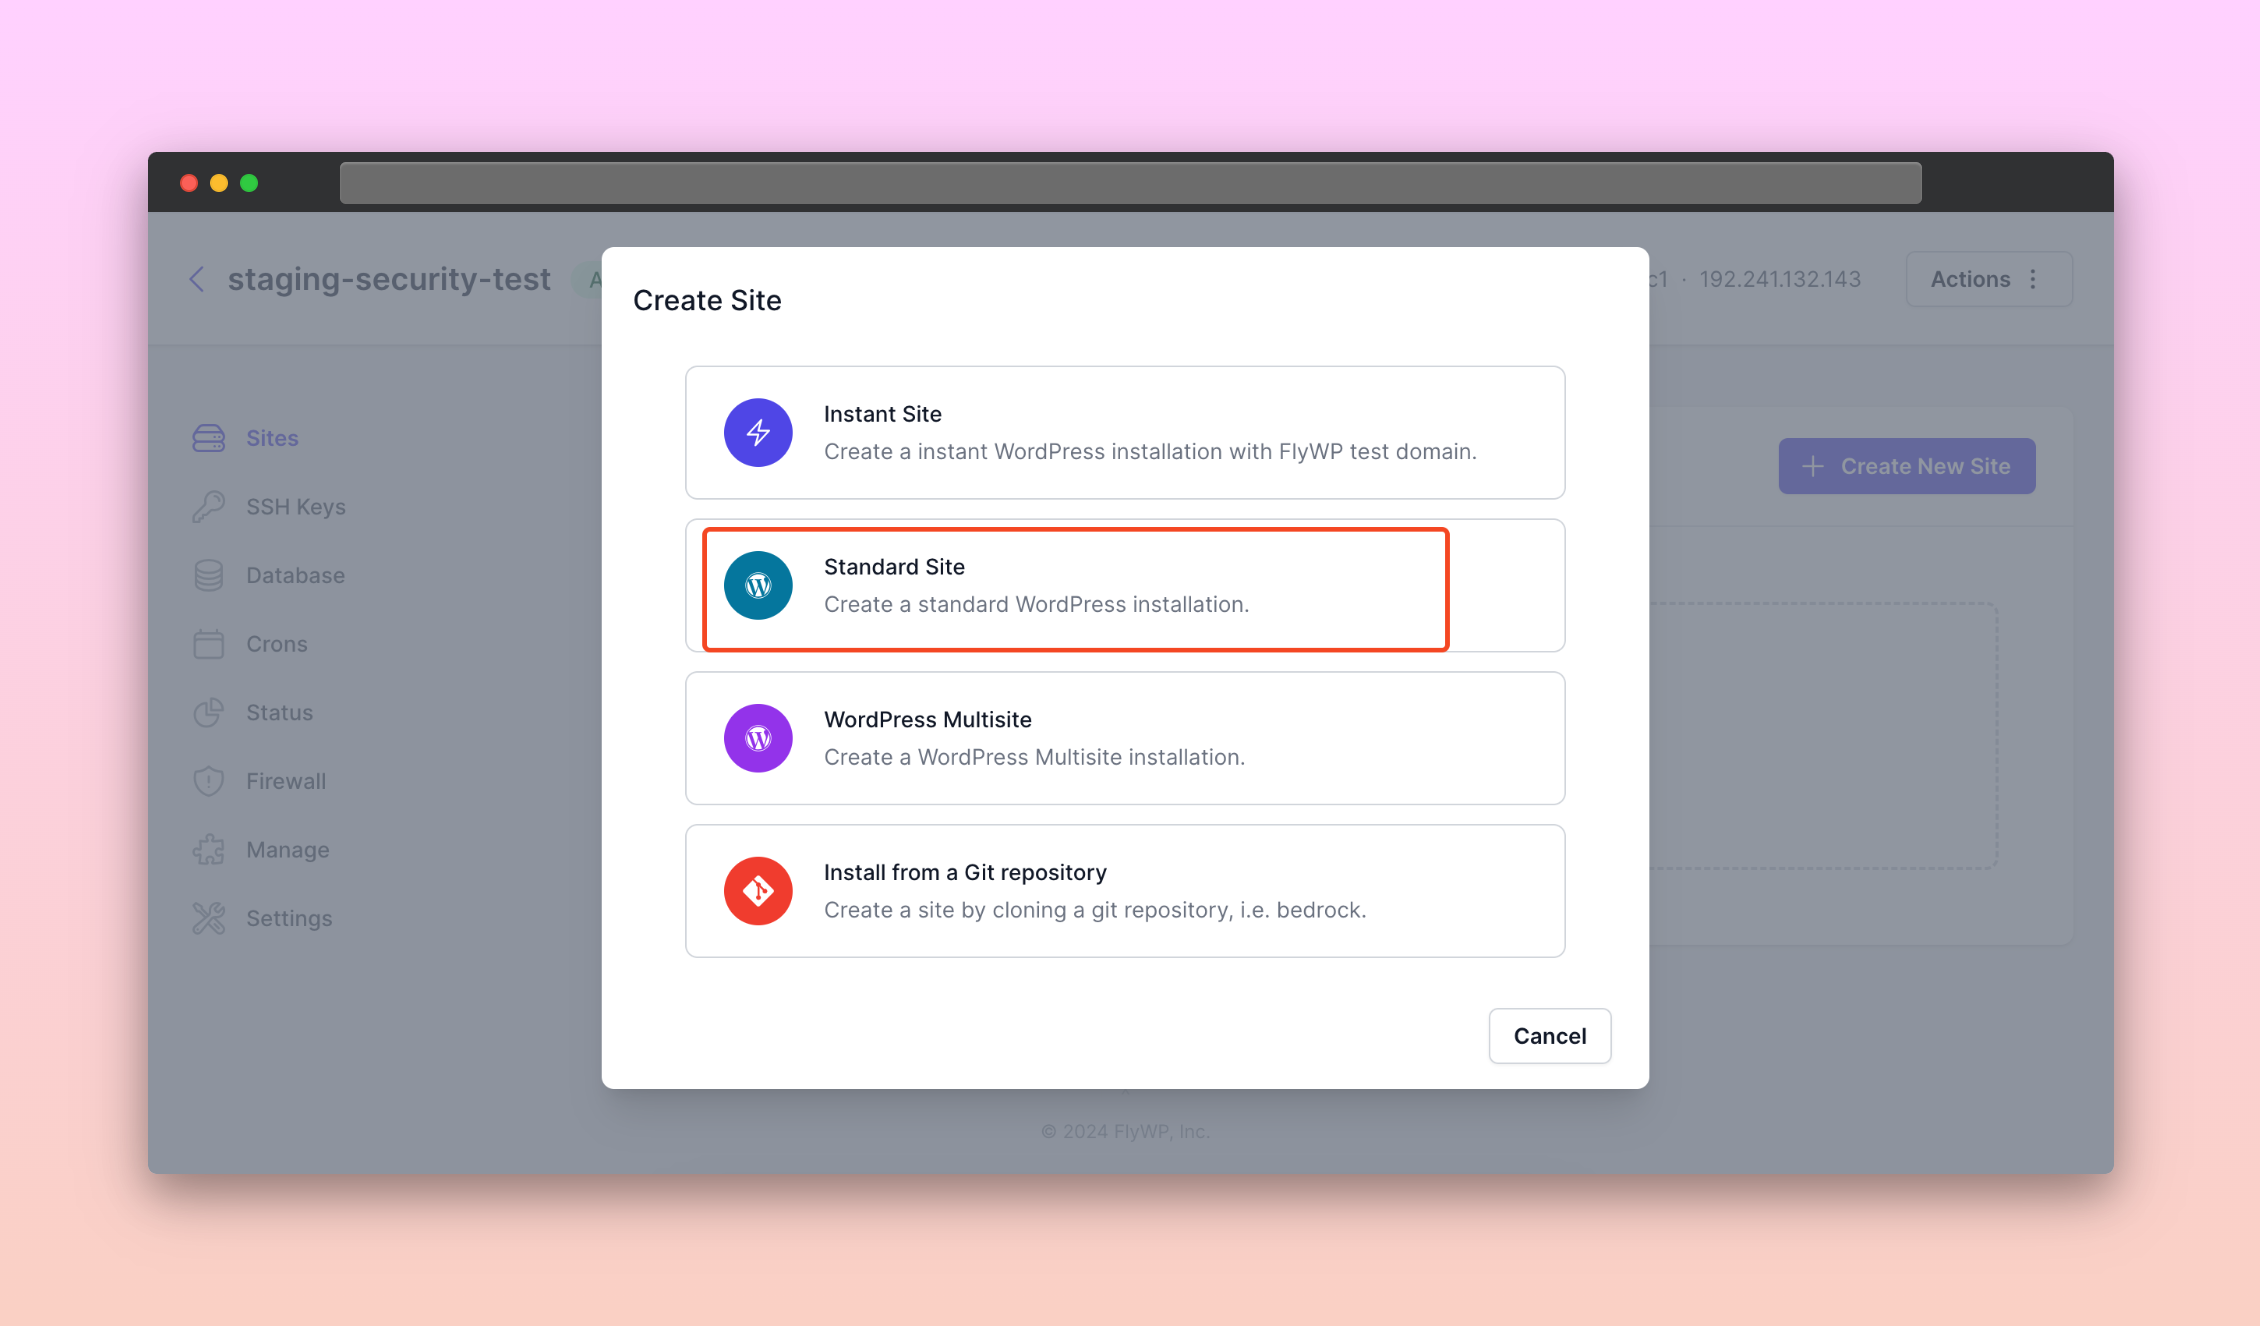
- Select the “Standard Site” option.
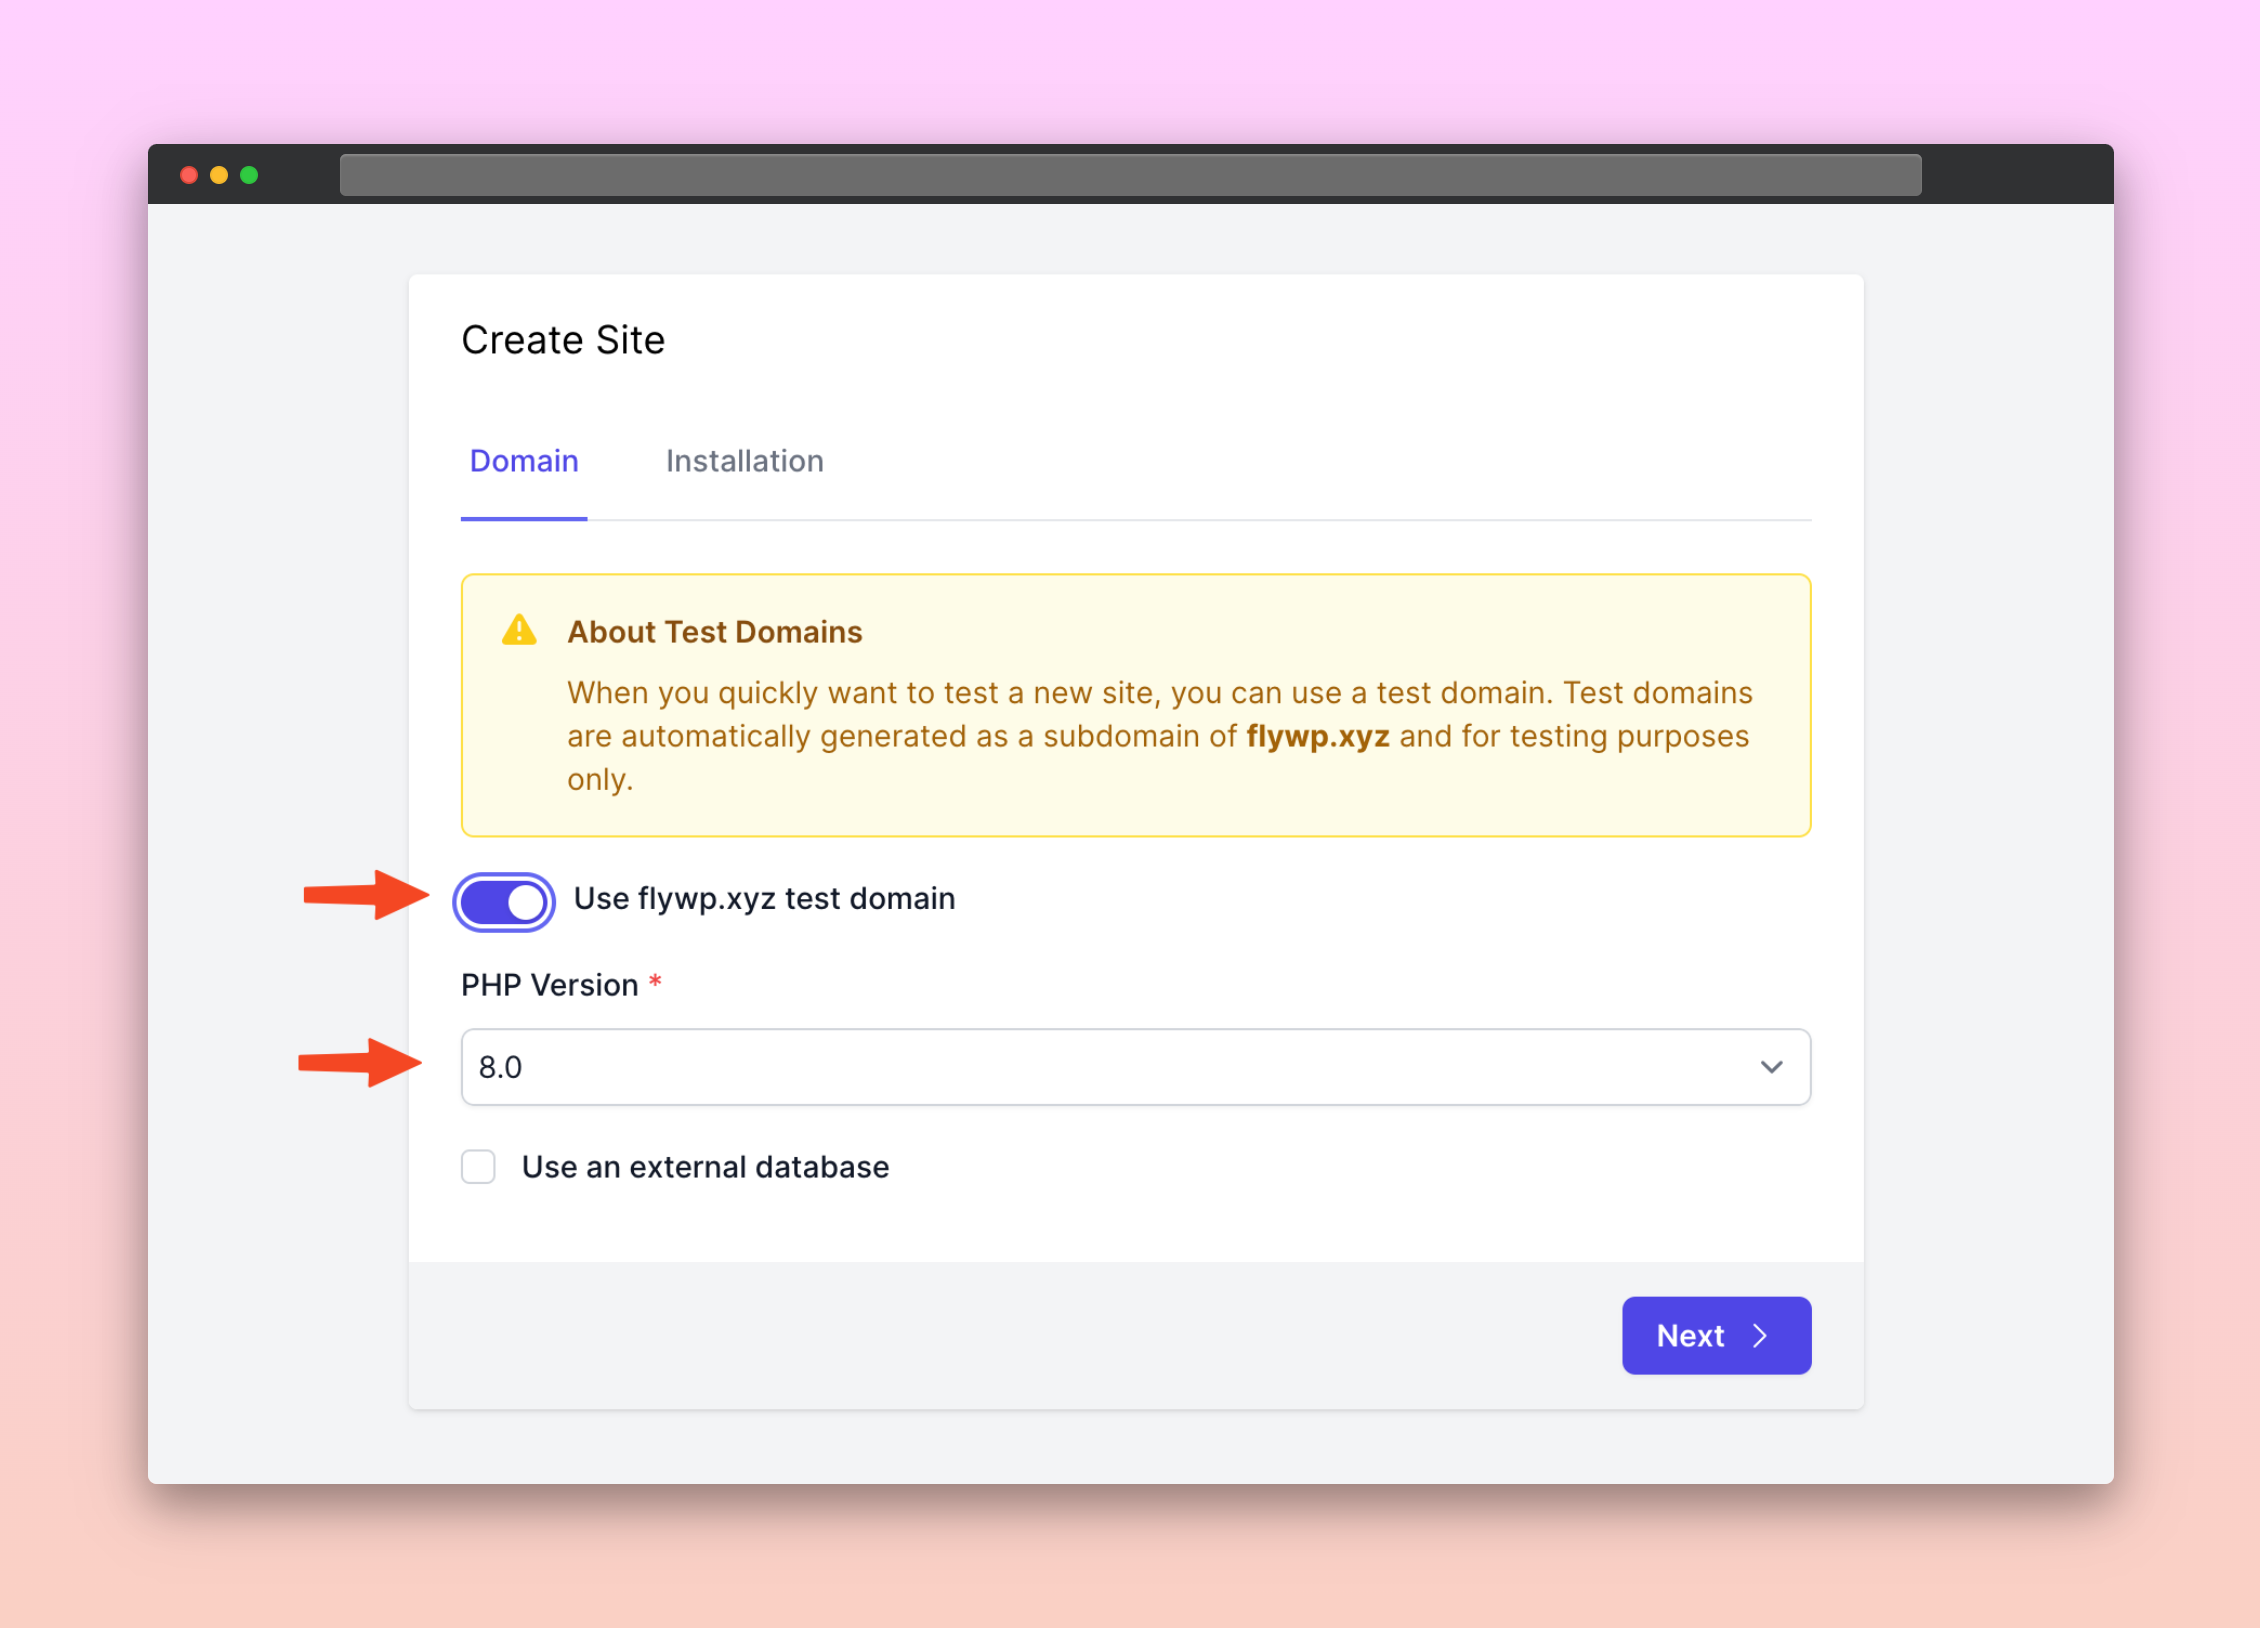
- Turn on the “Use flywp.xyz test domain” option. Then choose the PHP version.
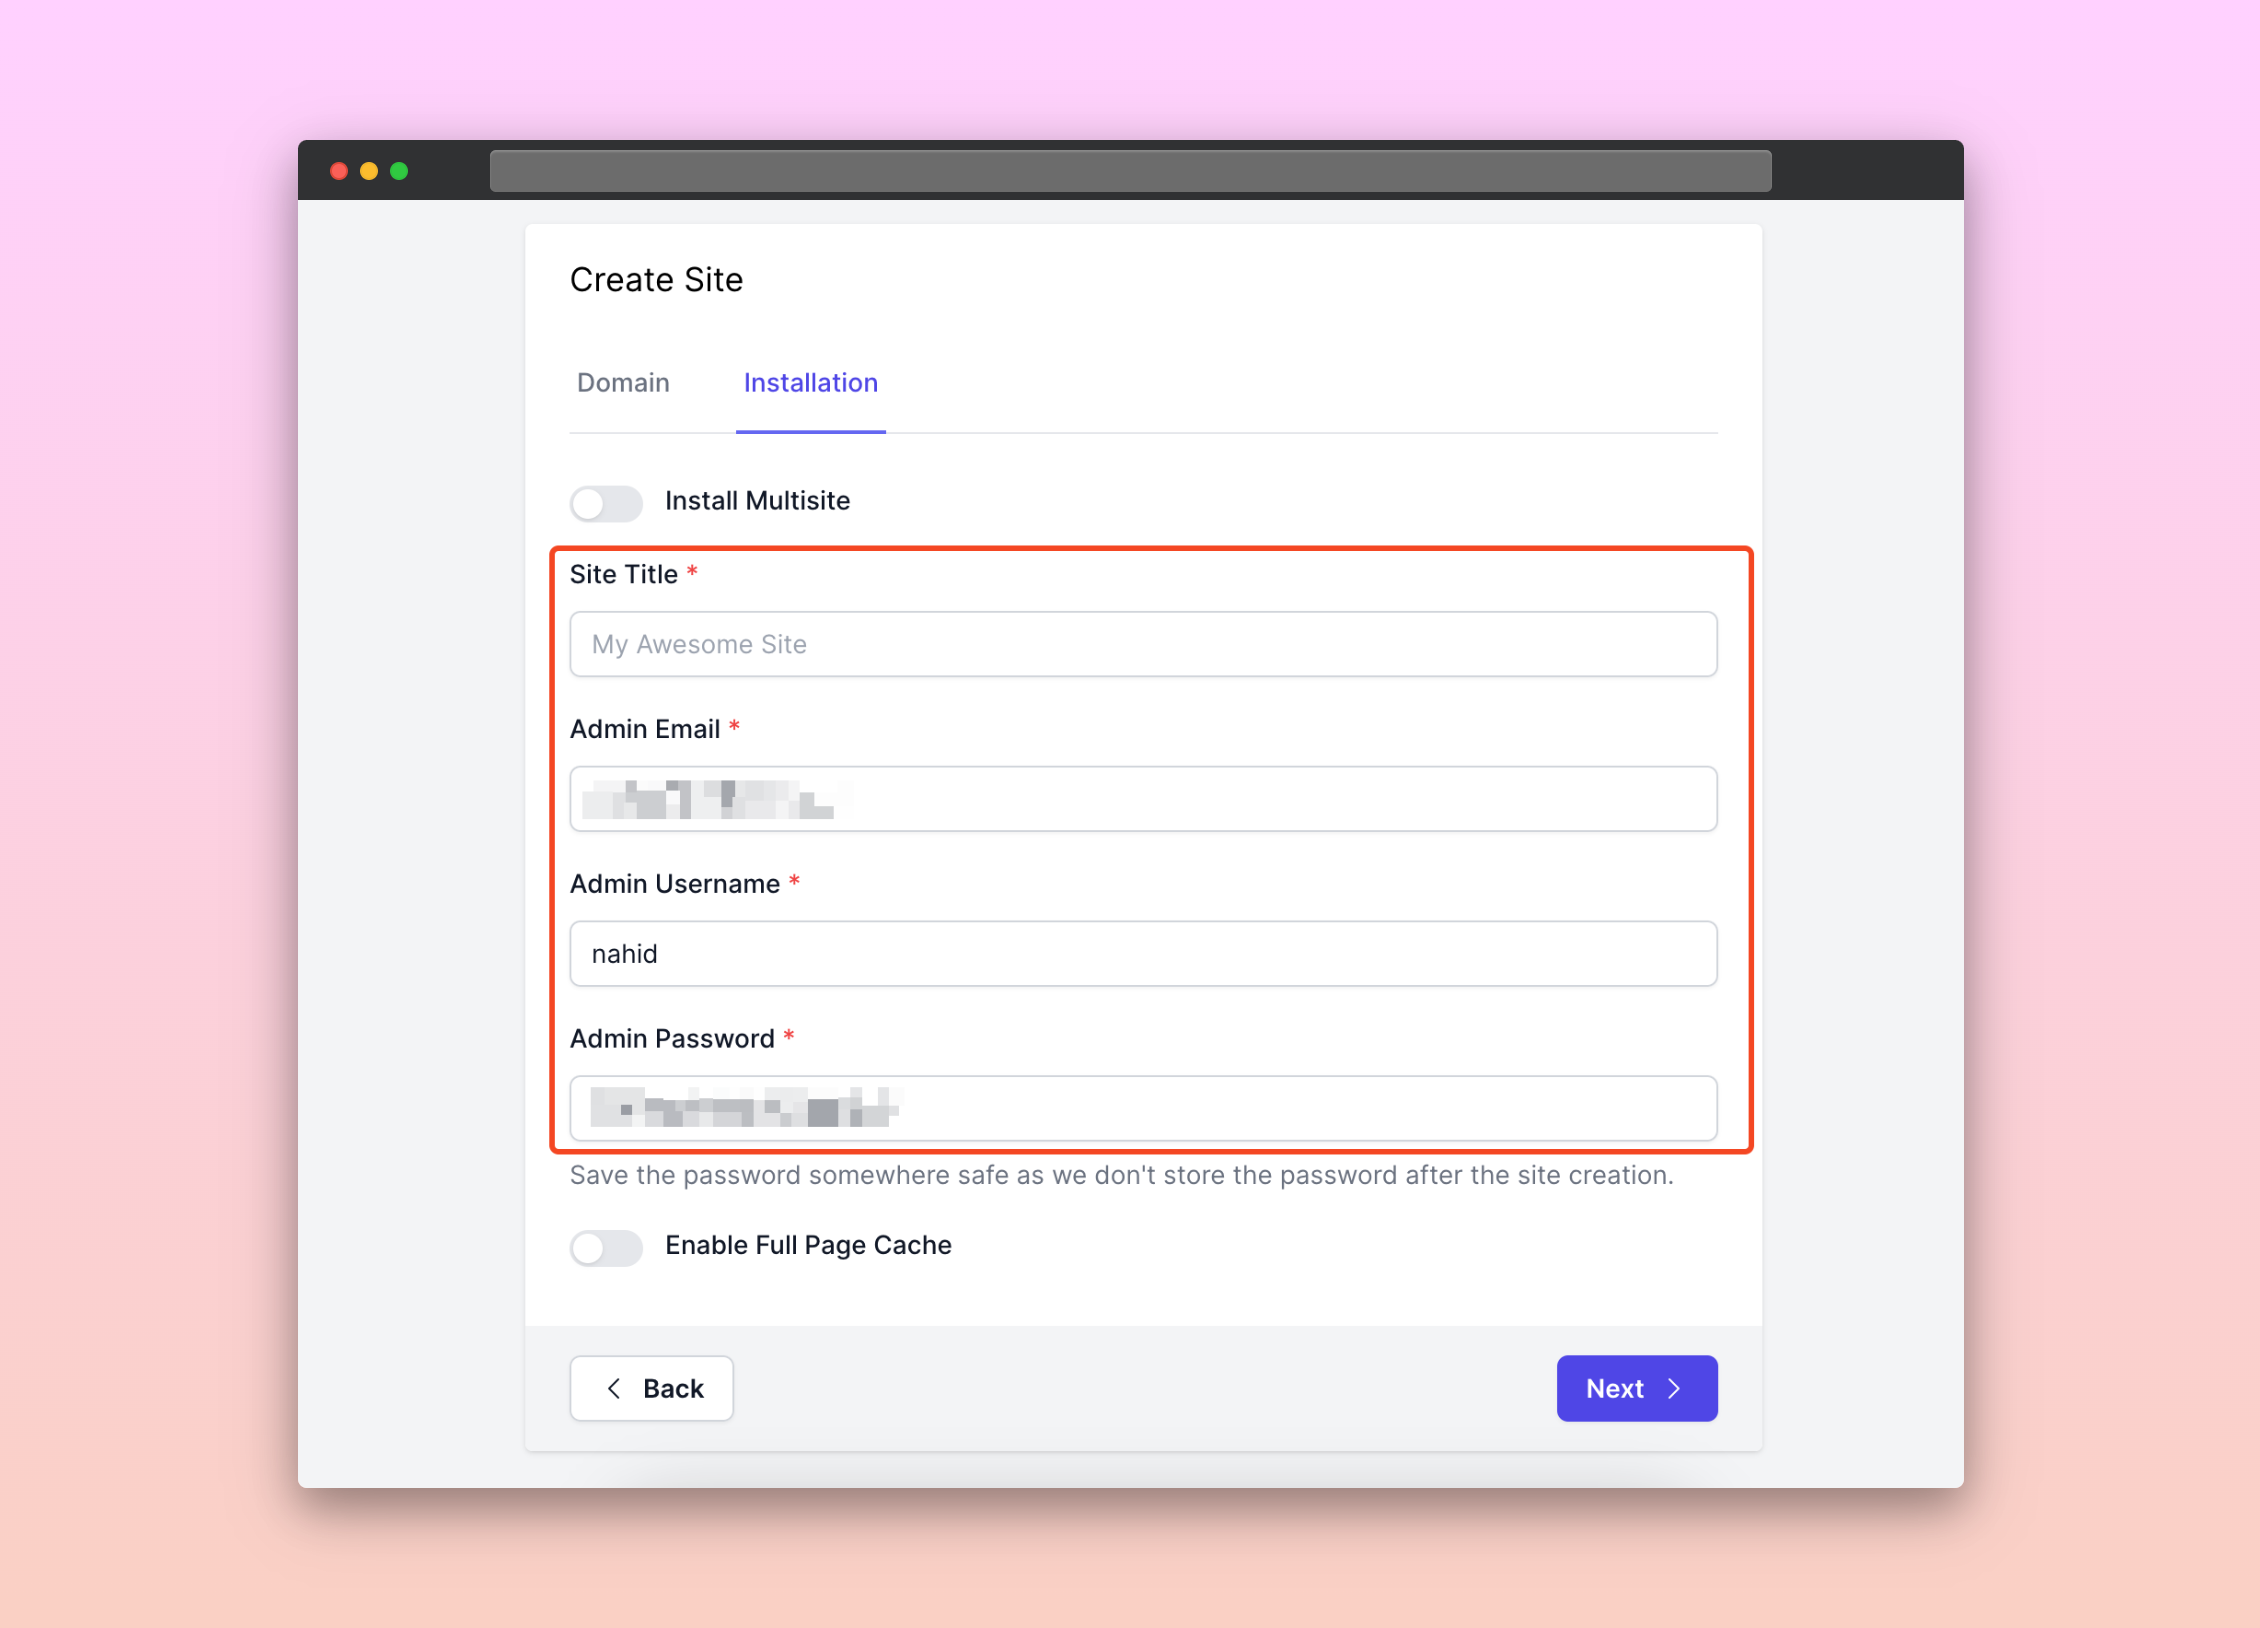
- Provide site title, admin email, admin username, and password. Then click on the “Next” button.
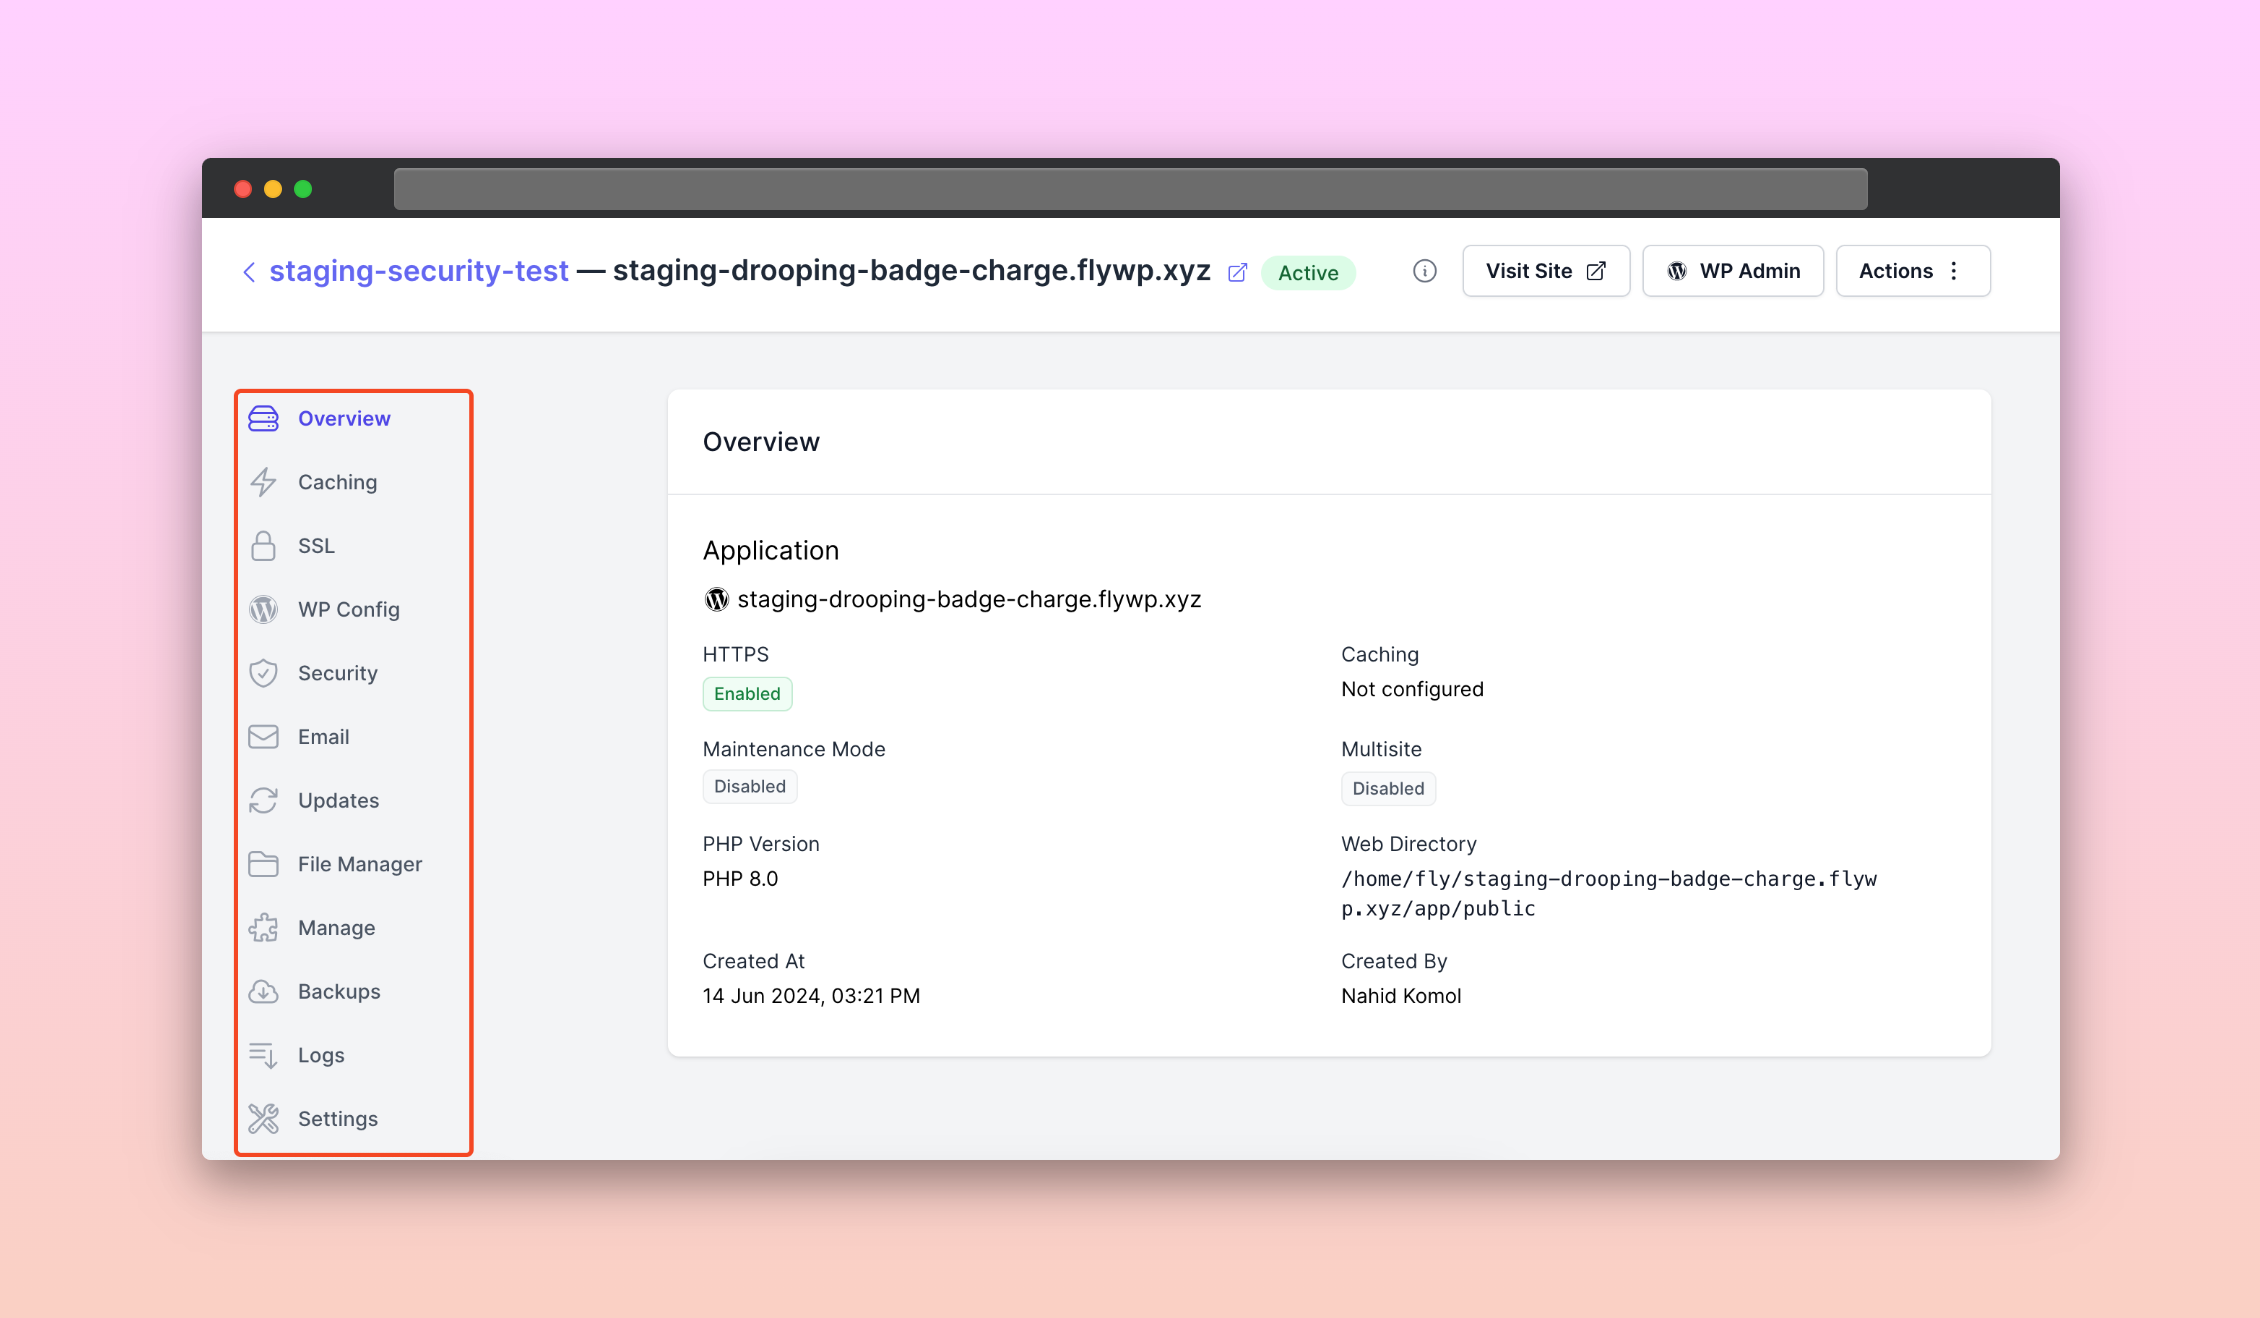
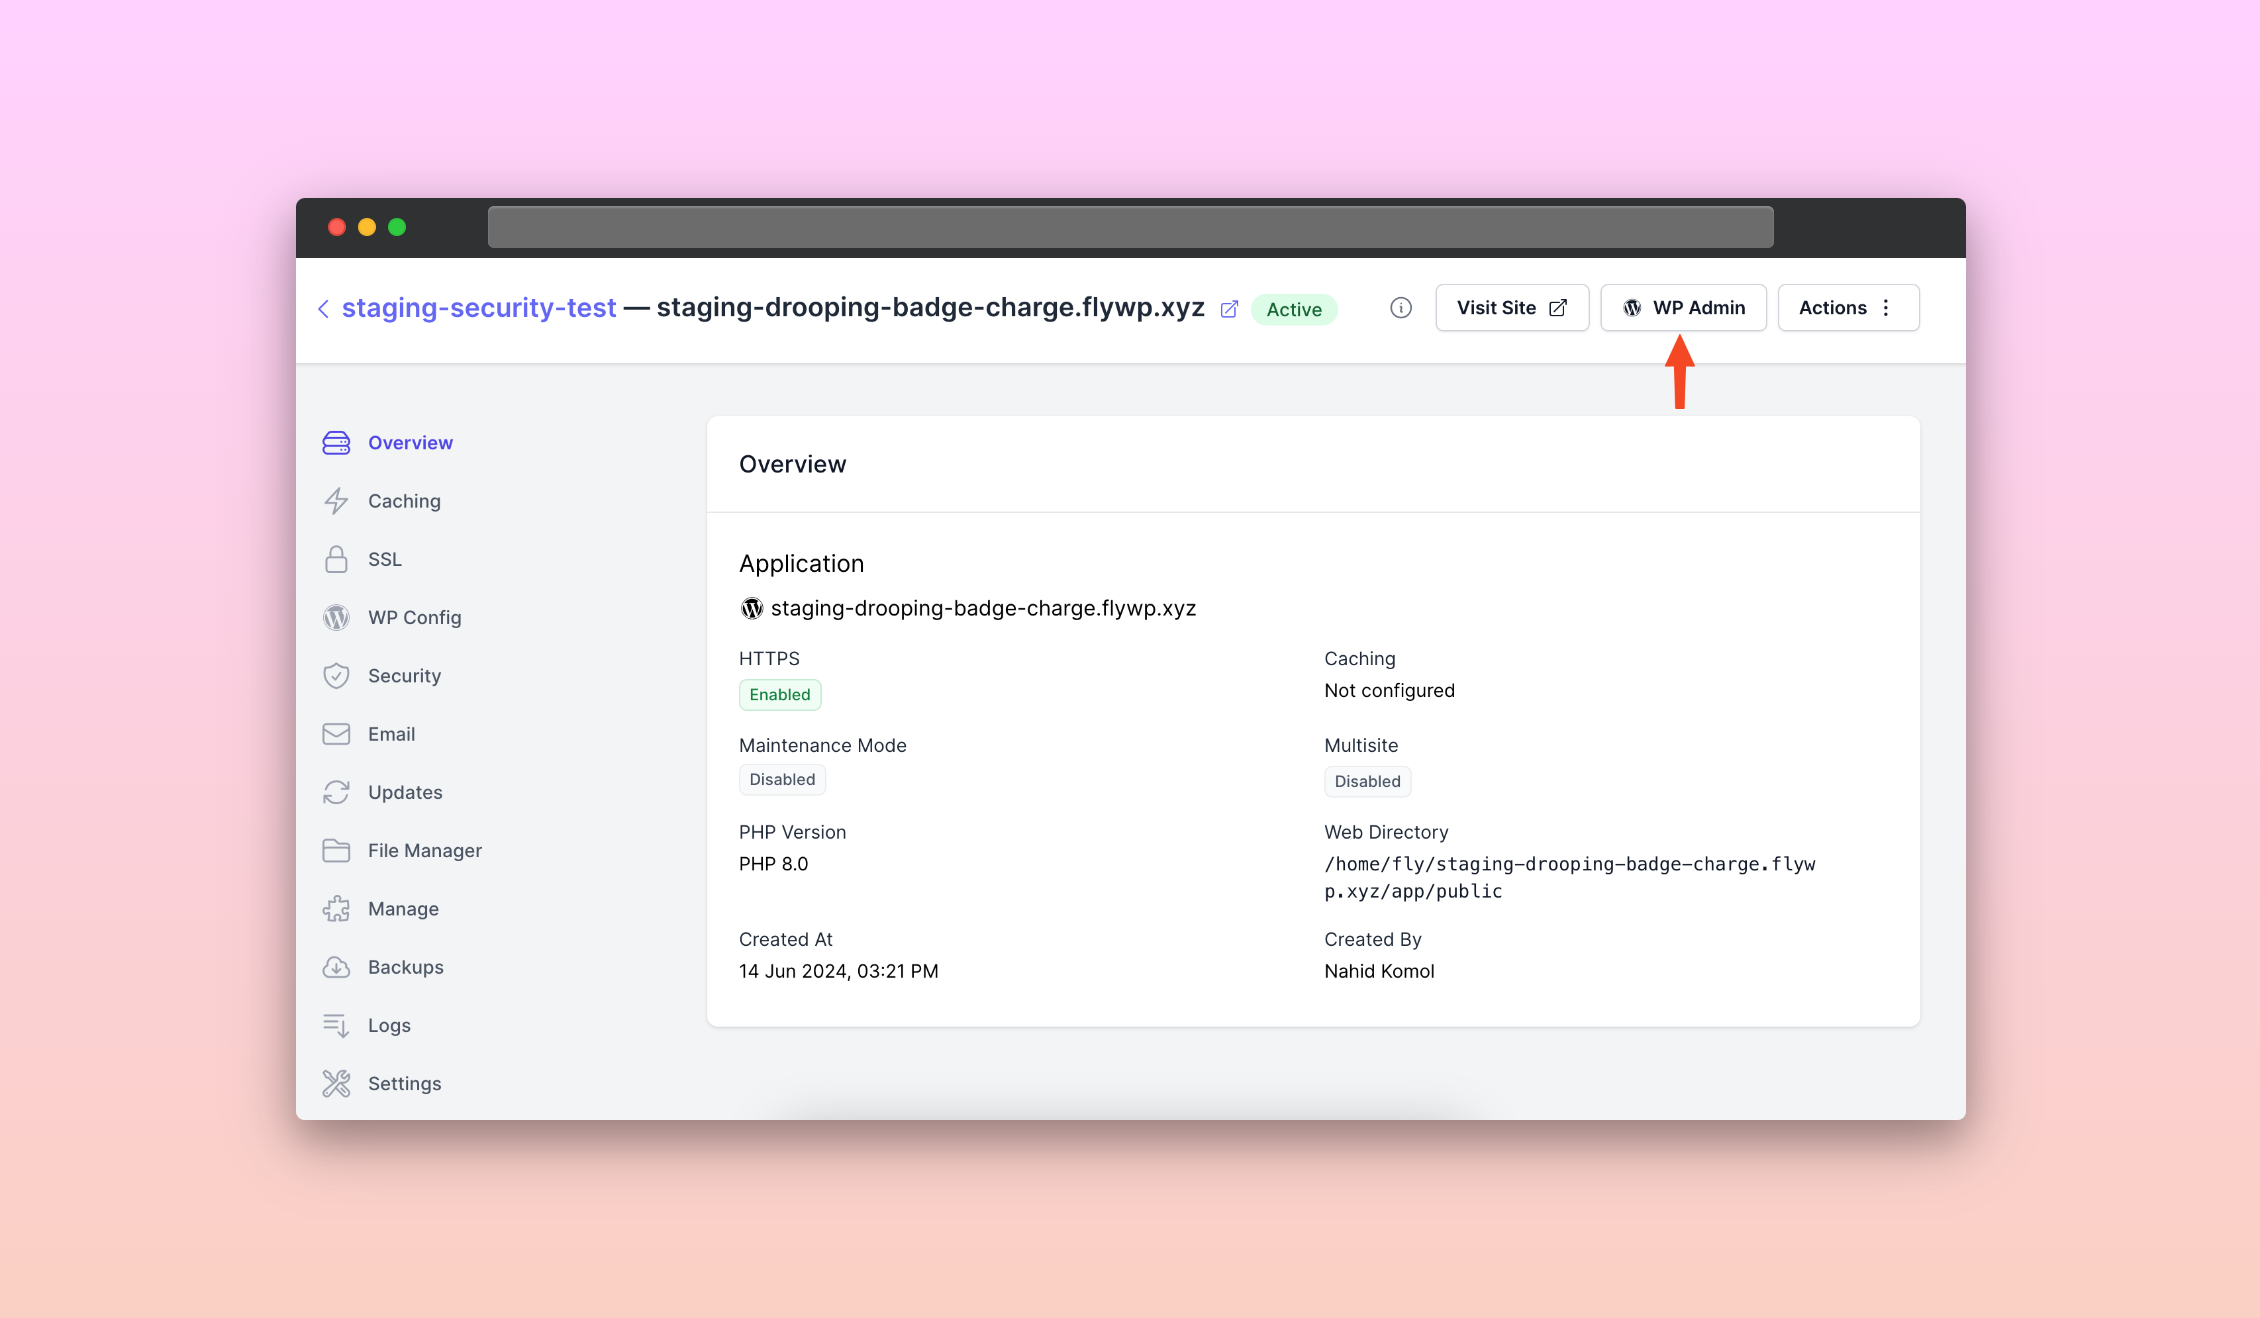
Your site will be created and you’ll get an interface of the available website customizing options.
- Overview: You’ll get an overview of the site, like HTTPS, PHP version, caching, multisite, and more.
- Caching: Here, you can determine whether to enable the page cache or not.
- SSL: You can install an SSL certificate and a custom SSL to secure your website.
- WP config: You will find WP-config-related data about your WordPress site. Also, a manual editing option is available.
- Security: Enable or disable security measures on your WordPress site from here.
- Email: You can enable the email-sending options from here.
- Updates: Update themes, plugins, and the WordPress core from here.
- File manager: WordPress file management-related options are available here.
- Manage: Get the database credentials here and configure your website’s options with mandatory services.
- Backups: Create, delete, or schedule a website backup from here.
- Logs: Get an overview of your website’s logs.
- Settings: Perform your website with some general settings like site domain name change, PHP version management, maintenance mode, and so on.
Step four: final preview and magic login feature
- Now visit the website from here.
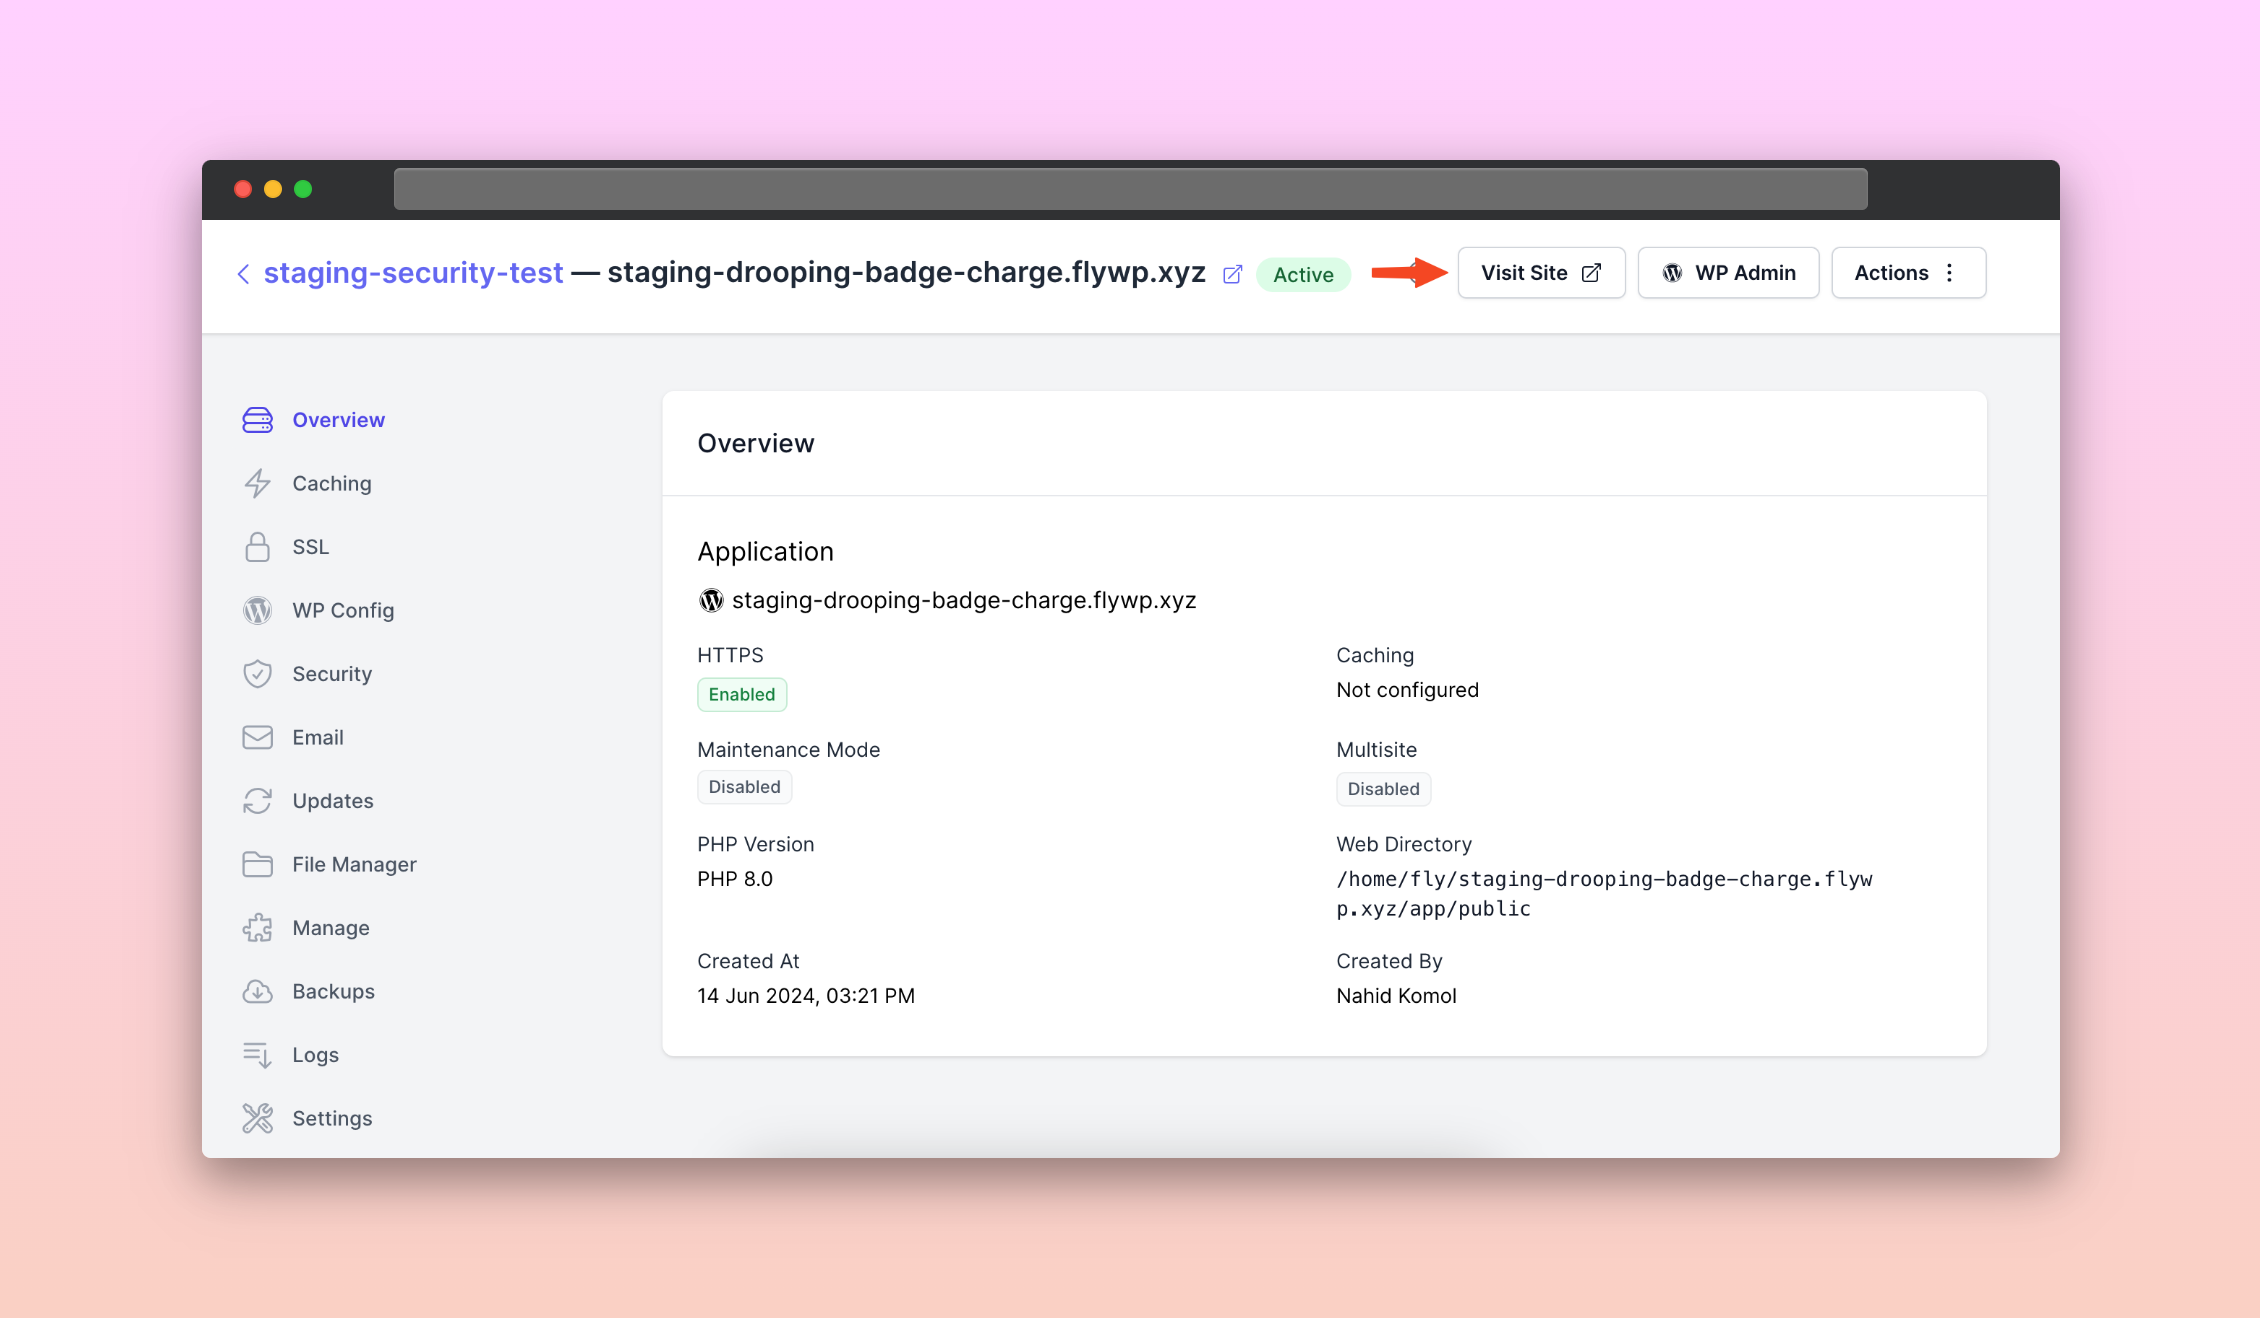
- Here’s the overview of the newly created site.
- Also, you can get through the site’s backend from the “magic login” feature of FlyWP.
- That’s all, you can see the backend access is working fine.

Learn how to clone a WordPress site using FlyWP
Some other concerns regarding the tutorial
- Connection problems: Ensure you have entered the correct server details and that your Vultr server is accessible.
- Server configuration issues: Double-check server settings, such as firewall rules and SSH access permissions.
- Security measures: Implement security best practices, such as using strong passwords and enabling firewalls.
- Regular maintenance: Schedule regular maintenance tasks like backups, updates, and performance checks.
Conclusion
Connecting a Vultr server with FlyWP can significantly streamline your WordPress site management. By following the steps outlined in this blog, you can leverage Vultr’s powerful hosting capabilities and FlyWP’s intuitive management tools to ensure your WordPress sites run smoothly and efficiently. Try connecting Vultr with FlyWP today and experience the benefits for yourself.
For additional resources and support, check out the documentation and tutorials on the Vultr and FlyWP websites.