
We’ve all been there. You go to check your WordPress website, and instead of your beautiful homepage, you’re greeted with a stark, terrifying white screen and a simple message:
“There has been a critical error on your website. Please check your site admin email inbox for instructions.”
Your heart sinks. Your site is down. You’re losing visitors, customers, and credibility every second. This message is the modern version of the infamous “White Screen of Death” (WSoD), and it’s WordPress’s way of telling you that something has gone so wrong, it had to shut everything down.
But don’t panic. This error is almost always fixable.
In this comprehensive, step-by-step guide, we will walk you through everything you need to do to diagnose and fix the critical error in 2025. We’ll start with the simplest solutions and move to more advanced troubleshooting, complete with code snippets, tables, and the exact processes you need to get your site back online fast.
Part 1: What is the Critical Error (And Your First Step)
Before we dive into FTP clients and code, let’s understand what’s happening.
This error is a PHP Fatal Error. WordPress is built on a programming language called PHP. If a piece of code (from a plugin, your theme, or even WordPress core) contains a fatal error, the script cannot continue to run.
In the past, this would result in a blank white screen, leaving you with no information. The “Critical Error” screen is actually a huge improvement. Since WordPress 5.2, this “fatal error protection” feature does two things:
- It displays a user-friendly message instead of a broken page.
- It attempts to email the site’s admin email address with details about the error.
Your Very First Step: Check Your Email
This is the “happy path” solution. Before you do anything else, open the email account associated with your WordPress site’s admin user.
You should be looking for an email with a subject line like:
“[Your Site Name] Your Site is Experiencing a Technical Issue”
This email is your golden ticket. It will contain three crucial pieces of information:
- The Culprit: It will often directly name the plugin or theme that caused the error.
- The Error Details: It will provide the specific PHP error message, which is invaluable for debugging.
- A Recovery Mode Link: This is the most important part.
What is Recovery Mode?
The Recovery Mode link is a special, secure login URL. When you click it, WordPress will pause the problematic plugin or theme just for your session. This allows you to log into your WordPress dashboard, which you couldn’t do before, without permanently deactivating the plugin.
Once you’re in, you can safely:
- Deactivate the faulty plugin.
- Switch to a default theme.
- Fix the underlying issue without your site being completely broken for everyone.
If you get this email and the recovery link works, congratulations! Your problem is 90% solved. You can log in, deactivate the plugin or theme the email mentioned, and then investigate why it broke (e.g., it needs an update, it conflicts with another plugin, or it’s just badly coded).
But what if you didn’t get the email? Or what if the email link doesn’t work?
Don’t worry. The rest of this guide is for you.
Part 2: Enabling Debug Mode (How to See the Real Error)
If you can’t get into Recovery Mode, our next mission is to find out what the error message is. The white screen is just a mask; we need to see the “monster” behind it.
To do this, we’re going to manually enable WordPress’s debug mode. This requires accessing your website’s files directly.
How to Access Your Site’s Files
You have two primary methods for this:
- Using an FTP/SFTP Client: This is the most common way. An FTP (File Transfer Protocol) client like FileZilla (free, cross-platform) or Cyberduck (free, Mac/Windows) allows you to securely browse the files on your server. You’ll get your FTP login details (host, username, password, port) from your hosting provider.
- Using cPanel File Manager: If your web host provides cPanel, you can log into your hosting account, find the “File Manager” tool, and use it to browse and edit files directly in your web browser.
For this guide, we’ll assume you’ve logged in via FTP or File Manager.
A Modern Alternative to FTP/cPanel
If you find FTP clients clunky or cPanel’s File Manager slow, you’re not alone. The manual file editing we’re about to do is a major pain point for WordPress users.
This is where a modern WordPress control panel like FlyWP comes in. FlyWP securely connects to your server (on any provider like DigitalOcean, Vultr, or AWS) and gives you a clean dashboard to manage everything.
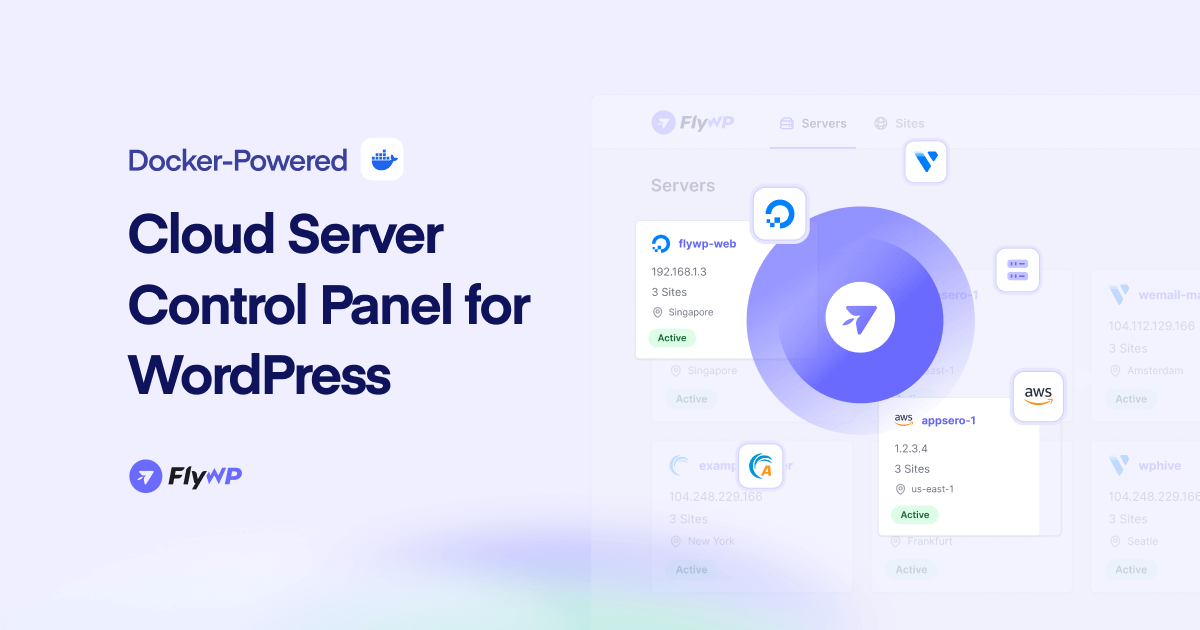
Instead of fumbling with FTP credentials, you could just use:
- FlyWP’s File Manager: A fast, web-based tool to edit
wp-config.phpdirectly. - FlyWP’s Log Viewer: A one-click tool to view the
debug.logand other server logs without ever leaving your dashboard.
While the rest of this guide will show you the manual way, know that tools like FlyWP are designed to make this entire troubleshooting process much less painful.
Editing the wp-config.php File
- Once connected, navigate to the root directory of your WordPress installation. This is usually
public_html,www, or named after your site. - In this directory, you will find a crucial file named
wp-config.php. - IMPORTANT: Before you edit anything, download a backup of this file to your computer. Just drag it from the server panel to your local panel in FileZilla, or use the “Download” button in cPanel.
- Now, open the
wp-config.phpfile to edit it.
Scroll down until you find a line that says:
/* That's all, stop editing! Happy publishing. */
Just before this line, you need to add the following lines of code:
define( 'WP_DEBUG', true );
define( 'WP_DEBUG_LOG', true );
define( 'WP_DEBUG_DISPLAY', false );
Let’s break down what this code does:
define( 'WP_DEBUG', true );: This turns on the main debug mode.define( 'WP_DEBUG_LOG', true );: This is the most important part. It tells WordPress to save all errors to a new file nameddebug.loginstead of printing them on the screen.define( 'WP_DEBUG_DISPLAY', false );: This is a critical safeguard. It hides the errors from your site’s visitors. We never want to show raw PHP errors on a live site, as it’s a major security risk.
Save the wp-config.php file and re-upload it to your server, overwriting the original.
Reading the debug.log File
Now, visit your broken website again. Just load the homepage. This will trigger the fatal error, and thanks to our new code, the error details will be recorded.
Go back to your FTP client or File Manager. A new file will have appeared inside the /wp-content/ folder.
This file is named debug.log.
Open this file. It might look like a jumble of text, but don’t be intimidated. You are looking for the most recent “Fatal error” entry. It will look something like this:
[14-Nov-2025 10:30:01 UTC] PHP Fatal error: Cannot redeclare my_awesome_function() (previously declared in /home/username/public_html/wp-content/plugins/some-other-plugin/file.php:15) in /home/username/public_html/wp-content/plugins/a-bad-plugin/includes/functions.php on line 25This log is your treasure map. Read the file path carefully. It almost always points you directly to the source of the problem.
- Does the path include
/wp-content/plugins/some-plugin-name/? The culprit is a plugin. - Does the path include
/wp-content/themes/your-theme-name/? The culprit is your theme.
Now that we have our suspect, we can move on to the fix.
Note: Once your site is fixed, remember to go back into
wp-config.phpand setWP_DEBUGtofalse, or remove the three lines you added. Leaving debug mode on is not recommended for a live site.
Diagnosing Common debug.log Errors
To help you decipher the log, here’s a table of common fatal errors and what they typically mean.
| Error Message Prefix | Common Meaning | Likely Culprit |
PHP Fatal error: Cannot redeclare... | Two plugins (or a plugin and a theme) are trying to create a function with the same name. | A plugin conflict. |
PHP Fatal error: Allowed memory size of... | A script (usually a plugin) tried to use more server memory (RAM) than it was allowed. | A poorly coded plugin or insufficient server resources. |
PHP Fatal error: Call to undefined function... | The code is trying to use a function that doesn’t exist. This often happens if a plugin is outdated or relies on another plugin that is deactivated. | An outdated or conflicting plugin. |
PHP Parse error: syntax error... | There’s a typo in a code file (e.g., a missing semicolon ; or bracket }). This often happens if you just edited a file. | A theme’s functions.php file or a plugin file you recently edited. |
PHP Fatal error: require_once()... Failed to open required... | A file is missing. This can happen during a failed update or if a file was accidentally deleted. | A corrupted plugin, theme, or even WordPress core. |
Part 3: The Fix – Neutralizing the Most Common Culprits
Based on our debug.log, the problem is almost certainly a plugin or your theme. Since you can’t access the dashboard, we have to fix this manually via FTP/File Manager.
Culprit #1: A Faulty Plugin
This is the cause 90% of the time. A plugin update went wrong, it conflicts with another plugin, or it’s not compatible with your version of PHP or WordPress.
The debug.log told you the name of the plugin. But even if it didn’t, this process will find the culprit.
- Log in via FTP or File Manager.
- Navigate to the
/wp-content/folder. - You will see a folder named
plugins. - The Fix: Right-click the
pluginsfolder and rename it to something likeplugins_old.
What does this do?
When WordPress loads, it looks for the /wp-content/plugins folder. When it can’t find it, it simply deactivates all plugins on your site.
Now, check your website.
If your site loads (it might look broken or messy, but it loads), you have confirmed the problem is a plugin.
You’re not done. Now we find the specific plugin:
- Rename
plugins_oldback toplugins. - Go inside the
pluginsfolder. - If your
debug.loggave you a name (e.g.,a-bad-plugin), find that plugin’s folder, and rename just that folder (e.g.,a-bad-plugin_old). This will keep it deactivated. - If you don’t know the specific plugin, you have to do this one by one. Rename the first plugin folder (e.g.,
akismet_old). Check your site. Does it load? If yes, you found the culprit. If no, rename it back and try the next plugin folder. - Repeat this process until your site comes back online.
Once you find the bad plugin, you can log into your WordPress dashboard, go to the Plugins page (you’ll see a message that the plugin was deactivated), and permanently delete it. You can then try to reinstall a fresh copy or find an alternative.
Culprit #2: A Faulty Theme
If deactivating plugins didn’t work, the problem is likely your active theme. This often happens with custom code added to functions.php or a theme update that failed.
- Log in via FTP or File Manager.
- Navigate to
/wp-content/themes/. - You will see folders for each theme you have installed. Find the folder of your active theme (e.g.,
my-awesome-theme). - The Fix: Right-click your active theme’s folder and rename it (e.g.,
my-awesome-theme_old).
What does this do?
When WordPress can’t find its active theme, it has a built-in failsafe: it automatically reverts to the most recent default theme. In 2025, this will likely be “Twenty Twenty-Five” or “Twenty Twenty-Four.”
Pro-Tip: This is why you should always have a default WordPress theme (like Twenty Twenty-Five) installed, even if you don’t use it. It’s your emergency backup.
Now, check your website.
If your site loads (it will look very different, but it’s online), you’ve confirmed your theme is the problem.
You can now log into your WordPress admin panel. Go to Appearance > Themes. You’ll see your broken theme and a message that it’s unavailable. You can now:
- Activate a different theme (like the default theme) permanently.
- If you had custom code in
functions.php, you’ll need to re-download the theme, fix the code error in the file, and re-upload the theme (after deleting the broken one). - Check for an update for the theme from the theme developer.
Part 4: Advanced Troubleshooting (When the Basics Fail)
What if you’ve deactivated all plugins and your theme, and the site is still showing a critical error? This is rare, but it means the problem is deeper. Let’s look at the advanced culprits.
Culprit #3: PHP Memory Limit Exhausted
If your debug.log contained the “Allowed memory size… exhausted” error, your site is trying to do a task that requires more RAM than your server is giving it.
You can try to increase the memory limit.
Method 1: Edit wp-config.php
This is the easiest way. Open your wp-config.php file (the same one from Part 2) and add this line just before the “That’s all” line:
PHP
define( 'WP_MEMORY_LIMIT', '256M' );
This attempts to raise the limit to 256 megabytes. If 256M doesn’t work, you can try 512M, but any higher is usually a sign of a bad plugin, not a lack of memory.
Method 2: Edit .htaccess
If your server is configured to allow it, you can edit the .htaccess file in your WordPress root directory and add this line:
PHP
php_value memory_limit 256M
Method 3: Contact Your Host
This is the best solution. Your hosting provider sets your memory limit. Many cheap, shared hosting plans have a very low limit. Contact their support and ask them to increase your PHP memory limit.
Culprit #4: Corrupted .htaccess File
The .htaccess file controls your site’s permalinks (the structure of your URLs). If it becomes corrupted, it can cause a critical error.
- Log in via FTP or File Manager.
- In your root WordPress directory, find the file named
.htaccess. (Note: Files starting with a dot.are sometimes hidden. You may need to “Show Hidden Files” in your FTP client or File Manager settings). - Right-click the file and rename it to
.htaccess_old. This deactivates it. - Now, check your site.
If the site loads, the .htaccess file was the problem!
To fix it permanently:
- Log into your WordPress dashboard.
- Go to Settings > Permalinks.
- Do not change anything. Just scroll down and click the “Save Changes” button.
- This action will automatically generate a brand new, clean
.htaccessfile for you.
For reference, a default WordPress .htaccess file looks like this:
Apache
# BEGIN WordPress
<IfModule mod_rewrite.c>
RewriteEngine On
RewriteRule .* - [E=HTTP_AUTHORIZATION:%{HTTP:Authorization}]
RewriteBase /
RewriteRule ^index\.php$ - [L]
RewriteCond %{REQUEST_FILENAME} !-f
RewriteCond %{REQUEST_FILENAME} !-d
RewriteRule . /index.php [L]
</IfModule>
# END WordPress
Culprit #5: PHP Version Incompatibility
This is a very common issue in 2025. You update a plugin that requires PHP 8.2, but your server is still running an old, unsupported version like PHP 7.4. Or, the reverse: you have an old, abandoned plugin that breaks on new versions like PHP 8.2.
How to Check and Change Your PHP Version:
- Log into your hosting control panel (cPanel, Plesk, Kinsta, SiteGround, etc.).
- Look for an option called “PHP Version Manager,” “Select PHP Version,” or something similar.
- The tool will show you your current version.
- The Test:
- If you are on an old version (e.g., 7.4), try upgrading to a newer, stable version (e.g., 8.1 or 8.2).
- If you are on the newest version (e.g., 8.3), try downgrading one step (e.g., to 8.2).
- After changing the version, wait about 30 seconds, then check your site.
This “toggle and check” method can often resolve incompatibility issues instantly. As a best practice for 2025, you should be running a stable, secure version of PHP, like 8.1 or 8.2.
Culprit #6: Corrupted WordPress Core Files
If nothing else works, it’s possible the core files of WordPress itself have become corrupted (e.g., during a failed automatic update).
We can fix this by “re-installing” WordPress without losing any of your content.
- Go to WordPress.org and download a fresh, new copy of WordPress.
- Unzip the file on your computer.
- Open the unzipped
wordpressfolder. - DELETE the following items from this new folder:
- The
/wp-content/folder (This contains your themes and plugins; we must not overwrite it). - The
wp-config-sample.phpfile (We want to keep your existingwp-config.php).
- The
- Now, log in via FTP.
- Upload all the remaining files and folders from the fresh WordPress download into your site’s root directory.
- Your FTP client will ask if you want to overwrite existing files. Say YES (or “Overwrite all”).
- This process will replace all of WordPress’s core files with clean, fresh copies, leaving your themes, plugins, and settings untouched.
This often fixes deep, underlying issues that are hard to trace.
Part 5: Prevention – How to Never See This Error Again
Fixing the critical error is good. Never having it happen in the first place is better. Here’s your checklist for a stable, error-free WordPress site.
- Use a Staging Site: This is the #1 rule for professionals. A staging site is a private clone of your live site. You test all updates (plugins, themes, WordPress core) on the staging site first. If it breaks, who cares? Your live site is safe. Most good WordPress hosts (Kinsta, WP Engine, SiteGround) offer one-click staging.
- Update Plugins One-by-One: Don’t just click “Update All.” Update your plugins one at a time. After each update, check your site to make sure it’s still working.
- Use High-Quality Plugins & Themes: Don’t install dozens of random, un-vetted plugins. Check for recent updates, good reviews, and active support.
- Choose Managed WordPress Hosting: Instead of cheap $3/month shared hosting, invest in a managed host. They offer better security, automatic backups, staging sites, and expert support that can often fix these errors for you.
- Have Automatic Daily Backups: Use a plugin like UpdraftPlus or a service like Jetpack Backup. If your site ever has a critical error, you can simply restore a backup from before the error occurred. This is the ultimate “undo” button.
Finally…You Are Back in Control…
The “There has been a critical error on your website” message is terrifying, but it’s not a death sentence. It’s a solvable problem, and now you have a complete toolbox to fight back.
Let’s recap the battle plan:
- Check Your Email: Look for the Recovery Mode link first.
- Enable Debug Mode: Edit
wp-config.phpto turn onWP_DEBUG_LOGand check the/wp-content/debug.logfile. - Identify the Culprit: The log will almost always point to a plugin or a theme.
- Fix Manually: Rename the faulty plugin/theme folder via FTP to deactivate it.
- Escalate: If that fails, check your
.htaccessfile, your PHP memory limit, your PHP version, and finally, re-upload the WordPress core files.
By following these steps, you’ve moved from a place of panic to a position of control. You’ve learned how to be a WordPress detective, and you have the skills to ensure your site stays healthy, secure, and online.
Bouns: WordPress Critical Error Checklist
Here is a completed checklist showing all the steps taken to find and fix the error.
Phase 1: The Quick Fixes
| Status | Task |
[✅] | Check Admin Email: Look for the “Recovery Mode” email from WordPress. |
[✅] | Restore Backup: If you have one, restore the latest known-good backup. |
Phase 2: Diagnose the Error
| Status | Task |
[✅] | Connect to Server: Log in via FTP, cPanel File Manager, or a dashboard like FlyWP. |
[✅] | Enable Debug Mode: Edit wp-config.php and add the WP_DEBUG and WP_DEBUG_LOG lines. |
[✅] | Trigger the Error: Reload your broken website. |
[✅] | Read the Log: Open /wp-content/debug.log and find the “PHP Fatal error” message. |
[✅] | Identify Culprit: Note if the error path points to a specific plugin or theme. |
Phase 3: Fix the Common Culprits
| Status | Task |
[✅] | Test All Plugins: Rename the /wp-content/plugins folder to plugins_old. Check if the site loads. |
[✅] | Find Specific Plugin: If plugins were the issue, rename them one by one (or the one from the log) to find the offender. |
[✅] | Test Active Theme: If plugins are not the issue, rename your active theme’s folder (e.g., my-theme to my-theme_old). |
Phase 4: Advanced Troubleshooting
| Status | Task |
[✅] | Check .htaccess File: Rename .htaccess to .htaccess_old. |
[✅] | Generate New .htaccess: If this fixed it, go to Settings > Permalinks and click “Save Changes.” |
[✅] | Check PHP Version: Use your host’s (or FlyWP’s) panel to switch your PHP version (e.g., upgrade to 8.2 or downgrade to 8.1). |
[✅] | Increase PHP Memory: Add define( 'WP_MEMORY_LIMIT', '256M' ); to wp-config.php. |
[✅] | Re-install WordPress Core: Upload a fresh copy of WordPress core files (minus /wp-content/ and wp-config.php). |
Phase 5: Clean Up
| Status | Task |
[✅] | Disable Debug Mode: Remove the debug lines from wp-config.php. |
[✅] | Delete Log File: Delete the debug.log file from the /wp-content/ folder. |