Skip to content

Talk to our team and see how FlyWP can simplify your WordPress server management.

Book a Live Demo
FlyWP
  • Home
  • Features
    • Features
      • Provisioning Server with FlyWP
        Start server provisioning directly through FlyWP
      • Built-in Security
        Achieve Fort Knox like security for your sites and database
      • Nginx or LiteSpeed
        Choose Nginx/LiteSpeed stack as you prefer
      • Centralized WordPress Update
        Update all your plugins & themes directly from FlyWP
      • Powerful Clone & Transfer
        Easily clone or migrate WordPress sites across servers
      • Granular Team Permission
        Assign precise roles for secure, efficient team collaboration
      • Instant Demo Sites
        Create staging sites using FlyWP with just a few clicks
      • Git Deployment
        Make deployment easy with continuous git deployment
      • Intelligent Backup/Restore
        Backup your site automatically and restore with one click
      • Smart Site Sleep & Wake Up
        Pause or resume sites instantly when required
      • Website Uptime Monitoring
        Monitor your websites’ uptime inside FlyWP dashboard
      • WP Config Manager
        Configure all WP settings with the built-in Config Manager
      • phpMyAdmin
        Manage databases and control PHP versions as you prefer
      • Support for ARM processors
        Host sites on ARM-based servers easily
      • SSH
        Take server security to the next level with FlyWP SSH
    • More Features
      • Redis Caching
      • Support for WordPress Multisite
      • Versatile Backup Integration
      • FastCGI Caching
      • WordPress Magic Login
      • Proudly Open Source
      • WordPress Site Migration
      • Whitelabeling
      • Feature Request & Feedback
        Suggest features that will make your FlyWP experience better!
      • Suggest Feature
  • Comparison
    • FlyWP vs Everyone
      See how FlyWP gives you the edge among others
    • Cloudways vs FlyWP
      Check how we compare against one of the best server managing solution
    • GridPane vs FlyWP
      Check how FlyWP’s feature & benefits compare against GridPane
    • ServerAvatar vs FlyWP
      Take a look at how we compare on server solution against ServerAvatar
    • xCloud vs FlyWP
      Check how FlyWP’s feature & benefits compare against xCloud
    • RunCloud vs FlyWP
      Running against RunClouds feature to showcase if we are the better solution!
  • Pricing
  • Resources
    • Docs
      Documentation for every FlyWP process
    • Blog
      Resources for Server Management, WordPress, and WordPress developers
    • Changelog
      Explore FlyWP’s latest features and enhancements
    • Giving Back
      Giving back to the WordPress community
    • Contact/Support
      Contact us regarding any kind of product related queries or support
    • FlyWP Community
      Join the FlyWP community to stay updated with all news
  • My Community
  • Login
  • Start for Free
How To Create A Cloudflare Account And Add A Website

By Nahid Komol

·

January 25, 2024

·

4 min read

How to Create a Cloudflare Account and Add a Website

Establishing a strong online presence is essential for both individuals and businesses in an era where digital landscapes predominate. One powerful tool that facilitates this is Cloudflare, a content delivery network (CDN) and security platform that enhances website performance and protects against various online threats.

This article serves as a comprehensive guide on how to create a Cloudflare account and seamlessly integrate a website. Whether you’re a website owner looking to enhance performance or bolster security or a novice navigating the intricacies of web development, this step-by-step tutorial will demonstrate the process, empowering you to harness the benefits of Cloudflare.

Steps to create a Cloudflare account

  • First, head over to the account creation page. Here, we provide you with an email and password to get started.
Creating a Cloudflare account
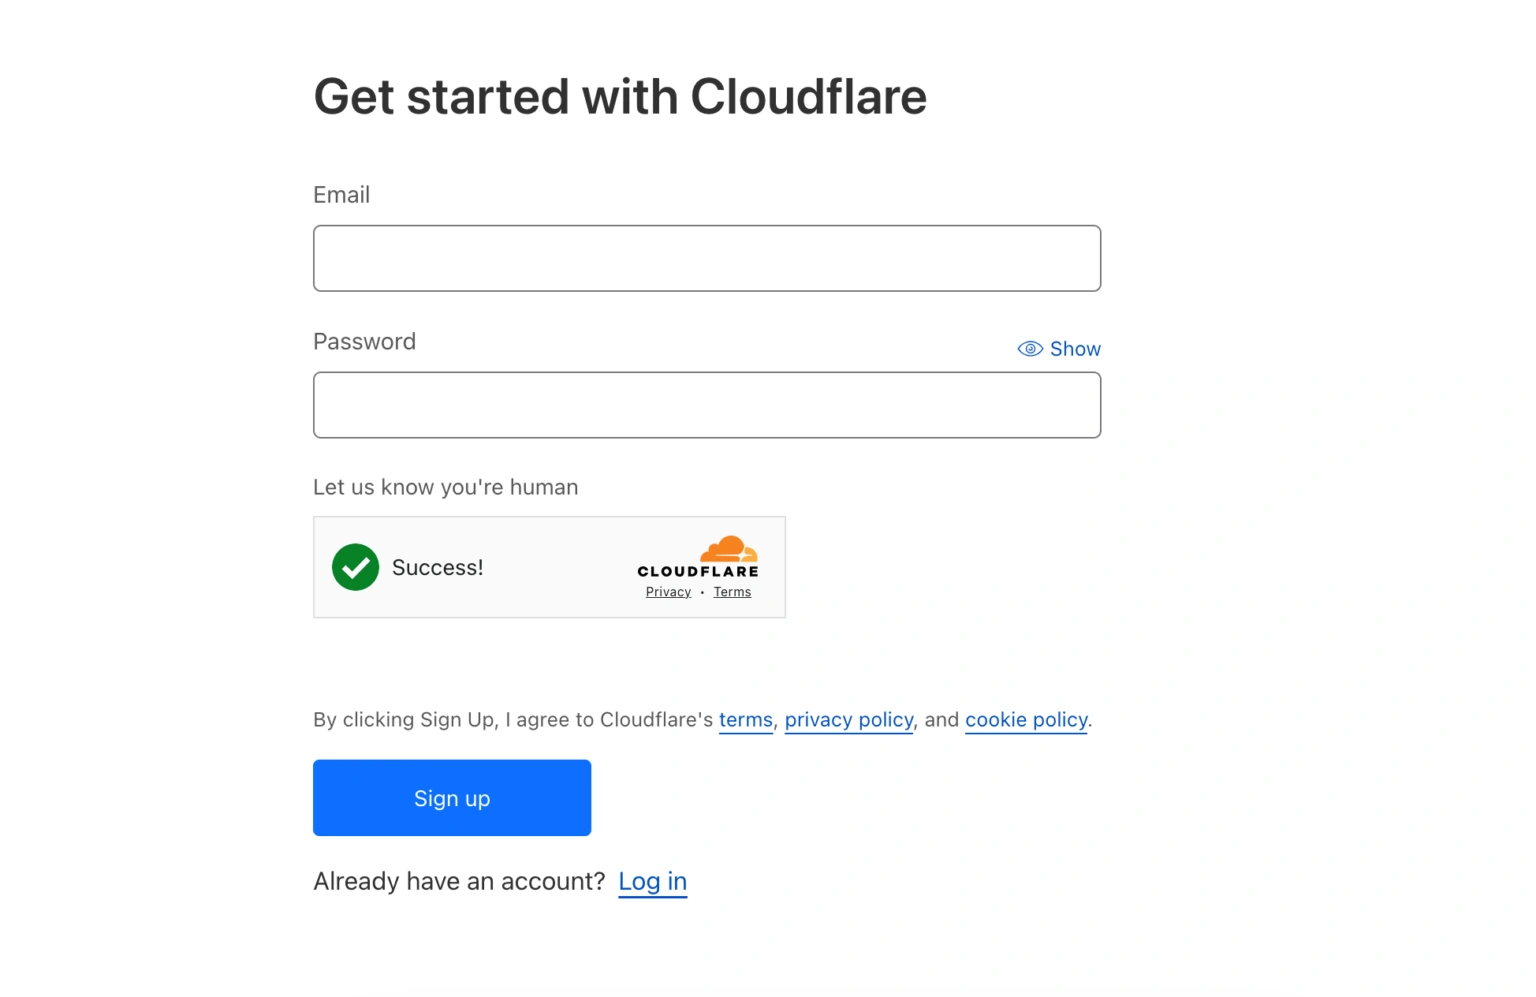
  • You’ll get a message after creating the account. Also, you’ll get an email to confirm. Then click on the “Add a website or application” button.
Confirmation email

Adding a website

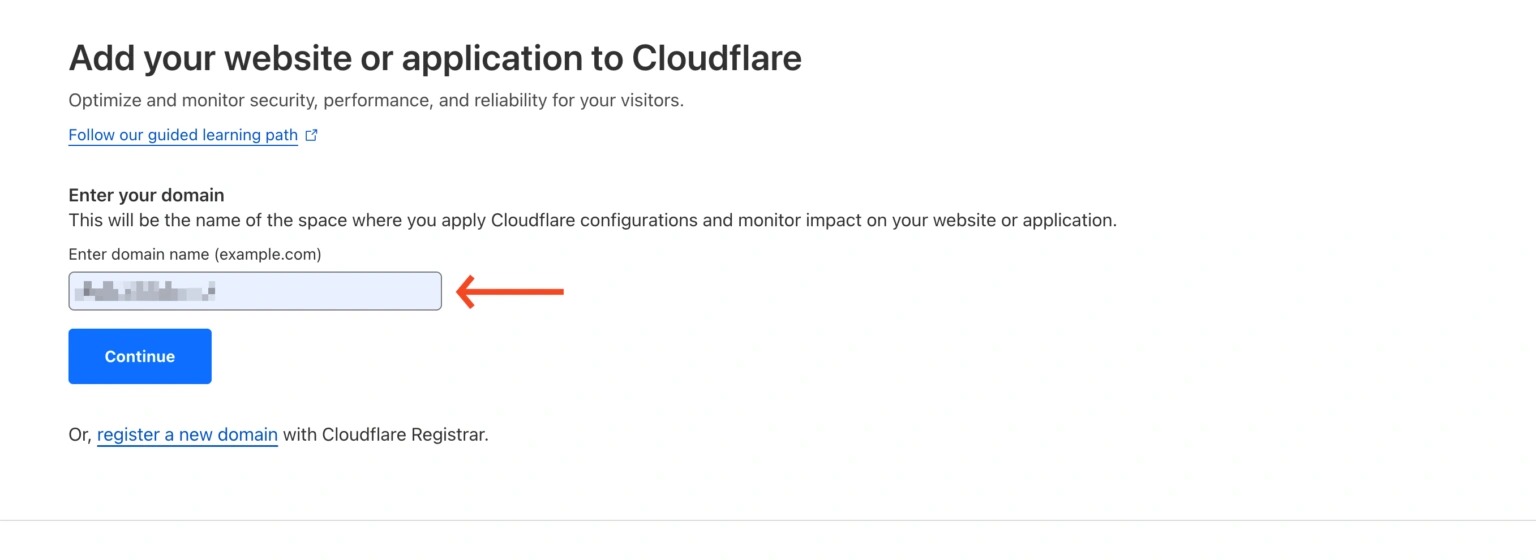
  • Now add your domain name—for example, yourwebsite.com. Avoid using (HTTPS://) or (HTTP://) in the URL.
Adding a website
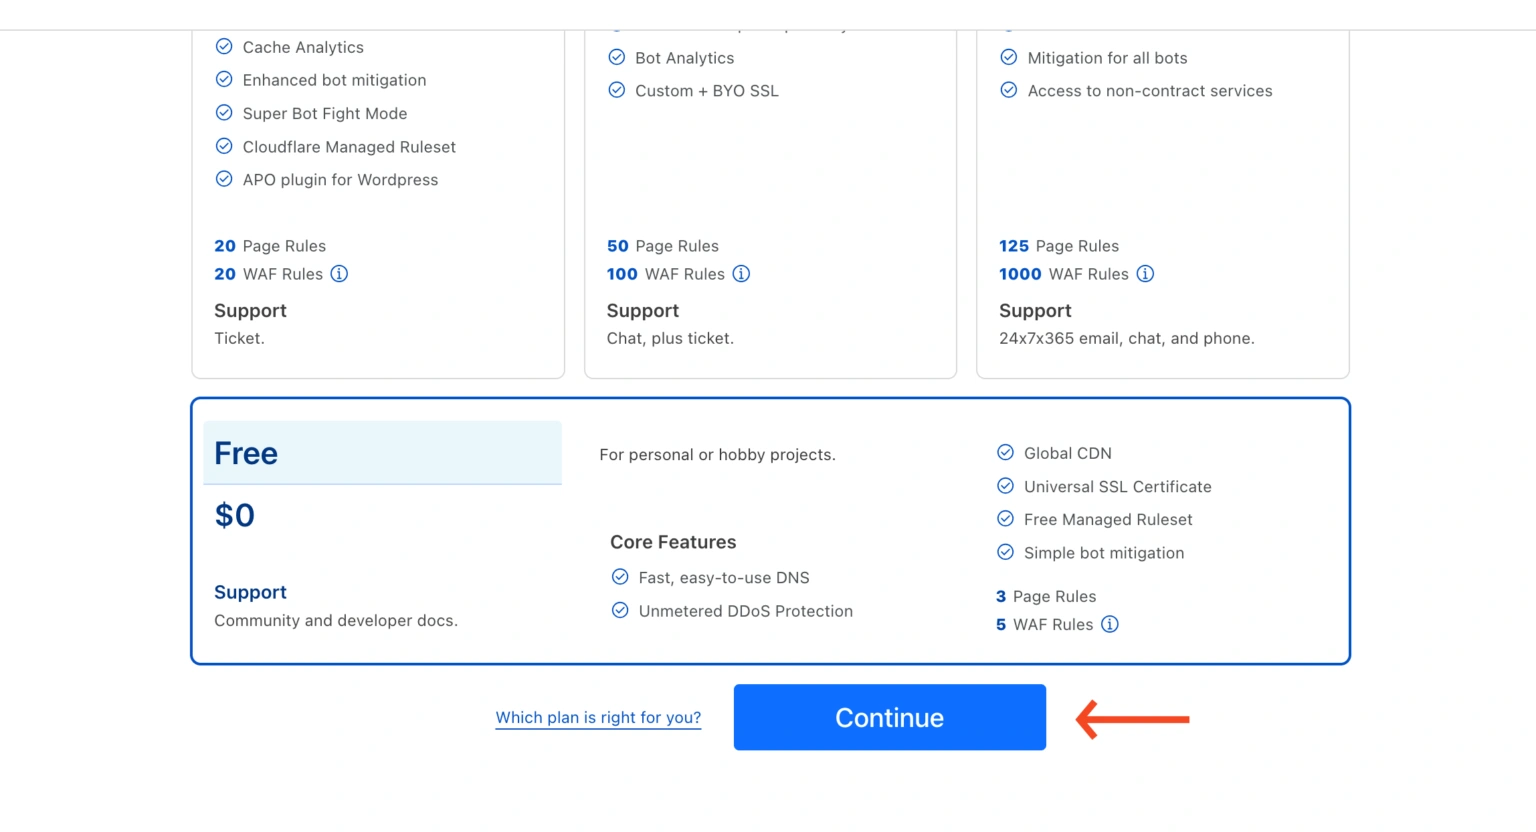
  • Next, you’ll be landed on the payment method page. Choose your preferred plan. Or you can go with the free version.
Image 40
  • If you have previously added the record for your website, it will show here. That means you need to change it if you further add the website. Then click on the continue button.
Adding DNS records
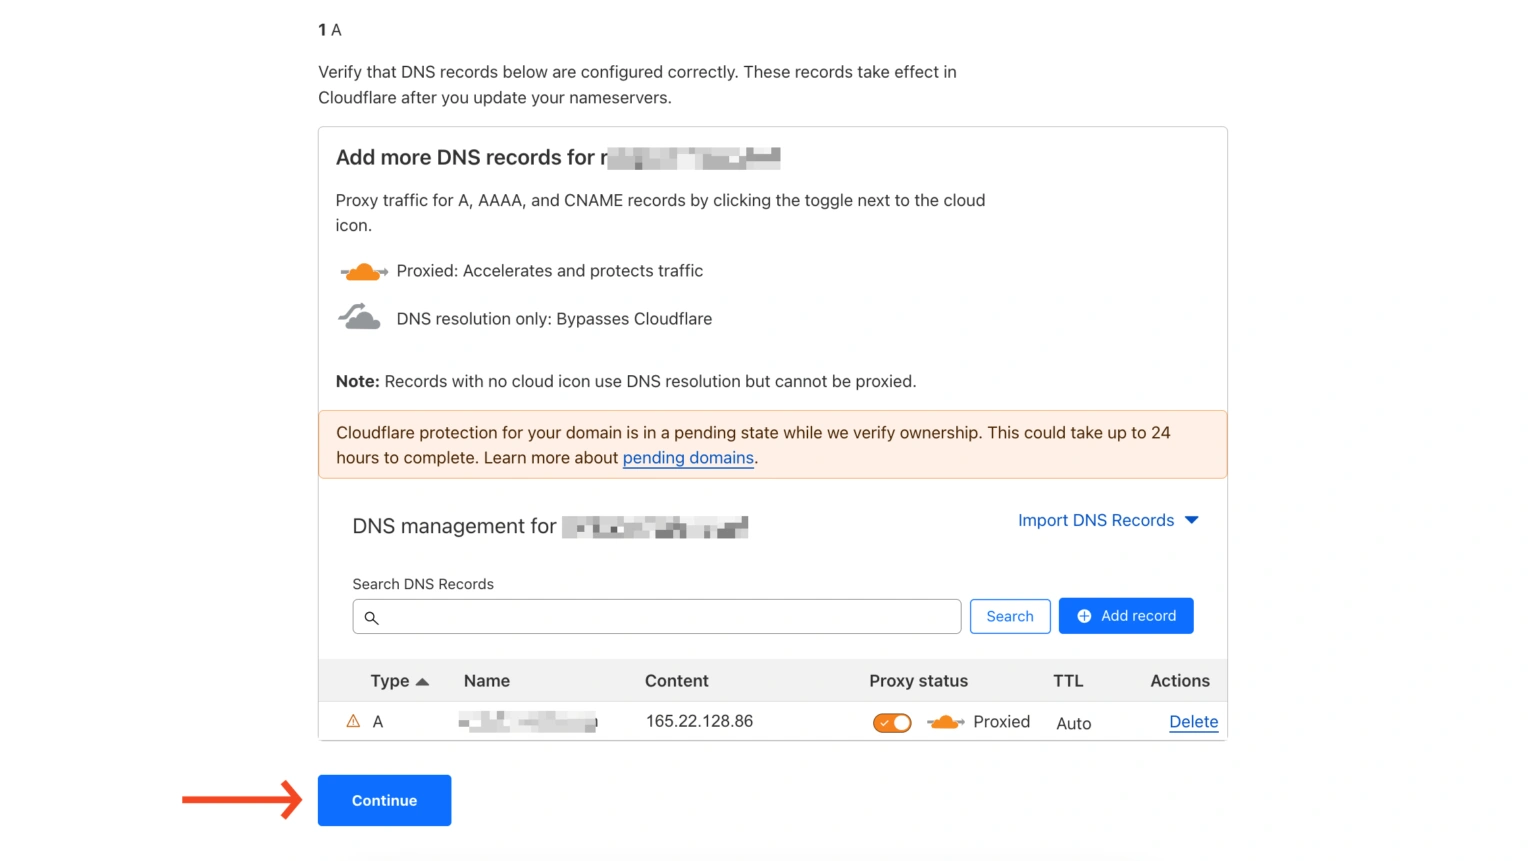
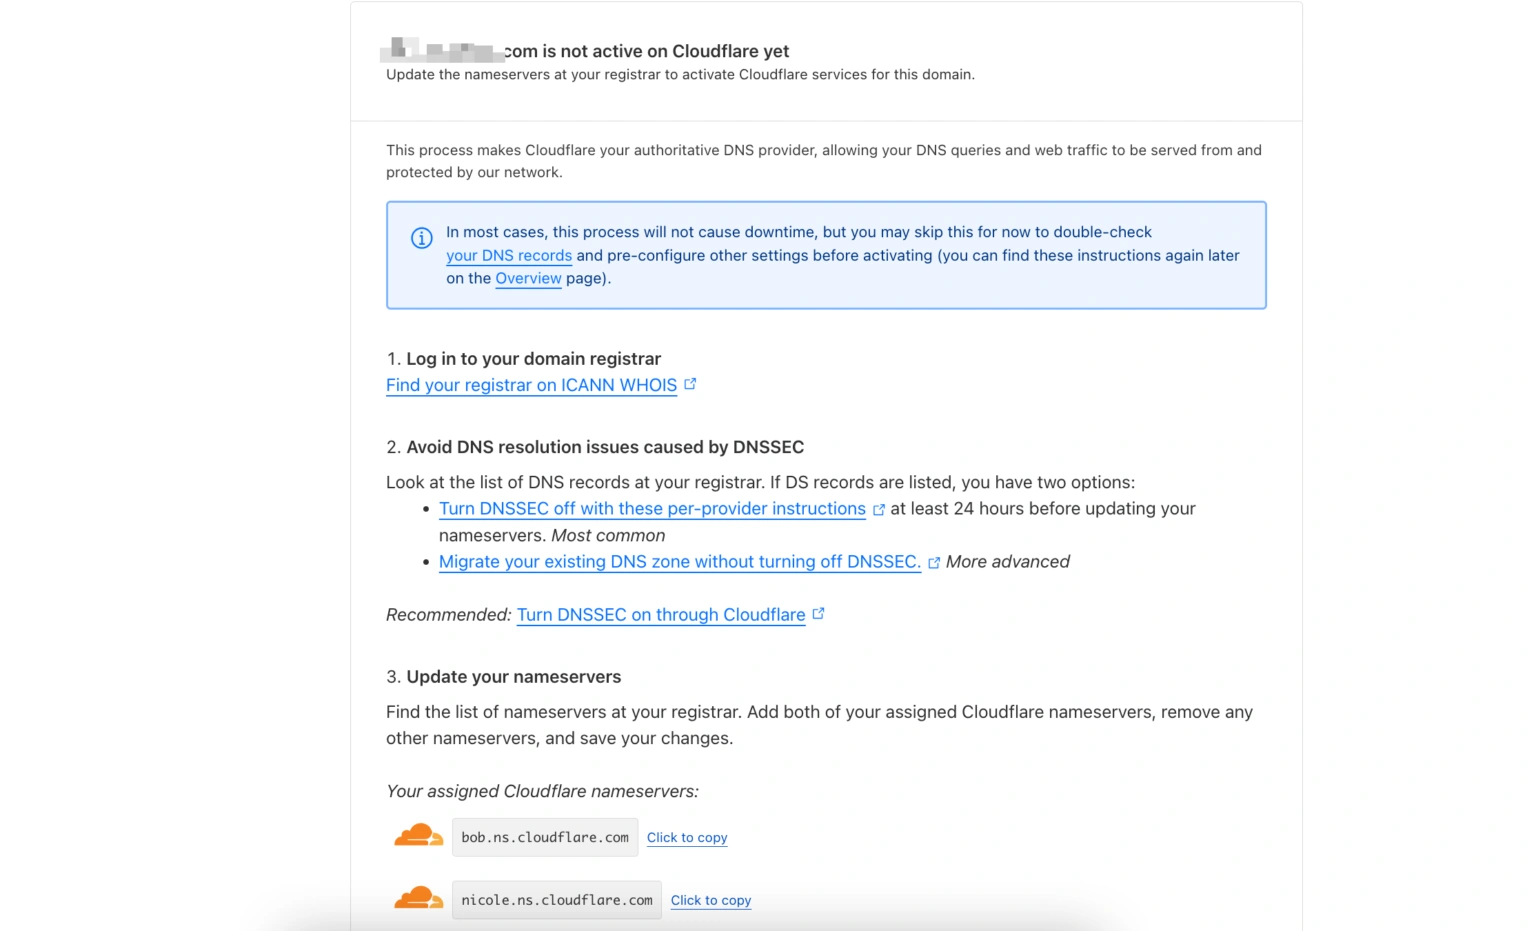
  • Now you need to add the DNS record to your website hosting account.
  1. Login to your domain registrar
  2. Navigate to your DNS management area
  3. Then update the nameservers provided by Cloudflare. Add them as your DNS record file
Image 46
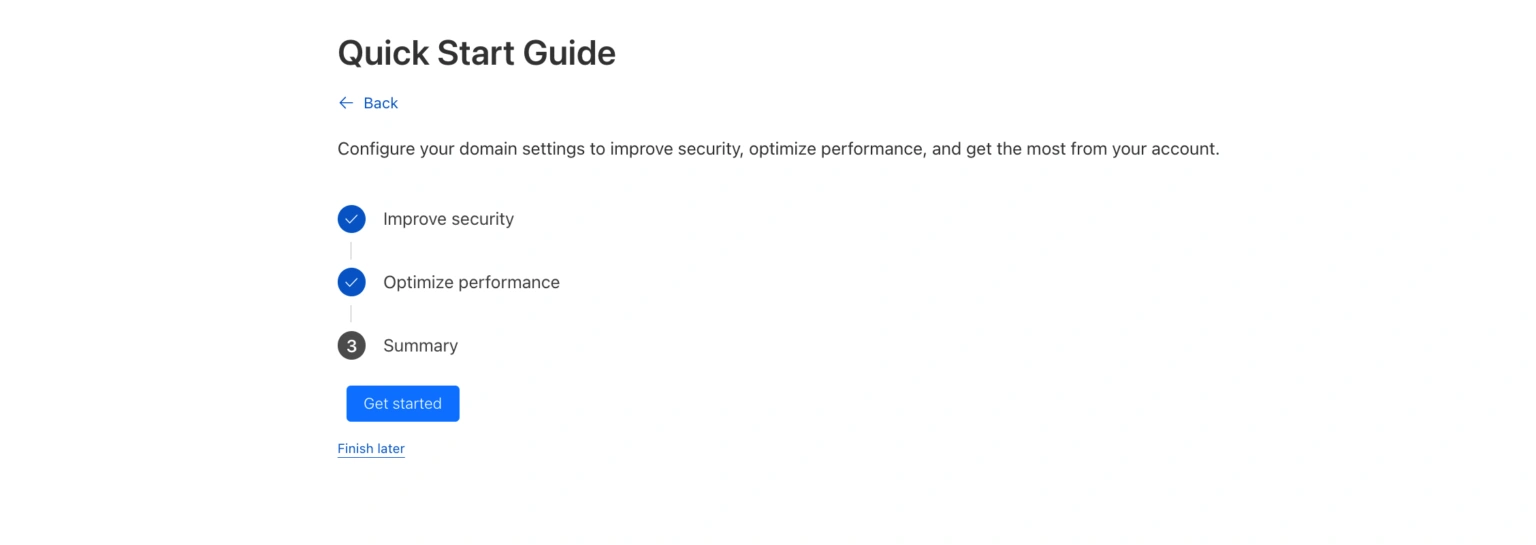
  • After you add the DNS records, you’ll get a quick-start guide. Like what to add or not. And then click on the Get Started button.
Image 47

Registrars take up to 24 hours to process nameserver changes (quicker in most cases). We will email you when rankyourblog.com is active on Cloudflare.

While in this pending state, Cloudflare will respond to DNS queries on your assigned nameservers. Once activated, SSL/TLS, DDoS protection, caching, and other automatic optimizations will go live for proxied DNS records and any custom settings you pre-configure. Learn more about pending domains

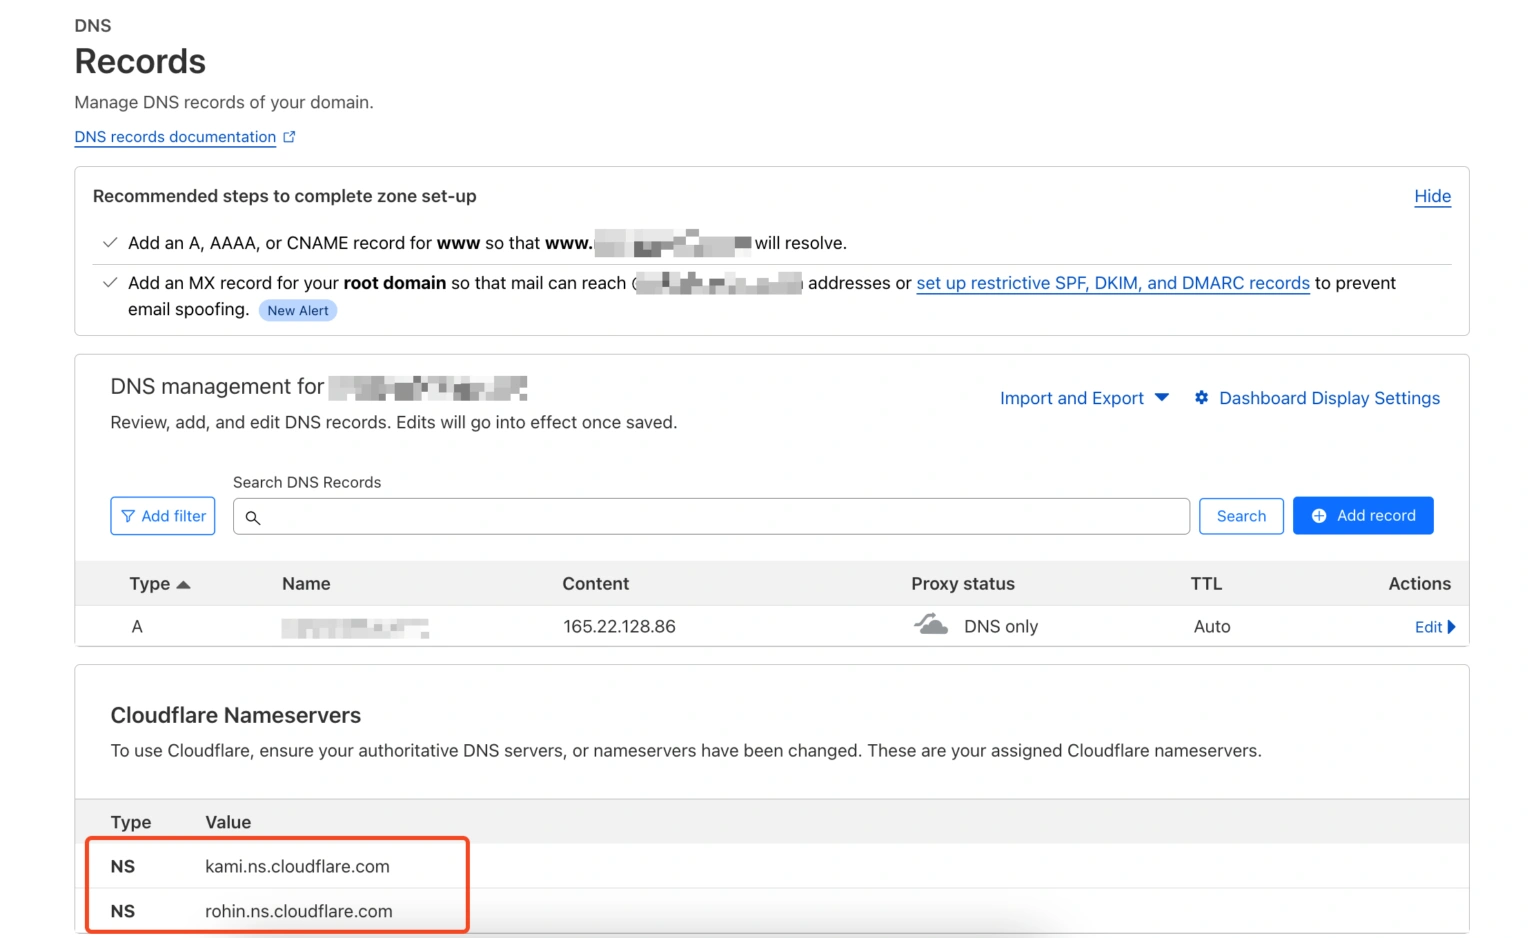
  • Then you need to review the nameservers, and you’ll find them here.
Review the nameserver
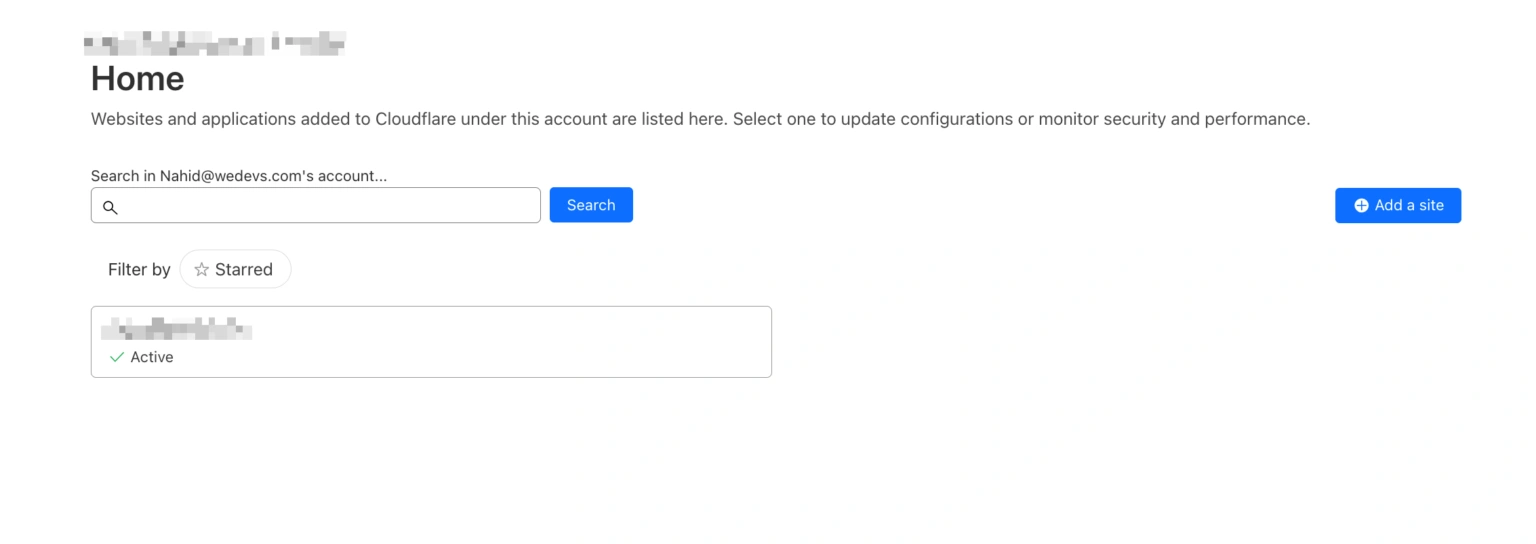
  • After successfully adding the nameservers, you will get a green tick beside your website.
Image 50

This is how you can create a Cloudflare account and add a website. After adding the website, you need to optimize it so it performs well from an SEO perspective. Cloudflare has a detailed guide to it. You can check it out here.

Final words

As we come to the end of this guide on how to create a Cloudflare account and add a website, it’s clear that using advanced technologies is crucial in today’s digital world. Cloudflare not only improves website speed but also strengthens it against cyber threats, providing a smooth and secure online experience for website owners and visitors alike.

By following the steps outlined, you can optimize your website’s performance and strengthen its defenses. As technology advances, it becomes increasingly important to utilize tools like Cloudflare to stay ahead in the competitive online realm. With Cloudflare, you are not just keeping up but also moving your online presence to new heights.

Also, if you want to integrate Cloudflare into FlyWP and manage your WordPress site, you can check out this article to learn about the entire process.


Category: WordPress security
Tags: Cloudflare accountCreating a free Cloudflare accounthow to add a website in Cloudflare
Footer Logo

Docker powered blazing fast and optimized WordPress site management platform on the cloud

  • Facebook
  • X
  • LinkedIn
  • YouTube

© 2025, FlyWP Inc. All rights are reserved.

Company

Blog

Pricing

Terms and Conditions

Privacy Policy

Refund Policy

Affiliate Program

Servers

DigitalOcean

Amazon AWS

Google Cloud

Vultr

Akamai (Formerly Linode)

Custom Servers & VPS

Compare

Cloudways vs FlyWP

GridPane vs FlyWP

ServerAvatar vs FlyWP

xCloud vs FlyWP

RunCloud vs FlyWP

Links

Documentation

Changelog

Contact & Support

FlyWP Community

Feedback & Roadmap

Brand Assets

Support for WordPress Community

Wedevs Logo Flywp

Explore FlyWP
with an Expert

Book A Demo