At FlyWP, we’re always working to make our platform better, and we’re excited to share some of the latest updates we’ve rolled out! With this release, we are introducing one of the most wanted features following our roadmap: the Website Uptime Monitor add-on is now Live. Additionally, we’ve included essential fixes to address issues raised by our community members. Let’s dive into the detailed release log.
What’s New in This Release?
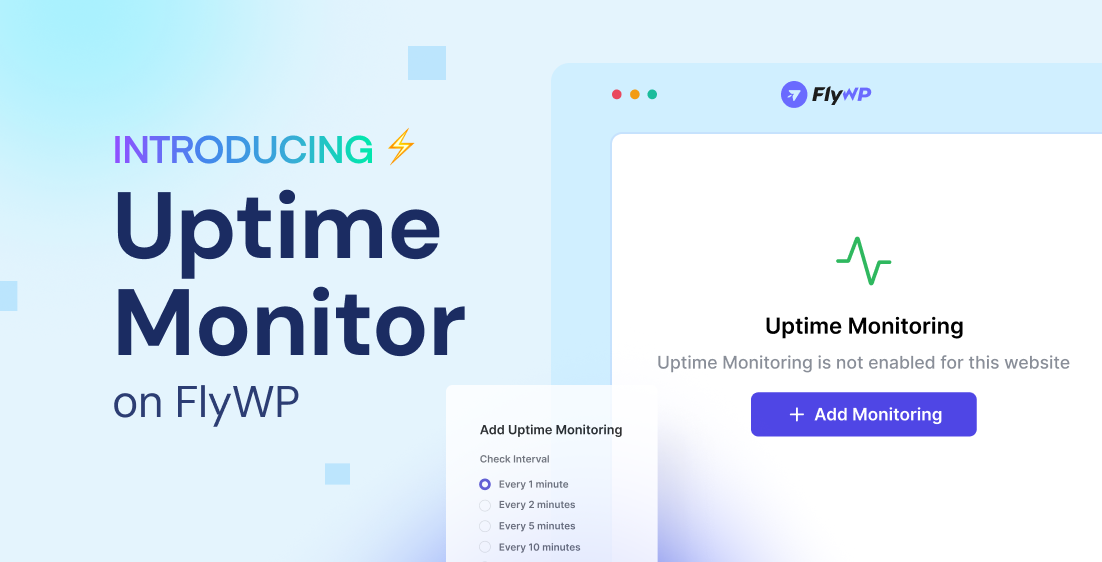
We’ve introduced a brand-new Website Uptime Monitor add-on, designed to help you keep a close eye on your website’s availability. With this feature, you’ll be notified immediately if your website goes down, so you can take quick action to minimize downtime.
Key Features:
- Real-time uptime checks for your websites and get alerts when any downtime incident occurs.
- Get 01 website monitoring for free with any Premium plans of FlyWP.
- Choose from multiple add-on packages to monitor unlimited websites based on your needs.
- Multiple checking interval options are available from 01 minutes to 15.
- Track uptime insights and incident reports from the FlyWP dashboard.
How to Setup Website Uptime Monitor on FlyWP?
You can easily turn on website uptime monitoring from FlyWP dashboard by following the process mentioned below:
Steps to Subscribe to Uptime Monitor Addon:
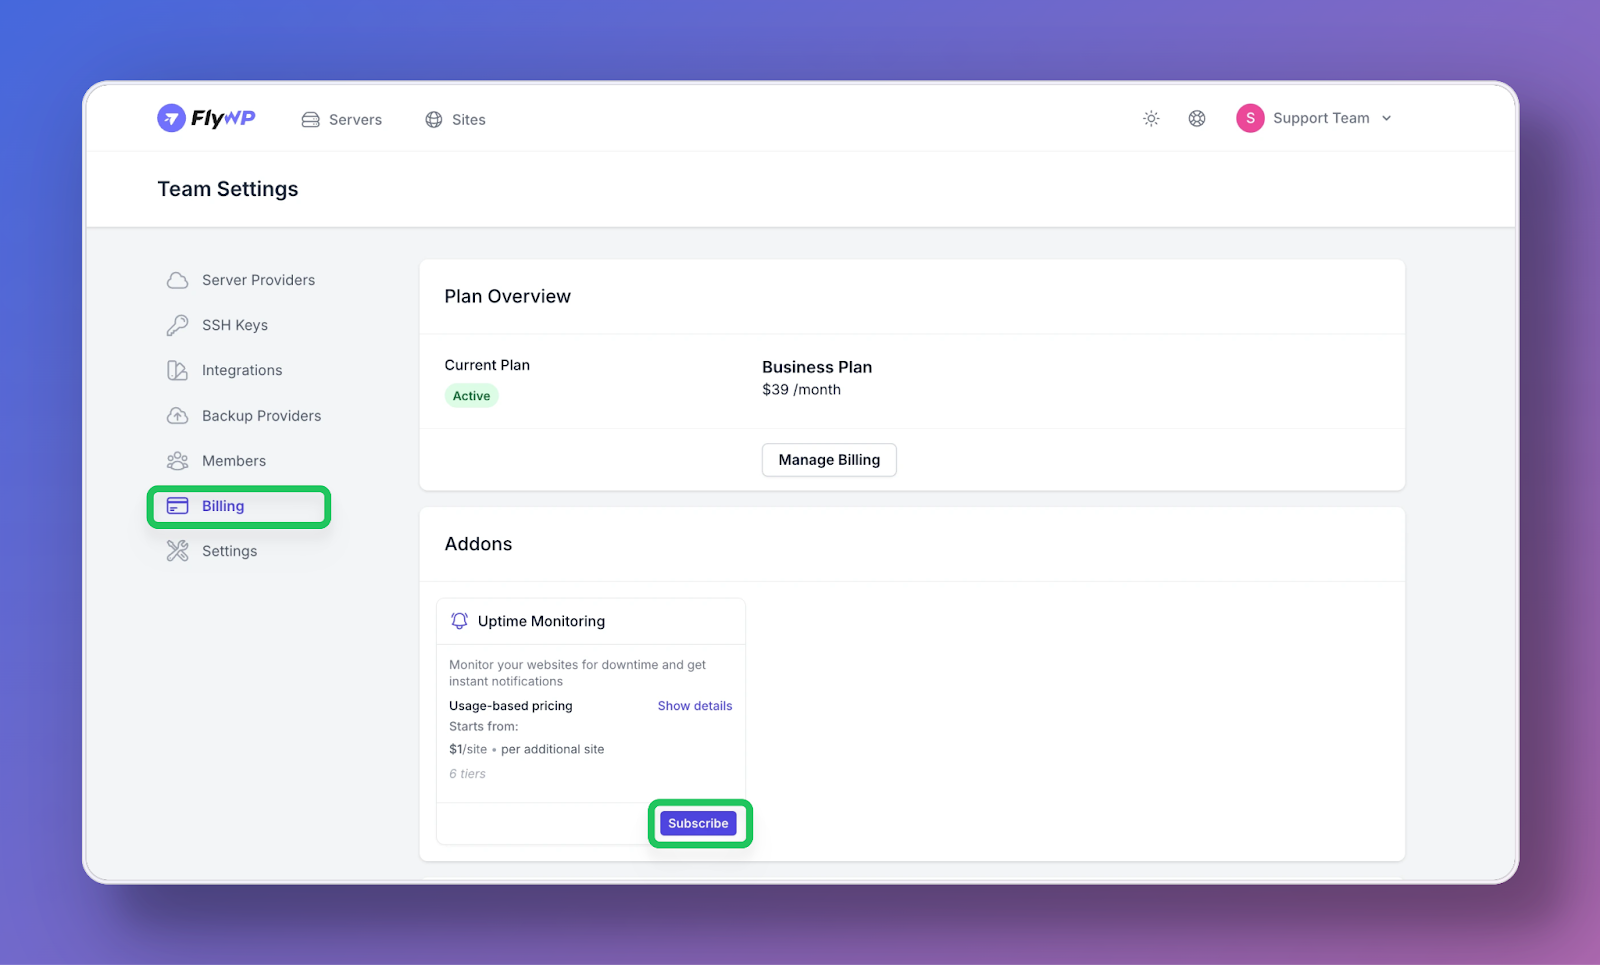
- Log in to the FlyWP Dashboard: Navigate to the Billing section.
- Subscribe to Uptime Monitoring: Under Billing, go to the Addons section. Then locate Uptime Monitor and click Subscribe.
- Confirm Subscription: Follow the on-screen instructions to complete your subscription.
Note: The feature is only available to FlyWP premium users. If you are a free user, you can’t enjoy this feature unless you subscribe to premium plans. See the FlyWP subscription plans here.
Steps to Enable Uptime Check for Your Websites:
Once subscribed to the uptime monitoring addon, follow these steps to enable uptime check for your websites:
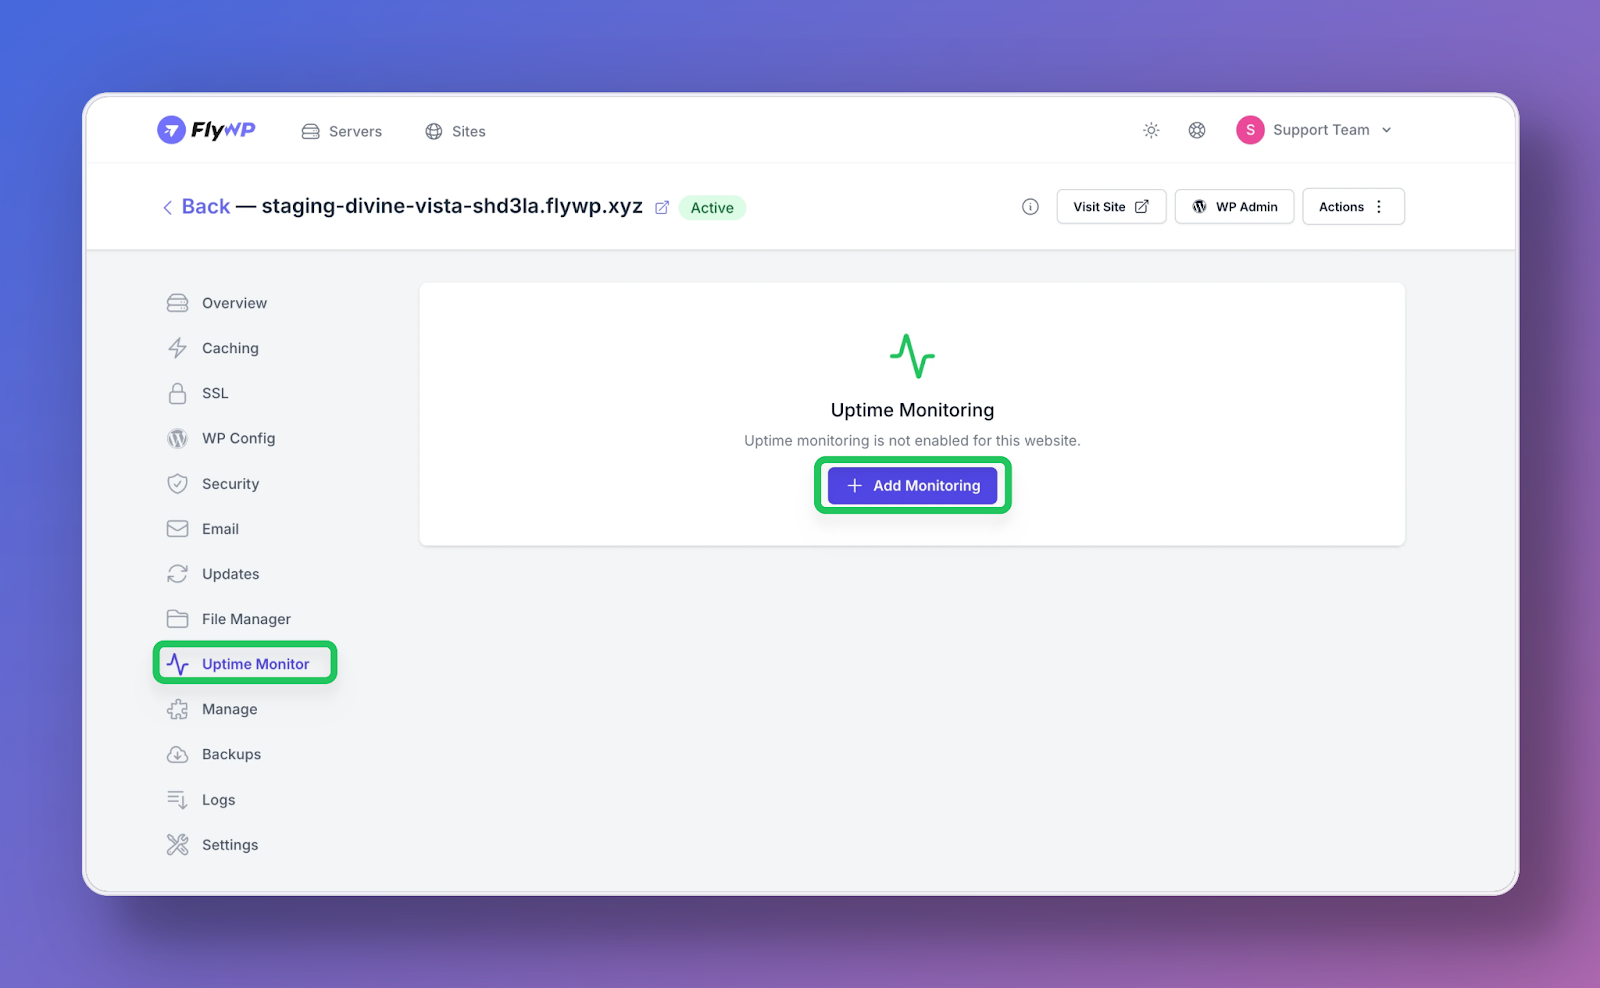
- Log in to the FlyWP Dashboard: Navigate to your server and then to your site.
- Access Uptime Monitoring: Click on the Uptime Monitoring section from the site dashboard.
- Add Monitoring: Click on Add Monitoring to create a new monitoring instance.
- Set Up Monitoring: Select your preferred check interval (e.g., 1 min, 5 min, 10 min).
- Finally, click on Save to begin monitoring your website.
For a detailed guideline, please check the full documentation from the link below.
Hotfixes
We have worked on some hotfixes to make your experience with FlyWP smoother and better.
- Backup Error Handling Improved: We enhanced error handling for backups and added clear error messages to help you understand and resolve issues quickly.
- PHP Setting Validation: Fixed a bug that caused a 502 error when incorrect PHP process manager settings were applied.
- Site Transfer Progress: Missing steps in the site transfer process are now visible in the UI for better tracking.
- Transfer Completion Fixed: Resolved an issue where site transfer appeared stuck after provisioning.
Last but not least, our goal is to provide you with a more reliable, transparent, and user-friendly experience, and we believe these updates do just that. Feel free to reach out to us at [email protected] or ping us on Live Chat about any issues.