# How to Clone and Transfer WordPress Sites on FlyWP
Source: https://flywp.com/docs/site/site-migration/how-to-clone-or-transfer-wordpress-sites-on-flywp/
The **Clone and Transfer** feature in FlyWP is designed to simplify site management and migration, making it easier than ever to replicate or move your WordPress site. Whether you need a staging environment for testing updates and changes, or you’re preparing to shift your site to a new server, this powerful tool ensures a seamless and efficient process.
[Video: Effortlessly Clone & Transfer Your WordPress Site with FlyWP | Step-by-Step Tutorial](https://www.youtube.com/watch?v=dwblS14DQWc)
With Clone and Transfer, you can:
- **Duplicate/Clone your site** without impacting the live environment, perfect for safe experimentation.
- **Transfer your site** to a new server effortlessly, reducing the hassle of manual migrations.
Explore this guide to learn how to leverage the Clone and Transfer feature to enhance your workflow and maintain your site’s integrity.
Navigate to the Site **Settings** tab. You will find the **Clone or Transfer Site** option.

## **Clone Site**

Previously, the Clone feature in FlyWP offered a single option, providing basic site duplication capabilities. With the latest update, this feature has been expanded to offer two distinct options for greater flexibility:
1. **Clone to the Current Server**: This option allows you to duplicate your site on the same server. It’s ideal for creating a staging or testing environment without affecting your live site.
2. **Clone to a Different Server**: This option enables you to replicate your site on a new server, making it easy to set up a development environment or prepare for migration.
To use the feature, simply select one of the two options based on your requirements and click the **Next** button to proceed. FlyWP will guide you through the remaining steps to complete the cloning process efficiently.
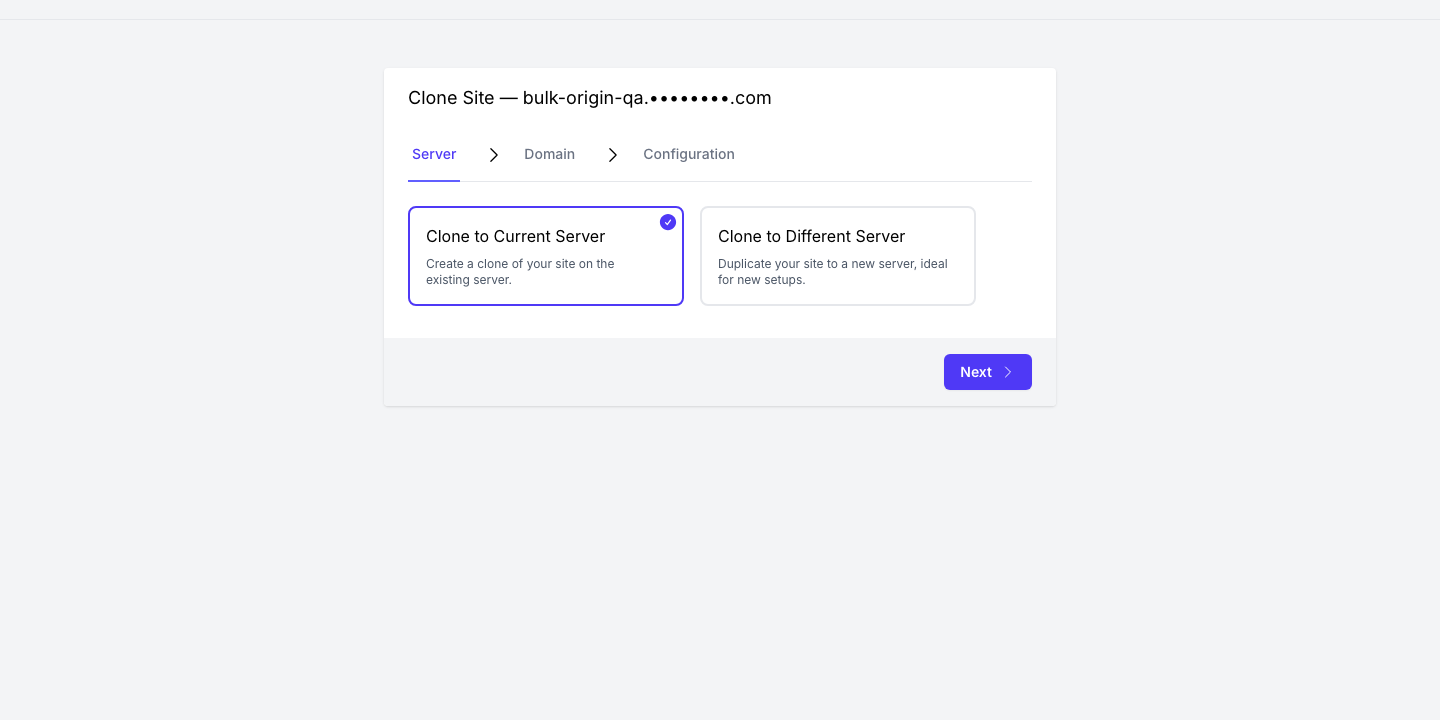
*Clone to the Current Server*
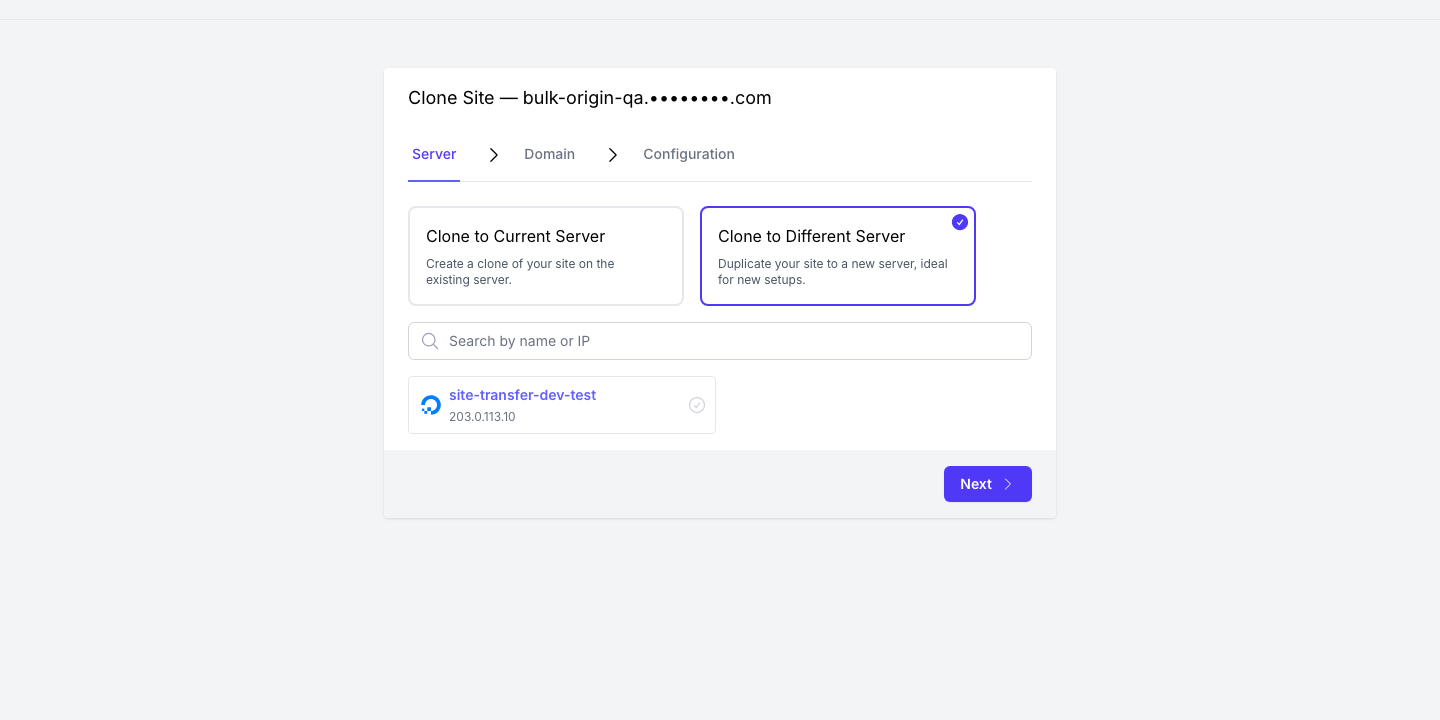
*Clone to Different Server*
### **Domain Configuration**
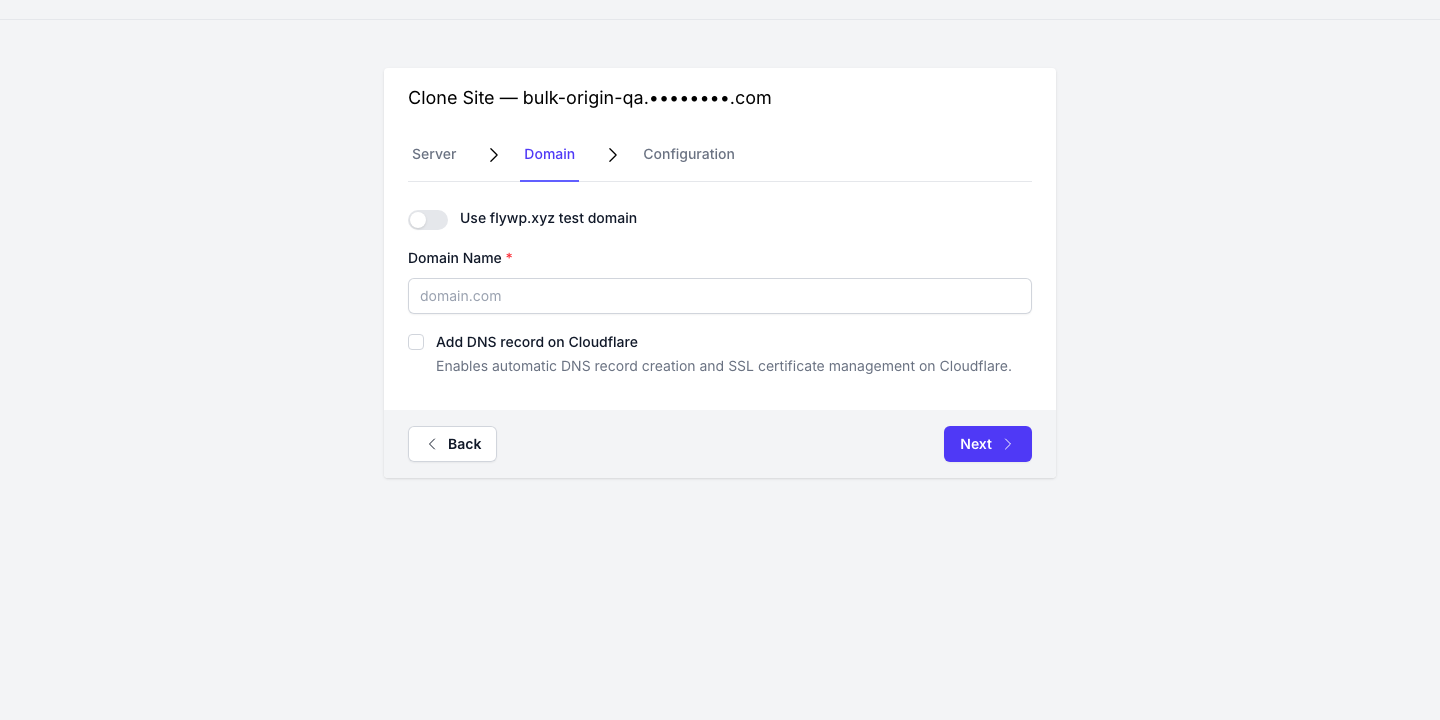
After selecting your cloning option, you will be prompted to configure the domain for the cloned site. This step includes the following options:
1. **Use FlyWP Test Domain**:
Toggle this option to use a free test domain provided by FlyWP, ending in **flywp.xyz**
2. **Custom Domain Name**:
If you prefer to use a custom domain, enter the desired domain name in the provided field (*e.g. YourDomain.com*). This field is required if the test domain option is not selected.
3. **Add DNS record on Cloudflare**:
Optionally, you can enable automatic DNS record creation and SSL certificate management on Cloudflare by ticking this checkbox (it is available once a Cloudflare account is connected). This simplifies the process of pointing your domain to the cloned site and ensuring secure connections.
Once the domain settings are configured, click the **Next** button to proceed to the final configuration step.
### **Configuration**
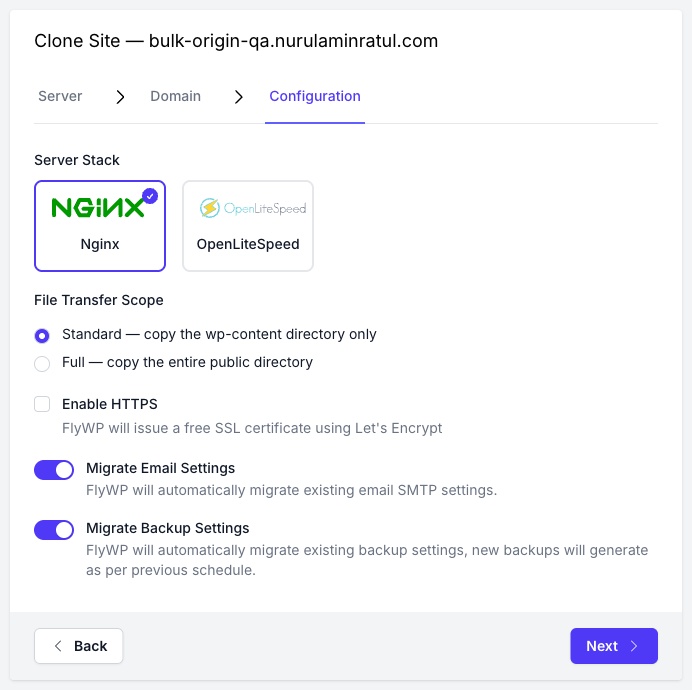
In the final step of the cloning process, you can configure the following settings for the cloned site:
1. **Server Stack**:
Choose the server stack for your cloned site:
- **Nginx**: Select this option for optimal performance with Nginx.
- **OpenLiteSpeed**: Alternatively, choose OpenLiteSpeed based on your preference or requirements.
2. **Migrate Email Settings**:
Enable this option to automatically migrate existing email SMTP settings to the cloned site. This ensures seamless email functionality without additional configuration.
3. **Migrate Backup Settings**:
Toggle this option to transfer existing backup settings. New backups will automatically generate as per the previous schedule, maintaining consistency in your backup strategy.
4. **File Transfer Scope**:
Choose how much of the site is copied:
- **Standard**: Copies only the `wp-content` directory.
- **Full**: Copies the entire `public` directory, including WordPress core files. This takes noticeably longer and is meant for advanced users with custom files outside `wp-content`.
Once all configurations are set, click **Next**. If your domain needs a manual DNS step, a **DNS** step follows, and its final button reads **Clone Site**.
Now, continue with the final button of the wizard to start the cloning process.
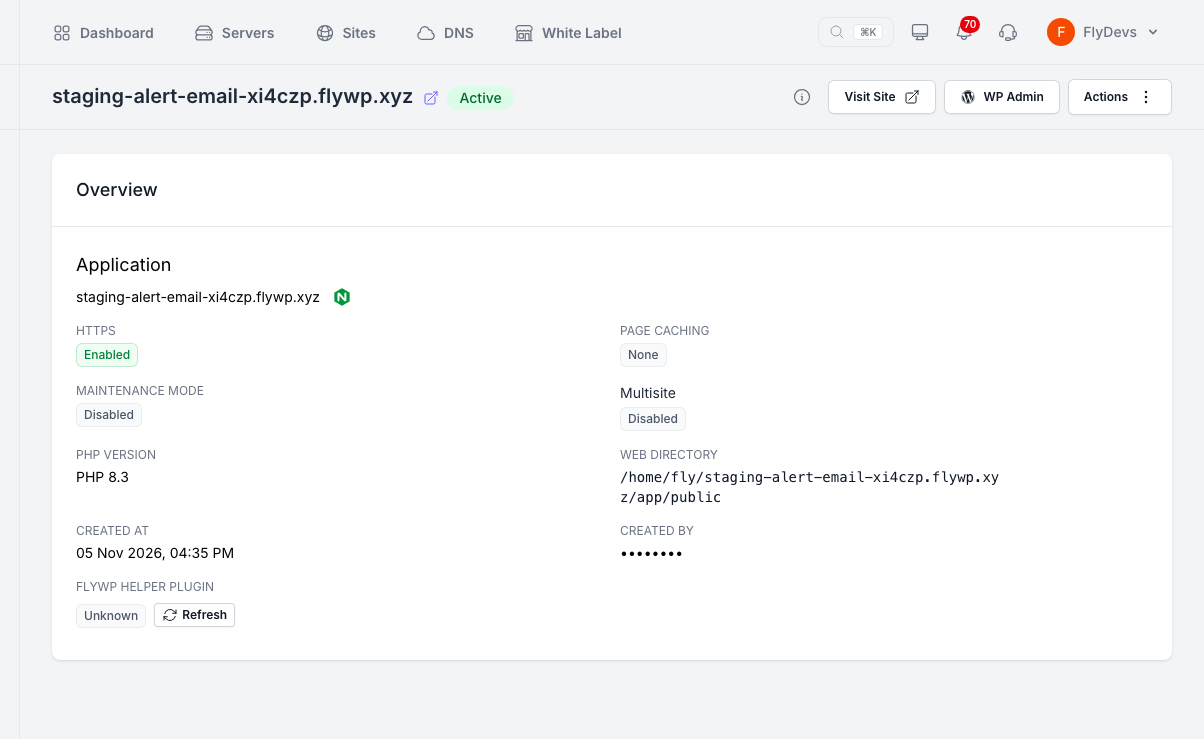
Here is the final result:
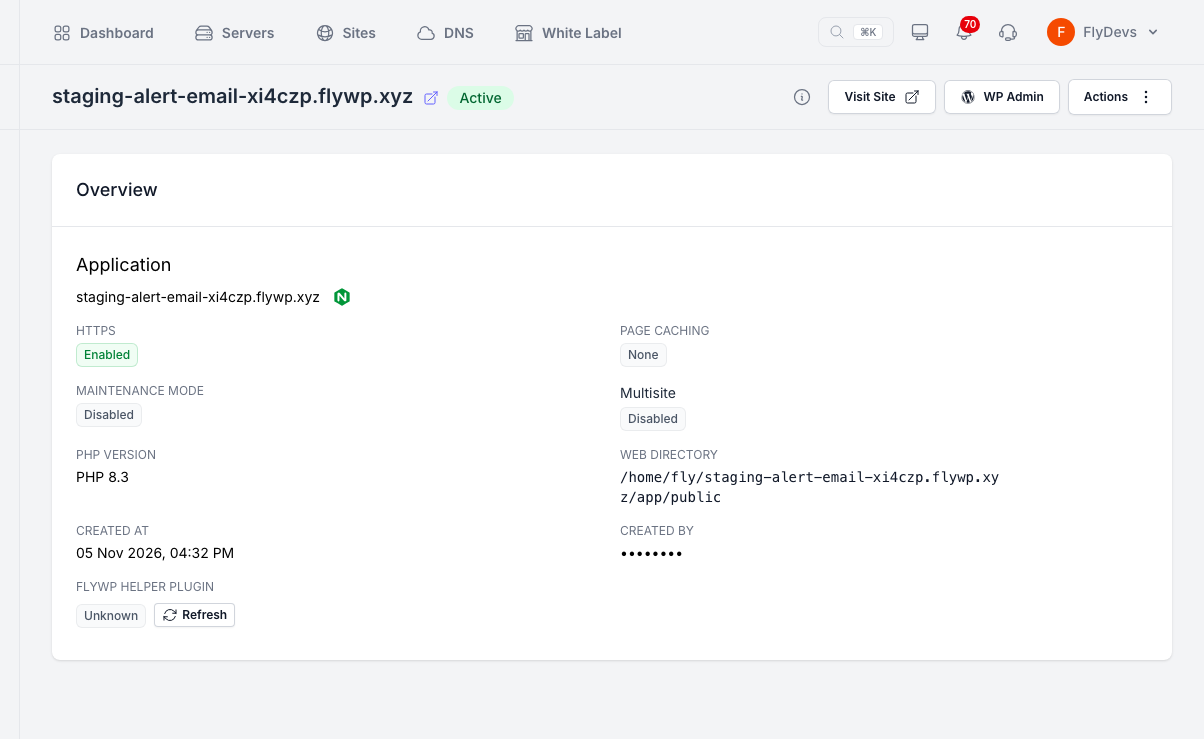
So, you are now done with the cloning. Cheers!
## **Transfer Site**
**Server Selection**
The **Transfer Site** option allows you to move your site seamlessly to a new server. Follow these steps:
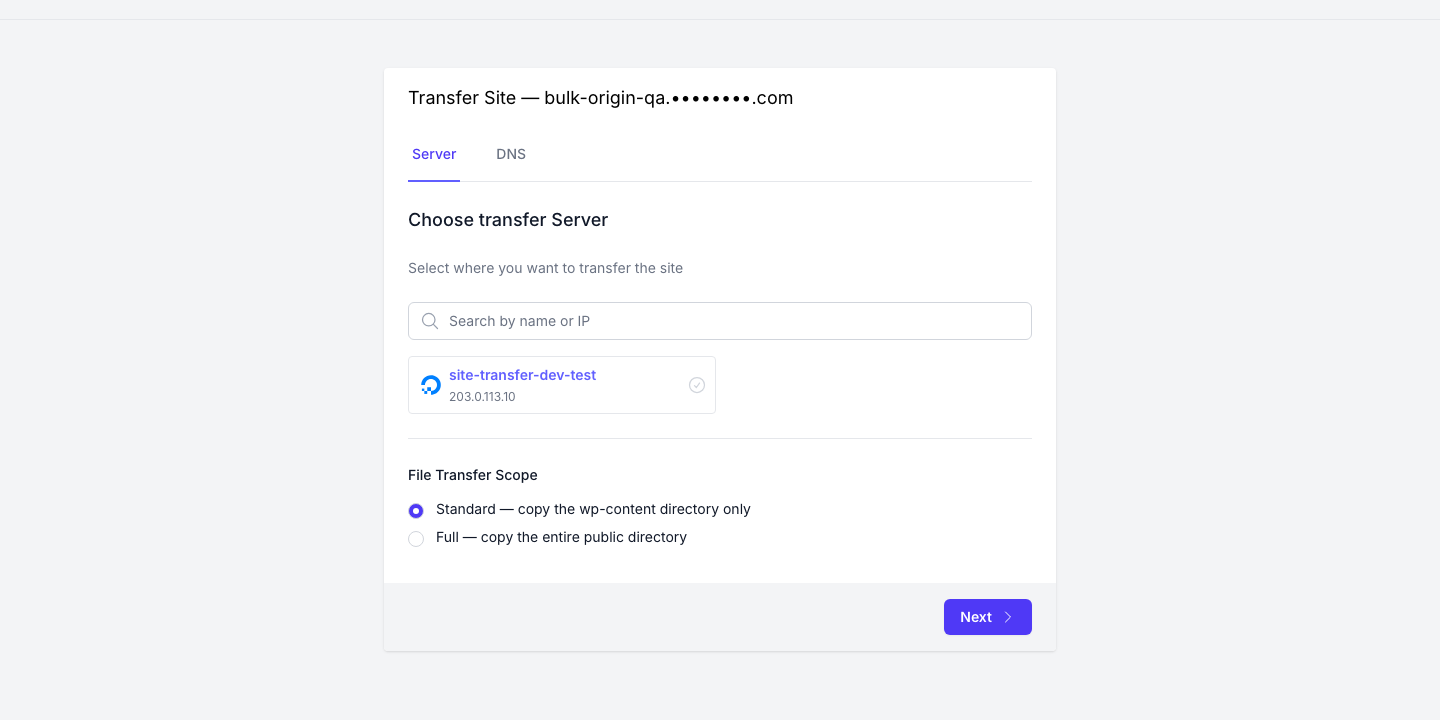
1. **Choose Transfer Server**:
- On the **Transfer Site** screen, you will see a list of available servers.
- Use the search bar to find your target server by name or IP address.
- Select the desired server from the displayed options.
2. **Proceed with the Transfer**:
- The Transfer wizard has two steps: **Server** and **DNS**. The DNS step is skipped when the site uses a FlyWP test domain.
- Once the target server is selected, click the **Next** button to continue to the DNS step.
- On the final step, click **Transfer Site** to start the transfer.
By simplifying server selection and automating essential steps, FlyWP ensures a smooth and efficient transfer process without manual complexities.
Redirect rules move with the site. The transferred site gets a copy of each rule from the old site, in the same order. Check them under **Redirect Rules** on the new site after the transfer finishes.
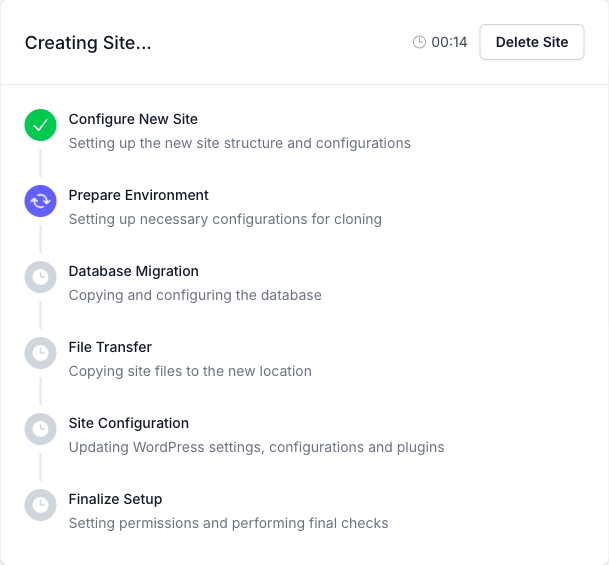
Once you have selected the target server for the site transfer and confirmed your choice, the **Creating Site** screen will appear:
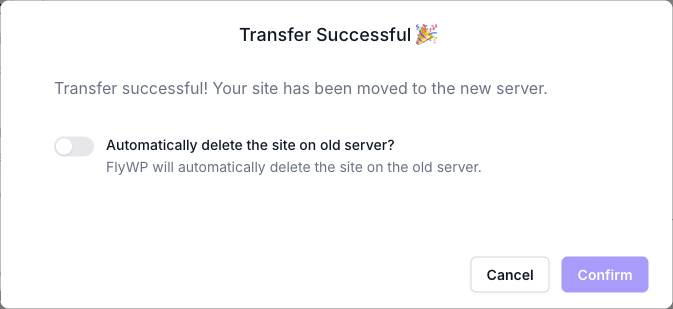
After a successful site transfer on FlyWP, a **Transfer Successful** window opens on the new site's overview page. In it, you can enable the **“Automatically delete the site on old server?”** option. This feature deletes the old site immediately upon confirmation. Users must consent by checking a box, ensuring deliberate action to prevent accidental deletions. (This option is not part of the Transfer wizard itself, which only has the Server and DNS steps.)
Final Result:
You are done transferring your site from one server to another server. Cheers!