# SSL Management
Source: https://flywp.com/docs/site/custom-ssl-management/
Effective management of SSL is important for maintaining a secure online environment, preventing security breaches, ensuring data privacy, and building trust with website visitors. With that being said, FlyWP has now added two new features to let you smartly do that.
By using the SSL management feature, you can:
- The Enhanced SSL Manager
- Custom SSL certificate support
As a result, you can manage your site’s SSL shield, set your online preferences, and establish a secure connection.
[Video: Easy SSL Management in FlyWP | Free & Custom SSL Certificates | Quick & Simple Guide](https://www.youtube.com/watch?v=m5ywDNcLBks)
## Table of Contents
- [Deploying Let's Encrypt SSL on FlyWP](#deploying-lets-encrypt-ssl-on-flywp)
- [How to use FlyWP SSL Manager to deploy SSL via Let's Encrypt?](#how-to-use-flywp-ssl-manager-to-deploy-ssl-via-lets-encrypt)
- [Renewal](#renewal)
- [Custom SSL Support](#custom-ssl-support)
### Deploying Let’s Encrypt SSL on FlyWP
FlyWP’s SSL Manager is designed to make SSL certificate management more manageable and intuitive. With a clean and user-friendly interface, you can install, manage, and renew SSL certificates for your WordPress sites.
### How to use FlyWP SSL Manager to deploy SSL via Let’s Encrypt?
Head over to FlyWP and open a website. Then go to the SSL section. Here is how to create a website with a FlyWP.
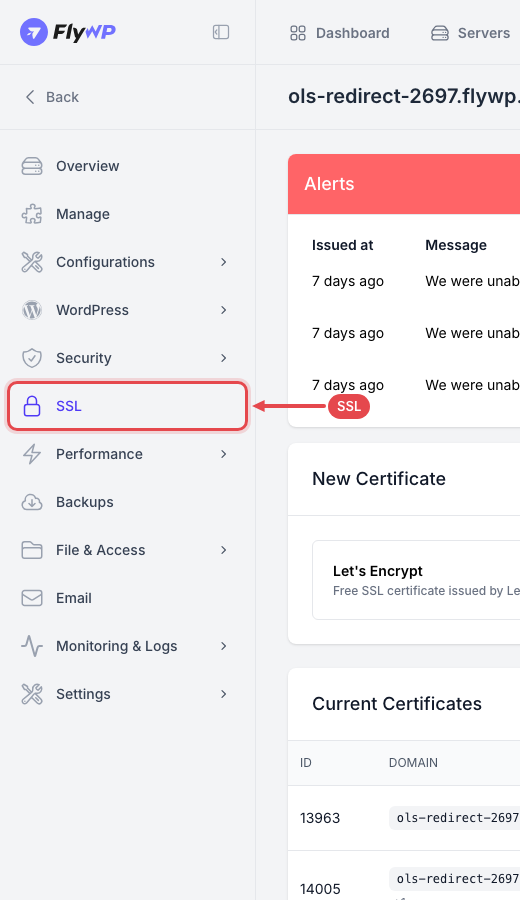
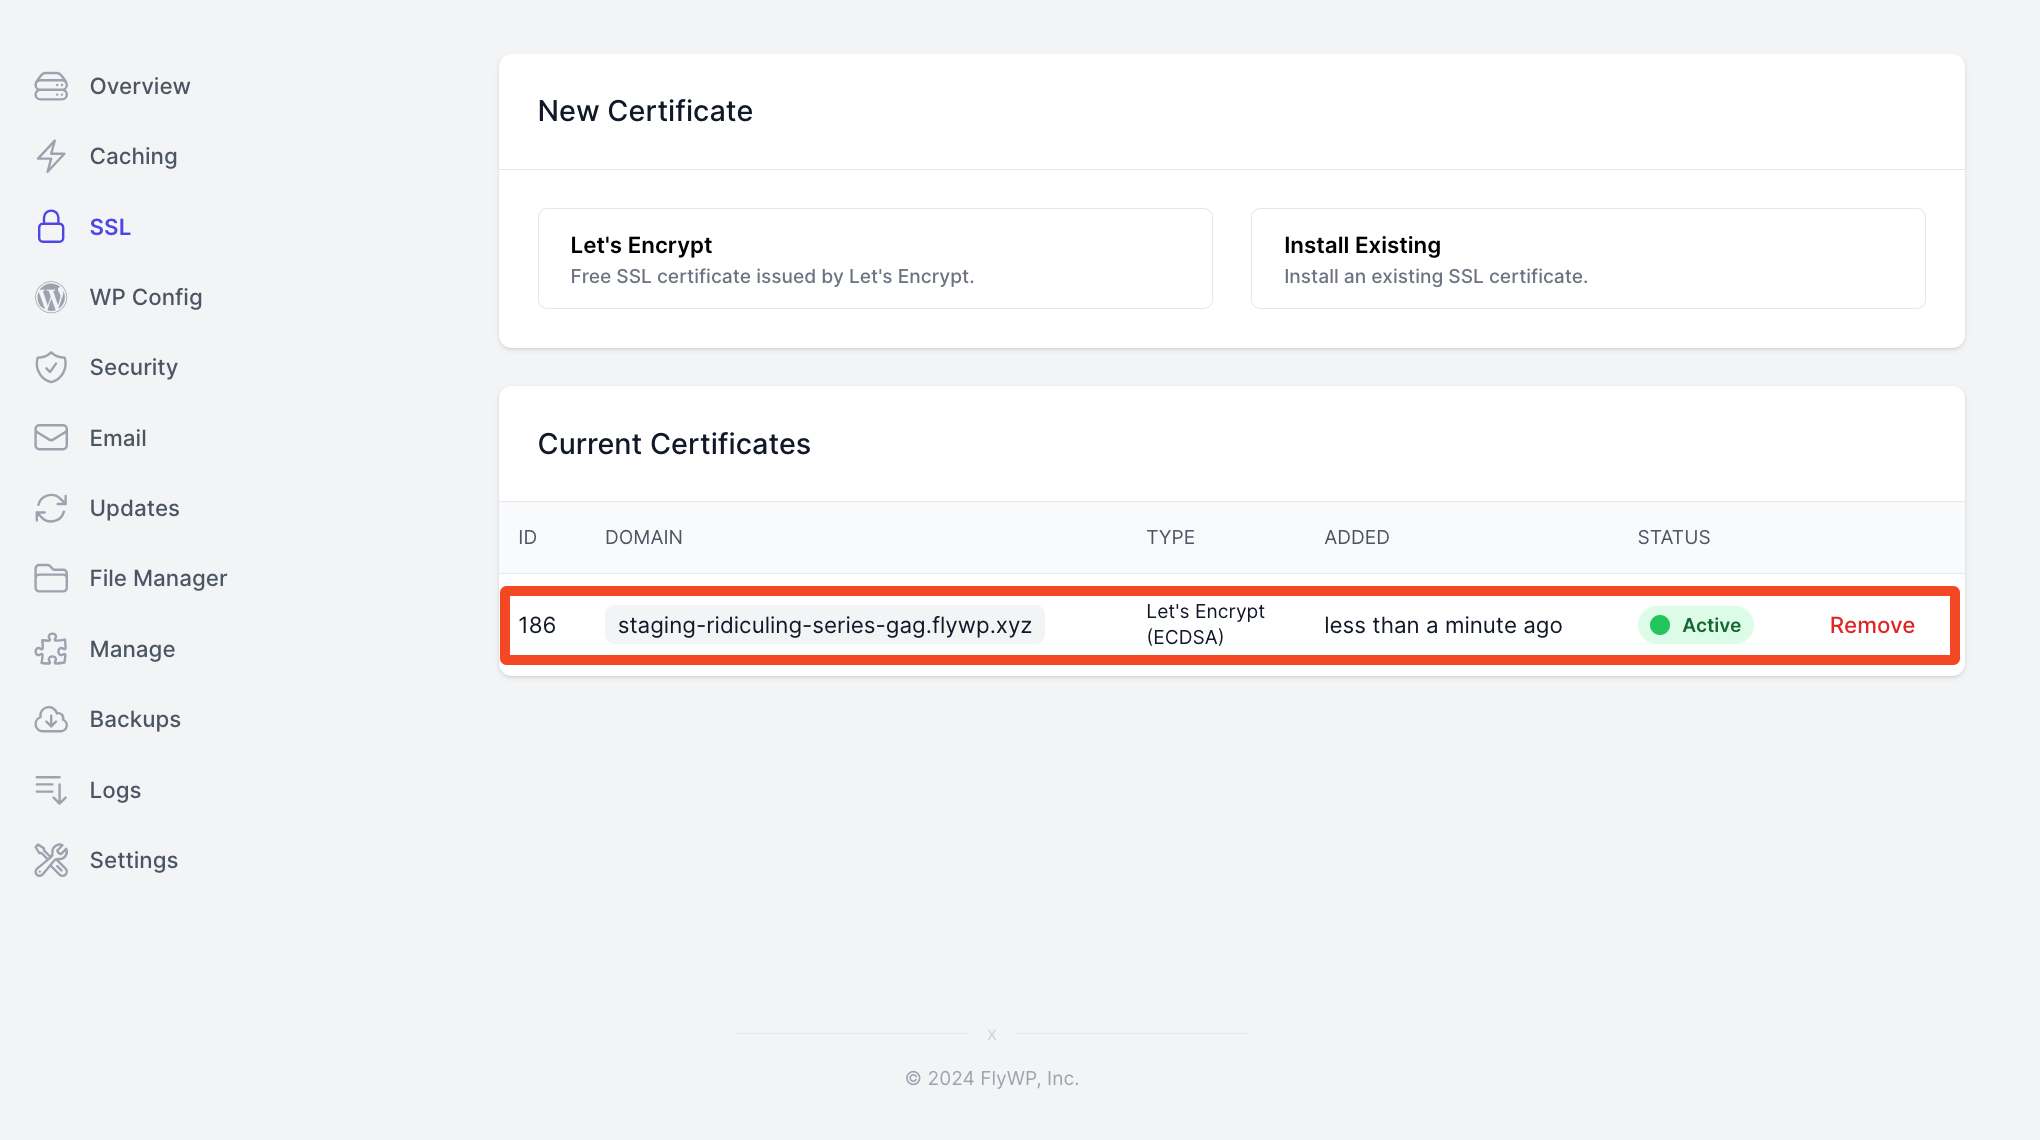
Here, you’ll get three options under **New Certificate**:
1. Installing a free SSL (**Let’s Encrypt**)
2. Installing an existing certificate (**Install Existing**)
3. Provisioning via Cloudflare (**Cloudflare Origin CA**)
If you’re using **Cloudflare** to manage DNS with Let's Encrypt, make sure you’ve selected SSL mode to **Full (Strict),** and then try re-generating (after DNS propagation is complete) the Let’s Encrypt SSL on the FlyWP end.
*Cloudflare can take a little time to update the SSL mode. If you’ve recently changed, give it about 30 minutes and try again.*
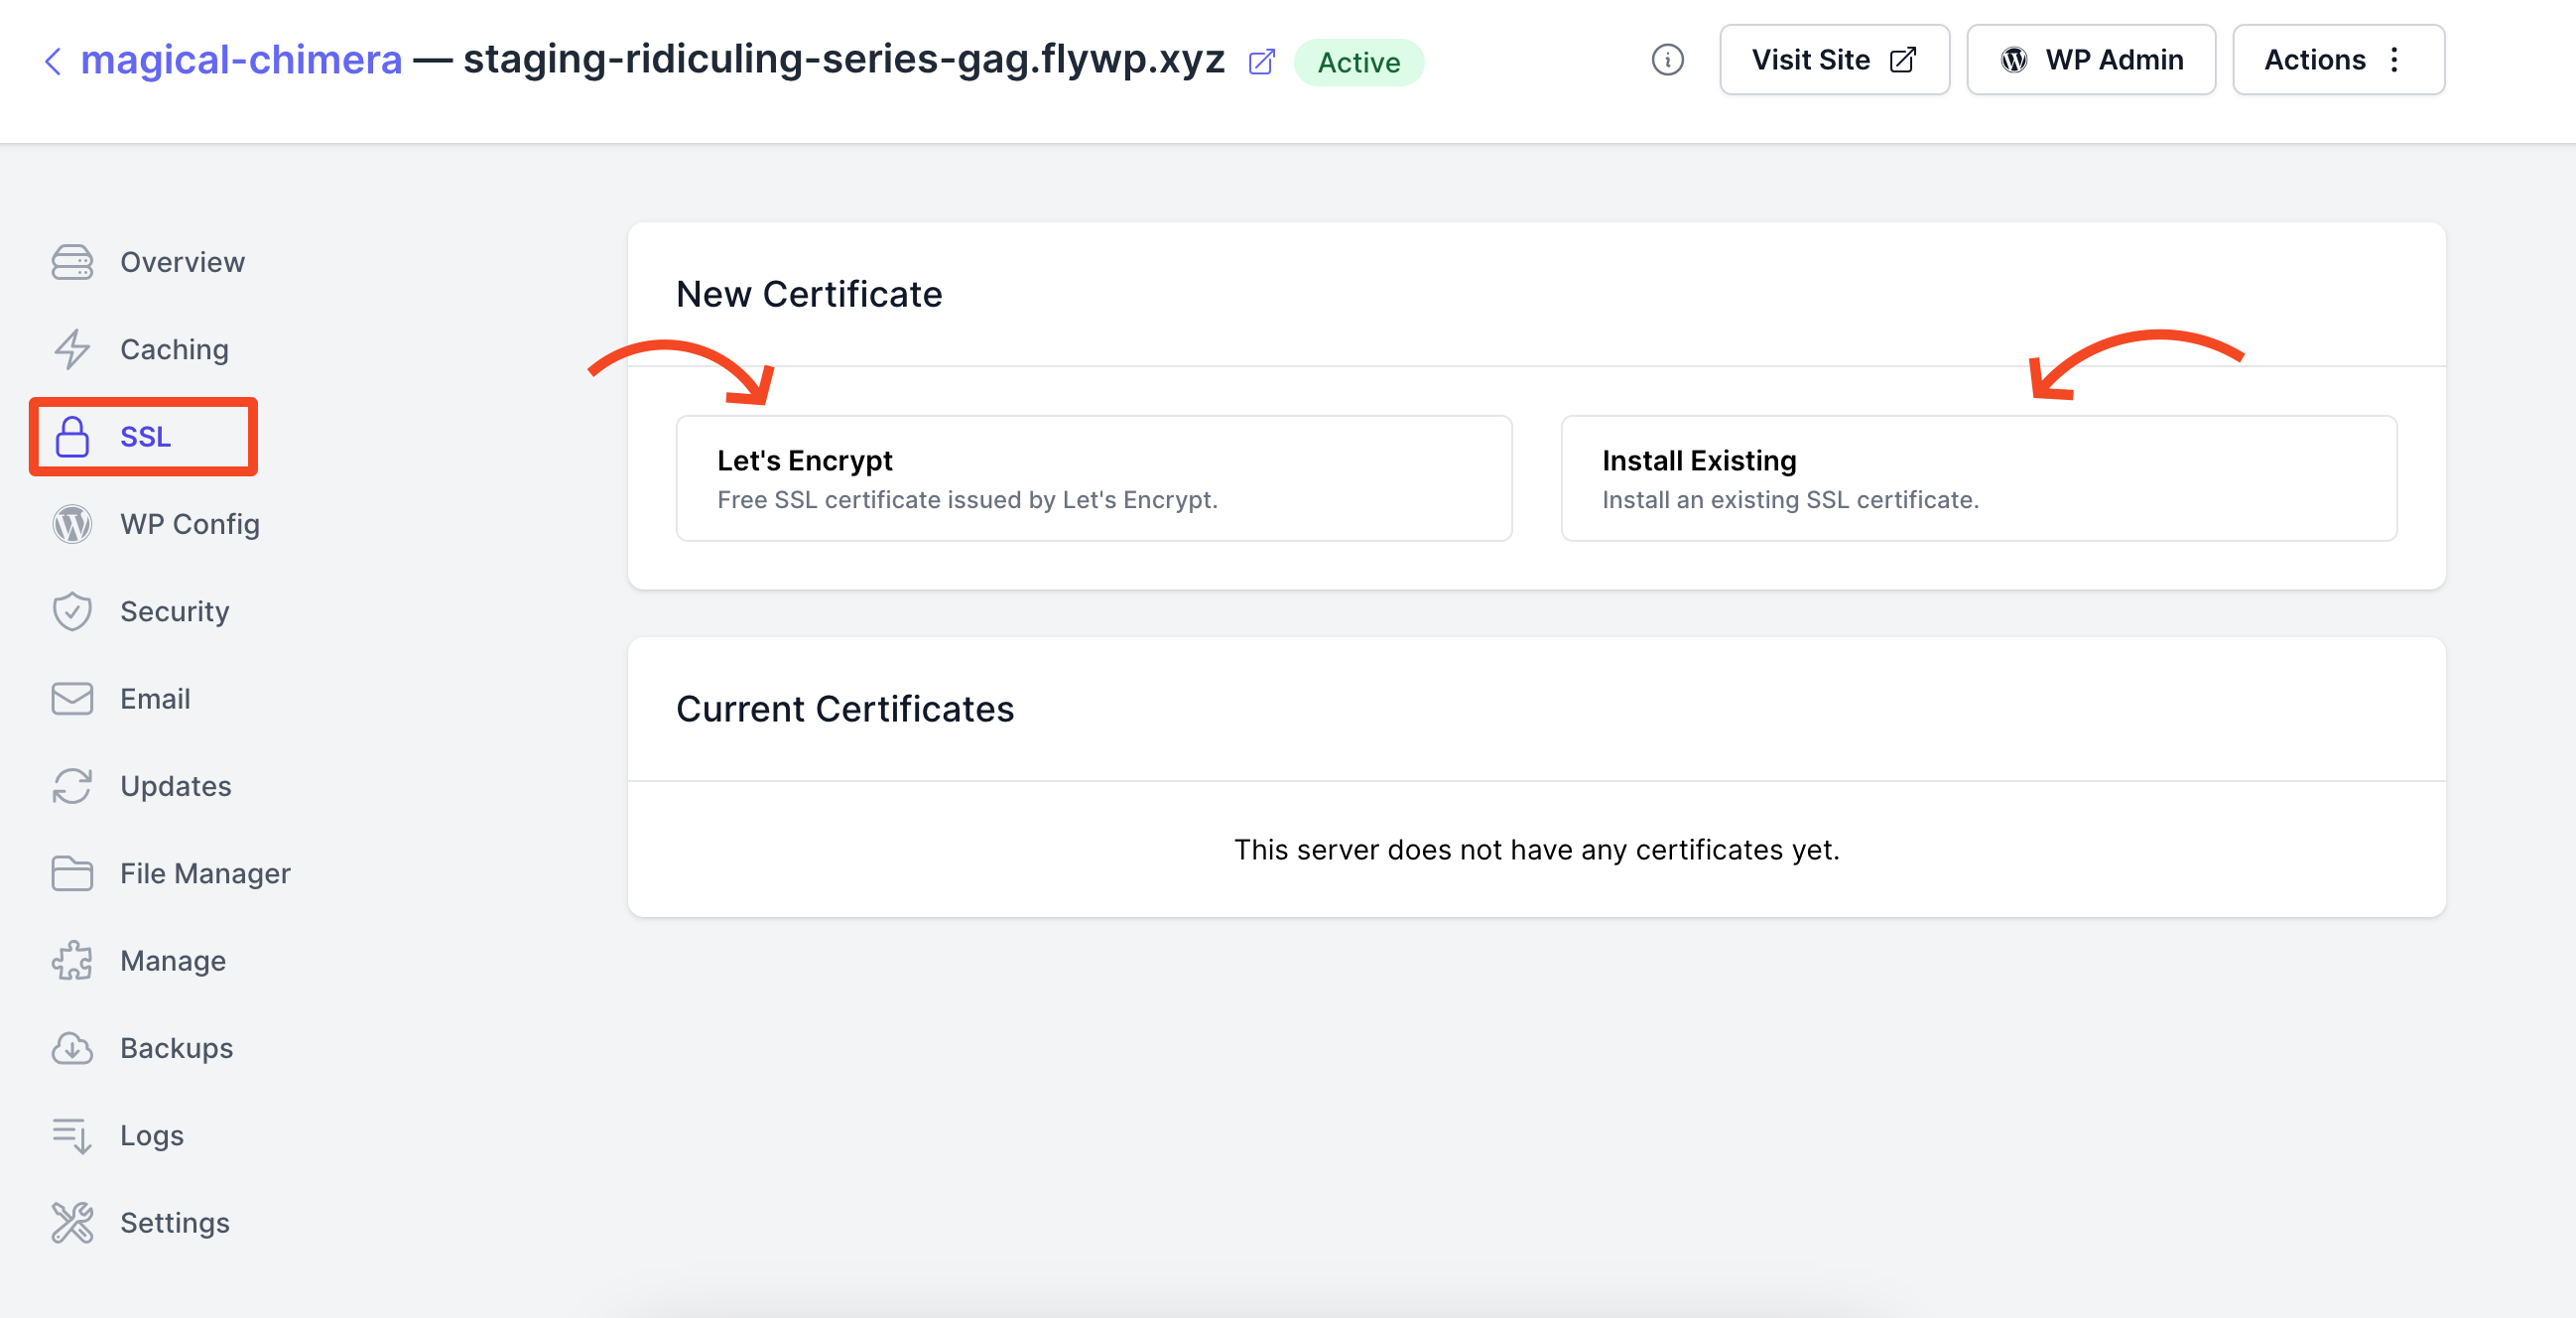
You can see the domain’s details here.
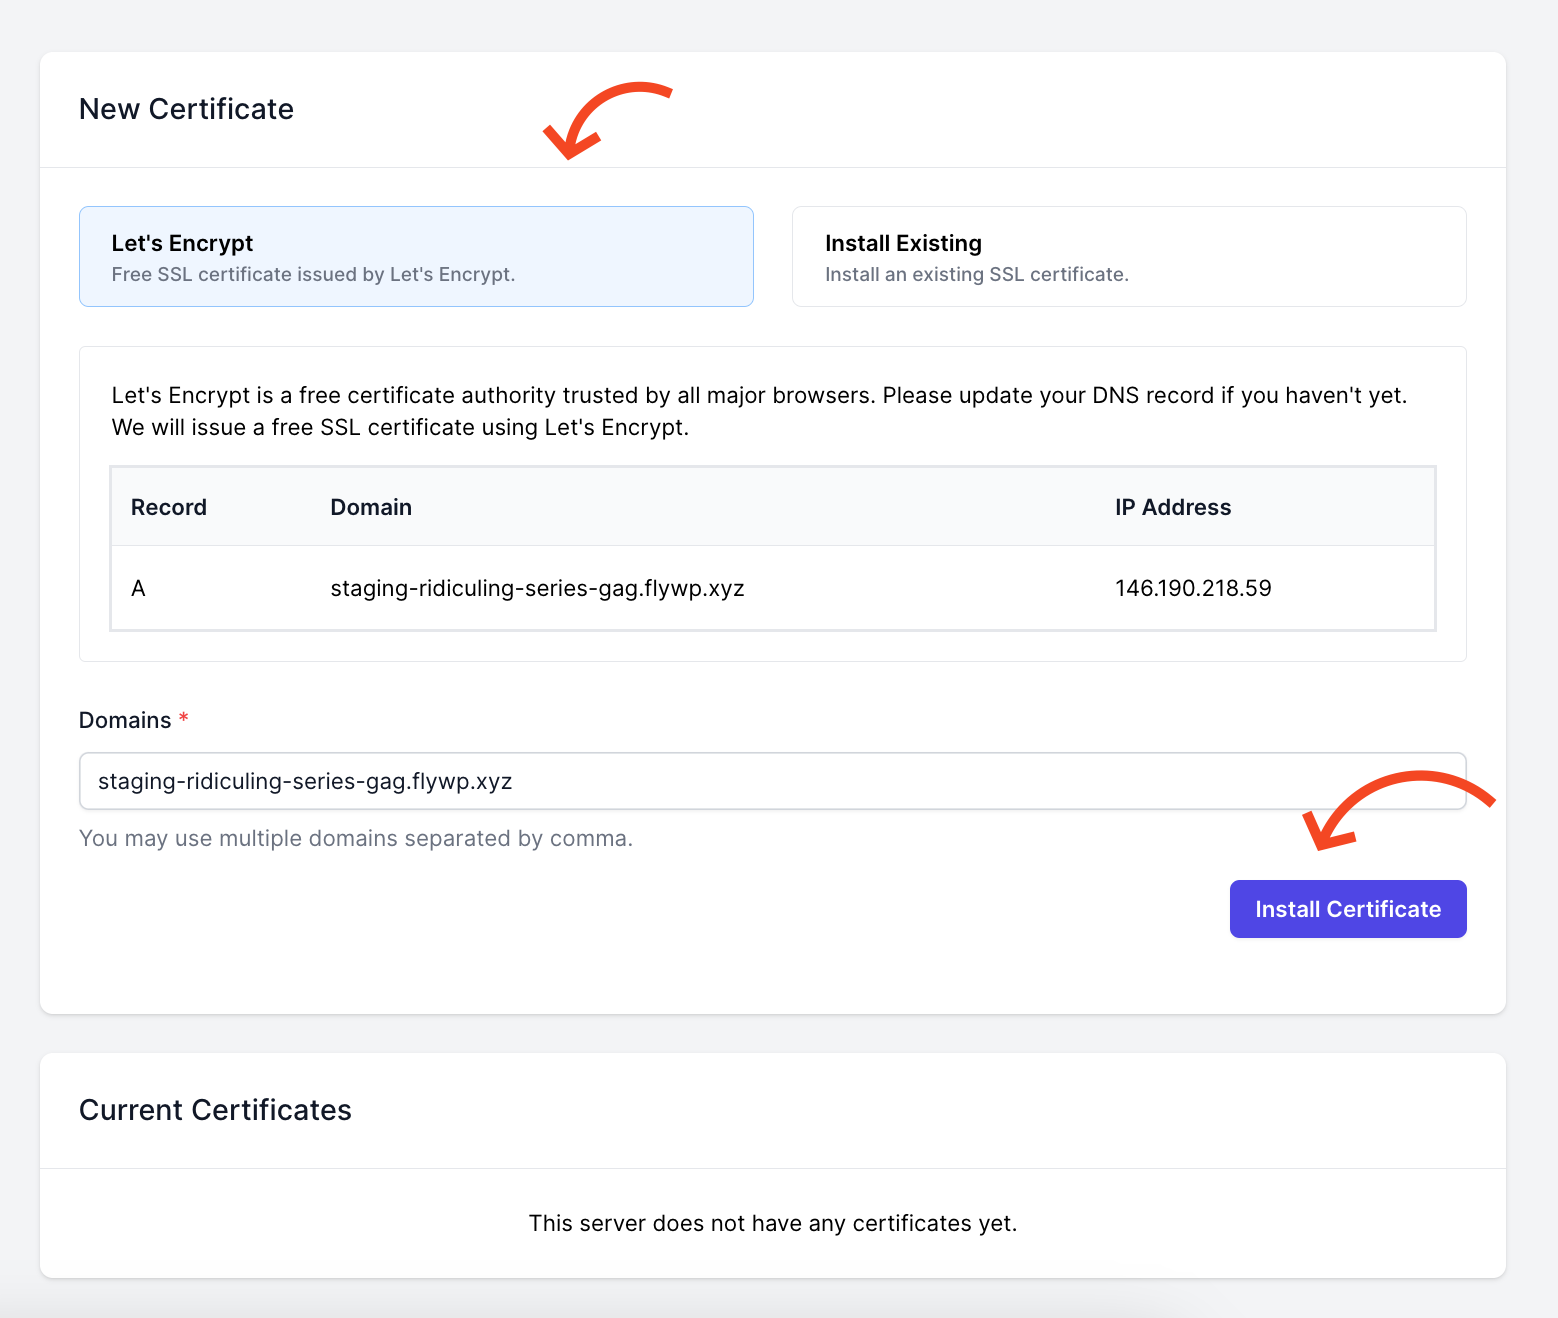
Just click on the “**Install Certificate**” button to install the SSL.
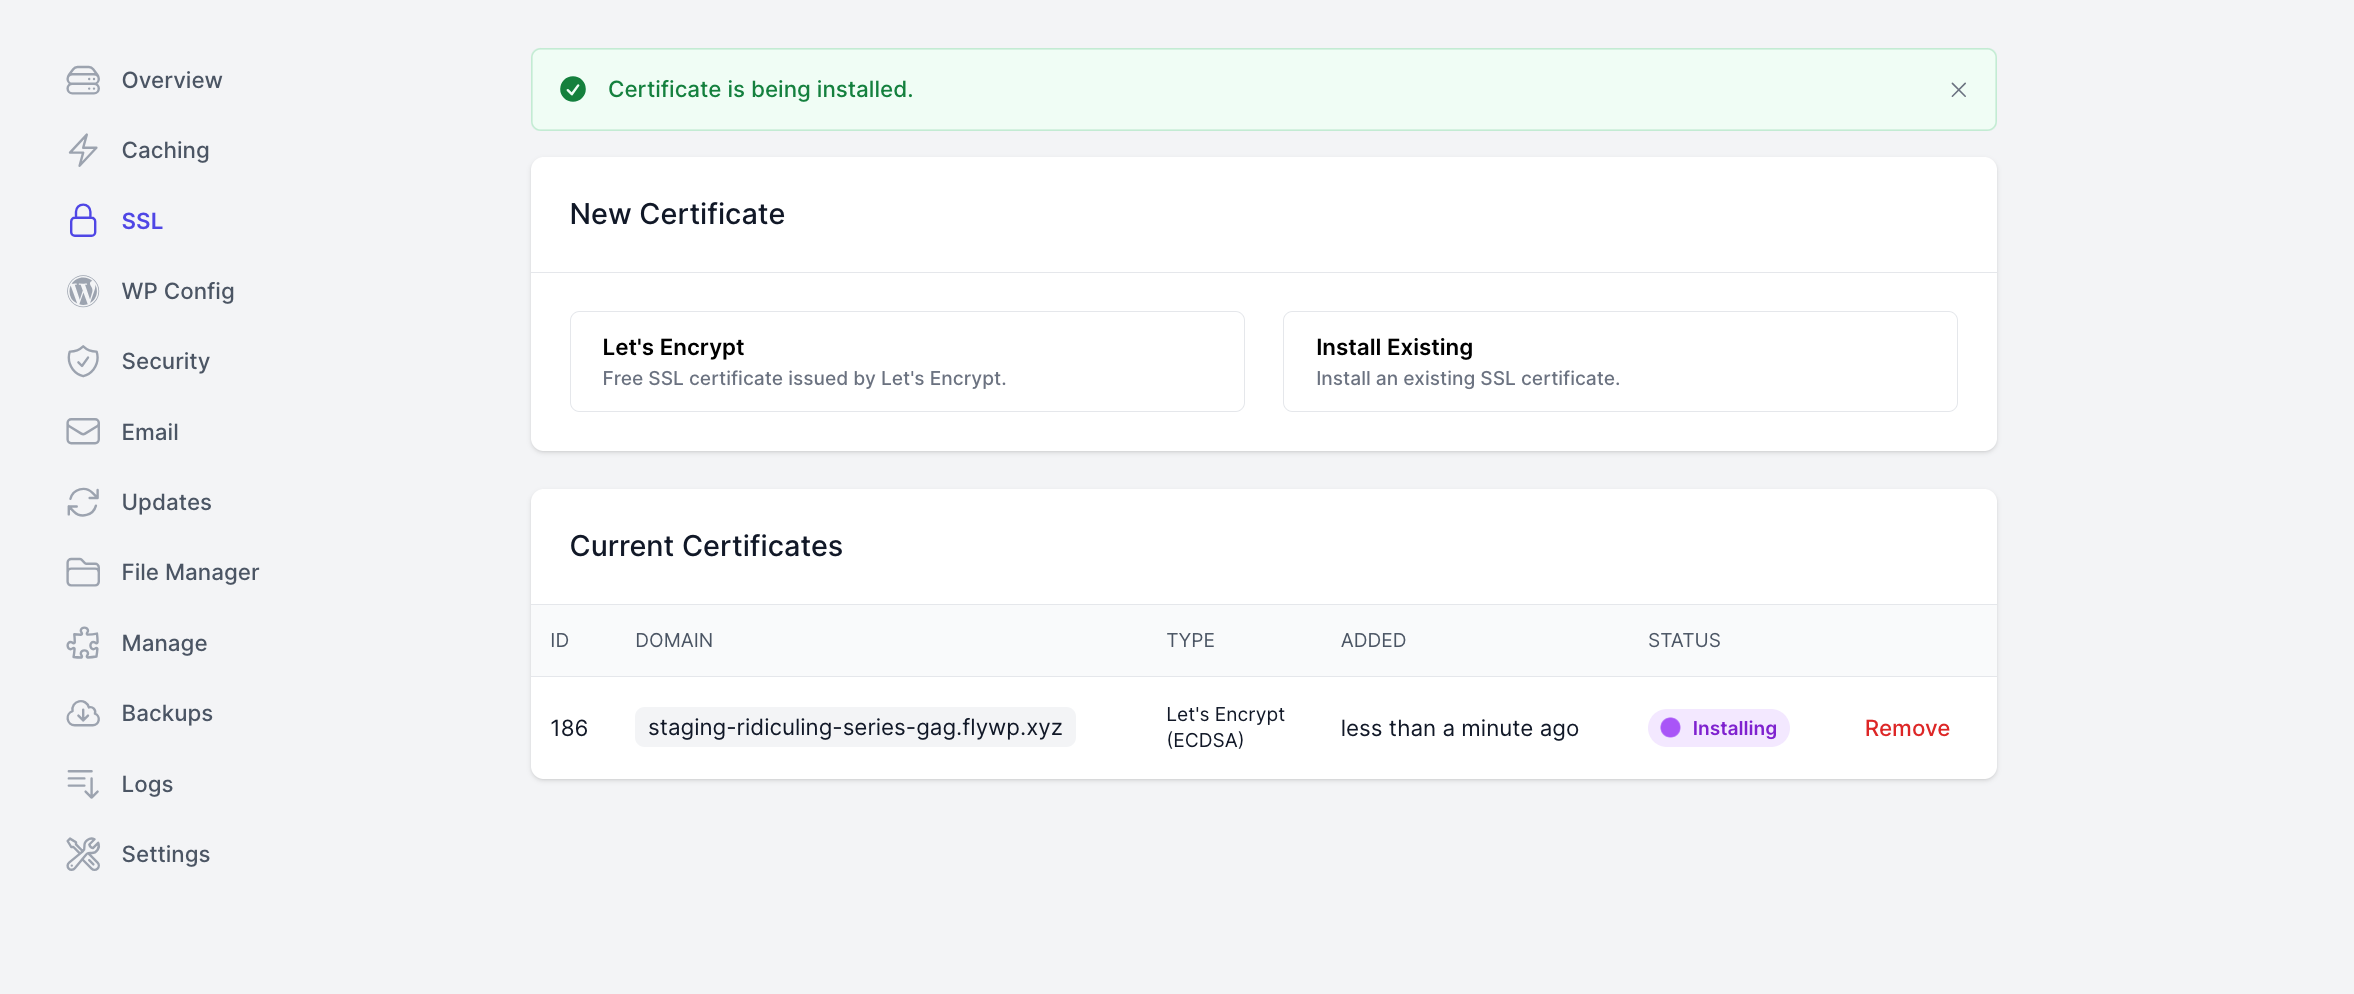
If there were no issues, the SSL certificate creation will be successful. You can also remove the SSL whenever you want.
### Renewal
FlyWP renews a Let’s Encrypt certificate when it is within 14 days of expiry. FlyWP checks this once a week on your server.
If a renewal fails while the certificate is still valid, FlyWP adds an SSL renewal alert to the site and notifies your team’s admins. The current certificate keeps serving your site until it expires. The notification lists the usual causes:
- The domain no longer points to this server.
- A DNS record is blocking the validation.
- The Cloudflare SSL mode is not **Full (Strict)**.
Fix the cause shown in the alert. Once a certificate has expired, FlyWP keeps retrying the renewal every week until one succeeds, and it sends an expiry notice in the meantime.
### Custom SSL Support
Along with our improved SSL Manager, we are excited to announce that custom SSL certificates can now be used. This feature lets you install existing SSL certificates from any provider, giving you the freedom to use certificates that are best for your needs.
Key benefits include:
- Install SSL certificates from any trusted provider.
- It’s easy to paste your certificate and private key into the provided fields. After that, FlyWP takes care of the rest. No configurations or command-line interactions are required.
- Custom SSL support ensures your site’s highest level of security.
#### How do I use the custom SSL management feature?
Just beside “**SSL management**,” you will find the custom management option for it. Click here, and you’ll be asked to enter your existing certificate and private keys.
Paste the **Certificate** and the **Private Key** as PEM text, from the `-----BEGIN` line to the `-----END` line. Other formats are not accepted. Before you install, check that:
- The certificate is within its start and end dates.
- The private key matches the certificate.
If a field is empty or invalid, the form shows the error under that field.
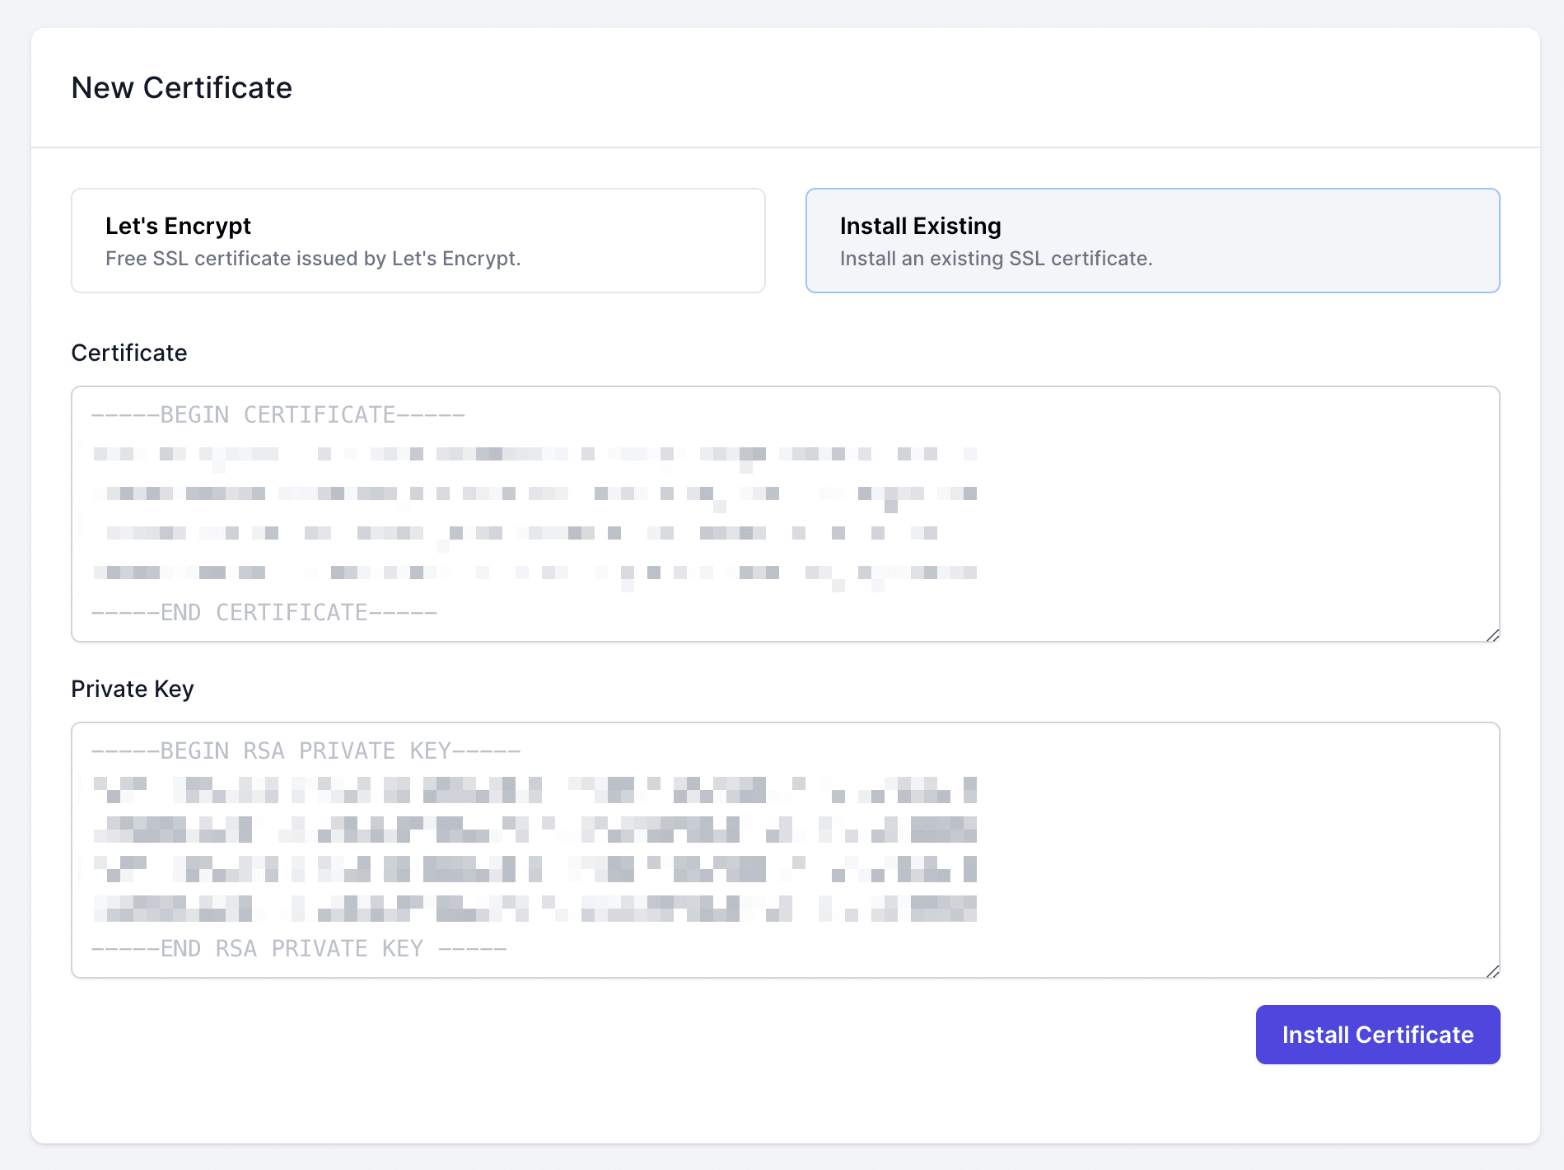
That’s all. Your certificate will be added, and your privacy will be encrypted. That’s how the SSL management feature works. If you have any questions regarding any of our features, please feel free to [contact us](https://flywp.com/contact/). We’ll be glad to solve your issues.
More resources:
1. [Getting started with FlyWP](https://flywp.com/docs/getting-started/quickstart/)
2. Onboarding video of FlyWP
## In this section
- [Cloudflare Origin Certificate](https://flywp.com/docs/site/custom-ssl-management/cloudflare-origin-certificate.md)
- [SSL Installation Checks and Warnings](https://flywp.com/docs/site/custom-ssl-management/installation-checks-and-warnings.md): Review site and alias checks and resolve warnings before installing an SSL certificate in FlyWP.